
Congratulations on reaching the deployment stage with your Next.js app! If you’re looking to steer away from major cloud providers, such as Vercel, Amazon Amplify, or Netlify, either due to cost considerations, privacy concerns, or a desire for more control, you’re in the right place.
This article is your go-to resource for learning how to self-host or deploy your Next.js app on a virtual machine running Ubuntu. Our approach involves leveraging the Ubuntu operating system for your server, configuring the powerful NGINX web server to manage incoming traffic, and implementing PM2 to efficiently handle your Next.js application.
By the end of this tutorial, you’ll have a fully operational Next.js app accessible through your personalized domain. Just to clarify, I’ll be utilizing a Virtual Machine (VM) from Vultr throughout the guide. However, you’re free to opt for other VM providers like DigitalOcean, Linode, Amazon Lightsail, Microsoft Azure, or Google Cloud based on your preferences.
I’ve chosen Vultr primarily because they offer an appealing free tier, providing you with a $100 credit to explore their platform. To get this $100 test bonus, simply follow this link. Rest assured, I’ve been a satisfied user of their services for years, and I can vouch for their reliability and performance.
More practice:
- Learn Next.js Server Actions and Mutations with Examples
- Integrate FastAPI Framework with Next.js and Deploy
- Integrate Python Flask Framework with Next.js and Deploy
- JWT Authentication in Next.js 13 API Route Handlers
- User Registration and Login in Next.js 13 App Directory
- Build a Simple API in Next.js 13 App Directory
- Build a Simple Frontend App in Next.js 13 App Directory
- Next.js – Add Google and GitHub OAuth2 using NextAuth.js
- Next.js – Use Custom Login and SignUp Pages for NextAuth.js
- How to Setup Prisma ORM in Next.js 13 App Directory
- How to Setup and Use Apollo Client in Next.js 13 App Directory
- How to Setup React Context API in Next.js 13 App Directory
- How to Setup React Query in Next.js 13 App Directory
- How to Setup Redux Toolkit in Next.js 13 App Directory
- Setup tRPC Server and Client in Next.js 13 App Directory
- Setup and Use NextAuth.js in Next.js 13 App Directory
Prerequisites
Before proceeding with this article, ensure you have the following prerequisites in place:
- GitHub account – We’ll be using GitHub to host our project and later pull the repository onto the VM.
- VPS (Virtual Private Server) – This will serve as the hosting environment for our Next.js application. If you don’t have a VPS yet, no worries—I’ve dedicated a section that will guide you step by step on acquiring one.
- Domain name – To access the Next.js application, you’ll need a domain name instead of relying on the IP address of the VM.
Setting Up the Next.js Application
I’ll assume you already have a Next.js project that you intend to deploy to production on a Virtual Machine. However, if you don’t have one, don’t worry—I’ve got you covered. Follow these steps to obtain a Next.js project from a previous article titled ‘How to Setup Redux Toolkit in Next.js 13 App Directory‘.
To accomplish this, clone the repository from https://github.com/wpcodevo/nextjs13-redux-toolkit. Once cloned, open it in your preferred text editor and review the files to gain a brief understanding of the project. Execute the following commands to perform these steps:
- Clone the repository to your local machine:
git clone https://github.com/wpcodevo/nextjs13-redux-toolkit.git - Change your current working directory to the cloned repository:
cd nextjs13-redux-toolkit - Open the repository in Visual Studio Code:
code . - Install the required dependencies:
yarn install - Run the project:
yarn dev
Setting up our Virtual Machine (VM)
Here’s a detailed, step-by-step guide on provisioning a VM through Vultr. While these steps are specific to Vultr, they should closely resemble the process on other platforms. Additionally, the choice of your VM provider won’t impact the deployment steps for the Next.js app, so feel free to use any VM provider you have access to.
- Sign In or Sign Up: Go to Vultr.com. If you’re new to Vultr, take advantage of this link to sign up and receive $100 in credits for testing the platform. For existing users, simply login to your account.
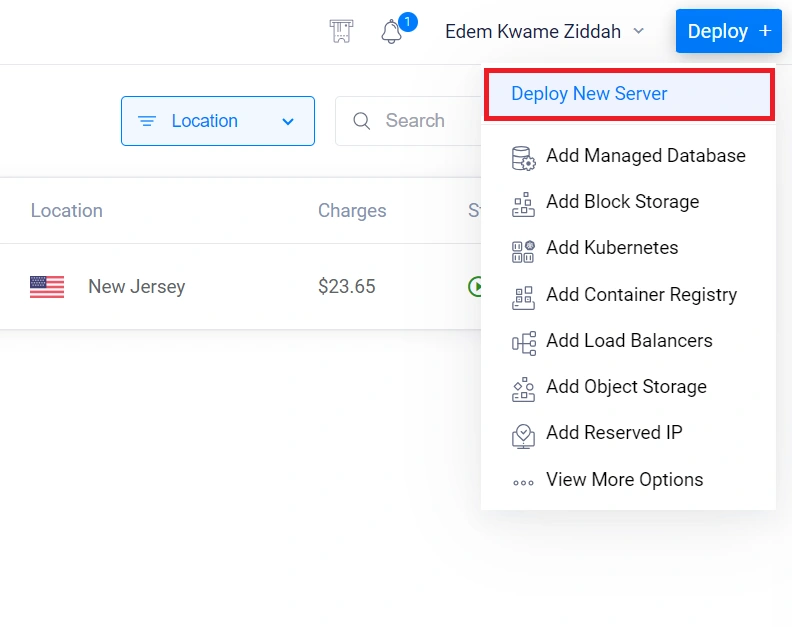
- Initiate Server Deployment: Navigate to the dashboard, hover over the “Deploy” button, and select “Deploy New Server”.
- Choose Server Type: Opt for the server type that aligns with your needs and budget. For instance, if you prefer “Cloud Compute“, navigate to the “CPU & Storage Technology” section and select “High Frequency”.

- Select Server Location: Choose a server location that is closest to your customers or users for optimal performance.
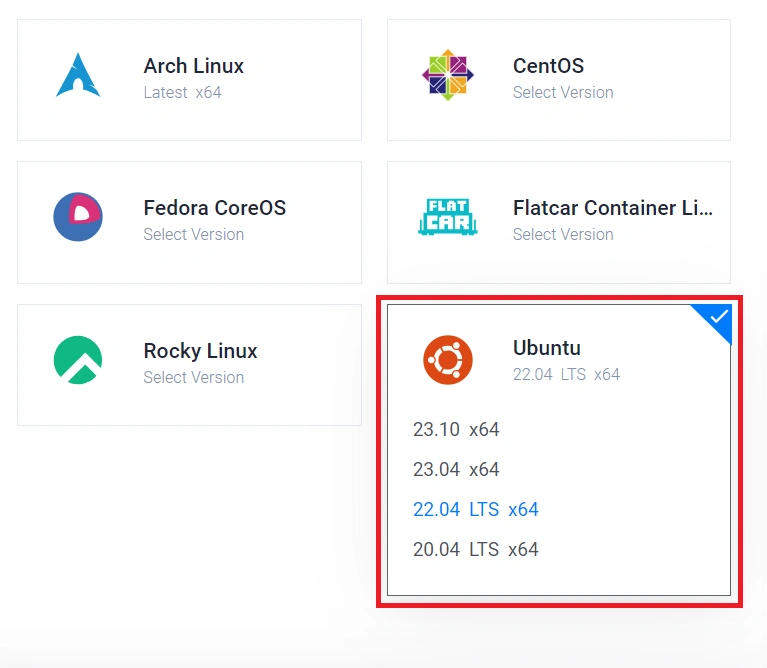
- Select Server Image: Opt for the Ubuntu image and select version 22.04 LTS x64 for your server.
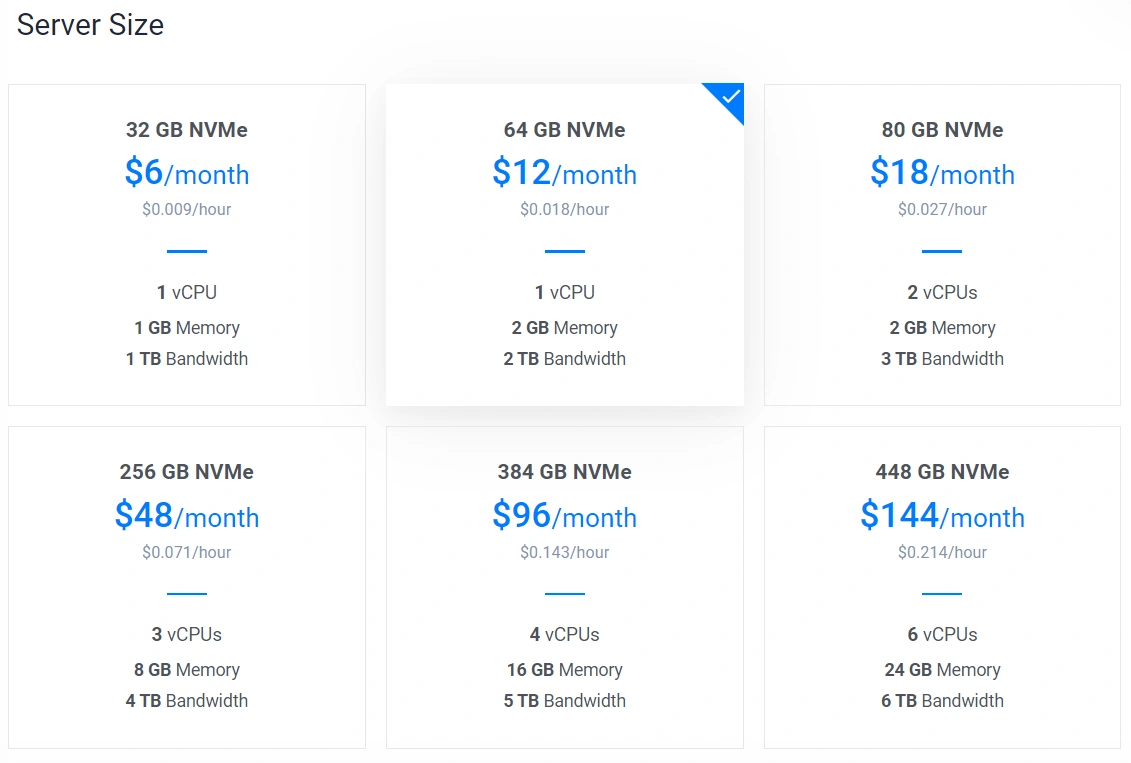
- Select Server Size: Choose the server size that aligns with your budget. For this project, the $12 plan, offering 1 virtual CPU, 2GB memory, and 3TB bandwidth, is sufficient.
- Configure Auto Backups: If auto backups are unnecessary for your setup, feel free to disable this feature.
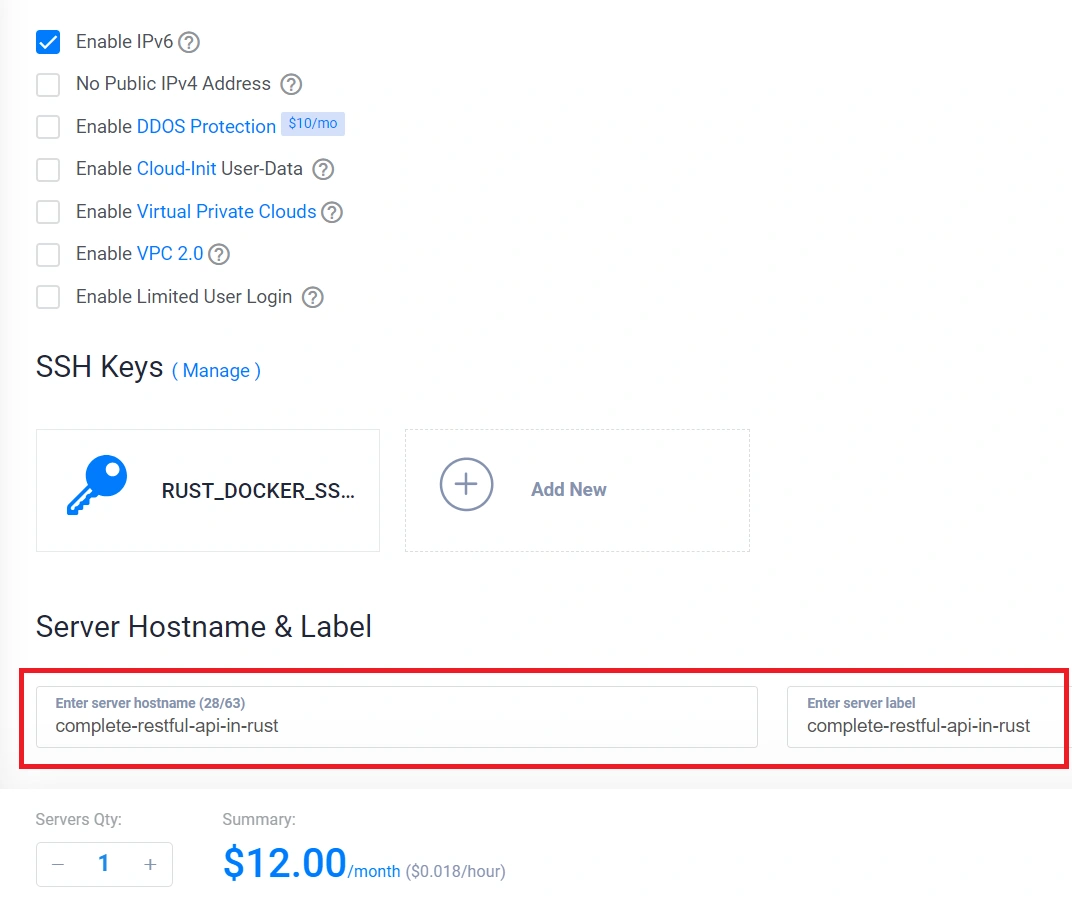
- Specify Server Hostname: Provide a name for your server, and upon completion, click the “Deploy Now” button to initiate the server deployment.
Pointing Domain Name to the Server
After provisioning the Virtual Machine, you’ll be provided with an IP and a server password. To avoid accessing the Next.js website through the server’s IP, it’s crucial to associate a domain name with the server. While I manage my DNS records through the Ezoic platform, you can handle them directly on Namecheap or Cloudflare, and the steps should be similar.
If you don’t have a domain yet, you can easily obtain one from Namecheap. After purchasing the domain, follow these steps to link your domain to the VM.
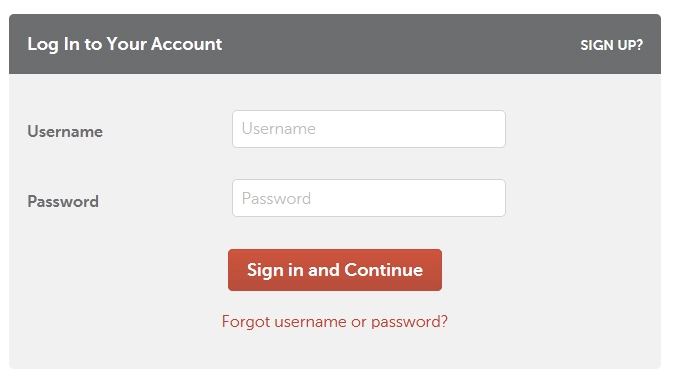
- Log in to your Namecheap account: Open the Namecheap website and log in to your account.
- Access Domain List: In the upper left corner, hover over your username and click on “Dashboard”.
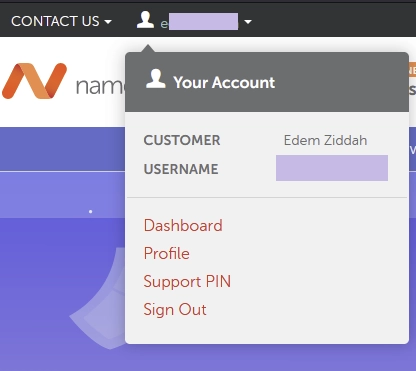
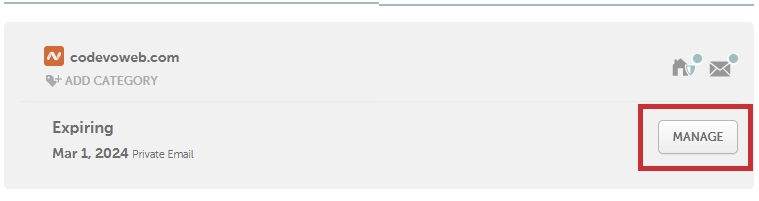
Locate and click on “Domain List” from the menu. - Select Domain: Find the domain for which you want to add an A Record and click on “Manage” next to it.
- DNS Management: Look for the “Advanced DNS” or “DNS” tab. Click on it to access the DNS management section.
- Add A Record: Find the section for adding records. Look for an option like “Add a Record” or “Add New Record”.
- Fill in A Record Details:
- Type: Select “A Record”
- Host: Input @ for the host
- Value: Input the IP address of your Virtual Machine.
- TTL (Time to Live): You can leave the TTL as ‘automatic’.
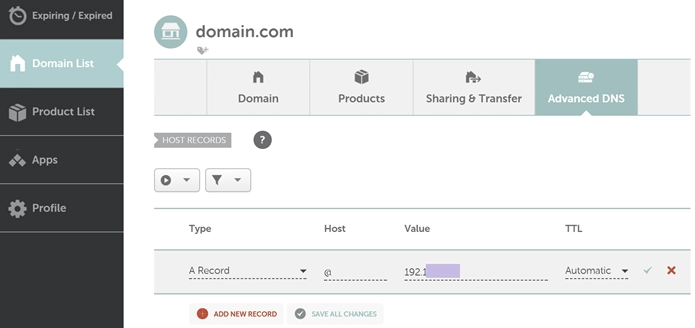
- Save Changes: After entering the details, save the changes, which may involve clicking the green check mark.
- Verify A Record:
It may take some time for the new A Record to propagate. Let’s leave it while we continue. You can use an online tool like What’s My DNS to verify the A Record’s propagation status.
Connecting to the Server via SSH and Updating Server Packages
At this point, we are now ready to SSH into the server. Copy the IP of your VM and follow the steps below to SSH into it:
- Open a Terminal or Command Prompt: On Linux or macOS, you can use the Terminal. If you’re on Windows, you can use either Windows Subsystem for Linux (WSL) or an SSH client like PuTTY.
- Connect to the Server:
- Use the command
ssh root@your_server_ipto connect to the server. Replace<your_server_ip>with the actual IP address of your server.
It’s good practice to create a new user with sudo privileges and disable root login, but for this example, I will use the root since the same steps apply. - Enter the server password when prompted.
- Use the command
- Update Server Packages:
- Once connected, update the package lists to get the latest information about available packages using the command
sudo apt update. - Upgrade the installed packages to their latest versions using the command
sudo apt upgrade.
If prompted, simply proceed by accepting the default option, which is to ‘Keep the local version currently installed‘, and press Enter.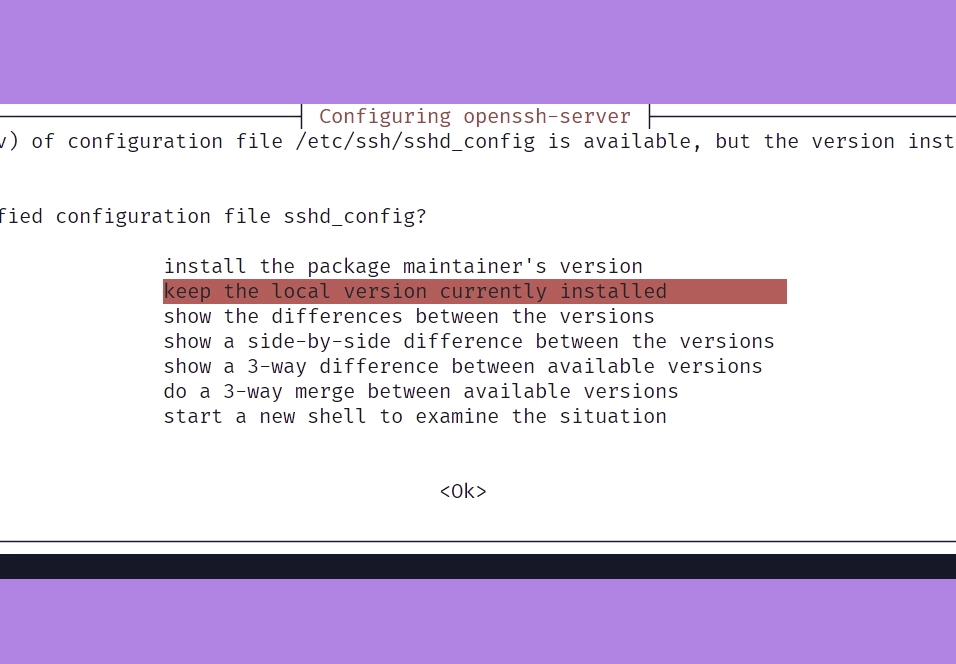
- Once connected, update the package lists to get the latest information about available packages using the command
Installing Nginx & Certbot
The next thing we need to do is install Nginx, which will function both as a web server and a reverse proxy for our Next.js app. Additionally, we’ll install Certbot, a tool that will enable us to use Let’s Encrypt to manage SSL/TLS certificates for our domain for free.
To install Nginx and Certbot, run the following command in your terminal:
sudo apt install nginx certbot python3-certbot-nginx
After completing the installations, let’s proceed with basic firewall configurations. We’ll enable Nginx to handle both HTTP and HTTPS traffic and allow incoming traffic on the default SSH port. Execute the following commands:
sudo ufw allow "Nginx Full"
ufw allow OpenSSH
ufw enable
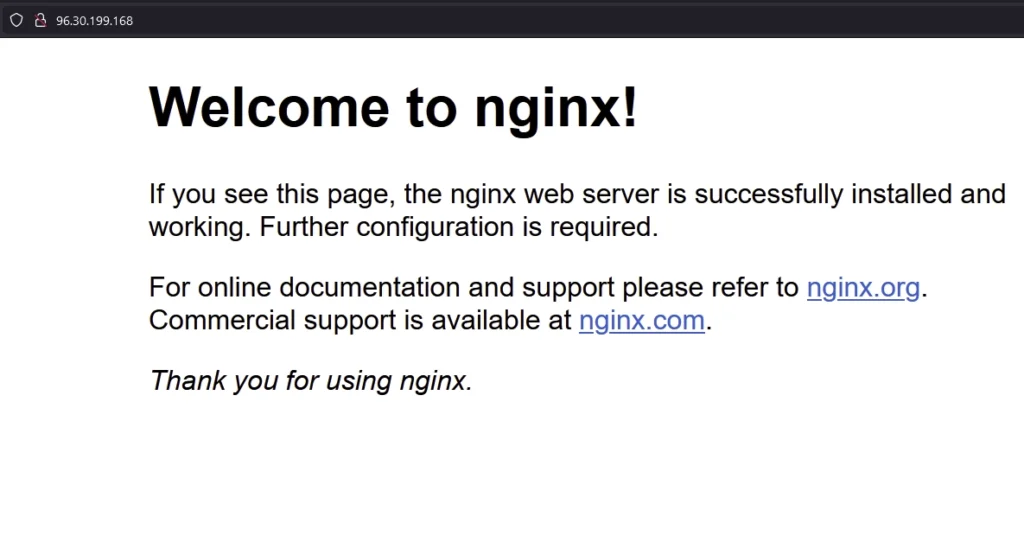
Now that the firewall is active, you can verify its status by accessing the VM’s IP directly in your browser. You should see the default Nginx page.
Installing NPM and PM2
At this stage, we’ve completed the basic steps, and now we can proceed to install NPM. This will allow us to set up the Next.js project or install the necessary dependencies to run the Next.js app. To do this, run the following command:
apt install npm
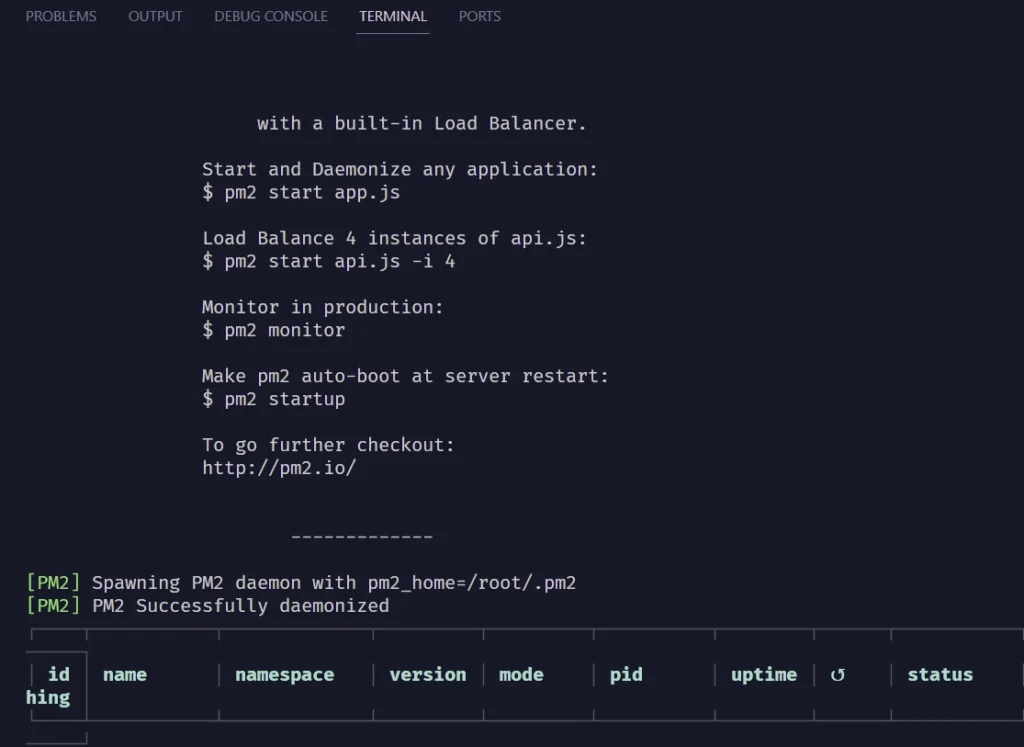
The next step is to install a package called PM2. PM2 is a process manager designed to manage and run Node.js applications in production environments. It offers advanced features to guarantee the stability and reliability of your applications. It’s worth noting that while PM2 is often associated with Node.js applications, it is equally applicable to Next.js applications. To install PM2, use the following command:
npm install -g pm2
To verify the successful installation of PM2, execute the command pm2 status in your terminal. You should see an output similar to the screenshot below, confirming that PM2 is up and running.
Installing NVM and Node.js
Now, let’s proceed with the installation of Node.js. There are various methods to install Node.js, but for this guide, we’ll use NVM (Node Version Manager), a tool that allows us to easily switch between different Node.js versions. Execute the following command to install NVM:
curl -o- https://raw.githubusercontent.com/nvm-sh/nvm/v0.39.7/install.sh | bash
To get the latest version of NVM, you can visit their GitHub installation page and copy the curl script provided.
Next, run the following command to install the LTS version of Node.js using NVM:
exec $SHELL
nvm install --lts
To verify if Node.js is installed, execute the command node -v in your terminal. This will display the currently installed version of Node.js.
Creating the Next.js App or Pulling from Git Repository
Now, let’s dive into a crucial step of the tutorial – creating a new Next.js app or pulling one from your GitHub repository. In my case, I’ll be pulling a project we previously built. Start by navigating to the www folder using the command cd /var/www. Once inside, head to your GitHub repository, copy the repo link, and clone it into the www directory. If you don’t have a Next.js project, you can use the following command to clone the project we created in a previous article:
git clone https://github.com/wpcodevo/nextjs13-redux-toolkit
In this project, we utilized Yarn as our package manager. If you haven’t installed it globally yet, you can do so by running the command npm i -g yarn. Once the installation is complete, proceed with the following commands to navigate into the Next.js project, install all necessary dependencies, and build the project. If you are working with your own project, remember to replace nextjs13-redux-toolkit with the actual name of your project directory.
cd nextjs13-redux-toolkit/
yarn install
yarn build
Configuring NGINX
Moving on, let’s configure Nginx to manage traffic routing to our Next.js server and handle static assets for our Next.js app. To accomplish this, we’ll create a configuration file in /etc/nginx/sites-available. Execute the following command to generate the file and open it for editing. Ensure to replace nextjs13-redux-toolkit with your project name if you’re working with your own project.
cd /etc/nginx/sites-available
touch nextjs13-redux-toolkit
nano nextjs13-redux-toolkit
Next, copy the configurations below and paste them into the nextjs13-redux-toolkit file. Make sure to customize a couple of things in the configurations. First, replace nextjs.codevoweb.com with your domain name. Also, within the location /_next/static/ block, replace nextjs13-redux-toolkit with your project name if you are using your own project.
Once you’ve made these changes, press Ctrl + X, type Y, and press Enter to save the file.
#nginx config file for Nextjs App
#place in /etc/nginx/sites-available/name_of_config_file
server {
        listen 80;
        server_name nextjs.codevoweb.com;

        gzip on;
        gzip_proxied any;
        gzip_types application/javascript application/x-javascript text/css text/javascript;
        gzip_comp_level 5;
        gzip_buffers 16 8k;
        gzip_min_length 256;

        location /_next/static/ {
                alias /var/www/nextjs13-redux-toolkit/.next/static/;
                expires 365d;
                access_log off;
        }

        location / {
                proxy_pass http://127.0.0.1:3000; #change to 3001 for second app, but make sure second nextjs app starts on new port in packages.json "start": "next start -p 3001",
                proxy_http_version 1.1;
                proxy_set_header Upgrade $http_upgrade;
                proxy_set_header Connection 'upgrade';
                proxy_set_header Host $host;
                proxy_cache_bypass $http_upgrade;
        }
}
We are required to copy this Nginx configuration file into the /etc/nginx/sites-enabled/ directory; however, this process can be tedious. To simplify, we’ll make a small modification inside the nginx.conf file, enabling us to keep the configuration only in the sites-available without worrying about copying it into the sites-enabled directory. Execute the following command to open the nginx.conf file.
cd ..
nano /etc/nginx/nginx.conf
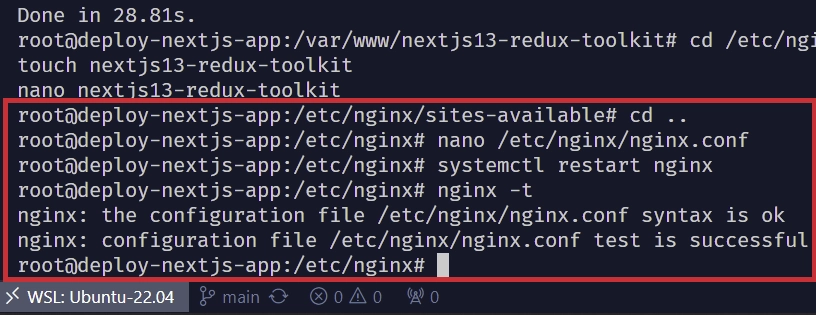
Scroll down to the section where you find include /etc/nginx/sites-enabled/*; and modify it to include /etc/nginx/sites-available/*;. After making this change, save the file and execute the command systemctl restart nginx to restart the Nginx server.
cd ..
nano /etc/nginx/nginx.conf
To ensure that we haven’t introduced any errors into the Nginx configuration files, run the command nginx -t. A successful test result should be displayed in the terminal.
Now, let’s remove the default Nginx configuration file from both the sites-available and sites-enabled directories. Execute the following commands:
cd /etc/nginx/sites-available
rm default
cd .. && cd /etc/nginx/sites-enabled
rm default
After completing the removal, restart the Nginx server by running the command systemctl restart nginx.
Launching Site with PM2
At this stage, we are prepared to launch the Next.js application using PM2. Navigate to the www directory with the command cd /var/www/. Once there, proceed to your project directory. In my case, as my project is named nextjs13-redux-toolkit, I will use the command cd nextjs13-redux-toolkit.
cd /var/www/nextjs13-redux-toolkit
Launch the Next.js application with PM2 by executing the following command. Ensure to replace nextjs13-redux-toolkit with your actual project name if you are working with a different project.
pm2 start npm --name nextjs13-redux-toolkit -- start
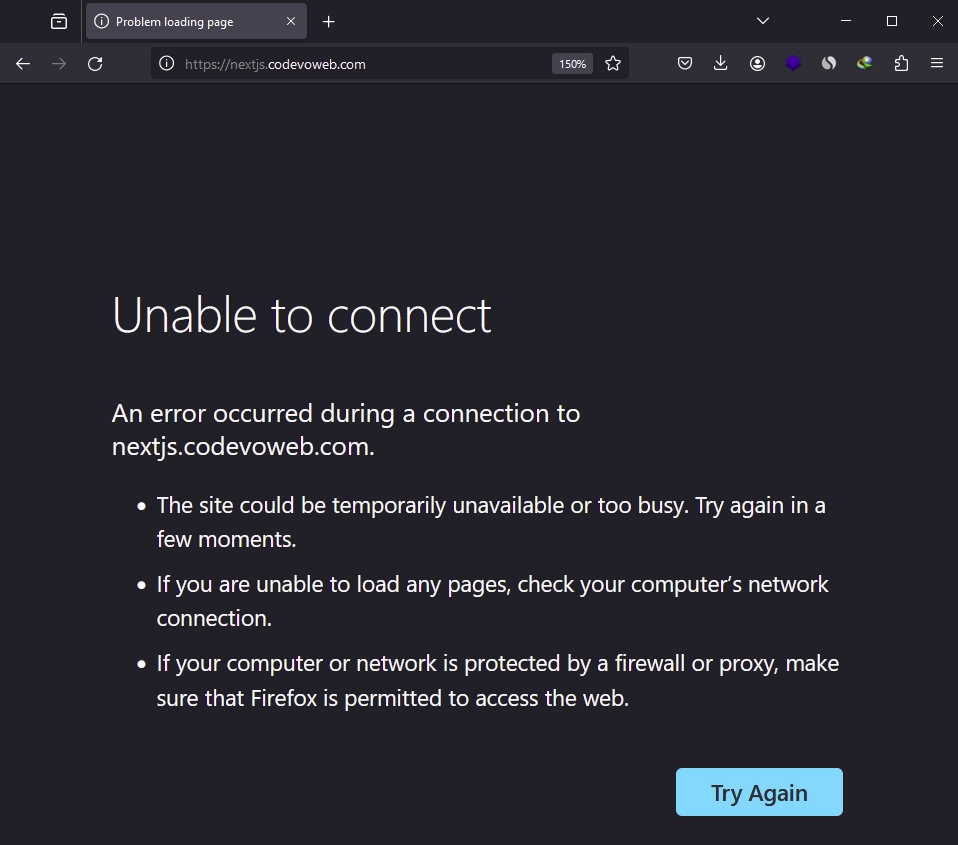
At this point, if you try to access the site through your domain, you’ll notice it won’t be reachable because we haven’t obtained an SSL certificate for the domain yet.
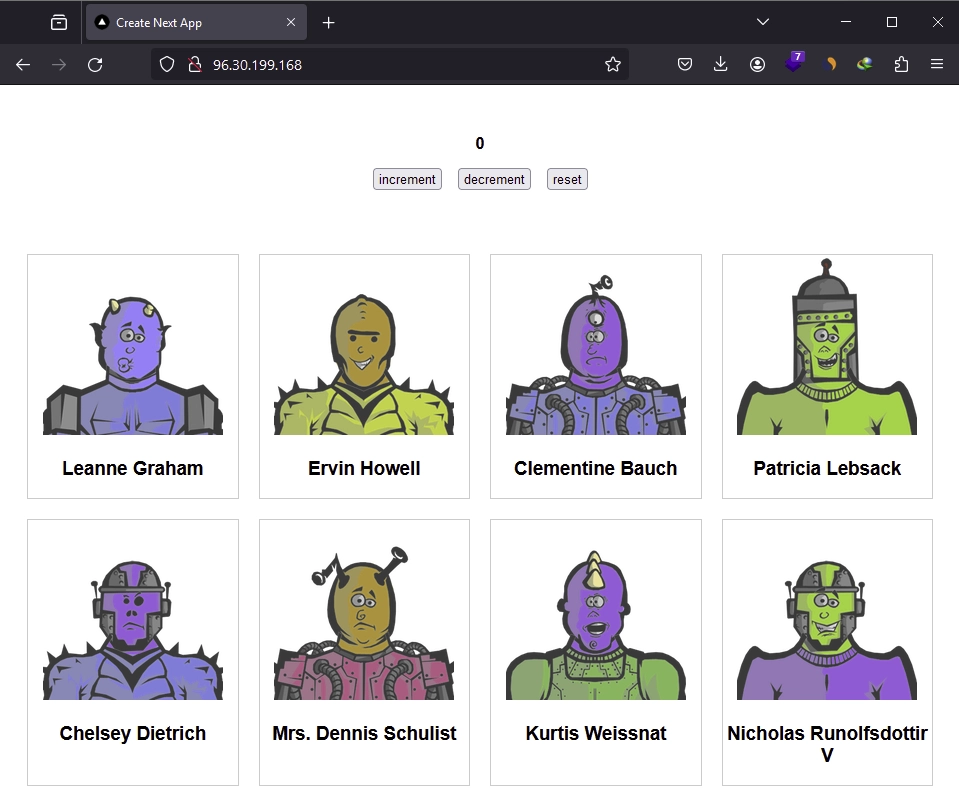
However, if you visit the IP directly, you should see the Next.js app.
Adding SSL to Domain Name
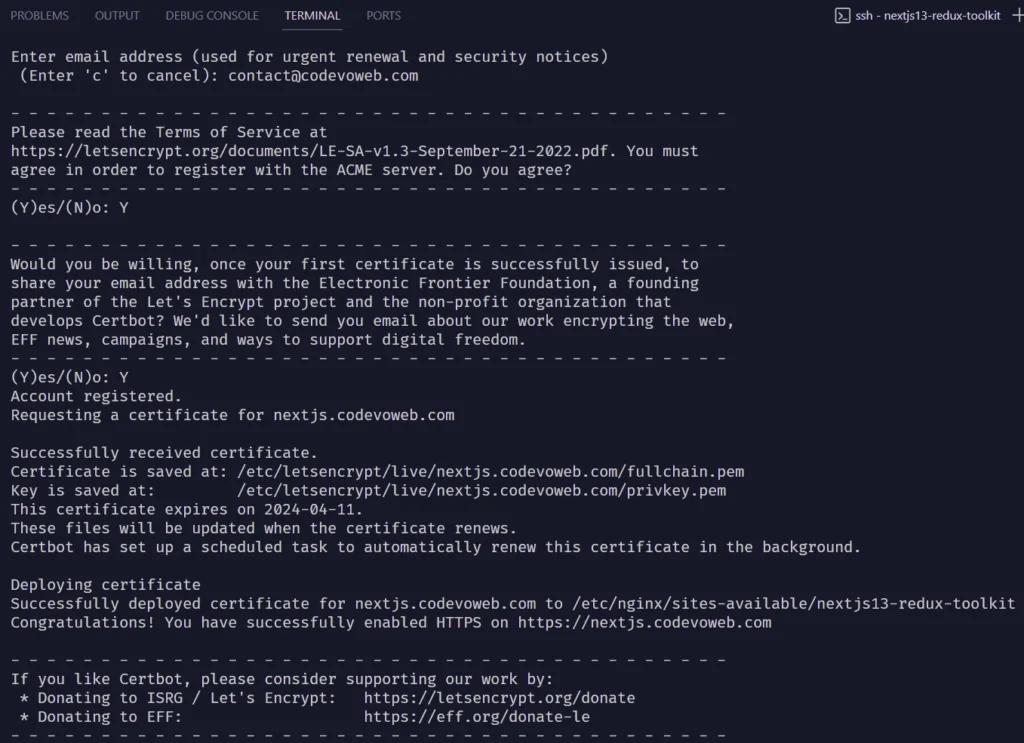
To secure your domain with an SSL certificate, run the following command using Certbot. Make sure to replace nextjs.codevoweb.com with your actual domain name:
sudo certbot --nginx -d nextjs.codevoweb.com
Upon running the command above, you’ll be prompted to answer a series of questions. Provide your email address and answer ‘Y’ to the remaining questions. After completing this process, Certbot will issue the SSL certificate for your domain.
To ensure the changes take effect, restart Nginx by executing the following command:
systemctl restart nginx
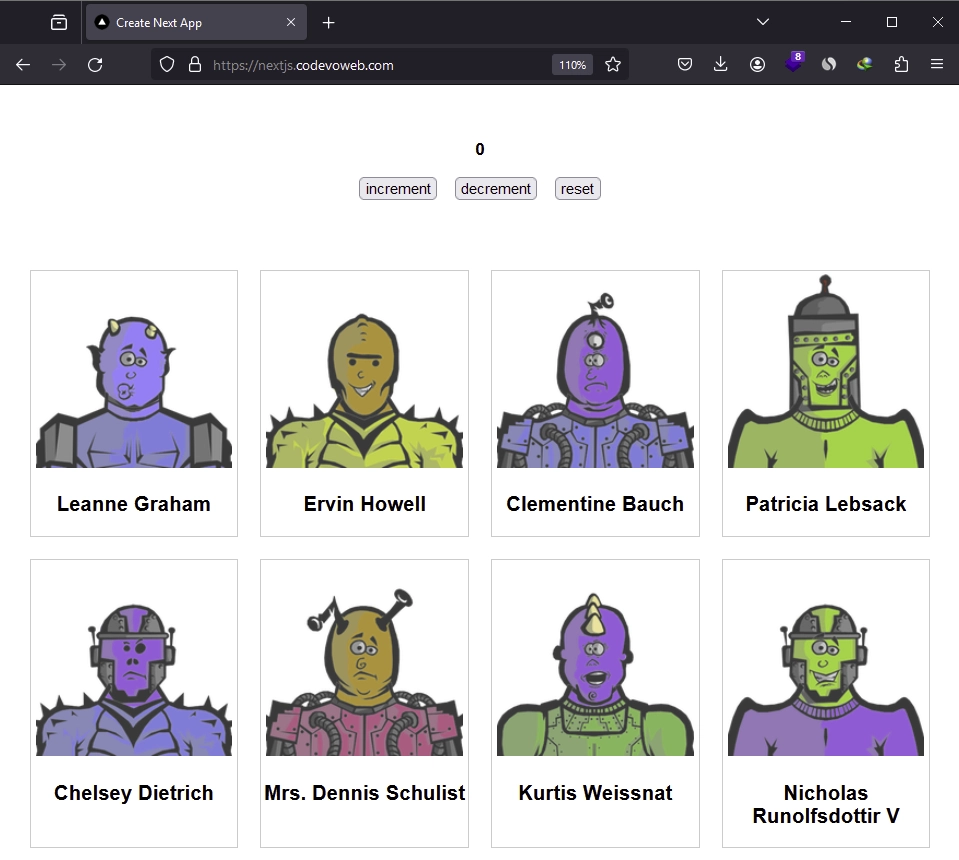
Now that your domain has been issued with the SSL certificate, visiting it in your browser should display the running Next.js app.
Conclusion
Congratulations on completing this tutorial! Throughout the guide, you’ve acquired the skills to deploy a Next.js app on a virtual machine using Ubuntu, Nginx, and Certbot. I trust you found this tutorial both helpful and enjoyable. Should you have any questions, please don’t hesitate to leave them in the comments section. Thank you for reading!
thank you so much for your blog, this is the 1st time I deploy my next.js website outside of vercel which does not have any challenge, the steps were so clear and my app now is working, wish you the best
I’m glad the tutorial was helpful to you. Cheers and happy coding!