
In this tutorial, you will learn how to dockerize a Rust application, PostgreSQL, and pgAdmin servers using Docker Compose and deploy them onto a Virtual Private Server (VPS) through GitHub Actions.
Here’s a brief overview of the steps we’ll cover. First, we will run all the unit tests on our local machine to ensure every feature works as expected. Following that, we will dockerize the application on our local machine to verify that the Rust Docker image works as expected.
Next, we’ll create a build workflow on GitHub. This workflow will replicate the tasks we performed on our local machine—launching a Postgres server with Docker, running various unit tests—and include an extra step of pushing the Docker image to your DockerHub repository. All of these tasks will be executed on the virtual machines provided by the GitHub Actions platform.
Finally, we’ll create a deployment job connecting to our VPS via SSH to deploy the Rust application. With this roadmap in mind, let’s delve into the tutorial.
Articles in This Series
- Building a Rust API with Unit Testing in Mind
- How to Add Swagger UI, Redoc and RapiDoc to a Rust API
- JWT Authentication and Authorization in a Rust API using Actix-Web
- How to Write Unit Tests for Your Rust API
- Dockerizing a Rust API Project: SQL Database and pgAdmin
- Deploy Rust App on VPS with GitHub Actions and Docker

Introduction
Before we explore CI/CD with GitHub Actions, let’s pause to grasp the concepts of Continuous Integration, Continuous Deployment, and GitHub Actions. Although CI/CD falls within the realm of DevOps, as a Rust developer, gaining a brief understanding of the entire process is beneficial. This knowledge equips you to seamlessly implement these practices in your own projects without depending on a DevOps engineer.
What is Continuous Integration (CI)
Continuous Integration (CI) is a practice in software development that emphasizes the frequent commits of code changes into a shared repository. To understand this better, think of CI as an automated assistant overseeing the collaborative coding process.
Imagine, in your team, where multiple developers contribute code snippets frequently, CI helps put all those pieces of code together, runs tests on them, and looks for any potential issues or conflicts between different parts of the code.
What is Continuous Deployment (CD)
Continuous Deployment (CD) is also a software development practice that works hand in hand with Continuous Integration (CI) to automate the delivery of software to production environments, without requiring manual intervention. This process activates upon the successful completion of the CI phase, where code changes undergo rigorous testing and validation.
With Continuous Deployment, criteria for code releases are established in advance. Upon meeting and validating these criteria, the code is seamlessly delivered into the hands of users or a production environment. This ensures that new features reach users more rapidly.
What are GitHub Actions
GitHub Actions is a built-in continuous integration and continuous delivery (CI/CD) platform on GitHub, designed to automate your build, test, and deployment pipelines. This platform allows you to automate a variety of workflows triggered by different events within your repository. For instance, you can create workflows to build and test every pull request or deploy merged pull requests to production environments.
These workflows are defined using YAML files, specifying steps like building, testing, and deploying code. In essence, GitHub Actions facilitates the creation of CI/CD pipelines that automatically execute when specific actions occur in your repository.
Prerequisites
To follow this article, make sure you have the following prerequisites:
- GitHub account
- VPS (Virtual Private Server)
- Domain name
- Basic knowledge of Rust, Docker, and GitHub Actions
Setting Up the Rust Application
I’m going to assume you already have a Rust project that you want to deploy to production using Docker and GitHub Actions. However, if you don’t have one, don’t worry—I’ve got you covered. This article is part of a tutorial series where we built a Rust app, wrote unit tests, and documented it using Swagger docs. To ensure we are all on the same page, you can pick up from the phase where we wrote the unit tests.
To do this, simply clone the repository from https://github.com/wpcodevo/complete-restful-api-in-rust. Once you’ve cloned it, open it in the text editor of your choice. Go through the files to get a brief understanding of where we left off, then open the integrated terminal and change the Git branch to dockerize-rust-api-project. You can accomplish all of the above steps with the commands below:
- Clone the repository to your local machine:
git clone https://github.com/wpcodevo/complete-restful-api-in-rust.git - Change your current working directory to the cloned repository:
cd complete-restful-api-in-rust - Open the repository in Visual Studio Code:
code . - Switch the branch:
git checkout dockerize-rust-api-project
Dockerizing the Rust App
At this stage, we are prepared to dockerize the Rust app. Before proceeding, let’s execute the various unit tests to verify that each feature of the application functions as intended.
Running the Unit Tests with a PostgreSQL Server Locally
To run the unit tests, a test database is required. To set this up, create a file named docker-compose.no_api.yml in the root directory and include the following YAML code:
docker-compose.no_api.yml
version: '3'

services:
  postgres:
    image: postgres:15.3-alpine
    container_name: postgres
    environment:
      POSTGRES_USER: ${POSTGRES_USER}
      POSTGRES_PASSWORD: ${POSTGRES_PASSWORD}
      POSTGRES_DB: ${POSTGRES_DB}
    ports:
      - 6500:5432
    volumes:
      - postgres:/var/lib/postgresql/data
    healthcheck:
      test: ["CMD", "pg_isready", "-h", "postgres", "-U", "${POSTGRES_USER}"]
      interval: 5s
      timeout: 5s
      retries: 5
    networks:
      - rust_app_no_api_network

  pgadmin:
    image: dpage/pgadmin4
    container_name: pgadmin
    environment:
      PGADMIN_DEFAULT_EMAIL: ${PGADMIN_DEFAULT_EMAIL}
      PGADMIN_DEFAULT_PASSWORD: ${PGADMIN_DEFAULT_PASSWORD}
      PGADMIN_LISTEN_PORT: ${PGADMIN_LISTEN_PORT}
    ports:
      - 5050:80
    volumes:
      - pgadmin-data:/var/lib/pgadmin
    restart: always
    depends_on:
      - postgres
    networks:
      - rust_app_no_api_network

volumes:
  postgres:
  pgadmin-data:

networks:
  rust_app_no_api_network:
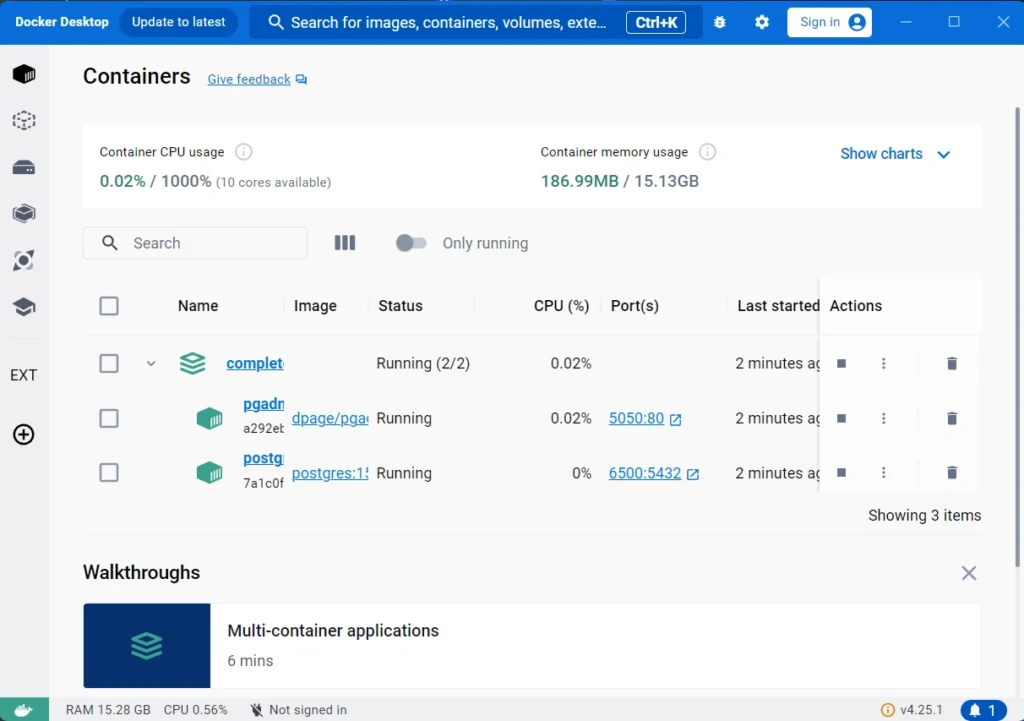
Proceed by running the following command to launch the Postgres and pgAdmin servers within their respective Docker containers:
docker-compose -f docker-compose.no_api.yml up -d
After the command completes its execution, you can verify whether the containers are running by either checking the Docker Desktop app or using the command docker ps.
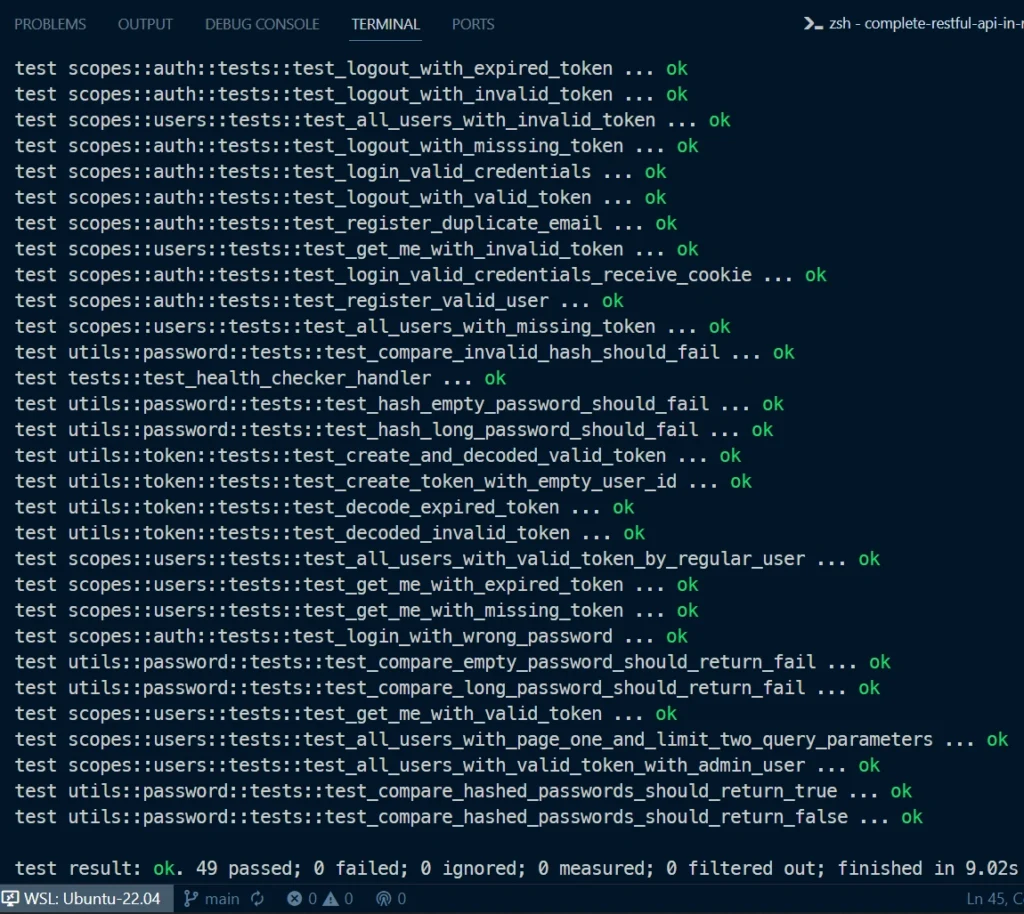
Continuing, execute the command sqlx migrate run to apply the SQLx migrations to the database. Afterward, run the following command to execute the unit tests defined in the project:
cargo test
In your terminal, you should see all 49+ tests passing with no errors. Now, you can execute the command docker-compose -f docker-compose.no_api.yml down -v to bring down the Docker containers, as we have run the tests and ensured that no feature is broken in the application.
Creating a Dockerfile for the Rust application
It’s time to create a Dockerfile for our Rust application. For those unfamiliar, the Dockerfile serves as a blueprint, allowing us to create a containerized environment for our Rust application. This not only ensures consistency and reproducibility but also streamlines deployment across various stages of the development and deployment pipeline.
Let’s create a Dockerfile in the root directory of the project and populate it with the following configurations:
Dockerfile
# Builder Stage
FROM rust:1.71 as builder
ENV SQLX_OFFLINE=true

# Create a new Rust project
RUN USER=root cargo new --bin complete-restful-api-in-rust
WORKDIR /complete-restful-api-in-rust

# Copy and build dependencies
COPY Cargo.toml Cargo.lock ./
RUN cargo build --release --locked
RUN rm src/*.rs

# Copy the source code and build the application
COPY . .
RUN cargo build --release --locked

# Production Stage
FROM debian:buster-slim
ARG APP=/usr/src/app

RUN apt-get update \
    && apt-get install -y ca-certificates tzdata \
    && rm -rf /var/lib/apt/lists/*

ENV TZ=Etc/UTC \
    APP_USER=appuser

RUN groupadd $APP_USER \
    && useradd -g $APP_USER $APP_USER \
    && mkdir -p ${APP}

COPY --from=builder /complete-restful-api-in-rust/target/release/complete-restful-api-in-rust ${APP}/complete-restful-api-in-rust

RUN chown -R $APP_USER:$APP_USER ${APP}

USER $APP_USER
WORKDIR ${APP}

ENTRYPOINT ["./complete-restful-api-in-rust"]
EXPOSE 8000
If you’re using your own Rust project, make sure to replace every instance of
complete-restful-api-in-rustin the provided Dockerfile with the actual name specified in your Cargo.toml file.
Let me quickly go over the Dockerfile. The Dockerfile is divided into two stages: the Builder Stage and the Production Stage.
Builder Stage:
- It uses the
rust:1.71image as a base image. - Sets the environment variable
SQLX_OFFLINEtotrue. This instructs the SQLx library to operate in offline mode, enabling the generation of SQL queries and preparation of statements at build time rather than at runtime. - Creates a new Rust project named
complete-restful-api-in-rustusing the root user. - Sets the working directory to the project.
- Copies the
Cargo.tomlandCargo.lockfiles and builds the project’s dependencies in a separate layer. - Removes any existing Rust source files.
- Copies the entire project into the container.
- Builds the application in release mode
Production Stage:
- Uses the
debian:buster-slimimage as the base image. The reason for choosing this image is to enable us to create a lightweight and minimal container image since it doesn’t include unnecessary packages or components that are not essential for running the application. - Installs necessary dependencies like ca-certificates and sets the timezone to Etc/UTC.
- Creates a non-root user (
appuser) and a directory for the application (/usr/src/app). - Copies the compiled executable from the Builder Stage into the production image.
- Sets ownership of the application directory to the non-root user.
- Specifies the user and working directory for the container.
- Configures the entry point for the container as the executable.
- Exposes port 8000.
With that clarified, let’s now exclude unnecessary files and folders from the Docker image-building process. This helps reduce the size of the context sent to the Docker daemon during the build, making the image creation more efficient. To achieve this, create a .dockerignore file in the root directory and include the following content:
.dockerignore
/target
.git
.gitignore
.vscode
Creating a docker-compose.yml File for Multi-Container Setups
You can create the Docker image from the Dockerfile using the command docker build -t your-image-name. However, given that the project involves a web server, pgAdmin, and a database, it’s more practical to use a Docker Compose file. To do this, create a file named docker-compose.yml in the root directory of your project and add the following code:
docker-compose.yml
version: '3'

services:
  api-rust:
    image: /api-rust
    container_name: api-rust
    restart: unless-stopped
    environment:
      DATABASE_URL: ${DATABASE_URL}
      JWT_SECRET_KEY: ${JWT_SECRET_KEY}
      JWT_MAXAGE: ${JWT_MAXAGE}
    build:
      context: .
      dockerfile: Dockerfile
    networks:
      - rust_app_network

  postgres:
    image: postgres:15.3-alpine
    container_name: postgres
    environment:
      POSTGRES_USER: ${POSTGRES_USER}
      POSTGRES_PASSWORD: ${POSTGRES_PASSWORD}
      POSTGRES_DB: ${POSTGRES_DB}
    volumes:
      - postgres:/var/lib/postgresql/data
    healthcheck:
      test: ["CMD", "pg_isready", "-h", "postgres", "-U", "${POSTGRES_USER}"]
      interval: 5s
      timeout: 5s
      retries: 5
    networks:
      - rust_app_network

  pgadmin:
    image: dpage/pgadmin4
    container_name: pgadmin
    environment:
      PGADMIN_DEFAULT_EMAIL: ${PGADMIN_DEFAULT_EMAIL}
      PGADMIN_DEFAULT_PASSWORD: ${PGADMIN_DEFAULT_PASSWORD}
      PGADMIN_LISTEN_PORT: ${PGADMIN_LISTEN_PORT}
    volumes:
      - pgadmin-data:/var/lib/pgadmin
    restart: always
    depends_on:
      - postgres
    networks:
      - rust_app_network

volumes:
  postgres:
  pgadmin-data:

networks:
  rust_app_network:
In the docker-compose.yml file, be sure to replace the placeholder <your_username> with your actual DockerHub username. It’s a widely adopted practice to suffix the image name with your username when pushing Docker images to DockerHub or another container registry.
By incorporating your DockerHub username into the image name, it uniquely associates the image with your account on the registry. The additional tag (api-rust) helps differentiate and categorize different versions or variants of the image.
You may have noticed that, for security reasons, we used placeholders for the environment variables needed to run the Docker containers. Docker Compose will look for the values of these placeholders in a .env file located in the root directory, so ensure you have the following environment variables as shown in the file below:
.env
# -----------------------------------------------------------------------------
# PostgreSQL Credentials for Docker Compose
# -----------------------------------------------------------------------------
POSTGRES_USER=postgres
POSTGRES_PASSWORD=password123
POSTGRES_DB=rust_app

# -----------------------------------------------------------------------------
# pgAdmin4 Credentials for Docker Compose
# -----------------------------------------------------------------------------
PGADMIN_DEFAULT_EMAIL=admin@admin.com
PGADMIN_DEFAULT_PASSWORD=password123
PGADMIN_LISTEN_PORT=80


# -----------------------------------------------------------------------------
# Database (PostgreSQL - Docker)
# -----------------------------------------------------------------------------
DATABASE_URL=postgresql://postgres:password123@localhost:6500/rust_app?schema=public
DATABASE_CONTAINER_URL=postgresql://postgres:password123@postgres:5432/rust_app?schema=public
DATABASE_TEST_URI=postgresql://postgres:password123@localhost:5432/rust_app?schema=public

# -----------------------------------------------------------------------------
# JSON Web Token Credentials
# -----------------------------------------------------------------------------
JWT_SECRET_KEY=my_ultra_secure_jwt_secret_key
JWT_MAXAGE=60

# -----------------------------------------------------------------------------
# DockerHub Credentails | Only for Deployment
# -----------------------------------------------------------------------------
DOCKER_USERNAME=
DOCKER_PASSWORD=

# -----------------------------------------------------------------------------
# VPS IP and Password | Only for Deployment
# -----------------------------------------------------------------------------
VPS_IP=
VPS_PASSWORD=
Building and Testing the Docker Image Locally
Oops, that’s quite a few configurations. Now, let’s proceed to run the Docker images in our development environment and ensure they work seamlessly together. Start by creating a file named docker-compose.dev.yml and include the following Docker Compose configurations:
docker-compose.dev.yml
version: '3'

services:
  api-rust:
    ports:
      - "8000:8000"
    environment:
      DATABASE_URL: ${DATABASE_CONTAINER_URL}
  postgres:
    ports:
    - 6500:5432

  pgadmin:
    ports:
      - 5050:80
Before we proceed to build the Rust Docker image, there’s a crucial step we need to take. We must generate prepared statements for the SQLx library; otherwise, the final image won’t function as expected, and you’ll repeatedly see ‘Hello World’ printed in the terminal of the Docker container. Execute the following command to launch the Postgres database:
docker-compose -f docker-compose.no_api.yml up -d
After ensuring the PostgreSQL server is up and running, execute the command sqlx migrate run to apply the SQLx migrations to the database schema. Upon completion, proceed to generate the prepared statements with the following command:
cargo sqlx prepare
After the successful execution of the command, you’ll see the generated prepared statements stored in a folder named .sqlx within the root directory. With this done, you can proceed to bring down the running containers using the following command:
docker-compose -f docker-compose.no_api.yml down -v
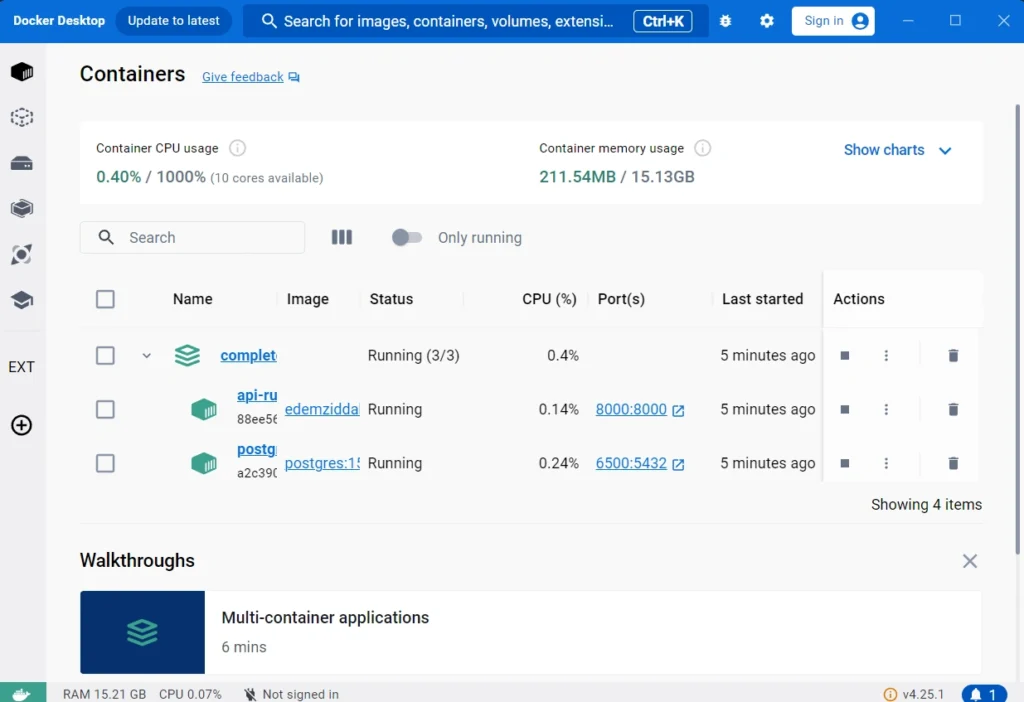
To initiate the build process for the Rust Docker image and launch the other Docker containers, run the following command:
docker-compose -f docker-compose.yml -f docker-compose.dev.yml up -d
Here’s the sequence of events:
- Docker Compose will check your local system for the image
<your_username>/api-rust. If it’s not found, it will attempt to pull it from your DockerHub account. - In the absence of the image on DockerHub, Docker Compose will proceed to build the image based on the instructions outlined in your Dockerfile.
- Upon the completion of the Rust Docker image build, Docker Compose will initiate the launch of the associated Docker containers.
Configuring GitHub Actions
Now, let’s replicate the steps we executed in our local development environment using GitHub Actions. This includes building the Docker image from the Rust Dockerfile, running the unit tests, and an additional step of pushing the image to your DockerHub account.
Note: Make sure you’ve pushed the project to your GitHub repository before proceeding with the remaining sections.
Building Rust App and Running Unit Tests with GitHub Actions
Let’s start with Continuous Integration (CI), which involves running unit tests to ensure no feature is broken, building the Rust Docker image, and pushing the image to DockerHub. To achieve this, the convention is to create a .github/workflows directory and a YAML file within it that contains the workflows. So, follow these steps:
- Create a
.githubdirectory at the project’s root level. - Inside the
.githubdirectory, create another directory namedworkflows. - Within the
workflowsdirectory, create a file namedprod.ymland insert the following code:
.github/workflows/prod.yml
name: Build, Test and Deploy to Prod

on:
  push:
    branches:
      - main

env:
  SQLX_OFFLINE: true
  DATABASE_URL: ${{secrets.DATABASE_TEST_URI}}

jobs:
  build:
    runs-on: ubuntu-latest

    services:
      postgres:
        image: postgres:15.3-alpine
        ports:
          - 5432:5432
        env:
          POSTGRES_USER: ${{secrets.POSTGRES_USER}}
          POSTGRES_PASSWORD: ${{secrets.POSTGRES_PASSWORD}}
          POSTGRES_DB: ${{secrets.POSTGRES_DB}}
        options: >-
          --health-cmd pg_isready
          --health-interval 10s
          --health-timeout 5s
          --health-retries 5

    steps:
      - name: Checkout code
        uses: actions/checkout@v3

      - name: Cache dependencies
        uses: actions/cache@v3
        with:
          path: |
            ~/.cargo
            target/
          key: ${{ runner.os }}-cargo-${{ hashFiles('**/Cargo.lock') }}
          restore-keys: ${{ runner.os }}-cargo-

      - name: Install Rust
        uses: actions-rs/toolchain@v1
        with:
          profile: minimal
          toolchain: stable

      - name: Install SQLx CLI
        run: cargo install sqlx-cli --no-default-features --features native-tls,postgres

      - name: Run SQLx Database Migrations
        run: sqlx migrate run

      - name: Generate SQLX Prepared Queries
        run: cargo sqlx prepare

      - name: Build and test code
        run: |
          cargo build --verbose
          cargo test --verbose

      - name: Set up Docker Buildx
        uses: docker/setup-buildx-action@v2

      - name: Log in to Docker Hub
        uses: docker/login-action@v2
        with:
          username: ${{secrets.DOCKER_USERNAME}}
          password: ${{secrets.DOCKER_PASSWORD}}

      - name: Build and push Docker images
        uses: docker/bake-action@v2.3.0
        with:
          push: true
          set: |
            *.cache-from=type=gha
            *.cache-to=type=gha,mode=max
You can see that we utilized secrets, also known as environment variables, within the workflow. Navigate to the GitHub repository and add the following secrets:
# -----------------------------------------------------------------------------
# PostgreSQL Credentials for Docker Compose
# -----------------------------------------------------------------------------
POSTGRES_USER=postgres
POSTGRES_PASSWORD=password123
POSTGRES_DB=rust_app

# -----------------------------------------------------------------------------
# Database (PostgreSQL - Docker)
# -----------------------------------------------------------------------------
DATABASE_TEST_URI=postgresql://postgres:password123@localhost:5432/rust_app?schema=public

# -----------------------------------------------------------------------------
# DockerHub Credentails | Only for Deployment
# -----------------------------------------------------------------------------
DOCKER_USERNAME=
DOCKER_PASSWORD=
To add the secrets to your GitHub Actions workflow, follow these steps:
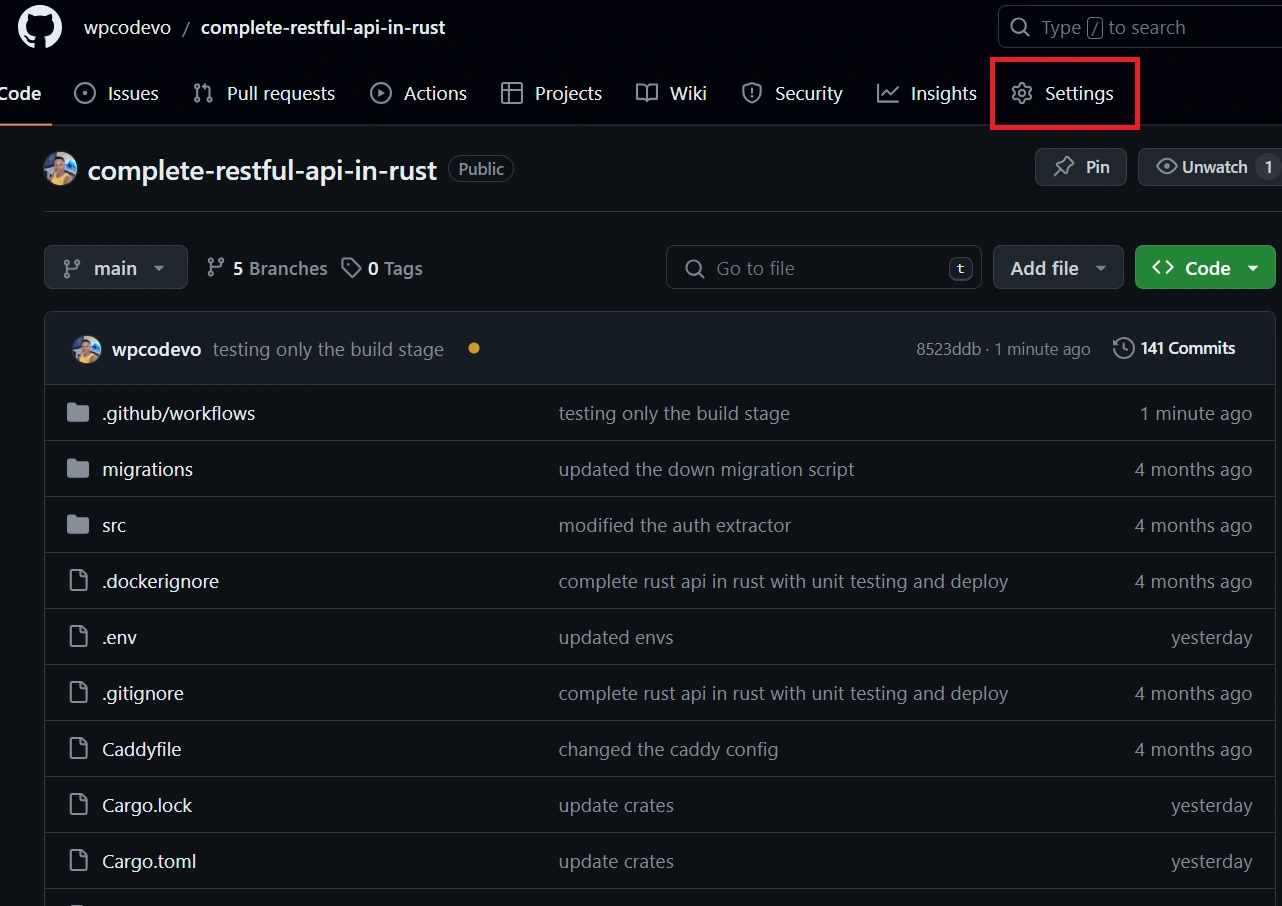
- Navigate to your Repository: Open your GitHub repository in your web browser.
- Go to Settings: On the top menu bar, click on the “Settings” tab of your repository.
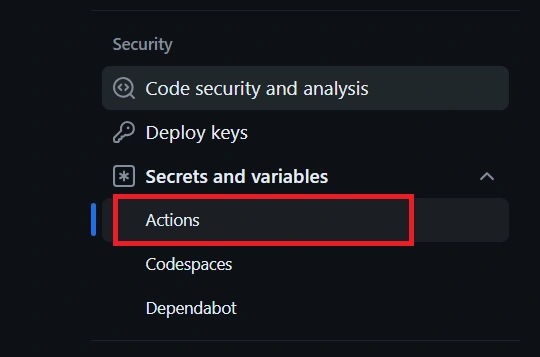
- Navigate to Secrets and Variables: In the left sidebar, click on the ‘Secrets and Variables’ option under the ‘Settings’ section, and then choose ‘Actions‘ from the available options.
- Add a New Secret:
- Click on the “New repository secret” button
- Enter a name for the secret
- Enter the value for the secret
- Click on the “Add secret” button to save it.
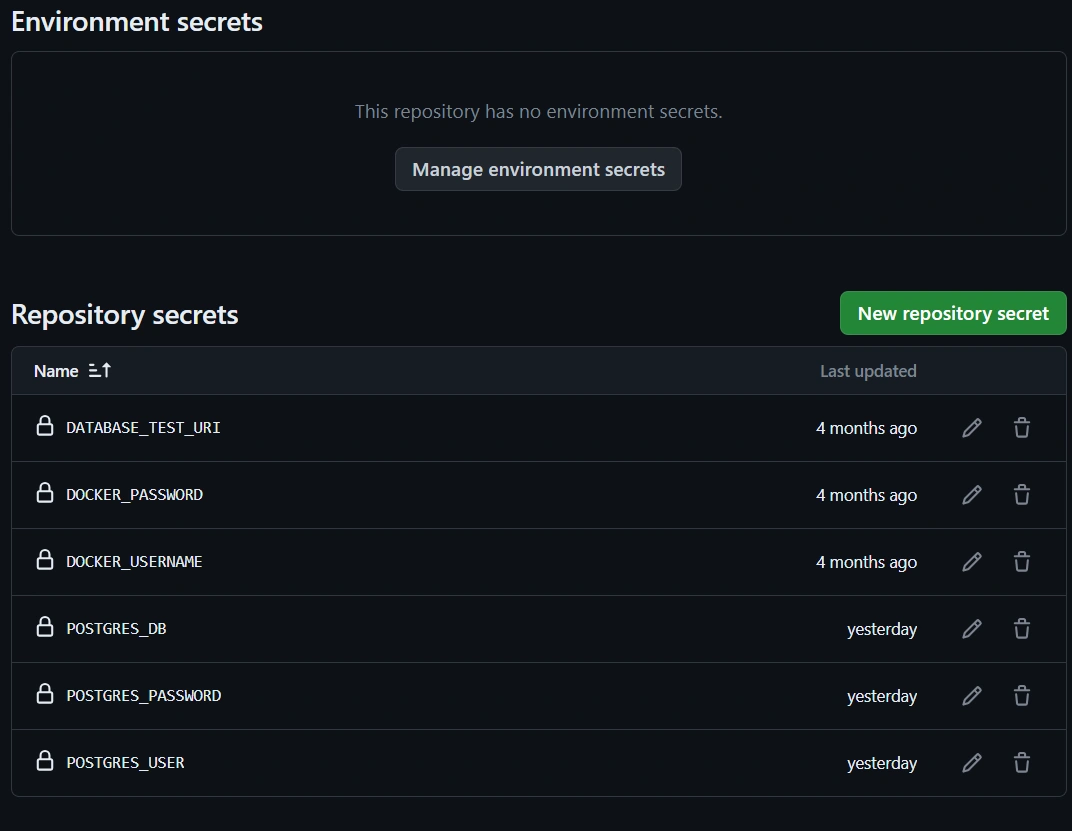
- Verify the Secrets: After adding the secrets, double-check to ensure they match the ones shown in the image below.
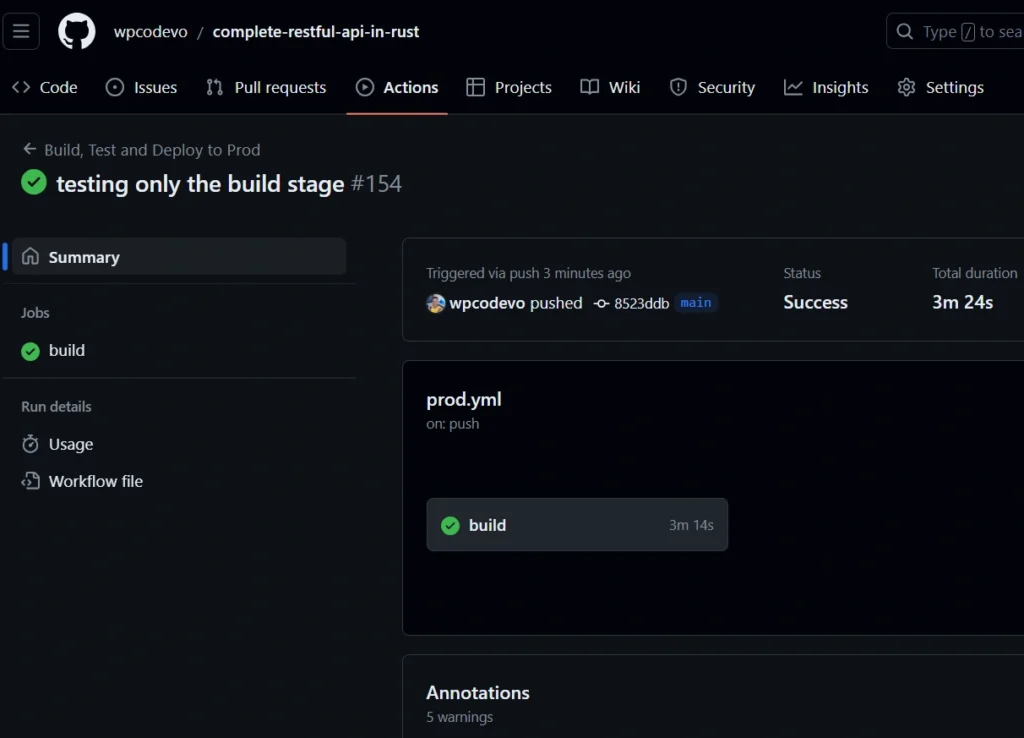
After adding the secrets, commit the changes in your project and push them to the main branch. Then, navigate to the repository, click on the ‘Actions‘ tab, and you should see the build workflow in progress.
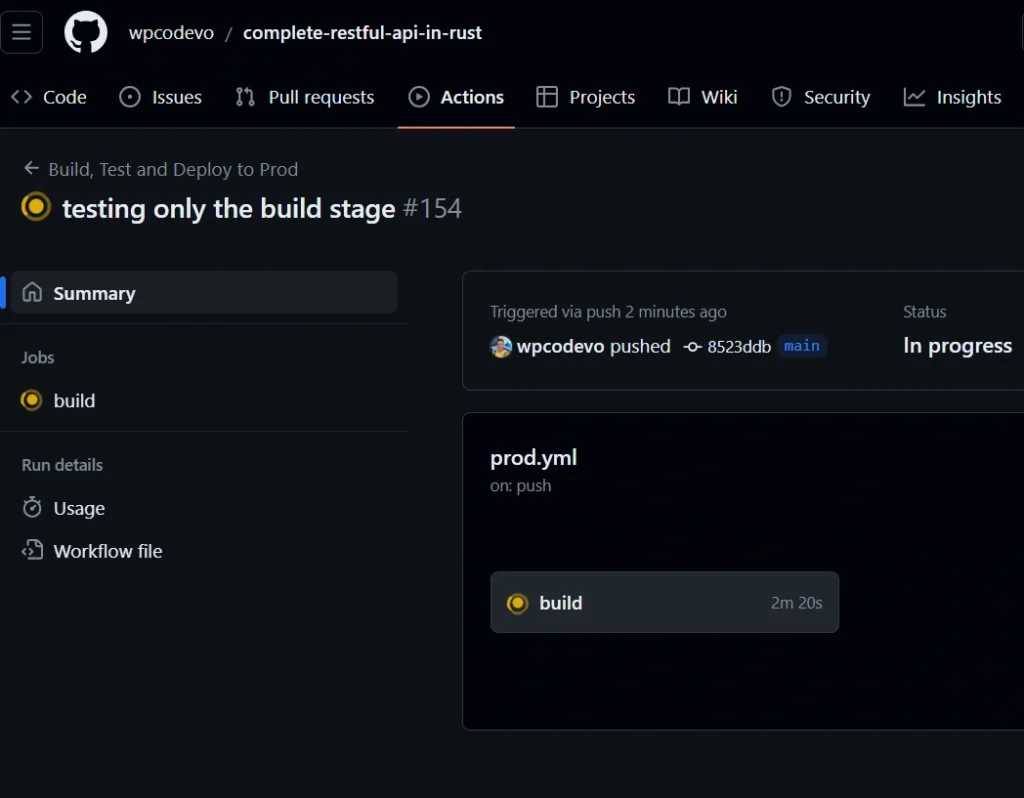
You can click on the build workflow to view detailed information on each executed step. Upon successful completion of all the steps, the status will be displayed in green, signifying a successful execution.
Visit your DockerHub account to locate the Rust Docker image that was pushed during the GitHub Actions build workflow.
Automating Deployment with GitHub Actions
Now that we have confirmed the success of the build job, let’s proceed to add the deployment job. Open the prod.yml file within the .github/workflows directory and include the following code under the ‘jobs’ section.
.github/workflows/prod.yml
  deploy:
    needs: build
    runs-on: ubuntu-latest

    steps:
      - name: Checkout code
        uses: actions/checkout@v2

      - name: Log in to Docker Hub
        uses: docker/login-action@v1
        with:
          username: ${{ secrets.DOCKER_USERNAME }}
          password: ${{ secrets.DOCKER_PASSWORD }}

      - name: Install sshpass
        run: sudo apt-get install sshpass

      - name: Copy Caddyfile to vps_server
        run: sshpass -v -p '${{ secrets.VPS_PASSWORD }}' scp -o StrictHostKeyChecking=no Caddyfile root@${{ secrets.VPS_IP }}:~

      - name: Copy docker-compose.yml to vps_server
        run: sshpass -v -p '${{ secrets.VPS_PASSWORD }}' scp -o StrictHostKeyChecking=no docker-compose.yml root@${{ secrets.VPS_IP }}:~

      - name: Copy docker-compose.prod.yml to vps_server
        run: sshpass -v -p '${{ secrets.VPS_PASSWORD }}' scp -o StrictHostKeyChecking=no docker-compose.prod.yml root@${{ secrets.VPS_IP }}:~

      - name: Deploy
        uses: appleboy/ssh-action@master
        with:
          host: ${{ secrets.VPS_IP }}
          username: root
          password: ${{ secrets.VPS_PASSWORD }}
          script: |
            cd ~
            export DATABASE_URL=${{ secrets.DATABASE_URL }}
            export JWT_SECRET_KEY=${{ secrets.JWT_SECRET_KEY }}
            export JWT_MAXAGE=${{ secrets.JWT_MAXAGE }}
            export POSTGRES_USER=${{secrets.POSTGRES_USER}}
            export POSTGRES_PASSWORD=${{secrets.POSTGRES_PASSWORD}}
            export POSTGRES_DB=${{secrets.POSTGRES_DB}}
            export PGADMIN_DEFAULT_EMAIL=${{secrets.PGADMIN_DEFAULT_EMAIL}}
            export PGADMIN_DEFAULT_PASSWORD=${{secrets.PGADMIN_DEFAULT_PASSWORD}}
            export PGADMIN_LISTEN_PORT=${{secrets.PGADMIN_LISTEN_PORT}}
            docker-compose down
            docker-compose pull
            docker-compose -f docker-compose.yml -f docker-compose.prod.yml up -d
Complete GitHub Actions
After inserting the code, your prod.yml file should now include the following content:
.github/workflows/prod.yml
name: Build, Test and Deploy to Prod

on:
  push:
    branches:
      - main

env:
  SQLX_OFFLINE: true
  DATABASE_URL: ${{secrets.DATABASE_TEST_URI}}

jobs:
  build:
    runs-on: ubuntu-latest

    services:
      postgres:
        image: postgres:15.3-alpine
        ports:
          - 5432:5432
        env:
          POSTGRES_USER: ${{secrets.POSTGRES_USER}}
          POSTGRES_PASSWORD: ${{secrets.POSTGRES_PASSWORD}}
          POSTGRES_DB: ${{secrets.POSTGRES_DB}}
        options: >-
          --health-cmd pg_isready
          --health-interval 10s
          --health-timeout 5s
          --health-retries 5

    steps:
      - name: Checkout code
        uses: actions/checkout@v3

      - name: Cache dependencies
        uses: actions/cache@v3
        with:
          path: |
            ~/.cargo
            target/
          key: ${{ runner.os }}-cargo-${{ hashFiles('**/Cargo.lock') }}
          restore-keys: ${{ runner.os }}-cargo-

      - name: Install Rust
        uses: actions-rs/toolchain@v1
        with:
          profile: minimal
          toolchain: stable

      - name: Install SQLx CLI
        run: cargo install sqlx-cli --no-default-features --features native-tls,postgres

      - name: Run SQLx Database Migrations
        run: sqlx migrate run

      - name: Generate SQLX Prepared Queries
        run: cargo sqlx prepare

      - name: Build and test code
        run: |
          cargo build --verbose
          cargo test --verbose

      - name: Set up Docker Buildx
        uses: docker/setup-buildx-action@v2

      - name: Log in to Docker Hub
        uses: docker/login-action@v2
        with:
          username: ${{secrets.DOCKER_USERNAME}}
          password: ${{secrets.DOCKER_PASSWORD}}

      - name: Build and push Docker images
        uses: docker/bake-action@v2.3.0
        with:
          push: true
          set: |
            *.cache-from=type=gha
            *.cache-to=type=gha,mode=max
  deploy:
    needs: build
    runs-on: ubuntu-latest

    steps:
      - name: Checkout code
        uses: actions/checkout@v2

      - name: Log in to Docker Hub
        uses: docker/login-action@v1
        with:
          username: ${{ secrets.DOCKER_USERNAME }}
          password: ${{ secrets.DOCKER_PASSWORD }}

      - name: Install sshpass
        run: sudo apt-get install sshpass

      - name: Copy Caddyfile to vps_server
        run: sshpass -v -p '${{ secrets.VPS_PASSWORD }}' scp -o StrictHostKeyChecking=no Caddyfile root@${{ secrets.VPS_IP }}:~

      - name: Copy docker-compose.yml to vps_server
        run: sshpass -v -p '${{ secrets.VPS_PASSWORD }}' scp -o StrictHostKeyChecking=no docker-compose.yml root@${{ secrets.VPS_IP }}:~

      - name: Copy docker-compose.prod.yml to vps_server
        run: sshpass -v -p '${{ secrets.VPS_PASSWORD }}' scp -o StrictHostKeyChecking=no docker-compose.prod.yml root@${{ secrets.VPS_IP }}:~

      - name: Deploy
        uses: appleboy/ssh-action@master
        with:
          host: ${{ secrets.VPS_IP }}
          username: root
          password: ${{ secrets.VPS_PASSWORD }}
          script: |
            cd ~
            export DATABASE_URL=${{ secrets.DATABASE_URL }}
            export JWT_SECRET_KEY=${{ secrets.JWT_SECRET_KEY }}
            export JWT_MAXAGE=${{ secrets.JWT_MAXAGE }}
            export POSTGRES_USER=${{secrets.POSTGRES_USER}}
            export POSTGRES_PASSWORD=${{secrets.POSTGRES_PASSWORD}}
            export POSTGRES_DB=${{secrets.POSTGRES_DB}}
            export PGADMIN_DEFAULT_EMAIL=${{secrets.PGADMIN_DEFAULT_EMAIL}}
            export PGADMIN_DEFAULT_PASSWORD=${{secrets.PGADMIN_DEFAULT_PASSWORD}}
            export PGADMIN_LISTEN_PORT=${{secrets.PGADMIN_LISTEN_PORT}}
            docker-compose down
            docker-compose pull
            docker-compose -f docker-compose.yml -f docker-compose.prod.yml up -d
Deployment to VPS
With the completion of the build workflow, let’s shift our focus to deployment. For this, you’ll need a Virtual Private Server (VPS). You can obtain one from AWS, DigitalOcean, or, in my case, I’ll be using Vutr.com for my VPS.
Setting up a Virtual Private Server (VPS) for Deployment
- Sign In or Sign Up: Go to Vultr.com. If you’re new to Vultr, take advantage of this link to sign up and receive $100 in credits for testing the platform. For existing users, simply login to your account.
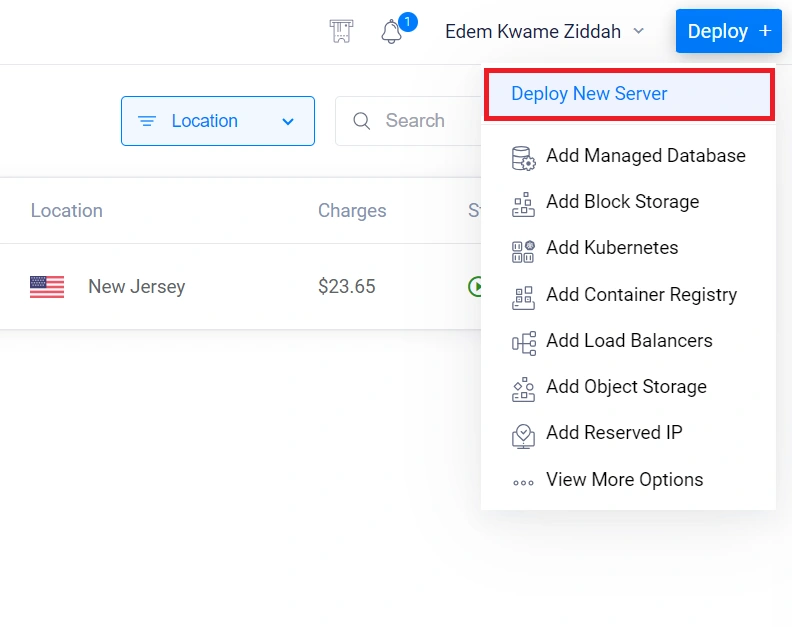
- Initiate Server Deployment: Navigate to the dashboard, hover over the “Deploy” button, and select “Deploy New Server”.
- Choose Server Type: Opt for the server type that aligns with your needs and budget. For instance, if you prefer “Cloud Compute“, navigate to the “CPU & Storage Technology” section and select “High Frequency”.

- Select Server Location: Choose a server location that is closest to your customers or users for optimal performance.
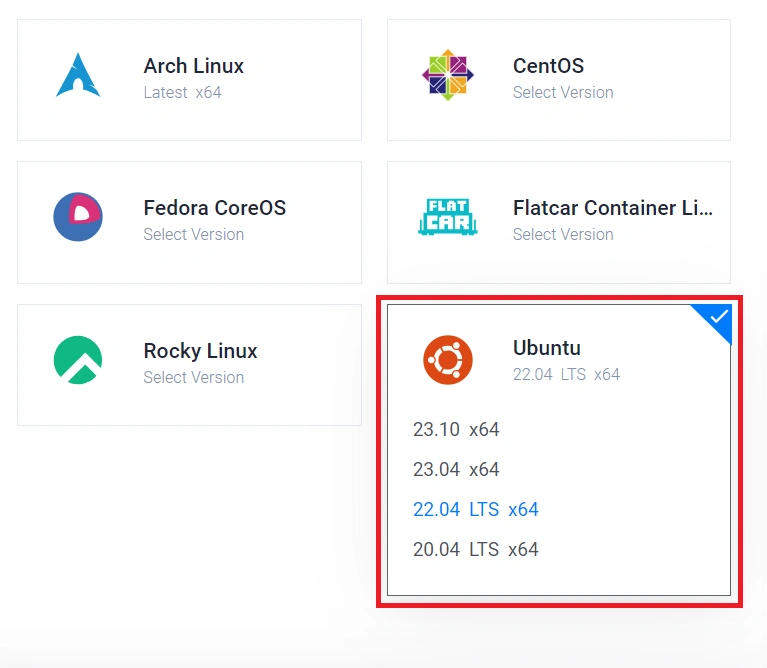
- Select Server Image: Opt for the Ubuntu image and select version 22.04 LTS x64 for your server.
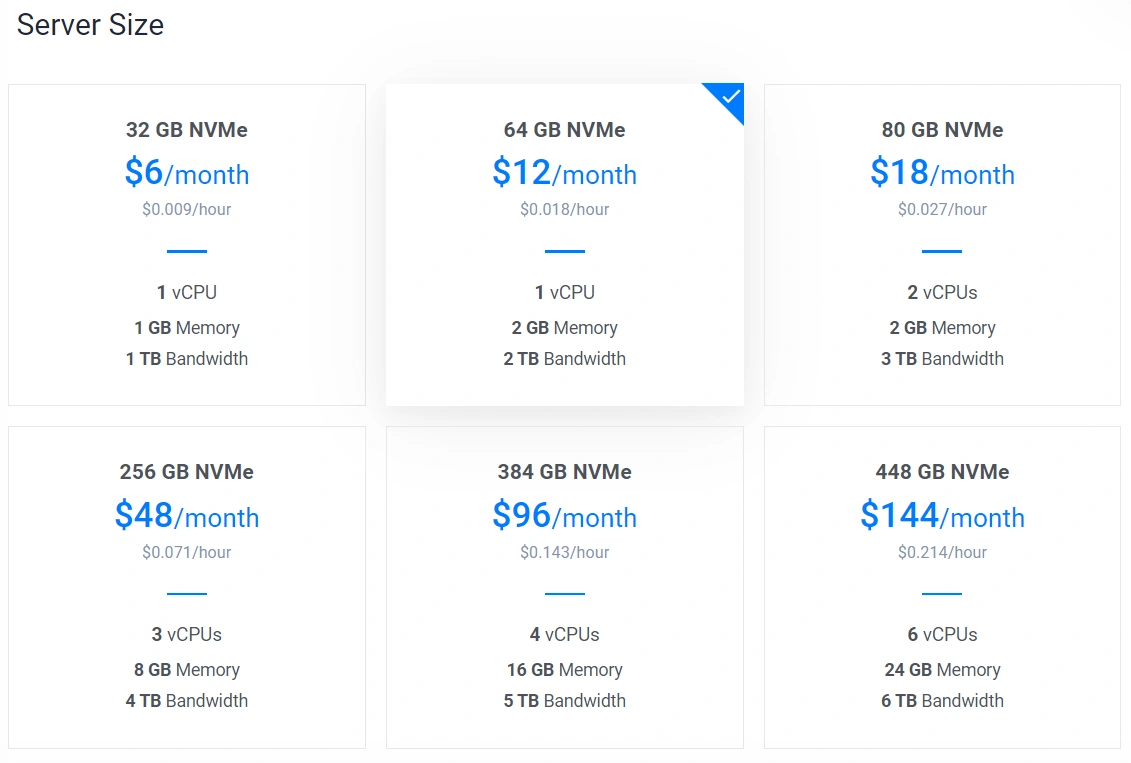
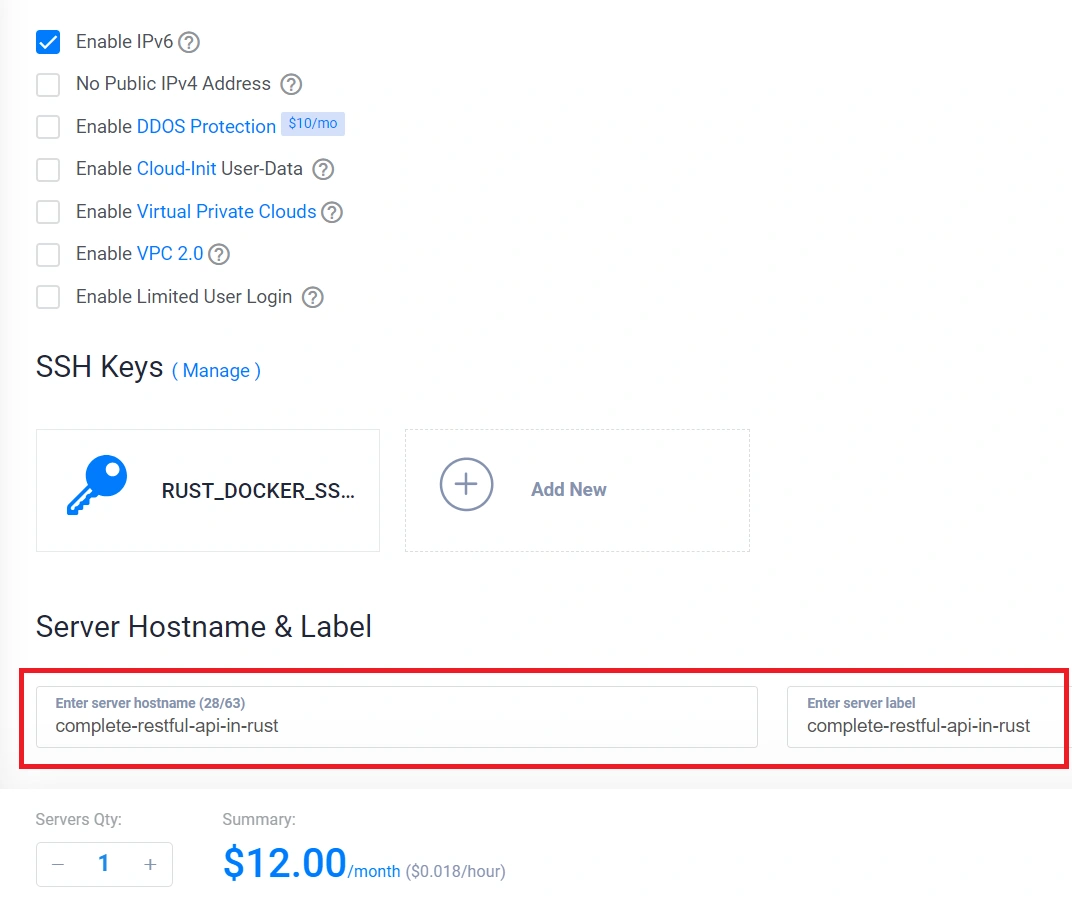
- Select Server Size: Choose the server size that aligns with your budget. For this project, the $12 plan, offering 1 virtual CPU, 2GB memory, and 3TB bandwidth, is sufficient.
- Configure Auto Backups: If auto backups are unnecessary for your setup, feel free to disable this feature.
- Specify Server Hostname: Provide a name for your server, and upon completion, click the “Deploy Now” button to initiate the server deployment.
Install Docker and Docker Compose on the VPS
To proceed, establish an SSH connection to your Virtual Private Server (VPS) and install Docker along with Docker-Compose. If you’re using Linux or macOS, leverage the terminal application. Windows users can use an SSH client like PuTTY or use Windows Subsystem for Linux (WSL).
Use the following command to connect to your VPS, replacing with the actual IP address of your VPS:
ssh root@
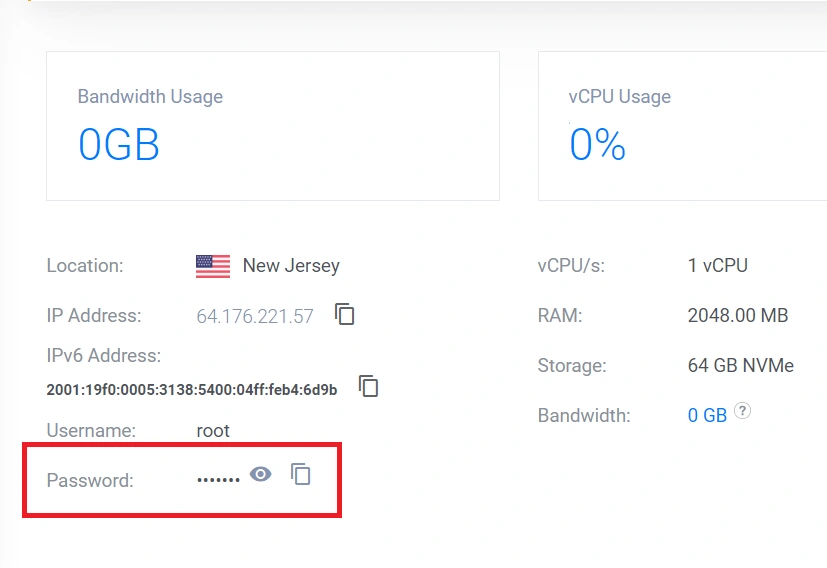
You might encounter a password prompt during the SSH connection. Retrieve the password from your VPS provider’s dashboard, copy it, and paste it into the terminal. Afterward, press the Enter key to proceed.
After establishing a connection to the server, ensure you have the most up-to-date package information by executing sudo apt update. Subsequently, upgrade the installed packages to their latest versions with the command sudo apt upgrade.
To proceed, execute the following commands to install Docker and Docker-Compose:
apt-get install docker
apt-get install docker-compose
You can confirm whether Docker and Docker-Compose have been successfully installed by running the following commands:
- To check Docker:
docker --version
If Docker is installed, it will display the installed version information. - To check Docker-Compose:
docker-compose --version
If Docker-Compose is installed, it will display the installed version information.
Creating a docker-compose.prod.yml File for Production Deployment
Now, let’s create a Docker Compose file for the production environment. This file will help us set up a Caddy server, allowing it to handle both HTTP and HTTPS traffic based on the configuration provided in the Caddyfile. To do this, create a docker-compose.prod.yml file in the root directory and add the following code
docker-compose.prod.yml
version: '3'

services:
  caddy:
    image: caddy/caddy:2.7.2-alpine
    container_name: caddy
    restart: unless-stopped
    ports:
      - 443:443
      - 80:80
    volumes:
      - $PWD/Caddyfile:/etc/caddy/Caddyfile
      - caddy_data:/data
      - caddy_config:/config
    networks:
      - rust_app_network

volumes:
  caddy_data:
  caddy_config:
With that in place, navigate to the ‘Secrets and Variables‘ section within the ‘Settings‘ page of your GitHub repository, and choose ‘Actions‘. Subsequently, add any environment variables not already present, using the ones provided below. These secrets will play a crucial role in the deployment phase of the workflow.
.env
# -----------------------------------------------------------------------------
# PostgreSQL Credentials for Docker Compose
# -----------------------------------------------------------------------------
POSTGRES_USER=postgres
POSTGRES_PASSWORD=password123
POSTGRES_DB=rust_app

# -----------------------------------------------------------------------------
# pgAdmin4 Credentials for Docker Compose
# -----------------------------------------------------------------------------
PGADMIN_DEFAULT_EMAIL=admin@admin.com
PGADMIN_DEFAULT_PASSWORD=password123
PGADMIN_LISTEN_PORT=80


# -----------------------------------------------------------------------------
# Database (PostgreSQL - Docker)
# -----------------------------------------------------------------------------
DATABASE_URL=postgresql://postgres:password123@postgres:5432/rust_app?schema=public
DATABASE_CONTAINER_URL=postgresql://postgres:password123@postgres:5432/rust_app?schema=public
DATABASE_TEST_URI=postgresql://postgres:password123@localhost:5432/rust_app?schema=public

# -----------------------------------------------------------------------------
# JSON Web Token Credentials
# -----------------------------------------------------------------------------
JWT_SECRET_KEY=my_ultra_secure_jwt_secret_key
JWT_MAXAGE=60

# -----------------------------------------------------------------------------
# DockerHub Credentails | Only for Deployment
# -----------------------------------------------------------------------------
DOCKER_USERNAME=
DOCKER_PASSWORD=

# -----------------------------------------------------------------------------
# VPS IP and Password | Only for Deployment
# -----------------------------------------------------------------------------
VPS_IP=
VPS_PASSWORD=
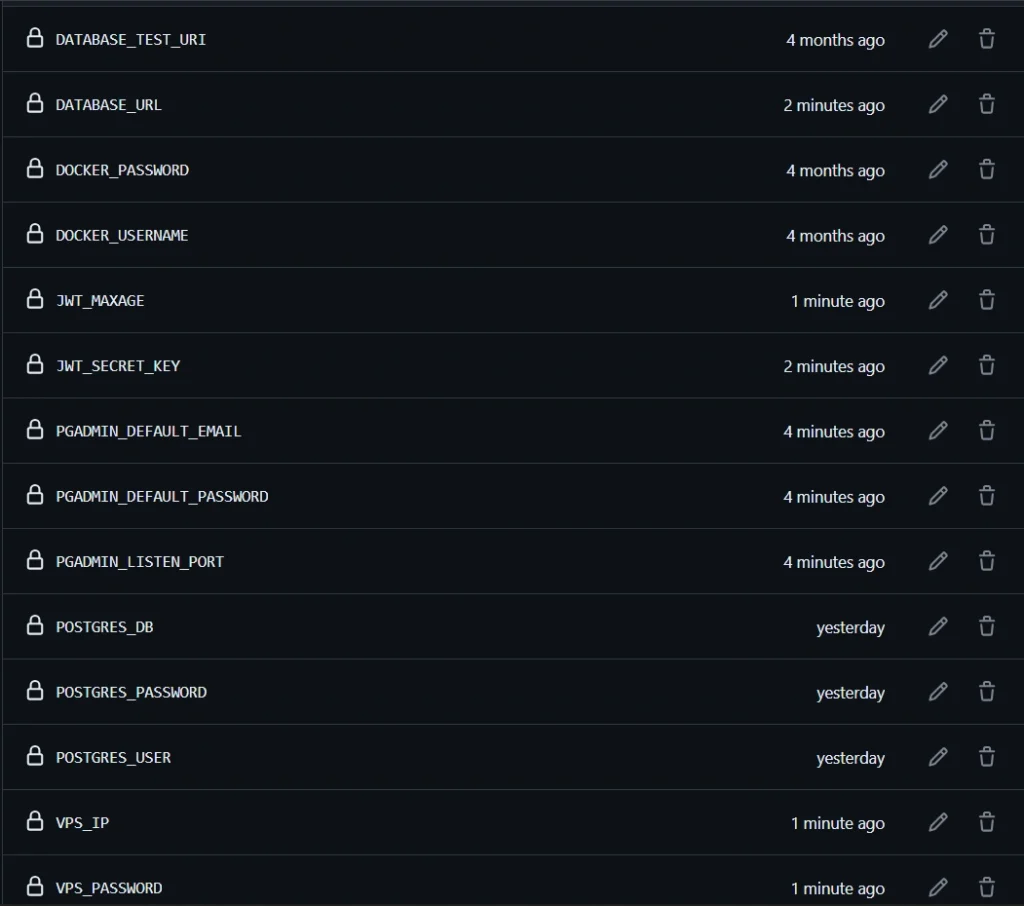
After completion, you should have the following secrets, as shown in the screenshot:
Configuring Caddy as the Reverse Proxy for the Rust App
Next, we’ll configure the Caddy server using a Caddyfile. Create a file named Caddyfile and include the following content:
Caddyfile
rust.codevoweb.com {
    reverse_proxy api-rust:8000 {
        header_down Strict-Transport-Security max-age=31536000;
    }
}

pgadmin4.codevoweb.com {
    reverse_proxy pgadmin:80 {
        header_down Strict-Transport-Security max-age=31536000;
    }
}
The above configuration sets up Caddy to handle traffic for ‘rust.codevoweb.com‘ and ‘pgadmin4.codevoweb.com‘, forwarding requests to the corresponding services and applying specific security headers. Note that you can customize these domains; in my case, I’m using subdomains.
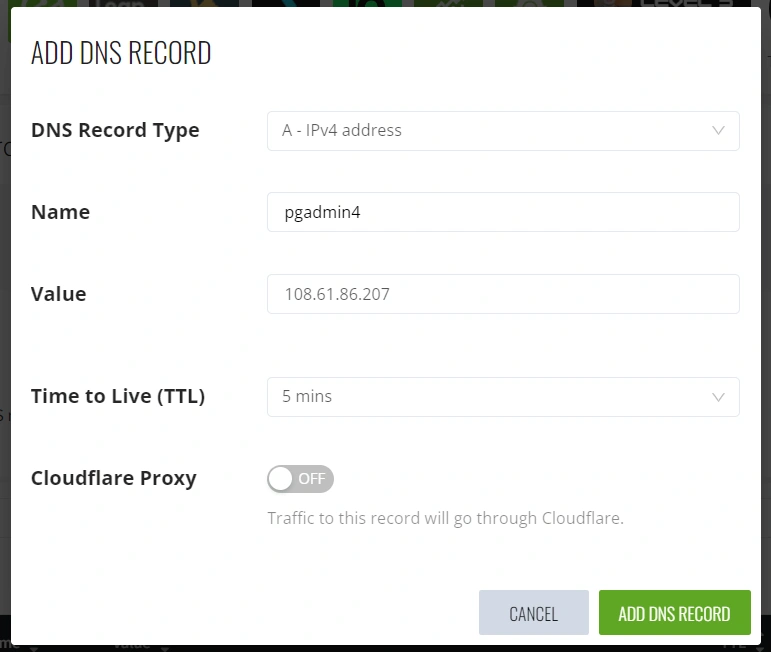
To configure these subdomains, navigate to the DNS section of your domain provider or DNS management platform, such as Cloudflare. Add a new A record with the name ‘rust‘ and set the value to the IP address of your VPS.

Next, add another A record. This time, set the name to ‘pgadmin4‘ and use the IP address of your VPS as the value.
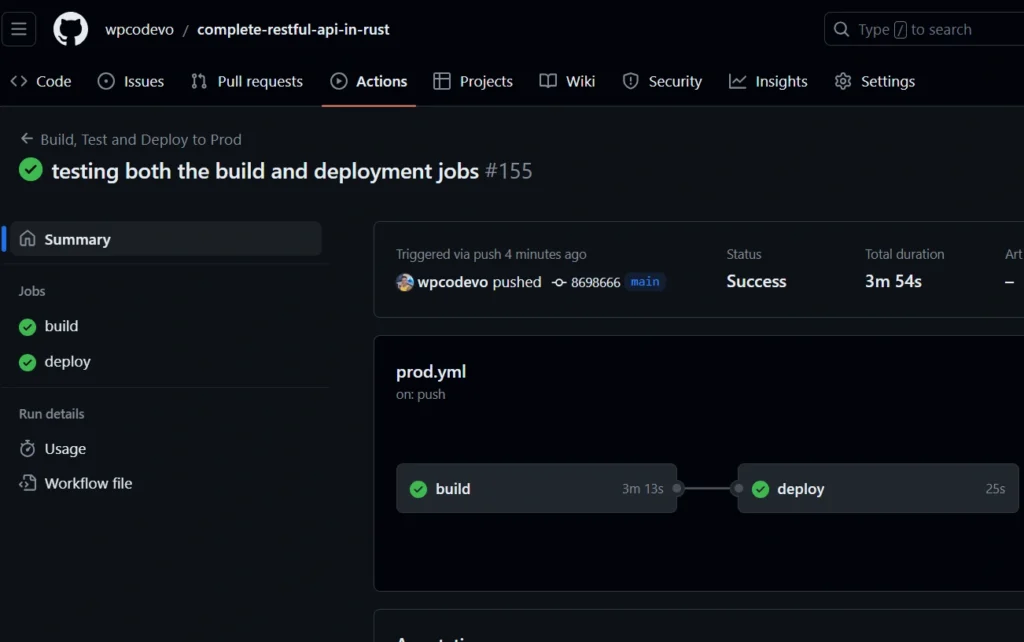
Testing the Automated Deployment Process
Now, to test both the build and deployment workflows in GitHub Actions, commit all the changes and push them to the main branch. After a few minutes, observe that both jobs should be marked as successful with a green status.
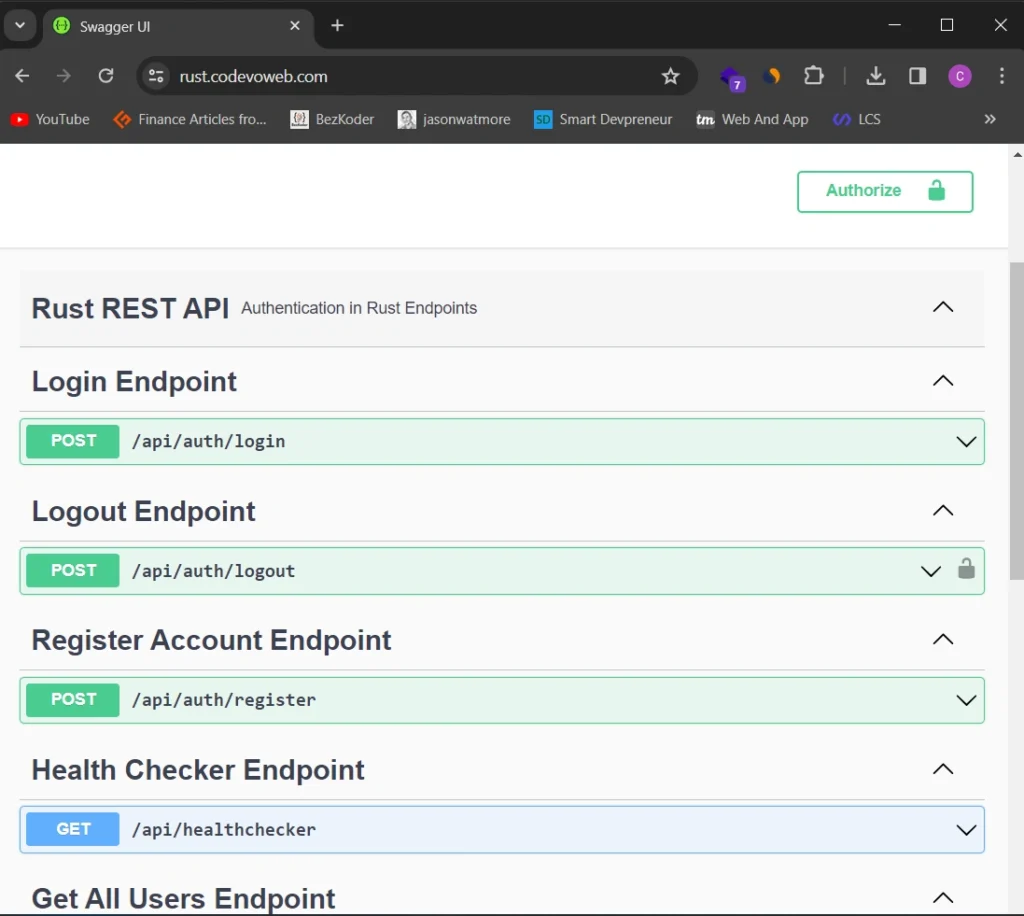
Having completed the process, you can now access the Swagger documentation via the subdomain https://rust.codevoweb.com/. From there, you can make HTTP requests to interact with the Rust application using the available endpoints.
Likewise, you can access the pgAdmin dashboard via the subdomain https://pgadmin4.codevoweb.com. This allows you to add the PostgreSQL server running in its Docker container and inspect the stored data. For login, use the credentials provided in the .env file.
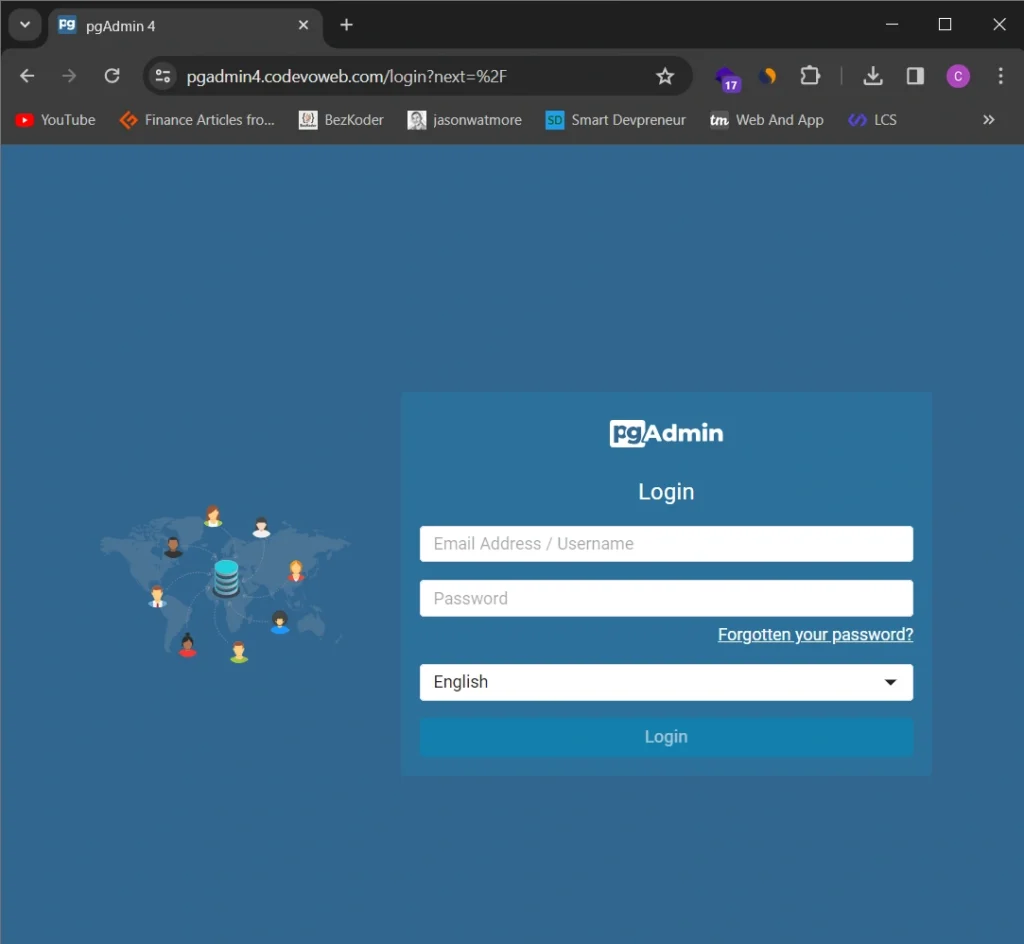
To add the PostgreSQL server on pgAdmin, utilize the credentials from the .env file. Since both services are running under the same network, use “postgres” as the host name.

Conclusion
And we are done! In this article, you learned how to deploy a Rust application using Docker and GitHub Actions. We even went a step further to dockerize the application and run unit tests in our development environment. I hope you found this article helpful and enjoyable. Thanks for reading!
Thanks, do you have any idea how to setup 2nd application with the caddyfile
because when we run 1st caddyfile the ports 443 and 80 get captured by it, changing the port to other values don’t work with https, ssl i guess