

This article will teach you how to set up and use React Query v5 in the new Next.js 14 app directory. With the recent release of React Query v5, it has generated considerable buzz in the React ecosystem, primarily due to improvements in Automatic Data Synchronization and Performance Optimizations.
If you’re unfamiliar with React Query, don’t worry. Here’s a brief breakdown: React Query is a library designed for fetching, caching, and updating data in React applications. It focuses on managing asynchronous operations and the data they return.
Here’s the roadmap we’ll follow. First, we’ll create the React Query Client Provider and wrap it around the root children node using the root layout component. This ensures that the Query Client is accessible to all components in the component tree.
Moving on, we’ll demonstrate two major ways of using React Query to fetch data. Firstly, we’ll fetch the initial data in a server component higher up in the component tree and pass it as a prop to a client component that needs it. Secondly, we’ll prefetch the query in a server component, dehydrate the cache, and rehydrate it on the client. So, without further ado, let’s dive into the article.
The tutorial’s source code is available on GitHub: https://github.com/wpcodevo/nextjs14-react-query
More practice:
- How to Set Up and Use React Query in Next.js 14
- How to Setup React Query in Next.js 13 App Directory
- React Query and Axios: User Registration and Email Verification
- Forgot/Reset Passwords with React Query and Axios
- How to Setup tRPC API Server & Client with Next.js and Prisma
- tRPC Server API with Next.js & PostgreSQL: Access & Refresh Tokens
- Full-Stack Next.js tRPC App: User Registration & Login Example
- Build a tRPC CRUD API Example with Next.js

Set Up the Next.js 14 Project
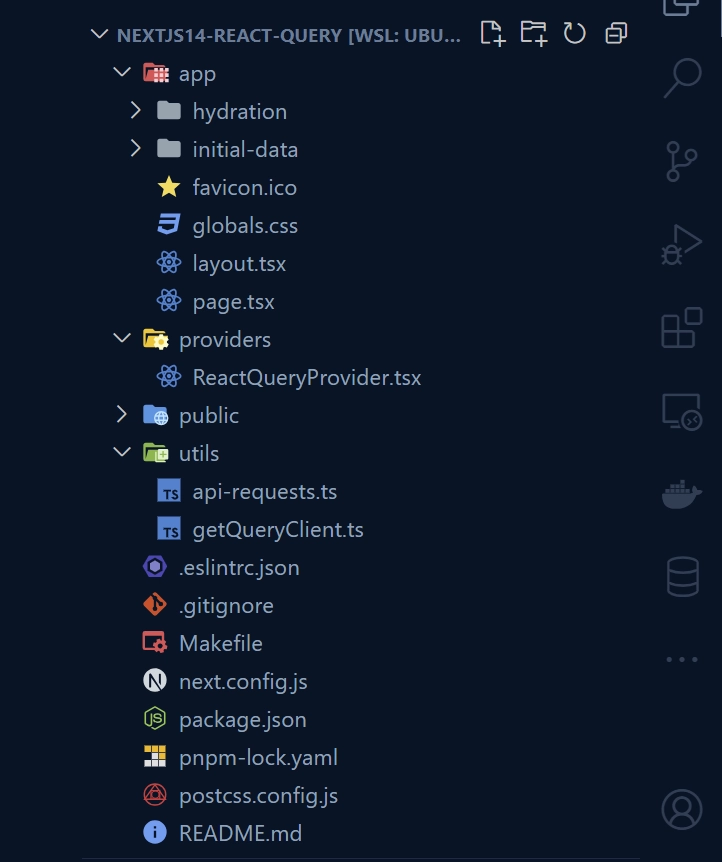
Upon completing this tutorial, your directory and file structure will resemble the one shown in the screenshot below.
First and foremost, let’s bootstrap a new Next.js 14 app. Navigate to the directory on your machine where you wish to store the source code. Open a new terminal there and, based on your preferred package manager, execute the following command to begin the project scaffolding process.
yarn create next-app nextjs14-react-query
# or
npx create-next-app@latest nextjs14-react-query
# or
pnpm create next-app nextjs14-react-query
You’ll be prompted to choose which features to enable for the project. Make sure to select “Yes” for TypeScript and ESLint. Additionally, you’ll be asked if you’d like to use the src/ directory and the app/ directory. Select “No” for the src/ directory and “Yes” for the app/ directory. For the import alias, simply press the Enter key to accept the default.
Once you’ve answered all the questions, the Next.js 14 project will be generated, and all necessary dependencies will be installed. After the installation is complete, you can open the project in your preferred IDE or text editor, such as VS Code.
Moving on, replace the existing content of the app/page.tsx file with the code below, which contains links to different pages we are yet to create:
app/page.tsx
import Link from "next/link";

export default function Home() {
  return (
    <div>
      <h1>Hello, Next.js 14 App Directory!</h1>
      <p>
        <Link prefetch href="/initial-data">
          Prefetching Using initial data --- Good for SEO
        </Link>
      </p>
      <p>
        <Link prefetch href="/hydration">
          Prefetching Using Hydration --- Good for SEO
        </Link>
      </p>
    </div>
  );
}
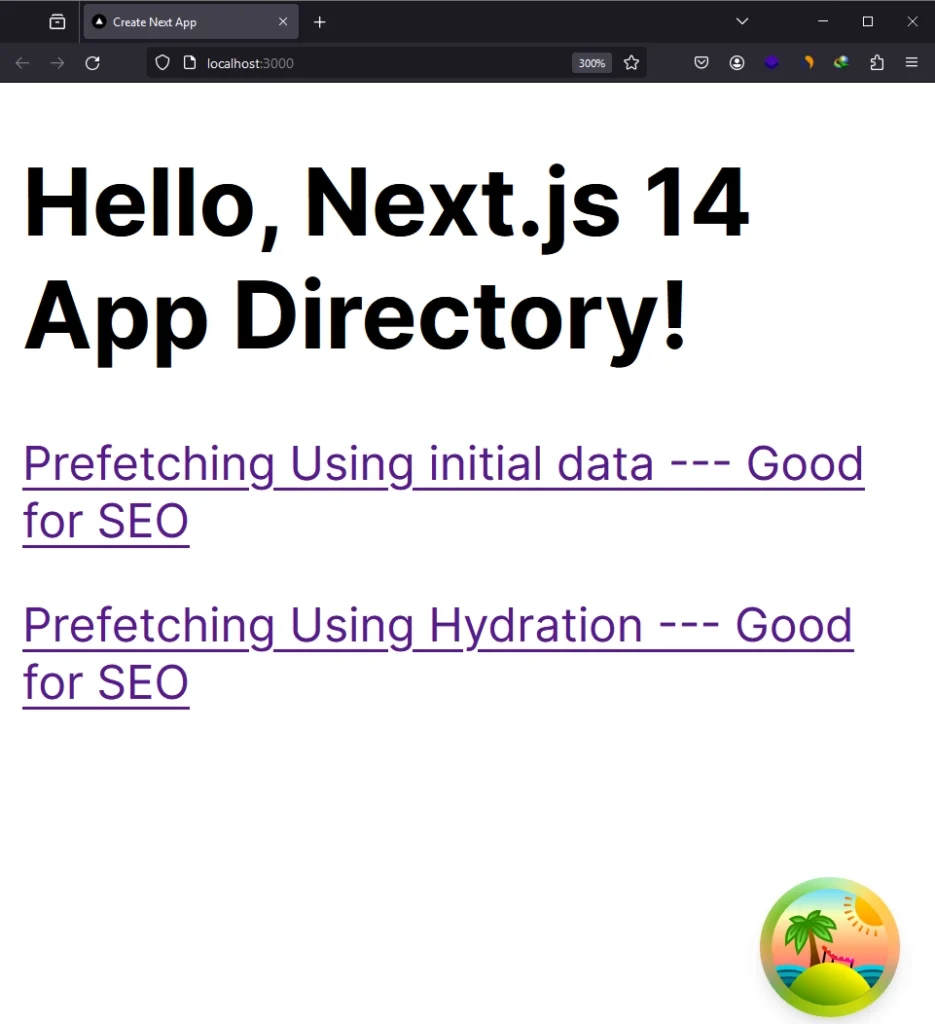
Next.js comes with default styling, which we won’t need for this tutorial. To remove it, go into the app/layout.tsx file and comment out the line import './globals.css' located at the top of the file. After making this change, start the development server and visit the root URL provided in the terminal in your browser. You should now see a page similar to the one below:
Now, it’s time to install the React Query dependencies we will need throughout this article. Open your terminal and run the following commands to install them:
pnpm add @tanstack/react-query
pnpm add @tanstack/query-core
pnpm add -D @tanstack/eslint-plugin-query
pnpm add -D @tanstack/react-query-devtools
# or
yarn add @tanstack/react-query
yarn add @tanstack/query-core
yarn add -D @tanstack/eslint-plugin-query
yarn add -D @tanstack/react-query-devtools
# or
npm i @tanstack/react-query
npm i @tanstack/query-core
npm i -D @tanstack/eslint-plugin-query
npm i -D @tanstack/react-query-devtools
@tanstack/react-query– This package is a React bindings library for React Query. It provides hooks and components to integrate React Query with React applications.@tanstack/query-core– This package is the core library of React Query. It contains the fundamental logic and functionality for managing queries, caching, and fetching data.@tanstack/eslint-plugin-query– This is an ESLint plugin specifically designed for React Query. It provides ESLint rules to enforce best practices and conventions when using React Query in your code.@tanstack/react-query-devtools– This package provides a set of development tools for debugging and inspecting React Query in your application.
Create a React Query Client Provider
In previous versions of Next.js, especially those below v13, it was common to wrap the Query Client Provider around the root component within the _app.tsx file, considering it a client component. However, with all components now being server components in Next.js 13+, it is necessary to extract the code required to wrap the children node into a separate client component.
To implement this change, follow these steps:
- Create a
providersdirectory at the root level of your Next.js 14 project. - Inside the
providersdirectory, create a file namedReactQueryProvider.tsx. - Add the following code to the
ReactQueryProvider.tsxfile:
providers/ReactQueryProvider.tsx
'use client';

import { QueryClient, QueryClientProvider } from '@tanstack/react-query';
import { ReactQueryDevtools } from '@tanstack/react-query-devtools';
import { useState } from 'react';

function ReactQueryProvider({ children }: React.PropsWithChildren) {
  const [client] = useState(new QueryClient());

  return (
    <QueryClientProvider client={client}>
      {children}
      <ReactQueryDevtools initialIsOpen={false} />
    </QueryClientProvider>
  );
}

export default ReactQueryProvider;
You will notice that we included the 'use client' directive at the top of the file. This directive instructs Next.js to render this component exclusively on the client or in the browser. Furthermore, we instantiated the query client within the component without any configurations. This simplifies things; however, if you wish to configure the cache, you can refer to the API docs to explore the available options.
Wrap the QueryClient Provider Around the Root Children
Now, it’s time to wrap the query client provider around the children node, ensuring that all components in the component tree have access to the query client. To accomplish this, open the app/layout.tsx file and wrap the ReactQueryProvider component around the {children}.
app/layout.tsx
import type { Metadata } from "next";
import { Inter } from "next/font/google";
// import './globals.css';
import ReactQueryProvider from "@/providers/ReactQueryProvider";

const inter = Inter({ subsets: ["latin"] });

export const metadata: Metadata = {
  title: "Create Next App",
  description: "Generated by create next app",
};

export default function RootLayout({
  children,
}: {
  children: React.ReactNode;
}) {
  return (
    <html lang="en">
      <body className={inter.className}>
        <ReactQueryProvider>
          <div>{children}</div>
        </ReactQueryProvider>
      </body>
    </html>
  );
}
With the provider rendered at the root, all other Client Components throughout your app will be able to access the query client. One thing to note is that it’s good practice to render the provider as deep as possible in the tree. Notice how ReactQueryProvider only wraps {children} instead of the entire <html> document. This makes it easier for Next.js to optimize the static parts of your Server Components.
Prefetching Data Using Initial Data
Let’s explore how to pass prefetched data from a Server Component, positioned at a higher level in the component hierarchy, to a Client-side component using props. Before we proceed, it’s beneficial to create some utility functions to facilitate HTTP requests across various sections of our application.
To achieve this, create a “utils” folder at the root level of your project. Subsequently, create an api-requests.ts file within this folder and include the following code:
utils/api-requests.ts
export type User = {
  id: number;
  name: string;
  email: string;
};

export async function getUsers() {
  const res = await fetch('https://jsonplaceholder.typicode.com/users');
  const users = (await res.json()) as User[];
  return users;
}
Fetch the Data in a Client Component
To implement this approach, let’s create a client component that accepts the prefetched data as a prop and pass it as initial data to the useQuery hook. We will set a stale time of 5 seconds to keep the initial data fresh for that duration. However, once it becomes stale, the hook will re-fetch the data as usual.
Navigate to the ‘app‘ directory and create a new folder named ‘initial-data‘. Inside the ‘initial-data‘ folder, generate a file named list-users.tsx and include the following code:
app/initial-data/list-users.tsx
'use client';

import { User, getUsers } from '@/utils/api-requests';
import { useQuery } from '@tanstack/react-query';
import Image from 'next/image';
import React from 'react';

export default function ListUsers({ users }: { users: User[] }) {
  const [count, setCount] = React.useState(0);

  const { data } = useQuery({
    queryKey: ['initial-users'],
    queryFn: () => getUsers(),
    initialData: users,
    staleTime: 5 * 1000,
  });

  return (
    <main style={{ maxWidth: 1200, marginInline: 'auto', padding: 20 }}>
      <div style={{ marginBottom: '4rem', textAlign: 'center' }}>
        <h4 style={{ marginBottom: 16 }}>{count}</h4>
        <button onClick={() => setCount((prev) => prev + 1)}>increment</button>
        <button
          onClick={() => setCount((prev) => prev - 1)}
          style={{ marginInline: 16 }}
        >
          decrement
        </button>
        <button onClick={() => setCount(0)}>reset</button>
      </div>

      {
        <div
          style={{
            display: 'grid',
            gridTemplateColumns: '1fr 1fr 1fr 1fr',
            gap: 20,
          }}
        >
          {data.map((user) => (
            <div
              key={user.id}
              style={{ border: '1px solid #ccc', textAlign: 'center' }}
            >
              <Image
                src={`https://robohash.org/${user.id}?set=set2&size=180x180`}
                alt={user.name}
                width={180}
                height={180}
              />
              <h3>{user.name}</h3>
            </div>
          ))}
        </div>
      }
    </main>
  );
}
Given that we are utilizing external images in the code above, it’s necessary to configure these external images using the remotePatterns property in the next.config.js file, as illustrated below:
next.config.js
/** @type {import('next').NextConfig} */
const nextConfig = {
  images: {
    remotePatterns: [
      {
        protocol: 'https',
        hostname: 'robohash.org',
      },
    ],
  },
};

module.exports = nextConfig;
Prefetch the Data in a Server Component
Now, let’s create a server component to render the <ListUsers /> component. In this context, we will fetch the data—specifically, the list of users—from the JSON Placeholder API and pass it as a prop to the <ListUsers /> component.
To achieve this, create a file named page.tsx within the app/initial-data/ directory and append the following code:
app/initial-data/page.tsx
import { getUsers } from '@/utils/api-requests';
import ListUsers from './list-users';

export default async function InitialData() {
  const users = await getUsers();

  return <ListUsers users={users} />;
}
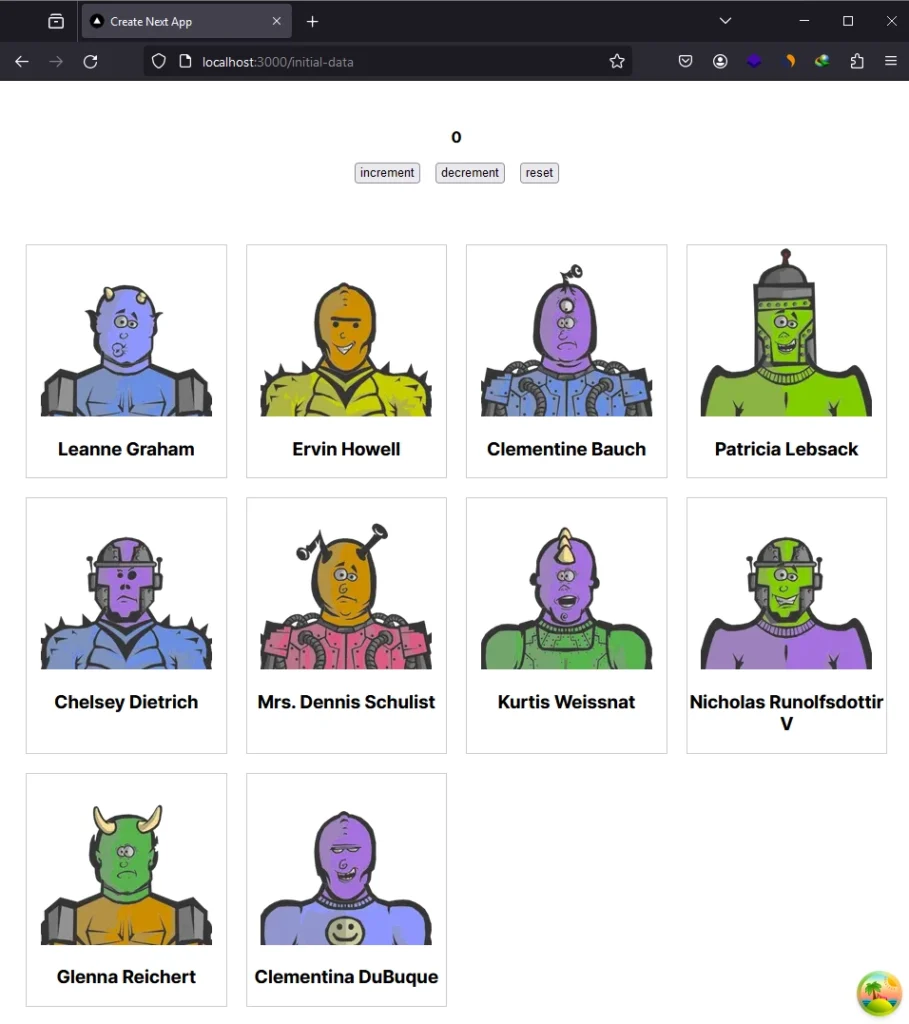
Once you are done, launch the Next.js development server and navigate to the URL http://localhost:3000/initial-data. You should see the list of users rendered on the page.
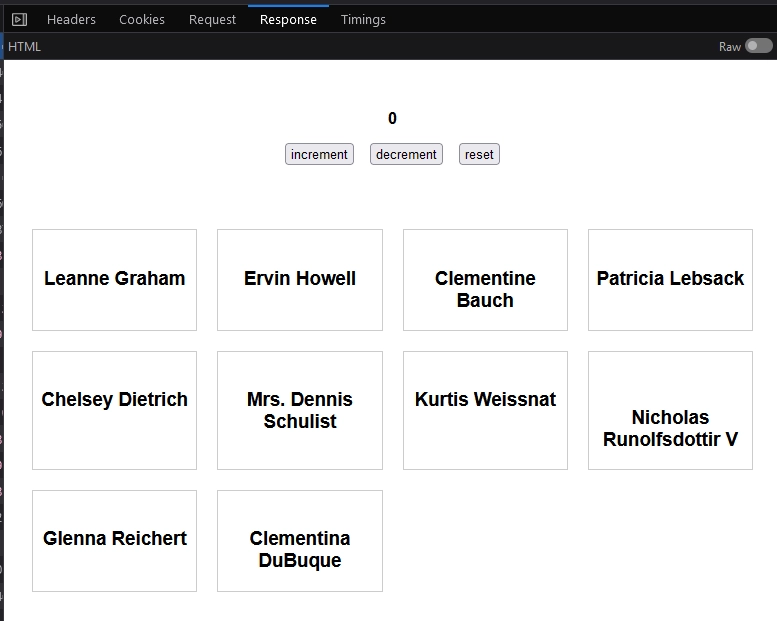
When you inspect the HTML document in the Network tab, you should see the list of users included in the document. This indicates that the data was initially fetched on the server and subsequently made available to the client component, which is beneficial for SEO.
It’s important to note that the initial data approach is not recommended by the React Query team. For optimal performance and reliability, it is advised to prioritize the use of the hydration and dehydration methods, as we will illustrate below.
Prefetching Data Using Hydration and Dehydration
Prefetching data using hydration and dehydration in React Query and Next.js is a technique for optimizing data fetching and rendering in server-rendered React applications.
Benefits of this Approach:
- SEO Optimization: Prefetching data during server rendering contributes to SEO optimization by including essential data in the initial HTML response.
- Optimal Performance: Dehydrating and rehydrating the query client state on the client side reduces redundant data fetching and enhances performance.
Fetch the Data in a Client Component
Continuing, let’s explore how to prefetch data using hydration and dehydration in React Query. Initially, we need to create a client component that will make use of the dehydrated cache. Begin by creating a ‘hydration‘ folder within the ‘app‘ directory. Inside the ‘hydration‘ folder, generate a list-users.tsx file and include the following code:
app/hydration/list-users.tsx
'use client';

import { getUsers } from '@/utils/api-requests';
import { useQuery } from '@tanstack/react-query';
import Image from 'next/image';
import React from 'react';

export default function ListUsers() {
  const [count, setCount] = React.useState(0);

  const { data } = useQuery({
    queryKey: ['hydrate-users'],
    queryFn: () => getUsers(),
    staleTime: 10 * 1000,
  });

  return (
    <main style={{ maxWidth: 1200, marginInline: 'auto', padding: 20 }}>
      <div style={{ marginBottom: '4rem', textAlign: 'center' }}>
        <h4 style={{ marginBottom: 16 }}>{count}</h4>
        <button onClick={() => setCount((prev) => prev + 1)}>increment</button>
        <button
          onClick={() => setCount((prev) => prev - 1)}
          style={{ marginInline: 16 }}
        >
          decrement
        </button>
        <button onClick={() => setCount(0)}>reset</button>
      </div>

      {
        <div
          style={{
            display: 'grid',
            gridTemplateColumns: '1fr 1fr 1fr 1fr',
            gap: 20,
          }}
        >
          {data?.map((user) => (
            <div
              key={user.id}
              style={{ border: '1px solid #ccc', textAlign: 'center' }}
            >
              <Image
                src={`https://robohash.org/${user.id}?set=set2&size=180x180`}
                alt={user.name}
                width={180}
                height={180}
              />
              <h3>{user.name}</h3>
            </div>
          ))}
        </div>
      }
    </main>
  );
}
In the above component, we use the useQuery hook from React Query to fetch the list of users. This hook won’t run during the initial page request since the data becomes immediately available to it. Once the data becomes stale, it triggers a re-fetch.
Hydrate and Dehydrate the Query Client
Now, let’s create a server component to contain the hydration and dehydration code. Within this component, we will initialize a new React Query Client, use the query client to prefetch the list of users, and then leverage the <HydrationBoundary /> component to dehydrate the query client.
To achieve this, generate a file named page.tsx within the app/hydration/ directory and integrate the following code:
app/hydration/page.tsx
import { dehydrate } from "@tanstack/query-core";
import ListUsers from "./list-users";
import { HydrationBoundary, QueryClient } from "@tanstack/react-query";
import { getUsers } from "@/utils/api-requests";

export default async function Hydation() {
  const queryClient = new QueryClient();

  await queryClient.prefetchQuery({
    queryKey: ["hydrate-users"],
    queryFn: getUsers,
  });

  return (
    <HydrationBoundary state={dehydrate(queryClient)}>
      <ListUsers />
    </HydrationBoundary>
  );
}
With the hydration boundary now set up, the useQuery hook within the ListUsers component should be capable of retrieving the list of users from the cache during the initial request. To test this, start the Next.js development server and navigate to the URL http://localhost:3000/hydration. You should see the list of users displayed on the screen.
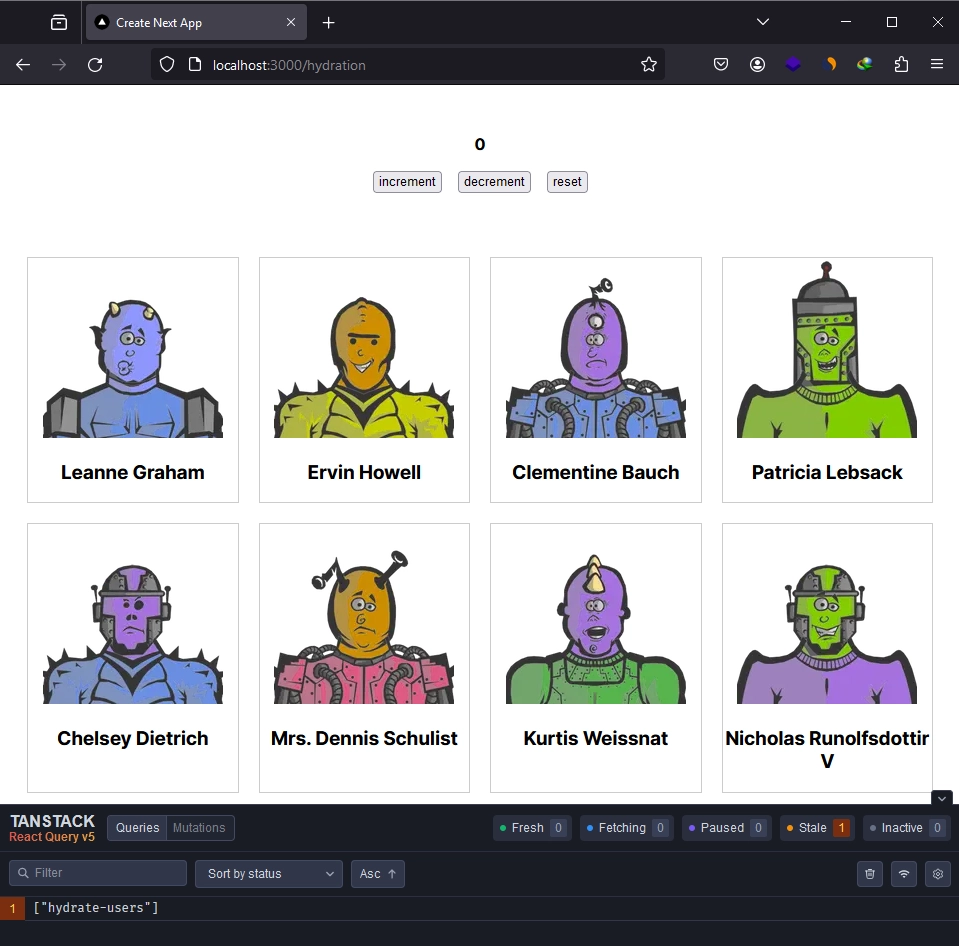
Upon inspecting the document in the Network tab, you should observe the data included in the HTML shipped to the browser during the request.
Conclusion
And we’re finished. In this comprehensive guide, you’ve acquired knowledge on setting up and utilizing React Query v5 in the Next.js 14 app directory. I hope you found this guide helpful and enjoyable. If you have any questions or feedback, feel free to share them in the comment section below. Thanks for reading!
For the source code, feel free to explore it on GitHub: https://github.com/wpcodevo/nextjs14-react-query
I implied the hydration/dehydration method as stated in this post, but it throws the following error.
I have even copy pasted the codes from this post here, and got the same result.
can you please help?
Unhandled Runtime Error
Error: Maximum call stack size exceeded
Call Stack
String.replace
ec
/Users/shovontanvir/Documents/documents/webprojects/BTSL/bttl-web-2024/node_modules/next/dist/compiled/next-server/app-page.runtime.dev.js (35:261047)
eh
/Users/shovontanvir/Documents/documents/webprojects/BTSL/bttl-web-2024/node_modules/next/dist/compiled/next-server/app-page.runtime.dev.js (35:261709)
eh
/Users/shovontanvir/Documents/documents/webprojects/BTSL/bttl-web-2024/node_modules/next/dist/compiled/next-server/app-page.runtime.dev.js (35:262782)
eh
/Users/shovontanvir/Documents/documents/webprojects/BTSL/bttl-web-2024/node_modules/next/dist/compiled/next-server/app-page.runtime.dev.js (35:262782)
eh
/Users/shovontanvir/Documents/documents/webprojects/BTSL/bttl-web-2024/node_modules/next/dist/compiled/next-server/app-page.runtime.dev.js (35:262782)
I just updated the dependencies to their latest version and tested the project, but I wasn’t able to replicate the “Maximum call stack size exceeded” error.
If you’re still unable to resolve the issue, then try increasing the memory size to 4G or more by replacing the script inside the package.json file with
"dev": "NODE_OPTIONS=--max-old-space-size=4096 next dev".How would i handle POST requests? or mutations? it seems to give me
TypeError: (0 , _swc_helpers_class_private_field_get__WEBPACK_IMPORTED_MODULE_1__._)(…).defaultMutationOptions is not a function
pointing to useMutation()