

In this article, you’ll discover how to set up and use Apollo Client in the new Next.js 13 app directory. Specifically, you’ll learn how to use Apollo Client in both React Server and Client Components.
With the release of Next.js 13, a new App Router was introduced that leverages the latest React Server Components to transform the way data rendering and fetching are handled. This achievement is significant because it eliminates the need to ship large amounts of JavaScript to the browser. However, most libraries, including Apollo Client, had to make significant adjustments to their source code to adopt these new features.
Fortunately, the Apollo Client team has released an alpha version of @apollo/client@alpha that works with both Server Components and Client Components. To use Apollo Client with Next.js 13, you also need to install the experimental peer dependency @apollo/experimental-nextjs-app-support. This package adds the necessary primitives to support React Server Components (RSC) and server-side rendering (SSR) in the Next.js app directory.
With these two libraries installed and properly configured, you can start using Apollo Client to make your queries and mutations, regardless of whether you’re running under Server Components or Client Components.
Although there are a few concepts to understand, you don’t need to know all the technical aspects to use the library. In this article, I’ll make the process easy for you, and I’ll provide relevant resources along the way to help you gain a deeper understanding.
More practice:
- Build a Simple API in Next.js 13 App Directory
- Build a Simple Frontend App in Next.js 13 App Directory
- Next.js – Add Google and GitHub OAuth2 using NextAuth.js
- Next.js – Use Custom Login and SignUp Pages for NextAuth.js
- How to Setup Prisma ORM in Next.js 13 App Directory
- How to Setup React Context API in Next.js 13 App Directory
- How to Setup React Query in Next.js 13 App Directory
- How to Setup Redux Toolkit in Next.js 13 App Directory
- Setup tRPC Server and Client in Next.js 13 App Directory
- Setup and Use NextAuth.js in Next.js 13 App Directory

Bootstrap the Next.js 13 Project
In order to demonstrate how Apollo Client can be utilized in both Client and Server Components, we will create a simple application that consists of two components – one for displaying a list of users and the other for a counter. Although the React Server Component implementation will not include the counter component due to the unavailability of React hooks for interactivity, the basic functionality will remain the same.
Before we dive into using Apollo Client in our Next.js 13 app directory, we need to set up a new project. To do this, you can start the scaffolding process by running one of the following commands based on your preferred package manager:
pnpm create next-app nextjs13-apollo-client
# or
yarn create next-app nextjs13-apollo-client
# or
npx create-next-app@latest nextjs13-apollo-client
When you run one of the commands above, you will be prompted to enable TypeScript and ESLint. If you wish to use them, choose “Yes” for both options. You can also choose “Yes” for the Tailwind CSS feature if you want to style your components with it. Additionally, select “Yes” for both the src/ directory option and the App Router. Finally, select “Yes” to use the import alias and choose the first option.
Once you have answered all the prompts, the Next.js 13 project will be generated based on the features you enabled, and the required dependencies will be installed. After the installation is complete, open the project in your preferred IDE or text editor.
To facilitate the testing process, we’ll create two links that allow us to quickly navigate between the pages where Apollo Client is used in a Client Component and a React Server Component. This saves us the trouble of manually entering the URLs in the address bar every time we want to switch pages. To achieve this, we need to update the content of the src/app/page.tsx file. Simply replace the current code with the following snippet.
src/app/page.tsx
import Link from "next/link";

export default function Home() {
  return (
    <>
      <h1>Hello, Next.js 13 App Directory!</h1>
      <p>
        <Link href="/client-side">
          Use Apollo Client inside Client Side Component
        </Link>
      </p>
      <p>
        <Link href="/server-side">
          Use Apollo Client inside React Server Component (RSC)
        </Link>
      </p>
    </>
  );
}
To complete the setup, we will comment out the import of the globals.css file in the root layout component. This is necessary to prevent Next.js from applying its default styles to our application. To do this, open the src/app/layout.tsx file and replace its contents with the code below.
src/app/layout.tsx
// import "./globals.css";

export const metadata = {
  title: "Create Next App",
  description: "Generated by create next app",
};

export default function RootLayout({
  children,
}: {
  children: React.ReactNode;
}) {
  return (
    <html lang="en">
      <body>{children}</body>
    </html>
  );
}
Now you can install the Apollo Client library and its peer dependency by running the command below:
npm install @apollo/client@alpha @apollo/experimental-nextjs-app-support
# or
pnpm add @apollo/client@alpha @apollo/experimental-nextjs-app-support
# or
yarn add @apollo/client@alpha @apollo/experimental-nextjs-app-support
Use Apollo Client in a React Server Component (RSC)
We’ll begin by exploring how to use Apollo Client in a React Server Component, which is a simple and straightforward process that doesn’t require any complicated setup.
Create a Scoped Apollo Client Instance
First, we need to create an Apollo Client instance that is specific to each request, so that the client cache won’t be shared between multiple requests. To achieve this, let’s start by creating a ‘lib‘ folder within your src directory. Inside the lib folder, create a client.ts file and add the following code to it.
src/lib/client.ts
import { ApolloClient, HttpLink, InMemoryCache } from "@apollo/client";
import { registerApolloClient } from "@apollo/experimental-nextjs-app-support/rsc";

const GRAPHQL_ENDPOINT =
  process.env.GRAPHQL_ENDPOINT || "https://jsonplaceholder.ir/graphql";

export const { getClient } = registerApolloClient(() => {
  return new ApolloClient({
    cache: new InMemoryCache(),
    link: new HttpLink({
      uri: GRAPHQL_ENDPOINT,
    }),
  });
});
In the code above, we exported a registerApolloClient function that should be called in a global scope. This function returns a ‘getClient‘ function that we can use inside an async React Server Component to obtain the appropriate client instance for the current request or create a new one.
Use the Apollo Client Instance in an RSC
To utilize the getClient function in a server component, navigate to the app directory and create a new folder called server-side. Within the server-side directory, create a page.tsx file and include the following code.
src/app/server-side/page.tsx
import { getClient } from "@/lib/client";
import { gql } from "@apollo/client";
import React from "react";

export const dynamic = "force-dynamic";

const query = gql`
  query {
    users {
      id
      name
      email
    }
  }
`;

interface Response {
  users: { id: number; name: string; email: string }[];
}

export default async function ServerSide() {
  const data = await getClient().query<Response>({
    query,
  });

  return (
    <main style={{ maxWidth: 1200, marginInline: "auto", padding: 20 }}>
      <div
        style={{
          display: "grid",
          gridTemplateColumns: "1fr 1fr 1fr 1fr",
          gap: 20,
        }}
      >
        {data.data.users.map((user) => (
          <div
            key={user.id}
            style={{ border: "1px solid #ccc", textAlign: "center" }}
          >
            <img
              src={`https://robohash.org/${user.id}?set=set2&size=180x180`}
              alt={user.name}
              style={{ height: 180, width: 180 }}
            />
            <h3>{user.name}</h3>
          </div>
        ))}
      </div>
    </main>
  );
}
In the above code, we used the getClient function to obtain the Apollo Client instance for the current request. We then used the instance to execute a GraphQL query to fetch a list of users from the GraphQL endpoint.
To ensure that the page always displays the latest data, we set the dynamic property to "force-dynamic" which signals Next.js to bypass its caching mechanisms for this page. We then display the queried data using JSX in the return statement.
In order to handle longer server-side rendering times, it’s important to create a loading.tsx component. When the server-side component is taking more than 100ms to load, Next.js will use the loading.tsx component to define the loading state of the page.
To create the ‘loading.tsx‘ component, simply add a new file with that name to the src/app/server-side directory, and include the following content.
src/app/server-side/loading.tsx
export default function Loading() {
  return <p>Loading...</p>;
}
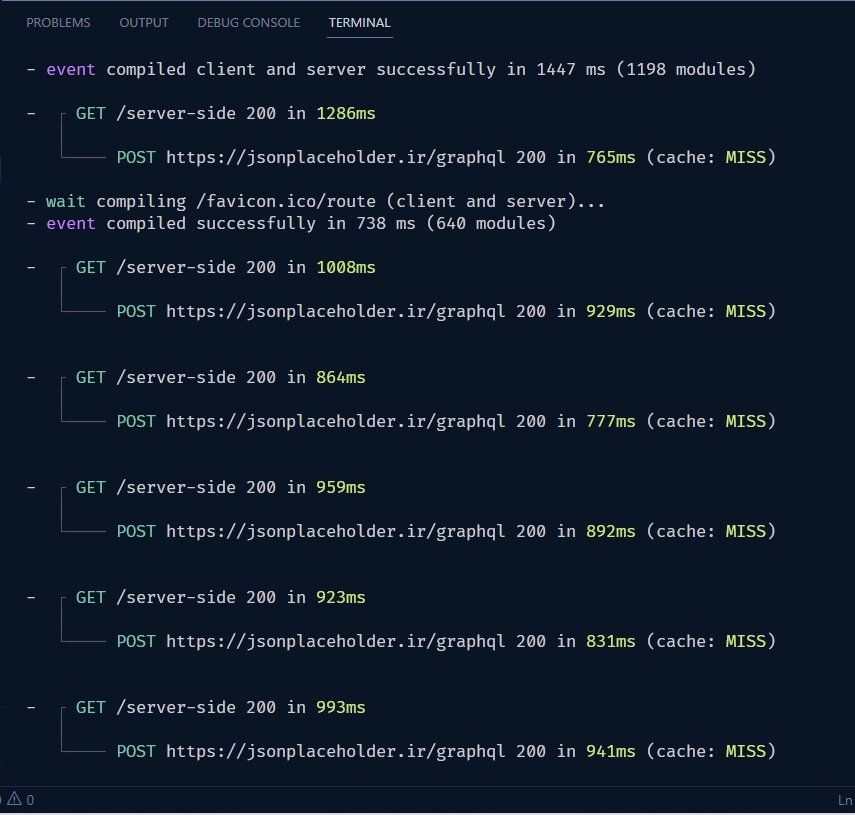
To test the Apollo Client integration with React Server Components, you can build the project and navigate to the home page. Once there, click on the ‘Use Apollo Client inside React Server Component (RSC)‘ link. This will trigger the page to fetch the data and display a loading state while it’s being loaded. After the data has been successfully fetched, the page will display the list of users.

When you visit or reload the page multiple times, you should see logs of the request being made to the GraphQL endpoint in your terminal. These logs should look similar to the example shown in the screenshot below.
Use Apollo Client in a Client-Side Component (SSR)
Now that we have explored using Apollo Client with a React Server Component, we can dive into using it with a Client Side Component.
Create the Apollo Client Wrapper
If you want to use Apollo Client in the “traditional” way of fetching data on the client, you need to create an Apollo provider that lives on the client side. This provider needs to wrap around the children nodes of the root layout component. By doing so, all client-side components that are children of the root layout component can have access to the Apollo Client instance and make queries to the GraphQL endpoint.
To create an Apollo provider wrapper, navigate to the src/lib directory and create a new file called apollo-wrapper.tsx. In this file, add the code snippet provided below.
src/lib/apollo-wrapper.tsx
"use client";

import {
  ApolloClient,
  ApolloLink,
  HttpLink,
  SuspenseCache,
} from "@apollo/client";
import {
  ApolloNextAppProvider,
  NextSSRInMemoryCache,
  SSRMultipartLink,
} from "@apollo/experimental-nextjs-app-support/ssr";

const GRAPHQL_ENDPOINT =
  process.env.GRAPHQL_ENDPOINT || "https://jsonplaceholder.ir/graphql";

function makeClient() {
  const httpLink = new HttpLink({
    uri: GRAPHQL_ENDPOINT,
  });

  return new ApolloClient({
    cache: new NextSSRInMemoryCache(),
    link:
      typeof window === "undefined"
        ? ApolloLink.from([
            // in a SSR environment, if you use multipart features like
            // @defer, you need to decide how to handle these.
            // This strips all interfaces with a `@defer` directive from your queries.
            new SSRMultipartLink({
              stripDefer: true,
            }),
            httpLink,
          ])
        : httpLink,
  });
}

function makeSuspenseCache() {
  return new SuspenseCache();
}

export function ApolloWrapper({ children }: React.PropsWithChildren) {
  return (
    <ApolloNextAppProvider
      makeClient={makeClient}
      makeSuspenseCache={makeSuspenseCache}
    >
      {children}
    </ApolloNextAppProvider>
  );
}
The code above includes the "use client"; directive at the beginning of the file, which indicates that this file has a Client Component. This enables us to use browser APIs and React hooks in our code.
The ApolloWrapper function returns an ApolloNextAppProvider component, which is responsible for restoring the cache on the browser side. This is done by calling the makeClient and makeSuspenseCache functions, which create an instance of the ApolloClient and a SuspenseCache respectively.
If you want to learn more about the various code snippets used in this file, you can refer to the article “Using Apollo Client with Next.js 13“
Add the Apollo Client Wrapper in the Root Layout Component
Now, to make the Apollo Client instance available to all client-side components, we can wrap the ApolloWrapper around the children prop of the root layout component. To do this, open the src/app/layout.tsx file and replace its content with the following code:
src/app/layout.tsx
import { ApolloWrapper } from "@/lib/apollo-wrapper";
// import "./globals.css";

export const metadata = {
  title: "Create Next App",
  description: "Generated by create next app",
};

export default function RootLayout({
  children,
}: {
  children: React.ReactNode;
}) {
  return (
    <html lang="en">
      <body>
        <ApolloWrapper>{children}</ApolloWrapper>
      </body>
    </html>
  );
}
Note that it’s recommended to render providers as close to their respective consumers as possible, in order to optimize the static parts of your Server Components. In this case, the ApolloWrapper is wrapped around {children} instead of the entire <html> document, as this makes it easier for Next.js to perform the necessary optimizations.
Use the Apollo Client in a Client-Side Component
With the Apollo wrapper now applied to the root layout component’s children prop, we are able to take advantage of the useQuery, useSuspenseQuery, useFragment, and useApolloClient hooks in our client-side components.
To take advantage of the streaming SSR features provided by React and the Next.js App Router, we’ll use the useSuspenseQuery hook to fetch data, although you could also use the useFragment hook for the same benefits.
To get started, navigate to the app directory and create a client-side folder. Within this folder, create a listusers.tsx file and paste the following code.
src/app/client-side/listusers.tsx
"use client";

import { gql } from "@apollo/client";
import { useSuspenseQuery } from "@apollo/experimental-nextjs-app-support/ssr";
import React from "react";

const query = gql`
  query {
    users {
      id
      name
      email
    }
  }
`;

interface Response {
  users: { id: number; name: string; email: string }[];
}

export default function ListUsers() {
  const [count, setCount] = React.useState(0);
  const { data, error } = useSuspenseQuery<Response>(query);

  return (
    <main style={{ maxWidth: 1200, marginInline: "auto", padding: 20 }}>
      <div style={{ marginBottom: "4rem", textAlign: "center" }}>
        <h4 style={{ marginBottom: 16 }}>{count}</h4>
        <button onClick={() => setCount((prev) => prev + 1)}>increment</button>
        <button
          onClick={() => setCount((prev) => prev - 1)}
          style={{ marginInline: 16 }}
        >
          decrement
        </button>
        <button onClick={() => setCount(0)}>reset</button>
      </div>

      {error ? (
        <p>Oh no, there was an error</p>
      ) : !data ? (
        <p>Loading...</p>
      ) : data ? (
        <div
          style={{
            display: "grid",
            gridTemplateColumns: "1fr 1fr 1fr 1fr",
            gap: 20,
          }}
        >
          {data?.users.map((user) => (
            <div
              key={user.id}
              style={{ border: "1px solid #ccc", textAlign: "center" }}
            >
              <img
                src={`https://robohash.org/${user.id}?set=set2&size=180x180`}
                alt={user.name}
                style={{ height: 180, width: 180 }}
              />
              <h3>{user.name}</h3>
            </div>
          ))}
        </div>
      ) : null}
    </main>
  );
}
In the above code, we used the useSuspenseQuery hook to fetch the GraphQL query. This hook will send a request during rendering and suspend until it has data. This does not only happen in the Browser but also on the server.
Render the Client-Side Component in a Server Component
We need to create a new file called page.tsx in the src/app/client-side directory and use it to render the ‘ListUsers‘ component. In this file, we will set the dynamic property to "force-dynamic", which instructs Next.js not to cache this page and to always fetch fresh data.
src/app/client-side/page.tsx
import ListUsers from "./listusers";

export const dynamic = "force-dynamic";

export default function ClientSide() {
  return <ListUsers />;
}
Create a Loading Component
We’re almost ready to test the Apollo Client implementation in a Client-Side Component, but first, we need to create a component that Next.js can display while the page is being loaded. To do this, create a loading.tsx file in the src/app/client-side directory and add the following code:
src/app/client-side/loading.tsx
export default function Loading() {
  return <p>Loading...</p>;
}
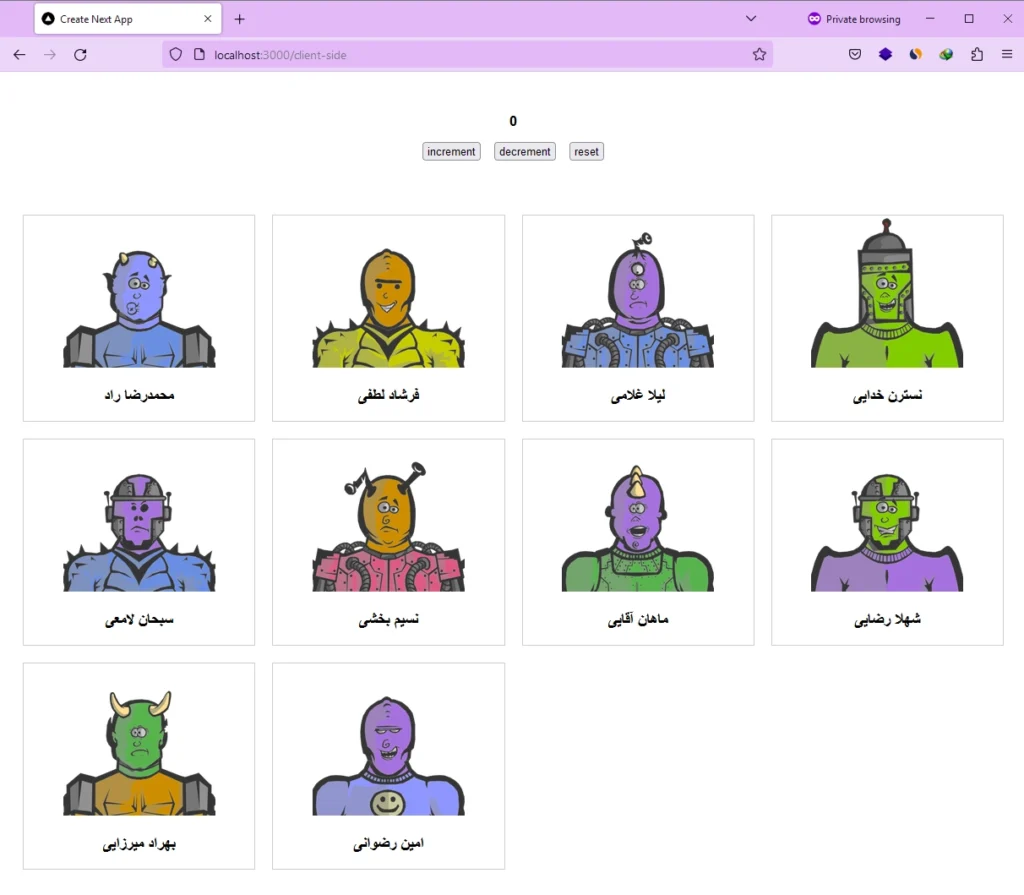
Now when you visit the home page and click on the ‘Use Apollo Client inside Client Side Component‘ link, you should be taken to the new page where you will find the counter component and the list of users displayed at the bottom.
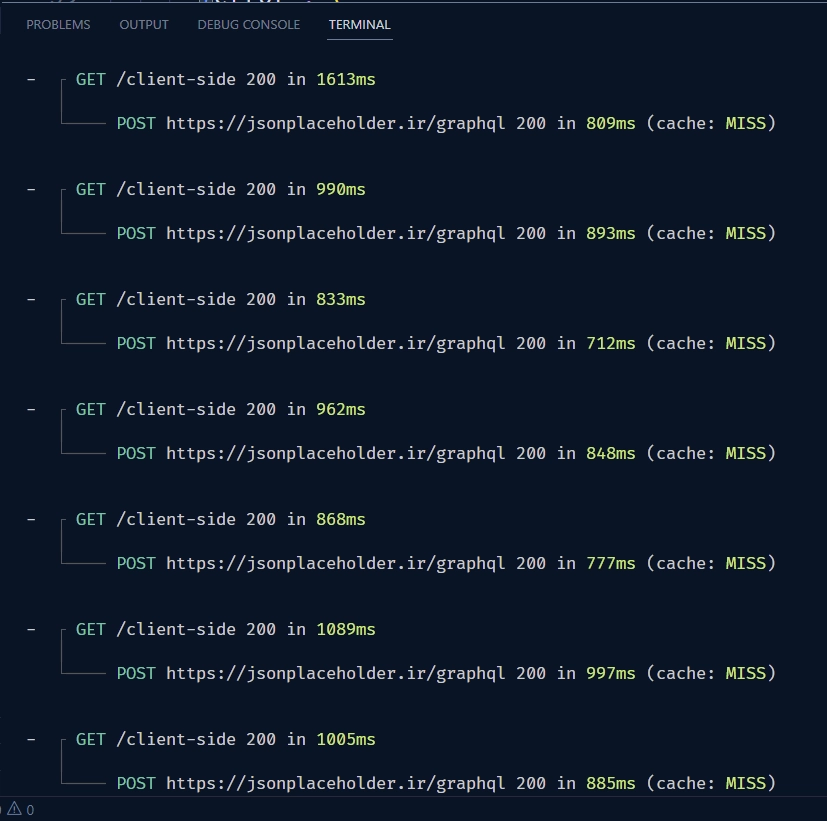
When you reload the page, Next.js will perform server-side rendering, which will result in the GraphQL request being executed on the server and the log will be displayed in the terminal.
Should you use Apollo Client in a Client or Server Component?
When deciding whether to use Apollo Client in a Client Component or Server Component, it’s important to keep data consistency in mind. If the same data is used in both environments, it can quickly become out of sync and inconsistent.
Apollo Client’s normalized cache automatically updates all usages of an entity in your application, which is not the case for Server Components. Entities are cached data objects stored in the client cache, which enables efficient updates to the cache.
However, if your Client Component is still rendering in Server-Side Rendering (SSR) and making overlapping queries in the browser, you might run into race conditions. The Apollo Client team has stated that this issue cannot be resolved on their end and requires API changes in Next.js or React. But if you don’t use suspense in your application, this won’t be a problem.
If you’re interested in learning more about the technical details and reasoning behind the implementation of the alpha version of the Apollo Client library, you can refer to the discussion in the accompanying RFC. The RFC can be found at https://github.com/apollographql/apollo-client-nextjs/blob/pr/RFC-2/RFC.md and the discussion can be found at https://github.com/apollographql/apollo-client-nextjs/pull/9.
Conclusion
That’s it! You can access the source code of the application we built in this tutorial at https://github.com/wpcodevo/nextjs13-apollo-client. In this guide, you learned how to set up and use Apollo Client in the new Next.js 13 app directory, including using it in both a React Server Component and a Client Component.
I hope you found this tutorial helpful and enjoyable. If you have any feedback or questions, please feel free to leave them in the comments section below. Thanks for reading!
Hey ! It’s amazing the job that you made with this post !
However, after setting this up, I have one question concerning the use of useSuspenseQuery()
I read about the differences of useQuery and useSuspenseQuery, plus the new features of React 18 and Next 13. However, I don’t get why if I use useSuspenseQuery in a Client component, the fetched data is available inside the source code (The query request is made in the client though. This specific query is server rendered because of the need of use of suspense?)…
If I do the same with useQuery, the results are not in the code source…
It’s like if I use useSuspenseQuery in a client component, it kind of make this client component into a server one !
I believe nextjs pre-renders even client component in the server to hydrate them on the client after.
I tried to add the lazy loading + Suspense tag and it works !, the streaming of HTML is splitted so in the code source i can see the spinner plus the little piece of code that is rendered for the fetched data, which is merged thanks to JS. This makes the first render when refreshing faster. Even though, the difference is more visible with a big amount of complex data (in my case is just +-75ms) so I wanted just to not add the Suspense. By doing this, the response from the server last a bit (it’s normal) but it renders the whole page completed (with the useSuspenseQuery fetched data in the HTML! How is this possible if the query is requested on the client???)
I hope i explained myself clairly. If I didn’t, don’t hesitate to ask me again 🙂
Thanks in advance !!
Oops, your comment looks like a detailed answer to an already asked question and a question at the same time. Nonetheless, when using
useSuspenseQuery, the fetched data is available in the source code because Next.js pre-renders the client components on the server, allowing the data to be included in the initial HTML response. This hook is still new, and I don’t know much about it.However, if you need a more detailed answer to your specific situation, I suggest raising an issue on the Apollo Client GitHub page. The experts there will be better equipped to provide you with comprehensive insights and guidance.
you dont show example of mutation how, do you do it without the useMutation hook