
In this article, you will learn how to integrate custom login and signup pages with NextAuth.js in the new Next.js 13 app directory. Am going to assume that you have already set up NextAuth in your project and that you are only looking for a way to integrate your custom login and signup pages.
If you’re new to NextAuth and want to see how it can be used in the new Next.js 13 app directory, I recommend checking out the post titled “Setup and Use NextAuth.js in Next.js 13 App Directory“.
Before we dive into the integration process, let me give you a quick overview of how simple it is to integrate custom login and signup pages in NextAuth. To tell NextAuth to use your custom login page, you only need to provide the absolute path to the login page as the value of the signIn field within the pages object in the NextAuth configuration options.
Regarding account registration, NextAuth does not provide a built-in strategy for handling it. Instead, it leaves this aspect of authentication for us to implement. This is because for some strategies like magic links, email logins, or OAuth, there is no need for a registration phase. For example, with Google OAuth, users sign up by clicking the “login with Google” button, and if they don’t have an account, it’s created in real-time.
However, with credential authentication, you’ll need to create the user in the first place, which typically happens on a registration page. In this article, I’ll show you how to create custom login and signup pages and link them to NextAuth.
It’s worth mentioning that I am using a specific pull request recommended by the NextAuth team that is compatible with the new Next.js app directory. To install it, add
"next-auth": "0.0.0-pr.6777.c5550344"to your dependencies, or you can install it via your package manager.
More practice:
- How to Setup Prisma ORM in Next.js 13 App Directory
- How to Setup React Context API in Next.js 13 App Directory
- How to Setup React Query in Next.js 13 App Directory
- How to Setup Redux Toolkit in Next.js 13 App Directory
- Setup tRPC Server and Client in Next.js 13 App Directory
- Setup and Use NextAuth.js in Next.js 13 App Directory
- Build a Simple API in Next.js 13 App Directory
- Forgot/Reset Passwords with React Query and Axios

Run the NextAuth Project on your Computer
To view a demo of the project, follow these simple steps:
- Download or clone the project from its GitHub repository at https://github.com/wpcodevo/nextauth-nextjs13-prisma and open it in your favourite IDE or text editor.
- Open your IDE’s integrated terminal and change the Git branch by running
git checkout nextauth-nextjs13-signin-signup. If you intend to use the main branch, you’ll need to add your GitHub and Google OAuth client IDs and secrets to the.envfile. This is necessary to enable authentication with GitHub and Google OAuth along with the credential provider. - Install the project’s dependencies by running the command
yarnoryarn install. - Start a PostgreSQL server in a Docker container with the command
docker-compose up -d. - Apply the Prisma migrations to the Postgres database by running
yarn prisma db push. This command will also generate the Prisma Client in the node modules folder. - Start the Next.js development server by running
yarn dev. - Finally, test the authentication features by visiting the app at
http://localhost:3000/and playing around with the different options.
Test the NextAuth Project
Now that the app is open in your browser, you can proceed to register an account, sign in, access a protected page, and log out when you’re done.
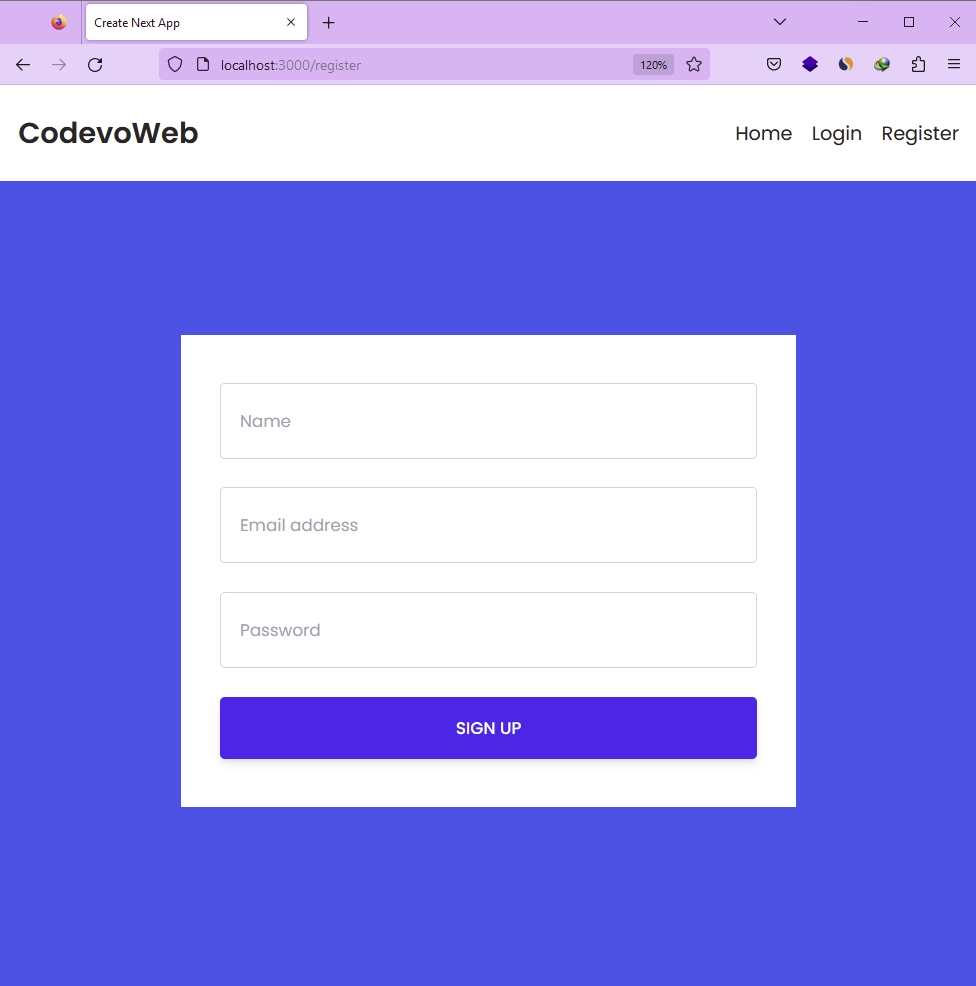
Register an Account
To create a new account, navigate to the registration page and fill in your name, email, and password. After providing the necessary information, click the “Sign Up” button to submit the form data to the Next.js API route handler responsible for processing new user registrations. If your registration is successful, you will be redirected to the login page.
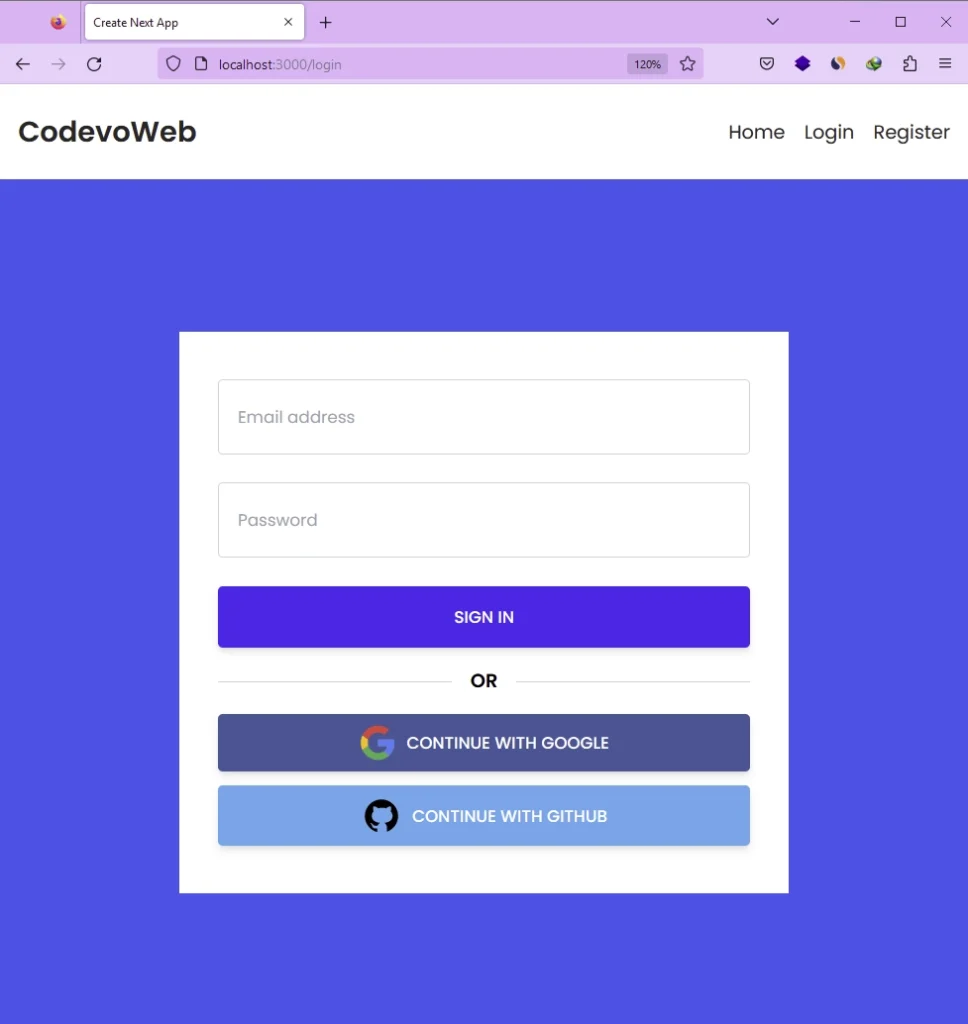
Log into your Account
To sign in to your account, go to the login page and enter the email and password you used when creating the account. Then, click the “Sign In” button to submit your credentials to the Next.js API. If your credentials are authenticated successfully, you will be redirected to the profile page where you can view your account information.
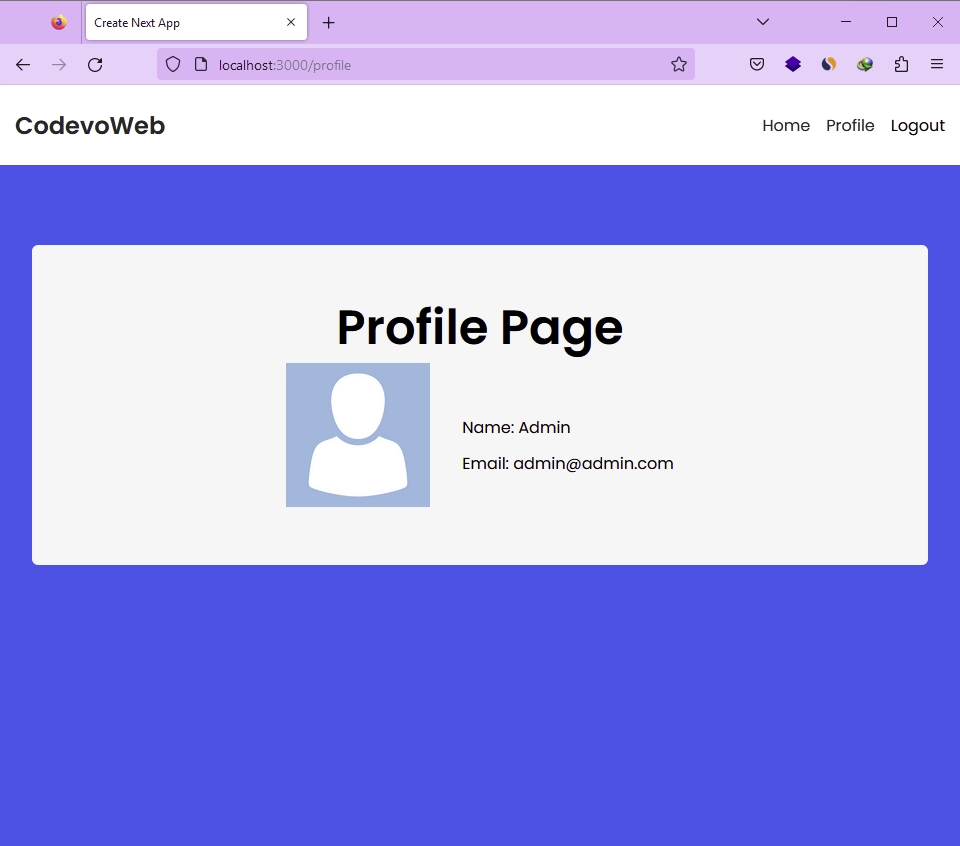
Access a Protected Page
Please note that the Profile page is protected and can only be accessed with valid NextAuth cookies. You can view the cookies sent by NextAuth by inspecting the page and checking the cookies section in your Dev tools.
On the Profile page, you’ll be able to view your profile picture, name, and email address. To sign out, simply click on the “Logout” button located in the navigation bar.
Configure the NextAuth API Endpoint
With that out of the way, we can proceed with configuring NextAuth to use our custom login page for authentication. To achieve this, we will define a ‘pages‘ object within the NextAuthOptions object. Then, we set the signIn property to the absolute path of our login page. This way, NextAuth will use our custom login page instead of the default one.
Typically, the NextAuth options are defined and exported in the auth/[...nextauth]/route.ts file. However, some users have encountered export errors while running the project. To solve this issue, we will create a separate file that only contains the NextAuth options.
To begin, create a new folder named lib within the src directory. Once the lib folder is created, navigate inside it and create a file named auth.ts. Then, add the provided code to the auth.ts file.
src/lib/auth.ts
import { prisma } from "@/lib/prisma";
import { compare } from "bcryptjs";
import type { NextAuthOptions } from "next-auth";
import CredentialsProvider from "next-auth/providers/credentials";

export const authOptions: NextAuthOptions = {
  pages: {
    signIn: "/login",
  },
  session: {
    strategy: "jwt",
  },
  providers: [
    CredentialsProvider({
      name: "Sign in",
      credentials: {
        email: {
          label: "Email",
          type: "email",
          placeholder: "example@example.com",
        },
        password: { label: "Password", type: "password" },
      },
      async authorize(credentials) {
        if (!credentials?.email || !credentials.password) {
          return null;
        }

        const user = await prisma.user.findUnique({
          where: {
            email: credentials.email,
          },
        });

        if (!user || !(await compare(credentials.password, user.password))) {
          return null;
        }

        return {
          id: user.id,
          email: user.email,
          name: user.name,
          randomKey: "Hey cool",
        };
      },
    }),
  ],
  callbacks: {
    session: ({ session, token }) => {
      return {
        ...session,
        user: {
          ...session.user,
          id: token.id,
          randomKey: token.randomKey,
        },
      };
    },
    jwt: ({ token, user }) => {
      if (user) {
        const u = user as unknown as any;
        return {
          ...token,
          id: u.id,
          randomKey: u.randomKey,
        };
      }
      return token;
    },
  },
};
Now that we have moved the NextAuth configuration to the src/lib/auth.ts file to avoid export errors, we need to define and export the GET and POST API handlers NextAuth will use for authentication using the NextAuth() method.
To get started, open your api/auth/[...nextauth]/route.ts file and add the following code:
src/app/api/auth/[…nextauth]/route.ts
import { authOptions } from "@/lib/auth";
import NextAuth from "next-auth";

const handler = NextAuth(authOptions);
export { handler as GET, handler as POST };
Create the Custom Login Page
With NextAuth configured to use our custom login page, we’re ready to create the login component. However, since all components inside the app directory are React Server Components (RSC) by default, certain browser APIs and React hooks, including those needed for form validation, are not available.
To work around this limitation, we’ll need to render the form component on the client side by adding the "use client"; directive at the top of the file.
Create the Login Form
Before we dive into creating the form, it’s important to consider a few key points. First, we need to check if the callbackUrl parameter has been added to the URL by NextAuth. If it’s present, we need to extract it and store it in a variable. This allows us to dynamically redirect the user to the appropriate page after successful authentication, rather than hard-coding a specific URL.
Next, we’ll create a form with email and password inputs because NextAuth’s credential provider expects these fields for authentication.
To handle form submission, we’ll create an onSubmit() function that is triggered when the user submits the form. Within this function, we’ll use the signIn() method provided by NextAuth, passing in the email and password inputs as arguments. Additionally, we’ll provide the signIn() method with the callbackUrl, which is the URL that NextAuth will redirect the user to after successful authentication.
It’s important to note that by default, NextAuth will reload the browser if authentication fails, which will prevent us from displaying an error message to the user. To work around this, we can add redirect: false to the signIn() method, which means we’ll need to handle the redirect ourselves. After the promise has been resolved, we will check if there was an error. If there was, we will display an error message to the user. Otherwise, we will redirect them to the callback URL.
To create the login form, navigate to the app directory and create a new ‘login‘ folder. Within the ‘login‘ folder, create a form.tsx file and add the following code.
src/app/login/form.tsx
"use client";

import { signIn } from "next-auth/react";
import { useSearchParams, useRouter } from "next/navigation";
import { ChangeEvent, useState } from "react";

export const LoginForm = () => {
  const router = useRouter();
  const [loading, setLoading] = useState(false);
  const [formValues, setFormValues] = useState({
    email: "",
    password: "",
  });
  const [error, setError] = useState("");

  const searchParams = useSearchParams();
  const callbackUrl = searchParams.get("callbackUrl") || "/profile";

  const onSubmit = async (e: React.FormEvent) => {
    e.preventDefault();
    try {
      setLoading(true);
      setFormValues({ email: "", password: "" });

      const res = await signIn("credentials", {
        redirect: false,
        email: formValues.email,
        password: formValues.password,
        callbackUrl,
      });

      setLoading(false);

      console.log(res);
      if (!res?.error) {
        router.push(callbackUrl);
      } else {
        setError("invalid email or password");
      }
    } catch (error: any) {
      setLoading(false);
      setError(error);
    }
  };

  const handleChange = (event: ChangeEvent<HTMLInputElement>) => {
    const { name, value } = event.target;
    setFormValues({ ...formValues, [name]: value });
  };

  const input_style =
    "form-control block w-full px-4 py-5 text-sm font-normal text-gray-700 bg-white bg-clip-padding border border-solid border-gray-300 rounded transition ease-in-out m-0 focus:text-gray-700 focus:bg-white focus:border-blue-600 focus:outline-none";

  return (
    <form onSubmit={onSubmit}>
      {error && (
        <p className="text-center bg-red-300 py-4 mb-6 rounded">{error}</p>
      )}
      <div className="mb-6">
        <input
          required
          type="email"
          name="email"
          value={formValues.email}
          onChange={handleChange}
          placeholder="Email address"
          className={`${input_style}`}
        />
      </div>
      <div className="mb-6">
        <input
          required
          type="password"
          name="password"
          value={formValues.password}
          onChange={handleChange}
          placeholder="Password"
          className={`${input_style}`}
        />
      </div>
      <button
        type="submit"
        style={{ backgroundColor: `${loading ? "#ccc" : "#3446eb"}` }}
        className="inline-block px-7 py-4 bg-blue-600 text-white font-medium text-sm leading-snug uppercase rounded shadow-md hover:bg-blue-700 hover:shadow-lg focus:bg-blue-700 focus:shadow-lg focus:outline-none focus:ring-0 active:bg-blue-800 active:shadow-lg transition duration-150 ease-in-out w-full"
        disabled={loading}
      >
        {loading ? "loading..." : "Sign In"}
      </button>

      <div className="flex items-center my-4 before:flex-1 before:border-t before:border-gray-300 before:mt-0.5 after:flex-1 after:border-t after:border-gray-300 after:mt-0.5">
        <p className="text-center font-semibold mx-4 mb-0">OR</p>
      </div>

      <a
        className="px-7 py-2 text-white font-medium text-sm leading-snug uppercase rounded shadow-md hover:shadow-lg focus:shadow-lg focus:outline-none focus:ring-0 active:shadow-lg transition duration-150 ease-in-out w-full flex justify-center items-center mb-3"
        style={{ backgroundColor: "#3b5998" }}
        onClick={() => alert("Not implemented yet")}
        role="button"
      >
        <img
          className="pr-2"
          src="/images/google.svg"
          alt=""
          style={{ height: "2rem" }}
        />
        Continue with Google
      </a>
      <a
        className="px-7 py-2 text-white font-medium text-sm leading-snug uppercase rounded shadow-md hover:shadow-lg focus:shadow-lg focus:outline-none focus:ring-0 active:shadow-lg transition duration-150 ease-in-out w-full flex justify-center items-center"
        style={{ backgroundColor: "#55acee" }}
        onClick={() => alert("Not implemented yet")}
        role="button"
      >
        <img
          className="pr-2"
          src="/images/github.svg"
          alt=""
          style={{ height: "2.2rem" }}
        />
        Continue with GitHub
      </a>
    </form>
  );
};
Create the Login Page
Our next step is to create a page component that will render the login form we just created. Since we’ve marked the form as a client-side component, we won’t run into any issues when we use it in the page component, which is a React Server Component.
To do this, navigate to the src/app/login directory and create a new file named page.tsx. Then, add the following code to the file.
src/app/login/page.tsx
import { LoginForm } from "./form";
import Header from "@/components/header.component";

export default function LoginPage() {
  return (
    <>
      <Header />
      <section className="bg-ct-blue-600 min-h-screen pt-20">
        <div className="container mx-auto px-6 py-12 h-full flex justify-center items-center">
          <div className="md:w-8/12 lg:w-5/12 bg-white px-8 py-10">
            <LoginForm />
          </div>
        </div>
      </section>
    </>
  );
}
Create the Custom SignUp Page
Next, let’s focus on the account registration component. This component is similar to the login component, but it won’t include the GitHub and Google OAuth buttons. While some companies choose to display these options on both the signup and login pages, we won’t be doing that in our example.
Create the SignUp Form
We’ll now create a registration form, which will also be rendered in the browser. To achieve this, we’ll start by adding the 'use client'; directive at the top of the file. The form will have fields for name, email, and password.
To handle form submission, we’ll create an onSubmit function that will be called when the user submits the form. In this function, we’ll extract the values entered by the user and use the Fetch API to send a POST request to our API route handler, which we’ll create shortly.
To create the registration form, navigate to the app directory and create a new folder called ‘register‘. Then, create a file called form.tsx inside the ‘register‘ folder and add the following code to it.
src/app/register/form.tsx
"use client";

import { signIn } from "next-auth/react";
import { ChangeEvent, useState } from "react";

export const RegisterForm = () => {
  const [loading, setLoading] = useState(false);
  const [formValues, setFormValues] = useState({
    name: "",
    email: "",
    password: "",
  });
  const [error, setError] = useState("");

  const onSubmit = async (e: React.FormEvent) => {
    e.preventDefault();
    setLoading(true);
    setFormValues({ name: "", email: "", password: "" });

    try {
      const res = await fetch("/api/register", {
        method: "POST",
        body: JSON.stringify(formValues),
        headers: {
          "Content-Type": "application/json",
        },
      });

      setLoading(false);
      if (!res.ok) {
        setError((await res.json()).message);
        return;
      }

      signIn(undefined, { callbackUrl: "/" });
    } catch (error: any) {
      setLoading(false);
      setError(error);
    }
  };

  const handleChange = (event: ChangeEvent<HTMLInputElement>) => {
    const { name, value } = event.target;
    setFormValues({ ...formValues, [name]: value });
  };

  const input_style =
    "form-control block w-full px-4 py-5 text-sm font-normal text-gray-700 bg-white bg-clip-padding border border-solid border-gray-300 rounded transition ease-in-out m-0 focus:text-gray-700 focus:bg-white focus:border-blue-600 focus:outline-none";

  return (
    <form onSubmit={onSubmit}>
      {error && (
        <p className="text-center bg-red-300 py-4 mb-6 rounded">{error}</p>
      )}
      <div className="mb-6">
        <input
          required
          type="name"
          name="name"
          value={formValues.name}
          onChange={handleChange}
          placeholder="Name"
          className={`${input_style}`}
        />
      </div>
      <div className="mb-6">
        <input
          required
          type="email"
          name="email"
          value={formValues.email}
          onChange={handleChange}
          placeholder="Email address"
          className={`${input_style}`}
        />
      </div>
      <div className="mb-6">
        <input
          required
          type="password"
          name="password"
          value={formValues.password}
          onChange={handleChange}
          placeholder="Password"
          className={`${input_style}`}
        />
      </div>
      <button
        type="submit"
        style={{ backgroundColor: `${loading ? "#ccc" : "#3446eb"}` }}
        className="inline-block px-7 py-4 bg-blue-600 text-white font-medium text-sm leading-snug uppercase rounded shadow-md hover:bg-blue-700 hover:shadow-lg focus:bg-blue-700 focus:shadow-lg focus:outline-none focus:ring-0 active:bg-blue-800 active:shadow-lg transition duration-150 ease-in-out w-full"
        disabled={loading}
      >
        {loading ? "loading..." : "Sign Up"}
      </button>
    </form>
  );
};
Create the Account Registration Page
Now we can create a page component to render the registration form we just created. To do this, navigate to the src/app/register directory and create a page.tsx file. Then, add the code below to the file:
src/app/register/page.tsx
import { RegisterForm } from "./form";
import Header from "@/components/header.component";

export default function RegisterPage() {
  return (
    <>
      <Header />
      <section className="bg-ct-blue-600 min-h-screen pt-20">
        <div className="container mx-auto px-6 py-12 h-full flex justify-center items-center">
          <div className="md:w-8/12 lg:w-5/12 bg-white px-8 py-10">
            <RegisterForm />
          </div>
        </div>
      </section>
    </>
  );
}
Create the API Handler for Account Registration
To process the registration form’s POST request, we need to create a Next.js API route handler. Since this is a demo project, we’ll keep things simple and just hash the password, save the user to the database, and return the newly registered user in a JSON response.
Head over to the src/app/api directory and create a new folder called ‘register‘. Inside this folder, create a ‘route.ts‘ file and add the following code:
src/app/api/register/route.ts
import { prisma } from "@/lib/prisma";
import { hash } from "bcryptjs";
import { NextResponse } from "next/server";

export async function POST(req: Request) {
  try {
    const { name, email, password } = (await req.json()) as {
      name: string;
      email: string;
      password: string;
    };
    const hashed_password = await hash(password, 12);

    const user = await prisma.user.create({
      data: {
        name,
        email: email.toLowerCase(),
        password: hashed_password,
      },
    });

    return NextResponse.json({
      user: {
        name: user.name,
        email: user.email,
      },
    });
  } catch (error: any) {
    return new NextResponse(
      JSON.stringify({
        status: "error",
        message: error.message,
      }),
      { status: 500 }
    );
  }
}
I used a <Header /> component in both the login and signup pages, but I didn’t provide the code for it in this article as our main focus was to demonstrate the integration of custom login and signup pages with NextAuth. However, you can find the Header component code in the project’s GitHub repository, along with the Tailwind CSS configurations used in the project.
Conclusion
That wraps up our tutorial on integrating custom login and signup pages with NextAuth. Throughout this article, we have demonstrated how to handle user authentication using NextAuth in the new Next.js 13 app directory. Moreover, we went one step further and implemented the code to register new users.
I hope you found this article helpful and informative. If you have any questions or feedback, please don’t hesitate to leave a comment below. Thank you for reading!
Hey,
I’ve got this error:
Cannot find […nextauth].{js,ts} in `/pages/api/auth`. Make sure the filename is written correctly. MissingAPIRoute [MissingAPIRouteError]: Cannot find […nextauth].{js,ts} in `/pages/api/auth`. Make sure the filename is written correctly.
My file is in app/api/auth/[…nextauth]/route.js
And it looks like this:
import NextAuth from ‘next-auth’
import GoogleProvider from ‘next-auth/providers/google’
import { Stripe } from ‘stripe’
import prisma from ‘../../../../prisma/client’
import { STRIPE_API_VERSION } from ‘@/config’
export const authOptions = {
secret: process.env.AUTH_SECRET,
providers: [
GoogleProvider({
clientId: process.env.GOOGLE_CLIENT_ID,
clientSecret: process.env.GOOGLE_CLIENT_SECRET,
}),
],
pages: {
signIn: ‘/sign-in’,
},
events: {
createUser: async ({ user }) => {
const stripe = new Stripe(process.env.STRIPE_SECRET_KEY, {
apiVersion: STRIPE_API_VERSION,
})
await stripe.customers
.create({
email: user.email,
})
.then(async (customer) => {
return prisma.user.update({
where: { id: user.id },
data: {
stripeCustomerId: customer.id,
},
})
})
},
},
callbacks: {
async session({ session, user }) {
session.user.id = user.id
session.user.stripeCustomerId = user.stripeCustomerId
session.user.stripeSubTier = user.currentSubPlan
return session
},
},
}
const handler = NextAuth(authOptions)
export { handler as GET, handler as POST }
I’ve got this error when I click on my custom sign in page. What could be the problem?
You’re correct, many developers have faced the same issue. The workaround involves separating the NextAuth options from the route file and creating a separate file to export those options.
This allows you to import the options into the route file and generate the GET and POST route handlers based on them.
To see an example of this approach, you can refer to the following link: GitHub Repository. In that repository, you’ll find a
lib/auth.tsfile that exports the NextAuthOptions.No, it is not working. Still getting the same error message. 🙁 Any other ideas?
That is weird. You can take a look at this GitHub repository to see how they implemented it and compare it to yours.
This was the problem:
https://github.com/nextauthjs/next-auth/issues/7632#issuecomment-1559415021
What is the purpose of
“`
signIn(undefined, { callbackUrl: “/” });
“`
in register form?
The
signIn()method is used to initiate a sign-in flow or send the user to the sign-in page. When you invoke thesignIn()method without providing any arguments, the user will be redirected to the login page.However, if you want to redirect the user to a specific page after a successful sign-in, you need to provide the callback URL as the second argument in an object. This requires providing the first argument as well. In this case, since we only want to redirect the user, we pass
undefinedas the first argument.The callback URL can be any path, but in this example, we provided
/which means the user will be taken to the homepage after successfully signing in.what’s the difference between :
signIn(undefined, { callbackUrl: “/connexion?inscription=ok” });
and
router.push(“/connexion?inscription=ok”);
Result is the same or I forget something ?
The two statements have different effects and are used in different scenarios.
By default, when you use
signIn()without providing any additional options, NextAuth will handle the redirection after authentication by reloading the browser. This behavior is suitable for traditional server-side applications.However, if you are building a Single Page Application (SPA) with Next.js and you don’t want NextAuth to reload the browser after authentication, you can use
signIn(undefined, { redirect: false }). This prevents NextAuth from performing the redirect automatically.In this case, you can use Next.js’s
router.push()to handle the redirection yourself. This allows you to navigate the user to the desired route without reloading the entire page.after succesfull sing up,its redirected to sign in page?why?
It’s a matter of preference. Most websites redirect the user to the login page after registration is complete, but you can automatically sign the user into the application without requiring them to sign in with their credentials.
Hey, I found this really useful, so thank you, but I’m having a problem. I’m using Prisma to store the user in the database, so I’m creating a user on \register\route.tsx (using the command prisma.user.create) and then I check if the user exists to log in (prisma.user.findUnique). That works great but then I check the session using getServerSession but it doesn’t return anything. Do you know how should I handle the Session using a database? Should I update and check it by hand or Prisma take care of it by itself?
Thank you very much!
I’d be happy to help! However, instead of repeating the information here, I recommend checking out an article I’ve already written on this topic titled “Setup and Use NextAuth.js in Next.js 13 App Directory“. The article provides in-depth guidance on handling sessions and even covers adding custom fields to the session. I believe you’ll find all the answers you’re looking for there.
If you still encounter issues after reading the article, please let me know, and I’ll be glad to assist you further. The only aspect not covered in the article is adding Prisma as an adapter to the NextAuth configuration.
Awesome! Thank you, I’ll check it out 😃
really helpfull. This is the best article I found on the topic
This was indeed a great tutorial. I have a doubt , I have downloaded the source code in that there is a route called session which have been never used ? Can you please explain when and where can we use that?
The code in the ‘session’ route demonstrates how an API route can be protected with respect to NextAuth. If I remember correctly, that demonstration was done in a different article, which is why I didn’t discuss it in this article.