

In this article, you will learn how to build a frontend application within the new Next.js 13 app directory that covers various aspects of authentication such as user registration, login, logout, protected pages via middleware, protected pages via React Hooks, and more.
This article serves as a continuation of our previous piece, where we built the API. Here, we will shift our attention to developing the frontend part of the application to establish seamless communication with the backend API. For an in-depth guide on building the API, feel free to refer to the article titled “JWT Authentication in Next.js 13 API Route Handlers“.
Before we proceed, let me provide an overview of how we will secure the private pages. The best option I came up with is to utilize the Next.js middleware, which enables us to protect both the pages and the API routes within the same file. However, it’s important to note that the middleware runs only during the initial request, specifically during server-side rendering (SSR). This means that subsequent navigations between pages in the browser (CSR) won’t trigger the middleware.
To overcome these limitations, we will implement an invisible component that we can add to pages accessible only to authenticated users. This component will check for the presence of a specific cookie in the browser. If the cookie is not found, the user will be immediately redirected to the login page.
Let me pause here. As you continue reading, you will discover the detailed implementation of this logic. Without further ado, let’s dive into the article and explore how we can implement JWT authentication in Next.js 13.
More practice:
- JWT Authentication in Next.js 13 API Route Handlers
- Build a Simple API in Next.js 13 App Directory
- Build a Simple Frontend App in Next.js 13 App Directory
- Next.js – Add Google and GitHub OAuth2 using NextAuth.js
- Next.js – Use Custom Login and SignUp Pages for NextAuth.js
- How to Setup Prisma ORM in Next.js 13 App Directory
- How to Setup and Use Apollo Client in Next.js 13 App Directory
- How to Setup React Context API in Next.js 13 App Directory
- How to Setup React Query in Next.js 13 App Directory
- How to Setup Redux Toolkit in Next.js 13 App Directory
- Setup tRPC Server and Client in Next.js 13 App Directory
- Setup and Use NextAuth.js in Next.js 13 App Directory

Running the Next.js 13 JWT Authentication Project
To test the JSON Web Token (JWT) authentication flow of both frontend and backend of the Next.js 13 project, simply follow the steps outlined below:
- Make sure you have PNPM installed. If not, refer to the installation guide at https://pnpm.io/installation.
- Clone or download the Next.js project from its GitHub repository at https://github.com/wpcodevo/nextjs13-user-signin-signup and open the source code in your preferred IDE or text editor.
- Install all the necessary dependencies by executing
pnpm install. - Once the package installation is complete, synchronize the database with the Prisma schema and generate the Prisma Client in the node modules folder by running
pnpm prisma migrate dev. - Start the Next.js development server and build the application with
pnpm dev. - Open the application in your preferred browser and explore the features. Sign up for a new account, sign in using the credentials you provided during registration, access protected pages, and log out when you’re done.
- Alternatively, if you want to focus solely on testing the API, import the
Next.js HS256 JWT.postman_collection.jsonfile provided in the source code into Postman or the Thunder Client VS Code extension. This collection offers pre-defined requests for the Next.js API. Utilize these requests to test the JWT authentication flow.
Install Packages and Configure Tailwind CSS
To have access to the backend API and build upon it, you can clone the project from its GitHub repository at https://github.com/wpcodevo/nextjs13-user-signin-signup and switch to the Git branch named nextjs13-jwt-authentication. This ensures that you’re on the same page as we proceed with building the frontend for the API.
Now, let’s get started by installing the required dependencies for the frontend components and configuring Tailwind CSS. Depending on your preferred package manager, execute one of the following commands to install the dependencies.
pnpm add zustand tailwind-merge react-hot-toast react-hook-form @hookform/resolvers
# or
npm i zustand tailwind-merge react-hot-toast react-hook-form @hookform/resolvers
# or
yarn add zustand tailwind-merge react-hot-toast react-hook-form @hookform/resolvers
Next, open your tailwind.config.js file and replace its current content with the provided code snippet below. This code snippet includes the predefined colors, breakpoints, and font that we will be using throughout the project.
tailwind.config.js
/** @type {import('tailwindcss').Config} */
module.exports = {
  content: [
    './src/pages/**/*.{js,ts,jsx,tsx,mdx}',
    './src/components/**/*.{js,ts,jsx,tsx,mdx}',
    './src/app/**/*.{js,ts,jsx,tsx,mdx}',
  ],
  theme: {
    extend: {
      colors: {
        'ct-dark-600': '#222',
        'ct-dark-200': '#e5e7eb',
        'ct-dark-100': '#f5f6f7',
        'ct-blue-600': '#2363eb',
        'ct-yellow-600': '#f9d13e',
      },
      fontFamily: {
        Poppins: ['Poppins, sans-serif'],
      },
      container: {
        center: true,
        padding: '1rem',
        screens: {
          lg: '1125px',
          xl: '1125px',
          '2xl': '1125px',
        },
      },
    },
  },
  plugins: [],
}
Next, you’ll need to remove the default CSS that comes with the Next.js project. Open the globals.css file located in the app directory and replace its current content with the following CSS code. This code imports the Poppins font from Google Fonts and includes the necessary Tailwind CSS directives.
src/app/globals.css
@import url('https://fonts.googleapis.com/css2?family=Poppins:wght@300;400;500;600;700&display=swap');

@tailwind base;
@tailwind components;
@tailwind utilities;

html {
    font-family: 'Poppins', sans-serif;
}
Create the TypeScript Types and API Request Functions
Now, let’s focus on creating the API request functions that will handle sending requests to the backend API. While it’s possible to include this code directly in the components where they will be used, it’s often beneficial to separate them into a dedicated module. This approach allows us to reuse these functions in multiple places throughout our application.
API Response Types
As we are using TypeScript, we need to create interfaces that represent the responses we will receive from the backend API. To do this, navigate to the src/lib/ directory and create a new file named types.ts. Within this file, add the following interfaces:
src/lib/types.ts
export interface FilteredUser {
  id: string;
  name: string;
  email: string;
  role: string;
  verified: boolean;
  createdAt: string;
  updatedAt: string;
}

export interface UserResponse {
  status: string;
  data: {
    user: FilteredUser;
  };
}

export interface UserLoginResponse {
  status: string;
  token: string;
}
API Request Functions
Now that we have defined the TypeScript types, it’s time to create the API request functions. These functions handle various interactions with the backend API and serve specific purposes:
apiRegisterUser– This function is responsible for sending a POST request to submit the user’s registration credentials to the backend server.apiLoginUser– This function sends a POST request to submit the user’s sign-in credentials to the backend API.apiLogoutUser– This function sends a GET request to log out the user from the API.apiGetAuthUser– This function exchanges a token for the authenticated user’s credentials.
To proceed, navigate to the src/lib/ directory and create a new file named api-requests.ts. Copy and paste the following code into the file:
src/lib/api-requests.ts
import { FilteredUser, UserLoginResponse, UserResponse } from "./types";

const SERVER_ENDPOINT = process.env.SERVER_ENDPOINT || "http://localhost:3000";

async function handleResponse<T>(response: Response): Promise<T> {
  const contentType = response.headers.get("Content-Type") || "";
  const isJson = contentType.includes("application/json");
  const data = isJson ? await response.json() : await response.text();

  if (!response.ok) {
    if (isJson && data.errors !== null) {
      throw new Error(JSON.stringify(data.errors));
    }

    throw new Error(data.message || response.statusText);
  }

  return data as T;
}

export async function apiRegisterUser(
  credentials: string
): Promise<FilteredUser> {
  const response = await fetch(`${SERVER_ENDPOINT}/api/auth/register`, {
    method: "POST",
    credentials: "include",
    headers: {
      "Content-Type": "application/json",
    },
    body: credentials,
  });

  return handleResponse<UserResponse>(response).then((data) => data.data.user);
}

export async function apiLoginUser(credentials: string): Promise<string> {
  const response = await fetch(`${SERVER_ENDPOINT}/api/auth/login`, {
    method: "POST",
    credentials: "include",
    headers: {
      "Content-Type": "application/json",
    },
    body: credentials,
  });

  return handleResponse<UserLoginResponse>(response).then((data) => data.token);
}

export async function apiLogoutUser(): Promise<void> {
  const response = await fetch(`${SERVER_ENDPOINT}/api/auth/logout`, {
    method: "GET",
    credentials: "include",
    headers: {
      "Content-Type": "application/json",
    },
  });

  return handleResponse<void>(response);
}

export async function apiGetAuthUser(token?: string): Promise<FilteredUser> {
  const headers: Record<string, string> = {
    "Content-Type": "application/json",
  };

  if (token) {
    headers["Authorization"] = `Bearer ${token}`;
  }
  const response = await fetch(`${SERVER_ENDPOINT}/api/users/me`, {
    method: "GET",
    credentials: "include",
    headers,
  });

  return handleResponse<UserResponse>(response).then((data) => data.data.user);
}
Setup a Global Application State with Zustand
In this section, we’ll establish a global application state, also known as a store, using the Zustand library. If you’re unfamiliar with Zustand, it’s a lightweight yet robust state management library that offers a straightforward and intuitive API for handling state in React applications.
To create the store, follow these steps:
- Navigate to the
srcdirectory of your project. - Create a new folder called
store. - Inside the
storefolder, create a file namedindex.ts. - Open the
index.tsfile and include the following code, which defines the store for the application:
src/store/index.ts
"use client";

import { FilteredUser } from "@/lib/types";
import { create } from "zustand";

type Store = {
  authUser: FilteredUser | null;
  requestLoading: boolean;
  setAuthUser: (user: FilteredUser | null) => void;
  setRequestLoading: (isLoading: boolean) => void;
  reset: () => void;
};

const useStore = create<Store>((set) => ({
  authUser: null,
  requestLoading: false,
  setAuthUser: (user) => set((state) => ({ ...state, authUser: user })),
  setRequestLoading: (isLoading) =>
    set((state) => ({ ...state, requestLoading: isLoading })),
  reset: () => set({ authUser: null, requestLoading: false }),
}));

export default useStore;
Implement the Authentication Logic
Here comes the most crucial aspect of this article, where we will delve into writing the logic for protecting routes. To achieve this, we will implement three essential components:
- Next.js Middleware for Route Protection: We will create a Next.js middleware that plays a significant role in securing both API and page routes during server-side rendering (SSR). This middleware ensures that the appropriate authorization checks are performed before allowing access to protected routes.
- User Credentials Retrieval on Page Reload: We’ll create a hook that takes care of fetching the user’s credentials when they reload the browser.
- Additionally, we will introduce an invisible component that silently checks for the existence of a specific cookie named
logged-inas a user navigates between pages during client-side rendering.
Protect Page and API Routes in Next.js Middleware
Let’s start with the Next.js middleware. When this middleware is invoked, it first checks for the presence of a token in the request cookies object. If the token is not found there, it checks the Authorization header. If the token is not found in either location, the middleware returns a 401 Unauthorized error, assuming that the user is trying to access a protected API route. However, if the user is accessing a protected page, the middleware redirects them to the login page.
If the token is present, the middleware uses the verifyJWT function to verify the token and extract its payload. If the verification fails, the middleware redirects the user to the login page, assuming they were trying to access a protected page. However, if the user was accessing a protected API endpoint, the middleware returns a 401 Unauthorized error with the message “Token is invalid or user doesn’t exist“.
One important thing to note is that when a logged-in user tries to access the login page, the middleware automatically redirects them to the profile page.
Here is the code for the Next.js middleware:
src/middleware.ts
import { NextRequest, NextResponse } from "next/server";
import { verifyJWT } from "./lib/token";
import { getErrorResponse } from "./lib/helpers";

interface AuthenticatedRequest extends NextRequest {
  user: {
    id: string;
  };
}

let redirectToLogin = false;
export async function middleware(req: NextRequest) {
  let token: string | undefined;

  if (req.cookies.has("token")) {
    token = req.cookies.get("token")?.value;
  } else if (req.headers.get("Authorization")?.startsWith("Bearer ")) {
    token = req.headers.get("Authorization")?.substring(7);
  }

  if (req.nextUrl.pathname.startsWith("/login") && (!token || redirectToLogin))
    return;

  if (
    !token &&
    (req.nextUrl.pathname.startsWith("/api/users") ||
      req.nextUrl.pathname.startsWith("/api/auth/logout"))
  ) {
    return getErrorResponse(
      401,
      "You are not logged in. Please provide a token to gain access."
    );
  }

  const response = NextResponse.next();

  try {
    if (token) {
      const { sub } = await verifyJWT<{ sub: string }>(token);
      response.headers.set("X-USER-ID", sub);
      (req as AuthenticatedRequest).user = { id: sub };
    }
  } catch (error) {
    redirectToLogin = true;
    if (req.nextUrl.pathname.startsWith("/api")) {
      return getErrorResponse(401, "Token is invalid or user doesn't exists");
    }

    return NextResponse.redirect(
      new URL(`/login?${new URLSearchParams({ error: "badauth" })}`, req.url)
    );
  }

  const authUser = (req as AuthenticatedRequest).user;

  if (!authUser) {
    return NextResponse.redirect(
      new URL(
        `/login?${new URLSearchParams({
          error: "badauth",
          forceLogin: "true",
        })}`,
        req.url
      )
    );
  }

  if (req.url.includes("/login") && authUser) {
    return NextResponse.redirect(new URL("/profile", req.url));
  }

  return response;
}

export const config = {
  matcher: ["/profile", "/login", "/api/users/:path*", "/api/auth/logout"],
};
Create an Authentication Session Hook
Now, let’s move on to working on the session hook. The purpose of this hook is to attempt fetching the user’s credentials. If the request is successful, the hook will add the credentials to the Zustand store, making them available to other components. However, if the request fails, indicating that no token was sent or the token was invalid, we will reset the Zustand store.
To create this hook, follow these steps:
- Go to the
src/lib/directory. - Create a new file named
useSession.tsx. - Inside the
useSession.tsxfile, add the following code:
src/lib/useSession.tsx
import { useEffect } from "react";
import { apiGetAuthUser } from "./api-requests";
import useStore from "@/store";

export default function useSession() {
  const store = useStore();

  async function fetchUser() {
    try {
      const user = await apiGetAuthUser();
      store.setAuthUser(user);
    } catch (error: any) {
      store.reset();
    }
  }

  useEffect(() => {
    if (!store.authUser) {
      fetchUser();
    }
    // eslint-disable-next-line react-hooks/exhaustive-deps
  }, []);

  return store.authUser;
}
This hook will be specifically used in the Header component. It allows us to display the sign-in and sign-up links when there is no active session and remove them when a session exists.
Create a Client-side JWT Protection Component
Let’s proceed with the invisible component. When this component is rendered, it utilizes the document.cookie.includes() method to check for the presence of the ‘logged-in‘ cookie. It’s worth noting that this cookie is not HTTP-only, which is why we can access it from the React component.
Additionally, the logged-in cookie shares the same expiration time as the token cookie, which primarily grants access to protected routes on the backend server. If the logged-in cookie is not found, it implies that the token cookie is also absent since they have the same maximum age. In such a scenario, the user will be instantly redirected to the login page.
To create this component, follow these steps:
- Create a file named
protect-page.tsxwithin thesrc/lib/directory. - Add the following code to the
protect-page.tsxfile:
src/lib/protect-page.tsx
"use client";

import { useEffect } from "react";

const requireAuth = () => {
  const loggedIn = document.cookie.includes("logged-in=true");

  if (!loggedIn) {
    window.location.href = "/login";
  }
};

export const AuthPageInvisible = () => {
  useEffect(() => {
    requireAuth();
  }, []);

  return <></>;
};
Create a Couple of Reusable Components
In this section, we will create reusable components that can be utilized in other components. These components include a Spinner, Loading Button, Form Input, and Header component. To keep the article concise and focused, I will provide brief explanations for each component.
Create a Spinner Component
Let’s begin by creating the Spinner component. This component will be used to indicate that a request is being processed by the backend API. We will also utilize it within the button of the form component. By default, the Spinner will be invisible, but when the form data is submitted to the API, it will become visible, providing visual feedback that the server is processing the request.
To create the Spinner component, follow these steps:
- Create a new directory named “components” within the
srcfolder. - Inside the “components” directory, create a file named
Spinner.tsx. - Add the following code to the
Spinner.tsxfile:
src/components/Spinner.tsx
import React from "react";
import { twMerge } from "tailwind-merge";
type SpinnerProps = {
  width?: string;
  height?: string;
  color?: string;
  bgColor?: string;
};
const Spinner: React.FC<SpinnerProps> = ({
  width = "1.25rem",
  height = "1.25rem",
  color,
  bgColor,
}) => {
  return (
    <svg
      role="status"
      className={twMerge(
        "mr-2 text-gray-200 animate-spin dark:text-gray-600 fill-blue-600",
        `${color} ${bgColor}`
      )}
      style={{ height, width }}
      viewBox="0 0 100 101"
      fill="none"
      xmlns="http://www.w3.org/2000/svg"
    >
      <path
        d="M100 50.5908C100 78.2051 77.6142 100.591 50 100.591C22.3858 100.591 0 78.2051 0 50.5908C0 22.9766 22.3858 0.59082 50 0.59082C77.6142 0.59082 100 22.9766 100 50.5908ZM9.08144 50.5908C9.08144 73.1895 27.4013 91.5094 50 91.5094C72.5987 91.5094 90.9186 73.1895 90.9186 50.5908C90.9186 27.9921 72.5987 9.67226 50 9.67226C27.4013 9.67226 9.08144 27.9921 9.08144 50.5908Z"
        fill="currentColor"
      />
      <path
        d="M93.9676 39.0409C96.393 38.4038 97.8624 35.9116 97.0079 33.5539C95.2932 28.8227 92.871 24.3692 89.8167 20.348C85.8452 15.1192 80.8826 10.7238 75.2124 7.41289C69.5422 4.10194 63.2754 1.94025 56.7698 1.05124C51.7666 0.367541 46.6976 0.446843 41.7345 1.27873C39.2613 1.69328 37.813 4.19778 38.4501 6.62326C39.0873 9.04874 41.5694 10.4717 44.0505 10.1071C47.8511 9.54855 51.7191 9.52689 55.5402 10.0491C60.8642 10.7766 65.9928 12.5457 70.6331 15.2552C75.2735 17.9648 79.3347 21.5619 82.5849 25.841C84.9175 28.9121 86.7997 32.2913 88.1811 35.8758C89.083 38.2158 91.5421 39.6781 93.9676 39.0409Z"
        fill="currentFill"
      />
    </svg>
  );
};

export default Spinner;
Create a Loading Button Component
Next, we will create a button that combines two components: the Spinner component and a text. The Spinner component will be initially hidden, but it will become visible when the loading state is set to true. To create this button, follow these steps:
- Create a file named
LoadingButton.tsxwithin thesrc/components/directory. - Add the following code to the
LoadingButton.tsxfile:
src/components/LoadingButton.tsx
import React from "react";
import { twMerge } from "tailwind-merge";
import Spinner from "./Spinner";

type LoadingButtonProps = {
  loading: boolean;
  btnColor?: string;
  textColor?: string;
  children: React.ReactNode;
};

export const LoadingButton: React.FC<LoadingButtonProps> = ({
  textColor = "text-white",
  btnColor = "bg-ct-yellow-600",
  children,
  loading = false,
}) => {
  return (
    <button
      type="submit"
      className={twMerge(
        `w-full py-3 font-semibold rounded-lg outline-none border-none flex justify-center`,
        `${btnColor} ${loading && "bg-[#ccc]"}`
      )}
    >
      {loading ? (
        <div className="flex items-center gap-3">
          <Spinner />
          <span className="text-slate-500 inline-block">Loading...</span>
        </div>
      ) : (
        <span className={`${textColor}`}>{children}</span>
      )}
    </button>
  );
};
Create a Form Input Component
Since the registration and login forms have the same input elements, we’ll create an input component that can be shared between them. This will prevent the repetition of code in multiple places, making our forms more concise and readable. To create the form input component, follow these steps:
- Create a
FormInput.tsxfile within thesrc/components/directory. - Add the following code to the
FormInput.tsxfile:
src/components/FormInput.tsx
import React from "react";
import { useFormContext } from "react-hook-form";

type FormInputProps = {
  label: string;
  name: string;
  type?: string;
};

const FormInput: React.FC<FormInputProps> = ({
  label,
  name,
  type = "text",
}) => {
  const {
    register,
    formState: { errors },
  } = useFormContext();
  return (
    <div className="">
      <label htmlFor={name} className="block text-ct-blue-600 mb-3">
        {label}
      </label>
      <input
        type={type}
        placeholder=" "
        className="block w-full rounded-2xl appearance-none focus:outline-none py-2 px-4"
        {...register(name)}
      />
      {errors[name] && (
        <span className="text-red-500 text-xs pt-1 block">
          {errors[name]?.message as string}
        </span>
      )}
    </div>
  );
};

export default FormInput;
Header Component with Logout Functionality
Finally, let’s proceed with the creation of the Header component. This component is responsible for displaying a navigation menu with links to various pages in our application. To hide the login and sign-up links when a user is already logged in, even upon page reload, we will utilize the useSession() hook we created earlier.
This hook will attempt to get the user’s credentials, and if the request is successful, the login and signup links will be hidden. Additionally, this component will contain the logic for logging out a user from the application.
To create the Header component, follow these steps:
- Create a new file named
Header.tsxwithin your project’s ‘components‘ directory. - Copy and paste the provided code snippet into the
Header.tsxfile.
src/components/Header.tsx
"use client";

import Spinner from "./Spinner";
import Link from "next/link";
import useSession from "@/lib/useSession";
import useStore from "@/store";
import { apiLogoutUser } from "@/lib/api-requests";
import { useRouter } from "next/navigation";

const Header = () => {
  const store = useStore();
  const user = useSession();
  const router = useRouter();

  const handleLogout = async () => {
    store.setRequestLoading(true);
    try {
      await apiLogoutUser();
    } catch (error) {
    } finally {
      store.reset();
      router.push("/login");
    }
  };

  return (
    <>
      <header className="bg-white h-20">
        <nav className="h-full flex justify-between container items-center">
          <div>
            <Link href="/" className="text-ct-dark-600 text-2xl font-semibold">
              CodevoWeb
            </Link>
          </div>
          <ul className="flex items-center gap-4">
            <li>
              <Link href="/" className="text-ct-dark-600">
                Home
              </Link>
            </li>
            {!user && (
              <>
                <li>
                  <Link href="/register" className="text-ct-dark-600">
                    Register
                  </Link>
                </li>
                <li>
                  <Link href="/login" className="text-ct-dark-600">
                    Login
                  </Link>
                </li>
              </>
            )}
            {user && (
              <>
                <li>
                  <Link href="/profile" className="text-ct-dark-600">
                    Profile
                  </Link>
                </li>
                <li className="cursor-pointer" onClick={handleLogout}>
                  Logout
                </li>
              </>
            )}
          </ul>
        </nav>
      </header>
      <div className="pt-4 pl-2 bg-ct-blue-600 fixed">
        {store.requestLoading && <Spinner color="text-ct-yellow-600" />}
      </div>
    </>
  );
};

export default Header;
Create the Application Page Components
Now, we have reached the most important part of this article where we will create the page components. As you already know, in Next.js 13, when you create a folder within the app directory that contains a page.tsx file, it automatically becomes a page. Within that directory, we can also have other files like a loading.tsx file, which will be displayed when the page component is undergoing server-side rendering, and an error.tsx file that displays an error if any.
Additionally, you have the option to create a layout.tsx file within the directory, which will serve as the base for other child pages within that directory.
Create an Error Handling Utility Function
During the development of the project, I noticed that the same error-handling logic was being used in multiple functions that send requests to the backend API. To make these components easier to understand and work with, I decided to separate the code that handles errors into its own function. This allows us to have cleaner and more concise code.
To add the error handling function, go to the src/lib/helpers.ts file and include the following code:
src/lib/helpers.ts
export function handleApiError(error: Error): void {
  try {
    let errorData;
    try {
      errorData = JSON.parse(error.message);
    } catch (parseError) {
      // Treat error.message as a plain error message
      // console.log("Error message:", error.message);
      toast.error(error.message);
      return;
    }

    if (
      typeof errorData === "object" &&
      errorData !== null &&
      "fieldErrors" in errorData
    ) {
      const fieldErrors = errorData.fieldErrors as Record<string, string[]>;
      Object.keys(fieldErrors).forEach((fieldName) => {
        const validationMessages = fieldErrors[fieldName];
        if (validationMessages.length > 0) {
          const firstValidationMessage = validationMessages[0];
          toast.error(firstValidationMessage);
          // console.log(
          //   `Validation error for ${fieldName}:`,
          //   firstValidationMessage
          // );
        }
      });
    }
  } catch (error: any) {
    // console.log("Original error message:", error);
    toast.error(error);
  }
}
Account Registration Page
Let’s begin with the first component, which is the account registration page. This component will consist of a form that accepts the user’s credentials and submits them to the backend API. Since we will be utilizing React hooks and DOM events to manage the form in this page component, we will extract the form component into a separate file. By doing this, we can mark it as a client component and easily include it in the page component without encountering any errors.
Create the Signup Form Component
The signup form component will consist of fields for name, email, password, and password confirmation. These fields will undergo validation using Zod and React Hook Form. Upon form submission without any validation errors, a request will be sent to the backend API, containing the provided credentials in the request body. If the registration process succeeds, the user will be redirected to the login page.
To create the signup form component, follow these steps:
- Create a new folder named “register” within your
src/app/directory. - Inside the “register” directory, create a file named
register-form.tsx. - Copy and paste the provided code snippet into the
register-form.tsxfile.
src/app/register/register-form.tsx
"use client";

import {
  RegisterUserInput,
  RegisterUserSchema,
} from "@/lib/validations/user.schema";
import { useForm, SubmitHandler, FormProvider } from "react-hook-form";
import { zodResolver } from "@hookform/resolvers/zod";
import { useEffect } from "react";
import { apiRegisterUser } from "@/lib/api-requests";
import FormInput from "@/components/FormInput";
import Link from "next/link";
import { LoadingButton } from "@/components/LoadingButton";
import useStore from "@/store";
import { handleApiError } from "@/lib/helpers";
import { toast } from "react-hot-toast";
import { useRouter } from "next/navigation";

export default function RegisterForm() {
  const store = useStore();
  const router = useRouter();

  const methods = useForm<RegisterUserInput>({
    resolver: zodResolver(RegisterUserSchema),
  });

  const {
    reset,
    handleSubmit,
    formState: { isSubmitSuccessful },
  } = methods;

  useEffect(() => {
    if (isSubmitSuccessful) {
      reset();
    }
    // eslint-disable-next-line react-hooks/exhaustive-deps
  }, [isSubmitSuccessful]);

  async function RegisterUserFunction(credentials: RegisterUserInput) {
    store.setRequestLoading(true);
    try {
      const user = await apiRegisterUser(JSON.stringify(credentials));
      store.setAuthUser(user);
      return router.push("/login");
    } catch (error: any) {
      if (error instanceof Error) {
        handleApiError(error);
      } else {
        toast.error(error.message);
        console.log("Error message:", error.message);
      }
    } finally {
      store.setRequestLoading(false);
    }
  }

  const onSubmitHandler: SubmitHandler<RegisterUserInput> = (values) => {
    RegisterUserFunction(values);
  };

  return (
    <FormProvider {...methods}>
      <form
        onSubmit={handleSubmit(onSubmitHandler)}
        className="max-w-md w-full mx-auto overflow-hidden shadow-lg bg-ct-dark-200 rounded-2xl p-8 space-y-5"
      >
        <FormInput label="Full Name" name="name" />
        <FormInput label="Email" name="email" type="email" />
        <FormInput label="Password" name="password" type="password" />
        <FormInput
          label="Confirm Password"
          name="passwordConfirm"
          type="password"
        />
        <span className="block">
          Already have an account?{" "}
          <Link href="/login" className="text-ct-blue-600">
            Login Here
          </Link>
        </span>
        <LoadingButton
          loading={store.requestLoading}
          textColor="text-ct-blue-600"
        >
          Register
        </LoadingButton>
      </form>
    </FormProvider>
  );
}
Create the Signup Page
Now that you have created the registration component, it is time to create a page component that will render it. To accomplish this, create a page.tsx file within the src/app/register/ directory and include the code below in it.
src/app/register/page.tsx
import Header from "@/components/Header";
import RegisterForm from "./register-form";

export default async function RegisterPage() {
  // await new Promise((resolve) => {
  //   setTimeout(resolve, 1000);
  // });
  return (
    <>
      <Header />
      <section className="py-8 bg-ct-blue-600 min-h-screen grid place-items-center">
        <div className="w-full">
          <h1 className="text-4xl xl:text-6xl text-center font-[600] text-ct-yellow-600 mb-4">
            Welcome to CodevoWeb!
          </h1>
          <h2 className="text-lg text-center mb-4 text-ct-dark-200">
            Sign Up To Get Started!
          </h2>
          <RegisterForm />
        </div>
      </section>
    </>
  );
}
If you wish to observe the loading state while the page is being generated on the server, you can uncomment the Promise code in the RegisterPage component.
Create Loading Component
Let us now proceed to create the loading component that will be displayed during the server-side rendering of the account registration component. Within the src/app/register/ directory, create a loading.tsx file and include the following code.
src/app/register/loading.tsx
import Spinner from "@/components/Spinner";

export default function loading() {
  return (
    <div className="h-screen flex items-center justify-center bg-slate-100">
      <div className="h-20 w-40 rounded-md shadow-md flex items-center justify-center bg-white">
        <Spinner height="2rem" width="2rem" />
      </div>
    </div>
  );
}
Account Login Page
Now that the account registration page is complete, we can move on to the login page. Similar to the registration page, this page will also feature a form component that will submit the credentials to the backend API.
Create the Login Form Component
The form component will consist of email and password fields, both of which will be validated using Zod and React Hook Form. Instead of creating a separate validation schema, we will reuse the one implemented to validate the request body on the backend API. Upon form submission, if there are no validation errors, the credentials will be sent to the backend API. In the case of a successful request, the user will be redirected to the protected page, which, in this example, is the /profile page.
To create the login component, please follow these steps:
- Create a new folder named “login” within your
src/app/directory. - Inside the “login” directory, create a file named
login-form.tsx. - Copy and paste the provided code snippet into the
login-form.tsxfile.
src/app/login/login-form.tsx
"use client";

import { LoginUserInput, LoginUserSchema } from "@/lib/validations/user.schema";
import { useForm, SubmitHandler, FormProvider } from "react-hook-form";
import { zodResolver } from "@hookform/resolvers/zod";
import { useEffect } from "react";
import { apiLoginUser } from "@/lib/api-requests";
import FormInput from "@/components/FormInput";
import Link from "next/link";
import { LoadingButton } from "@/components/LoadingButton";
import useStore from "@/store";
import { handleApiError } from "@/lib/helpers";
import { toast } from "react-hot-toast";
import { useRouter } from "next/navigation";

export default function LoginForm() {
  const store = useStore();
  const router = useRouter();

  const methods = useForm<LoginUserInput>({
    resolver: zodResolver(LoginUserSchema),
  });

  const {
    reset,
    handleSubmit,
    formState: { isSubmitSuccessful },
  } = methods;

  useEffect(() => {
    if (isSubmitSuccessful) {
      reset();
    }
    // eslint-disable-next-line react-hooks/exhaustive-deps
  }, [isSubmitSuccessful]);

  useEffect(() => {
    store.reset();
    // eslint-disable-next-line react-hooks/exhaustive-deps
  }, []);

  async function LoginUserFunction(credentials: LoginUserInput) {
    store.setRequestLoading(true);
    try {
      await apiLoginUser(JSON.stringify(credentials));

      toast.success("Logged in successfully");
      return router.push("/profile");
    } catch (error: any) {
      console.log(error);
      if (error instanceof Error) {
        handleApiError(error);
      } else {
        toast.error(error.message);
        console.log("Error message:", error.message);
      }
    } finally {
      store.setRequestLoading(false);
    }
  }

  const onSubmitHandler: SubmitHandler<LoginUserInput> = (values) => {
    LoginUserFunction(values);
  };

  return (
    <FormProvider {...methods}>
      <form
        onSubmit={handleSubmit(onSubmitHandler)}
        className="max-w-md w-full mx-auto overflow-hidden shadow-lg bg-ct-dark-200 rounded-2xl p-8 space-y-5"
      >
        <FormInput label="Email" name="email" type="email" />
        <FormInput label="Password" name="password" type="password" />

        <div className="text-right">
          <Link href="#" className="">
            Forgot Password?
          </Link>
        </div>
        <LoadingButton
          loading={store.requestLoading}
          textColor="text-ct-blue-600"
        >
          Login
        </LoadingButton>
        <span className="block">
          Need an account?{" "}
          <Link href="/register" className="text-ct-blue-600">
            Sign Up Here
          </Link>
        </span>
      </form>
    </FormProvider>
  );
}
Create the Login Page
Next, create the page component to render the login form component. To accomplish this, create a page.tsx file within the src/app/login/ folder and include the following code in it.
src/app/login/page.tsx
import Header from "@/components/Header";
import LoginForm from "./login-form";

export default async function LoginPage() {
  // await new Promise((resolve) => {
  //   setTimeout(resolve, 1000);
  // });
  return (
    <>
      <Header />
      <section className="bg-ct-blue-600 min-h-screen grid place-items-center">
        <div className="w-full">
          <h1 className="text-4xl lg:text-6xl text-center font-[600] text-ct-yellow-600 mb-4">
            Welcome Back
          </h1>
          <h2 className="text-lg text-center mb-4 text-ct-dark-200">
            Login to have access
          </h2>
          <LoginForm />
        </div>
      </section>
    </>
  );
}
Create the Loading Component
Let’s now proceed to create a loading component that will be displayed during the server rendering of the login page. To accomplish this, create a loading.tsx file within the src/app/login/ directory and include the following code snippet.
src/app/login/loading.tsx
import Spinner from "@/components/Spinner";

export default function loading() {
  return (
    <div className="h-screen flex items-center justify-center bg-slate-100">
      <div className="h-20 w-40 rounded-md shadow-md flex items-center justify-center bg-white">
        <Spinner height="2rem" width="2rem" />
      </div>
    </div>
  );
}
Create the Error Component
To effectively handle any potential errors that may occur during the rendering of the login page, create an error.tsx file within the src/app/login/ directory. Next.js will automatically populate this file with any errors that occur, ensuring proper error handling.
src/app/login/error.tsx
"use client";

export default function Error({ error }: { error: Error }) {
  return <p>{error.message}</p>;
}
Profile Page
Now, let’s proceed to create the profile page that will display the authenticated user’s credentials. This page will be protected by Next.js middleware, ensuring that only authenticated users can access its contents.
Create the Loading Component
Let’s start by creating the loading component for the profile page. Begin by navigating to the app directory and create a new folder called “profile“. Inside the “profile” folder, create a file named loading.tsx. Now, you can include the following code snippet in the loading.tsx file.
src/app/profile/loading.tsx
import Spinner from "@/components/Spinner";

export default function loading() {
  return (
    <div className="h-screen flex items-center justify-center bg-slate-100">
      <div className="h-20 w-40 rounded-md shadow-md flex items-center justify-center bg-white">
        <Spinner height="2rem" width="2rem" />
      </div>
    </div>
  );
}
Create the Error Component
Next, proceed to create an error.tsx file within the src/app/profile/ directory. This file will be responsible for displaying any errors that may arise during the server-side rendering of the profile page component.
src/app/profile/error.tsx
"use client";

export default function Error({ error }: { error: Error }) {
  return <p>Error: {error.message}</p>;
}
Create the Profile Page
Finally, it’s time to create the profile page component. In this component, we will extract the token cookie and initiate a GET request to the backend API in order to retrieve the user’s credentials. Once we have obtained the credentials, we will display them on the page. To create this component, navigate to the src/app/profile/ directory and create a page.tsx file. Then, simply add the provided code snippet to the page.tsx file.
src/app/profile/page.tsx
import Header from "@/components/Header";
import { apiGetAuthUser } from "@/lib/api-requests";
import { cookies } from "next/headers";
import { AuthPageInvisible } from "@/lib/protect-page";

export default async function ProfilePage() {
  const cookieStore = cookies();
  const token = cookieStore.get("token");

  const user = await apiGetAuthUser(token?.value);

  return (
    <>
      <Header />
      <section className="bg-ct-blue-600  min-h-screen pt-20">
        <div className="max-w-4xl mx-auto bg-ct-dark-100 rounded-md h-[20rem] flex justify-center items-center">
          <div>
            <p className="mb-3 text-5xl text-center font-semibold">
              Profile Page
            </p>
            <div className="mt-8">
              <p className="mb-3">Id: {user.id}</p>
              <p className="mb-3">Name: {user.name}</p>
              <p className="mb-3">Email: {user.email}</p>
              <p className="mb-3">Role: {user.role}</p>
              <p className="mb-3">Verified: {String(user.verified)}</p>
            </div>
          </div>
        </div>
      </section>
      <AuthPageInvisible />
    </>
  );
}
Testing the User Registration and Login Flow
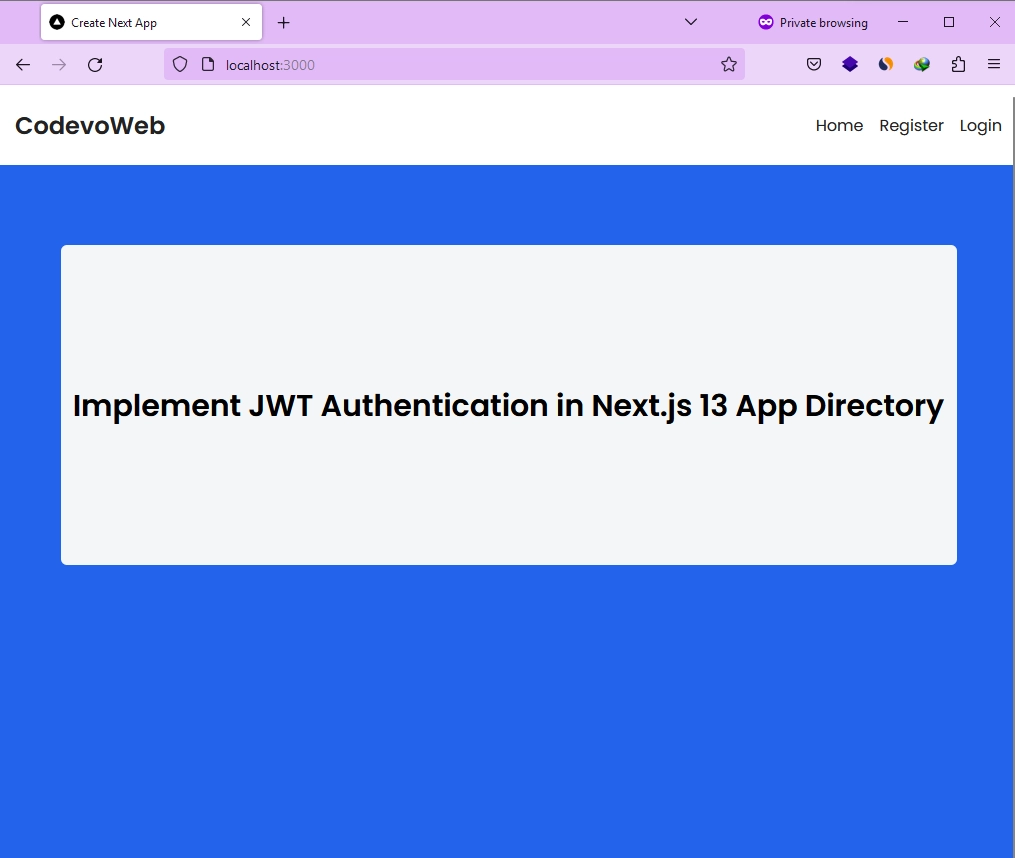
Congratulations on completing the project! Now, it’s time to start the Next.js development server, which will build the project and launch both the frontend application and backend API. Once the development server is up and running, you can open your preferred web browser and access the application by navigating to http://localhost:3000/.
Register an Account
To create an account, simply click on the “Register” link in the navigation menu, and you will be directed to the account registration page. On this page, you can enter your name, email, and password in the provided fields. Once you have filled in the required information, click on the “Register” button to submit the form data to the backend API.
If the registration process is successful, you will be automatically redirected to the login page.

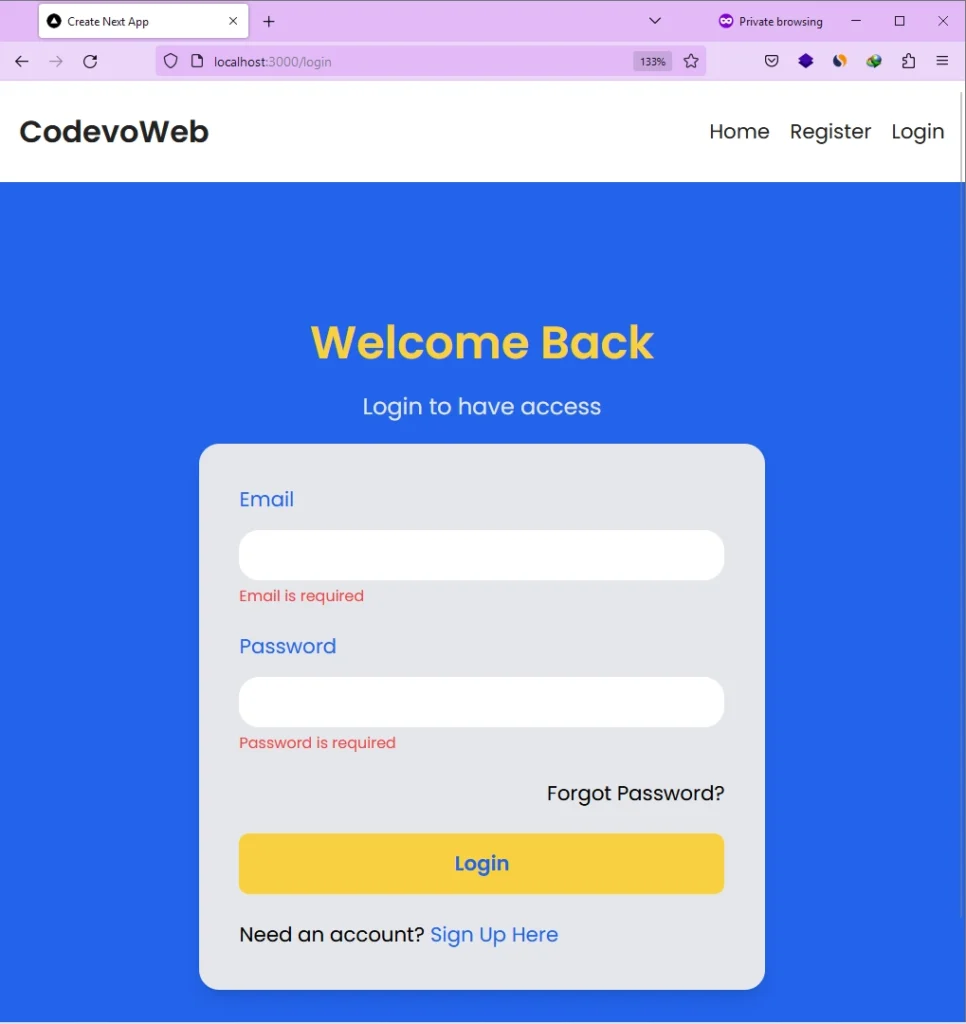
Log in to your Account
To sign in to the application, simply click on the ‘Login‘ link in the navigation menu, and you will be directed to the login page. On this page, you can enter your email and password in the respective fields. Once you have provided the required information, click on the “Login” button to submit the form data to the backend API.
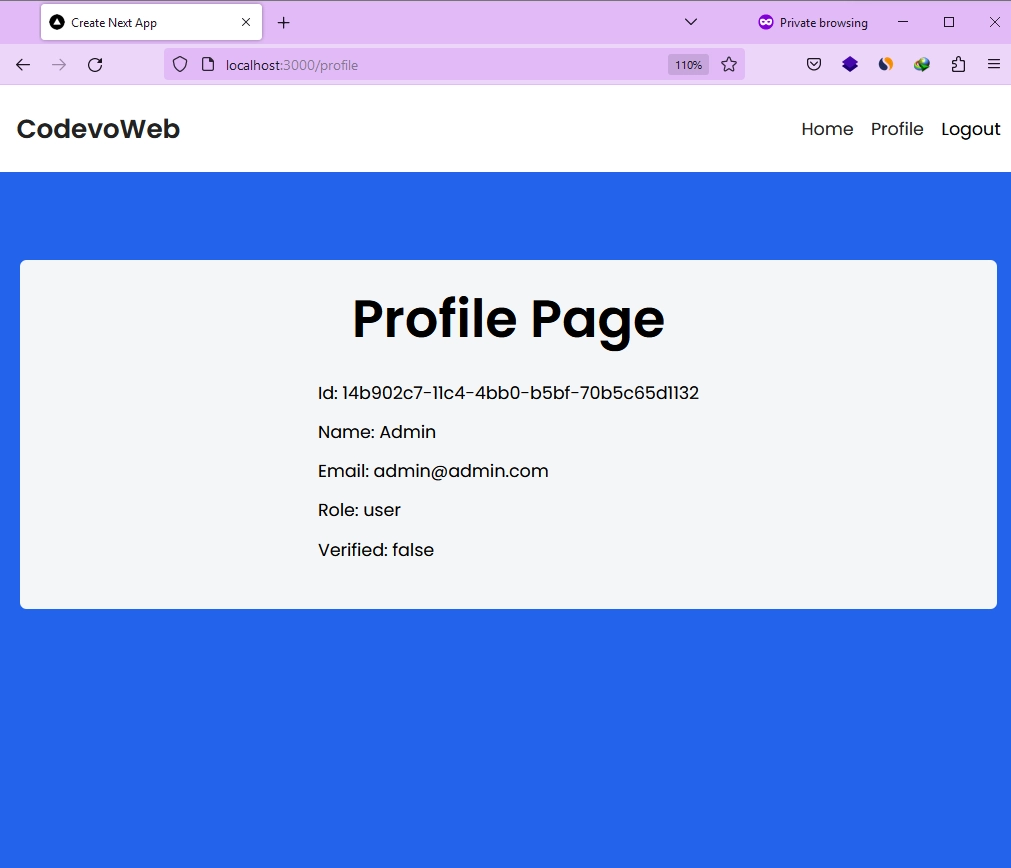
If the authentication process is successful, you will be automatically redirected to the profile page, where you can conveniently view and access your account credentials.
View your Account Credentials
After being redirected to the profile page, you can view your account information. When you’re done, simply click the ‘Logout‘ button in the navigation menu to sign out of the application.
Conclusion
And we are done! Throughout this tutorial, you have gained valuable knowledge on building a frontend application using the new Next.js 13 App Router and integrating it with a backend API that supports JWT authentication. I hope you found this tutorial helpful and informative.
If you have any questions or feedback, please don’t hesitate to share them in the comment section. Thank you for reading!
How can i handle the awaiting of the user object in the Header component? I want to show a loader until the user is requested from the API instead of showing the Sign-up/ Sign-in buttons.
I have the same problem, the user is authenticated but the component is not updated.
i kinda fixed this by making a fetchUser call again, not a permanent solution tho.
I’ve also corrected it by adding these lines just before the redirection:
const user = await apiGetAuthUser() ;
store.setAuthUser(user) ;
With this, I can be sure that the store is updated before the redirection.
I’m not sure this is the optimal solution though