

Are you interested in using React Query in your Next.js 13 app directory? If so, you’ve come to the right place! In this article, I’ll guide you through the process of setting up React Query and making the QueryClient accessible to all components in the component tree.
Firstly, I’ll show you how to wrap the QueryClientProvider around the Children Node of the root layout component in the Next.js 13 app directory. This is important as it will ensure that all components in your app have access to the same query client.
You’ll then learn how to fetch initial data in a Server Component higher up in the component tree and pass it as a prop to your Client Component. Additionally, I’ll explain how to prefetch the query on the server, dehydrate the cache, and rehydrate it on the client.
Since Next.js 13 is still in beta and libraries are still being adjusted to work with it, React Query has faced some challenges when integrating with the Next.js 13 app directory. However, I have carefully reviewed all the solutions proposed by the React Query team on GitHub, and in this article, I’ll show you the right way to set up React Query in the new app directory of Next.js 13.
On July 15th, 2023, while scrolling through Twitter, I came across a tweet from the React Query team announcing a new package. This package makes working with React Query in the Next.js App Router much easier. Excited about this update, I have now included the recommended approach in the article.
More practice:
- How to Set Up and Use React Query in Next.js 14
- React Query and Axios: User Registration and Email Verification
- Forgot/Reset Passwords with React Query and Axios
- How to Setup tRPC API Server & Client with Next.js and Prisma
- tRPC Server API with Next.js & PostgreSQL: Access & Refresh Tokens
- Full-Stack Next.js tRPC App: User Registration & Login Example
- Build a tRPC CRUD API Example with Next.js

Setup the Next.js 13 Project
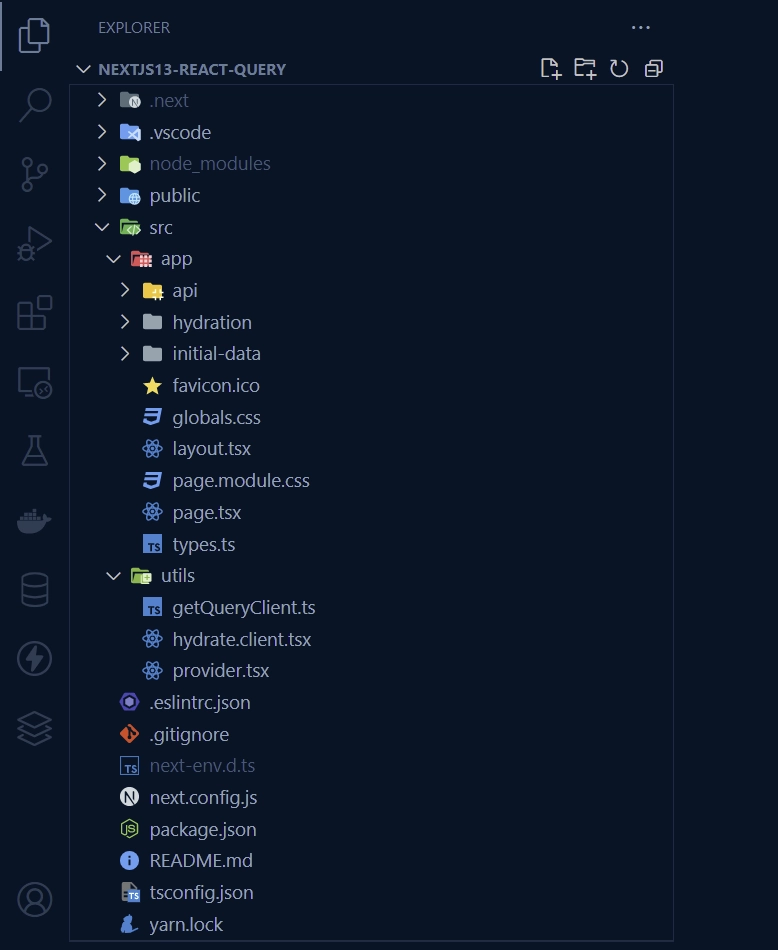
After following this tutorial, your folder and file structure will look like the one shown in the screenshot below.
In this tutorial, we will create a simple project that includes a counter app and a component for displaying a list of users. This project will showcase how React Query can be used in both server-side and client-side rendered components.
Now that we have an understanding of what we’ll be building, let’s get started by generating a Next.js 13 project. Navigate to any directory on your computer and open a terminal in that directory. Depending on your preferred package manager, you can run the following command to initiate the project scaffolding process.
yarn create next-app nextjs13-react-query
# or
npx create-next-app@latest nextjs13-react-query
During the process, you’ll be prompted to choose which features to enable for the project. Make sure to select “Yes” for TypeScript and ESLint. Additionally, you’ll be asked if you’d like to use the src/ directory and the experimental app/ directory. Select “Yes” for both options, and for the import alias, simply press Tab and Enter to accept.
Once you’ve answered all the questions, the Next.js 13 project will be generated, and all necessary dependencies will be installed. After everything is installed, you can open the project in your preferred IDE or text editor, such as VS Code.
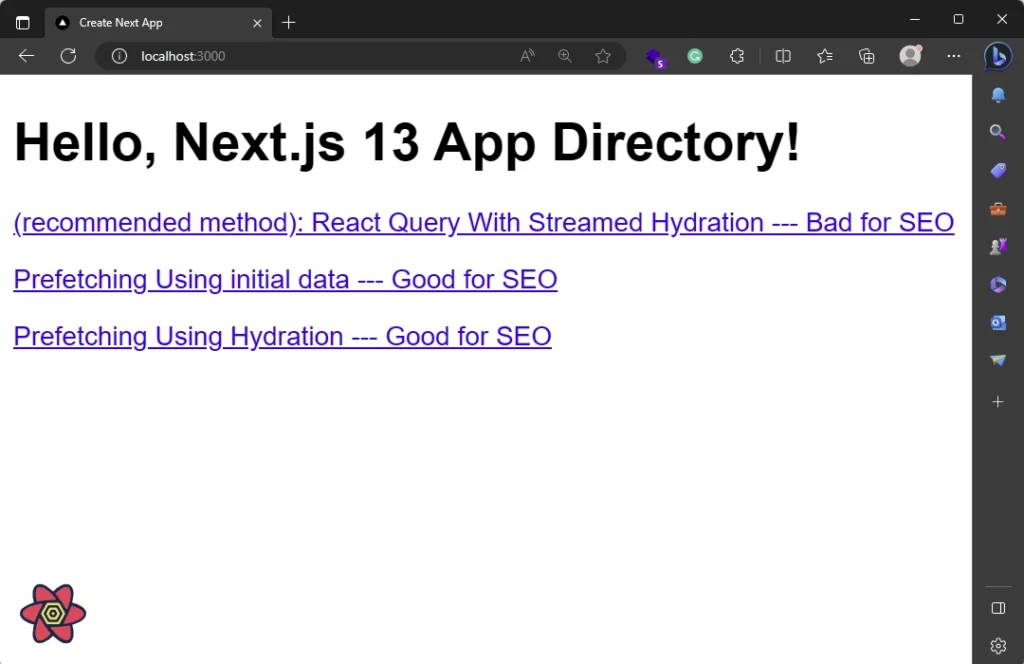
To proceed, replace the existing content of the src/app/page.tsx file with the code below, which contains links to different pages demonstrating all the workarounds for React Query in the new Next.js 13 app directory:
src/app/page.tsx
import Link from "next/link";

export default function Home() {
  return (
    <div>
      <h1>Hello, Next.js 13 App Directory!</h1>
      <p>
        <Link href="/hydration-stream-suspense">
          (recommended method): React Query With Streamed Hydration --- Bad for
          SEO
        </Link>
      </p>
      <p>
        <Link href="/initial-data">
          Prefetching Using initial data --- Good for SEO
        </Link>
      </p>
      <p>
        <Link href="/hydration">
          Prefetching Using Hydration --- Good for SEO
        </Link>
      </p>
    </div>
  );
}
Save the file, and upon visiting http://localhost:3000, you will see a preview resembling the one shown in the screenshot below:
Recommended Approach: Using Client Stream Hydration
When I first wrote this article, there was no recommended way to use React Query in the new Next.js 13 app directory. However, the community came up with some workarounds, which involve handling the hydration yourself or passing the initial data to a client component from a server component. Fortunately, the React Query team has recently published an experimental package that makes working with React Query in the Next.js 13 App Router a breeze.
With this new experimental package, you do not need to manually handle hydration or pass the initialData as a prop from a server component to a client component. When the initial request is made, the data will be fetched on the server, which means the API request from the useQuery hook is first initialized on the server to fetch the data. Once the data is ready, it will be automatically made available in the QueryClient on the client.
To install the package, run the following command:
# For yarn
yarn add @tanstack/react-query-next-experimental

# For PNPM
pnpm add @tanstack/react-query-next-experimental

# For NPM
npm i @tanstack/react-query-next-experimental
Create a Client Query Client Provider
To use the installed package, we need to wrap the ReactQueryStreamedHydration and QueryClientProvider components around the entry point of our Next.js application. However, since all components within the app directory are server components by default, attempting to do so will result in errors because the QueryClientProvider can only be initialized on the client.
To resolve this, we must create a client-side provider where we can initialize the components. Then, we can safely wrap the client-side provider around the root children without encountering any errors.
To begin, let’s create a utils directory within the src directory. Within the utils folder, create a provider.tsx file and insert the following code:
src/utils/provider.tsx
"use client";

import React from "react";
import { QueryClientProvider, QueryClient } from "@tanstack/react-query";
import { ReactQueryDevtools } from "@tanstack/react-query-devtools";
import { ReactQueryStreamedHydration } from "@tanstack/react-query-next-experimental";

function Providers({ children }: React.PropsWithChildren) {
  const [client] = React.useState(new QueryClient());

  return (
    <QueryClientProvider client={client}>
      <ReactQueryStreamedHydration>{children}</ReactQueryStreamedHydration>
      <ReactQueryDevtools initialIsOpen={false} />
    </QueryClientProvider>
  );
}

export default Providers;
The ReactQueryStreamedHydration component from the experimental package enables the streaming of data from the server to the client.
Wrap the Provider Around the Root Children Prop
Next, we need to wrap the client-side provider we created earlier around the children prop of the root layout component. This ensures that the QueryClient is made available to all the client-side components within the app. To do this, open the src/app/layout.tsx file and make the following modifications:
src/app/layout.tsx
import Providers from "@/utils/provider";
import React from "react";
// import "./globals.css";

export const metadata = {
  title: "Create Next App",
  description: "Generated by create next app",
};

export default function RootLayout({
  children,
}: {
  children: React.ReactNode;
}) {
  return (
    <html lang="en">
      <body>
        <Providers>{children}</Providers>
      </body>
    </html>
  );
}
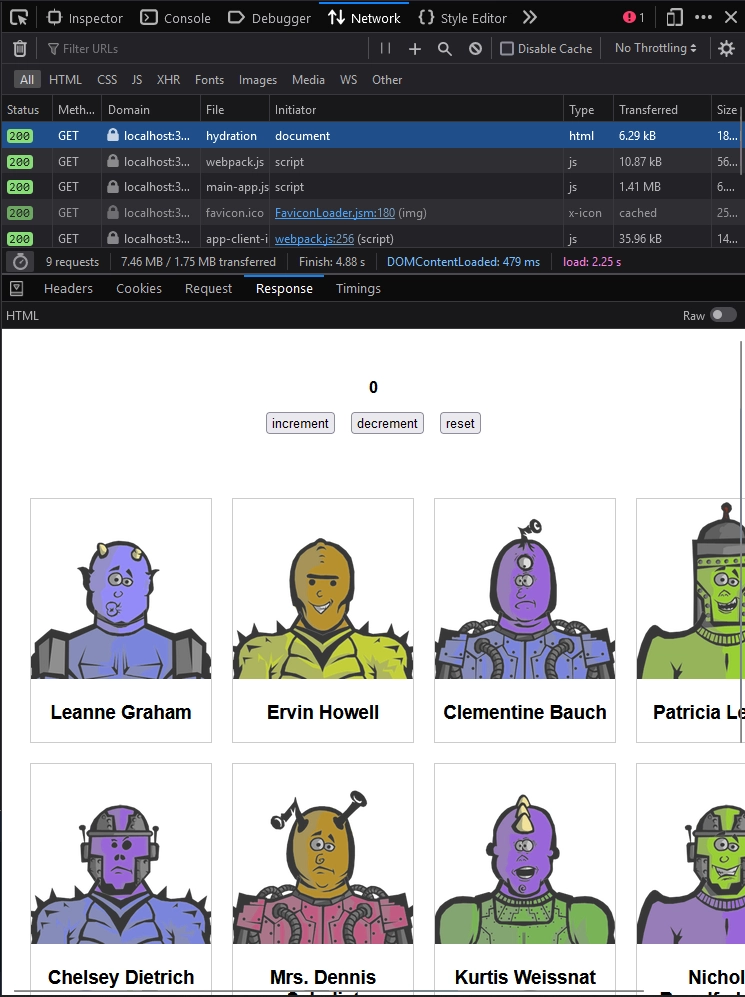
Use React Query for Data Fetching
Now we can start using useQuery from React Query to fetch data in our Next.js app. The only requirement is to set suspense: true in the useQuery options for this recommended approach to work. Here’s an example of how to use useQuery to fetch a list of users and display them in the UI:
src/app/hydration-stream-suspense/list-users.tsx
"use client";

import { User } from "../types";
import { useQuery } from "@tanstack/react-query";
import React from "react";

async function getUsers() {
  return (await fetch("https://jsonplaceholder.typicode.com/users").then(
    (res) => res.json()
  )) as User[];
}

export default function ListUsers() {
  const [count, setCount] = React.useState(0);
  const { data } = useQuery<User[]>({
    queryKey: ["stream-hydrate-users"],
    queryFn: () => getUsers(),
    suspense: true,
    staleTime: 5 * 1000,
  });

  React.useEffect(() => {
    const intervalId = setInterval(() => {
      setCount((prev) => prev + 1);
    }, 100);

    return () => {
      clearInterval(intervalId);
    };
  }, []);

  return (
    <>
      <p>{count}</p>
      {
        <div
          style={{
            display: "grid",
            gridTemplateColumns: "1fr 1fr 1fr 1fr",
            gap: 20,
          }}
        >
          {data?.map((user) => (
            <div
              key={user.id}
              style={{ border: "1px solid #ccc", textAlign: "center" }}
            >
              <img
                src={`https://robohash.org/${user.id}?set=set2&size=180x180`}
                alt={user.name}
                style={{ width: 180, height: 180 }}
              />
              <h3>{user.name}</h3>
            </div>
          ))}
        </div>
      }
    </>
  );
}
Wrap the Client Component in React Suspense
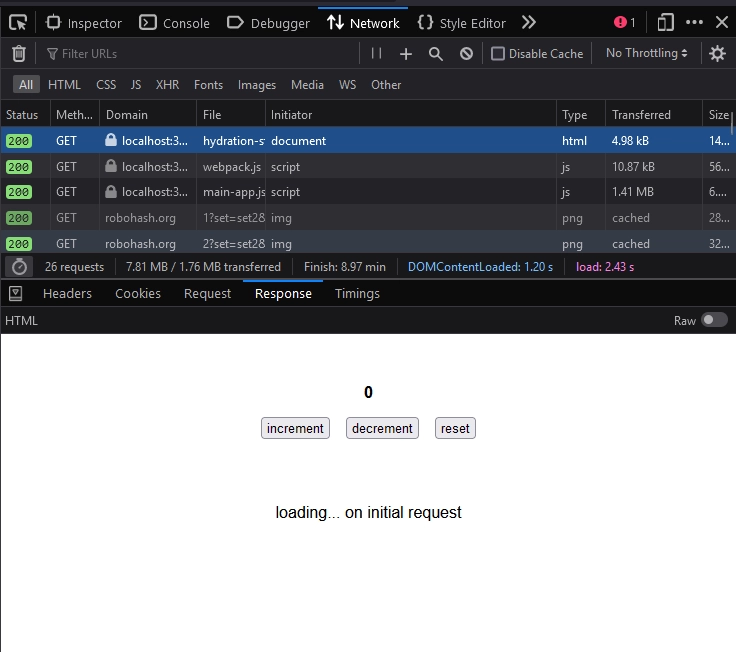
To render the ListUsers component we created earlier, we need to include it in the JSX of a page file. Since we included suspense: true in the useQuery options, we must wrap the <Suspense> component from React around the ListUsers component in order for the streaming of data from the server to the client to work.
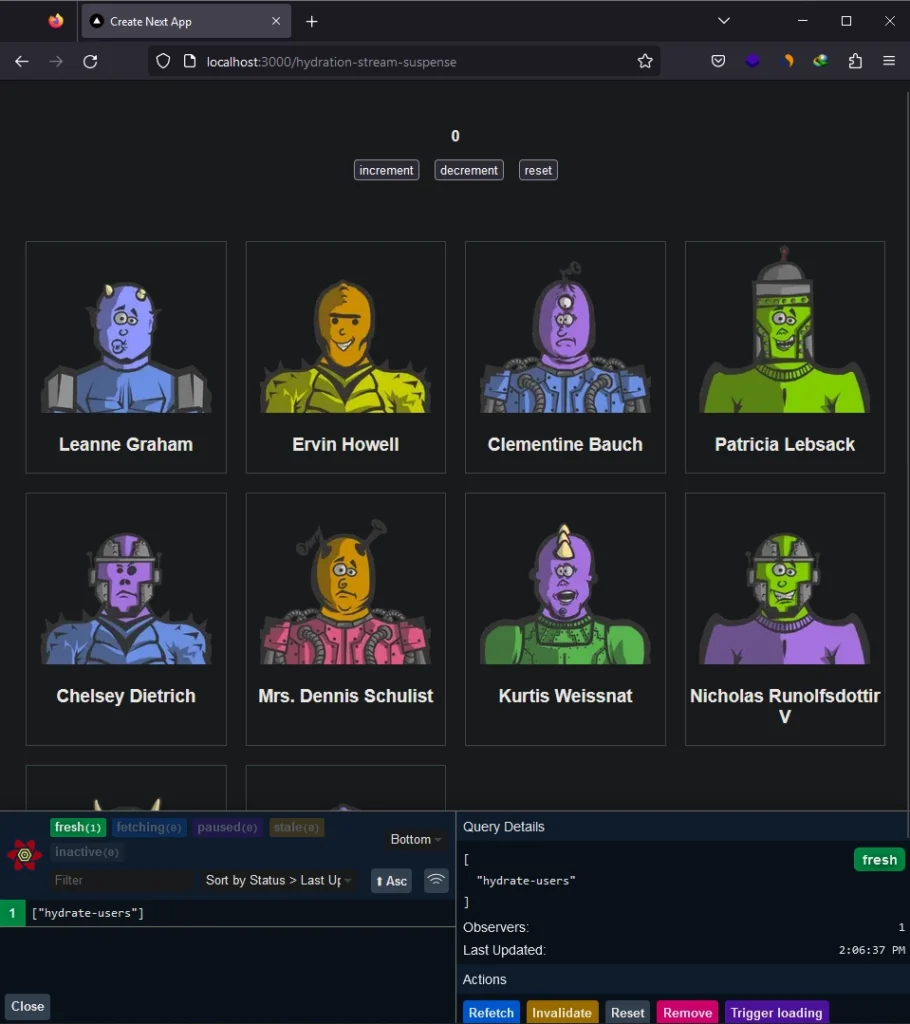
src/app/hydration-stream-suspense/page.tsx
import Counter from "./counter";
import ListUsers from "./list-users";
import { Suspense } from "react";

export default async function Page() {
  return (
    <main style={{ maxWidth: 1200, marginInline: "auto", padding: 20 }}>
      <Counter />
      <Suspense
        fallback={
          <p style={{ textAlign: "center" }}>loading... on initial request</p>
        }
      >
        <ListUsers />
      </Suspense>
    </main>
  );
}
If you want to see React Query in action in the new Next.js app directory, you can clone the project from https://github.com/wpcodevo/nextjs13-react-query and open it in your text editor. Take a look at the code or start the Next.js development server and open the application in your browser to test the different ways of using React Query in Next.js 13.
To verify if the data is initially fetched on the server, manually refresh the browser and check the terminal where the dev server is running. You should see the API request logged in the terminal, confirming that the data is being fetched on the server.

Because we are using Suspense boundaries to achieve data streaming from the server to the client, when you inspect the document in your browser’s dev tools, you will only see the loading component used in the fallback function. This is not good for SEO.
As of now, this is one of the drawbacks of using the @tanstack/react-query-next-experimental package. Nevertheless, it’s expected that future releases will address the SEO compatibility issue. In the meantime, if you require improved SEO, you can consider implementing the workarounds provided below.
Previous WorkArounds
The content within this section describes the previous ways we used React Query in the app directory. These approaches involved using tricks to make hydration work or passing initial data from a server component to a client component.
Create a Custom Query Client Provider
By default, all components in Next.js 13 are rendered on the server but React Query doesn’t work with Server Components. Therefore, we must create a custom provider to render the QueryClientProvider within a Client Component.
To ensure that the custom provider component only renders on the client-side, we can add "use client"; at the top of the file. This tells the server to skip rendering the custom provider component and render it only on the client-side.
To create this component, navigate to the ‘src‘ directory and create a new folder named ‘utils‘. Inside the ‘utils‘ folder, create a file named provider.tsx and add the following code.
src/utils/provider.tsx
"use client";

import React from "react";
import { QueryClientProvider, QueryClient } from "@tanstack/react-query";
import { ReactQueryDevtools } from "@tanstack/react-query-devtools";

function Providers({ children }: React.PropsWithChildren) {
  const [client] = React.useState(
    new QueryClient({ defaultOptions: { queries: { staleTime: 5000 } } })
  );

  return (
    <QueryClientProvider client={client}>
      {children}
      <ReactQueryDevtools initialIsOpen={false} />
    </QueryClientProvider>
  );
}

export default Providers;
Create a Request-scoped Instance of QueryClient
To prevent data from being shared across users and requests, while still ensuring that the QueryClient is only created once per request, we can create a request-scoped singleton instance of the QueryClient.
This will make prefetched queries available to all components further down the component tree, and allow us to fetch data within multiple Server Components and use <Hydrate> in multiple places.
You can create a getQueryClient.ts file in the ‘src/utils‘ directory and add the following code snippets in order to achieve this.
src/utils/getQueryClient.ts
import { QueryClient } from "@tanstack/query-core";
import { cache } from "react";

const getQueryClient = cache(() => new QueryClient());
export default getQueryClient;
Create a Custom Hydrate Component
In Next.js 13, there was an issue with prefetching data on the server using the <Hydrate> method, which was raised in the React Query GitHub issues. When we use the <Hydrate> component in a server component, we encounter an error. To work around this, we need to create a custom component that renders the <Hydrate> component on the client-side using the "use client" flag.
To create this custom hydrate component, simply create a file named hydrate.client.tsx in the ‘src/utils‘ directory and add the following code.
src/utils/hydrate.client.tsx
"use client";

import { Hydrate as RQHydrate, HydrateProps } from "@tanstack/react-query";

function Hydrate(props: HydrateProps) {
  return <RQHydrate {...props} />;
}

export default Hydrate;
Provide the QueryClient Provider to Next.js
Next, we’ll wrap the custom provider around the children of the RootLayout component to render the QueryClientProvider at the root. By doing so, all other Client Components across the app will have access to the query client.
As the RootLayout is a Server Component, the custom provider can directly render the QueryClientProvider since it’s marked as a Client Component.
To implement this, simply replace the contents of the layout.tsx file located in the ‘app‘ directory with the following code.
src/app/layout.tsx
import Providers from "@/utils/provider";
import React from "react";
// import "./globals.css";

export const metadata = {
  title: "Create Next App",
  description: "Generated by create next app",
};

export default function RootLayout({
  children,
}: {
  children: React.ReactNode;
}) {
  return (
    <html lang="en">
      <body>
        <Providers>{children}</Providers>
      </body>
    </html>
  );
}
Please keep in mind that it is best practice to render providers as deep as possible in the component tree. You may have noticed that in our example, the Providers component only wraps around the {children} prop instead of the entire <html> document. This allows Next.js to better optimize the static parts of your Server Components.
Prefetching Data Using Hydration and Dehydration
With React Query set up in our Next.js 13 project, we’re ready to demonstrate how it can be used to fetch data on the server, hydrate the state, dehydrate the cache, and rehydrate it on the client. To illustrate this, we’ll fetch a list of users from the https://jsonplaceholder.typicode.com/ API.
Since we’re using TypeScript, we’ll need to define the structure of the API’s response. To do this, create a types.ts file in the ‘app‘ directory and add the following TypeScript code.
src/app/types.ts
export type User = {
  id: number;
  name: string;
  email: string;
};
Create the Client-Side Component
Now let’s create a Client-side component that displays the list of users fetched from the https://jsonplaceholder.typicode.com/users endpoint.
When this component mounts, it can retrieve the dehydrated query cache if available but will refetch the query on the client if it has become stale since the time it was rendered on the server.
To create this component, navigate to the ‘app‘ directory and create a ‘hydration‘ folder. Inside the ‘hydration‘ folder, create a list-users.tsx file with the following code.
src/app/hydration/list-users.tsx
"use client";

import { User } from "../types";
import { useQuery } from "@tanstack/react-query";
import React from "react";

async function getUsers() {
  const res = await fetch("https://jsonplaceholder.typicode.com/users");
  const users = (await res.json()) as User[];
  return users;
}

export default function ListUsers() {
  const [count, setCount] = React.useState(0);

  const { data } = useQuery({
    queryKey: ["hydrate-users"],
    queryFn: () => getUsers(),
  });

  return (
    <main style={{ maxWidth: 1200, marginInline: "auto", padding: 20 }}>
      <div style={{ marginBottom: "4rem", textAlign: "center" }}>
        <h4 style={{ marginBottom: 16 }}>{count}</h4>
        <button onClick={() => setCount((prev) => prev + 1)}>increment</button>
        <button
          onClick={() => setCount((prev) => prev - 1)}
          style={{ marginInline: 16 }}
        >
          decrement
        </button>
        <button onClick={() => setCount(0)}>reset</button>
      </div>

      {
        <div
          style={{
            display: "grid",
            gridTemplateColumns: "1fr 1fr 1fr 1fr",
            gap: 20,
          }}
        >
          {data?.map((user) => (
            <div
              key={user.id}
              style={{ border: "1px solid #ccc", textAlign: "center" }}
            >
              <img
                src={`https://robohash.org/${user.id}?set=set2&size=180x180`}
                alt={user.name}
                style={{ height: 180, width: 180 }}
              />
              <h3>{user.name}</h3>
            </div>
          ))}
        </div>
      }
    </main>
  );
}
Create the Page Component
Next, we’ll create a Server Component that prefetches the query and passes the prefetched data to the list-users.tsx component.
When the Server Component renders, calls to useQuery nested inside the <Hydrate> Client Component will have access to the prefetched data that is provided in the state property.
To create this Server Component, go to the ‘hydration‘ directory and create a page.tsx file, then add the following code:
src/app/hydration/page.tsx
import getQueryClient from "@/utils/getQueryClient";
import Hydrate from "@/utils/hydrate.client";
import { dehydrate } from "@tanstack/query-core";
import ListUsers from "./list-users";
import { User } from "../types";

async function getUsers() {
  const res = await fetch("https://jsonplaceholder.typicode.com/users");
  const users = (await res.json()) as User[];
  return users;
}

export default async function Hydation() {
  const queryClient = getQueryClient();
  await queryClient.prefetchQuery(["hydrate-users"], getUsers);
  const dehydratedState = dehydrate(queryClient);

  return (
    <Hydrate state={dehydratedState}>
      <ListUsers />
    </Hydrate>
  );
}
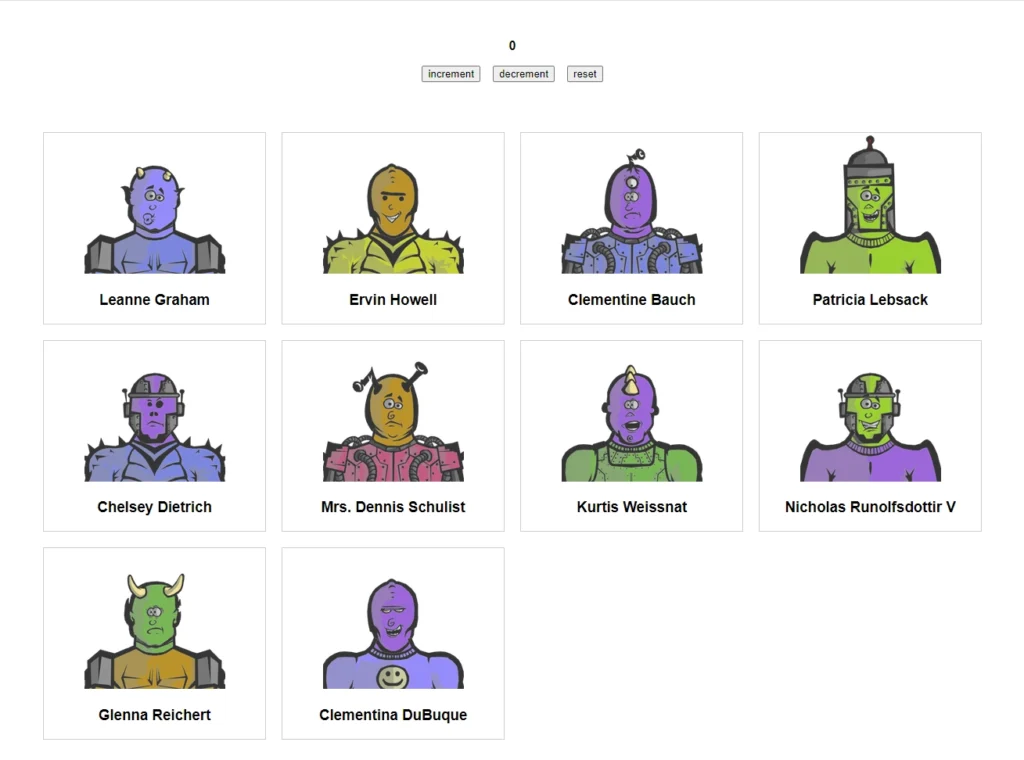
With this in place, when you visit http://localhost:3000/hydration and inspect the document in the Network tab of your browser’s development tools, you should see that the data is already available during the initial request, which is beneficial for SEO.
Prefetching Data Using Initial Data
Let’s explore how to transfer prefetched data from a Server Component, located at a higher level in the component hierarchy, to a Client-side component using props.
However, note that this approach is not recommended by the React Query team, and you should always aim to use the hydration and dehydration method for better performance and reliability.
Create the Client-Side Component
To implement this approach, we’ll create a new Client-side component that will accept the prefetched data as a prop and render it in the UI. Once the data becomes stale, the component will use React Query to refetch the data as usual.
Create a new folder called initial-data inside the ‘app‘ directory. Within this folder, create a file called list-users.tsx, and add the following code:
src/app/initial-data/list-users.tsx
"use client";

import { User } from "../types";
import { useQuery } from "@tanstack/react-query";
import React from "react";

async function getUsers() {
  const res = await fetch("https://jsonplaceholder.typicode.com/users");
  const users = (await res.json()) as User[];
  return users;
}

export default function ListUsers({ users }: { users: User[] }) {
  const [count, setCount] = React.useState(0);

  const { data } = useQuery({
    queryKey: ["initial-users"],
    queryFn: () => getUsers(),
    initialData: users,
  });
  return (
    <main style={{ maxWidth: 1200, marginInline: "auto", padding: 20 }}>
      <div style={{ marginBottom: "4rem", textAlign: "center" }}>
        <h4 style={{ marginBottom: 16 }}>{count}</h4>
        <button onClick={() => setCount((prev) => prev + 1)}>increment</button>
        <button
          onClick={() => setCount((prev) => prev - 1)}
          style={{ marginInline: 16 }}
        >
          decrement
        </button>
        <button onClick={() => setCount(0)}>reset</button>
      </div>

      {
        <div
          style={{
            display: "grid",
            gridTemplateColumns: "1fr 1fr 1fr 1fr",
            gap: 20,
          }}
        >
          {data.map((user) => (
            <div
              key={user.id}
              style={{ border: "1px solid #ccc", textAlign: "center" }}
            >
              <img
                src={`https://robohash.org/${user.id}?set=set2&size=180x180`}
                alt={user.name}
                style={{ height: 180, width: 180 }}
              />
              <h3>{user.name}</h3>
            </div>
          ))}
        </div>
      }
    </main>
  );
}
Create the Page Component
Let’s create a Server Component that prefetches the data and passes it as a prop to the list-users.tsx component.
To do this, create a page.tsx file in the initial-data folder and include the following code:
src/app/initial-data/page.tsx
import ListUsers from "./list-users";
import { User } from "../types";

async function getUsers() {
  const res = await fetch("https://jsonplaceholder.typicode.com/users");
  const users = (await res.json()) as User[];
  return users;
}

export default async function InitialData() {
  const users = await getUsers();

  return <ListUsers users={users} />;
}
When you visit http://localhost:3000/initial-data and inspect the Network tab in your browser’s dev tools, you will notice that the data was initially fetched on the server and then rendered on the client within the cards. This approach is beneficial for SEO since the data is available during server-side rendering and improves the page’s search engine visibility.
Conclusion
You can access the React Query and Next.js 13 project’s source code on GitHub.
Throughout this article, you learned how to set up React Query in the Next.js 13 app directory and explored two different ways to prefetch data supported by React Query.
I hope this article was helpful and enjoyable for you. If you have any feedback or questions, please leave a comment below. Thank you for reading!
Good Job
Thank you! I’m glad you enjoyed the article.
Thanks for the explanation. I guess axios can no longer be used for queries now?
You can definitely still use Axios for your queries. However, since Fetch API is now recommended for use in React Server Components, it might make more sense to use it along with React Query on the client-side for your queries.
If you find that Fetch API is limited for your specific use case, then you could choose to use Axios instead. Currently, everything looks good for React Query, but the question of how to handle hydration in the new Next.js 13 app directory remains.
I appreciate your post.
I’m a beginner, so I don’t think I understand properly. can I ask you a question?
So in Next.js v13, it’s best to use fetchAPI, and if I feel the limit while using fetchAPI, can I consider Axios then?
The
fetch()function provided in the Next.js app directory is a modified version of the Fetch API provided by the browser.It has some cool features like automatic request deduplication and the ability to set caching and revalidating options for each request.
Both the React and Next.js teams recommend using the
fetch()function for data fetching, so you can take advantage of these features. If you want to fetch data in client components, you can use the newuse()hook along withfetch(). If you need more info, I suggest checking out https://nextjs.org/docs/app/building-your-application/data-fetching.thank you soooooooo much Edem
Is there a point of using React Query anymore since Nextjs 13 with App router gives you a loading page, error page, and also the fetch() on superpowers?
Even though the Next.js 13 app router provides pages for handling loading and error states, React Query still retains its advantages when it comes to intelligent refetching features and caching.
Moreover, React Query can be utilized to manage other forms of asynchronous data, such as WebSocket streams or local storage.
For me, I believe that the new features in Next.js 13’s app router are useful for handling basic loading and error states. As for the Fetch API, I am already enjoying it along with the new `use` hook.
hey, thanks for the work on this… I tried to migrate my custom boilerplate to the hydrate solution and it kinda works. But it seems when loading the page that the data is being fetched on the client side only initially. With page routing the data that is fetched was rendered the same time the rest was rendered. Now its popping up after the asynchronous fetch is done. Am I missing something?
I’m happy to help! However, it’s tough to determine what might be missing without seeing your code.
While there isn’t yet an officially recommended approach to hydration with React Query in Next.js 13, some developers have used
InitialDatawith success, although it can lead to prop drilling in certain cases.I did come across this repository (https://github.com/2manoj1/poc-nextjs-13-react-query) that demonstrates how to implement Hydration with React Query in Next.js 13, which you might find helpful.
First , thanks for the post
I have a question ! What is the different between tanstack/query-core and tanstack/react-query ?
Is tanstack/react-query include code run on client ?
I’m glad you found the post helpful.
To answer your question,
@tanstack/query-coreand@tanstack/react-queryare both packages provided by the TanStack team, but they serve different purposes.@tanstack/query-coreis the core package of the TanStack Query library. It contains the essential functionality and utilities for managing asynchronous data in your application, including query fetching, caching, and mutation handling. It serves as the foundation for thereact-querypackage.On the other hand,
@tanstack/react-queryis a React-specific package that builds on top of@tanstack/query-core. It provides React hooks and components that allow you to easily integrate TanStack Query’s functionality into your React application.Great job Edem!
Thanks Morgan, I’m glad you found the article helpful.
Hi,
You may be able to inform me, I followed your tutorial but my data remains in ‘slate’ in the devtools
Do you know how i can fix this please ?
Thank u 🙂
That is the default behavior of React Query. When the data is fetched, it is immediately marked as
stale. However, you have the power to modify this behavior according to your requirements.To address the issue, you can adjust the
staleTimeduration in React Query. For example, you can set it to 5000 milliseconds (or 5 seconds).By doing this, after the data is fetched, React Query will consider it fresh and usable for the next 5 seconds. During this time, it won’t trigger unnecessary refetches. After the 5 seconds pass, React Query will automatically initiate a background refresh to update the data.
To implement this change, you have a couple of options. You can specify the
staleTimedirectly in the query by using theuseQueryhook. Alternatively, you can set it as a default value for all queries by modifying the configuration object of theQueryClient.With next 13.4.3 this line
await queryClient.prefetchQuery([‘key’], fetchApi) not working, failing with message saying createContext works only in client components.
queryClient is imported from the util (as defined in this tutorial)
Did you include the
"use client";pragma at the beginning of the file where thequeryClientis defined?Hi Edem nice post, ut i keep getting the error when i passed dehydratedState to state here
Error: Unhandled Runtime Error
Error: Maximum call stack size exceeded
What is the advantage of React Query while using static generation? We have here next cache and also infinity cacheTime on a server which is memory consumed as new client per request. IS there any reasons to rehydrate state of SSG page?
When you use React Query with static generation, you gain the benefits that React Query provides, such as efficient caching, improved performance, data consistency, and seamless client-side updates for your application.
In the case of rehydrating the state of the SSG page, it ensures that the data fetched on the server is available on the client-side during the initial request. This eliminates the need for additional data requests and allows the page to utilize the hydrated data.
We have published pages in a CDN delivered to users with a bit of js for hydration and interactivity. So where those prefetching queries are stored? Where the cache sitting in? How can we compare if the query stale or not? CI/CD is stateless. Can you elaborate on this a bit?
Usually, during the initial request, the server fetches the data and includes it in the HTML response sent to the browser. The prefetching queries are subsequently stored in the client-side cache. The cache sits within the user’s browser as part of the React Query library. The cache stores the results of the queries and their corresponding data.
To determine if the query is stale or up-to-date, I would have suggested using the React Query Devtools.
However, since you have deployed the project in a production environment, a simple
console.logwill do the trick. You can useconsole.logto output the value of theisStaleproperty and inspect it in your browser’s console. This way, you can observe the value ofisStaleand determine if the query data is considered stale or up-to-date.Regarding CI/CD being stateless, it means that the Continuous Integration and Continuous Deployment process doesn’t retain any state between different builds or deployments. Each build or deployment is treated as a separate and independent instance.
In the context of React Query, this means that the client-side cache is not persisted across different deployments. However, the cache can still be utilized within the scope of a single user session.
I hope this explanation helps you understand how React Query handles caching, detects stale data, and deals with the statelessness of CI/CD. If you still have any concerns or questions, I recommend reaching out to the React Query community on GitHub. There, you can interact with other developers and gather various insights and opinions on the topic.
In case you’re debating on using React Query with Nextjs 13, this article might help https://tkdodo.eu/blog/you-might-not-need-react-query
// app/getQueryClient.jsx
import { QueryClient } from “@tanstack/react-query”;
import { cache } from “react”;
const getQueryClient = cache(() => new QueryClient());
export default getQueryClient;
Using this getQUeryClient for invalidating gives following error:
“`
export const ProductList = () => {
const queryClient = getQueryClient();
const { data, isLoading, isFetching, error } = useQuery({
queryKey: [“hydrate-users”],
queryFn: () => getProducts(),
});
return (
{
queryClient.getQueriesData(“hydrate-users”);
}}>Revalidate
{/* Rest of the code */}
);
};
No overload matches this call.
Overload 1 of 2, ‘(queryKey: QueryKey): [QueryKey, unknown][]’, gave the following error.
Argument of type ‘string’ is not assignable to parameter of type ‘QueryKey’.
Overload 2 of 2, ‘(filters: QueryFilters): [QueryKey, unknown][]’, gave the following error.
Type ‘”hydrate-users”‘ has no properties in common with type ‘QueryFilters’.
“`
The error message indicates that the
queryKeyparameter should be of typeQueryKey, but it’s currently being passed as a string with the value"hydrate-users".To resolve this issue, modify the code to pass the query key as an array like
["hydrate-users"]:queryClient.getQueriesData(["hydrate-users"]);what a nice post!
Hi, thanks for the post!
I have just one issue, next 13 throws an error: “Error: Not implemented.” when using react cache on line: “getQueryClient = cache(() => queryClient)”.
Do you know how to solve this error?
I’m using react version 18.2.0 and next version 13.4.6
You are absolutely right about the “Error: Not implemented” issue. At the moment, I don’t know the cause of this error. I have thoroughly reviewed the Next.js documentation on caching with React Cache, specifically the section on
cache()function usage (https://nextjs.org/docs/app/building-your-application/data-fetching/caching#react-cache), but I couldn’t find any explanation or guidance on error handling for this particular scenario.In my attempts to troubleshoot the issue, I even created an
error.tsxfile to test if the error would persist, but unfortunately, it still occurred. It’s possible that someone has already raised this issue on the Next.js GitHub page, and I recommend checking there for any ongoing discussions or solutions.However, I encourage you to raise the issue yourself as well, as this will allow the experts on the Next.js GitHub page to provide specific guidance and assistance.
Can you share the github link ? Can’t find it.
Oops, I thought I included the GitHub link in the article. Nonetheless, you can find it at https://github.com/wpcodevo/nextjs13-react-query.
Hey Edem thanks a lot for this great tutorial. Although I can’t seem to be able to use useEffect or other react hooks like useState inside the listusers page even though it is use Client. Is this supposed to happen, will i have to use client side rendering?
No, you should be able to use any React hooks inside the
list-users.tsxpage since we included"use client"at the top of the file. I just used theuseEffecthook in thesrc\app\hydration-stream-suspense\list-users.tsxfile, and it works as expected. You can rungit pullto retrieve the latest changes and see how I implemented it.Thank you Edem it now works!
Also, if one where to make a loading screen, would you put it in the page.tsx Suspense fallback function or inside the user-lists as the isFetching or isLoading conditional rendering, pros and cons? Thank you in advance.
The loading screen or component that is placed in the Suspense fallback function will only be displayed the first time the user visits the page or if the page is reloaded, as these requests are made on the server during server-side rendering.
However, the loading screen in the
user-listscomponent, which is based on theisFetchingorisLoadingstates, will be shown during client-side navigations. In the case of React Query, when you refocus on the tab, the loading screen in theuser-listscomponent will be shown, as the request is made on the client.To ensure a consistent loading experience for users, you can create a skeleton UI component that can be used both in the Suspense fallback function and the
user-listspage. This way, regardless of whether the request is made during server-side rendering or client-side navigation, users will see the same loading screen design.Additionally, if your application’s data doesn’t frequently change, you can set the query cache to infinity. By doing so, the cache won’t expire, and you won’t need to display a loading screen when the tab regains focus or during client-side navigation.
This means that only the loading screen placed in the Suspense fallback function will be shown during the initial page request or when the user reloads the page.
Hi All,
Edem thanks for this great article.
I wonder if anyone has encountered the problem with @tanstack/react-query-devtools installation
code ERESOLVE
npm ERR! ERESOLVE could not resolve
npm ERR!
npm ERR! While resolving: @tanstack/react-query-next-experimental@5.0.0-alpha.80
npm ERR! Found: @tanstack/react-query@4.29.25
npm ERR! node_modules/@tanstack/react-query
npm ERR! @tanstack/react-query@”^4.29.25″ from the root project
npm ERR! peer @tanstack/react-query@”4.29.25″ from @tanstack/react-query-devtools@4.29.25
npm ERR! node_modules/@tanstack/react-query-devtools
npm ERR! @tanstack/react-query-devtools@”4.29.25″ from the root project
npm ERR!
npm ERR! Could not resolve dependency:
npm ERR! peer @tanstack/react-query@”5.0.0-alpha.71″ from @tanstack/react-query-next-experimental@5.0.0-alpha.80
npm ERR! node_modules/@tanstack/react-query-next-experimental
npm ERR! @tanstack/react-query-next-experimental@”^5.0.0-alpha.80″ from the root project
npm ERR!
npm ERR! Conflicting peer dependency: @tanstack/react-query@5.0.0-alpha.71
npm ERR! node_modules/@tanstack/react-query
npm ERR! peer @tanstack/react-query@”5.0.0-alpha.71″ from @tanstack/react-query-next-experimental@5.0.0-alpha.80
npm ERR! node_modules/@tanstack/react-query-next-experimental
npm ERR! @tanstack/react-query-next-experimental@”^5.0.0-alpha.80″ from the root project
that’s what I have got
I am aware of this error. It mostly happens when using NPM. That’s why I prefer to use
YarnorPNPMin most of my projects.To resolve this error, you need to add the
--forceflag while installing the package. So it will look likenpm i @tanstack/react-query-devtools --force.Thank you, that works
Hey friend, that’s a freaking cool addition, funny enough that when I use `next@13.4.12`, it still sends an initial request from client side as well, looks like they changed something, when I use the version from your repo (`13.4.10`). Looks like they’ve changed something and experimental react-query version hasn’t caught up yet. Maybe it’s worth noting that somewhere in the beginning so people don’t bang their heads against the wall, nonetheless great article, thanks a lot!
You’re right! I just tested both versions as you described, and it seems they’ve made some changes in the
next@13.4.12version. This change causes the initial request to happen on the client-side.I also checked the SEO compatibility, and it appears that the approach recommended by the React Query team, using the Suspense boundary for data streaming, is not currently SEO-friendly. When you inspect the document in the Network tab, you’ll only see the loading component used in the fallback function of the Suspense component.
On the other hand, the workaround approach mentioned in the article, which involves custom hydration and initial data, shows good SEO support.
To see this in action, you can pull the recent changes I made to the project’s repository by running the command
git pull. I made some adjustments to the source code for testing purposes.hi, i really like your whole article. so inspiring
Thanks, I’m glad you found the article inspiring.
Hi Edem,
How do I invalidate queries with this approach?
Maybe the singleton isn’t working?:
const useLogin = (): UseLoginHandler => {
const client = getQueryClient();
const { data, mutateAsync, isSuccess, isError, error } =
useDjRestAuthLoginCreate({
mutation: {
mutationKey: [“user-login”],
onSuccess: () => {
const queriesToInvalidate = [“user-me”];
client.invalidateQueries({ queryKey: queriesToInvalidate });
},
},
});
After successfully logging in, my “user-me” query remains stale.
It remains stale because you are passing in the wrong query key. You need to copy the correct query key from the React Query devtool and use it in the
client.invalidateQueries()method.The query key was correct, just the singleton wasn’t working for me somehow.
instead of using client = getQueryClient(), i am now using:
import { useQueryClient } from “@tanstack/react-query”;
const client = useQueryClient();
And now “user-me” does revalidate.
Thanks man, great article
Soo….Comprehensive! Thanks a lot
Thanks for your work. I have a question. It seems we are sending same request twice, one in server component one in client component, which seems ugly to me at first sight, why this is necessary, is the second request gets data from cache?
It was a known problem, but I’m confident it will be resolved in future versions.
When I update the database, the new data is not cached. What should I do?
Would Next.js’ fetch function caching mechanism mess with the React Query’s cache and vice-versa? Any tips for using them together?