
In this article, you will learn how to build a basic RESTful API in the new Next.js 13 app directory. Next.js 13.2 introduced a new approach to building APIs in the App Router (app), where we can create custom request handlers for a given route using the Web Request and Response APIs.
To get started, all you need to do is create a special file named route.ts in the API folder available in the app directory, which exports an async function named after the HTTP verbs: GET, HEAD, OPTIONS, POST, PUT, DELETE, and PATCH.
In this tutorial, we will be building an API for a feedback application, and in a later article, we will build the frontend for the API. For now, we will only focus on the API side of things and use Prisma to store the data in a SQLite database.
Before we get started, I would like to give a shoutout to Brad Traversy, who originally created this feedback application in Svelte. Please check out his work and show him some love. Without further ado, let’s dive into the tutorial and explore how we can build an API in the new Next.js 13 app directory.
More practice:
- Build a Simple Frontend App in Next.js 13 App Directory
- How to Setup Prisma ORM in Next.js 13 App Directory
- How to Setup React Context API in Next.js 13 App Directory
- How to Setup React Query in Next.js 13 App Directory
- How to Setup Redux Toolkit in Next.js 13 App Directory
- Setup tRPC Server and Client in Next.js 13 App Directory
- Setup and Use NextAuth.js in Next.js 13 App Directory
- React Query and Axios: User Registration and Email Verification
- Forgot/Reset Passwords with React Query and Axios
Run the API Project on your Machine
To run the Next.js project on your computer, follow these steps:
- Make sure you have PNPM installed on your machine. If you don’t have it yet, you can visit their website for installation instructions: https://pnpm.io/installation.
- Download or clone the project from its repository on GitHub at https://github.com/wpcodevo/nextjs13-simple-app. Once you have access to the project, open it in your preferred IDE.
- Install all the project’s dependencies by running the command
pnpm install. - Apply the Prisma migrations to the SQLite database by running the command
pnpm prisma db push. - Start the Next.js development server by running
pnpm dev. - To test the API endpoints, import the
Feedback App API.postman_collection.jsonfile into Postman or the Thunder Client VS Code extension. This file contains predefined requests that you can use to add, edit, view, and delete feedback items.
Setup the Next.js 13 Project
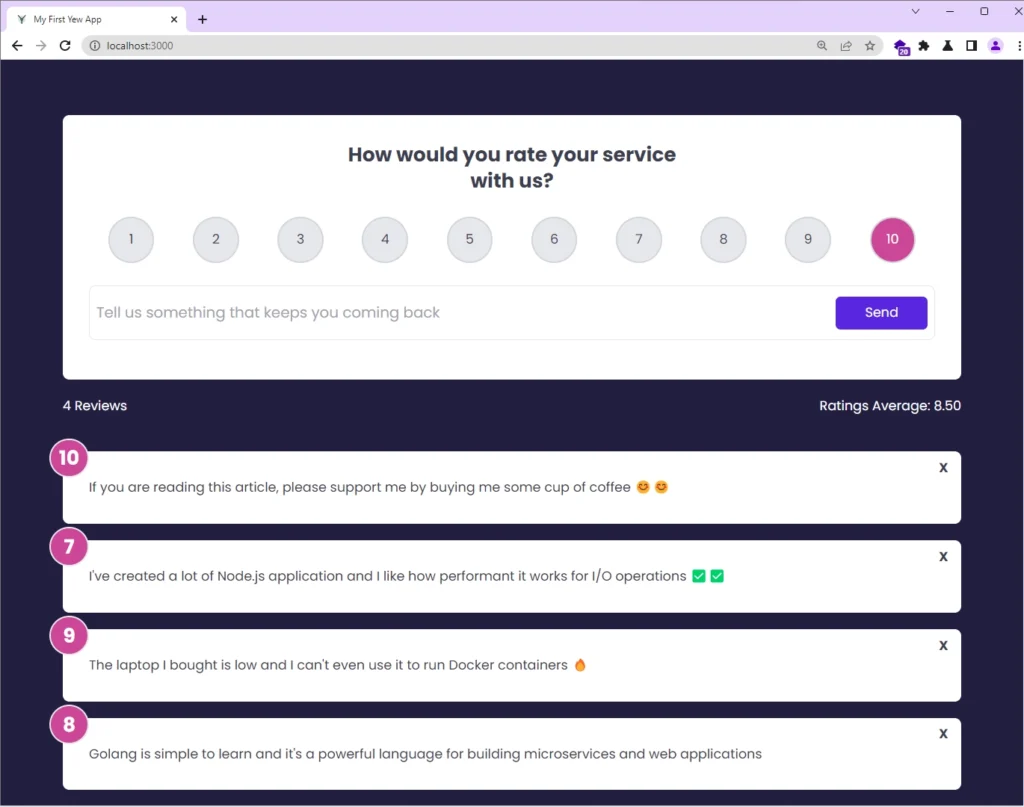
As we mentioned earlier, we’ll only be creating the API for the feedback application in this tutorial. However, to give you a preview of what the application will look like, I’ve included a screenshot below. By the end of this tutorial, you will have a fully functional API that can perform CRUD operations (Create, Read, Update, Delete) for feedback items stored in a SQLite database.
To get started, choose a location on your computer where you’d like to create the project – for instance, a folder on your Desktop. Then, open a terminal in that directory and use one of the commands below based on your preferred package manager to scaffold the Next.js project.
yarn create next-app nextjs13-simple-app
# or
npx create-next-app@latest nextjs13-simple-app
# or
pnpm create next-app nextjs13-simple-app
After executing the command above, a prompt will appear requesting to enable certain features. It is recommended to choose “Yes” for both TypeScript and ESLint options as they are crucial for developing robust and maintainable applications.
Next, you’ll be prompted to enable the src/ directory. Choose “Yes” for this option. Additionally, select “Yes” when asked to enable the experimental app directory. This directory is where you will build your API, and enabling it will ensure that you have access to all the necessary tools and configurations.
As for the import alias, you can simply press TAB and then Enter to accept the default option. This alias simplifies the process of importing modules by eliminating the need for lengthy and complicated paths like ../../../components/button.
Once you’ve responded to these prompts, the scaffolding process will begin, and all the required dependencies will be automatically installed. After the installation is complete, you can open the project in your preferred IDE or text editor.
Database Migration with Prisma ORM
Now it’s time to install both the Prisma CLI and the Client, which we’ll need to initialize Prisma in the project and interact with the SQLite database. To do so, run the following command:
pnpm add @prisma/client
pnpm add -D prisma
# or
yarn add @prisma/client
yarn add -D prisma
# or
npm i @prisma/client
npm i -D prisma
With the necessary packages installed, we can now initialize Prisma in the project. However, since we are using SQLite as our database, we must pass the --datasource-provider sqlite flag to the Prisma CLI to ensure that it recognizes SQLite as the data source provider. To do this, run the following command to initialize Prisma:
pnpm prisma init --datasource-provider sqlite
# or
yarn prisma init --datasource-provider sqlite
# or
npx prisma init --datasource-provider sqlite
After running the initialization command, the Prisma CLI will generate a ‘prisma‘ directory in the root directory. Inside this directory, you’ll find a schema.prisma file, which is the main configuration file for your Prisma project. Additionally, a .env file will be created to store the connection URL for your SQLite database.
To define the model for a feedback item, open the prisma/schema.prisma file and add the following model to it:
prisma/schema.prisma
generator client {
  provider = "prisma-client-js"
}

datasource db {
  provider = "sqlite"
  url      = env("DATABASE_URL")
}

model Feedback {
  id        String   @id @default(uuid())
  text      String   @unique
  rating    Float
  createdAt DateTime @default(now())
  updatedAt DateTime @updatedAt
}
Now that we’ve added the feedback model to the schema.prisma file, it’s time to generate migrations for it. These migrations will allow us to easily apply or revert changes to the database schema.
To generate the migrations and push the schema to the SQLite database, run the following command:
pnpm prisma migrate dev --name init
# or
npm prisma migrate dev --name init
# or
yarn prisma migrate dev --name init
This command will also generate the Prisma Client in the node_modules folder.
Initialize the Prisma Client
Now that we have successfully synced the SQLite schema with the Prisma schema, we can start using the Prisma Client to read and write data to the database. However, before we can do that, we need to create a single instance of the Prisma Client and export it as a module that can be used across all the files in our project.
Having a single instance of the Prisma Client offers many advantages, such as ensuring that transactions are handled correctly across multiple files, which helps to maintain data consistency and integrity.
To achieve this, we’ll create a new directory named ‘lib‘ within the ‘src‘ directory. Within this new directory, we’ll create a file named prisma.ts and add the following code to it:
src/lib/prisma.ts
import { PrismaClient } from "@prisma/client";

const globalForPrisma = global as unknown as { prisma: PrismaClient };

export const prisma =
  globalForPrisma.prisma ||
  new PrismaClient({
    log: ["query"],
  });

if (process.env.NODE_ENV != "production") globalForPrisma.prisma;
Create the CRUD API in Next.js 13 Route Handlers
With the Prisma set up now complete, we can proceed to create the API route handlers responsible for handling CRUD API requests to interact with the feedback data in the database. The endpoints we will be creating are:
| HTTP VERB | URL PATH | Endpoint Summary |
|---|---|---|
| POST | /api/feedbacks | Creates a new feedback item |
| GET | /api/feedbacks | Retrieves all feedback items |
| GET | /api/feedbacks/:id | Retrieves a single feedback item by ID |
| PATCH | /api/feedbacks/:id | Updates an existing feedback item |
| DELETE | /api/feedbacks/:id | Deletes a feedback item by ID |
Each endpoint serves a specific purpose, and the table provides a clear overview of what each endpoint does, along with its corresponding HTTP method and URL path.
Handle GET and POST Requests
Let’s start by creating the handlers for adding new feedback items and retrieving all feedback items. In Next.js 13.2, we can define these handlers by creating a folder for the resource and adding a route.ts file within it. For our feedback API, we’ll create a feedbacks folder within the src/app/api directory.
Once the folder is created, we can create the GET and POST handler functions in the ‘route.ts‘ file. The GET handler will be called when a GET request is made to the /api/feedbacks endpoint, while the POST handler will be called when a POST request is made to the same endpoint.
To begin, navigate to the src/app/api directory and create a new folder called feedbacks. Then, create a ‘route.ts‘ file within this folder and add the import statements below.
src/app/api/feedbacks/route.ts
import { prisma } from "@/lib/prisma";
import { NextRequest, NextResponse } from "next/server";
Fetch All Records
This API route function is designed to handle GET requests to the /api/feedbacks endpoint. Upon invocation, it will extract the ‘page‘ and ‘limit‘ query parameters from the request URL using the searchParams property. In case these query parameters are not present in the request, the function will use default values of 1 for ‘page‘ and 10 for ‘limit‘.
Next, the function will call the prisma.feedback.findMany() method, passing in the ‘skip‘ and ‘take‘ values to retrieve the relevant feedback records from the database. The ‘skip‘ parameter is used to determine the number of records to skip before starting to retrieve records, while the ‘take‘ parameter limits the number of records to retrieve.
Lastly, a new object will be constructed to hold the list of feedbacks and the number of feedbacks returned. The object will then be returned to the client in the form of a JSON response, using the NextResponse.json() method.
To implement this API route function, copy the code below and add it to the feedbacks/route.ts file.
src/app/api/feedbacks/route.ts
export async function GET(request: NextRequest) {
  const page_str = request.nextUrl.searchParams.get("page");
  const limit_str = request.nextUrl.searchParams.get("limit");

  const page = page_str ? parseInt(page_str, 10) : 1;
  const limit = limit_str ? parseInt(limit_str, 10) : 10;
  const skip = (page - 1) * limit;

  const feedbacks = await prisma.feedback.findMany({
    skip,
    take: limit,
  });

  let json_response = {
    status: "success",
    results: feedbacks.length,
    feedbacks,
  };
  return NextResponse.json(json_response);
}
Insert a Single Record
Our next API route function will handle POST requests to the /api/feedbacks endpoint. When called, it will retrieve the request payload using the request.json() method and pass the parsed JSON data to the prisma.feedback.create() method to insert the new record into the database.
If the creation of feedback is successful, the newly created feedback will be returned in the JSON response. However, if a feedback with the provided text content already exists in the database or an unknown error occurs, an error response containing the error message will be returned to the client.
src/app/api/feedbacks/route.ts
export async function POST(request: Request) {
  try {
    const json = await request.json();

    const feedback = await prisma.feedback.create({
      data: json,
    });

    let json_response = {
      status: "success",
      data: {
        feedback,
      },
    };
    return new NextResponse(JSON.stringify(json_response), {
      status: 201,
      headers: { "Content-Type": "application/json" },
    });
  } catch (error: any) {
    if (error.code === "P2002") {
      let error_response = {
        status: "fail",
        message: "Feedback with title already exists",
      };
      return new NextResponse(JSON.stringify(error_response), {
        status: 409,
        headers: { "Content-Type": "application/json" },
      });
    }

    let error_response = {
      status: "error",
      message: error.message,
    };
    return new NextResponse(JSON.stringify(error_response), {
      status: 500,
      headers: { "Content-Type": "application/json" },
    });
  }
}
Handle GET, PATCH, and DELETE Requests
Let’s proceed to implement the remaining API route handlers, which will enable us to edit, get, and delete a feedback from the database. Since these handlers will be dynamically evaluated, you need to create a new folder called [id] in the src/app/api/feedbacks directory. Within this folder, you can create the route.ts file that will contain the route handler functions.
Once the file is created, you can proceed to add the following import statements to it:
src/app/api/feedbacks/[id]/route.ts
import { prisma } from "@/lib/prisma";
import { NextResponse } from "next/server";
Retrieve a Single Record
When a GET request is made to the /api/feedbacks/:id endpoint, this route function will be called to retrieve a feedback record with the specified ID.
To do so, it will first extract the ID parameter from the request URL and use the prisma.feedback.findUnique() method to retrieve the corresponding record.
If the feedback object is not found, the function will return a JSON response with a 404 status code and an error message. Otherwise, it will return a JSON response with a success status code and the feedback data.
src/app/api/feedbacks/[id]/route.ts
export async function GET(
  request: Request,
  { params }: { params: { id: string } }
) {
  const id = params.id;
  const feedback = await prisma.feedback.findUnique({
    where: {
      id,
    },
  });

  if (!feedback) {
    let error_response = {
      status: "fail",
      message: "No Feedback with the Provided ID Found",
    };
    return new NextResponse(JSON.stringify(error_response), {
      status: 404,
      headers: { "Content-Type": "application/json" },
    });
  }

  let json_response = {
    status: "success",
    data: {
      feedback,
    },
  };
  return NextResponse.json(json_response);
}
Edit a Single Record
When a PATCH request is made to the /api/feedbacks/:id endpoint, this function will be called to update the feedback item in the database.
First, the function will retrieve the ID of the feedback item from the request URL. Then, it will parse the JSON payload from the request body using the request.json() method.
Using the parsed JSON data, the function will call the prisma.feedback.update() method to update the feedback item that matches the query.
If the update is successful, the function will return a JSON response with a success status code and the updated feedback data. However, if no record with the provided ID exists in the database, the function will return a JSON response with a 404 Not Found status code.
In case of an unexpected error, the function will return a 500 Internal Server error.
src/app/api/feedbacks/[id]/route.ts
export async function PATCH(
  request: Request,
  { params }: { params: { id: string } }
) {
  try {
    const id = params.id;
    let json = await request.json();

    const updated_feedback = await prisma.feedback.update({
      where: { id },
      data: json,
    });

    let json_response = {
      status: "success",
      data: {
        feedback: updated_feedback,
      },
    };
    return NextResponse.json(json_response);
  } catch (error: any) {
    if (error.code === "P2025") {
      let error_response = {
        status: "fail",
        message: "No Feedback with the Provided ID Found",
      };
      return new NextResponse(JSON.stringify(error_response), {
        status: 404,
        headers: { "Content-Type": "application/json" },
      });
    }

    let error_response = {
      status: "error",
      message: error.message,
    };
    return new NextResponse(JSON.stringify(error_response), {
      status: 500,
      headers: { "Content-Type": "application/json" },
    });
  }
}
Delete a Single Record
Finally, let’s create the last route function, responsible for deleting a feedback item from the database. This function will be called when a DELETE request is made to the /api/feedbacks/:id endpoint.
Upon invocation, it will retrieve the ID parameter from the request URL and use the prisma.feedback.delete() method to delete the record that matches the query.
If the deletion is successful, a 204 No Content response will be returned to the client. However, if no record with the provided ID exists in the database, a 404 Not Found error will be returned.
src/app/api/feedbacks/[id]/route.ts
export async function DELETE(
  request: Request,
  { params }: { params: { id: string } }
) {
  try {
    const id = params.id;
    await prisma.feedback.delete({
      where: { id },
    });

    return new NextResponse(null, { status: 204 });
  } catch (error: any) {
    if (error.code === "P2025") {
      let error_response = {
        status: "fail",
        message: "No Feedback with the Provided ID Found",
      };
      return new NextResponse(JSON.stringify(error_response), {
        status: 404,
        headers: { "Content-Type": "application/json" },
      });
    }

    let error_response = {
      status: "error",
      message: error.message,
    };
    return new NextResponse(JSON.stringify(error_response), {
      status: 500,
      headers: { "Content-Type": "application/json" },
    });
  }
}
Congratulations on completing the project! You can now start the Next.js development server. If the server starts without errors, it means you have successfully followed the instructions. To test the API endpoints, please refer to the section below.
Test the CRUD API
With the Next.js server now up and running, we’re ready to test the API’s CRUD functionalities by making requests to the server. To streamline the process, I’ve added a Postman collection named Feedback App API.postman_collection.json to the project repository, which you can easily import into either Postman or the Thunder Client VS Code extension.
Once you have access to the API collection, you’ll be able to seamlessly add, edit, retrieve, and delete feedbacks from the database.
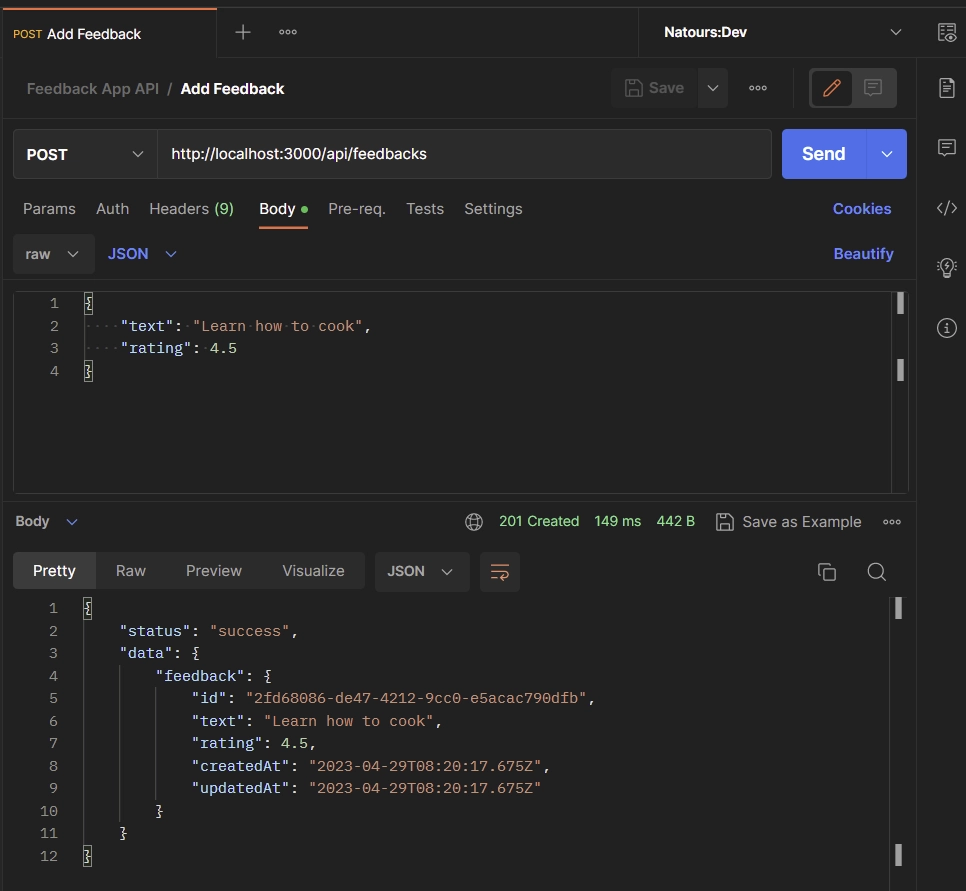
Add a Feedback Item
To add a new feedback, include the feedback text and rating in the request body and make a POST request to the /api/feedbacks endpoint.
{
    "text": "Learn how to cook",
    "rating": 4.5
}
If the feedback is successfully added to the database, a JSON response containing the newly-created feedback will be returned.
Get a Feedback Item
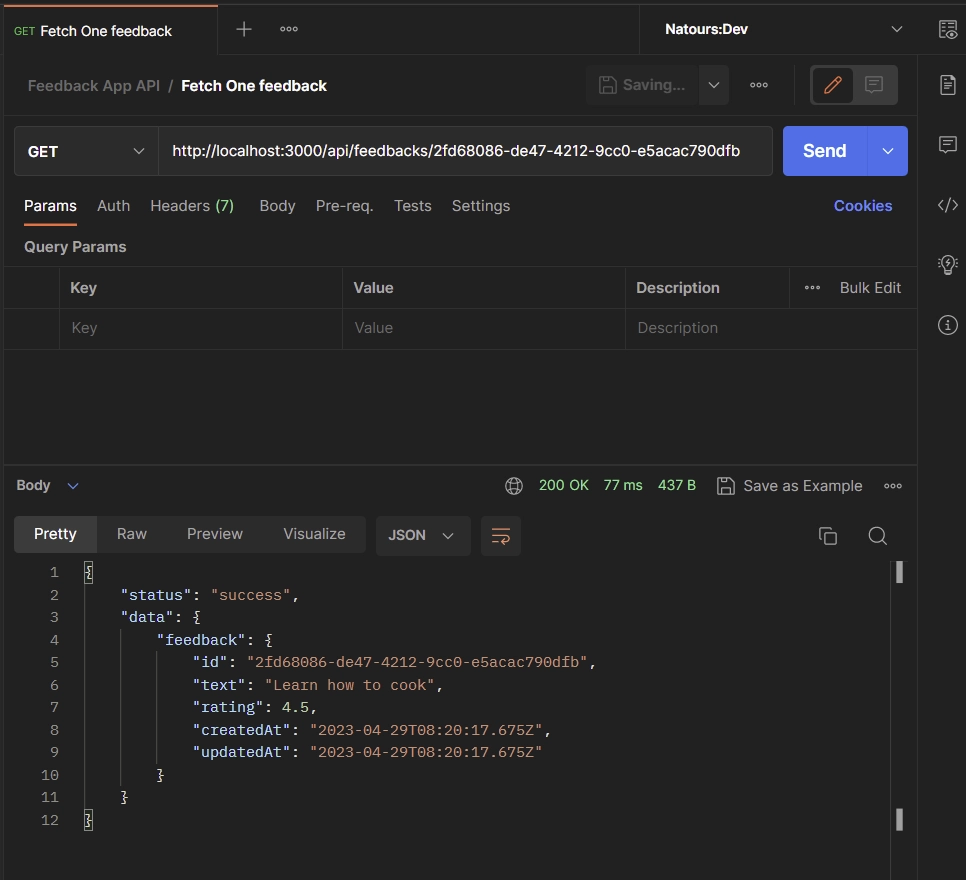
If you want to fetch a specific feedback from the database, you can simply provide the ID of the feedback as a URL parameter and send a GET request to the /api/feedbacks/:id endpoint, where :id should be replaced with the actual ID. This will retrieve the corresponding feedback data from the database and return it in a JSON response.
Edit a Feedback Item
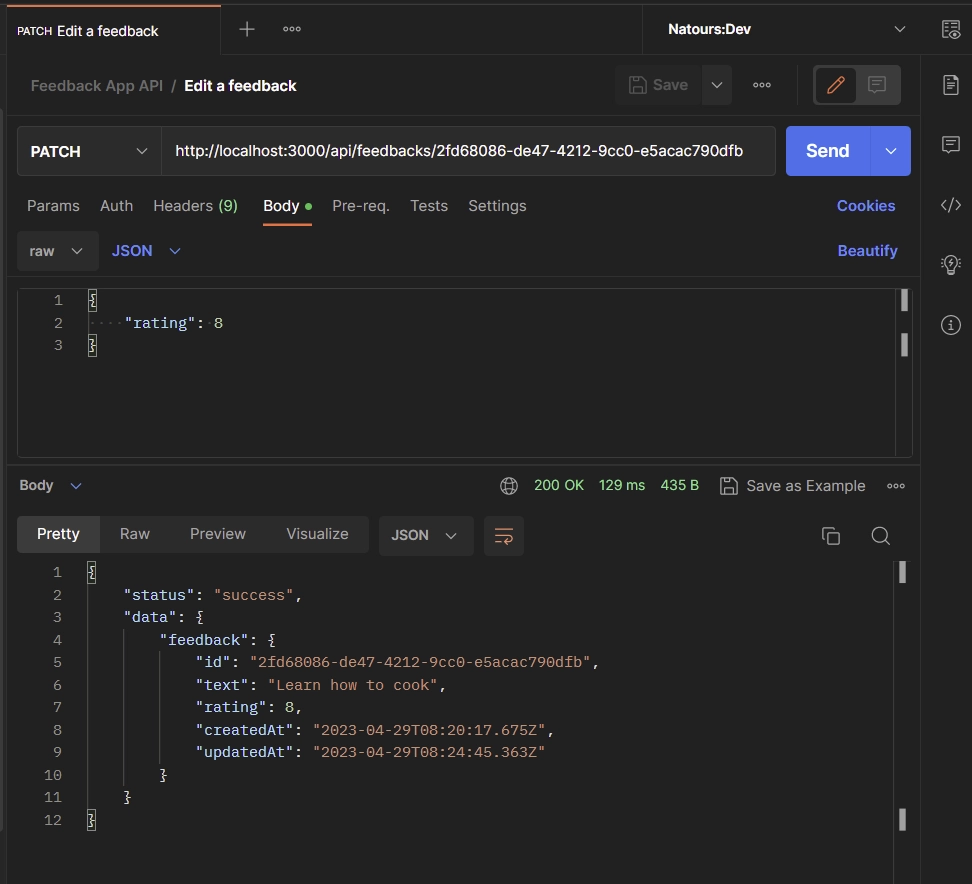
Let’s say you want to update the rating of a specific feedback in the database. To do this, you can provide the new rating in the request body and send a PATCH request to the /api/feedbacks/:id endpoint, where :id represents the ID of the feedback.
{
    "rating": 8
}
The API will find and update the feedback that matches the provided ID, using the data from the request body. After the update, the updated version of the feedback will be returned in the JSON response.
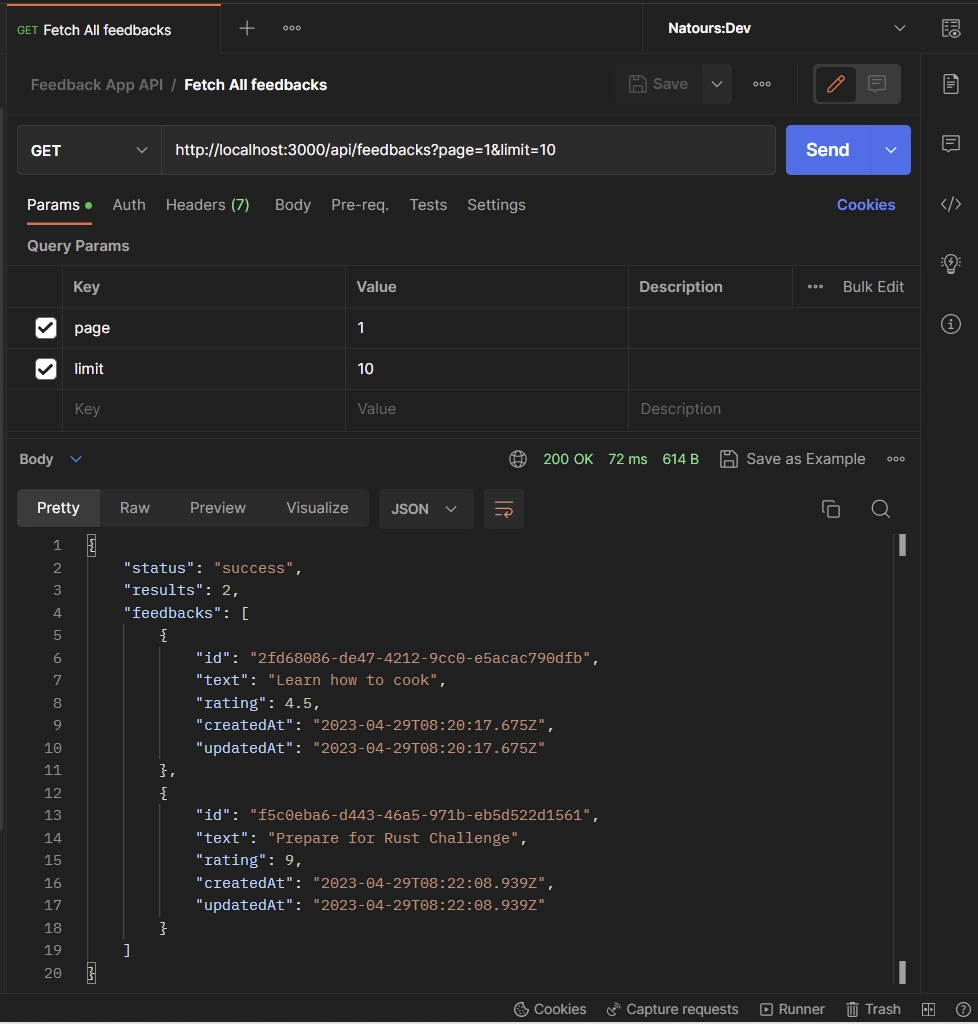
Fetch All the Feedback Items
If you need to retrieve a paginated list of feedbacks from the database, you can simply send a GET request to the /api/feedbacks endpoint with the page and limit parameters included in the URL. For instance, /api/feedbacks?page=1&limit=10 will return the first ten records. If you don’t provide these parameters, the API will only return the first ten records.
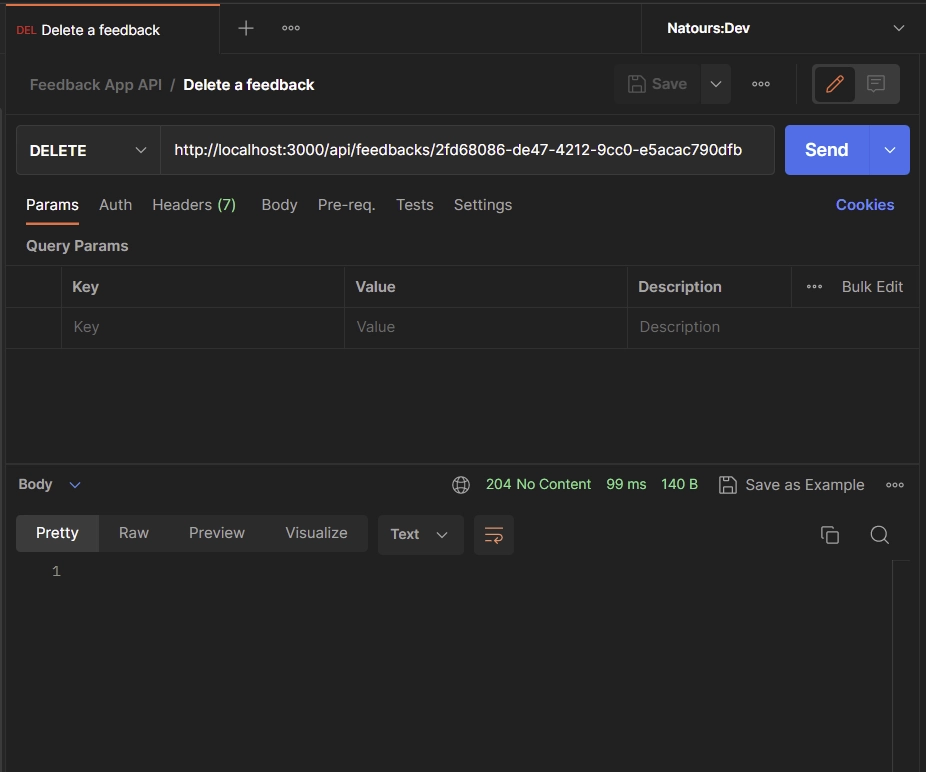
Delete a Feedback Item
To delete a feedback, simply send a DELETE request to the /api/feedbacks/:id endpoint, where :id represents the ID of the feedback to be deleted. Upon successful deletion, you will receive a 204 No Content response indicating that the operation was successful.
Conclusion
And we are done! In this article, you’ve learned how to build a simple API with CRUD functionalities in the new Next.js 13 app directory. Although it might seem like a simple project, it’s a stepping stone to exploring the new ways of building APIs in Next.js.
I hope this article has been helpful and informative for you. If you have any feedback or questions, please feel free to leave them in the comment section. Your feedback is valuable and helps me improve the quality of my content.
Complete and useful article! Thank you so much
I’m thrilled to hear that the article was helpful to you! Cheers and happy coding!
I love this post…. I have been looking for this for about four hours now and I just saw it here… Nextjs has made so much upgrade that each version is confusing as you might still use the principles of the older versions
Thanks a lot!
Very helpfull.
It should be included in the official next js doc
I’m glad you found the article helpful!
Thank you for this article, it answered a lot of questions about Prisma and Next.js 🙂