
In this tutorial, we’ll cover the complete process of integrating Drizzle ORM with NextAuth v5 in Next.js 14. Starting from the ground up, we’ll walk through setting up a serverless database, defining Drizzle ORM schemas, configuring NextAuth, implementing credentials and OAuth authentication, and finally, securing routes.
Getting Drizzle ORM to work with NextAuth version 5 can be challenging, but in this article, we’ll adopt an approach that ensures compatibility with the edge runtime.
Initially, I attempted to use a PostgreSQL database running in a Docker container with the Drizzle ORM adapter for NextAuth. However, I encountered webpack errors when signing in with an OAuth provider, prompting me to switch to a serverless PostgreSQL database, which worked perfectly. Without further delay, let’s dive into the tutorial.
The tutorial’s source code is available on GitHub: https://github.com/wpcodevo/nextauth-nextjs14-drizzle
More practice:
- Setup and Use NextAuth.js in Next.js 14 App Directory
- Implement Authentication with NextAuth in Next.js 14
- Set up Google and GitHub OAuth with NextAuth in Next.js 14
- Implement Authentication with Supabase in Next.js 14
- Setup Google and GitHub OAuth with Supabase in Next.js 14
- Implement Authentication with tRPC in Next.js 14
- Implement Authentication with tRPC API in Next.js 14
- Using tRPC with Next.js 14, React Query and Prisma
- How to Set Up and Use React Query in Next.js 14
- Using React Query with Supabase in Next.js App Router
- How to Setup React Query in Next.js 13 App Directory
- React Query and Axios: User Registration and Email Verification
Running the Project on Your Machine
To run the NextAuth Drizzle ORM project on your local machine, follow the steps below:
- Download or clone the project from its GitHub repository located at https://github.com/wpcodevo/nextauth-nextjs14-drizzle, and then open the source code in your preferred IDE or code editor.
- Open the integrated terminal in your IDE, and from the root directory, execute the command
pnpm installto install all the necessary dependencies. - Duplicate the
example.envfile and rename the copy to.env. - Create a serverless PostgreSQL database on https://neon.tech/ and add the connection string to the
DATABASE_URLvariable in the.envfile. - Synchronize the Drizzle migrations with the PostgreSQL database schema by running the command
pnpm drizzle-kit push:pg. - Launch the Next.js development server with the command
pnpm dev. After the server is prepared to handle requests, access the application in your browser and explore its functionalities to grasp the authentication process. - To utilize the Google and GitHub OAuth options for signing into the application, you must include the corresponding Google and GitHub OAuth client IDs and secrets in the appropriate variables within the
.envfile.
Demo of the Application
With the project now running on your machine, let’s explore its features to understand the authentication flow. On the home page, click on the ‘Register’ link in the navigation to access the registration page. Once there, input your full name, email, password, and confirm the password. After filling out the required fields, click the ‘SIGN UP’ button to submit the credentials to the Next.js backend API, which handles user registration.
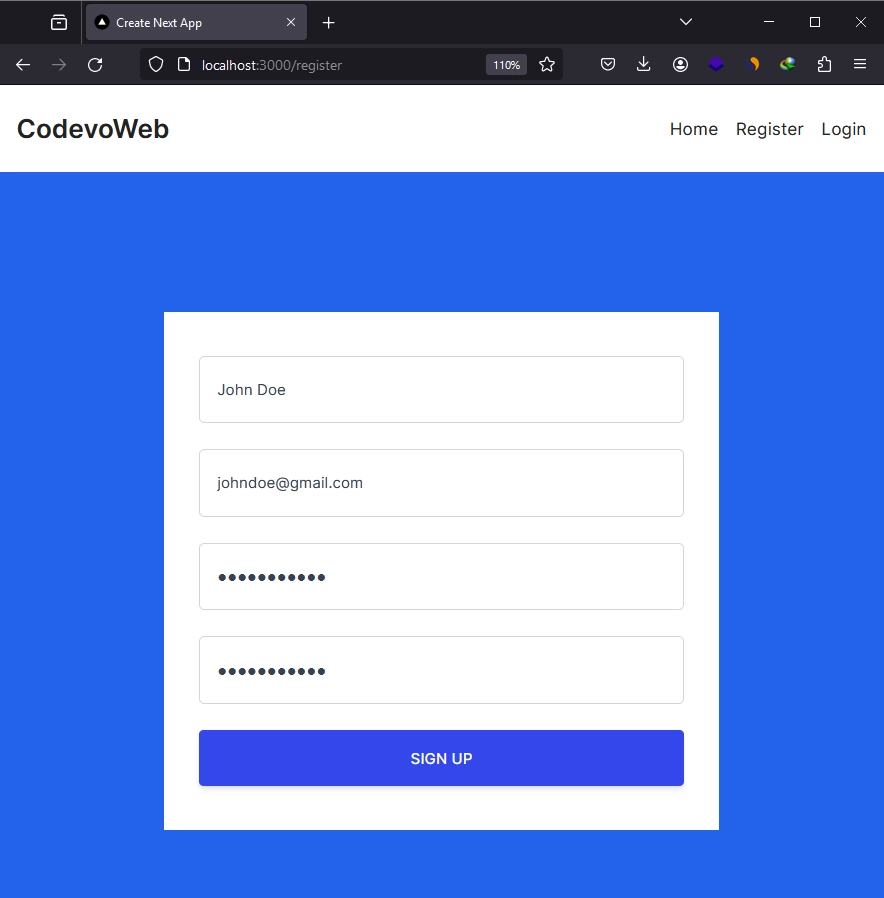
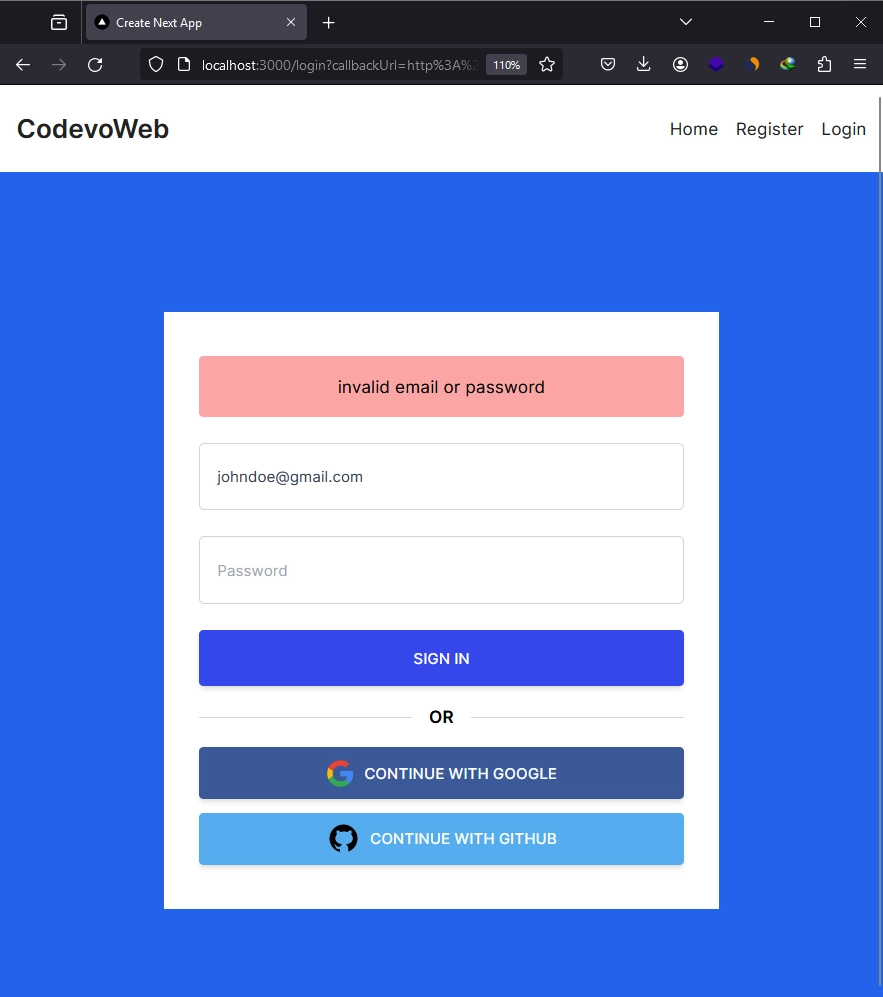
Once the API registers your account, you will be redirected to the login page. Enter your email and password, and click the ‘SIGN IN’ button to submit the credentials. After submission, NextAuth will validate the credentials and provide a JSON Web Token and session to sign you into the application. Assuming you have already added your OAuth client IDs and secrets to the .env file, you can log in using either the Google or GitHub OAuth sign-in options.
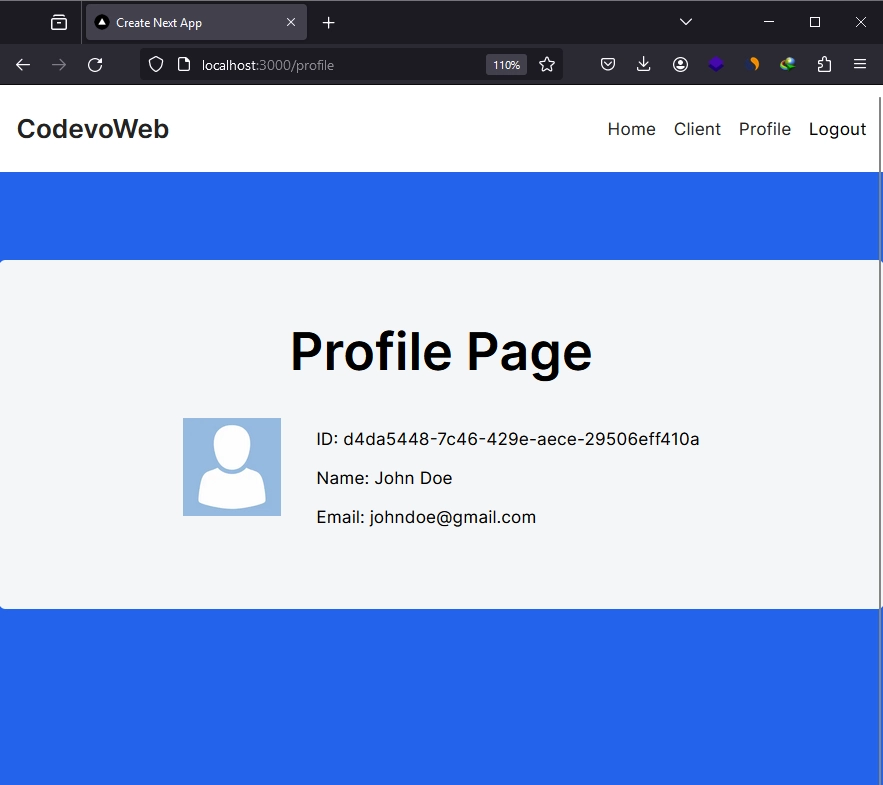
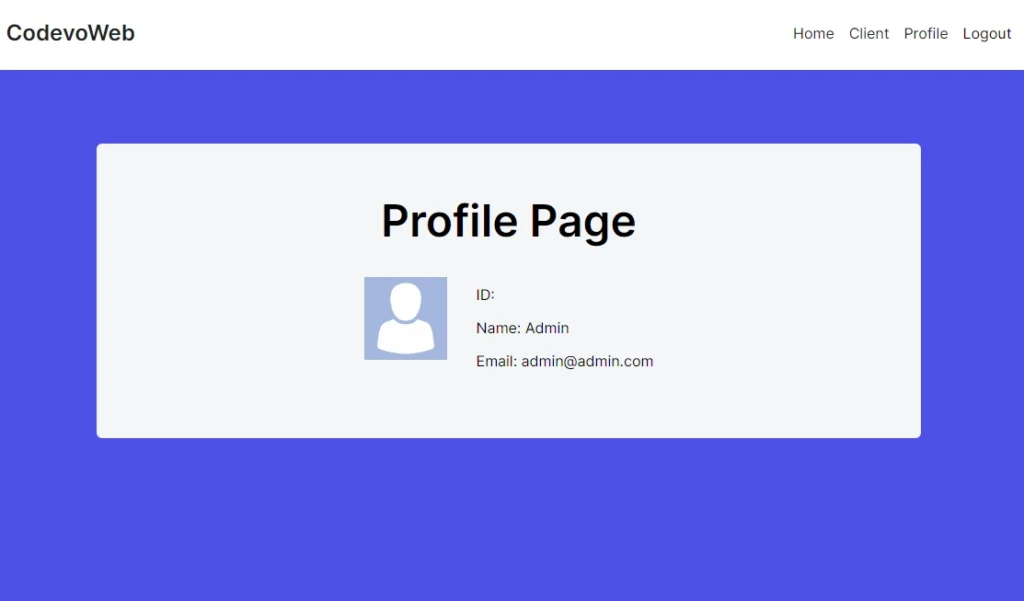
After signing into the application, you can access private routes or pages. For instance, you can navigate to the profile page to view your account credentials.
Setting Up a Serverless PostgreSQL Database
Let’s begin by creating a serverless PostgreSQL database that we can utilize with Drizzle ORM. There are many serverless database providers, but for this article, I will be using https://neon.tech/ as they offer a generous free tier.
- Visit the https://neon.tech/ website and sign in using your GitHub account. If you don’t already have an account, click on the GitHub sign-up option to register for a new account.
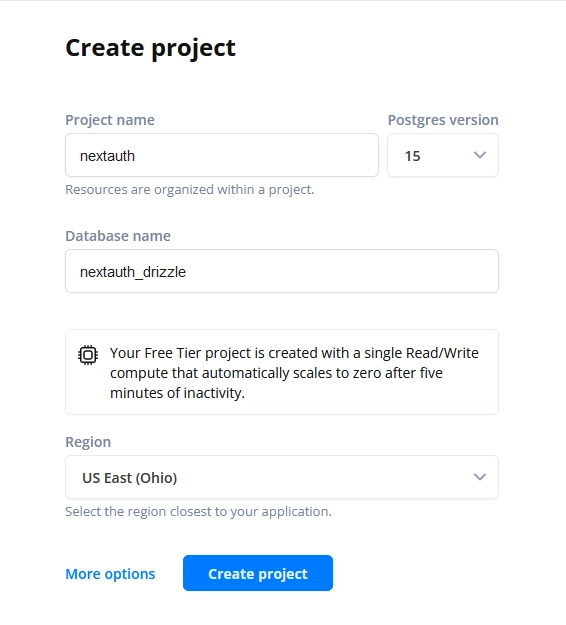
- Neon only permits one database project per account for the free tier. If you have registered for a new account, input the names of your project and database. Then, proceed to click on the ‘Create Project’ button.
- Once the project is successfully created, a popup will appear displaying the PostgreSQL connection string. Check the ‘Pooled connection’ checkbox and copy the connection string. Then, add it to a
DATABASE_URLvariable in your.envfile.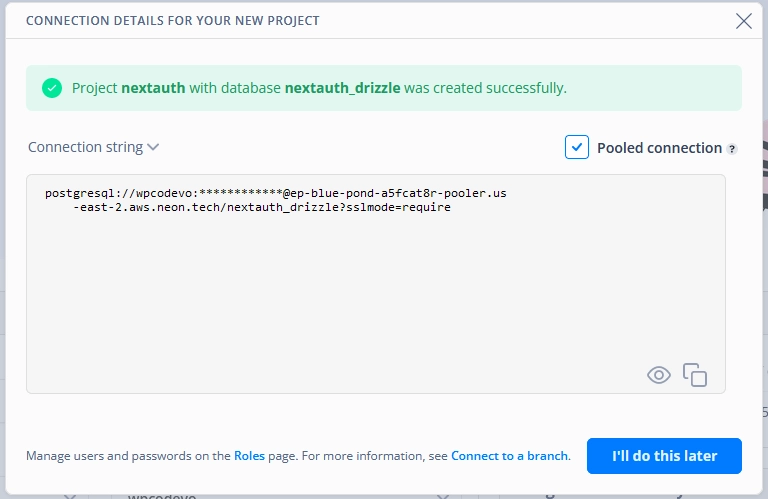
DATABASE_URL=input_neon_serverless_postgres_connection_url
Creating the NextAuth SQL Tables with Drizzle ORM
Now, we’ll proceed to create all the SQL tables in the database that NextAuth will utilize for authentication using Drizzle ORM. To start, let’s install Drizzle ORM and Kit, along with the Drizzle adapter and the Neon serverless database libraries.
pnpm add dotenv
pnpm add drizzle-orm @auth/drizzle-adapter @neondatabase/serverless
pnpm add drizzle-kit --save-dev

# or
yarn add dotenv
yarn add drizzle-orm @auth/drizzle-adapter @neondatabase/serverless
yarn add drizzle-kit --save-dev

# or
npm i dotenv
npm i drizzle-orm @auth/drizzle-adapter @neondatabase/serverless
npm i drizzle-kit --save-dev
Creating the Database Schemas
Next, let’s define the Drizzle ORM schemas, which we’ll later convert into SQL tables before pushing them to the database. I obtained the schemas from the NextAuth Drizzle ORM adaptor reference documentation at https://authjs.dev/reference/adapter/drizzle. However, I modified the ‘users‘ table to use UUID instead of text.
To define the schemas, create a ‘database‘ folder at the root level of your project. Within the ‘database’ directory, create a schema.ts file and insert the following code:
database/schema.ts
import {
  timestamp,
  pgTable,
  text,
  primaryKey,
  integer,
  uuid,
} from 'drizzle-orm/pg-core';
import type { AdapterAccount } from 'next-auth/adapters';

export const users = pgTable('user', {
  id: uuid('id').primaryKey().defaultRandom(),
  name: text('name'),
  email: text('email').unique().notNull(),
  password: text('password'),
  emailVerified: timestamp('emailVerified', { mode: 'date' }),
  image: text('image'),
});

export const accounts = pgTable(
  'account',
  {
    userId: uuid('userId')
      .notNull()
      .references(() => users.id, { onDelete: 'cascade' }),
    type: text('type').$type<AdapterAccount['type']>().notNull(),
    provider: text('provider').notNull(),
    providerAccountId: text('providerAccountId').notNull(),
    refresh_token: text('refresh_token'),
    access_token: text('access_token'),
    expires_at: integer('expires_at'),
    token_type: text('token_type'),
    scope: text('scope'),
    id_token: text('id_token'),
    session_state: text('session_state'),
  },
  (account) => ({
    compoundKey: primaryKey({
      columns: [account.provider, account.providerAccountId],
    }),
  })
);

export const sessions = pgTable('session', {
  sessionToken: text('sessionToken').notNull().primaryKey(),
  userId: uuid('userId')
    .notNull()
    .references(() => users.id, { onDelete: 'cascade' }),
  expires: timestamp('expires', { mode: 'date' }).notNull(),
});

export const verificationTokens = pgTable(
  'verificationToken',
  {
    identifier: text('identifier').notNull(),
    token: text('token').notNull(),
    expires: timestamp('expires', { mode: 'date' }).notNull(),
  },
  (vt) => ({
    compoundKey: primaryKey({ columns: [vt.identifier, vt.token] }),
  })
);
You do not need to understand the details of the Drizzle schemas, but it’s essential to know that NextAuth requires them to handle authentication.
Connecting to the Serverless Database
Let’s now establish a connection to our serverless PostgreSQL database. We will use the neon function provided by the Neon package, which returns an HTTP client that we can use to create an instance of Drizzle ORM. This Drizzle ORM instance will enable us to interact with the serverless database from within our application.
To implement this, create an index.ts file inside the ‘database’ directory and include the code below:
database/index.ts
import * as schema from './schema';

import { neon } from '@neondatabase/serverless';
import { drizzle } from 'drizzle-orm/neon-http';

const connectionString = process.env.DATABASE_URL!;
const client = neon(connectionString);

export const db = drizzle(client, { schema: schema, logger: true });
Performing the Database Migration and Synchronization
At this point, we are ready to generate the Drizzle migration files and synchronize the PostgreSQL schema with the schemas defined in our project. To start, we need to create a Drizzle configuration file to specify where the schema definitions are, the type of database driver we are using, the database credentials, and where to output the migrations. Create a drizzle.config.ts file at the root level of your project and include the code below:
drizzle.config.ts
import 'dotenv/config';
import type { Config } from 'drizzle-kit';

export default {
  schema: './database/schema.ts',
  out: './drizzle',
  driver: 'pg',
  dbCredentials: {
    connectionString: process.env.DATABASE_URL!,
  },
} satisfies Config;
Next, run the command below to generate the migration files:
pnpm drizzle-kit generate:pg

# or

npx drizzle-kit generate:pg
After running the command, you’ll find the migration files within a ‘drizzle‘ folder in the root directory. Now that the migration files are generated, you can apply them to the database by running the following command:
pnpm drizzle-kit push:pg

# or

npx drizzle-kit push:pg
Initializing NextAuth in the Next.js 14 Project
With the database-related tasks now taken care of, let’s proceed to initialize NextAuth within the project. First, you need to install the NextAuth beta package since this is the version that is compatible with Next.js 14. Run the command below to install the package.
pnpm add next-auth@beta

# or
yarn add next-auth@beta

# or
npm i next-auth@beta
Next, create an auth.ts file within the root directory of your project and add the following code. This code initializes an instance of NextAuth with the provided configurations and exports several functions, notably the handlers object containing the GET and POST functions, which we can use to set up the Next.js HTTP routes.
auth.ts
import NextAuth from 'next-auth';
import { DrizzleAdapter } from '@auth/drizzle-adapter';
import { db } from './database';

export const { handlers, auth, signIn, signOut } = NextAuth({
  session: { strategy: 'jwt' },
  adapter: DrizzleAdapter(db),
  // pages: {
  //   signIn: '/login',
  // },
  providers: [

  ],
  callbacks: {},
});
In the above code, we included the Drizzle ORM adapter within the NextAuth configuration and passed our database client to it. NextAuth will utilize this adapter for OAuth authentication, which we will implement later.
To set up the Next.js HTTP route handlers for NextAuth, follow these steps:
- Navigate to the
appdirectory and create a new directory namedapi. - Inside the
apidirectory, create another directory namedauth. - Within the
authdirectory, create a dynamic route folder called[…nextauth]. Inside the[…nextauth]folder, create aroute.tsfile and add the following code:
app/api/auth/[…nextauth]/route.ts
import { handlers } from '@/auth';

export const { GET, POST } = handlers;
Setting up Credentials Authentication with NextAuth
Let’s now delve deeper and implement credentials authentication with NextAuth. Since we will be hashing the passwords in the authentication flow, we need to install the Bcrypt library to assist us with that. Run the following command to install it:
pnpm add bcryptjs
pnpm add -D @types/bcryptjs

# or
yarn add bcryptjs
yarn add -D @types/bcryptjs

# or
npm i bcryptjs
npm i -D @types/bcryptjs
Next, open the auth.ts file and replace its current content with the code below, which utilizes the CredentialsProvider function provided by NextAuth to set up credentials authentication.
auth.ts
import NextAuth from 'next-auth';
import CredentialsProvider from 'next-auth/providers/credentials';
import bcrypt from 'bcryptjs';
import { DrizzleAdapter } from '@auth/drizzle-adapter';
import { db } from './database';

export const { handlers, auth, signIn, signOut } = NextAuth({
  session: { strategy: 'jwt' },
  adapter: DrizzleAdapter(db),
  providers: [
    CredentialsProvider({
      name: 'Sign in',
      id: 'credentials',
      credentials: {
        email: {
          label: 'Email',
          type: 'email',
          placeholder: 'example@example.com',
        },
        password: { label: 'Password', type: 'password' },
      },
      async authorize(credentials) {
        if (!credentials?.email || !credentials.password) {
          return null;
        }

        const user = await db.query.users.findFirst({
          where: (users, { eq }) => eq(users.email, String(credentials.email)),
        });

        if (
          !user ||
          !(await bcrypt.compare(String(credentials.password), user.password!))
        ) {
          return null;
        }

        return {
          id: user.id,
          email: user.email,
          name: user.name,
          randomKey: 'Hey cool',
        };
      },
    }),
  ],
  callbacks: {},
});
Open your .env file and add a variable named AUTH_SECRET. Then, generate a unique string for it using the command openssl rand -hex 32. NextAuth will utilize this secret for encoding and decoding the JSON Web Token.
AUTH_SECRET=input_your_ultra_secure_nextauth_secret
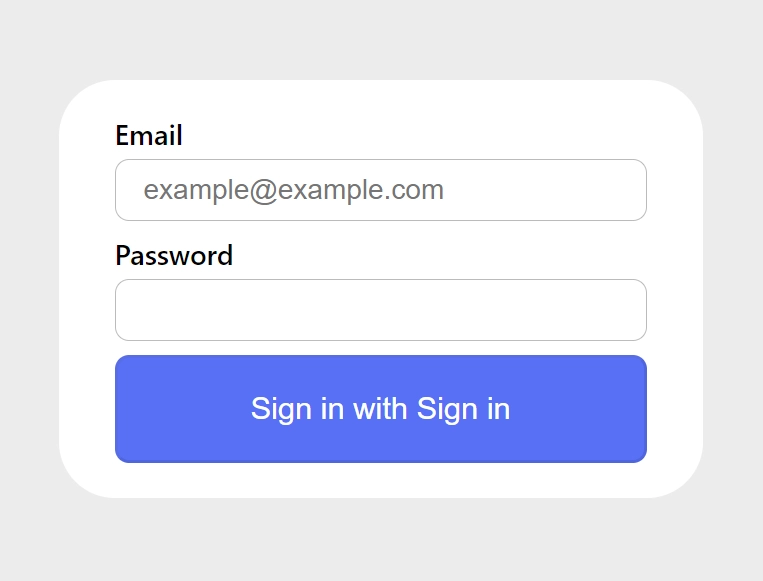
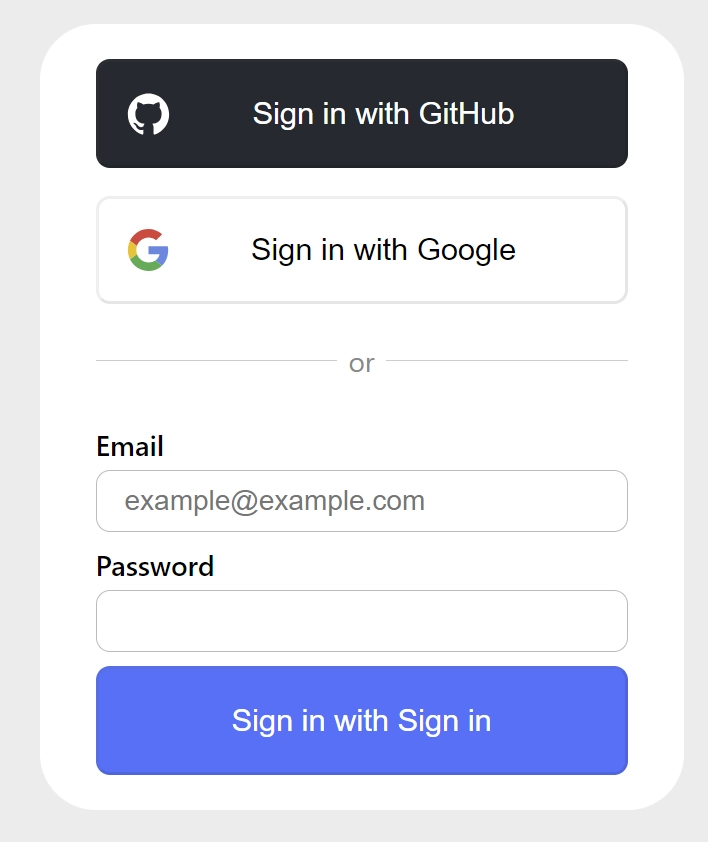
With credentials authentication set up, when you visit the default NextAuth signin page at http://localhost:3000/api/auth/signin, you’ll see a form where you can enter your email and password. However, attempting to sign in at this stage will result in an error, as we haven’t yet implemented the code for user registration.
Setting up Google and GitHub OAuth with NextAuth
Moving on, let’s proceed to set up Google and GitHub OAuth providers with NextAuth. NextAuth simplifies this process by offering two convenient functions that we can import from next-auth/providers and include them in the providers array within the NextAuth config object.
To enable this, you’ll need to obtain OAuth credentials from both Google and GitHub. Once acquired, add them to the .env file:
.env
AUTH_GITHUB_ID=input_your_github_oauth_client_id
AUTH_GITHUB_SECRET=input_your_github_oauth_secret

AUTH_GOOGLE_ID=input_your_google_oauth_client_id
AUTH_GOOGLE_SECRET=input_your_google_oauth_secret
Next, import the Google and GitHub providers from next-auth/providers and include them in the providers array as demonstrated in the code below:
auth.ts
import NextAuth from 'next-auth';
import github from 'next-auth/providers/github';
import google from 'next-auth/providers/google';
import CredentialsProvider from 'next-auth/providers/credentials';
import { DrizzleAdapter } from '@auth/drizzle-adapter';
import { db } from './database';

export const { handlers, auth, signIn, signOut } = NextAuth({
  session: { strategy: 'jwt' },
  adapter: DrizzleAdapter(db),
  providers: [
    github({ allowDangerousEmailAccountLinking: true }),
    google({ allowDangerousEmailAccountLinking: true }),
    CredentialsProvider({}),
  ],
  callbacks: {},
});
Note: You may not need to set
allowDangerousEmailAccountLinkingto true for the providers, but I had to do so because I encountered an account linking error in the current beta 8 version of NextAuth when I re-signed in using any of the OAuth sign-in options.
For instance, when I signed in with a specific OAuth, such as GitHub, for the first time, my account was created in the database. However, when I attempted to sign in to the application again using the same GitHub OAuth, I encountered an account linking error.
When you visit the default Next.js signin page, you should see both the Google and GitHub OAuth options included in the signin form.
If you want to display the profile images of the Google or GitHub account users in your application, you need to add the following configurations to your next.config.mjs file.
next.config.mjs
/** @type {import('next').NextConfig} */
const nextConfig = {
  images: {
    remotePatterns: [
      {
        protocol: 'https',
        hostname: 'avatars.githubusercontent.com',
      },
      {
        protocol: 'https',
        hostname: 'lh3.googleusercontent.com',
      },
    ],
  },
};

export default nextConfig;
Retrieving the Session Data in Different Locations
Let’s now explore how to retrieve the session data and make use of it. There are three locations where we can retrieve the session data: one is on the client side, and the other two are on the server side.
In a React Server Component
The first location to access the session data is on the server, specifically in a React Server Component. To access the session data in a React Server Component, simply invoke the auth function exported from the auth.ts file and await the promise to access the session data. Below is an example:
app/profile/page.tsx
import { auth } from '@/auth';
import Image from 'next/image';

export default async function ProfilePage() {
  const session = await auth();

  const user = session?.user;

  return (
    <div className='flex items-center gap-8'>
      <div>
        <Image
          src={user?.image ? user.image : '/images/default.png'}
          alt={`profile photo of ${user?.name}`}
          width={90}
          height={90}
        />
      </div>
      <div className='mt-8'>
        <p className='mb-3'>ID: {user?.id}</p>
        <p className='mb-3'>Name: {user?.name}</p>
        <p className='mb-3'>Email: {user?.email}</p>
      </div>
    </div>
  );
}
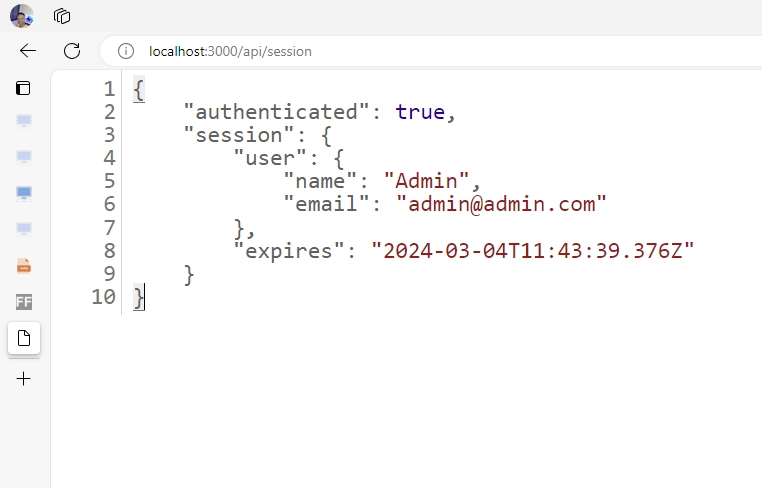
When you visit the page in your browser, you will notice that the ID field is missing from the session data. This is because, by default, NextAuth omits the ID from the session due to security reasons, but we will fix that in a moment.
In a Next.js Route File
The second location to retrieve the session data is also on the server, but in a Next.js route file. Here, too, all you need to do is invoke the auth function, await the promise, and voilà, you have access to the session.
app/api/session/route.ts
import { auth } from '@/auth';
import { NextResponse } from 'next/server';

export async function GET(_request: Request) {
  const session = await auth();

  if (!session?.user) {
    return new NextResponse(
      JSON.stringify({ status: 'fail', message: 'You are not logged in' }),
      { status: 401 }
    );
  }

  return NextResponse.json({
    authenticated: !!session,
    session,
  });
}
In a React Client Component
The final location to retrieve the session data is within a React Client Component. To achieve this, we need to wrap the SessionProvider component provided by NextAuth around the component that accesses the session. Since we may access the session in multiple client components, it’s advisable to wrap the SessionProvider around the root of our application. This ensures that all client components within the component tree have access to the session.
app/layout.tsx
import type { Metadata } from 'next';
import { Inter } from 'next/font/google';
import './globals.css';
import { SessionProvider } from 'next-auth/react';
import { Toaster } from 'react-hot-toast';

const inter = Inter({ subsets: ['latin'] });

export const metadata: Metadata = {
  title: 'Create Next App',
  description: 'Generated by create next app',
};

export default function RootLayout({
  children,
}: Readonly<{
  children: React.ReactNode;
}>) {
  return (
    <html lang='en'>
      <body className={inter.className}>
        <SessionProvider>{children}</SessionProvider>
        <Toaster />
      </body>
    </html>
  );
}
With the session provider wrapped around the root node, you can now utilize the useSession hook provided by NextAuth to access the session data.
app/client-side/page.tsx
'use client';

import { useSession } from 'next-auth/react';
import Image from 'next/image';
import { useRouter } from 'next/navigation';

export default function Profile() {
  const router = useRouter();
  const { data } = useSession({
    required: true,
    onUnauthenticated() {
      router.push('/api/auth/signin');
    },
  });

  const user = data?.user;

  return (
    <>
      {!user ? (
        <p>Loading...</p>
      ) : (
        <div className='flex items-center gap-8'>
          <div>
            <Image
              src={user.image ? user.image : '/images/default.png'}
              alt={`profile photo of ${user.name}`}
              width={90}
              height={90}
            />
          </div>
          <div className='mt-8'>
            <p className='mb-3'>ID: {user.id}</p>
            <p className='mb-3'>Name: {user.name}</p>
            <p className='mb-3'>Email: {user.email}</p>
          </div>
        </div>
      )}
    </>
  );
}
Modifying the Session Data and JWT Payload
Now, let’s delve into adding custom information to the session data or JSON Web Token (JWT) payload. NextAuth simplifies this process with two callback functions: jwt for appending extra information to the JWT payload and session for adding additional data to the session object.
The following code illustrates how to incorporate additional fields into both the JWT payload and session object.
auth.ts
export const { handlers, auth, signIn, signOut } = NextAuth({
  session: { strategy: 'jwt' },
  adapter: DrizzleAdapter(db),
  providers: [
    github({ allowDangerousEmailAccountLinking: true }),
    google({ allowDangerousEmailAccountLinking: true }),
    CredentialsProvider({})
  ],
  callbacks: {
    jwt: ({ token, user }) => {
      if (user) {
        const u = user as unknown as any;
        return {
          ...token,
          id: u.id,
          randomKey: u.randomKey,
        };
      }
      return token;
    },
    session(params) {
      return {
        ...params.session,
        user: {
          ...params.session.user,
          id: params.token.id as string,
          randomKey: params.token.randomKey,
        },
      };
    },
  },
});
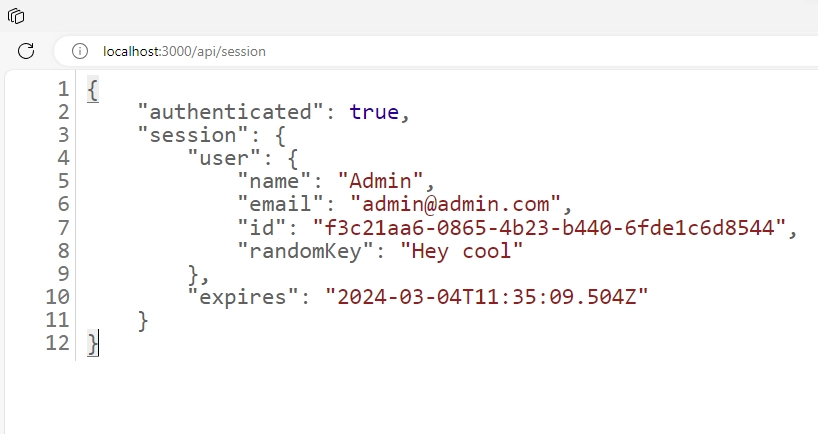
When you navigate to the route for displaying the session data, you should now see the ID field alongside the additional information included in the session data.
Protecting Routes in Different Locations
Securing private routes or pages within an application is crucial, especially when reserving access for authenticated users. Here, we’ll explore the various methods available for protecting routes in Next.js 14 in conjunction with NextAuth. Route protection can be implemented in four locations, with three on the server side and one on the client side:
- Within a Next.js route file
- Within a React Server Component
- Within a React Client Component
- Within a Next.js middleware
In a Next.js Route File
To protect routes within a route file, the process is straightforward. Import the auth function exported from auth.ts, await the promise to access the session, verify if the session exists, and return a 401 Unauthorized error to the user if the session is null.
app/api/session/route.ts
import { auth } from '@/auth';
import { NextResponse } from 'next/server';

export async function GET(_request: Request) {
  const session = await auth();

  if (!session) {
    return new NextResponse(
      JSON.stringify({ status: 'fail', message: 'You are not logged in' }),
      { status: 401 }
    );
  }

  return NextResponse.json({
    authenticated: !!session,
    session,
  });
}
In a React Server Component
React Server Component also runs on the server and here we have access to the auth function to retrieve the session. Then, we can check if the session exists or not. If the session is null, we redirect the user to the sign-in page.
app/profile/page.tsx
import { auth } from '@/auth';
import Image from 'next/image';
import { redirect } from 'next/navigation';

export default async function ProfilePage() {
  const session = await auth();

  if(!session){
    return redirect("/api/auth/signin")
  }

  const user = session.user;

  return (
    <div className='flex items-center gap-8'>
      <div>
        <Image
          src={user.image ? user.image : '/images/default.png'}
          alt={`profile photo of ${user?.name}`}
          width={90}
          height={90}
        />
      </div>
      <div className='mt-8'>
        <p className='mb-3'>ID: {user.id}</p>
        <p className='mb-3'>Name: {user.name}</p>
        <p className='mb-3'>Email: {user.email}</p>
      </div>
    </div>
  );
}
In a React Client Component
On the client side, we utilize the useSession hook to access the session. Within this hook, NextAuth offers an onUnauthenticated method, provided within the options, that triggers when the user is not authenticated. Within this function, we can redirect the user to the sign-in page. It’s worth noting that there may be a delay as a request needs to be made to the backend server to obtain the session.
app/client-side/page.tsx
'use client';

import { useSession } from 'next-auth/react';
import Image from 'next/image';
import { useRouter } from 'next/navigation';

export default function Profile() {
  const router = useRouter();
  const { data } = useSession({
    required: true,
    onUnauthenticated() {
      router.push('/api/auth/signin');
    },
  });

  const user = data?.user;

  return (
    <>
      {!user ? (
        <p>Loading...</p>
      ) : (
        <div className='flex items-center gap-8'>
          <div>
            <Image
              src={user.image ? user.image : '/images/default.png'}
              alt={`profile photo of ${user.name}`}
              width={90}
              height={90}
            />
          </div>
          <div className='mt-8'>
            <p className='mb-3'>ID: {user.id}</p>
            <p className='mb-3'>Name: {user.name}</p>
            <p className='mb-3'>Email: {user.email}</p>
          </div>
        </div>
      )}
    </>
  );
}
In a Next.js Middleware File
Now, let’s explore how to protect routes and pages from a single location using Next.js middleware along with NextAuth. The middleware approach enables us to protect multiple routes instead of implementing protection in each file separately. This approach is recommended because the middleware is invoked even before our routes are loaded. To start, create a middleware.ts file and include the following code:
middleware.ts
export { auth as middleware } from './auth';

export const config = {
  matcher: ['/((?!_next/static|_next/image|favicon.ico).*)'],
};
NextAuth provides another useful callback function called authorized that we can use to protect routes. Within this function, we can define the logic for route protection and redirect unauthenticated users to the sign-in page. The code below illustrates how to secure the /profile, /client-side, and /api/session routes from unauthorized users.
auth.ts
export const { handlers, auth, signIn, signOut } = NextAuth({
  session: { strategy: 'jwt' },
  adapter: DrizzleAdapter(db),
  pages: {
    signIn: '/login',
  },
  providers: [
    github({ allowDangerousEmailAccountLinking: true }),
    google({ allowDangerousEmailAccountLinking: true }),
    CredentialsProvider({}),
  ],
  callbacks: {
    authorized({ auth, request: { nextUrl } }) {
      const isLoggedIn = !!auth?.user;
      const paths = ["/profile", "/client-side", "/api/session"];
      const isProtected = paths.some((path) =>
        nextUrl.pathname.startsWith(path)
      );

      if (isProtected && !isLoggedIn) {
        const redirectUrl = new URL('/login', nextUrl.origin);
        redirectUrl.searchParams.append('callbackUrl', nextUrl.href);
        return Response.redirect(redirectUrl);
      }
      return true;
    },
  },
});
Conclusion
And we are done! Throughout this tutorial, you learned how to set up Drizzle ORM with NextAuth in Next.js 14. We even went a step further to demonstrate the different ways to retrieve session data and implement route protection. I hope you found this tutorial helpful and enjoyable. If you have any questions or feedback, feel free to leave them in the comment section.
Thank you for the amazing blog! But after finally managing to get it all to work on development, I realized and faced the issue of bcrypt not workring in edge runtime.
You need to use a database that supports edge runtime, such as Vercel Postgres.