

In this article, you will explore the implementation of user registration, login, and logout functionalities in Next.js 14 using tRPC (Type Remote Procedure Call). tRPC is a library designed to streamline the development of full-stack applications with a primary emphasis on type safety. Leveraging TypeScript, tRPC ensures robust static typing across the entire stack, enabling the detection of potential issues at compile time and thereby reducing runtime errors.
Building upon the foundation in the previous article, Implement Authentication with tRPC API in Next.js 14‘, where we built the tRPC API and incorporated authentication logic, this article takes the next step. Here, we delve into developing a frontend application that interacts seamlessly with the tRPC API.
The tutorial’s source code is available on GitHub: https://github.com/wpcodevo/nextjs14-trpc-authentication
More practice:
- Implement Authentication with tRPC API in Next.js 14
- Using tRPC with Next.js 14, React Query and Prisma
- Implement Authentication with Supabase in Next.js 14
- How to Set Up and Use React Query in Next.js 14
- Using React Query with Supabase in Next.js App Router
- How to Setup React Query in Next.js 13 App Directory
- React Query and Axios: User Registration and Email Verification
- Forgot/Reset Passwords with React Query and Axios
- How to Setup tRPC API Server & Client with Next.js and Prisma
- tRPC Server API with Next.js & PostgreSQL: Access & Refresh Tokens
- Full-Stack Next.js tRPC App: User Registration & Login Example
- Build a tRPC CRUD API Example with Next.js

Demo of the tRPC Application
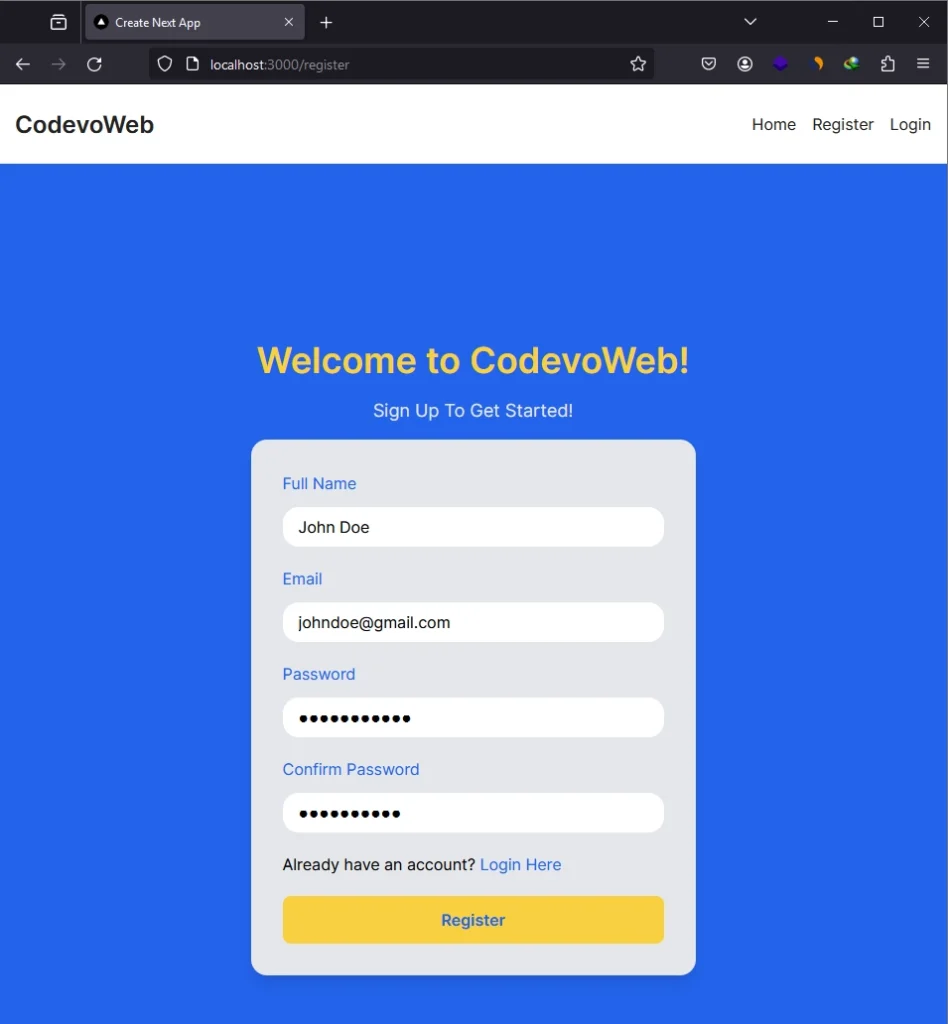
On the home page, click on the ‘Register‘ link in the navbar to access the account registration page. Here, you must provide your credentials to create a new account. After entering the required information, click the ‘Register‘ button. This action will prompt the frontend to invoke a tRPC procedure responsible for user registration on the backend. Upon successful registration, you will be automatically redirected to the login page.
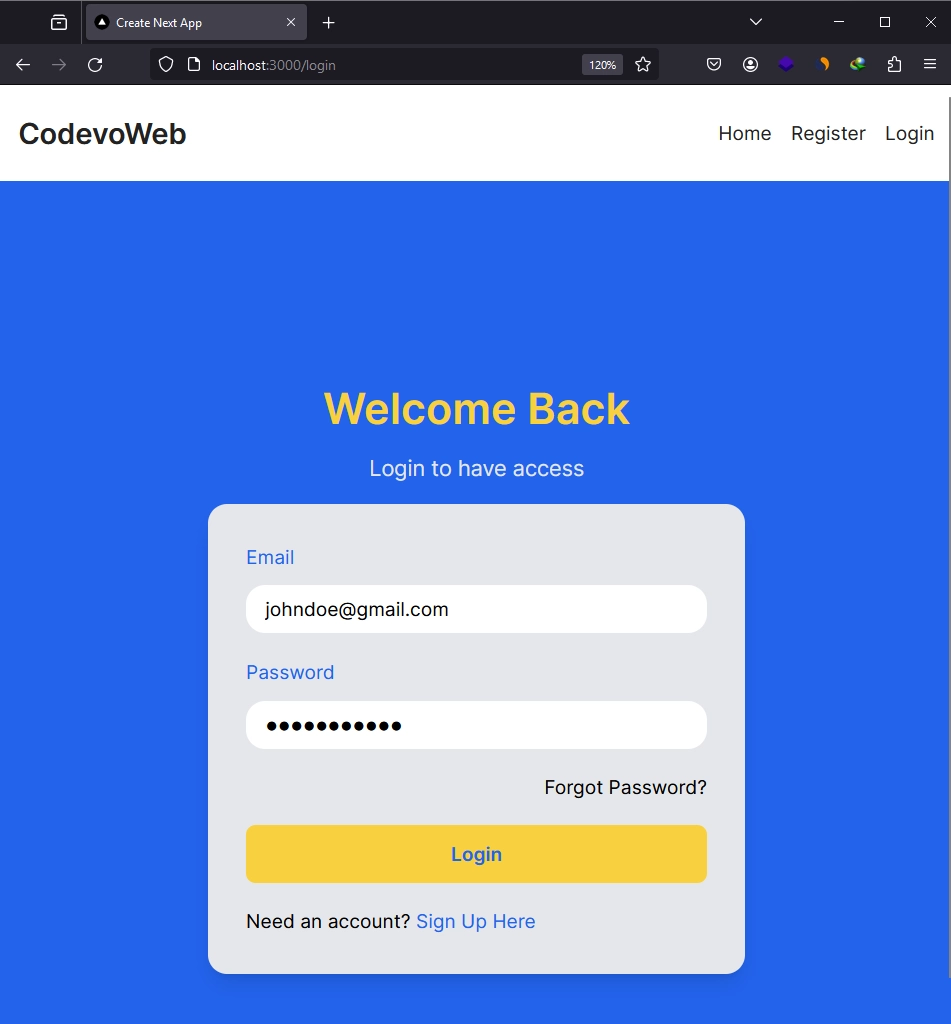
Upon reaching the login page, input the email and password associated with your registered account, then proceed to click the ‘Login‘ button. This action prompts the frontend to trigger an RPC on the backend, where your credentials are validated. If valid, a JSON Web Token is returned and stored as a cookie, signifying your successful login. Following a successful login, you will be automatically redirected to the home page.
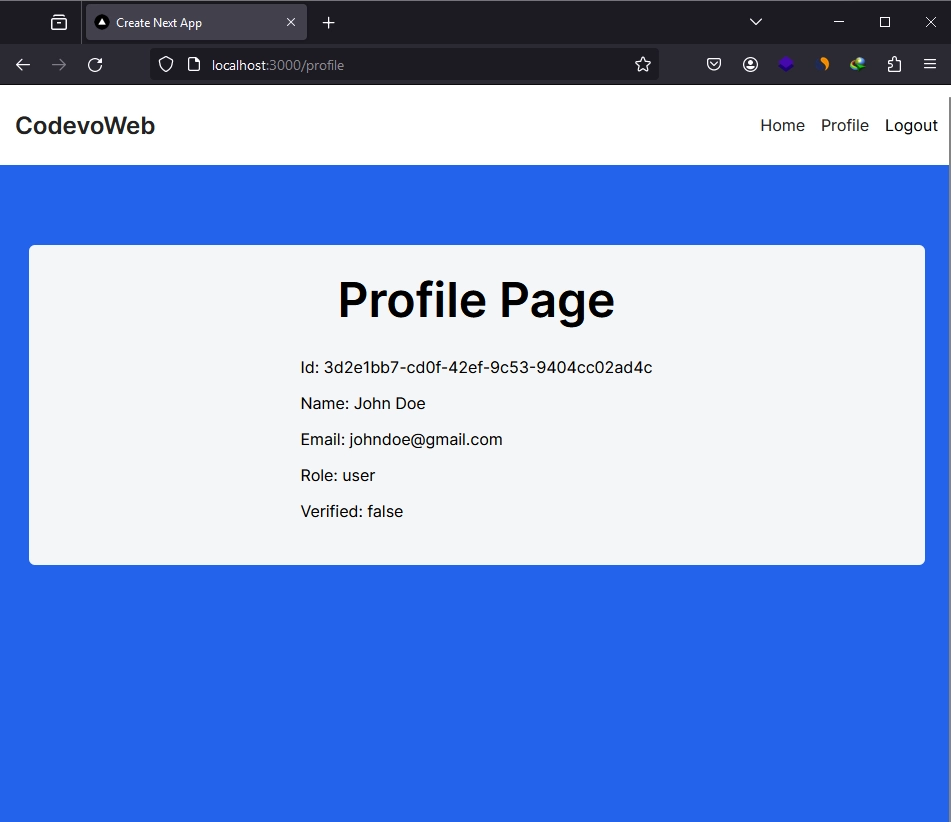
On the profile page, your account information will be displayed. To sign out, simply click on the ‘Logout’ button.
Setting up the Next.js 14 Project
As this article is a continuation of the previous one where we built the tRPC API, everyone needs to be on the same page before building the frontend. To do so, visit the project’s repository on GitHub at https://github.com/wpcodevo/nextjs14-trpc-authentication and clone it. Once cloned, open the source code in your preferred text editor or browser and familiarize yourself with the files to briefly understand our starting point.
Install the Required Dependencies
Let’s start by installing the necessary dependencies for building the frontend application. Open the integrated terminal in your IDE or text editor and execute the following commands to install them:
At the time of writing this article, you need to install
@tanstack/react-queryversion4.18.0because the@trpc/react-querylibrary depends on this specific version.
pnpm add @tanstack/react-query@4.18.0
pnpm add @tanstack/react-query-devtools@4.18.0
pnpm add -D @tanstack/eslint-plugin-query
pnpm add react-hook-form @hookform/resolvers
pnpm add tailwind-merge
pnpm add react-hot-toast
pnpm add @trpc/client
pnpm add @trpc/react-query

# or
yarn add @tanstack/react-query@4.18.0
yarn add @tanstack/react-query-devtools@4.18.0
yarn add -D @tanstack/eslint-plugin-query
yarn add react-hook-form @hookform/resolvers
yarn add tailwind-merge
yarn add react-hot-toast
yarn add @trpc/client
yarn add @trpc/react-query

# or
npm i @tanstack/react-query@4.18.0
npm i @tanstack/react-query-devtools@4.18.0
npm i -D @tanstack/eslint-plugin-query
npm i react-hook-form @hookform/resolvers
npm i tailwind-merge
npm i react-hot-toast
npm i @trpc/client
npm i @trpc/react-query
@tanstack/react-query– Core React Query library providing hooks and utilities for managing and caching asynchronous data.@tanstack/react-query-devtools– A tool for debugging and inspecting the state of React Query queries.@tanstack/eslint-plugin-query– An ESLint plugin for catching bugs and inconsistencies while using React Query.react-hook-form– A library for managing forms in React applications.@hookform/resolvers– Resolvers for use with react-hook-form, providing validation and schema handling.tailwind-merge– A utility for merging Tailwind CSS classes.react-hot-toast– A lightweight and customizable toast library for React.@trpc/client– A package for generating TypeScript types and hooks for calling tRPC methods on the client.@trpc/react-query– Integration of tRPC with React Query
Configure Tailwind CSS
Next, let’s tailor the Tailwind CSS configuration to include our custom colors, fonts, screen breakpoints, and default container classes. To achieve this, navigate to the tailwind.config.ts file and replace its current content with the following:
tailwind.config.ts
import type { Config } from 'tailwindcss';

const config: Config = {
  content: [
    './pages/**/*.{js,ts,jsx,tsx,mdx}',
    './components/**/*.{js,ts,jsx,tsx,mdx}',
    './app/**/*.{js,ts,jsx,tsx,mdx}',
  ],
  theme: {
    extend: {
      colors: {
        'ct-dark-600': '#222',
        'ct-dark-200': '#e5e7eb',
        'ct-dark-100': '#f5f6f7',
        'ct-blue-600': '#2363eb',
        'ct-yellow-600': '#f9d13e',
      },
      fontFamily: {
        Poppins: ['Poppins, sans-serif'],
      },
      container: {
        center: true,
        padding: '1rem',
        screens: {
          lg: '1125px',
          xl: '1125px',
          '2xl': '1125px',
        },
      },
    },
  },
  plugins: [],
};
export default config;
Setup the tRPC Client
With that step completed, let’s now move on to setting up React Query and the tRPC client within the Next.js project. First, we’ll need to initialize the tRPC client. To do so, navigate to the utils directory and create a file named trpc.ts. Within this file, include the following code:
utils/trpc.ts
import type { AppRouter } from '@/app/api/trpc/trpc-router';
import { createTRPCReact } from '@trpc/react-query';

export const trpc = createTRPCReact<AppRouter>();
Moving forward, let’s create an instance of the React Query Client, allowing us to effectively manage the state and behaviour of queries within the application. Within the utils directory, create a new file named query-client.ts and include the following code:
utils/query-client.ts
import { QueryClient } from '@tanstack/react-query';

const queryClient = new QueryClient();
export default queryClient;
Now, let’s ensure the tRPC and React Query clients are accessible to the entire component tree. As all components inside the ‘app‘ directory are now server components by default, and since we want to render the tRPC and React Query providers only on the client side, we need to create a client component. In Next.js, this is achieved by including the ‘use client‘ directive at the top of the file.
To implement the providers, create a trpc-provider.tsx file in the ‘utils‘ directory and add the following code to it:
utils/trpc-provider.tsx
'use client';

import { QueryClientProvider } from '@tanstack/react-query';
import { httpBatchLink, getFetch, loggerLink } from '@trpc/client';
import { useState } from 'react';
import superjson from 'superjson';
import { trpc } from './trpc';
import queryClient from './query-client';
import { ReactQueryDevtools } from '@tanstack/react-query-devtools';

export const TrpcProvider: React.FC<{ children: React.ReactNode }> = ({
  children,
}) => {
  const url = process.env.NEXT_PUBLIC_VERCEL_URL
    ? `https://${process.env.NEXT_PUBLIC_VERCEL_URL}`
    : 'http://localhost:3000/api/trpc/';

  const [trpcClient] = useState(() =>
    trpc.createClient({
      links: [
        loggerLink({
          enabled: () => true,
        }),
        httpBatchLink({
          url,
          fetch: async (input, init?) => {
            const fetch = getFetch();
            return fetch(input, {
              ...init,
              credentials: 'include',
            });
          },
        }),
      ],
      transformer: superjson,
    })
  );
  return (
    <trpc.Provider client={trpcClient} queryClient={queryClient}>
      <QueryClientProvider client={queryClient}>
        {children}
        <ReactQueryDevtools />
      </QueryClientProvider>
    </trpc.Provider>
  );
};
Let’s wrap the TrpcProvider client component around the {children} prop inside the root layout component to ensure that all client components within the component tree have access to both the tRPC and React Query clients. Open the layout.tsx file within the ‘app‘ directory and replace its content with the following code:
app/layout.tsx
import type { Metadata } from 'next';
import { Inter } from 'next/font/google';
import './globals.css';
import { TrpcProvider } from '@/utils/trpc-provider';
import { Toaster } from 'react-hot-toast';

const inter = Inter({ subsets: ['latin'] });

export const metadata: Metadata = {
  title: 'Create Next App',
  description: 'Generated by create next app',
};

export default function RootLayout({
  children,
}: Readonly<{
  children: React.ReactNode;
}>) {
  return (
    <html lang='en'>
      <body className={inter.className}>
        <TrpcProvider>
          <div>
            {children}
            <Toaster />
          </div>
        </TrpcProvider>
      </body>
    </html>
  );
}
In the above code snippet, we have also included the <Toaster /> component to ensure that toast notifications are displayed on the screen.
Retrieve Authenticated User
In this section, we will create a server function that utilizes the createAsyncCaller function we previously defined while building the tRPC API. This function will invoke the getMe procedure to fetch information about the authenticated user. In brief, the createAsyncCaller function enables us to invoke procedures on the server, eliminating the need for an HTTP request.
To implement this, create a get-auth-user.ts file inside the ‘utils‘ directory and include the following code:
utils/get-auth-user.ts
'use server';

import { createAsyncCaller } from '@/app/api/trpc/trpc-router';
import { redirect } from 'next/navigation';

export const getAuthUser = async ({
  shouldRedirect = true,
}: {
  shouldRedirect?: boolean;
} = {}) => {
  const caller = await createAsyncCaller();
  return caller
    .getMe(undefined)
    .then((result) => result.data.user)
    .catch((e) => {
      if (e.code === 'UNAUTHORIZED' && shouldRedirect) {
        redirect('/login');
      }

      return null;
    });
};
Create Reusable Components
Now, let’s proceed to create reusable components that can be utilized in various sections of our application. This adheres to the DRY (Don’t Repeat Yourself) principle, as it eliminates the need to include the same block of code in multiple places.
Header Component
Let’s begin with the Header component. In this component, our goal is to render navigation links dynamically based on the user’s authentication status. Specifically, we’ll display links such as Login, Register, Profile, and Logout. The Logout and Profile links should only be visible to authenticated users, while the Login and Register links should be shown exclusively to unauthenticated users.
There are two approaches to achieve this. One way is to fetch the user’s data from the client side after the user logs in. However, this involves an HTTP request, and waiting for this request might result in delayed link updates. Alternatively, we can fetch the user’s data on the server and render the links based on that information.
To implement this, we’ll convert the Header component into a server component. Note that the logout functionality involves hooks, which are only available in the browser. To address this, we’ll extract that part of the code into a client component.
Start by creating a ‘components‘ directory in the root folder. Within this directory, create an auth-menu.tsx file and add the following code:
components/auth-menu.tsx
'use client';

import queryClient from '@/utils/query-client';
import { trpc } from '@/utils/trpc';
import Link from 'next/link';
import { useRouter } from 'next/navigation';
import toast from 'react-hot-toast';

export default function AuthMenu() {
  const router = useRouter();

  const { mutate: logoutFn } = trpc.logoutUser.useMutation({
    onError(error) {
      toast.error(error.message);
      console.log('Error message:', error.message);
    },
    onSuccess() {
      queryClient.clear();
      toast.success('logout successful');
      router.push('/login');
    },
  });

  return (
    <>
      <li>
        <Link href='/profile' className='text-ct-dark-600'>
          Profile
        </Link>
      </li>
      <li className='cursor-pointer' onClick={() => logoutFn()}>
        Logout
      </li>
    </>
  );
}
Moving on, let’s create the Header component. In this component, we’ll use the getAuthUser function to fetch the user’s data by invoking the getMe RPC on the server. Subsequently, we’ll dynamically render the links based on whether data was returned or not. Additionally, we’ll include the AuthMenu component, responsible for managing the logout functionality.
Create a header.tsx file and add the following code:
components/header.tsx
import Link from 'next/link';
import AuthMenu from './auth-menu';
import { getAuthUser } from '@/utils/get-auth-user';

const Header = async () => {
  const user = await getAuthUser({ shouldRedirect: false });

  return (
    <header className='bg-white h-20'>
      <nav className='h-full flex justify-between container items-center'>
        <div>
          <Link href='/' className='text-ct-dark-600 text-2xl font-semibold'>
            CodevoWeb
          </Link>
        </div>
        <ul className='flex items-center gap-4'>
          <li>
            <Link href='/' className='text-ct-dark-600'>
              Home
            </Link>
          </li>
          {!user && (
            <>
              <li>
                <Link href='/register' className='text-ct-dark-600'>
                  Register
                </Link>
              </li>
              <li>
                <Link href='/login' className='text-ct-dark-600'>
                  Login
                </Link>
              </li>
            </>
          )}
          {user && <AuthMenu />}
        </ul>
      </nav>
    </header>
  );
};

export default Header;
Spinner and Button Components
Let’s create two components: a Spinner and a LoadingButton that uses the Spinner component. The Spinner component will be visible when a request is in progress or when the server is processing the request. To create the Spinner component, create a spinner.tsx file in the ‘components‘ directory and include the following code:
components/spinner.tsx
import React from 'react';
import { twMerge } from 'tailwind-merge';
type SpinnerProps = {
  width?: string;
  height?: string;
  color?: string;
  bgColor?: string;
};
const Spinner: React.FC<SpinnerProps> = ({
  width = '1.25rem',
  height = '1.25rem',
  color,
  bgColor,
}) => {
  return (
    <svg
      role='status'
      className={twMerge(
        'mr-2 text-gray-200 animate-spin dark:text-gray-600 fill-blue-600',
        `${color} ${bgColor}`
      )}
      style={{ height, width }}
      viewBox='0 0 100 101'
      fill='none'
      xmlns='http://www.w3.org/2000/svg'
    >
      <path
        d='M100 50.5908C100 78.2051 77.6142 100.591 50 100.591C22.3858 100.591 0 78.2051 0 50.5908C0 22.9766 22.3858 0.59082 50 0.59082C77.6142 0.59082 100 22.9766 100 50.5908ZM9.08144 50.5908C9.08144 73.1895 27.4013 91.5094 50 91.5094C72.5987 91.5094 90.9186 73.1895 90.9186 50.5908C90.9186 27.9921 72.5987 9.67226 50 9.67226C27.4013 9.67226 9.08144 27.9921 9.08144 50.5908Z'
        fill='currentColor'
      />
      <path
        d='M93.9676 39.0409C96.393 38.4038 97.8624 35.9116 97.0079 33.5539C95.2932 28.8227 92.871 24.3692 89.8167 20.348C85.8452 15.1192 80.8826 10.7238 75.2124 7.41289C69.5422 4.10194 63.2754 1.94025 56.7698 1.05124C51.7666 0.367541 46.6976 0.446843 41.7345 1.27873C39.2613 1.69328 37.813 4.19778 38.4501 6.62326C39.0873 9.04874 41.5694 10.4717 44.0505 10.1071C47.8511 9.54855 51.7191 9.52689 55.5402 10.0491C60.8642 10.7766 65.9928 12.5457 70.6331 15.2552C75.2735 17.9648 79.3347 21.5619 82.5849 25.841C84.9175 28.9121 86.7997 32.2913 88.1811 35.8758C89.083 38.2158 91.5421 39.6781 93.9676 39.0409Z'
        fill='currentFill'
      />
    </svg>
  );
};

export default Spinner;
To implement the loading button component, create a loading-button.tsx file in the ‘components‘ directory and include the following code:
components/loading-button.tsx
import React from 'react';
import { twMerge } from 'tailwind-merge';
import Spinner from './spinner';

type LoadingButtonProps = {
  loading: boolean;
  btnColor?: string;
  textColor?: string;
  children: React.ReactNode;
};

export const LoadingButton: React.FC<LoadingButtonProps> = ({
  textColor = 'text-white',
  btnColor = 'bg-ct-yellow-600',
  children,
  loading = false,
}) => {
  return (
    <button
      type='submit'
      className={twMerge(
        `w-full py-3 font-semibold rounded-lg outline-none border-none flex justify-center`,
        `${btnColor} ${loading && 'bg-[#ccc]'}`
      )}
    >
      {loading ? (
        <div className='flex items-center gap-3'>
          <Spinner />
          <span className='text-slate-500 inline-block'>Loading...</span>
        </div>
      ) : (
        <span className={`${textColor}`}>{children}</span>
      )}
    </button>
  );
};
Form Input Component
Considering that the application will feature two distinct forms—one for the login page and the other for registration—it is logical to abstract the input code into a reusable component. To create the form input component, create a form-input.tsx file in the ‘components‘ directory and include the following code:
components/form-input.tsx
import React from 'react';
import { useFormContext } from 'react-hook-form';

type FormInputProps = {
  label: string;
  name: string;
  type?: string;
};

const FormInput: React.FC<FormInputProps> = ({
  label,
  name,
  type = 'text',
}) => {
  const {
    register,
    formState: { errors },
  } = useFormContext();
  return (
    <div className=''>
      <label htmlFor={name} className='block text-ct-blue-600 mb-3'>
        {label}
      </label>
      <input
        type={type}
        placeholder=' '
        className='block w-full rounded-2xl appearance-none focus:outline-none py-2 px-4'
        {...register(name)}
      />
      {errors[name] && (
        <span className='text-red-500 text-xs pt-1 block'>
          {errors[name]?.message as string}
        </span>
      )}
    </div>
  );
};

export default FormInput;
Create the Home Page
Now, let’s proceed with building the page components, starting with the home page, as it is the simplest. Here, we will render the Header component, and below that, display a simple text “Implement Authentication with tRPC in Next.js 14“. Open the app/page.tsx file and replace its content with the following code:
app/page.tsx
import Header from '@/components/header';

export default function Home() {
  return (
    <>
      <Header />
      <section className='bg-ct-blue-600 min-h-screen pt-20'>
        <div className='max-w-4xl mx-auto bg-ct-dark-100 rounded-md h-[20rem] flex justify-center items-center'>
          <p className='text-3xl font-semibold'>
            Implement Authentication with tRPC in Next.js 14
          </p>
        </div>
      </section>
    </>
  );
}
User Registration with tRPC
Our next objective is to implement user registration. We’ll develop a client-side component containing a form for handling account registration. Form validation will be performed using React Hook Form and Zod. Speaking of Zod, we will reuse the validation schemas defined in the previous tutorial where we created the tRPC API.
Create the Registration Form
Let’s proceed to create the registration form. When the form is submitted without validation errors, our trpc.registerUser procedure will be invoked on the server to add the new user to the database. As this involves an HTTP request that might take some time, a loading Spinner will be displayed to provide feedback to the user that the request is being processed.
To create the form component, follow these steps:
- Navigate to the ‘app‘ directory and create a new folder called ‘register‘.
- Inside the ‘register‘ folder, create a file named
register-form.tsxand add the following code:
app/register/register-form.tsx
'use client';

import { useForm, SubmitHandler, FormProvider } from 'react-hook-form';
import { zodResolver } from '@hookform/resolvers/zod';
import { useState } from 'react';
import Link from 'next/link';
import { toast } from 'react-hot-toast';
import { useRouter } from 'next/navigation';
import { CreateUserInput, createUserSchema } from '@/lib/user-schema';
import { trpc } from '@/utils/trpc';
import FormInput from '@/components/form-input';
import { LoadingButton } from '@/components/loading-button';

export default function RegisterForm() {
  const router = useRouter();
  const [submitting, setSubmitting] = useState(false);

  const methods = useForm<CreateUserInput>({
    resolver: zodResolver(createUserSchema),
  });

  const { reset, handleSubmit } = methods;

  const { mutate: registerFn } = trpc.registerUser.useMutation({
    onMutate() {
      setSubmitting(true);
    },
    onSettled() {
      setSubmitting(false);
    },
    onError(error) {
      reset({ password: '', passwordConfirm: '' });
      toast.error(error.message);
      console.log('Error message:', error.message);
    },
    onSuccess() {
      toast.success('registered successfully');
      router.push('/login');
    },
  });

  const onSubmitHandler: SubmitHandler<CreateUserInput> = (values) => {
    registerFn(values);
  };

  return (
    <FormProvider {...methods}>
      <form
        onSubmit={handleSubmit(onSubmitHandler)}
        className='max-w-md w-full mx-auto overflow-hidden shadow-lg bg-ct-dark-200 rounded-2xl p-8 space-y-5'
      >
        <FormInput label='Full Name' name='name' />
        <FormInput label='Email' name='email' type='email' />
        <FormInput label='Password' name='password' type='password' />
        <FormInput
          label='Confirm Password'
          name='passwordConfirm'
          type='password'
        />
        <span className='block'>
          Already have an account?{' '}
          <Link href='/login' className='text-ct-blue-600'>
            Login Here
          </Link>
        </span>
        <LoadingButton loading={submitting} textColor='text-ct-blue-600'>
          Register
        </LoadingButton>
      </form>
    </FormProvider>
  );
}
Once the account registration is successful, the user will be automatically redirected to the login page.
Create the Page Component
Now, let’s create the page component to render the account registration form we created earlier. Within the app/register/ directory, generate a page.tsx file and include the following code:
app/register/page.tsx
import Header from '@/components/header';
import RegisterForm from './register-form';

export default async function RegisterPage() {
  return (
    <>
      <Header />
      <section className='py-8 bg-ct-blue-600 min-h-screen grid place-items-center'>
        <div className='w-full'>
          <h1 className='text-4xl xl:text-6xl text-center font-[600] text-ct-yellow-600 mb-4'>
            Welcome to CodevoWeb!
          </h1>
          <h2 className='text-lg text-center mb-4 text-ct-dark-200'>
            Sign Up To Get Started!
          </h2>
          <RegisterForm />
        </div>
      </section>
    </>
  );
}
User Login with tRPC
With the account registration completed, let’s proceed to implement the account login functionality. The implementation is quite similar to the account registration, except that there will be fewer input fields and a different RPC will be invoked.
Create the Login Form
The login form will consist of two input fields: email and password. Form validation will be handled using the loginUserSchema we defined during the API development, in conjunction with the React Hook Form library. When the user submits the form, the input values will be validated against the rules specified in the Zod schema. If valid, the trpc.loginUser RPC will be invoked on the server to authenticate the user.
To create the login form, follow these steps:
- Navigate to the ‘app‘ directory and create a ‘login‘ directory.
- Inside the ‘login‘ directory, create a
login-form.tsxfile. - Add the following code to the
login-form.tsxfile:
app/login/login-form.tsx
'use client';

import { useForm, SubmitHandler, FormProvider } from 'react-hook-form';
import { zodResolver } from '@hookform/resolvers/zod';
import { useState } from 'react';
import Link from 'next/link';
import { useRouter } from 'next/navigation';
import { LoginUserInput, loginUserSchema } from '@/lib/user-schema';
import FormInput from '@/components/form-input';
import { LoadingButton } from '@/components/loading-button';
import { trpc } from '@/utils/trpc';
import toast from 'react-hot-toast';

export default function LoginForm() {
  const [submitting, setSubmitting] = useState(false);
  const router = useRouter();

  const methods = useForm<LoginUserInput>({
    resolver: zodResolver(loginUserSchema),
  });

  const { reset, handleSubmit } = methods;

  const { mutate: loginFn } = trpc.loginUser.useMutation({
    onSettled() {
      setSubmitting(false);
    },
    onMutate() {
      setSubmitting(true);
    },
    onError(error) {
      toast.error(error.message);
      console.log('Error message:', error.message);
      reset({ password: '' });
    },
    onSuccess() {
      toast.success('login successfully');
      router.push('/');
    },
  });

  const onSubmitHandler: SubmitHandler<LoginUserInput> = (values) => {
    loginFn(values);
  };

  return (
    <FormProvider {...methods}>
      <form
        onSubmit={handleSubmit(onSubmitHandler)}
        className='max-w-md w-full mx-auto overflow-hidden shadow-lg bg-ct-dark-200 rounded-2xl p-8 space-y-5'
      >
        <FormInput label='Email' name='email' type='email' />
        <FormInput label='Password' name='password' type='password' />

        <div className='text-right'>
          <Link href='#' className=''>
            Forgot Password?
          </Link>
        </div>
        <LoadingButton loading={submitting} textColor='text-ct-blue-600'>
          Login
        </LoadingButton>
        <span className='block'>
          Need an account?{' '}
          <Link href='/register' className='text-ct-blue-600'>
            Sign Up Here
          </Link>
        </span>
      </form>
    </FormProvider>
  );
}
Create the Page Component
To render the login form, which is a client component, we need to create a server component. Navigate to the app/login/ directory and create a file named page.tsx. Inside this file, add the following code:
app/login/page.tsx
import Header from '@/components/header';
import LoginForm from './login-form';

export default async function LoginPage() {
  return (
    <>
      <Header />
      <section className='bg-ct-blue-600 min-h-screen grid place-items-center'>
        <div className='w-full'>
          <h1 className='text-4xl lg:text-6xl text-center font-[600] text-ct-yellow-600 mb-4'>
            Welcome Back
          </h1>
          <h2 className='text-lg text-center mb-4 text-ct-dark-200'>
            Login to have access
          </h2>
          <LoginForm />
        </div>
      </section>
    </>
  );
}
Display the Authenticated User’s Information
Now, let’s create a server component that will utilize the getAuthUser function to retrieve the authenticated user’s information and display it on the page. This page will be protected, and only users with valid JSON Web Tokens will be able to access it. When the user is not authenticated, they will be automatically redirected to the login page. We will name this page the profile, as it displays information about the user. To create this page, follow these steps:
- Create a ‘profile‘ directory inside the ‘app‘ folder.
- Inside the ‘profile‘ directory, create a
page.tsxfile. - Add the following code to the
page.tsxfile:
app/profile/page.tsx
import Header from '@/components/header';
import { getAuthUser } from '@/utils/get-auth-user';

export default async function ProfilePage() {
  const user = await getAuthUser();

  return (
    <>
      <Header />
      <section className='bg-ct-blue-600  min-h-screen pt-20'>
        <div className='max-w-4xl mx-auto bg-ct-dark-100 rounded-md h-[20rem] flex justify-center items-center'>
          <div>
            <p className='mb-3 text-5xl text-center font-semibold'>
              Profile Page
            </p>
            <div className='mt-8'>
              <p className='mb-3'>Id: {user?.id}</p>
              <p className='mb-3'>Name: {user?.name}</p>
              <p className='mb-3'>Email: {user?.email}</p>
              <p className='mb-3'>Role: {user?.role}</p>
              <p className='mb-3'>Verified: {String(user?.verified)}</p>
            </div>
          </div>
        </div>
      </section>
    </>
  );
}
And we are done! If you haven’t already started the Next.js development server, do so now. Open the application in your browser to interact with features such as creating a new account, signing into your account, viewing your profile information, and logging out.
Conclusion
This concludes our article. In this comprehensive guide, you have learned how to build a frontend application in Next.js 14 that leverages tRPC to communicate with a tRPC backend for handling user registration, login, and logout. I hope you found this tutorial helpful and enjoyable. If you have any questions or feedback, feel free to leave them in the comments section below. Thank you for reading!