

In this article, you will learn how to use Supabase with React Query in the new Next.js app directory, focusing on both client and server components. Additionally, you will learn how to leverage the Supabase CLI for performing database migrations and seeding data with dummy content for testing.
While Supabase provides a JavaScript SDK for interacting with its hosted PostgreSQL database, you might not necessarily need to use a library like React Query. However, if you aim to incorporate advanced data fetching features, such as re-fetching data in the background when stale or after a mutation, and efficiently caching fetched data, then React Query emerges as the optimal choice for this task.
Without further delay, let’s delve into the article to explore the integration of Supabase with React Query in the new Next.js App Router.
The tutorial’s source code is available on GitHub: https://github.com/wpcodevo/nextjs-react-query-supabase
More practice:
- How to Set Up and Use React Query in Next.js 14
- Using tRPC with Next.js 14, React Query and Prisma
- How to Setup React Query in Next.js 13 App Directory
- React Query and Axios: User Registration and Email Verification
- Forgot/Reset Passwords with React Query and Axios
- How to Setup tRPC API Server & Client with Next.js and Prisma
- tRPC Server API with Next.js & PostgreSQL: Access & Refresh Tokens
- Full-Stack Next.js tRPC App: User Registration & Login Example
- Build a tRPC CRUD API Example with Next.js
Bootstrap the Next.js 14+ Project
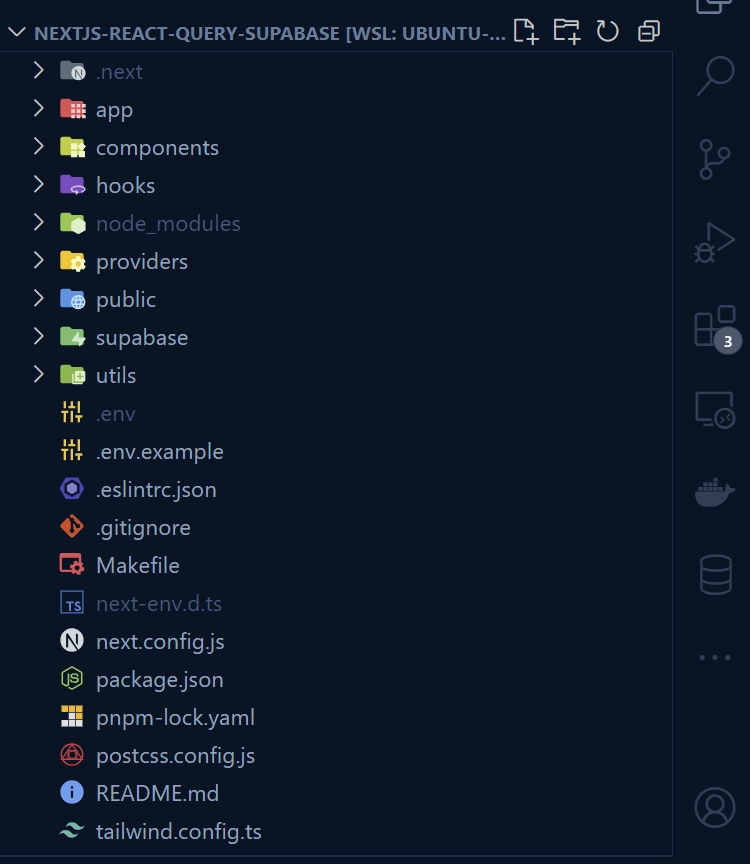
By the end of this article, you should have a project structure that resembles the one below.
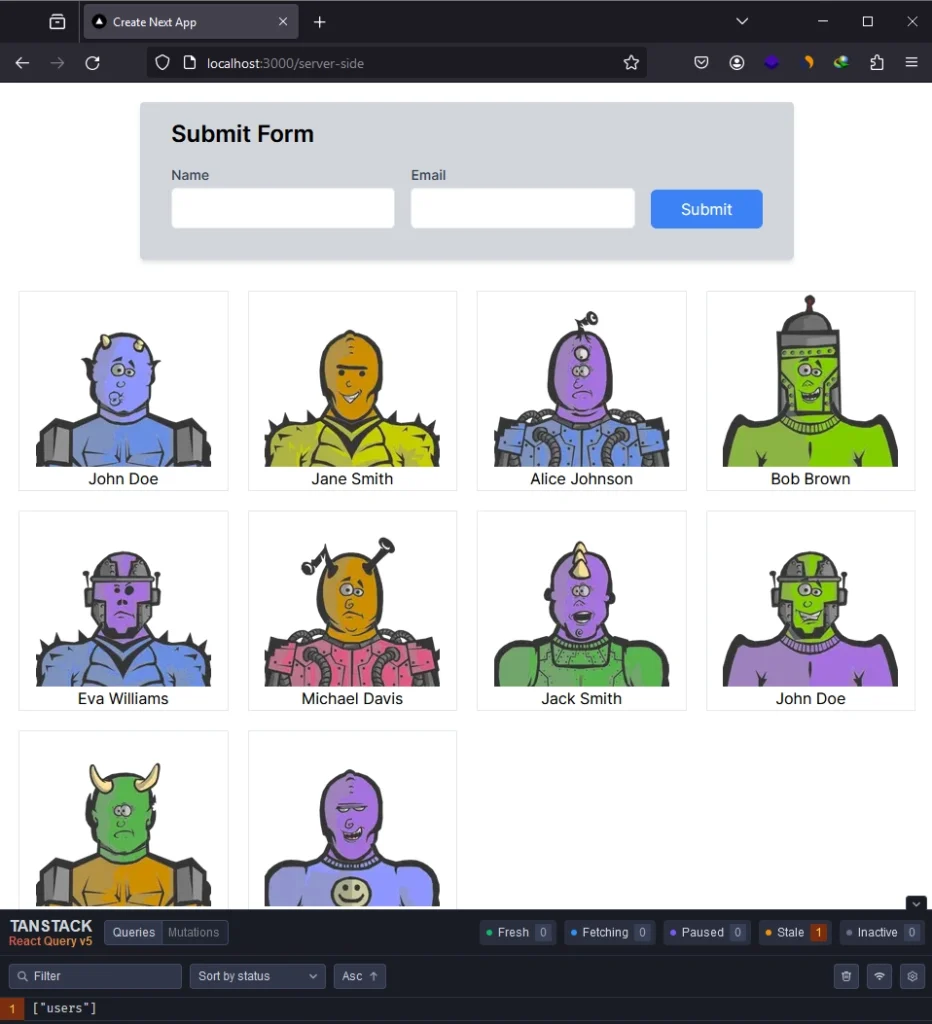
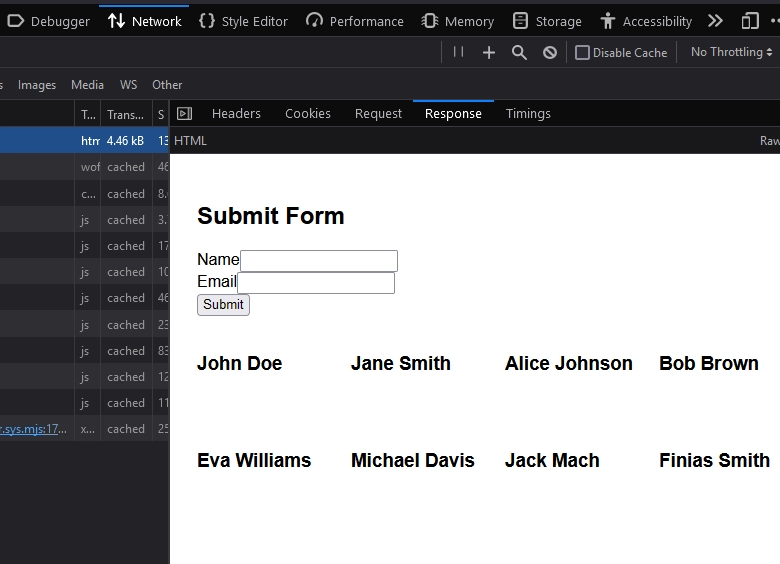
Below is the application we will be building to demonstrate how Supabase and React Query can be used in both client and server components in the new Next.js app router. The app comprises two components, the top one being a form for adding new users and the one below for displaying the users.
Let’s start by initializing a new Next.js 14+ project. To do this, navigate to the folder where you’d like to store the source code and open a new terminal there. Then, execute the following commands based on your preferred package manager.
yarn create nextjs-react-query-supabase
# or
npx create-next-app@latest nextjs-react-query-supabase
# or
pnpm create next-app nextjs-react-query-supabase
You will encounter prompts to enable specific features for the project. Ensure you choose ‘Yes‘ for TypeScript and ESLint. Regarding the project structure, opt for ‘No‘ for the src/ directory and ‘Yes‘ for the app/ directory. For the import alias, press Enter to accept the default.
After answering all the questions, the Next.js 14+ project will be generated, and the necessary dependencies will be installed. Once the installation is complete, open the project in your preferred IDE or text editor, such as VS Code.
Next, navigate to the app/globals.css file and remove all CSS styles, leaving only the Tailwind CSS directives.
Finally, open the app/page.tsx file and replace its existing content with the one provided below:
app/page.tsx
import Link from 'next/link';

export default function Home() {
  return (
    <div>
      <h1 className='text-4xl font-bold'>Hello, Next.js 14 App Directory!</h1>
      <p>
        <Link className='text-blue-500 underline' prefetch href='/client-side'>
          Using Supabase in a Client Component
        </Link>
      </p>
      <p>
        <Link prefetch href='/server-side' className='text-blue-500 underline'>
          Using Supabase in a Server Component with Hydration
        </Link>
      </p>
    </div>
  );
}
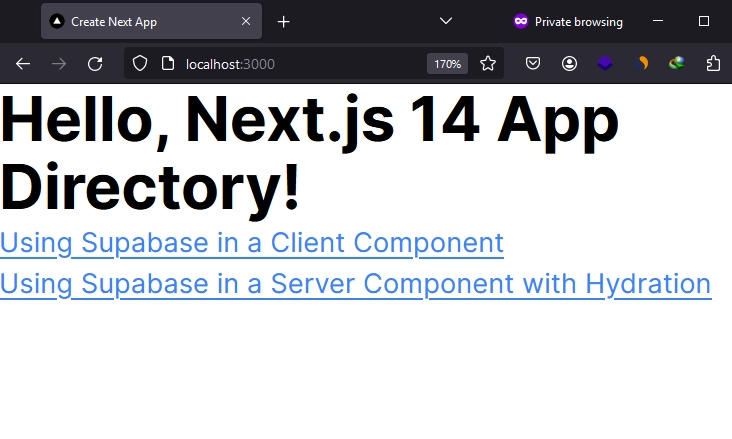
Start the Next.js development server and navigate to the root URL in the browser. You should see a page like this on your screen.
Install the Necessary Dependencies
Now, let’s install the dependencies that will allow us to integrate Supabase and React Query into the Next.js project. Open your terminal and execute the following commands to install these dependencies.
pnpm add @supabase/supabase-js @tanstack/react-query @supabase/ssr
pnpm add -D @tanstack/eslint-plugin-query
pnpm add -D @tanstack/react-query-devtools
pnpm add -D supabase
# or
yarn add @supabase/supabase-js @tanstack/react-query @supabase/ssr
yarn add -D @tanstack/eslint-plugin-query
yarn add -D @tanstack/react-query-devtools
yarn add -D supabase
# or
npm i @supabase/supabase-js @tanstack/react-query @supabase/ssr
npm i -D @tanstack/eslint-plugin-query
npm i -D @tanstack/react-query-devtools
npm i -D supabase
@supabase/supabase-js: The official JavaScript client library for Supabase, offering tools for interacting with Supbase services.@tanstack/react-query: A data management library for efficiently fetching and managing asynchronous data.@supabase/ssr: This package facilitates server-side rendering (SSR) support for Supabase in your project.@tanstack/eslint-plugin-query: A helpful ESLint plugin designed to catch bugs and maintain coding consistency.@tanstack/react-query-devtools: A development tool for debugging and monitoring React Query within your application.supabase: Supabase CLI, providing local development tools and deployment capabilities to the Supabase Platform.
Create a Project on Supabase
As usual, we need to create a new Supabase project on the Supabase website. Feel free to use an existing project if you have one. However, if you haven’t set up one yet, follow the steps outlined below.
- Visit the Supabase Website:
Open your web browser and navigate to the Supabase website. - Sign In:
Sign in using your GitHub account. If you’re new to Supabase, head to the Sign Up page, and click “Continue with GitHub” to create an account. - Create an Organization:
After signing up, log in to Supabase. You’ll be directed to the dashboard. Click “New Organization” to create one. Provide your organization name (e.g. your company name) and click “Create organization“. - Create a New Project:
Click “New Project” and select the organization. Provide a project name and generate a secure password. Create a new file in your Next.js project named.envand add the project password asSUPABASE_DATABASE_PASSWORD. Click “Create new project“. - Get the Project URL and Anon Key:
Copy the project URL and anon key. Add them to the.envfile asNEXT_PUBLIC_SUPABASE_URLandNEXT_PUBLIC_SUPABASE_ANON_KEY. If not visible, find them in the settings menu under API settings. - Get the Postgres Connection String:
On the Settings page, click “Database” and then “URI” under connection string options. Copy the Postgres connection string to the.envfile asSUPABASE_DATABASE_URL, replacing[YOUR-PASSWORD]with the project password. - Get the Project Reference:
Under the Settings menu, click “General” and copy the project reference. Add it to the.envfile asSUPABASE_PROJECT_REFERENCE. - Generate an Access Token:
On the main dashboard, click “Access token” in the left sidebar or use the link https://supabase.com/dashboard/account/tokens. Click “Generate new token“, provide a name, and click “Generate token“. Copy the token to the.envfile asSUPABASE_ACCESS_TOKEN.
If you choose to use an existing Supabase project, create a .env file at the root level of your project and include the following environment variables with their respective values.
.env
SUPABASE_ACCESS_TOKEN=
SUPABASE_DATABASE_PASSWORD=
SUPABASE_PROJECT_REFERENCE=
NEXT_PUBLIC_SUPABASE_ANON_KEY=
NEXT_PUBLIC_SUPABASE_URL=
SUPABASE_DATABASE_URL=
Setup Supabase in the Next.js App Router
Now that you have all the necessary environment variables in your .env file, we can proceed to initialize Supabase in the Next.js project. To enable communication between the Supabase CLI and the remote Supabase platform, make sure you have the SUPABASE_ACCESS_TOKEN variable in your .env file.
Initialize and Perform Migrations with the Supabase CLI
To initialize Supabase in the project, execute the command pnpm supabase initYou will be prompted to generate VS Code settings for Deno; press Enter to accept the default. After running the command, you should see a new directory named ‘supabase‘ generated in the root level of your project.
pnpm supabase init
# or
npx supabase init
Next, execute the following command to generate a new migration file in the supabase/migrations directory. If the migrations folder doesn’t already exist, it will be generated along with the migration file.
pnpm supabase migration new init_user
# or
npx supabase migration new init_user
Open the generated migration file and include the following SQL code. This code is designed to create a “User” table in the “public” schema, along with adding a unique constraint on the email to ensure that each user possesses a distinct email address.
supabase/migrations/20240116132802_init_user.sql
-- CreateTable
CREATE TABLE "public"."User" (
    "id" SERIAL NOT NULL,
    "name" TEXT NOT NULL,
    "email" TEXT NOT NULL,
    "role" TEXT NOT NULL DEFAULT 'user',
    "createdAt" TIMESTAMP(3) NOT NULL DEFAULT CURRENT_TIMESTAMP,

    CONSTRAINT "User_pkey" PRIMARY KEY ("id")
);

-- CreateIndex
CREATE UNIQUE INDEX "User_email_key" ON "public"."User"("email");
Also, open the supabase/seed.sql file and add the following SQL code, which will enable us to seed the database with some dummy users for testing.
supabase/seed.sql
INSERT INTO "public"."User" ("name", "email")
VALUES
  ('John Doe', 'john.doe@example.com'),
  ('Jane Smith', 'jane.smith@example.com'),
  ('Alice Johnson', 'alice.johnson@example.com'),
  ('Bob Brown', 'bob.brown@example.com'),
  ('Eva Williams', 'eva.williams@example.com'),
  ('Michael Davis', 'michael.davis@example.com');
With that sorted, it’s time to link our local Supabase project with the remote database. To achieve this, run the command below. Remember to replace the <project_reference> placeholder with the project reference stored in the .env file.
pnpm supabase link --project-ref
# or
npx supabase link --project-ref
After running the above command, you will be prompted to input your Supabase project password. Copy the project password from the .env file and paste it into the terminal. Once you are done, press the Enter key, and the project should be linked with the remote database.
At this point, we can apply the migration file to the remote database and seed it with dummy users. Run the following command, replacing the <DB_URL> placeholder with your PostgreSQL connection string.
pnpm supabase db reset --db-url ""
# or
npx supabase db reset --db-url ""
You will be prompted to confirm if you want to reset the remote database. Type ‘Y‘ and press the Enter key.
Generate the Database Types with the Supabase CLI
Now, to generate TypeScript types for our project based on the database schema, create a folder named ‘utils‘ in the root level of your project. Then, run the following command to generate the types and save them in the database.types.ts file within the ‘utils‘ folder.
pnpm supabase gen types typescript --linked --schema=public > utils/database.types.ts
# or
npx supabase gen types typescript --linked --schema=public > utils/database.types.ts
Set Up React Query in the Next.js App Router
In the root level of your project, navigate to the utils directory, and create a new file named queryClient.ts. Add the following code to the file to create a centralized instance of the React Query Client. This instance will be utilized across the application to handle queries and mutations. While you have the flexibility to configure various options, for simplicity, we’ll set a stale time for the cache in this example.
utils/queryClient.ts
import { QueryClient } from '@tanstack/react-query';

const queryClient = new QueryClient({
  defaultOptions: { queries: { staleTime: 5 * 1000 } },
});
export default queryClient;
As of Next.js 14+, all components are server components by default. Wrapping the QueryClientProvider component directly around the {children} node can lead to errors, as it uses hooks available only in the browser. To address this, we must create a client component that renders the QueryClientProvider component. Begin by creating a providers directory at the root of your project. Inside the providers directory, create a ReactQueryClientProvider.tsx file and include the following code:
providers/ReactQueryClientProvider.tsx
'use client';

import queryClient from '@/utils/queryClient';
import { QueryClientProvider } from '@tanstack/react-query';
import { ReactQueryDevtools } from '@tanstack/react-query-devtools';

function ReactQueryProvider({ children }: React.PropsWithChildren) {
  return (
    <QueryClientProvider client={queryClient}>
      {children}
      <ReactQueryDevtools initialIsOpen={false} />
    </QueryClientProvider>
  );
}

export default ReactQueryProvider;
In the provided code, we have included the 'use client' pragma at the top of the file. This pragma establishes a boundary between Server and Client Component modules. Consequently, all other modules imported into it, including client components, are recognized as part of the client bundle.
Next, wrap the {children} node with the ReactQueryProvider client component in the app/layout.tsx file. This step ensures that the query client becomes accessible to all components within the component tree.
app/layout.tsx
import type { Metadata } from 'next';
import { Inter } from 'next/font/google';
import './globals.css';
import ReactQueryProvider from '@/providers/ReactQueryClientProvider';

const inter = Inter({ subsets: ['latin'] });

export const metadata: Metadata = {
  title: 'Create Next App',
  description: 'Generated by create next app',
};

export default function RootLayout({
  children,
}: {
  children: React.ReactNode;
}) {
  return (
    <html lang='en'>
      <body className={inter.className}>
        <ReactQueryProvider>
          <div>{children}</div>
        </ReactQueryProvider>
      </body>
    </html>
  );
}
It’s essential to render the provider as deeply nested in the tree as possible. In this case, observe how ReactQueryProvider wraps only the {children} element rather than the entire <html> document. This approach aids Next.js in optimizing the static portions of your Server Components more effectively.
Create the Supabase Client
Let’s proceed to create the Supabase browser client, enabling us to perform various operations such as querying the database, inserting, updating, and deleting records, as well as managing authentication.
Essentially, the Supabase client serves as our interface to interact with the various services provided by Supabase. To set this up, create a hooks directory at the root level. Inside the hooks directory, create a useSupabaseClient.ts file and integrate the following code.
hooks/useSupabaseClient.ts
import { useMemo } from 'react';
import { createBrowserClient } from '@supabase/ssr';
import { Database } from '@/utils/database.types';
import { SupabaseClient } from '@supabase/supabase-js';

export type TypedSupabaseClient = SupabaseClient<Database>;
let client: TypedSupabaseClient | undefined;

export function getSupabaseBrowserClient() {
  if (client) {
    return client;
  }

  const SUPABASE_URL = process.env.NEXT_PUBLIC_SUPABASE_URL!;
  const SUPABASE_ANON_KEY = process.env.NEXT_PUBLIC_SUPABASE_ANON_KEY!;

  client = createBrowserClient<Database>(SUPABASE_URL, SUPABASE_ANON_KEY);

  return client;
}

function useSupabaseClient() {
  return useMemo(getSupabaseBrowserClient, []);
}

export default useSupabaseClient;
The useMemo hook ensures that the Supabase client isn’t recreated on every render.
Create a Hook to Fetch Data
Now that we have the Supabase client ready, let’s create a hook responsible for constructing the query to fetch data from the database. To ensure flexibility for usage in both client and server components, we’ll return an object containing the query function, query key, and query options. The ideal approach would involve using the useQuery hook in this file, but it would limit usage to only client components.
Therefore, create a use-users-query.ts file within the hooks directory and incorporate the following code:
hooks/use-users-query.ts
import { QueryKey, UseQueryOptions } from '@tanstack/react-query';
import { TypedSupabaseClient } from './useSupabaseClient';

interface User {
  id: number;
  name: string;
  email: string;
}

export const userQueryKey = ['users'];

function useUsersQuery(
  client: TypedSupabaseClient,
  queryOptions?: UseQueryOptions<User[], Error, User[], QueryKey>
) {
  const queryFn = async (): Promise<User[]> => {
    const users = await client.from('User').select('*').throwOnError();
    return users.data || [];
  };

  return { queryKey: userQueryKey, queryFn, ...queryOptions };
}

export default useUsersQuery;
Create a Hook to Mutate Data
Continuing with our setup, let’s create a hook dedicated to mutating data in the database, specifically for inserting new records. The approach remains similar to the previous one, but this time, we’ll utilize the useMutation hook in this file, as it will exclusively be used in client components. To implement this, create a user-insert-user-mutation.ts file in the hooks directory and include the following code:
hooks/user-insert-user-mutation.ts
import { useMutation } from '@tanstack/react-query';
import useSupabase from './useSupabaseClient';

function useInsertUserMutation() {
  const client = useSupabase();

  const mutationFn = async ({
    name,
    email,
  }: {
    name: string;
    email: string;
  }) => {
    return client
      .from('User')
      .upsert([{ name, email }])
      .throwOnError()
      .select(`*`)
      .throwOnError()
      .single()
      .then((result) => result.data);
  };

  return useMutation({ mutationFn });
}

export default useInsertUserMutation;
Using Supabase and React Query on the Client
Now that we have the Supabase client and query hook ready, we can utilize them to fetch data, specifically the list of users, from the database.
Fetching Data in a Client Component
Start by creating a components directory, and within it, create a list-users.tsx file, and add the following code:
components/list-users.tsx
'use client';

import useUsersQuery from '@/hooks/use-users-query';
import useSupabaseClient from '@/hooks/useSupabaseClient';
import { useQuery } from '@tanstack/react-query';
import Image from 'next/image';

export default function ListUsers() {
  const client = useSupabaseClient();

  const { data } = useQuery(useUsersQuery(client));

  return (
    <>
      {
        <div
          style={{
            display: 'grid',
            gridTemplateColumns: '1fr 1fr 1fr 1fr',
            gap: 20,
          }}
        >
          {data?.map((user) => (
            <div
              key={user.id}
              className='flex flex-col justify-center items-center border-gray-200 border'
            >
              <Image
                src={`https://robohash.org/${user.id}?set=set2&size=180x180`}
                alt={user.name}
                width={180}
                height={180}
                className='block'
              />
              <h3>{user.name}</h3>
            </div>
          ))}
        </div>
      }
    </>
  );
}
In the code above, we utilized the useQuery hook along with the useUsersQuery builder hook and the Supabase client to fetch the list of users from the database. Subsequently, we displayed them in the UI.
You may have noticed that we are displaying images from an external source in the HTML. For this to work, we need to configure the hostname in the next.config.js file. Here is an example:
next.config.js
/** @type {import('next').NextConfig} */
const nextConfig = {
  images: {
    remotePatterns: [
      {
        protocol: 'https',
        hostname: 'robohash.org',
      },
    ],
  },
};

module.exports = nextConfig;
Mutating Data in a Client Component
To insert new users into the database, let’s create a form component for that purpose. This component will utilize the useInsertUserMutation hook we created earlier to mutate data in the database. Create a user-form.tsx file in the components directory and add the following code:
components/user-form.tsx
'use client';

import { userQueryKey } from '@/hooks/use-users-query';
import useInsertUserMutation from '@/hooks/user-insert-user-mutation';
import queryClient from '@/utils/queryClient';
import React, { useState } from 'react';

const UserForm = () => {
  const [name, setName] = useState('');
  const [email, setEmail] = useState('');

  const insertUserMutation = useInsertUserMutation();

  const handleSubmit = async (e: React.FormEvent<HTMLFormElement>) => {
    e.preventDefault();
    insertUserMutation.mutate(
      { name, email },
      {
        onSettled: () => {
          setName('');
          setEmail('');
        },
        onSuccess: async () => {
          await queryClient.invalidateQueries({
            queryKey: userQueryKey,
          });
        },
      }
    );
  };

  return (
    <div className='bg-gray-300 p-8 pt-4 rounded shadow-md max-w-2xl w-full'>
      <h2 className='text-2xl font-semibold mb-4'>Submit Form</h2>

      <form onSubmit={handleSubmit} className='space-y-4'>
        <div className='flex space-x-4 items-end'>
          <div className='w-1/2'>
            <label
              htmlFor='name'
              className='block text-sm font-medium text-gray-700'
            >
              Name
            </label>
            <input
              type='text'
              id='name'
              name='name'
              value={name}
              onChange={(e) => setName(e.target.value)}
              className='mt-1 p-2 w-full border rounded-md'
              required
            />
          </div>

          <div className='w-1/2'>
            <label
              htmlFor='email'
              className='block text-sm font-medium text-gray-700'
            >
              Email
            </label>
            <input
              type='email'
              id='email'
              name='email'
              value={email}
              onChange={(e) => setEmail(e.target.value)}
              className='mt-1 p-2 w-full border rounded-md'
              required
            />
          </div>
          <div className='w-1/4'>
            <button
              type='submit'
              className='w-full block align-bottom bg-blue-500 text-white py-2 rounded-md hover:bg-blue-600'
            >
              Submit
            </button>
          </div>
        </div>
      </form>
    </div>
  );
};

export default UserForm;
Render the Components in a Page File
Now let’s render the UserForm and ListUsers components in a page file. Go into the app directory and create a folder named client-side. Within the client-side directory, create a page.tsx file and add the following code:
app/client-side/page.tsx
import ListUsers from '@/components/list-users';
import UserForm from '@/components/user-form';

export default function Home() {
  return (
    <main style={{ maxWidth: 1200, marginInline: 'auto', padding: 20 }}>
      <div className='w-full flex justify-center mb-8'>
        <UserForm />
      </div>
      <ListUsers />
    </main>
  );
}
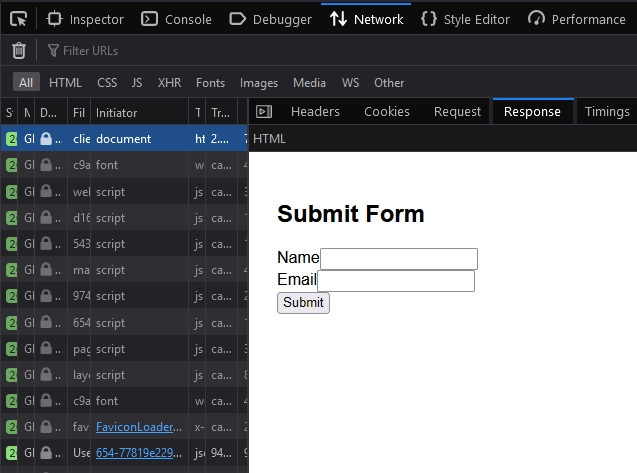
With that in place, start the development server again if you haven’t already, and visit the URL http://localhost:3000/client-side. You should see the form component along with the list of users displayed below it. This approach to fetching data is not SEO-friendly because when you inspect the HTML document in the browser, you will only see the form component.
Using Supabase and React Query on the Server
Now, let’s explore how to use Supabase and React Query on the server to prefetch data, ensuring that the data is included in the HTML sent to the browser. This approach is SEO-friendly since the data becomes immediately available to the useQuery hook.
Create the Supabase Server Client
First, let’s create the Supabase server client that will enable us to interact with Supabase on the server. Create a useSupabaseServer.ts file in the hooks directory and include the following code:
hooks/useSupabaseServer.ts
import { cookies } from 'next/headers';
import { createServerClient } from '@supabase/ssr';
import { Database } from '@/utils/database.types';

export function useSupabaseServer(cookieStore: ReturnType<typeof cookies>) {
  const SUPABASE_URL = process.env.NEXT_PUBLIC_SUPABASE_URL!;
  const SUPABASE_ANON_KEY = process.env.NEXT_PUBLIC_SUPABASE_ANON_KEY!;

  return createServerClient<Database>(SUPABASE_URL, SUPABASE_ANON_KEY, {
    cookies: {
      get(name: string) {
        return cookieStore.get(name)?.value;
      },
    },
  });
}
Prefetch Data on the Server
With the Supabase server client ready, let’s use it along with our query client to prefetch data on the server, dehydrate the cache, and hydrate it on the client. To do this, create a server-side folder in the app directory. Within the server-side folder, create a page.tsx file and add the following code:
app/server-side/page.tsx
import useUsersQuery from '@/hooks/use-users-query';
import {
  HydrationBoundary,
  QueryClient,
  dehydrate,
} from '@tanstack/react-query';
import { useSupabaseServer } from '@/hooks/useSupabaseServer';
import { cookies } from 'next/headers';
import ListUsers from '@/components/list-users';
import UserForm from '@/components/user-form';

export default async function Hydation() {
  const queryClient = new QueryClient();
  const cookieStore = cookies();
  const supabase = useSupabaseServer(cookieStore);

  await queryClient.prefetchQuery(useUsersQuery(supabase));

  return (
    <HydrationBoundary state={dehydrate(queryClient)}>
      <main style={{ maxWidth: 1200, marginInline: 'auto', padding: 20 }}>
        <div className='w-full flex justify-center mb-8'>
          <UserForm />
        </div>
        <ListUsers />
      </main>
    </HydrationBoundary>
  );
}
The above code looks similar to the client-side implementation, except that we are prefetching the query on the server and using the HydrationBoundary component to make the query available to the useQuery hook.
When you restart the Next.js development server and visit the URL http://localhost:3000/server-side, you should still see the form component along with the list of users. The only difference is that, when you inspect the HTML document, you will notice that the prefetched data was included in the HTML sent to the browser.
Conclusion
And that concludes our tutorial. Throughout this guide, you’ve gained insights into integrating Supabase and React Query within the new Next.js app router. I trust you found this article informative and engaging. For the source code, feel free to explore it on GitHub: https://github.com/wpcodevo/nextjs-react-query-supabase
it would be nice to see update for nextjs 14 with prisma postgres docker and trpc (full stack)
Thanks for the suggestion.
Check out this guide: Using tRPC with Next.js 14, React Query, and Prisma. It demonstrates how to integrate tRPC with Next.js 14.
Thank you Edem so much, appreciate it.
I’m glad the article was helpful to you.