In this blog post, I’ll guide you through the steps of integrating Shadcn UI and TanStack Router into your React.js project. Personally, I enjoy exploring the latest and trending libraries, and as of now, both Shadcn UI and TanStack Router are quickly becoming popular in the developer community. That’s why I wanted to write this article to show you how to set them up in a React.js project.
In a future post, we’ll also cover how to implement JSON Web Token (JWT) authentication and integrate it with a backend API that supports JWT.
More practice:
- How to Validate React.js Forms Without External Libraries
- Setup and Use NextAuth.js in Next.js 14 App Directory
- Implement Authentication with NextAuth in Next.js 14
- Set up Google and GitHub OAuth with NextAuth in Next.js 14
- Implement Authentication with Supabase in Next.js 14
- Setup Google and GitHub OAuth with Supabase in Next.js 14
- Implement Authentication with tRPC in Next.js 14
- Implement Authentication with tRPC API in Next.js 14
- Using tRPC with Next.js 14, React Query and Prisma
- How to Set Up and Use React Query in Next.js 14
- Using React Query with Supabase in Next.js App Router
- How to Setup React Query in Next.js 13 App Directory
- React Query and Axios: User Registration and Email Verification

What is Shadcn UI?
Before we jump into the setup, let’s take a moment to understand what Shadcn UI is all about. Simply put, Shadcn UI is a modern, highly customizable, and developer-friendly component library designed for building user interfaces in React applications.
It features pre-designed, accessible components built on Radix UI primitives and styled with the power and flexibility of Tailwind CSS. To get the most out of Shadcn UI, I recommend visiting the official website and exploring the available components.
What is TanStack Router?
TanStack Router is a powerful, fully type-safe, and framework-agnostic routing solution designed for React and other frameworks. As part of the TanStack family, it offers advanced features like built-in data fetching, stale-while-revalidate caching, and first-class support for search parameter APIs, making it an excellent choice for building modern, dynamic applications.
Installing and Setting Up Shadcn UI for Your React Project
For this guide, we’ll use Vite to scaffold the React.js project. If you’re unfamiliar with Vite, it’s a modern front-end build tool that enhances the developer experience by offering faster builds and optimized workflows for frameworks like React, Vue, Svelte, or plain JavaScript.
Now, I know many developers are accustomed to using create-react-app (CRA), but it’s worth noting that CRA is no longer the go-to choice for most developers. Its slower performance and outdated tooling have made modern options like Vite a far better alternative.
Create a New React.js Project
If you already have a React.js project set up with Vite as its module bundler, you can skip this step. Otherwise, open a terminal in the directory where you want to store your project’s source code and run the following command to scaffold a new project.
pnpm create vite@latest
# or
npm create vite@latest
# or
yarn create vite
Follow the prompts and select all the options for the configuration:
- First, specify the project name.
- Select React as the framework.
- Choose TypeScript as the variant
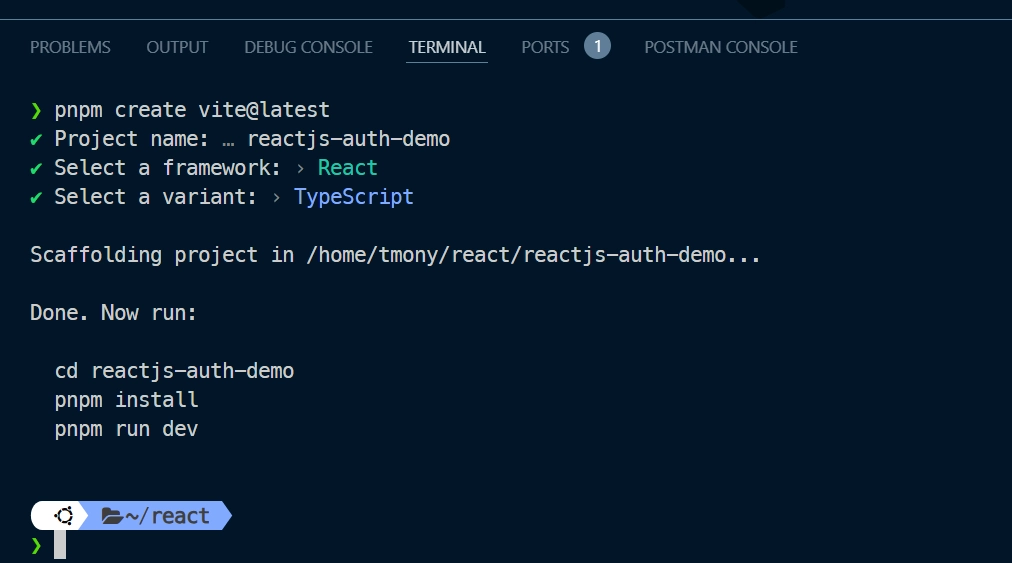
Now that the project has been generated, follow the instructions displayed in the terminal. First, navigate into the project directory using the cd command, and then run pnpm install to install all the required dependencies.
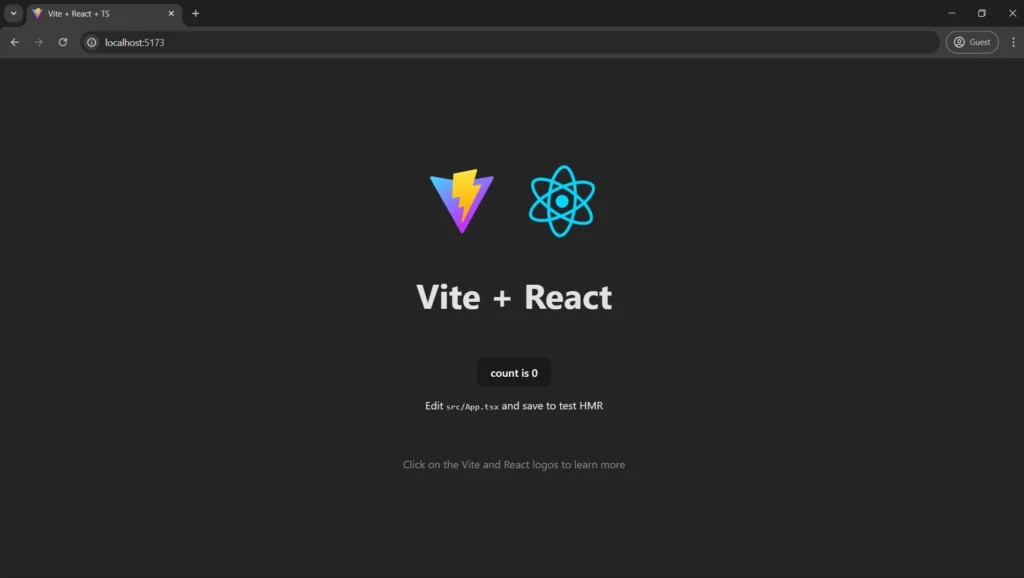
Once the installation is complete, start the development server by running pnpm run dev. This will launch the application on port 5173. Simply open your browser and go to http://localhost:5173/ to view the default Vite welcome page.
Add Tailwind and its configuration
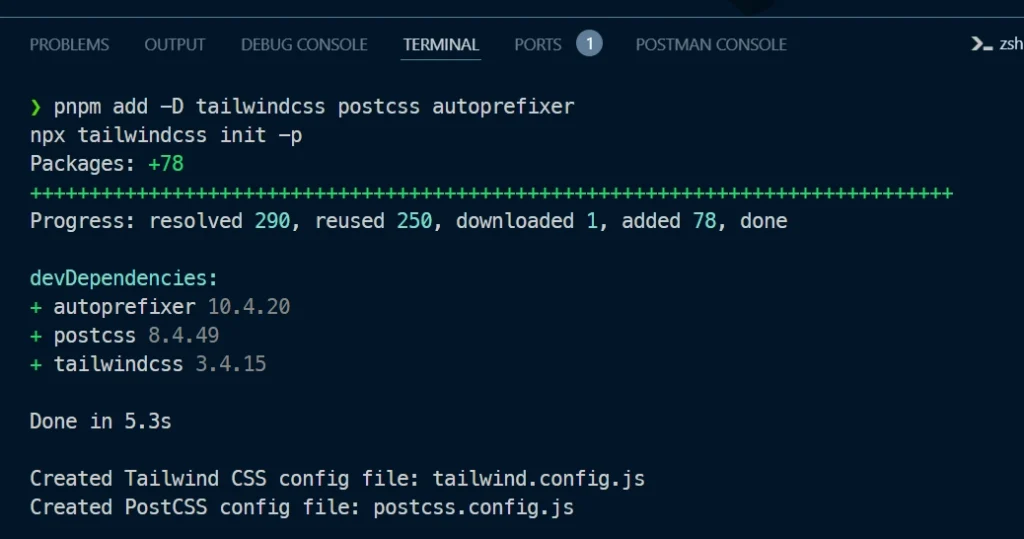
Shadcn UI components are styled using Tailwind CSS, so the next step is to set up Tailwind in your project. To do this, we need to install Tailwind CSS and its required peer dependencies. Simply run the following commands to get everything configured.
pnpm add -D tailwindcss postcss autoprefixer
npx tailwindcss init -p
# or
yarn add -D tailwindcss postcss autoprefixer
npx tailwindcss init -p
# or
npm install -D tailwindcss postcss autoprefixer
npx tailwindcss init -p
Once both commands have been executed, two files— postcss.config.js and tailwind.config.js—will be generated and added to your codebase.
Next, we need to include the Tailwind CSS directives in our src/index.css file. Open this file and add the following code:
@tailwind base;
@tailwind components;
@tailwind utilities;
Here’s why the Tailwind CSS directives should be included in your stylesheet:
@tailwind base;– Injects Tailwind’s base styles, which reset and normalize browser styles for a consistent starting point.@tailwind components;– Adds reusable classes and pre-built component styles.@tailwind utilities;– Adds the utility classes generated by Tailwind.
Next, you need to specify the paths to all your template files in the tailwind.config.js file. Open the file and either modify it as needed or replace its content with the configuration below, especially if you started with a new Vite project:
/** @type {import('tailwindcss').Config} */
module.exports = {
  content: ["./index.html", "./src/**/*.{ts,tsx,js,jsx}"],
  theme: {
    extend: {},
  },
  plugins: [],
}
Configure path aliases
With the Tailwind CSS configuration complete, the next step is to set up path aliases in the project. If you’re new to React, you might not be familiar with path aliases, but they offer numerous advantages.
The most notable benefit is that instead of writing lengthy and complex relative paths like ../../../components/Button, you can use a concise and clear alias, such as @components/Button. This makes your code more readable and easier to maintain.
To configure path aliases in a React.js project created with Vite, you’ll need to update three files: tsconfig.json, tsconfig.app.json, and vite.config.ts.
Step 1: Update tsconfig.json
Begin by opening the tsconfig.json file and replacing its contents with the following configuration:
{
  "files": [],
  "references": [
    {
      "path": "./tsconfig.app.json"
    },
    {
      "path": "./tsconfig.node.json"
    }
  ],
  "compilerOptions": {
    "baseUrl": ".",
    "paths": {
      "@/*": ["./src/*"]
    }
  }
}
This configuration sets up the base URL for the project and defines the alias @/ to map to the src directory.
Step 2: Update tsconfig.app.json
To enable your IDE to resolve the path aliases, add the following configuration to the tsconfig.app.json file:
{
  "compilerOptions": {
    // ...
    "baseUrl": ".",
    "paths": {
      "@/*": [
        "./src/*"
      ]
    }
    // ...
  }
}
Step 3: Configure vite.config.ts for Path Aliases
To ensure your app resolves path aliases correctly, follow the instructions below:
Install the @types/node package to enable the use of the path module without errors:
# (so you can import "path" without error)
npm i -D @types/node
# or
yarn add -D @types/node
# or
pnpm add -D @types/node
Update the vite.config.ts file with the following code:
import path from "path"
import react from "@vitejs/plugin-react"
import { defineConfig } from "vite"

export default defineConfig({
  plugins: [react()],
  resolve: {
    alias: {
      "@": path.resolve(__dirname, "./src"),
    },
  },
})
Initialize Shadcn/UI
After setting up Tailwind CSS and path aliases in your project, we are now ready to initialize Shadcn UI. To do this, we’ll use the Shadcn UI CLI. Run the following command to begin the initialization process:
pnpm dlx shadcn@latest init
# or
npx shadcn@latest init
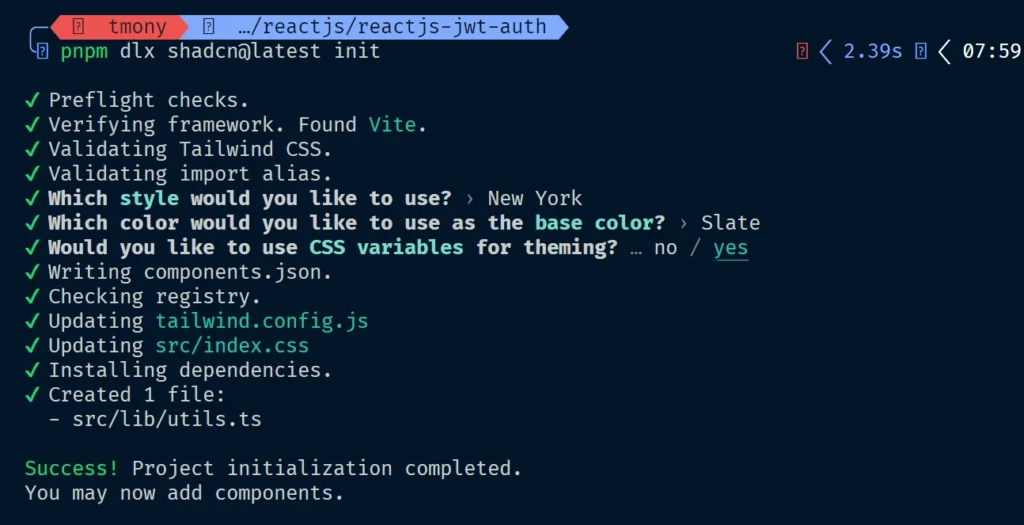
You will be prompted to select configuration options. The choices you make will be saved in a components.json file, which stores all the settings and preferences for the Shadcn UI components in your project. You can use the default pre-selected options, as shown in the screenshot below:
Add Your First Shadcn/UI Component
Wow, that’s a lot of configuration! With Shadcn now set up in the project, we can move on to using the Shadcn UI components.
To keep things simple, we’ll start by using the Button component to build a counter. This counter will have three buttons: one to increment, one to decrement, and one to reset the count. To add the Shadcn Button component to your project, run the following command:
pnpm dlx shadcn@latest add button
# or
npx shadcn@latest add button
This command will create a UI folder within the components directory, where all the Shadcn UI components will be stored.
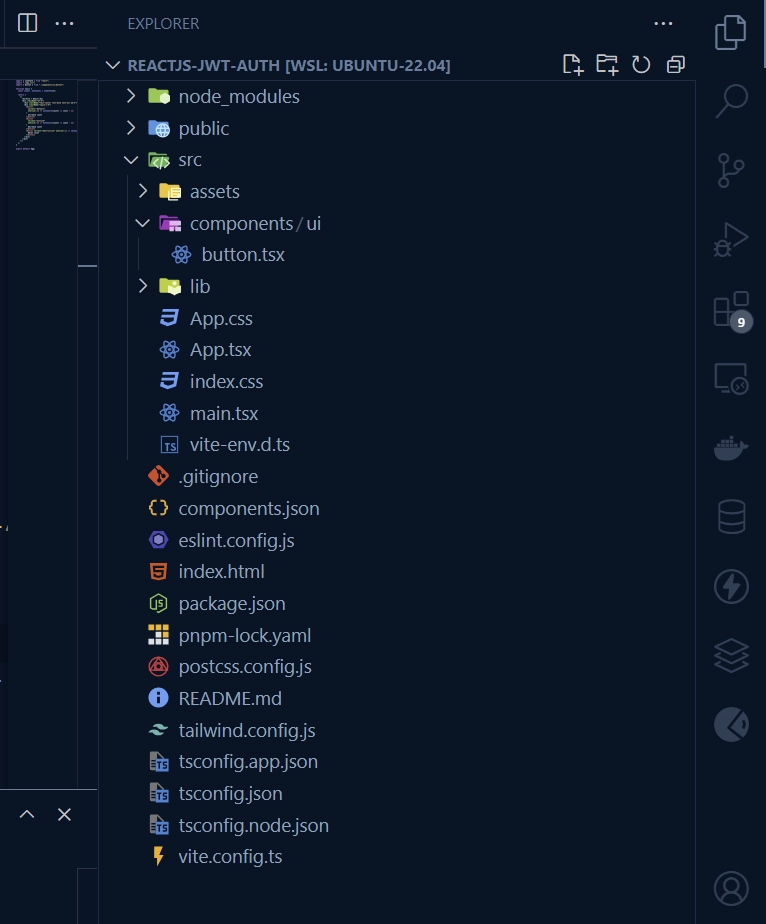
Now that the Shadcn button component has been added to the project, we can build the counter component. To do so, open the src/App.tsx file and replace its existing content with the code provided below:
import { useState } from "react";
import "./App.css";
import { Button } from "./components/ui/button";

function App() {
  const [count, setCount] = useState(0);

  return (
    <>
      <h1>Vite + React</h1>
      <div className="mt-5">
        <div className="text-center font-bold text-4xl mb-4">{count}</div>
        <div className="space-x-4">
          <Button
            variant="default"
            onClick={() => setCount((count) => count + 1)}
          >
            Increase count
          </Button>
          <Button
            variant="outline"
            onClick={() => setCount((count) => count - 1)}
          >
            Decrease count
          </Button>
          <Button variant="destructive" onClick={() => setCount(0)}>
            Reset count
          </Button>
        </div>
      </div>
    </>
  );
}

export default App;
To view the counter app, start the Vite development server and open the provided URL in your browser.
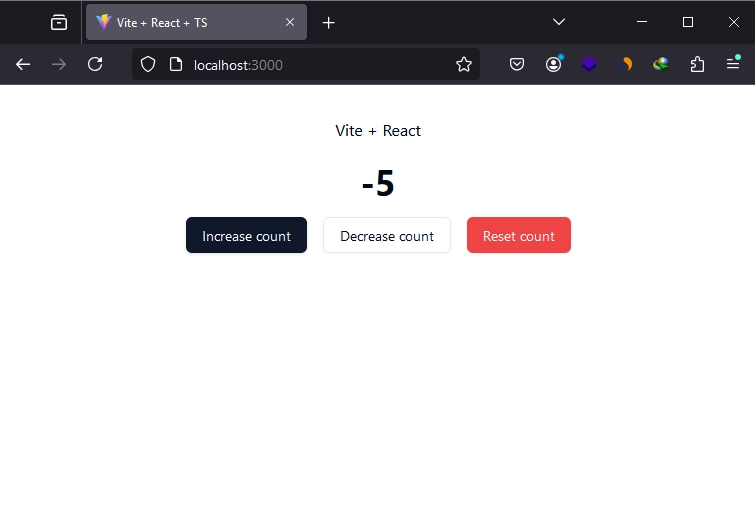
How to Integrate TanStack Router into Your React Application
In this section, we’ll integrate TanStack Router into our React project. As TanStack Router is fully type-safe and we’re using TypeScript, we’ll take advantage of its type safety for better accuracy and fewer errors.
TanStack Router provides two routing approaches: file-based routing, similar to Next.js, and code-based routing, like in libraries such as React Router. For simplicity, we’ll use the code-based routing approach. However, you can explore file-based routing and other features of TanStack Router in their documentation.
Install & Configure TanStack Router
First, we need to install TanStack Router. Open your terminal and run the appropriate command based on your preferred package manager:
npm install @tanstack/react-router
# or
pnpm add @tanstack/react-router
# or
yarn add @tanstack/react-router
# or
bun add @tanstack/react-router
Create a Root Route
Next, let’s initialize the TanStack Router by setting up a root route for your application’s route tree. In the src/lib/ directory, create a file named routes.tsx and add the following code:
src/lib/routes.tsx
import { createRootRoute } from "@tanstack/react-router";

export const rootRoute = createRootRoute();

export const routeTree = rootRoute.addChildren([]);
createRootRoute()– This method creates a new root route, which serves as the starting point for your application’s navigation hierarchy.rootRoute.addChildren([])– This method adds child routes to the root route. Currently, the array is empty, but we will add routes to it later as we build out the application’s navigation.routeTree– Defines the routing structure of the app
Render the Route Provider
With the root route and route tree defined, we can now create the router object and use it to render the RouterProvider. Open the src/App.tsx file and replace its content with the following code:
src/App.tsx
import "./App.css";
import { createRouter, RouterProvider } from "@tanstack/react-router";
import { routeTree } from "./components/route-root";

const router = createRouter({ routeTree });

declare module "@tanstack/react-router" {
  interface Register {
    router: typeof router;
  }
}

function App() {
  return <RouterProvider router={router} />;
}

export default App;
We utilized TypeScript’s declaration merging feature to register the router instance, ensuring type safety.
Create the Routes
Let’s create a couple of pages for navigation: Home and Dashboard. Create a new component for the home page:
src/pages/home.tsx
import { rootRoute } from "@/lib/routes";
import { createRoute } from "@tanstack/react-router";

export const homeRoute = createRoute({
  getParentRoute: () => rootRoute,
  path: "/",
  component: Home,
});

function Home() {
  return <h2 className="font-bold text-2xl">🏡 Home Page</h2>;
}

export default Home;
Create another component for the dashboard page:
src/pages/dashboard.tsx
import { rootRoute } from "@/lib/routes";
import { createRoute } from "@tanstack/react-router";

export const dashboardRoute = createRoute({
  getParentRoute: () => rootRoute,
  path: "/dashboard",
  component: Dashboard,
});

function Dashboard() {
  return <h2 className="font-bold text-2xl">🛹 Dashboard Page</h2>;
}

export default Dashboard;
You may have noticed that instead of exporting the components directly from their respective files, we used the createRoute() function to define routes for them and exported the routes instead.
Register the Routes
With the routes exported, we can now import them into the src/lib/routes.tsx file and add them to the array inside the rootRoute.addChildren([]) function.
src/lib/routes.tsx
import Layout from "@/components/layout";
import { dashboardRoute } from "@/pages/dashboard";
import { homeRoute } from "@/pages/home";
import { createRootRoute } from "@tanstack/react-router";

export const rootRoute = createRootRoute({
  component: Layout,
});

export const routeTree = rootRoute.addChildren([homeRoute, dashboardRoute]);
We also include the Layout component in the createRootRoute function, which we need to create.
Create a Layout Component
Creating the Layout component allows us to render the navigation menus above all the components that are descendants of the layout. We will use the Outlet component to achieve this.
To create the Layout component, navigate to the components directory and create a new file named layout.tsx. Then, add the following code to the file:
src/components/layout.tsx
import { Link, Outlet } from "@tanstack/react-router";
import { Button } from "./ui/button";

function Layout() {
  return (
    <>
      <nav className="mb-5">
        <Button asChild variant="link">
          <Link to="/" activeProps={{ className: "font-bold" }}>
            Home
          </Link>
        </Button>
        <Button asChild variant="link">
          <Link to="/dashboard" activeProps={{ className: "font-bold" }}>
            Dashboard
          </Link>
        </Button>
      </nav>
      <main>
        <Outlet />
      </main>
    </>
  );
}

export default Layout;
When you open the application in your browser, you should be able to navigate to the pages we created by clicking the navigation links.
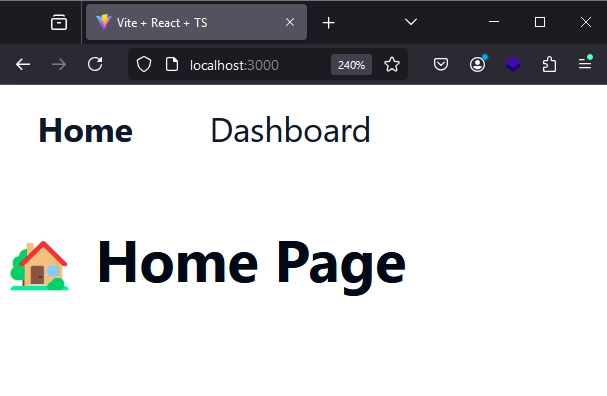
Conclusion
We’re finally done! In this comprehensive guide, you learned how to set up Shadcn UI and TanStack Router in a React.js project. I hope you found this tutorial both helpful and enjoyable. If you have any questions, feel free to leave them in the comments below. Thanks for reading!


your posts are very helpful, please make something on microservices with nodejs