

Last week, I had the idea of using Google Sheets as the database for one of my Next.js projects. After doing some research, I discovered three possible methods to achieve this.
The first involved building a complex backend to interact with the Google API. The second was directly integrating with the Google API. However, the third option I decided to go with was using a service called Apico. Apico simplifies the process by providing high-level APIs for interacting with Google Sheets, making the setup much easier.
In this article, I’ll guide you through building a CRUD app—essentially a note-taking app—that uses Google Sheets as its database and React Query for handling HTTP requests.
We’ll focus on the key steps needed to get everything up and running in your project. Additionally, there’s a dedicated section on how to run the project on your machine.
More practice:
- Setup and Use NextAuth.js in Next.js 14 App Directory
- Implement Authentication with NextAuth in Next.js 14
- Set up Google and GitHub OAuth with NextAuth in Next.js 14
- Implement Authentication with Supabase in Next.js 14
- Setup Google and GitHub OAuth with Supabase in Next.js 14
- Implement Authentication with tRPC in Next.js 14
- Implement Authentication with tRPC API in Next.js 14
- Using tRPC with Next.js 14, React Query and Prisma
- How to Set Up and Use React Query in Next.js 14
- Using React Query with Supabase in Next.js App Router
- How to Setup React Query in Next.js 13 App Directory
- React Query and Axios: User Registration and Email Verification

Create a new Google Sheets API with Apico
To get started, log in to your Google Sheets account and create a new spreadsheet. Make sure to take note of the URL, as we’ll need specific parameters from it later. The URL will look something like this:
https://docs.google.com/spreadsheets/d/13-o1SRN5KJ_nPhl40xr6moDbOVM9ELIC1yqe7b4tTNM/edit?gid=0#gid=0
The variables we will need from the URL are as follows:
| Variable | Value |
|---|---|
| spreadSheetId | 13-o1SRN5KJ_nPhl40xr6moDbOVM9ELIC1yqe7b4tTNM |
| sheetId | 0 |
The spreadsheet ID is the string of characters found after /d/ in the URL, and the sheet ID is the string that follows gid=.
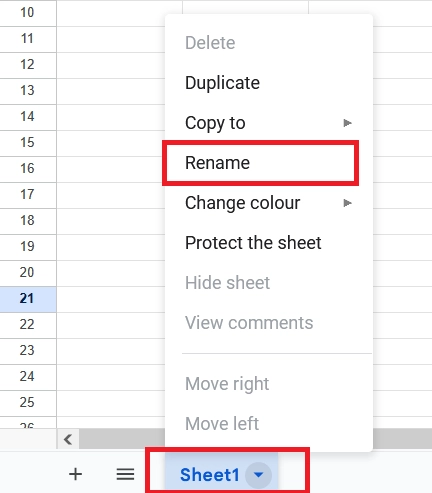
Next, we need to name the Google Sheet, as this will be required when connecting Apico to the Google API. At the bottom of the page, click the dropdown icon next to the ‘Sheet1‘ label. From the dropdown menu, select “Rename” and give your sheet a meaningful name.
Copy your spreadsheet ID, sheet ID, and sheet name, then replace their placeholders in the example environment variables below:
.env
NEXT_PUBLIC_APICOINTEGRATION_ID=""
NEXT_PUBLIC_SPREADSHEET_ID=""
NEXT_PUBLIC_SHEET_NAME=""
NEXT_PUBLIC_SHEET_ID=""
NEXT_PUBLIC_APICOINTEGRATION_ACCESS_TOKEN=""
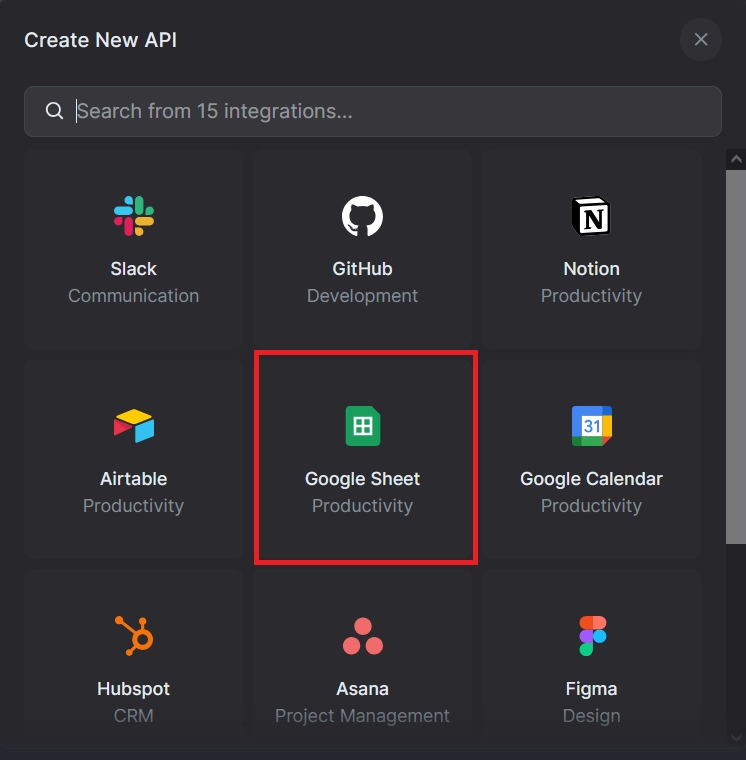
Log in to your Apico account, and from the dashboard, click the Create New API button. From the available options, select Google Sheets.
Next, you’ll be prompted to grant Apico access to your Google Sheets. Click the Authorize Google Sheets button, then select the Google account associated with the spreadsheet you want to connect.
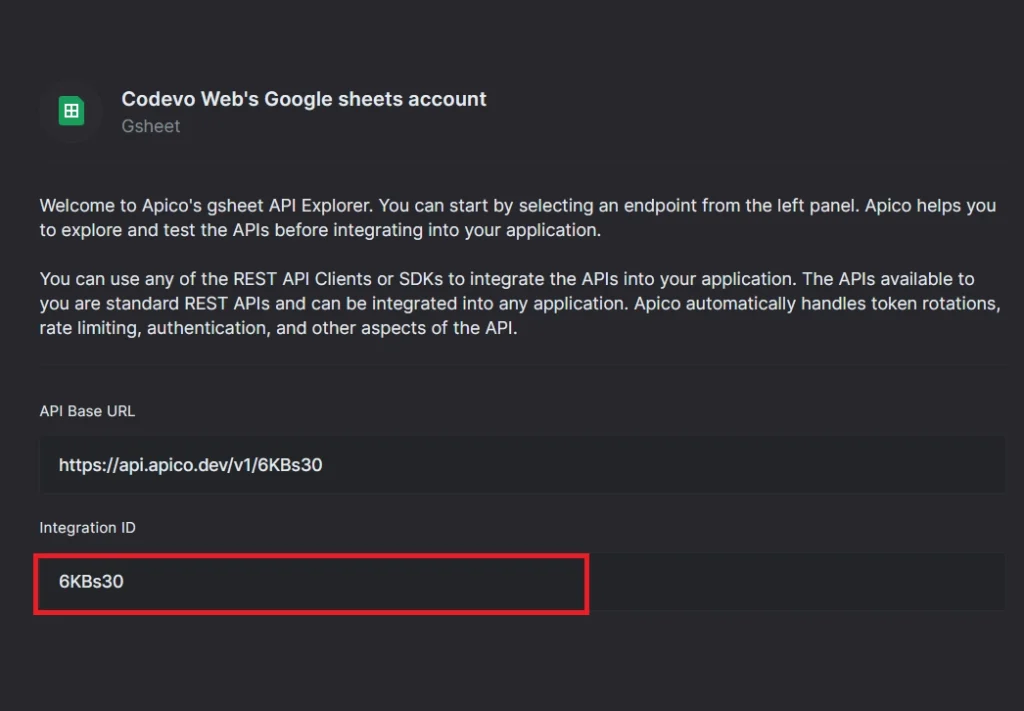
Copy the integration ID provided by Apico and replace the placeholder for the API integration ID in your environment variables.
Test the Frontend App on Your Machine
Now that you’ve set the required secrets in the environment variable file, you can test the frontend app with Google Sheets by performing CRUD operations against the database. To do this, follow these steps:
- Download or clone the project from its GitHub repository at https://github.com/wpcodevo/nextjs-crud-app-google-sheets and open it in your preferred development environment.
- Open the integrated terminal in your IDE and run the command
pnpm installto install all the necessary dependencies. - Duplicate the
example.envfile and rename it to.env. Then, replace the placeholders with the actual secrets outlined in the previous section. - Next, start the Next.js development server by running the command
pnpm dev. - Once the server is up and running, you can access the application by visiting
http://localhost:3000/in your browser.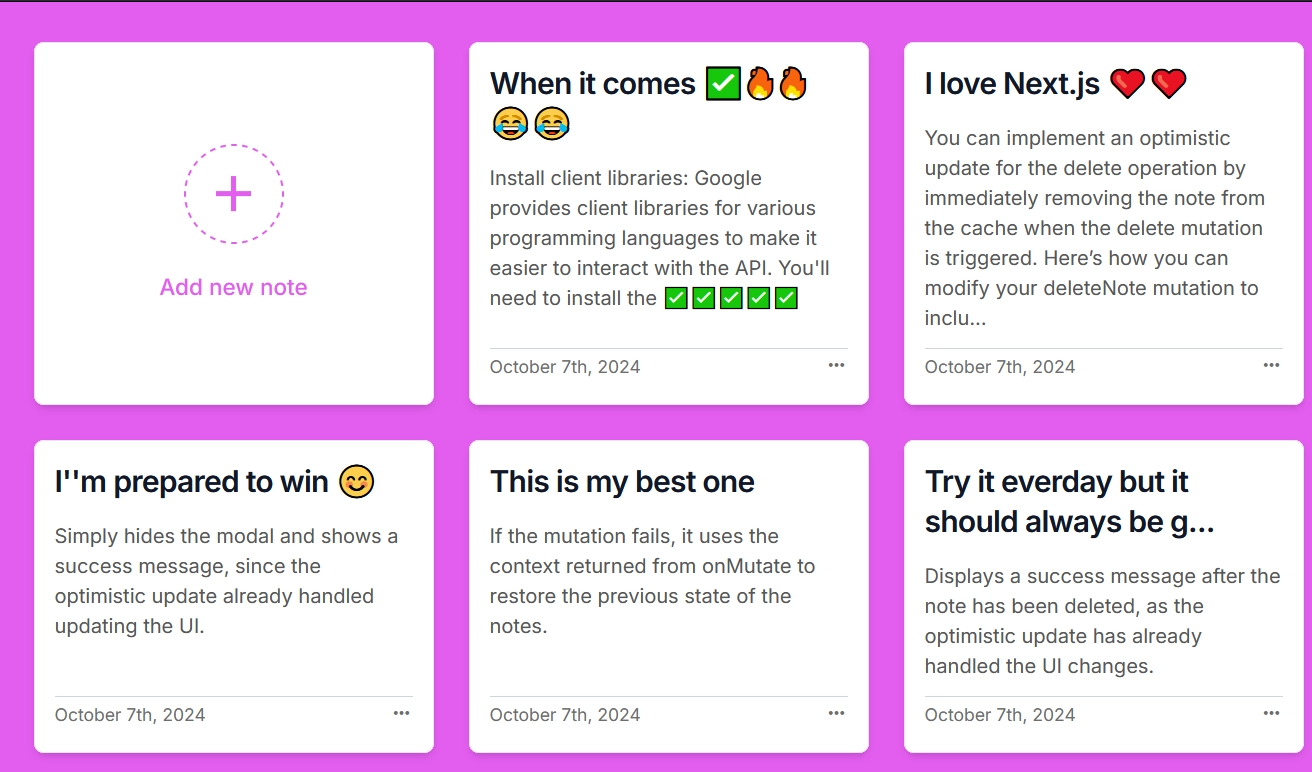
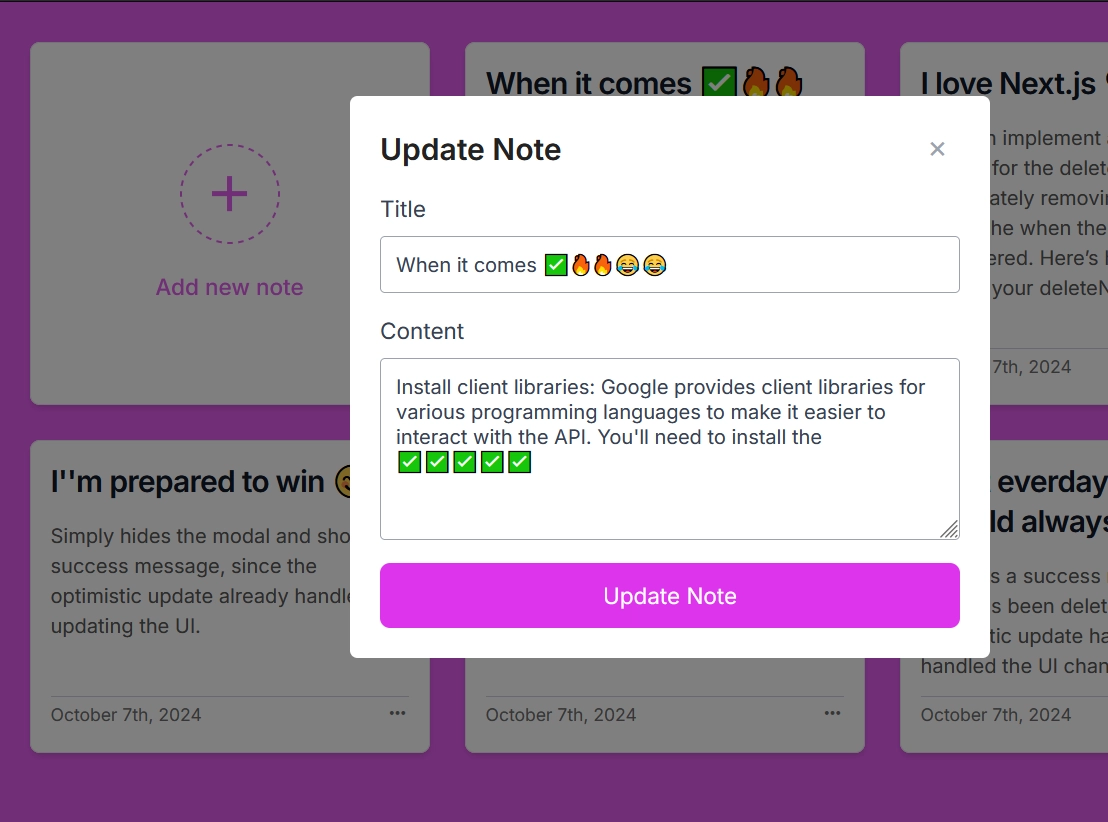
- You should now be able to add new notes, edit existing ones, and delete notes.
Perform CRUD Operations on Google Sheets in React/Next.js
Now that the necessary environment variables are configured, we can proceed to perform CRUD operations on the newly created Google Sheet. For this, we will use Axios to handle HTTP requests and React Query for caching.
To enhance performance and user experience, we’ll leverage optimistic updates with React Query, which minimizes unnecessary re-fetching from Google Sheets (our database) and provides immediate feedback to the user.
First, let’s access the environment variables from the .env file and assign them to variables for easy use in our code.
Inside the app directory, create a file named note-api.ts, and add the following code:
app/note-api.ts
import axios, { AxiosRequestConfig } from 'axios';

const apicoIntegrationId: string = process.env
  .NEXT_PUBLIC_APICOINTEGRATION_ID as string;
const spreadSheetId: string = process.env.NEXT_PUBLIC_SPREADSHEET_ID as string;
const sheetName: string = process.env.NEXT_PUBLIC_SHEET_NAME as string;
const sheetId: number = parseInt(process.env.NEXT_PUBLIC_SHEET_ID as string);

const apiBaseUrl = `https://api.apico.dev/v1/${apicoIntegrationId}/${spreadSheetId}`;

export interface SpreadSheetResponse {
  values: string[][];
}
We defined the base URL of our API and populated it with the Apico integration ID and the spreadsheet ID.
CREATE Operation of CRUD
We’ll start with the first CRUD operation, which lets us add new notes to our Google Spreadsheet. You can place the CRUD code in any file, but I’ll be defining the functions inside a note-api.ts file within the app directory. Here’s the code to append new rows of data to the spreadsheet.
app/note-api.ts
export const appendSpreadsheetData = async (
  data: (string | string | string | string)[]
) => {
  const options: AxiosRequestConfig = {
    method: 'POST',
    url: `${apiBaseUrl}/values/${sheetName}:append`,
    params: {
      valueInputOption: 'USER_ENTERED',
      insertDataOption: 'INSERT_ROWS',
      includeValuesInResponse: true,
    },
    data: {
      values: [data],
    },
  };

  const response = await axios(options);
  return response.data;
};
The appendSpreadsheetData function takes an array of strings, with each string representing a value for a different column in the Google Sheet.
Next, we’ll use the appendSpreadsheetData function in combination with React Query to insert a new note into our Google Spreadsheet. Below is the code that demonstrates how to achieve this.
components/notes/create.note.tsx
const { mutate: createNote } = useMutation({
    mutationFn: (note: (string | string | string | string | string)[]) =>
      appendSpreadsheetData(note),
    onMutate() {
      NProgress.start();
    },
    async onSuccess() {
      await queryClient.invalidateQueries({
        queryKey: ['getNotes'],
        refetchType: 'active',
      });
      setOpenNoteModal(false);
      NProgress.done();
      toast('Note created successfully', {
        type: 'success',
        position: 'top-right',
      });
    },
    onError(error: any) {
      setOpenNoteModal(false);
      NProgress.done();
      const resMessage =
        error.response.data.message ||
        error.response.data.detail ||
        error.message ||
        error.toString();
      toast(resMessage, {
        type: 'error',
        position: 'top-right',
      });
    },
  });
In the code above, we invalidate the query after a successful mutation, prompting React Query to re-fetch the list of notes.
READ Operation of CRUD
Next, let’s move on to the READ operation. This is straightforward, as we’ll simply fetch and return the data.
app/note-api.ts
export const getSpreasheetData = async () => {
  const response = await axios.get<SpreadSheetResponse>(
    `${apiBaseUrl}/values/${sheetName}`
  );
  return response.data;
};
When you invoke the getSpreadsheetData function, it will return an object containing a values field that holds the list of notes. Each note’s data is stored as an array within this parent array, meaning the structure consists of arrays nested inside another array.
To transform this raw data into a formatted note object, we can use JavaScript’s map function. This will allow us to access each field of the note and assign them to their corresponding properties. Below is the code that demonstrates this process:
app/page.tsx
const loadTodos = async () => {
    const response = await getSpreasheetData();
    const notes = response?.values?.map((t: string[]) => ({
      id: t[0],
      title: t[1],
      content: t[2],
      createdAt: new Date(t[3]),
      updatedAt: new Date(t[4]),
    }));
    return notes || [];
  };

  const {
    data: notes,
    isLoading,
    isFetching,
    isError,
    isSuccess,
    error,
  } = useQuery({
    queryKey: ['getNotes'],
    queryFn: () => loadTodos(),
    staleTime: 5 * 1000,
    select: (data) => data,
  });
UPDATE Operation of CRUD
Next, let’s move on to the UPDATE operation. Below is the function that updates a specific note item in the Google Spreadsheet using its index.
app/note-api.ts
export const updateSpreadsheetData = async (
  index: number,
  values: (string | string | string | string)[]
) => {
  const options: AxiosRequestConfig = {
    method: 'PUT',
    url: `${apiBaseUrl}/values/${sheetName}!A${index + 1}`,
    params: {
      valueInputOption: 'USER_ENTERED',
      includeValuesInResponse: true,
    },
    headers: {
      Authorization: `Bearer ${process.env.NEXT_PUBLIC_APICOINTEGRATION_ACCESS_TOKEN}`,
    },
    data: {
      values: [values],
    },
  };

  const response = await axios(options);
  return response.data;
};
Now, let’s use the updateSpreadsheetData function along with React Query to update a note in the Google Sheet based on its ID. Below is the code demonstrating how this is done.
const updateNoteFn = async (
    id: string,
    data: UpdateNoteInput
  ): Promise<INote[]> => {
    notes.map((p, index) => {
      if (p.id === id) {
        updateSpreadsheetData(index, [
          p.id,
          data.title,
          data.content,
          p.createdAt.toISOString(),
          new Date().toISOString(),
        ]);
        return p;
      } else return p;
    });

    return [];
  };

  const queryClient = useQueryClient();
  const { mutate: updateNote } = useMutation({
    mutationFn: ({ noteId, data }: { noteId: string; data: UpdateNoteInput }) =>
      updateNoteFn(noteId, data),

    onMutate: async ({ noteId, data }) => {
      await queryClient.cancelQueries({ queryKey: ['getNotes'] });

      const previousNotes = queryClient.getQueryData<INote[]>(['getNotes']);

      queryClient.setQueryData<INote[]>(['getNotes'], (oldNotes) =>
        oldNotes?.map((note) =>
          note.id === noteId ? { ...note, ...data } : note
        )
      );

      return { previousNotes };
    },

    onError: (error: any, { noteId }, context) => {
      queryClient.setQueryData(['getNotes'], context?.previousNotes);
      setOpenNoteModal(false);

      const resMessage =
        error.response?.data?.message ||
        error.response?.data?.detail ||
        error.message ||
        error.toString();
      toast(resMessage, {
        type: 'error',
        position: 'top-right',
      });
    },

    onSuccess: () => {
      setOpenNoteModal(false);
      toast('Note updated successfully', {
        type: 'success',
        position: 'top-right',
      });
    },
  });
DELETE Operation of CRUD
The final CRUD operation we need to implement is DELETE. Below is how the delete operation can be performed using the Apico API.
app/note-api.ts
export const deleteSpreadsheetRow = async (index: number) => {
  const range = {
    sheetId: sheetId,
    dimension: 'ROWS',
    startIndex: index,
    endIndex: index + 1,
  };
  const options: AxiosRequestConfig = {
    method: 'POST',
    url: `${apiBaseUrl}:batchUpdate`,
    data: {
      requests: [
        {
          deleteDimension: {
            range,
          },
        },
      ],
    },
  };

  const response = await axios(options);
  return response.data;
};
Next, you can integrate the deleteSpreadsheetRow function with React Query to delete a note from the Google Spreadsheet by its ID. This implementation uses an optimistic update, meaning the note is immediately removed from the UI before the actual request is made to the Google API. If the request succeeds, the UI stays updated; if it fails, the deletion is rolled back, and the note reappears.
components/notes/note.component.tsx
const { mutate: deleteNote } = useMutation({
    mutationFn: (noteId: string) => removeTodo(noteId),

    onMutate: async (noteId) => {
      await queryClient.cancelQueries({ queryKey: ['getNotes'] });

      const previousNotes = queryClient.getQueryData<INote[]>(['getNotes']);

      queryClient.setQueryData<INote[]>(['getNotes'], (oldNotes) =>
        oldNotes?.filter((note) => note.id !== noteId)
      );

      return { previousNotes };
    },

    onError: (error: any, _noteId, context) => {
      queryClient.setQueryData(['getNotes'], context?.previousNotes);
      const resMessage =
        error.response?.data?.message ||
        error.response?.data?.detail ||
        error.message ||
        error.toString();
      toast(resMessage, {
        type: 'error',
        position: 'top-right',
      });
      NProgress.done();
    },

    onSuccess: () => {
      toast('Note deleted successfully', {
        type: 'warning',
        position: 'top-right',
      });
      NProgress.done();
    },
  });
At this point, you should have all the knowledge needed to use Google Sheets as the database for your React/Next.js application.
Conclusion
And that’s a wrap! In this comprehensive guide, you’ve learned how to use Google Sheets as a database in your React/Next.js application. I hope you found this tutorial both helpful and enjoyable. If you have any questions or feedback, feel free to share them in the comments below.