
This article will teach you how to secure a Golang API by implementing two-factor authentication (2FA) using TOTP codes generated by an authenticator app like Google Authenticator or Authy. There are different methods like SMS, Voice call, etc that we can use to deliver the one-time passcode (OTP) to the user but we will use an authenticator application to reduce the complexity of the project.
Cyber attacks on APIs have increased almost fourfold between January 2021 and October 2022 and it makes a lot of sense to add an extra layer of protection like Facial recognition, Biometrics, social login with Google, GitHub, or Facebook, Two-factor/multifactor Authentication, and many more to our APIs.
Let’s get to the main focus of this tutorial. We will be using the https://github.com/pquerna/otp/ package to implement the Time-based OTP (TOTP) in Golang. The API will run on a Gin Gonic framework and use GORM to store data in an SQLite database.
Related article:
- How to Implement Two-factor Authentication (2FA) in React.js
- How to Implement Two-factor Authentication (2FA) in Node.js
- Two-factor Authentication (2FA) in FastAPI and Python
- Django – Implement (2FA) Two-Factor Authentication
- Rust – Implement (2FA) Two-Factor Authentication
More practice:
- How to Setup and Use MongoDB with Deno
- How to Set up Deno RESTful CRUD Project with MongoDB
- Authentication with Bcrypt, JWT, and Cookies in Deno
- Complete Deno CRUD RESTful API with MongoDB
What is Two-Factor Authentication (2FA)
Two-Factor Authentication (2FA) is an electronic authentication method that requires two or more pieces of evidence before access to a website or application will be granted. The pieces of evidence include the traditional method of authentication like username/email and password – plus a one-time passcode sent to a mobile phone via SMS.
Many organizations use two-factor authentication (2FA) because it protects against cyber attacks that target user accounts and passwords. These security threats include phishing, brute-force attacks, credential exploitation, malware attack, etc.
The two-factor authentication (2FA) methods that businesses use include:
- Voice-based authentication
- SMS verification
- Hardware tokens
- Push notifications
Prerequisites
Before you start this tutorial, these are the prerequisites required to get the most out of this article.
- Have the latest version of Golang installed on your system
- Have basic knowledge of Golang
- Have a basic understanding of API designs and CRUD patterns.
- Familiarity with Gin Gonic and GORM will be beneficial.
Run the Golang 2FA App Locally
- If you don’t have Golang installed, visit https://go.dev/doc/install to download the right binary for your machine.
- Download or clone the Golang two-factor authentication source code from https://github.com/wpcodevo/two_factor_golang
- Run
go mod tidyto install all the necessary packages - Start the Gin Gonic HTTP server by running
go run main.go - Test the 2FA verification system with any API testing software.
Run the 2FA Frontend Built with React.js
- Clone or download the React.js 2FA source code from https://github.com/wpcodevo/two_factor_reactjs.
- Run
yarnoryarn installto install all the required dependencies. - Start the Vite server by running
yarn dev. - Navigate to http://localhost:3000 in a new tab to test the two-factor authentication system against the API.
Two-factor Authentication in Golang Overview
The Golang API will have the following endpoints:
| METHOD | ENDPOINT | DESCRIPTION |
|---|---|---|
| POST | /api/auth/register | Creates new user |
| POST | /api/auth/login | Login the user |
| POST | /api/auth/otp/generate | Generate the TOTP Secret |
| POST | /api/auth/otp/verify | Verify the TOTP token |
| POST | /api/auth/otp/validate | Validate the TOTP Token |
| POST | /api/auth/otp/disable | Disable the 2FA Feature |
Despite having a frontend app to interact with the API, you can also use API testing software like Insomnia, Postman, VS Code Thunder Client extension, etc to test the endpoints defined on the Golang API.
Setup the 2FA feature
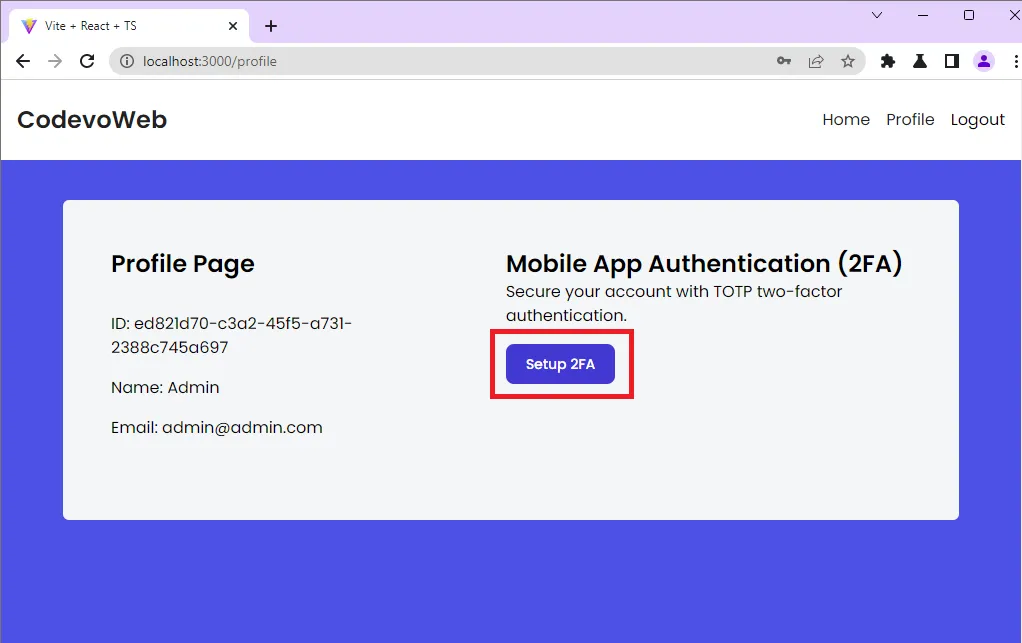
The React app has login and signup pages but I will skip the user registration and sign-in process to focus on the two-factor authentication. After signing into the app, you will be redirected to the profile page.
When the Setup 2FA button on the profile page is clicked, React will fire an Axios POST request to the /api/auth/otp/generate endpoint. The Golang API will then generate the one-time passcode (OTP) secrets, store the secrets in the database and return the OTP URL in addition to the base32 string to the frontend app or client.
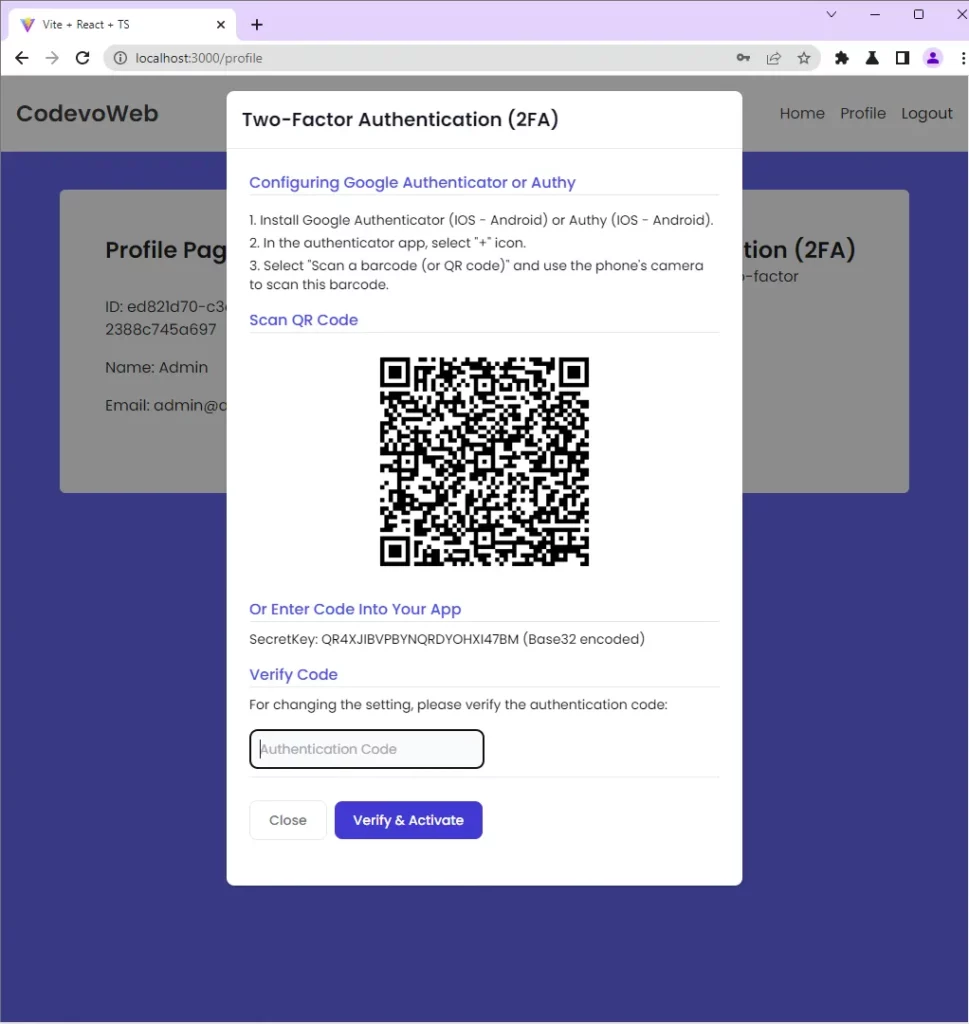
Generate the QR Code
Upon receiving the OTP URL, React will generate the QR Code from the OTP URL and render a modal component to display it.
Enable the 2FA feature
To read the content of the QR Code, you can utilize the following mediums:
- Google Authenticator app
- Authy app
- Google Chrome’s Authenticator extension
To demonstrate how the QR Code can be scanned, I will use the Authenticator extension in Chrome. If you have the Google Authenticator app, feel free to scan the QR Code with it.
Scan the QR Code with the authenticator extension in Chrome by clicking the scan icon adjacent to the edit icon and dragging the scanner over the QR Code.
The authenticator popup will close after you scan the QR Code. To view the TOTP token, open the authenticator extension again.
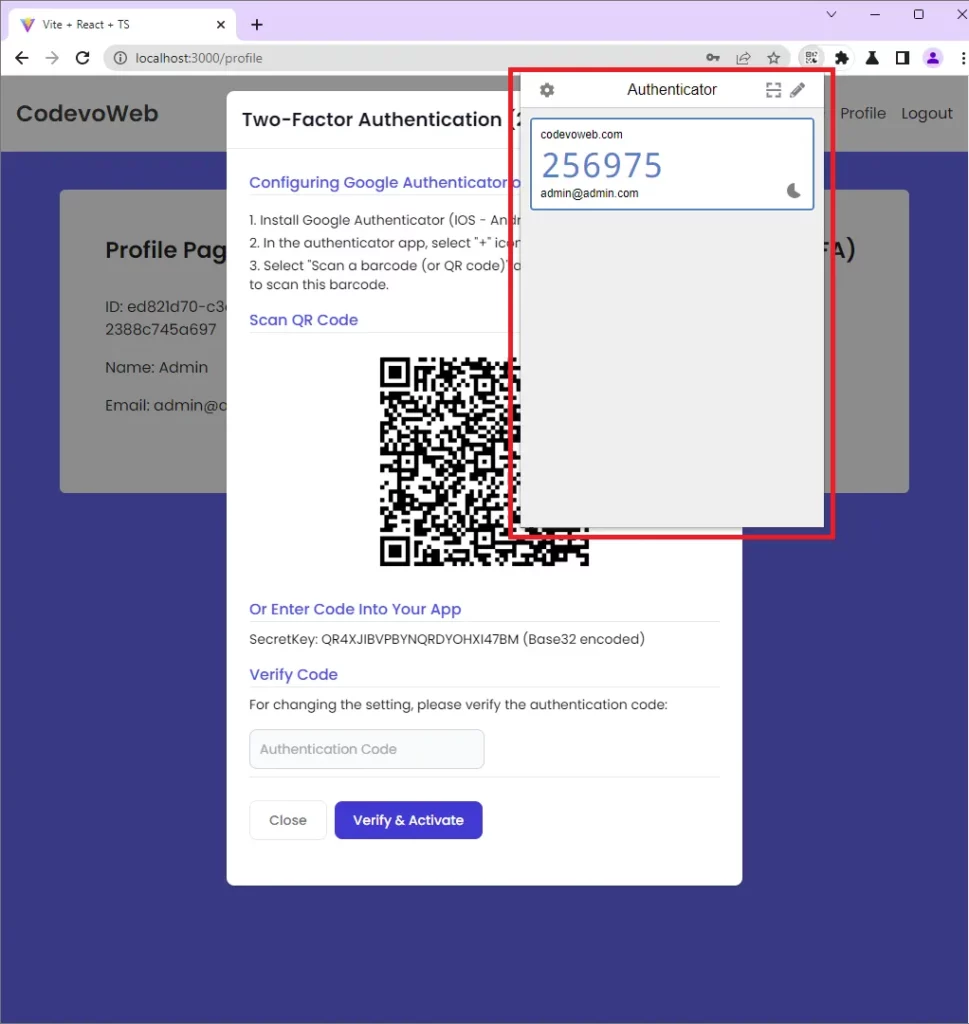
Copy the OTP token and paste it into the input component on the popup. Click on the Verify & Activate button to submit the token to the Golang API. The Golang API will then verify the token, enable the 2FA feature, and return a response to the client or app.
Validate the TOTP token
Once the 2FA feature has been enabled, refresh the browser to log out of the app. When you sign into the app, you will be redirected to the two-factor authentication page where you will provide the OTP token generated by the authenticator app.
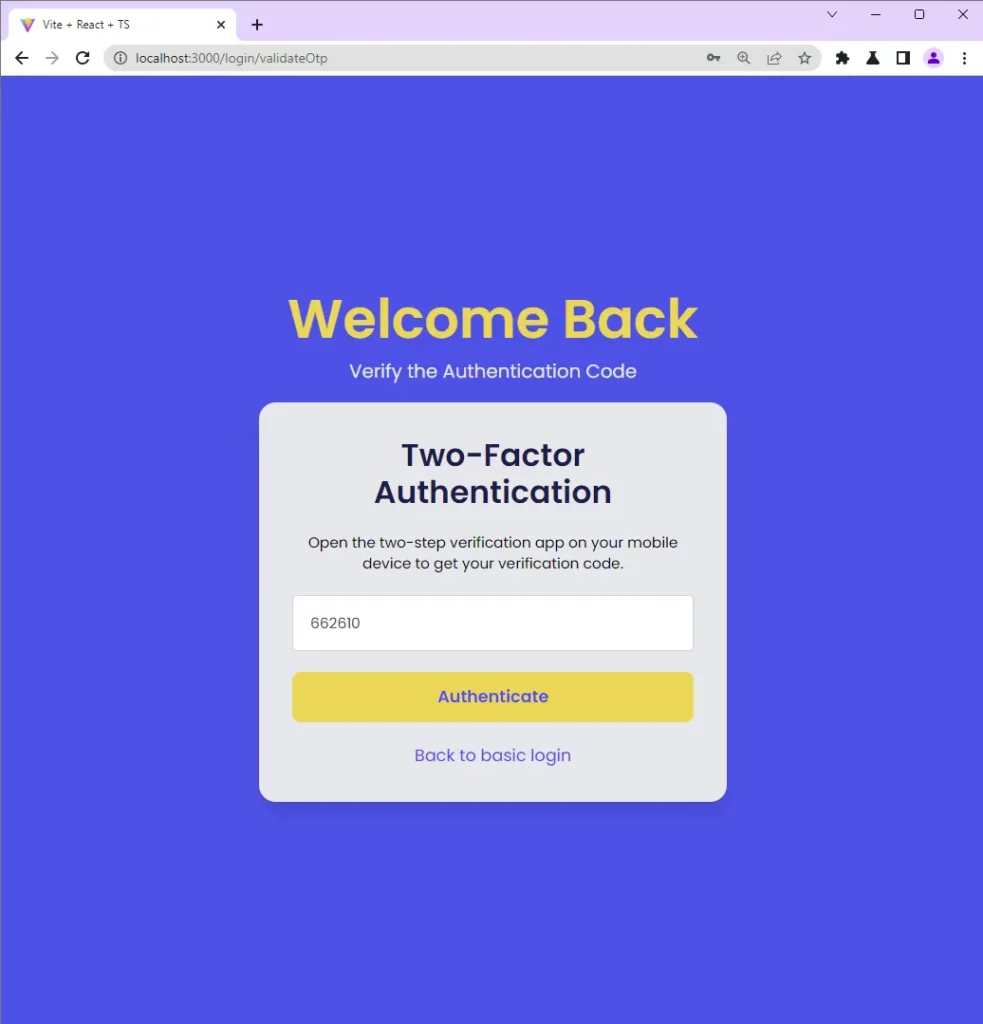
When you click on the Authenticate button, a POST request will be fired to the /api/auth/otp/validate endpoint with the OTP token included in the request body.
The Golang API will verify the OTP token against the OTP secrets stored in the database and return a response to the app.
Disable the 2FA Feature
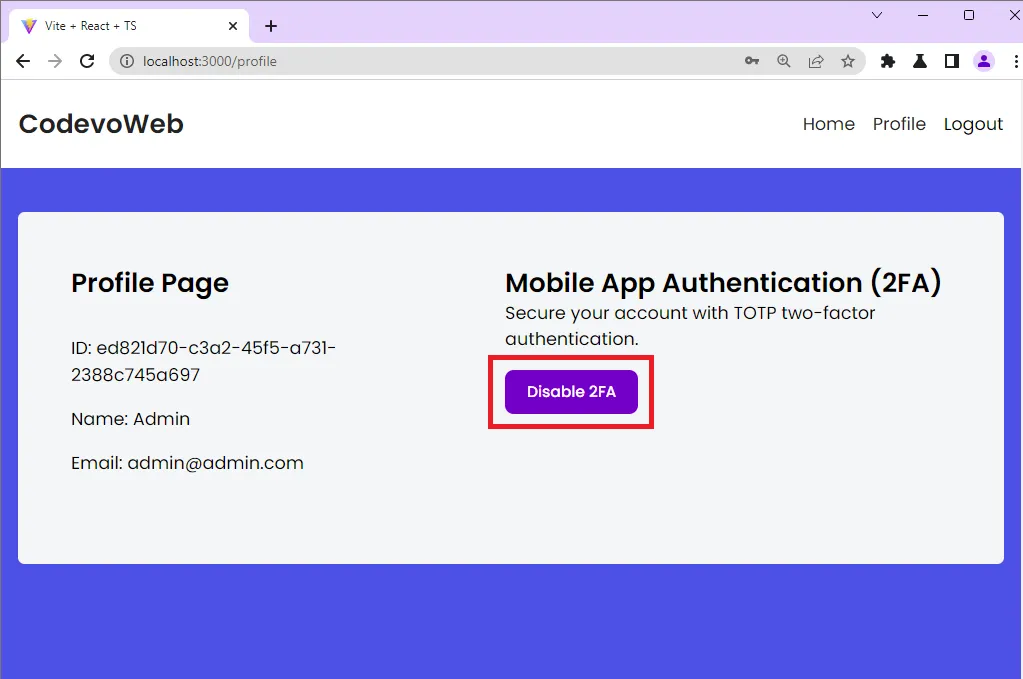
To disable the 2FA feature, click on the Disable 2FA button on the profile page. Clicking the Disable 2FA button will fire an Axios POST request to the /api/auth/otp/disable endpoint.
When you try logging into the app after the 2FA feature is disabled, React will take you to the profile page instead of going through the OTP verification page.
Step 1 – Setup the Golang Project
To begin, navigate to the location you would like to set up the project and create a directory with the name two_factor_golang. After the folder has been created, open it with your preferred IDE or text editor.
mkdir two_factor_golang && cd two_factor_golang && code .
Next, create the project module with this command:
go mod init github.com/:github_username/name_of_project
Now that you’ve initialized the Golang project, run this command to install the Gin Gonic package. Gin Gonic is an HTTP framework for building APIs in Golang.
go get -u github.com/gin-gonic/gin
With that out of the way, create a main.go file and add the following code snippets.
main.go
package main

import (
	"log"
	"net/http"

	"github.com/gin-gonic/gin"
)

var (
	server *gin.Engine
)

func init() {
	server = gin.Default()
}

func main() {
	router := server.Group("/api")
	router.GET("/healthchecker", func(ctx *gin.Context) {
		message := "Welcome to Two-Factor Authentication with Golang"
		ctx.JSON(http.StatusOK, gin.H{"status": "success", "message": message})
	})

	log.Fatal(server.Run(":8000"))
}
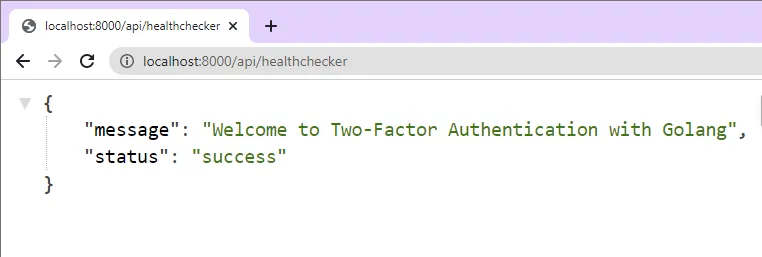
In the above code, we created a Gin Gonic server and added a health checker route to test the API. Start the Gin Gonic server by running go run main.go from the terminal in the root project directory.
Open a new tab in your browser and navigate to http://localhost:8000/api/healthchecker. You should see the JSON response sent by the Golang API.
Step 2 – Create the Database Model with GORM
This project will use GORM to store data in an SQLite database. What is GORM? GORM is a fantastic ORM library for Golang. It supports databases servers like:
- PostgreSQL
- MySQL
- SQLite
- SQL Server
That means you can easily adjust the code in this project to work with any GORM-supported database. I decided to use SQLite because it requires a few steps to set up.
To begin, install the following packages:
go get -u gorm.io/gorm gorm.io/driver/sqlite github.com/satori/go.uuid
gorm– ORM for Golangsqlite– SQLite driver based on GGOgo.uuid– For generating UUIDs
With the packages installed, it’s now time to create the database model with GORM. To do that, create a models/user.model.go file and add the following code:
models/user.model.go
package models

import (
	uuid "github.com/satori/go.uuid"
	"gorm.io/gorm"
)

type User struct {
	ID       uuid.UUID `gorm:"type:uuid;primary_key;"`
	Name     string    `gorm:"type:varchar(255);not null"`
	Email    string    `gorm:"uniqueIndex;not null"`
	Password string    `gorm:"not null"`

	Otp_enabled  bool `gorm:"default:false;"`
	Otp_verified bool `gorm:"default:false;"`

	Otp_secret   string
	Otp_auth_url string
}

func (user *User) BeforeCreate(*gorm.DB) error {
	user.ID = uuid.NewV4()

	return nil
}

type RegisterUserInput struct {
	Name     string `json:"name" binding:"required"`
	Email    string `json:"email" bindinig:"required"`
	Password string `json:"password" binding:"required"`
}

type LoginUserInput struct {
	Email    string `json:"email" bindinig:"required"`
	Password string `json:"password" binding:"required"`
}

type OTPInput struct {
	UserId string `json:"user_id"`
	Token  string `json:"token"`
}
Quite a lot happening in the above, let’s break it down:
- We created a User struct that will be used by GORM to generate the underlying SQL table.
- Next, we used GORM’s
BeforeCreatehook to assign a UUID to the ID column before the data gets stored in the database. - Lastly, we created a couple of structs that Gin Gonic will use to validate the request payloads.
With the above explanation, replace the content of the main.go file with the following code:
main.go
package main

import (
	"fmt"
	"log"
	"net/http"

	"github.com/gin-gonic/gin"
	"github.com/wpcodevo/two_factor_golang/models"
	"gorm.io/driver/sqlite"
	"gorm.io/gorm"
)

var (
	DB     *gorm.DB
	server *gin.Engine
)

func init() {
	var err error
	DB, err = gorm.Open(sqlite.Open("golang.db"), &gorm.Config{})
	DB.AutoMigrate(&models.User{})

	if err != nil {
		log.Fatal("Failed to connect to the Database")
	}
	fmt.Println("? Connected Successfully to the Database")

	server = gin.Default()
}

func main() {
	router := server.Group("/api")
	router.GET("/healthchecker", func(ctx *gin.Context) {
		message := "Welcome to Two-Factor Authentication with Golang"
		ctx.JSON(http.StatusOK, gin.H{"status": "success", "message": message})
	})

	log.Fatal(server.Run(":8000"))
}
In the above, we created an init function to automatically create the SQLite database and migrate the model we defined above.
Now execute the main.go by running go run main.go . The init function will be executed first to create the SQLite database and migrate the model to the database. You should see a golang.db SQLite file created in the root project directory.
After the init function has finished executing, the main function will be evoked to start the Gin Gonic HTTP server.
Step 3 – Create the Golang Route Handlers
In this section, you will create six Gin Gonic Route handlers to handle the 2FA authentication. To begin, install the TOTP library for Go. The https://github.com/pquerna/otp package will enable us to easily add TOTP authentication to the Golang API.
go get github.com/pquerna/otp
After that, create a controllers/auth.controller.go file and add the following code.
controllers/auth.controller.go
package controllers

import (
	"net/http"
	"strings"

	"github.com/gin-gonic/gin"
	"github.com/wpcodevo/two_factor_golang/models"
	"gorm.io/gorm"

	"github.com/pquerna/otp/totp"
)

type AuthController struct {
	DB *gorm.DB
}

func NewAuthController(DB *gorm.DB) AuthController {
	return AuthController{DB}
}
Register User Handler
The first step in the two-factor verification system is user registration. We will create a route handler that Gin Gonic will evoke to register the user.
controllers/auth.controller.go
// [...] Register User
func (ac *AuthController) SignUpUser(ctx *gin.Context) {
var payload *models.RegisterUserInput
if err := ctx.ShouldBindJSON(&payload); err != nil {
ctx.JSON(http.StatusBadRequest, gin.H{"status": "fail", "message": err.Error()})
return
}
newUser := models.User{
Name: payload.Name,
Email: strings.ToLower(payload.Email),
Password: payload.Password,
}
result := ac.DB.Create(&newUser)
if result.Error != nil && strings.Contains(result.Error.Error(), "duplicate key value violates unique") {
ctx.JSON(http.StatusConflict, gin.H{"status": "fail", "message": "Email already exist, please use another email address"})
return
} else if result.Error != nil {
ctx.JSON(http.StatusBadGateway, gin.H{"status": "error", "message": result.Error.Error()})
return
}
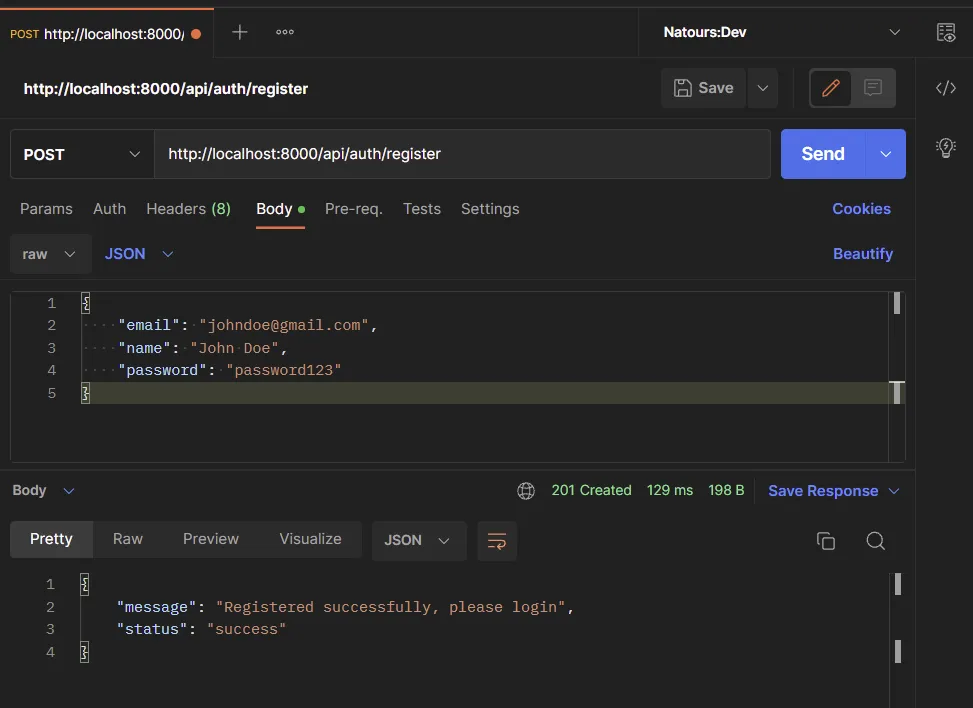
ctx.JSON(http.StatusCreated, gin.H{"status": "success", "message": "Registered successfully, please login"})
}
Let’s evaluate the above code:
- First, we passed the RegisterUserInput struct to the
.ShouldBindJSON()method provided by Gin Gonic to validate the request body during the account registration process. - Next, we initialized the
models.User{}struct and called GORM’s.Create()method to add the new user to the database. Since we added a unique constraint on the email column, we used anif...elsestatement to handle any possible errors returned by the database. - Lastly, we returned a JSON response to the client.
To register a user, you need to make a POST request with the necessary credentials to the /api/auth/register endpoint. When the request hits the Golang API, the SignUpUser route handler will be evoked to register the user.
Login User Handler
Here, you will create a route handler that Gin Gonic will call to log the user into the API. To reduce the steps involved in the authentication flow, we will ignore other authentication methods and return the user’s data to the client.
The API will assume the user is authenticated when the user_id is provided in the request body.
controllers/auth.controller.go
// [...] Register User
// [...] Login User
func (ac *AuthController) LoginUser(ctx *gin.Context) {
var payload *models.LoginUserInput
if err := ctx.ShouldBindJSON(&payload); err != nil {
ctx.JSON(http.StatusBadRequest, gin.H{"status": "fail", "message": err.Error()})
return
}
var user models.User
result := ac.DB.First(&user, "email = ?", strings.ToLower(payload.Email))
if result.Error != nil {
ctx.JSON(http.StatusBadRequest, gin.H{"status": "fail", "message": "Invalid email or Password"})
return
}
userResponse := gin.H{
"id": user.ID.String(),
"name": user.Name,
"email": user.Email,
"otp_enabled": user.Otp_enabled,
}
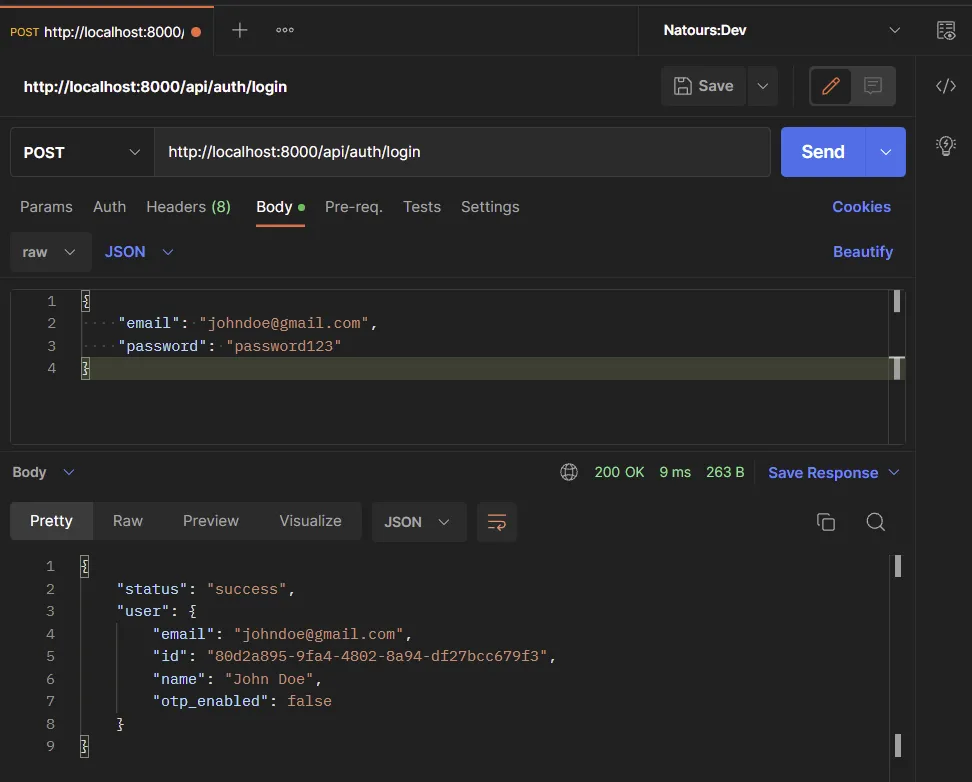
ctx.JSON(http.StatusOK, gin.H{"status": "success", "user": userResponse})
}
In the above code, we validated the request payload against the LoginUserInput struct and called GORM’s .First() method to check the database if a user with that email exists.
After that, we returned the found record to the client in JSON format. To log into the API, make a POST request with the required credentials to the /api/auth/login endpoint.
Generate the TOTP token
It’s now time to create the handler that will be evoked to generate the OTP secret key. The secret key will link the server and the application that will generate the OTP tokens.
controllers/auth.controller.go
// [...] Register User

// [...] Login User

// [...] Generate TOTP
func (ac *AuthController) GenerateOTP(ctx *gin.Context) {
	var payload *models.OTPInput

	if err := ctx.ShouldBindJSON(&payload); err != nil {
		ctx.JSON(http.StatusBadRequest, gin.H{"status": "fail", "message": err.Error()})
		return
	}

	key, err := totp.Generate(totp.GenerateOpts{
		Issuer:      "codevoweb.com",
		AccountName: "admin@admin.com",
		SecretSize:  15,
	})

	if err != nil {
		panic(err)
	}

	var user models.User
	result := ac.DB.First(&user, "id = ?", payload.UserId)
	if result.Error != nil {
		ctx.JSON(http.StatusBadRequest, gin.H{"status": "fail", "message": "Invalid email or Password"})
		return
	}

	dataToUpdate := models.User{
		Otp_secret:   key.Secret(),
		Otp_auth_url: key.URL(),
	}

	ac.DB.Model(&user).Updates(dataToUpdate)

	otpResponse := gin.H{
		"base32":      key.Secret(),
		"otpauth_url": key.URL(),
	}
	ctx.JSON(http.StatusOK, otpResponse)
}
To generate the secret key, we will use the totp.Generate() method provided by the https://github.com/pquerna/otp package. This method will return an object that has the secret key in base32, and URL format. The URL-encoded secret key will be sent to the frontend app to generate the QR Code.
After the OTP secret key has been generated, we will call GORM’s .Updates() method to add the secret key to the user’s data in the database.
Now generate the OTP secret key by making a POST request to the /api/auth/otp/generate endpoint with the user_id provided in the request body.

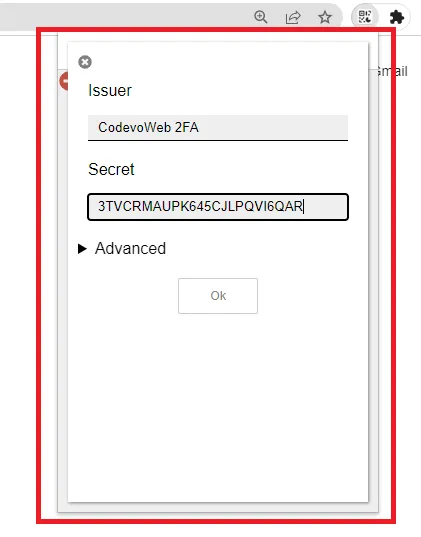
Open your authenticator app and enter the base32 encoded key to view the OTP token.
Verify the TOTP token
You should see the OTP token after adding the secret key to your authenticator app.

Now that we’ve been able to display the TOTP tokens, let’s create a route handler to verify them. This handler will verify the TOTP token and update the otp_enabled column in the “users” table to true.
controllers/auth.controller.go
// [...] Register User

// [...] Login User

// [...] Generate TOTP

// [...] Verify the OTP
func (ac *AuthController) VerifyOTP(ctx *gin.Context) {
	var payload *models.OTPInput

	if err := ctx.ShouldBindJSON(&payload); err != nil {
		ctx.JSON(http.StatusBadRequest, gin.H{"status": "fail", "message": err.Error()})
		return
	}

	message := "Token is invalid or user doesn't exist"

	var user models.User
	result := ac.DB.First(&user, "id = ?", payload.UserId)
	if result.Error != nil {
		ctx.JSON(http.StatusBadRequest, gin.H{"status": "fail", "message": message})
		return
	}

	valid := totp.Validate(payload.Token, user.Otp_secret)
	if !valid {
		ctx.JSON(http.StatusBadRequest, gin.H{"status": "fail", "message": message})
		return
	}

	dataToUpdate := models.User{
		Otp_enabled:  true,
		Otp_verified: true,
	}

	ac.DB.Model(&user).Updates(dataToUpdate)

	userResponse := gin.H{
		"id":          user.ID.String(),
		"name":        user.Name,
		"email":       user.Email,
		"otp_enabled": user.Otp_enabled,
	}
	ctx.JSON(http.StatusOK, gin.H{"otp_verified": true, "user": userResponse})
}
We extracted the token from the request payload and called the totp.Validate() method to verify the token against the base32-encoded secret key stored in the database.
Once the OTP token is valid, we’ll enable the 2FA feature and update the Otp_verified column to true. To verify the OTP token generated by the authenticator app, make a POST request with the token and user_id included in the request body to the /api/auth/otp/verify .

Validate the TOTP token
Similar to the OTP verification handler, this handle will also utilize the totp.Validate() method but it won’t update the user’s information in the database.
This handler will only verify the OTP token and return a validation response to the client.
controllers/auth.controller.go
// [...] Register User
// [...] Login User
// [...] Generate TOTP
// [...] Verify the OTP
// [...] Validate the TOTP
func (ac *AuthController) ValidateOTP(ctx *gin.Context) {
var payload *models.OTPInput
if err := ctx.ShouldBindJSON(&payload); err != nil {
ctx.JSON(http.StatusBadRequest, gin.H{"status": "fail", "message": err.Error()})
return
}
message := "Token is invalid or user doesn't exist"
var user models.User
result := ac.DB.First(&user, "id = ?", payload.UserId)
if result.Error != nil {
ctx.JSON(http.StatusBadRequest, gin.H{"status": "fail", "message": message})
return
}
valid := totp.Validate(payload.Token, user.Otp_secret)
if !valid {
ctx.JSON(http.StatusBadRequest, gin.H{"status": "fail", "message": message})
return
}
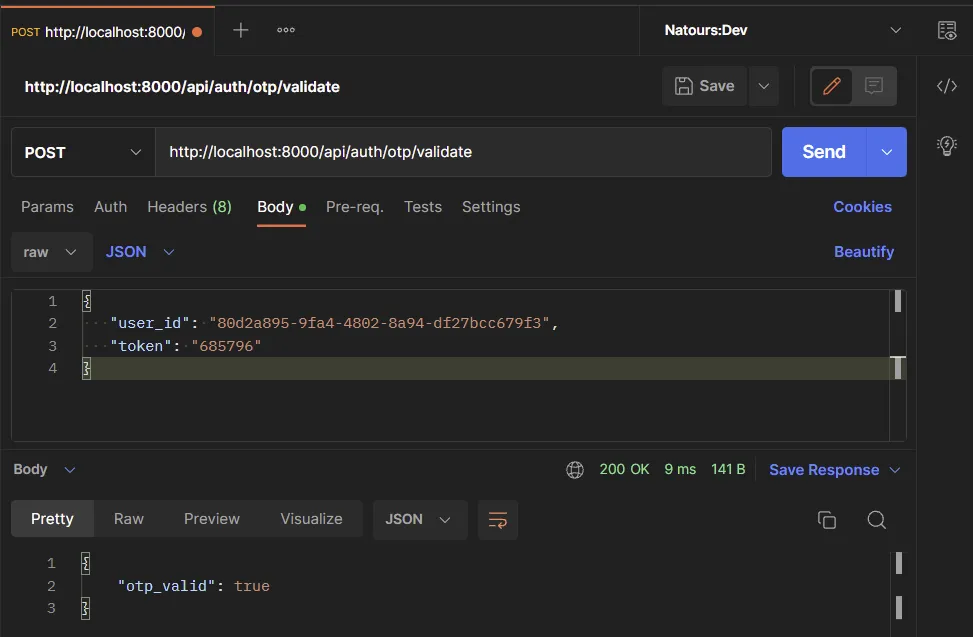
ctx.JSON(http.StatusOK, gin.H{"otp_valid": true})
}
To validate the OTP token, make a POST request with the user_id and token to the /api/auth/otp/validate endpoint.
Disable the TOTP Feature
The final step is to create a route handler that will be called to disable the 2FA feature. This handler will update the otp_enabled column in the “users” table to false.
controllers/auth.controller.go
// [...] Register User

// [...] Login User

// [...] Generate TOTP

// [...] Verify the OTP

// [...] Validate the TOTP

// [...] Disable the TOTP
func (ac *AuthController) DisableOTP(ctx *gin.Context) {
	var payload *models.OTPInput

	if err := ctx.ShouldBindJSON(&payload); err != nil {
		ctx.JSON(http.StatusBadRequest, gin.H{"status": "fail", "message": err.Error()})
		return
	}

	var user models.User
	result := ac.DB.First(&user, "id = ?", payload.UserId)
	if result.Error != nil {
		ctx.JSON(http.StatusBadRequest, gin.H{"status": "fail", "message": "User doesn't exist"})
		return
	}

	user.Otp_enabled = false
	ac.DB.Save(&user)

	userResponse := gin.H{
		"id":          user.ID.String(),
		"name":        user.Name,
		"email":       user.Email,
		"otp_enabled": user.Otp_enabled,
	}
	ctx.JSON(http.StatusOK, gin.H{"otp_disabled": true, "user": userResponse})
}
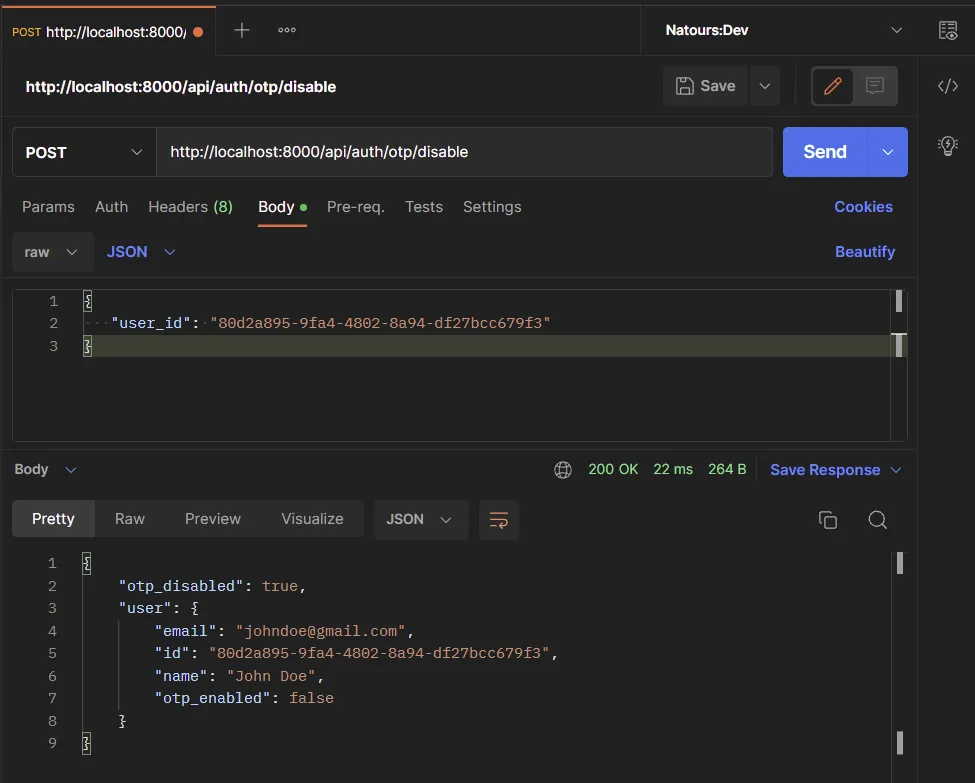
You can disable the 2FA feature by making a POST request with the user_id included in the request body to the /api/auth/otp/disable endpoint.
Final Code of the Route Controllers
controllers/auth.controller.go
package controllers

import (
	"net/http"
	"strings"

	"github.com/gin-gonic/gin"
	"github.com/wpcodevo/two_factor_golang/models"
	"gorm.io/gorm"

	"github.com/pquerna/otp/totp"
)

type AuthController struct {
	DB *gorm.DB
}

func NewAuthController(DB *gorm.DB) AuthController {
	return AuthController{DB}
}

func (ac *AuthController) SignUpUser(ctx *gin.Context) {
	var payload *models.RegisterUserInput

	if err := ctx.ShouldBindJSON(&payload); err != nil {
		ctx.JSON(http.StatusBadRequest, gin.H{"status": "fail", "message": err.Error()})
		return
	}

	newUser := models.User{
		Name:     payload.Name,
		Email:    strings.ToLower(payload.Email),
		Password: payload.Password,
	}

	result := ac.DB.Create(&newUser)

	if result.Error != nil && strings.Contains(result.Error.Error(), "duplicate key value violates unique") {
		ctx.JSON(http.StatusConflict, gin.H{"status": "fail", "message": "Email already exist, please use another email address"})
		return
	} else if result.Error != nil {
		ctx.JSON(http.StatusBadGateway, gin.H{"status": "error", "message": result.Error.Error()})
		return
	}

	ctx.JSON(http.StatusCreated, gin.H{"status": "success", "message": "Registered successfully, please login"})
}

func (ac *AuthController) LoginUser(ctx *gin.Context) {
	var payload *models.LoginUserInput

	if err := ctx.ShouldBindJSON(&payload); err != nil {
		ctx.JSON(http.StatusBadRequest, gin.H{"status": "fail", "message": err.Error()})
		return
	}

	var user models.User
	result := ac.DB.First(&user, "email = ?", strings.ToLower(payload.Email))
	if result.Error != nil {
		ctx.JSON(http.StatusBadRequest, gin.H{"status": "fail", "message": "Invalid email or Password"})
		return
	}

	userResponse := gin.H{
		"id":          user.ID.String(),
		"name":        user.Name,
		"email":       user.Email,
		"otp_enabled": user.Otp_enabled,
	}
	ctx.JSON(http.StatusOK, gin.H{"status": "success", "user": userResponse})
}

func (ac *AuthController) GenerateOTP(ctx *gin.Context) {
	var payload *models.OTPInput

	if err := ctx.ShouldBindJSON(&payload); err != nil {
		ctx.JSON(http.StatusBadRequest, gin.H{"status": "fail", "message": err.Error()})
		return
	}

	key, err := totp.Generate(totp.GenerateOpts{
		Issuer:      "codevoweb.com",
		AccountName: "admin@admin.com",
		SecretSize:  15,
	})

	if err != nil {
		panic(err)
	}

	var user models.User
	result := ac.DB.First(&user, "id = ?", payload.UserId)
	if result.Error != nil {
		ctx.JSON(http.StatusBadRequest, gin.H{"status": "fail", "message": "Invalid email or Password"})
		return
	}

	dataToUpdate := models.User{
		Otp_secret:   key.Secret(),
		Otp_auth_url: key.URL(),
	}

	ac.DB.Model(&user).Updates(dataToUpdate)

	otpResponse := gin.H{
		"base32":      key.Secret(),
		"otpauth_url": key.URL(),
	}
	ctx.JSON(http.StatusOK, otpResponse)
}

func (ac *AuthController) VerifyOTP(ctx *gin.Context) {
	var payload *models.OTPInput

	if err := ctx.ShouldBindJSON(&payload); err != nil {
		ctx.JSON(http.StatusBadRequest, gin.H{"status": "fail", "message": err.Error()})
		return
	}

	message := "Token is invalid or user doesn't exist"

	var user models.User
	result := ac.DB.First(&user, "id = ?", payload.UserId)
	if result.Error != nil {
		ctx.JSON(http.StatusBadRequest, gin.H{"status": "fail", "message": message})
		return
	}

	valid := totp.Validate(payload.Token, user.Otp_secret)
	if !valid {
		ctx.JSON(http.StatusBadRequest, gin.H{"status": "fail", "message": message})
		return
	}

	dataToUpdate := models.User{
		Otp_enabled:  true,
		Otp_verified: true,
	}

	ac.DB.Model(&user).Updates(dataToUpdate)

	userResponse := gin.H{
		"id":          user.ID.String(),
		"name":        user.Name,
		"email":       user.Email,
		"otp_enabled": user.Otp_enabled,
	}
	ctx.JSON(http.StatusOK, gin.H{"otp_verified": true, "user": userResponse})
}

func (ac *AuthController) ValidateOTP(ctx *gin.Context) {
	var payload *models.OTPInput

	if err := ctx.ShouldBindJSON(&payload); err != nil {
		ctx.JSON(http.StatusBadRequest, gin.H{"status": "fail", "message": err.Error()})
		return
	}

	message := "Token is invalid or user doesn't exist"

	var user models.User
	result := ac.DB.First(&user, "id = ?", payload.UserId)
	if result.Error != nil {
		ctx.JSON(http.StatusBadRequest, gin.H{"status": "fail", "message": message})
		return
	}

	valid := totp.Validate(payload.Token, user.Otp_secret)
	if !valid {
		ctx.JSON(http.StatusBadRequest, gin.H{"status": "fail", "message": message})
		return
	}

	ctx.JSON(http.StatusOK, gin.H{"otp_valid": true})
}

func (ac *AuthController) DisableOTP(ctx *gin.Context) {
	var payload *models.OTPInput

	if err := ctx.ShouldBindJSON(&payload); err != nil {
		ctx.JSON(http.StatusBadRequest, gin.H{"status": "fail", "message": err.Error()})
		return
	}

	var user models.User
	result := ac.DB.First(&user, "id = ?", payload.UserId)
	if result.Error != nil {
		ctx.JSON(http.StatusBadRequest, gin.H{"status": "fail", "message": "User doesn't exist"})
		return
	}

	user.Otp_enabled = false
	ac.DB.Save(&user)

	userResponse := gin.H{
		"id":          user.ID.String(),
		"name":        user.Name,
		"email":       user.Email,
		"otp_enabled": user.Otp_enabled,
	}
	ctx.JSON(http.StatusOK, gin.H{"otp_disabled": true, "user": userResponse})
}
Step 4 – Create the Gin Gonic API Routes
We are now ready to create the Gin Gonic routes to evoke the route handlers. Create a routes/auth.routes.go file and add the following Golang code to define the API routes.
routes/auth.routes.go
package routes

import (
	"github.com/gin-gonic/gin"
	"github.com/wpcodevo/two_factor_golang/controllers"
)

type AuthRouteController struct {
	authController controllers.AuthController
}

func NewAuthRouteController(authController controllers.AuthController) AuthRouteController {
	return AuthRouteController{authController}
}

func (rc *AuthRouteController) AuthRoute(rg *gin.RouterGroup) {
	router := rg.Group("auth")

	router.POST("/register", rc.authController.SignUpUser)
	router.POST("/login", rc.authController.LoginUser)
	router.POST("/otp/generate", rc.authController.GenerateOTP)
	router.POST("/otp/verify", rc.authController.VerifyOTP)
	router.POST("/otp/validate", rc.authController.ValidateOTP)
	router.POST("/otp/disable", rc.authController.DisableOTP)
}
Step 5 – Add Routes to Gin Gonic Middleware
Now that we have the routes defined, let’s add the router to the Gin Gonic middleware pipeline. Before that, install the CORS package that we’ll use to configure the Gin Gonic server to accept cross-origin requests.
go get github.com/gin-contrib/cors
Next, replace the content of the main.go file with the following code:
main.go
package main

import (
	"fmt"
	"log"
	"net/http"

	"github.com/gin-contrib/cors"
	"github.com/gin-gonic/gin"
	"github.com/wpcodevo/two_factor_golang/controllers"
	"github.com/wpcodevo/two_factor_golang/models"
	"github.com/wpcodevo/two_factor_golang/routes"
	"gorm.io/driver/sqlite"
	"gorm.io/gorm"
)

var (
	DB     *gorm.DB
	server *gin.Engine

	AuthController      controllers.AuthController
	AuthRouteController routes.AuthRouteController
)

func init() {
	var err error
	DB, err = gorm.Open(sqlite.Open("golang.db"), &gorm.Config{})
	DB.AutoMigrate(&models.User{})

	if err != nil {
		log.Fatal("Failed to connect to the Database")
	}
	fmt.Println("? Connected Successfully to the Database")

	AuthController = controllers.NewAuthController(DB)
	AuthRouteController = routes.NewAuthRouteController(AuthController)

	server = gin.Default()
}

func main() {
	corsConfig := cors.DefaultConfig()
	corsConfig.AllowOrigins = []string{"http://localhost:3000"}
	corsConfig.AllowCredentials = true

	server.Use(cors.New(corsConfig))

	router := server.Group("/api")
	router.GET("/healthchecker", func(ctx *gin.Context) {
		message := "Welcome to Two-Factor Authentication with Golang"
		ctx.JSON(http.StatusOK, gin.H{"status": "success", "message": message})
	})

	AuthRouteController.AuthRoute(router)
	log.Fatal(server.Run(":8000"))
}
Start the Gin HTTP server by running go run main.go .
Conclusion
In this article, you learned how to implement two-factor authentication in Golang using the https://github.com/pquerna/otp package. You also learned how to generate the OTP tokens with Chrome’s Authenticator extension.
You can find the React.js and Golang source code on this GitHub repository: