

In this comprehensive guide, you’ll learn how to implement two-factor authentication (2FA) in a Rust application using OTP tokens generated by an Authenticator app like Authy, Google Authenticator, or Chrome’s Authenticator extension.
Two-Factor Authentication is a method of verifying a user’s identity by requiring them to provide two forms of authentication. The first form of identification is usually a password or PIN, while the second form of identification is typically a one-time passcode generated by an authenticator app or sent via SMS to a registered phone number.
Let me clear the air. The one-time passcode (OTP) can be delivered to the user in several ways, including SMS, Push notification, Email, or Voice call. For security reasons, we won’t use SMS or Email to deliver the OTP token.
SMS and Email are considered less secure methods for delivering OTP tokens because SMS messages can be intercepted or redirected, while Email messages can be easily phished. Using an authenticator app or hardware token is more secure because the token is generated on the device the user physically possesses.
More practice:
- How to Implement Two-factor Authentication (2FA) in React.js
- How to Implement Two-factor Authentication (2FA) in Node.js
- How to Implement (2FA) Two-factor Authentication in Golang
- Django – Implement (2FA) Two-Factor Authentication
- Two-factor Authentication (2FA) in FastAPI and Python

Prerequisites
I’ve structured this article to be easily understood by both seasoned Rust developers and those who are new to the Rust language. But these prerequisites are needed to get the most out of this tutorial.
- Basic knowledge of Rust and any Rust web framework will be beneficial.
- Basic understanding of REST architecture.
Run the Rust 2FA Project Locally
- Download or clone the Rust 2FA API project from https://github.com/wpcodevo/totp-rust and open the source code in a code editor.
- Run
cargo r -rto install the required dependencies and start the Rust HTTP server. - Import the
Two-Factor Auth.postman_collection.jsonfile into Postman or Thunder Client VS Code extension to test the 2FA flow. - Alternatively, you can set up the React app to interact with the Rust 2FA API in a visual way.
Run the Rust 2FA Project with a React.js App
For a complete guide on how to implement the 2FA feature in React.js see the post How to Implement Two-factor Authentication (2FA) in React.js. Nonetheless, follow the steps below to spin up the React app.
- Download or clone the React two-factor authentication project from https://github.com/wpcodevo/two_factor_reactjs and open the source code in an IDE.
- Install the required dependencies by running
yarnoryarn installin the terminal of the root directory. - Run
yarn devto start the Vite development server. - Visit
http://localhost:3000in a new tab to interact with the two-factor authentication app. Note: Do not open the app onhttp://127.0.0.1:3000to avoid CORS or site can’t be reached errors.
Initialize the Rust Project
Excluding the Makefile and Two-Factor Auth.postman_collection.json files, your folder structure will look somewhat like the screenshot below at the end of the tutorial.
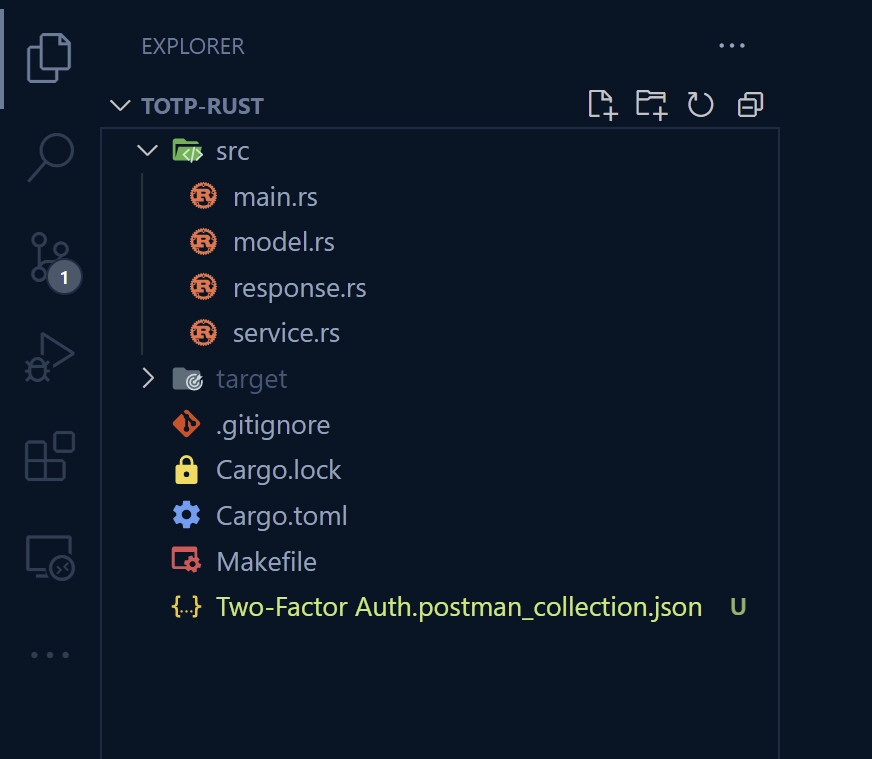
To begin, navigate to a convenient location on your machine and create a new directory to house the project’s source code. You can name the folder totp-rust . After that, open the folder in a code editor. In my case, I’ll use VS Code.
mkdir totp-rust
cd totp-rust && code .
Next, run Cargo’s init function to initialize the Rust project:
cargo init
Now it’s time to install the project’s dependencies. In the console of the root directory, run these commands to install the required crates.
cargo add actix-web
cargo add actix-cors
cargo add totp-rs
cargo add base32
cargo add rand
cargo add serde --features derive
cargo add serde_json
cargo add chrono --features serde
cargo add env_logger
cargo add uuid --features v4
actix-web– A web framework for building blazingly-fast web applications in Rust.actix-cors– This crate provides CORS middleware for the Actix web framework.totp-rs– This crate provides tools for generating and validating TOTP codes in Rust.base32– Base32 encoder/decoder for Rustrand– For generating random numbers and other random values.serde– For serializing and deserializing rust data structures.serde_json– For serializing and deserializing JSON data.chrono– Date and time library for Rust.env_logger– A logger middleware.uuid– A library to generate and parse UUIDs in Rust.
If you face any issues with the latest versions of the crates, you can use the versions provided in the Cargo.toml file below.
Cargo.toml
[package]
name = "totp-rust"
version = "0.1.0"
edition = "2021"

# See more keys and their definitions at https://doc.rust-lang.org/cargo/reference/manifest.html

[dependencies]
actix-cors = "0.6.4"
actix-web = "4.2.1"
base32 = "0.4.0"
chrono = { version = "0.4.23", features = ["serde"] }
env_logger = "0.10.0"
rand = "0.8.5"
serde = { version = "1.0.152", features = ["derive"] }
serde_json = "1.0.91"
totp-rs = "5.4.0"
uuid = { version = "1.2.2", features = ["v4"] }
Now let’s get our hands dirty by building a basic web server to return a simple JSON object before diving into the two-factor authentication implementation.
So open the src/main.rs file and replace its content with the following code snippets.
src/main.rs
use actix_web::middleware::Logger;
use actix_web::{get, App, HttpResponse, HttpServer, Responder};
use serde_json::json;

#[get("/api/healthchecker")]
async fn health_checker_handler() -> impl Responder {
    const MESSAGE: &str = "How to  Implement Two-Factor Authentication (2FA) in Rust";

    HttpResponse::Ok().json(json!({"status": "success", "message": MESSAGE}))
}

#[actix_web::main]
async fn main() -> std::io::Result<()> {
    if std::env::var_os("RUST_LOG").is_none() {
        std::env::set_var("RUST_LOG", "actix_web=info");
    }
    env_logger::init();

    println!("🚀 Server started successfully");

    HttpServer::new(move || {
        App::new()
            .service(health_checker_handler)
            .wrap(Logger::default())
    })
    .bind(("127.0.0.1", 8000))?
    .run()
    .await?;

    Ok(())
}
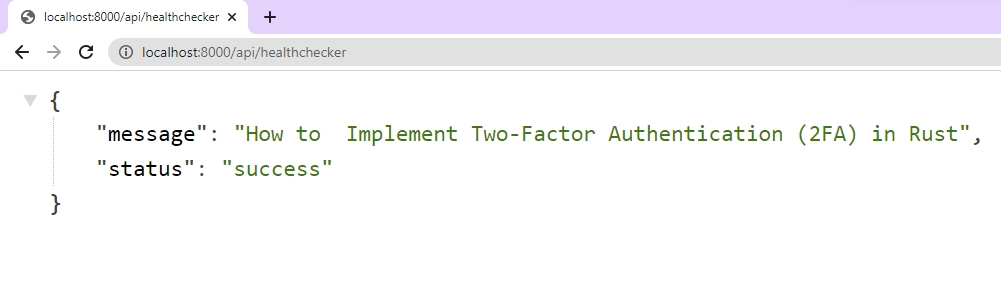
In the above code, we created a simple Actix web server to return a simple JSON object when a GET request is made to the /api/healthchecker endpoint.
You can run cargo r -r to start the Actix web HTTP server but if you want to hot-reload the server upon file changes, you’ll need to install the cargo-watch CLI tool.
Install the cargo-watch binary with this command:
cargo install cargo-watch
Run the command below to build the project and start the Actix web HTTP server. Also, this will make the cargo-watch CLI tool to watch the src directory for file changes and restart the server.
cargo watch -q -c -w src/ -x run
Now visit http://localhost:8000/api/healthchecker in a new tab to make a GET request to the Actix web server. Within a few milliseconds, the server should respond with the JSON object.
Setup an In-memory Database
To reduce the complexity of the project, we won’t persist the user data in a real database like Postgres or MySQL. This way, we can focus more on the 2FA implementation instead of worrying about how to use ORMs like Diesel or SQLX.
To set up a simple in-memory database in Rust, we’ll use a Vector and Mutex along with Rust’s smart pointer called Arc. The Mutex will ensure thread safety by preventing concurrent access and modification to the data store. The Arc on the other hand will allow multiple threads to share ownership of the in-memory database.
With the above explanations, create a model.rs file in the src directory and add the following code.
src/model.rs
use chrono::prelude::*;
use serde::{Deserialize, Serialize};
use std::sync::{Arc, Mutex};

#[allow(non_snake_case)]
#[derive(Debug, Deserialize, Serialize, Clone)]
pub struct User {
    pub id: Option<String>,
    pub email: String,
    pub name: String,
    pub password: String,

    pub otp_enabled: Option<bool>,
    pub otp_verified: Option<bool>,
    pub otp_base32: Option<String>,
    pub otp_auth_url: Option<String>,

    pub createdAt: Option<DateTime<Utc>>,
    pub updatedAt: Option<DateTime<Utc>>,
}

pub struct AppState {
    pub db: Arc<Mutex<Vec<User>>>,
}

impl AppState {
    pub fn init() -> AppState {
        AppState {
            db: Arc::new(Mutex::new(Vec::new())),
        }
    }
}

#[derive(Debug, Deserialize)]
pub struct UserRegisterSchema {
    pub name: String,
    pub email: String,
    pub password: String,
}

#[derive(Debug, Deserialize)]
pub struct UserLoginSchema {
    pub email: String,
    pub password: String,
}

#[derive(Debug, Deserialize)]
pub struct GenerateOTPSchema {
    pub email: String,
    pub user_id: String,
}

#[derive(Debug, Deserialize)]
pub struct VerifyOTPSchema {
    pub user_id: String,
    pub token: String,
}

#[derive(Debug, Deserialize)]
pub struct DisableOTPSchema {
    pub user_id: String,
}
Above, we created a User struct to represent our database model. Then, we defined a struct called AppState that has a vector of the User struct as its data. The AppState struct has an init method that will initialize the in-memory database with an empty vector.
Lastly, we defined other structs at the bottom to help us validate the incoming request bodies.
Create Response Structs
Now that the database model is ready, let’s create structs that implement Serde’s Serialize trait to help us send JSON objects to the client. To do this, create a response.rs file in the src folder and add the code below.
src/response.rs
use chrono::prelude::*;
use serde::Serialize;

#[derive(Serialize)]
pub struct GenericResponse {
    pub status: String,
    pub message: String,
}

#[allow(non_snake_case)]
#[derive(Serialize, Debug)]
pub struct UserData {
    pub id: String,
    pub email: String,
    pub name: String,

    pub otp_enabled: bool,
    pub otp_verified: bool,
    pub otp_base32: Option<String>,
    pub otp_auth_url: Option<String>,

    pub createdAt: DateTime<Utc>,
    pub updatedAt: DateTime<Utc>,
}

#[derive(Serialize, Debug)]
pub struct UserResponse {
    pub status: String,
    pub user: UserData,
}
Implement the Two-Factor Authentication
Oops, quite a lot of configurations. Now let’s create route functions to handle the two-factor authentication.
#[post("/auth/register")]– Actix web will use this route to register a new user when a POST request is made to the/api/auth/registerendpoint.#[post("/auth/login")]– Actix web will evoke the route function that implements this macro to log the user into their account when a POST request hits the/api/auth/loginpath.#[post("/auth/otp/generate")]– This route will generate the TOTP credentials, store them in the database, and return both the base32 encoded string and OTP auth URL to the client.#[post("/auth/otp/verify")]– This route will verify the OTP token generated by the authenticator app and enable the 2FA feature on the user’s account.#[post("/auth/otp/validate")]– This route will validate the OTP token generated by the authenticator app for subsequent logins.#[post("/auth/otp/disable")]– This route will disable the 2FA feature on the user’s account.
To begin, create a service.rs file in the src directory and add the following dependencies and crates.
src/service.rs
use crate::{
    model::{
        AppState, DisableOTPSchema, GenerateOTPSchema, User, UserLoginSchema, UserRegisterSchema,
        VerifyOTPSchema,
    },
    response::{GenericResponse, UserData, UserResponse},
};
use actix_web::{get, post, web, HttpResponse, Responder};
use base32;
use chrono::prelude::*;
use rand::Rng;
use serde_json::json;
use totp_rs::{Algorithm, Secret, TOTP};
use uuid::Uuid;
To avoid sending sensitive information to the client, let’s create a utility function to help us omit certain fields from the user record. So add the user_to_response helper function to the service.rs file.
src/service.rs
fn user_to_response(user: &User) -> UserData {
    UserData {
        id: user.id.to_owned().unwrap(),
        name: user.name.to_owned(),
        email: user.email.to_owned(),
        otp_auth_url: user.otp_auth_url.to_owned(),
        otp_base32: user.otp_base32.to_owned(),
        otp_enabled: user.otp_enabled.unwrap(),
        otp_verified: user.otp_verified.unwrap(),
        createdAt: user.createdAt.unwrap(),
        updatedAt: user.updatedAt.unwrap(),
    }
}
Register New User
This route function will be responsible for adding new users to the in-memory database. To prevent duplicate email addresses in the data store, we’ll check if a user with that email already exists before adding the new user.
If a user with that email already exists, a 409 Conflict error will be sent to the client. Otherwise, the new user will be added to the data store and a success message will be returned to the client.
src/service.rs
#[post("/auth/register")]
async fn register_user_handler(
    body: web::Json<UserRegisterSchema>,
    data: web::Data<AppState>,
) -> impl Responder {
    let mut vec = data.db.lock().unwrap();

    for user in vec.iter() {
        if user.email == body.email.to_lowercase() {
            let error_response = GenericResponse {
                status: "fail".to_string(),
                message: format!("User with email: {} already exists", user.email),
            };
            return HttpResponse::Conflict().json(error_response);
        }
    }

    let uuid_id = Uuid::new_v4();
    let datetime = Utc::now();

    let user = User {
        id: Some(uuid_id.to_string()),
        email: body.email.to_owned().to_lowercase(),
        name: body.name.to_owned(),
        password: body.password.to_owned(),
        otp_enabled: Some(false),
        otp_verified: Some(false),
        otp_base32: None,
        otp_auth_url: None,
        createdAt: Some(datetime),
        updatedAt: Some(datetime),
    };

    vec.push(user);

    HttpResponse::Ok()
        .json(json!({"status": "success", "message": "Registered successfully, please login"}))
}
Login User
Now that we’re able to register users, let’s create a route function to sign them into their accounts. We’ll skip other authentication methods like password hashing, generating cookies, creating JWT tokens, and more to reduce the complexity of the project.
The API will authenticate users by sending their account information in the JSON response. To do this, we’ll query the data store to find the user belonging to the provided email address. If no user was found, a 404 Not Found error will be sent to the client.
Otherwise, the user’s credentials will be returned in the JSON response.
src/service.rs
#[post("/auth/login")]
async fn login_user_handler(
    body: web::Json<UserLoginSchema>,
    data: web::Data<AppState>,
) -> impl Responder {
    let vec = data.db.lock().unwrap();

    let user = vec.iter().find(|user| user.email == body.email.to_lowercase());

    if user.is_none() {
        return HttpResponse::BadRequest()
            .json(json!({"status": "fail", "message": "Invalid email or password"}));
    }

    let user = user.unwrap().clone();

    let json_response = UserResponse {
        status: "success".to_string(),
        user: user_to_response(&user),
    };

    HttpResponse::Ok().json(json_response)
}
Generate the TOTP Credentials
Now it’s time to generate the TOTP credentials. First, we’ll query the data store to check if a user with the provided UUID exists. Once a user exists, we’ll generate a random array of bytes using the rng.gen() function, and encode it to base32 using the base32::encode() function.
Then, we’ll create a new TOTP instance by calling the TOTP::new() function provided by the totp-rs crate. The TOTP instance will hold information about how the auth code should be generated and validated. For a detailed explanation of the parameters accepted by the TOTP::new() function, read https://docs.rs/totp-rs/latest/totp_rs/struct.TOTP.html#fields.
src/service.rs
#[post("/auth/otp/generate")]
async fn generate_otp_handler(
    body: web::Json<GenerateOTPSchema>,
    data: web::Data<AppState>,
) -> impl Responder {
    let mut vec = data.db.lock().unwrap();

    let user = vec
        .iter_mut()
        .find(|user| user.id == Some(body.user_id.to_owned()));

    if user.is_none() {
        let json_error = GenericResponse {
            status: "fail".to_string(),
            message: format!("No user with Id: {} found", body.user_id),
        };

        return HttpResponse::NotFound().json(json_error);
    }

    let mut rng = rand::thread_rng();
    let data_byte: [u8; 21] = rng.gen();
    let base32_string = base32::encode(base32::Alphabet::RFC4648 { padding: false }, &data_byte);

    let totp = TOTP::new(
        Algorithm::SHA1,
        6,
        1,
        30,
        Secret::Encoded(base32_string)
            .to_bytes()
            .unwrap(),
    )
    .unwrap();

    let otp_base32 = totp.get_secret_base32();
    let email = body.email.to_owned();
    let issuer = "CodevoWeb";
    let otp_auth_url =
        format!("otpauth://totp/{issuer}:{email}?secret={otp_base32}&issuer={issuer}");

    // let otp_auth_url = format!("otpauth://totp/<issuer>:<account_name>?secret=<secret>&issuer=<issuer>");
    let user = user.unwrap();
    user.otp_base32 = Some(otp_base32.to_owned());
    user.otp_auth_url = Some(otp_auth_url.to_owned());

    HttpResponse::Ok()
        .json(json!({"base32":otp_base32.to_owned(), "otpauth_url": otp_auth_url.to_owned()} ))
}
Once the TOTP instance has been created, we’ll construct the OTP auth URL with the required parameters including the base32 secret and store them in the database. After that, we’ll return a copy of the base32 secret and the OTP auth URL to the client.
Verify the TOTP Token
Now that we’re able to generate the base32-encoded secret and OTP auth URL, let’s create a route handler to verify the OTP token and enable the 2FA feature on the user’s account.
When a user submits the OTP token generated by the authenticator app, we’ll query the in-memory database to check if the user belonging to the provided ID still exists.
If there is a user, we’ll extract the OTP base32 secret from the record returned by the database and assign it to an otp_base32 variable. Then, we’ll call the TOTP::new() function and provide the base32 secret with some other parameters.
src/service.rs
#[post("/auth/otp/verify")]
async fn verify_otp_handler(
    body: web::Json<VerifyOTPSchema>,
    data: web::Data<AppState>,
) -> impl Responder {
    let mut vec = data.db.lock().unwrap();

    let user = vec
        .iter_mut()
        .find(|user| user.id == Some(body.user_id.to_owned()));

    if user.is_none() {
        let json_error = GenericResponse {
            status: "fail".to_string(),
            message: format!("No user with Id: {} found", body.user_id),
        };

        return HttpResponse::NotFound().json(json_error);
    }

    let user = user.unwrap();

    let otp_base32 = user.otp_base32.to_owned().unwrap();

    let totp = TOTP::new(
        Algorithm::SHA1,
        6,
        1,
        30,
        Secret::Encoded(otp_base32).to_bytes().unwrap(),
    )
    .unwrap();

    let is_valid = totp.check_current(&body.token).unwrap();

    if !is_valid {
        let json_error = GenericResponse {
            status: "fail".to_string(),
            message: "Token is invalid or user doesn't exist".to_string(),
        };

        return HttpResponse::Forbidden().json(json_error);
    }

    user.otp_enabled = Some(true);
    user.otp_verified = Some(true);

    HttpResponse::Ok().json(json!({"otp_verified": true, "user": user_to_response(user)}))
}
Once the TOTP instance has been created, we’ll call the totp.check_current() method to check if the OTP token provided by the user is valid. If the OTP token is invalid, a 401 Forbidden error will be sent to the client.
Otherwise, we’ll enable the 2FA feature on the user’s account and return the user’s credentials along with "otp_verified": true in the JSON response.
Validate the TOTP Token
This route function is similar to the verify_otp_handler but this time around, we’ll only validate the OTP token without modifying the user’s data. This function will only be called during subsequent logins after the 2FA feature has been enabled on the user’s account.
src/service.rs
#[post("/auth/otp/validate")]
async fn validate_otp_handler(
    body: web::Json<VerifyOTPSchema>,
    data: web::Data<AppState>,
) -> impl Responder {
    let vec = data.db.lock().unwrap();

    let user = vec
        .iter()
        .find(|user| user.id == Some(body.user_id.to_owned()));

    if user.is_none() {
        let json_error = GenericResponse {
            status: "fail".to_string(),
            message: format!("No user with Id: {} found", body.user_id),
        };

        return HttpResponse::NotFound().json(json_error);
    }

    let user = user.unwrap();

    if !user.otp_enabled.unwrap() {
        let json_error = GenericResponse {
            status: "fail".to_string(),
            message: "2FA not enabled".to_string(),
        };

        return HttpResponse::Forbidden().json(json_error);
    }

    let otp_base32 = user.otp_base32.to_owned().unwrap();

    let totp = TOTP::new(
        Algorithm::SHA1,
        6,
        1,
        30,
        Secret::Encoded(otp_base32).to_bytes().unwrap(),
    )
    .unwrap();

    let is_valid = totp.check_current(&body.token).unwrap();

    if !is_valid {
        return HttpResponse::Forbidden()
            .json(json!({"status": "fail", "message": "Token is invalid or user doesn't exist"}));
    }

    HttpResponse::Ok().json(json!({"otp_valid": true}))
}
Disable the 2FA Feature
Finally, let’s create a route function that will be evoked to disable the 2FA feature on the user’s account. To do that, we’ll query the database to retrieve the user’s data and reset the TOTP credentials to their initial values.
src/service.rs
#[post("/auth/otp/disable")]
async fn disable_otp_handler(
    body: web::Json<DisableOTPSchema>,
    data: web::Data<AppState>,
) -> impl Responder {
    let mut vec = data.db.lock().unwrap();

    let user = vec
        .iter_mut()
        .find(|user| user.id == Some(body.user_id.to_owned()));

    if user.is_none() {
        let json_error = GenericResponse {
            status: "fail".to_string(),
            message: format!("No user with Id: {} found", body.user_id),
        };

        return HttpResponse::NotFound().json(json_error);
    }

    let user = user.unwrap();

    user.otp_enabled = Some(false);
    user.otp_verified = Some(false);
    user.otp_auth_url = None;
    user.otp_base32 = None;

    HttpResponse::Ok().json(json!({"user": user_to_response(user), "otp_disabled": true}))
}
Merge the 2FA API Routes
At this point, we’ve created all the route handlers to process the two-factor authentication requests. Now let’s use Actix-web’s web::scope() method to group them under a common prefix.
src/service.rs
pub fn config(conf: &mut web::ServiceConfig) {
    let scope = web::scope("/api")
        .service(health_checker_handler)
        .service(register_user_handler)
        .service(login_user_handler)
        .service(generate_otp_handler)
        .service(verify_otp_handler)
        .service(validate_otp_handler)
        .service(disable_otp_handler);

    conf.service(scope);
}
Complete Route Handlers
src/service.rs
use crate::{
    model::{
        AppState, DisableOTPSchema, GenerateOTPSchema, User, UserLoginSchema, UserRegisterSchema,
        VerifyOTPSchema,
    },
    response::{GenericResponse, UserData, UserResponse},
};
use actix_web::{get, post, web, HttpResponse, Responder};
use base32;
use chrono::prelude::*;
use rand::Rng;
use serde_json::json;
use totp_rs::{Algorithm, Secret, TOTP};
use uuid::Uuid;

#[get("/healthchecker")]
async fn health_checker_handler() -> impl Responder {
    const MESSAGE: &str = "How to  Implement Two-Factor Authentication (2FA) in Rust";

    HttpResponse::Ok().json(json!({"status": "success", "message": MESSAGE}))
}

#[post("/auth/register")]
async fn register_user_handler(
    body: web::Json<UserRegisterSchema>,
    data: web::Data<AppState>,
) -> impl Responder {
    let mut vec = data.db.lock().unwrap();

    for user in vec.iter() {
        if user.email == body.email.to_lowercase() {
            let error_response = GenericResponse {
                status: "fail".to_string(),
                message: format!("User with email: {} already exists", user.email),
            };
            return HttpResponse::Conflict().json(error_response);
        }
    }

    let uuid_id = Uuid::new_v4();
    let datetime = Utc::now();

    let user = User {
        id: Some(uuid_id.to_string()),
        email: body.email.to_owned().to_lowercase(),
        name: body.name.to_owned(),
        password: body.password.to_owned(),
        otp_enabled: Some(false),
        otp_verified: Some(false),
        otp_base32: None,
        otp_auth_url: None,
        createdAt: Some(datetime),
        updatedAt: Some(datetime),
    };

    vec.push(user);

    HttpResponse::Ok()
        .json(json!({"status": "success", "message": "Registered successfully, please login"}))
}

#[post("/auth/login")]
async fn login_user_handler(
    body: web::Json<UserLoginSchema>,
    data: web::Data<AppState>,
) -> impl Responder {
    let vec = data.db.lock().unwrap();

    let user = vec.iter().find(|user| user.email == body.email.to_lowercase());

    if user.is_none() {
        return HttpResponse::BadRequest()
            .json(json!({"status": "fail", "message": "Invalid email or password"}));
    }

    let user = user.unwrap().clone();

    let json_response = UserResponse {
        status: "success".to_string(),
        user: user_to_response(&user),
    };

    HttpResponse::Ok().json(json_response)
}

#[post("/auth/otp/generate")]
async fn generate_otp_handler(
    body: web::Json<GenerateOTPSchema>,
    data: web::Data<AppState>,
) -> impl Responder {
    let mut vec = data.db.lock().unwrap();

    let user = vec
        .iter_mut()
        .find(|user| user.id == Some(body.user_id.to_owned()));

    if user.is_none() {
        let json_error = GenericResponse {
            status: "fail".to_string(),
            message: format!("No user with Id: {} found", body.user_id),
        };

        return HttpResponse::NotFound().json(json_error);
    }

    let mut rng = rand::thread_rng();
    let data_byte: [u8; 21] = rng.gen();
    let base32_string = base32::encode(base32::Alphabet::RFC4648 { padding: false }, &data_byte);

    let totp = TOTP::new(
        Algorithm::SHA1,
        6,
        1,
        30,
        Secret::Encoded(base32_string)
            .to_bytes()
            .unwrap(),
    )
    .unwrap();

    let otp_base32 = totp.get_secret_base32();
    let email = body.email.to_owned();
    let issuer = "CodevoWeb";
    let otp_auth_url =
        format!("otpauth://totp/{issuer}:{email}?secret={otp_base32}&issuer={issuer}");

    // let otp_auth_url = format!("otpauth://totp/<issuer>:<account_name>?secret=<secret>&issuer=<issuer>");
    let user = user.unwrap();
    user.otp_base32 = Some(otp_base32.to_owned());
    user.otp_auth_url = Some(otp_auth_url.to_owned());

    HttpResponse::Ok()
        .json(json!({"base32":otp_base32.to_owned(), "otpauth_url": otp_auth_url.to_owned()} ))
}

#[post("/auth/otp/verify")]
async fn verify_otp_handler(
    body: web::Json<VerifyOTPSchema>,
    data: web::Data<AppState>,
) -> impl Responder {
    let mut vec = data.db.lock().unwrap();

    let user = vec
        .iter_mut()
        .find(|user| user.id == Some(body.user_id.to_owned()));

    if user.is_none() {
        let json_error = GenericResponse {
            status: "fail".to_string(),
            message: format!("No user with Id: {} found", body.user_id),
        };

        return HttpResponse::NotFound().json(json_error);
    }

    let user = user.unwrap();

    let otp_base32 = user.otp_base32.to_owned().unwrap();

    let totp = TOTP::new(
        Algorithm::SHA1,
        6,
        1,
        30,
        Secret::Encoded(otp_base32).to_bytes().unwrap(),
    )
    .unwrap();

    let is_valid = totp.check_current(&body.token).unwrap();

    if !is_valid {
        let json_error = GenericResponse {
            status: "fail".to_string(),
            message: "Token is invalid or user doesn't exist".to_string(),
        };

        return HttpResponse::Forbidden().json(json_error);
    }

    user.otp_enabled = Some(true);
    user.otp_verified = Some(true);

    HttpResponse::Ok().json(json!({"otp_verified": true, "user": user_to_response(user)}))
}

#[post("/auth/otp/validate")]
async fn validate_otp_handler(
    body: web::Json<VerifyOTPSchema>,
    data: web::Data<AppState>,
) -> impl Responder {
    let vec = data.db.lock().unwrap();

    let user = vec
        .iter()
        .find(|user| user.id == Some(body.user_id.to_owned()));

    if user.is_none() {
        let json_error = GenericResponse {
            status: "fail".to_string(),
            message: format!("No user with Id: {} found", body.user_id),
        };

        return HttpResponse::NotFound().json(json_error);
    }

    let user = user.unwrap();

    if !user.otp_enabled.unwrap() {
        let json_error = GenericResponse {
            status: "fail".to_string(),
            message: "2FA not enabled".to_string(),
        };

        return HttpResponse::Forbidden().json(json_error);
    }

    let otp_base32 = user.otp_base32.to_owned().unwrap();

    let totp = TOTP::new(
        Algorithm::SHA1,
        6,
        1,
        30,
        Secret::Encoded(otp_base32).to_bytes().unwrap(),
    )
    .unwrap();

    let is_valid = totp.check_current(&body.token).unwrap();

    if !is_valid {
        return HttpResponse::Forbidden()
            .json(json!({"status": "fail", "message": "Token is invalid or user doesn't exist"}));
    }

    HttpResponse::Ok().json(json!({"otp_valid": true}))
}

#[post("/auth/otp/disable")]
async fn disable_otp_handler(
    body: web::Json<DisableOTPSchema>,
    data: web::Data<AppState>,
) -> impl Responder {
    let mut vec = data.db.lock().unwrap();

    let user = vec
        .iter_mut()
        .find(|user| user.id == Some(body.user_id.to_owned()));

    if user.is_none() {
        let json_error = GenericResponse {
            status: "fail".to_string(),
            message: format!("No user with Id: {} found", body.user_id),
        };

        return HttpResponse::NotFound().json(json_error);
    }

    let user = user.unwrap();

    user.otp_enabled = Some(false);
    user.otp_verified = Some(false);
    user.otp_auth_url = None;
    user.otp_base32 = None;

    HttpResponse::Ok().json(json!({"user": user_to_response(user), "otp_disabled": true}))
}

fn user_to_response(user: &User) -> UserData {
    UserData {
        id: user.id.to_owned().unwrap(),
        name: user.name.to_owned(),
        email: user.email.to_owned(),
        otp_auth_url: user.otp_auth_url.to_owned(),
        otp_base32: user.otp_base32.to_owned(),
        otp_enabled: user.otp_enabled.unwrap(),
        otp_verified: user.otp_verified.unwrap(),
        createdAt: user.createdAt.unwrap(),
        updatedAt: user.updatedAt.unwrap(),
    }
}

pub fn config(conf: &mut web::ServiceConfig) {
    let scope = web::scope("/api")
        .service(health_checker_handler)
        .service(register_user_handler)
        .service(login_user_handler)
        .service(generate_otp_handler)
        .service(verify_otp_handler)
        .service(validate_otp_handler)
        .service(disable_otp_handler);

    conf.service(scope);
}
Add CORS to the API Server
Now let’s add the route handlers and in-memory database to the Actix web server and configure the server to accept requests from cross-origin domains.
To do that, open the src/main.rs file and replace its content with the following code.
src/main.rs
mod model;
mod response;
mod service;

use actix_cors::Cors;
use actix_web::middleware::Logger;
use actix_web::{http::header, web, App, HttpServer};
use model::AppState;

#[actix_web::main]
async fn main() -> std::io::Result<()> {
    if std::env::var_os("RUST_LOG").is_none() {
        std::env::set_var("RUST_LOG", "actix_web=info");
    }
    env_logger::init();

    let db = AppState::init();
    let app_data = web::Data::new(db);

    println!("🚀 Server started successfully");

    HttpServer::new(move || {
        let cors = Cors::default()
            .allowed_origin("http://localhost:3000")
            .allowed_origin("http://localhost:3000/")
            .allowed_methods(vec!["GET", "POST"])
            .allowed_headers(vec![
                header::CONTENT_TYPE,
                header::AUTHORIZATION,
                header::ACCEPT,
            ])
            .supports_credentials();

        App::new()
            .app_data(app_data.clone())
            .configure(service::config)
            .wrap(cors)
            .wrap(Logger::default())
    })
    .bind(("127.0.0.1", 8000))?
    .run()
    .await?;

    Ok(())
}
Let’s evaluate the above code:
- First, we initialized the in-memory database with an empty vector by calling the
AppState::init()method. - Then, we added the in-memory database to the Actix-web data state to make it available to all the route functions.
- Finally, we defined the CORS options and registered the CORS middleware by passing the options to the
.wrap()method.
With that out of the way, run the command below to start the Actix web server again.
cargo watch -q -c -w src/ -x run
Test the Two-Factor Authentication Flow
At this point, the Rust API is ready to accept requests. Follow the “Run the Rust 2FA Project with a React.js App” section to make requests to the Actix web server via the React app.
Create an Account
The first step in the two-factor authentication flow is account registration. To create a new account, provide the necessary credentials and click on the “Sign Up” button.
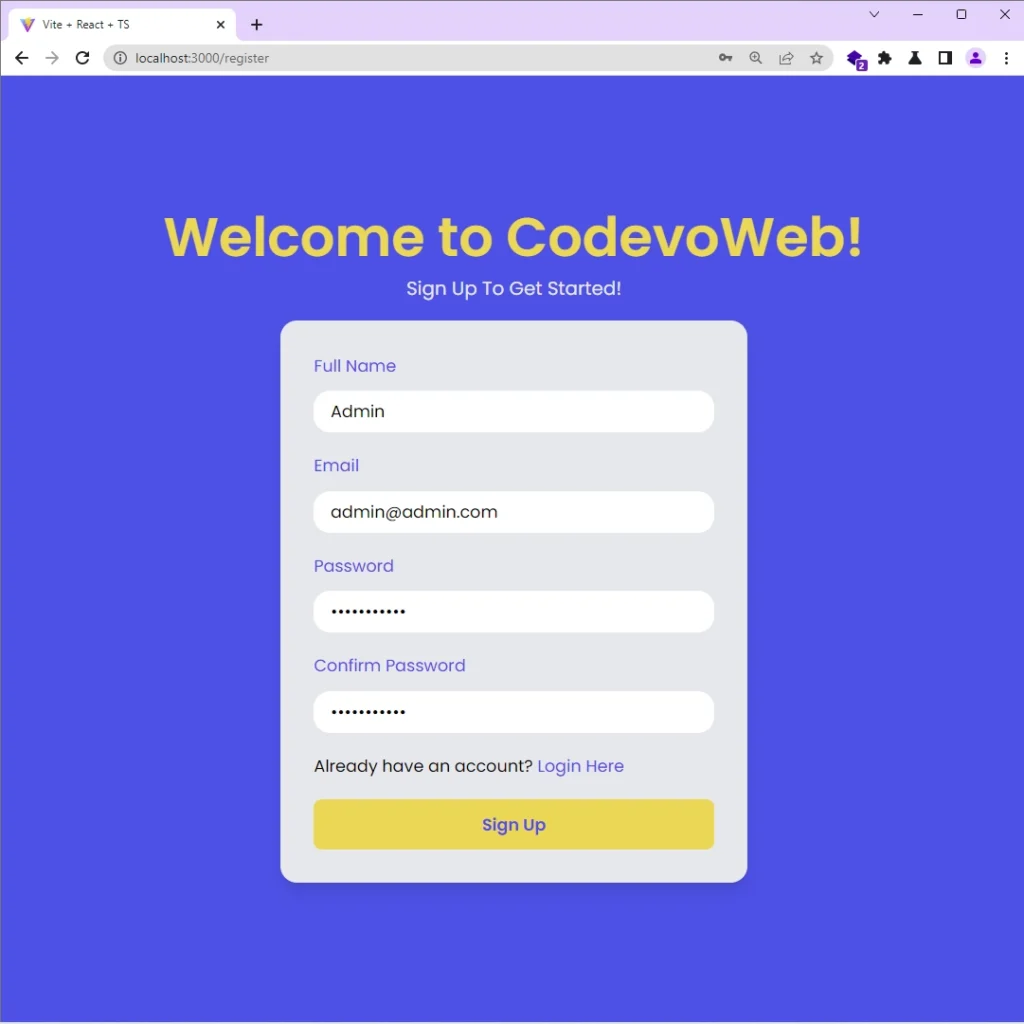
Upon clicking the “Sign Up” button, React will add the credentials to the JSON object and make a POST request to the /api/auth/register endpoint.
{
    "email": "admin@admin.com",
    "name": "Admin",
    "password": "password123"
}
Once the Rust API server receives the request, it will validate the credentials and add the new user to the in-memory database. After that, it will return a success message to the React app.
Sign into the Account
To log into your account, provide your email and password and then click on the “Login” button.
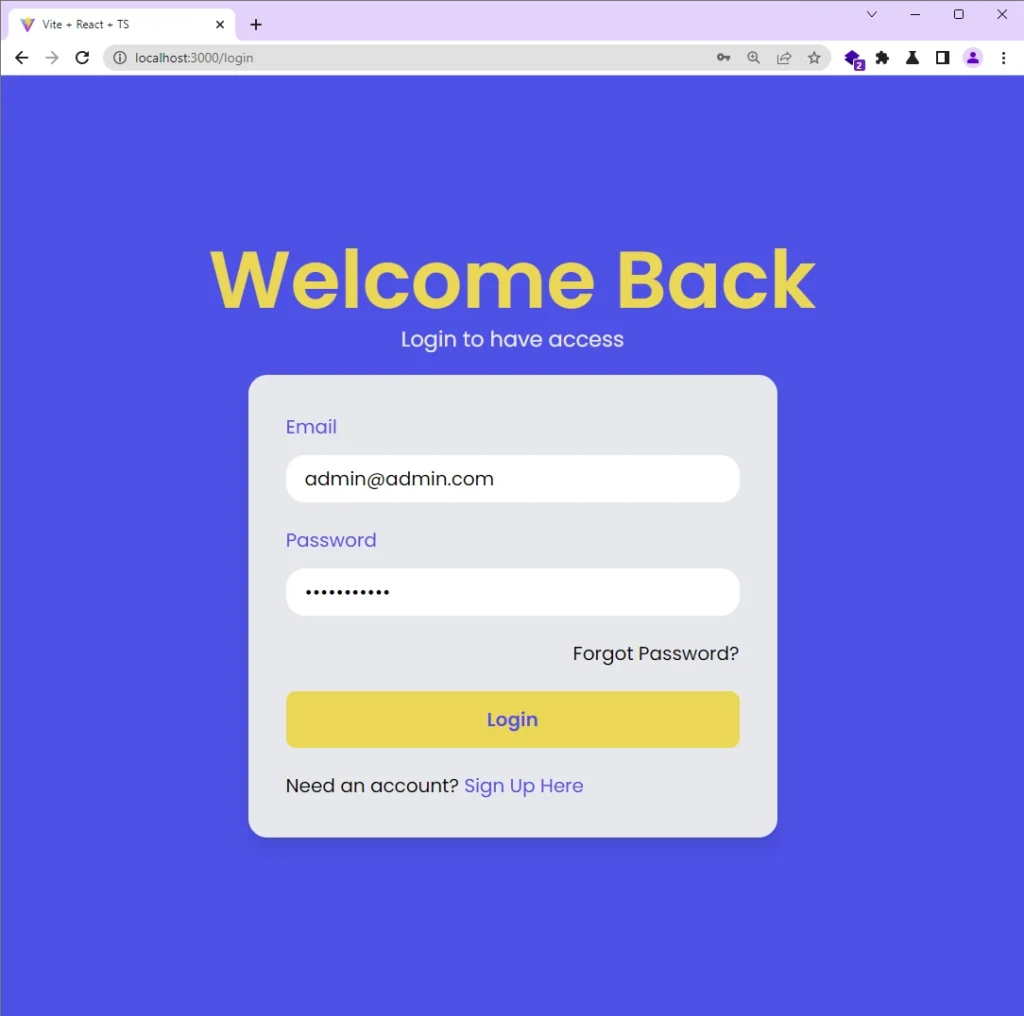
React will extract the credentials, add them to the JSON object, and make a POST request with Axios to the /api/auth/login endpoint.
{
    "email": "admin@admin.com",
    "password": "password123"
}
After the Actix web server authenticates the user, it will return the authenticated user’s credentials to the React app. React will then redirect the user to the profile page where the credentials will be displayed in the UI.
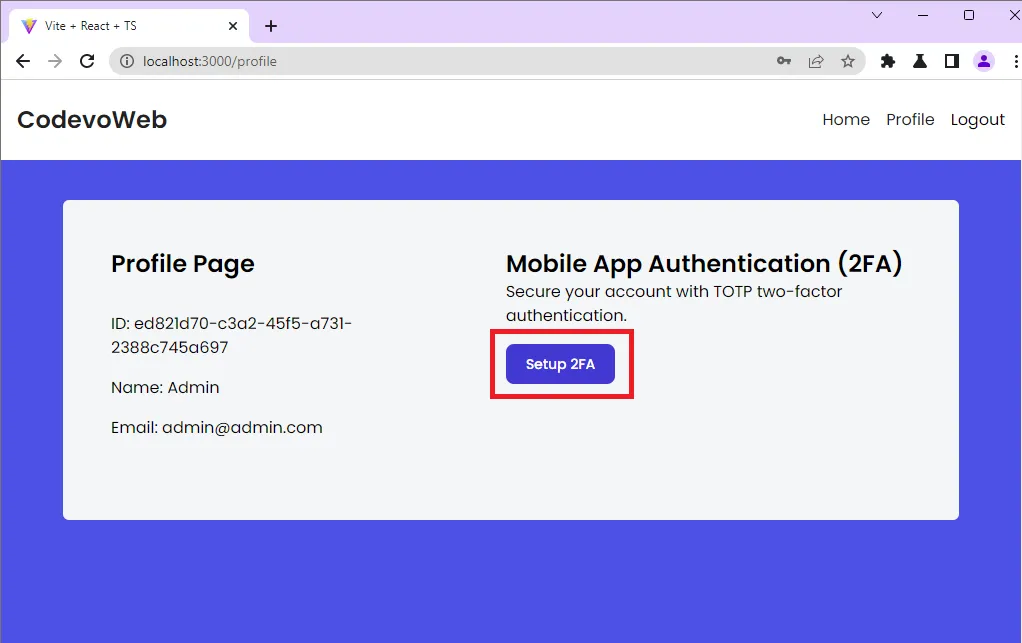
Generate the 2FA QRCode
To set up the 2FA feature on your account, click on the “Setup 2FA” button on the profile page to generate the QR Code from the OTP auth URL returned by the Rust API.
When you click the “Setup 2FA” button, React will add your email and ID to the request body and make a POST request to the /api/auth/otp/generate endpoint.
{
  "user_id": "6652208b-48f9-4a5b-9980-df632c4a3b6c",
  "email":"admin@admin.com"
}
The Rust API will then generate the TOTP credentials, store them in the database, and return both the base32 encoded string and the OTP auth URL to the React app.
Once React receive the response, it’ll use the OTP auth URL to generate a QR Code that the user can scan with an authenticator app.
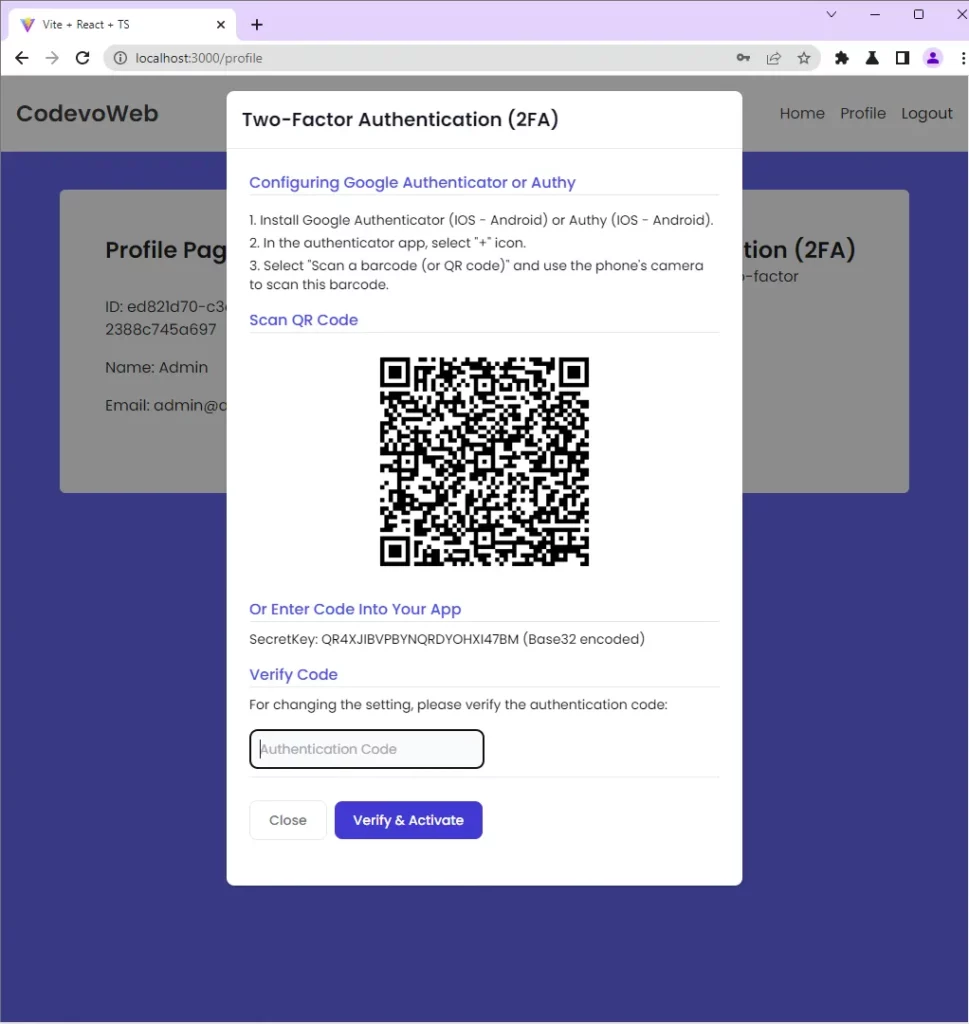
Verify the OTP Token
After the user scans the QR Code, the authenticator app will extract the information encoded in the QR Code, and configure itself to generate the TOTP codes for the user’s account.
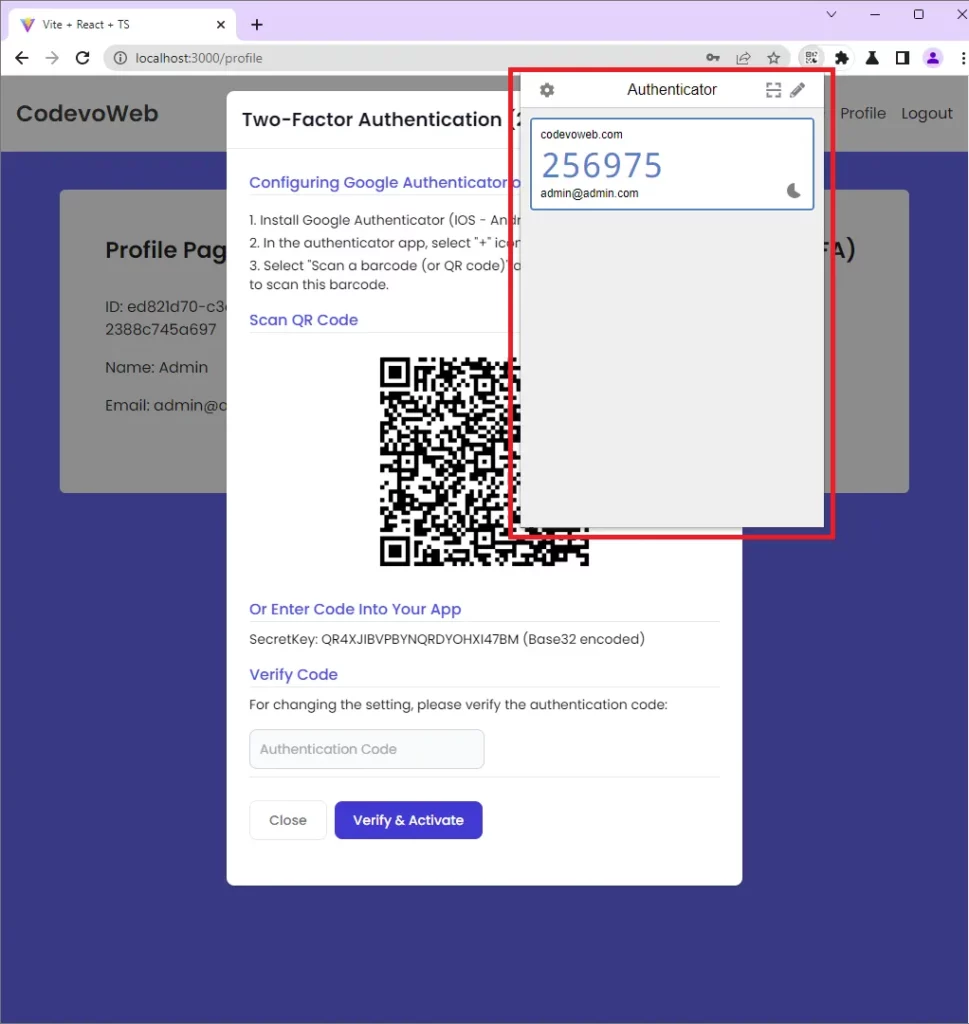
You can copy the OTP token from the authenticator app, add it to the “Authentication Code” input field and click on the “Verify & Activate” button.
{
  "user_id": "a67eae36-1e27-4be5-981c-8a74a3a8be7b",
  "token": "216109"
}
React will then add the token and user ID to the request body and make a POST request to the /api/auth/otp/verify endpoint. Once the Rust API receives the request, it will validate the TOTP token, enable the 2FA feature on the user’s account, and return the user’s credentials to the React app.
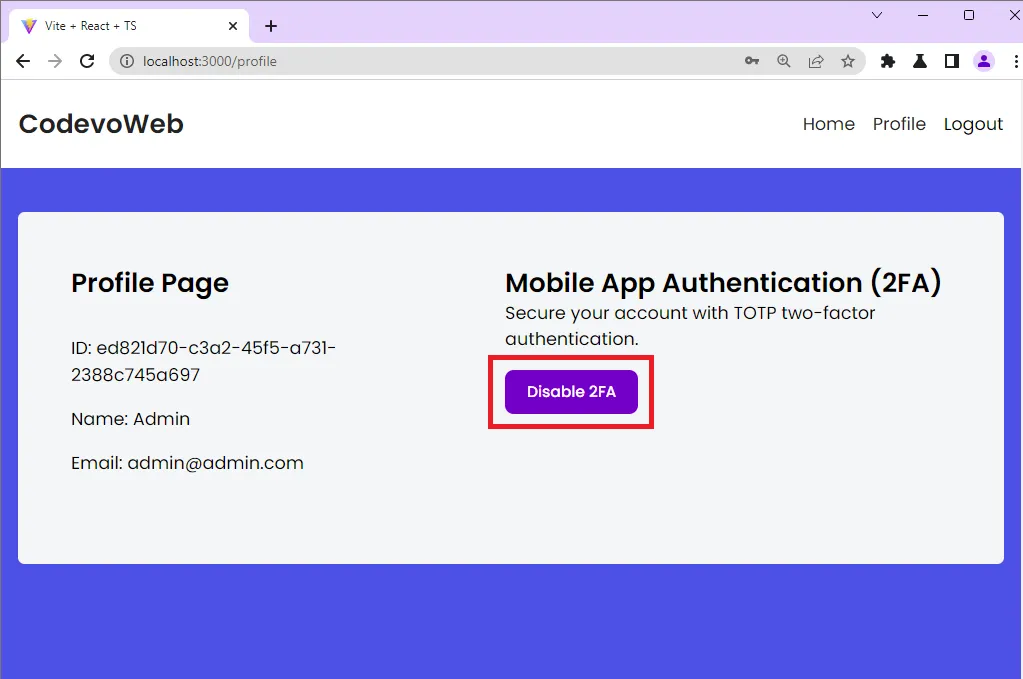
If the request resolves successfully, React will change the “Setup 2FA” button to “Disable 2FA“.
Validate the OTP Token
For subsequent logins, you’ll be redirected to the “Two-Factor Authentication” page after the Rust API validates the email and password. On the 2FA verification page, you’ll be required to provide the TOTP token generated by the authenticator app.

You can copy and paste the OTP token into the “Authentication Code” input field and click the “Authenticate” button to submit it to the Rust API.
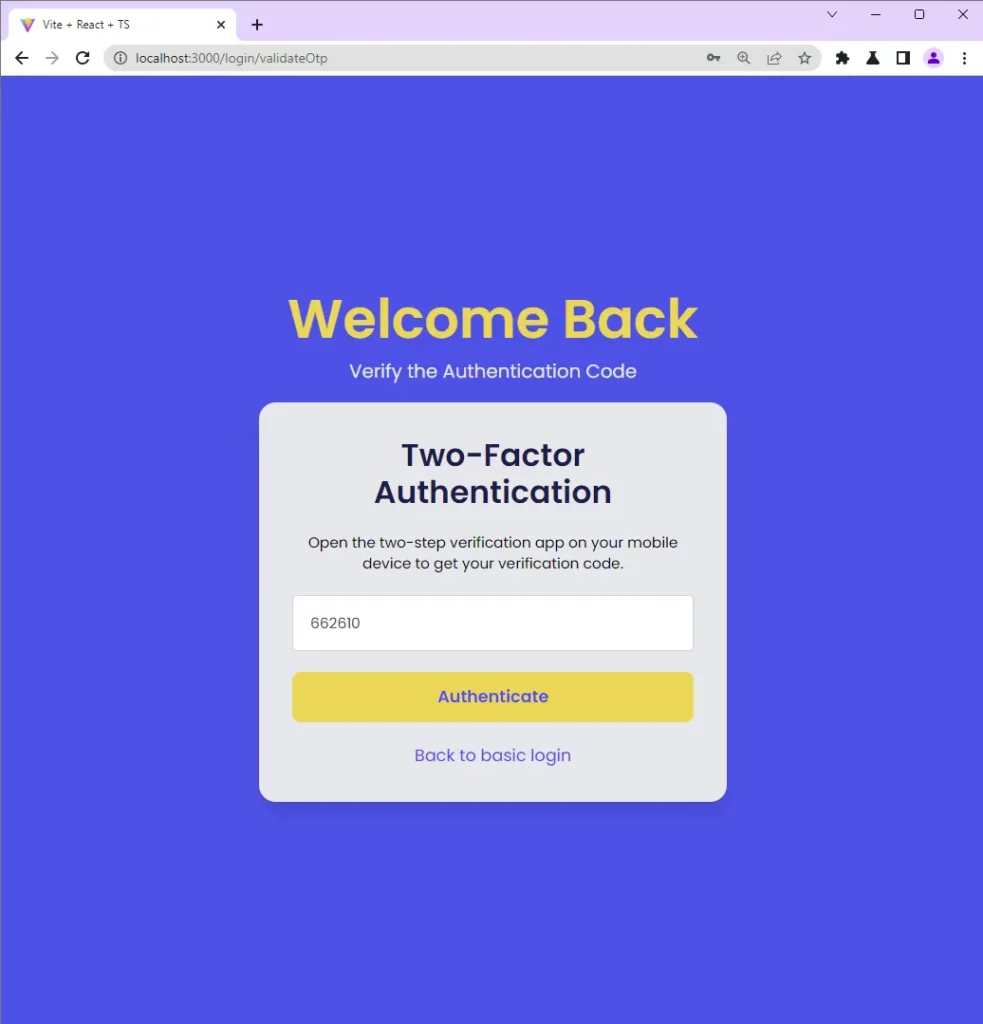
React will then add the OTP token and user ID to the request body and make a POST request with Axios to the /api/auth/otp/validate endpoint.
{
  "user_id": "a67eae36-1e27-4be5-981c-8a74a3a8be7b",
  "token": "216109"
}
Once the Rust API receives the request, it will validate the OTP token based on the base32 string stored in the database, and return a success message if the token is valid.
If the request resolves in success, React will redirect the user to the protected page which in this case is the profile page.
Disable the Two-Factor Authentication
To disable the 2FA feature on your account, you can click on the “Disable 2FA” button on the profile page. Upon clicking the button, React will make a POST request to the /api/auth/otp/disable endpoint where the Actix web server will disable the 2FA feature.
Importance of Adding 2FA to a Rust App
Two-factor authentication (2FA) can help mitigate several security risks by requiring an additional form of identification beyond the traditional single-factor authentication method, such as a password or PIN. Below are some security flaws 2FA can help mitigate.
- Password cracking: With 2FA enabled, even if the user’s password is compromised, the attacker would still need access to the second form of authentication, such as the OTP token generated by the Authenticator app in order to gain access to the user’s account.
- Man-in-the-middle attacks: 2FA can also protect the user’s account against man-in-the-middle (MitM) attacks by requiring the attacker to provide an additional form of identification that is not vulnerable to MitM attacks.
- Malware: Two-factor authentication can protect against malware that is capable of stealing a user’s password by requiring an additional form of authentication that is not vulnerable to malware.
- Phishing: Lastly, 2FA can protect against phishing attacks, where an attacker attempts to trick a user into giving away their password by posing as a legitimate website or service. With the 2FA feature enabled, the attacker would also need to steal the user’s second form of authentication.
Conclusion
In this article, you learned to add an extra layer of security to a Rust application by implementing two-factor authentication. You also learned how to set up a simple data store with a Vector, Mutex, and Arc.
You can find the complete source code of the Rust 2FA project on GitHub.