
In this article, you’ll learn how to add two-factor (2FA) authentication to a Django REST API using TOTP tokens generated by an Authenticator app like Chrome’s Authenticator extension, Authy or Google Authenticator. The API will run on a Django REST framework and store data in an SQLite database.
The one-time passcode (OTP) tokens can be delivered to the user’s mobile device via SMS, Email, Push notification, Voice call, and more but we’ll use an Authenticator app instead. An Authenticator app is more secure than the other methods because it uses strong encryption to generate time-based one-time passwords (TOTP) based on the time of day.
That being said, SMS is among the less secure 2FA methods because it uses a protocol that is not very secure. That means attackers can intercept the SMS messages to retrieve the OTP codes.
Related articles:
- How to Implement Two-factor Authentication (2FA) in React.js
- How to Implement Two-factor Authentication (2FA) in Node.js
- How to Implement (2FA) Two-factor Authentication in Golang
- Two-factor Authentication (2FA) in FastAPI and Python
- Rust – Implement (2FA) Two-Factor Authentication
Prerequisites
- Python 3.6+ installed. Download the latest version of Python from https://www.python.org/downloads/.
- A basic understanding of REST API will be beneficial
- Basic knowledge of Django and Django REST framework.
- An authenticator app like Authy or Google Authenticator.
Run the Django 2FA API Locally
- Download Python from https://www.python.org/downloads/ and install it on your machine.
- Download or clone the Django 2FA API from https://github.com/wpcodevo/Django_2FA_Project and open the project in an IDE.
- Run this command in the console of the root folder to create a virtual environment.
- Windows OS –
python -m venv venv - Mac or Linux OS –
python3 -m venv venv
- Windows OS –
- Click “Yes” if you are prompted by your IDE or text editor to activate the virtual environment in the current workspace.
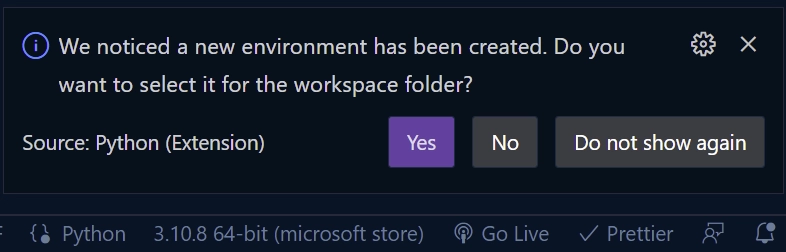
Now close the current terminal and open a new one to activate the virtual environment in the terminal.
Alternatively, you can run this command from the console of the root directory to manually activate the virtual environment in the workspace folder.- Windows OS (Command Prompt ) –
venv\Scripts\activate.bat. - Windows OS (Git Bash) –
venv/Scripts/activate.bat. - Mac or Linux OS –
source venv/bin/activate
- Windows OS (Command Prompt ) –
- Execute
pip install -r requirements.txtin the console of the root directory to install the required modules. - Migrate the database schema to the SQLite database by running
python manage.py migrate. - Run
python manage.py runserverto start the Django dev server. - Open an API testing software like Insomnia, Postman, or Thunder Client VS Code extension and test the Django 2FA API.
Run the Django 2FA API with React.js
For a complete guide on how to implement two-factor authentication in React.js see the post How to Implement Two-factor Authentication (2FA) in React.js. Nonetheless, follow these steps to spin up the 2FA React app.
- Download or clone the React two-factor (2FA) authentication project from https://github.com/wpcodevo/two_factor_reactjs and open the source code in an IDE or text editor.
- Execute
yarnoryarn installin the console of the root directory to install the project’s dependencies. - Start the web server by running
yarn dev. - Open a new tab and visit http://localhost:3000 to interact with the two-factor authentication app. Note: Do not open the app on
http://127.0.0.1:3000to avoid errors.
Setup the Django Project
First things first, navigate to the location where you would like to set up the project and create a new directory named Django_2FA_Project. Once that is done, change into the newly-created project folder and open it in an IDE or text editor. In my case, I’ll be using Visual Studio Code.
$ mkdir Django_2FA_Project
$ cd Django_2FA_Project && code .
Next, let’s create a Python virtual environment to house all the dependencies we’ll install in the project. Based on your operating system, run this command in the console of the root folder to create the virtual environment. Click “Yes” to activate the virtual environment in the workspace folder if your IDE or text editor prompts you.
- Windows OS –
python -m venv venv - Mac or Linux OS –
python3 -m venv venv
Alternatively, run one of these commands based on your operating system to activate the virtual environment manually.
- Windows environment (Command Prompt ) –
venv\Scripts\activate.bat. - Windows environment (Git Bash) –
venv/Scripts/activate.bat. - Mac or Unix environment –
source venv/bin/activate
Let’s now install the Django web and Django REST frameworks in the virtual environment.
$ pip install django djangorestframework
django– Is a high-level Python-based web framework that follows the model–template–views architectural pattern.djangorestframework– Is a powerful and flexible toolkit for building Web APIs in Django.
Once the installation is complete, execute this command to create a Django project named otp_project in the root directory. The period (.) placed after the project name will instruct Django-admin to generate the project in the current directory.
$ django-admin startproject otp_project .
Now run this command to push the initial migration files of the built-in user model to the database.
$ python manage.py migrate
At this point, we’ve created a Django project and pushed the migration files to the database. Start the Django dev server with the command below and navigate to http://127.0.0.1:8000/ in your browser to test if we did everything correctly.
$ python manage.py runserver
If you see the Django welcome page then it means you are on the right track. Otherwise, go through the steps again to make sure you didn’t miss any of them.
Now let’s create a Django app to handle the two-factor (2FA) authentication logic. In the console of the root directory, run this command to create a simple Django app called otp_app.
$ django-admin startapp otp_app
Next, open the otp_project/settings.py file and add rest_framework and otp_app to the list of installed apps.
otp_project/settings.py
INSTALLED_APPS = [
    'django.contrib.admin',
    'django.contrib.auth',
    'django.contrib.contenttypes',
    'django.contrib.sessions',
    'django.contrib.messages',
    'django.contrib.staticfiles',
    'rest_framework', # Add the rest_framework
    'otp_app', # Add the newly-created otp_app
]
Create Django Models
In this section, you’ll create a model that the Django web application will use to access and manage data in the database. The model will define the structure of the underlying SQL table in the database. Also, you’ll create a serializer model that the Django REST framework will use in converting the Python objects into serialized JSON objects
Database Model
Creating a user model in Django is different from creating other models because Django comes with a built-in user model that we must extend to create our own model. So, to define a custom user model, we need to inherit the built-in user model via the AbstractUser class.
To do this, create a models.py file in the otp_app folder and add the following model definitions.
otp_app/models.py
import uuid
from django.db import models
from django.contrib.auth.models import AbstractUser


class UserModel(AbstractUser):
    id = models.UUIDField(primary_key=True, default=uuid.uuid4, editable=False)
    name = models.CharField(max_length=50)
    email = models.EmailField(max_length=100, unique=True)
    password = models.CharField(max_length=32)
    otp_enabled = models.BooleanField(default=False)
    otp_verified = models.BooleanField(default=False)
    otp_base32 = models.CharField(max_length=255, null=True)
    otp_auth_url = models.CharField(max_length=255, null=True)
    username = None

    USERNAME_FIELD = 'email'
    REQUIRED_FIELDS = ['password', 'name']
By default, Django creates a required username field for the abstract user and requires us to log in with a username and password. Nonetheless, we can override this functionality and remove the username field from the Abstract user by providing the username = None property. Taking this approach will allow us to log in with our email and password without getting validation errors.
Also, we need to tell Django to accept an email address as the username. To do this, we assigned the email field to the USERNAME_FIELD constant. The fields provided in the REQUIRED_FIELDS list will tell Django to prompt us to supply a value for each when creating a user via the createsuperuser management command.
To help Django override the default user model, we need to provide the custom model as a value to the AUTH_USER_MODEL variable in the settings.py file. So, open the otp_project/settings.py file and add this statement at the end of the file.
otp_project/settings.py
AUTH_USER_MODEL = 'otp_app.UserModel'
Now let’s create a migration file for the abstract user and push it to the database. In the terminal of the root folder, run these commands to generate the migration based on the custom user model and push the schema to the database.
$ python manage.py makemigrations
$ python manage.py migrate
Model Serializer
Converting data from Python objects to JSON format and vice versa can be challenging but luckily for us, Django provides a serializers class that can be inherited to simplify the process. Django provides a hand full of serializers but in this article, we’ll only use the ModelSerializer class to define a serializer for the user model.
The ModelSerializer class is a thin wrapper around the default serializer class that can be used to create a serializer for a model in Django. In the otp_app directory, create a serializers.py file and add the serializer below.
otp_app/serializers.py
from rest_framework import serializers
from otp_app.models import UserModel


class UserSerializer(serializers.ModelSerializer):
    class Meta:
        model = UserModel
        fields = ['id', 'name', 'password', 'email', 'otp_enabled',
                  'otp_verified', 'otp_base32', 'otp_auth_url']

        extra_kwargs = {
            'password': {'write_only': True}
        }

    def create(self, validated_data):
        password = validated_data.pop('password', None)
        instance = self.Meta.model(**validated_data)
        instance.email = instance.email.lower()
        if password is not None:
            instance.set_password(password)
        instance.save()
        return instance
In the above code, we defined our model in the Meta class and specified the needed fields in the fields property. To avoid saving the plain-text passwords in the database, we adjusted the logic in the create() method to hash the user’s password before persisting the data to the database.
Since it’s a bad practice to include the hashed password in the JSON response, we made the password write_only to exclude it from the response object.
Implement the Two-Factor Authentication
A basic two-factor authentication API usually has six main characteristics; it can register a user, log in the user, generate the OTP URL, verify the OTP, validate the OTP, and disable the 2FA feature. In the next few sections, we’ll write business and application logic to handle these scenarios using the Django REST framework and the pyotp library.
$ pip install pyotp
The Python One-Time Password Library abbreviated as PyOTP can be used to implement two-factor (2FA) or multi-factor (MFA) authentication methods in Python web applications. Two-factor (2FA) authentication varies from language to language though the implementation tends to follow a similar pattern.
To begin, open the views.py file in the otp_app directory and add the following module imports.
otp_app/views.py
from rest_framework.response import Response
from rest_framework import status, generics
from django.contrib.auth import authenticate
from otp_app.serializers import UserSerializer
from otp_app.models import UserModel
import pyotp
Register User API View
The first API view class will handle POST requests made to the /api/auth/register endpoint. This route handler will be called by the Django REST framework to add a new user to the database.
When Django delegates the account registration request to this API View, the post() method will be evoked to process it. First, the request body will be validated against the rules defined in the UserSerializer and if any of the serializer rules are violated, a well-formatted validation error will be returned to the client or frontend app.
otp_app/views.py
class RegisterView(generics.GenericAPIView):
    serializer_class = UserSerializer
    queryset = UserModel.objects.all()

    def post(self, request):
        serializer = self.serializer_class(data=request.data)
        if serializer.is_valid():
            try:
                serializer.save()
                return Response({"status": "success", 'message': "Registered successfully, please login"}, status=status.HTTP_201_CREATED)
            except:
                return Response({"status": "fail", "message": "User with that email already exists"}, status=status.HTTP_409_CONFLICT)
        else:
            return Response({"status": "fail", "message": serializer.errors}, status=status.HTTP_400_BAD_REQUEST)
Once the request payload is valid, the serializer.save() method will be called to add the new user to the database. If you quite remember, we added a unique constraint on the email field to ensure that no two users end up with the same email addresses in the abstract user table. So, the serializer will return a unique constraint violation error if a user with that email already exists in the database.
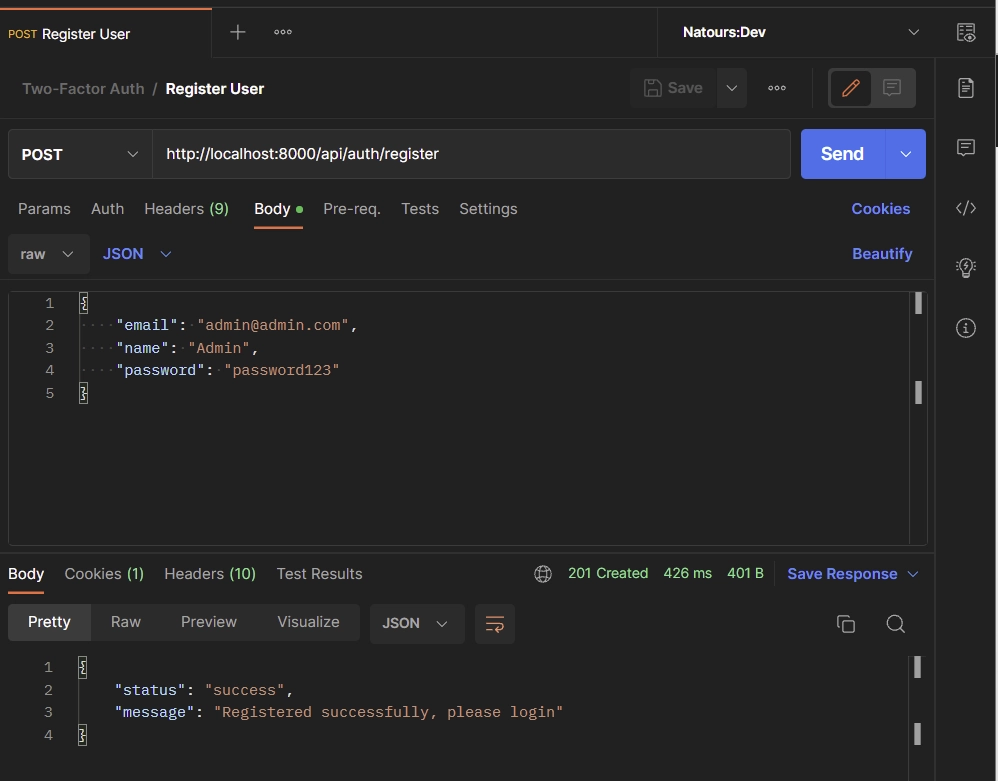
To create a new account, add the credentials below to the JSON object and make a POST request to the http://localhost:8000/api/auth/register endpoint.
{
    "email": "admin@admin.com",
    "name": "Admin",
    "password": "password123"
}
After a few seconds, you should receive a successful message from the Django API.
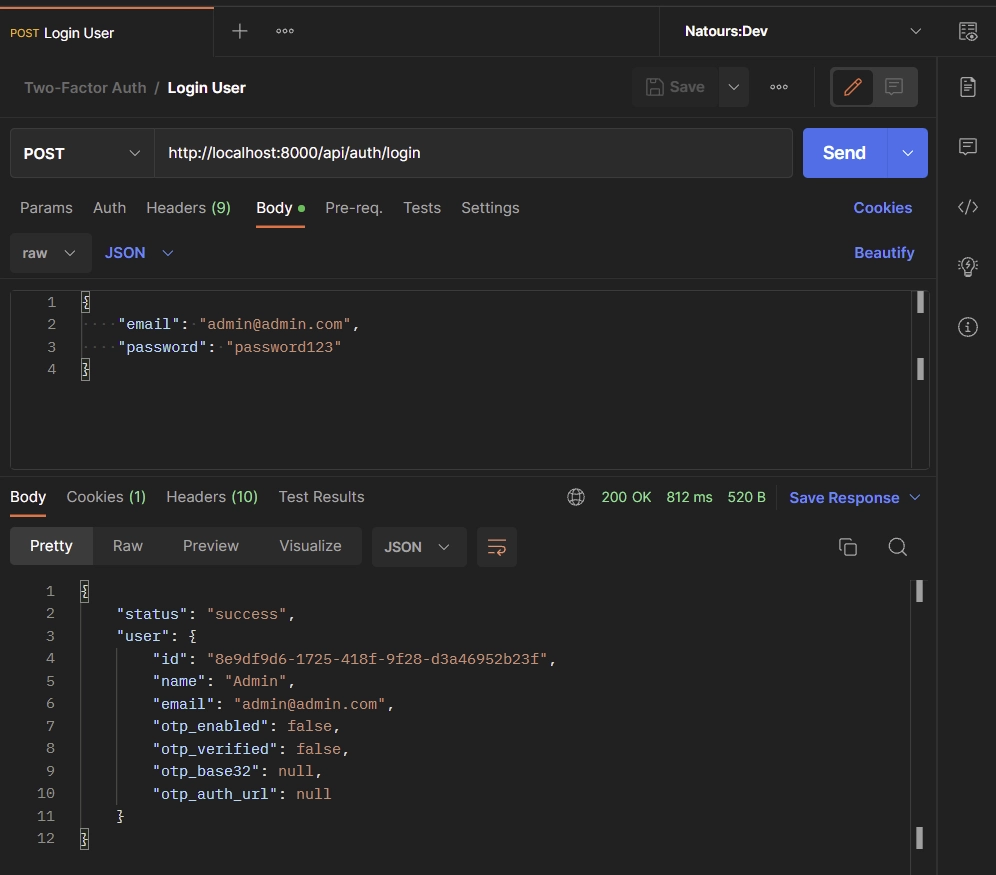
Login User API View
The second API view class will handle POST requests made to the /api/auth/login endpoint. This route controller will be evoked by the Django REST framework to authenticate the registered user.
Here, we’ll extract the email and password data from the request body and call the authenticate() method provided by Django to check if a user with that email exists and if the password is the same as the hashed one in the database.
otp_app/views.py
class LoginView(generics.GenericAPIView):
    serializer_class = UserSerializer
    queryset = UserModel.objects.all()

    def post(self, request):
        data = request.data
        email = data.get('email')
        password = data.get('password')

        user = authenticate(username=email.lower(), password=password)

        if user is None:
            return Response({"status": "fail", "message": "Incorrect email or password"}, status=status.HTTP_400_BAD_REQUEST)

        if not user.check_password(password):
            return Response({"status": "fail", "message": "Incorrect email or password"}, status=status.HTTP_400_BAD_REQUEST)

        serializer = self.serializer_class(user)
        return Response({"status": "success", "user": serializer.data})
After the user passes the two checks, the user’s data will be serialized and returned in the JSON response.
To log into the API, add these credentials to the JSON object and fire a POST request to the http://localhost:8000/api/auth/login endpoint.
{
    "email": "admin@admin.com",
    "password": "password123"
}
The Django API will validate the credentials and return the account information in the JSON response.
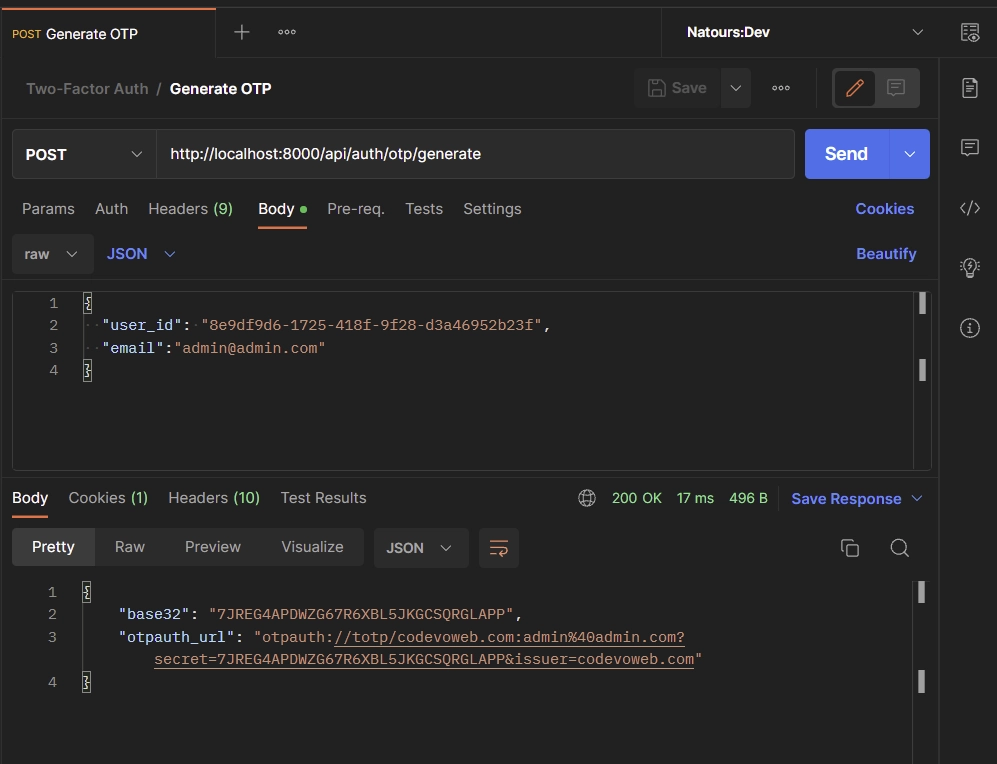
Generate OTP API View
The third API view class will handle POST requests made to the /api/auth/otp/generate endpoint. This API View will be called to generate the OTP base32 string and auth URL.
To begin, we’ll extract the user_id and email from the request payload and query the database to check if a user with that email exists. Then, we’ll call the pyotp.random_base32() function to generate a 32-character base32 secret that is compatible with any OTP application.
After that, we’ll pass the base32 secret to the pyotp.totp.TOTP() method to generate the provisioning URI for use with a QR Code generator. The provisioning URI can be rendered as a QR Code which can be scanned and added to the list of OTP credentials in any OTP Authenticator app.
otp_app/views.py
class GenerateOTP(generics.GenericAPIView):
    serializer_class = UserSerializer
    queryset = UserModel.objects.all()

    def post(self, request):
        data = request.data
        user_id = data.get('user_id', None)
        email = data.get('email', None)

        user = UserModel.objects.filter(id=user_id).first()
        if user == None:
            return Response({"status": "fail", "message": f"No user with Id: {user_id} found"}, status=status.HTTP_404_NOT_FOUND)

        otp_base32 = pyotp.random_base32()
        otp_auth_url = pyotp.totp.TOTP(otp_base32).provisioning_uri(
            name=email.lower(), issuer_name="codevoweb.com")

        user.otp_auth_url = otp_auth_url
        user.otp_base32 = otp_base32
        user.save()

        return Response({'base32': otp_base32, "otpauth_url": otp_auth_url})
After the OTP secrets have been generated, we’ll store them in the database before sending them in the JSON response to the client.
To generate the OTP base32 and URL secrets, add your user ID and email to the JSON object. Then, make a POST request to the http://localhost:8000/api/auth/otp/generate endpoint.
{
  "user_id": "8e9df9d6-1725-418f-9f28-d3a46952b23f",
  "email":"admin@admin.com"
}
The Django API will generate the base32 secret and auth URL before returning them in the JSON response.
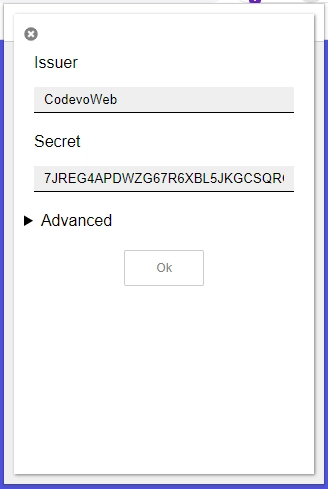
Next, copy the base32 secret and add it to the list of OTP credentials in the Authenticator app.
Verify OTP API View
Now let’s create an API View that will verify the OTP and enable the 2FA feature on the user’s account. This route controller will be called when a POST request hits the server at /api/auth/otp/verify.
Here, we’ll extract the user’s ID and OTP token from the request body and query the database to check if a user with that UUID exists. After that, we’ll pass the base32 secret stored in the database to the pyotp.TOTP() method and verify the TOTP against the OTP token provided in the request payload.
If the totp.verify() method returns true, then we’ll enable the 2FA feature in the user’s account and mark the otp_verified field as true.
otp_app/views.py
class VerifyOTP(generics.GenericAPIView):
    serializer_class = UserSerializer
    queryset = UserModel.objects.all()

    def post(self, request):
        message = "Token is invalid or user doesn't exist"
        data = request.data
        user_id = data.get('user_id', None)
        otp_token = data.get('token', None)
        user = UserModel.objects.filter(id=user_id).first()
        if user == None:
            return Response({"status": "fail", "message": f"No user with Id: {user_id} found"}, status=status.HTTP_404_NOT_FOUND)

        totp = pyotp.TOTP(user.otp_base32)
        if not totp.verify(otp_token):
            return Response({"status": "fail", "message": message}, status=status.HTTP_400_BAD_REQUEST)
        user.otp_enabled = True
        user.otp_verified = True
        user.save()
        serializer = self.serializer_class(user)

        return Response({'otp_verified': True, "user": serializer.data})
After the user’s credentials have been updated in the database, we’ll serialise the updated data returned by the database and send it to the client in the JSON response.
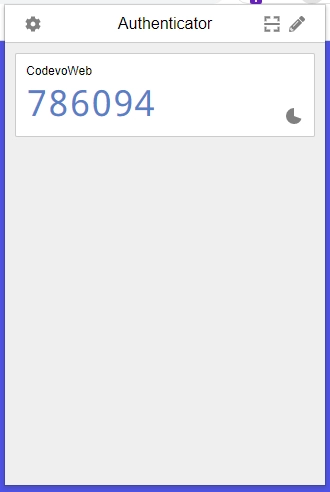
Copy the TOTP token generated by the Authenticator app and add it to the JSON object.
Add your user ID and make a POST request to the http://localhost:8000/api/auth/otp/verify endpoint.
{
  "user_id": "8e9df9d6-1725-418f-9f28-d3a46952b23f",
  "token": "748344"
}
The Django API will verify the TOTP against the one generated by the server before enabling the 2FA feature on your account assuming the TOTP token is valid.

Validate OTP API View
Now that we have the logic to enable the 2FA feature, let’s create an API View to validate the TOTP tokens. This API View will be evoked when a POST request hits the server at /api/auth/otp/validate.
Similar to the TOTP verification stage, we’ll verify the OTP token but we won’t update the user’s credentials in the database. So, we’ll extract the user’s ID and TOTP token from the request body and query the database to check if the user belonging to that ID exists.
Next, we’ll check if the user has verified the OTP token or has the 2FA feature enabled before calling the pyotp.TOTP() method to generate the TOTP based on the base32 secret stored in the database.
otp_app/views.py
class ValidateOTP(generics.GenericAPIView):
    serializer_class = UserSerializer
    queryset = UserModel.objects.all()

    def post(self, request):
        message = "Token is invalid or user doesn't exist"
        data = request.data
        user_id = data.get('user_id', None)
        otp_token = data.get('token', None)
        user = UserModel.objects.filter(id=user_id).first()
        if user == None:
            return Response({"status": "fail", "message": f"No user with Id: {user_id} found"}, status=status.HTTP_404_NOT_FOUND)

        if not user.otp_verified:
            return Response({"status": "fail", "message": "OTP must be verified first"}, status=status.HTTP_404_NOT_FOUND)

        totp = pyotp.TOTP(user.otp_base32)
        if not totp.verify(otp_token, valid_window=1):
            return Response({"status": "fail", "message": message}, status=status.HTTP_400_BAD_REQUEST)

        return Response({'otp_valid': True})
After that, we’ll call the totp.verify() method to check if the TOTP token provided in the request payload matches the one created by the server. The valid_window parameter will extend the token’s validity to the counter ticks before and after the current one.
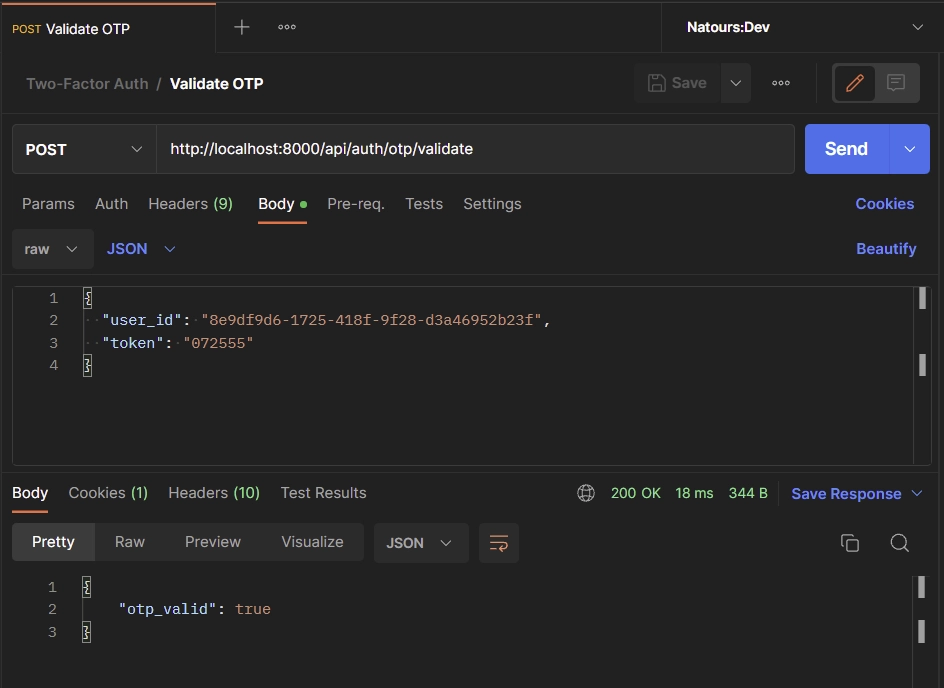
Copy the most recent TOTP token and add it to the JSON object. Next, make a POST request to the http://localhost:8000/api/auth/otp/validate endpoint.
{
  "user_id": "8e9df9d6-1725-418f-9f28-d3a46952b23f",
  "token": "072555"
}
The API will validate the TOTP token and return a otp_valid: true in the JSON response.
Disable 2FA API View
The final API View will be called to disable the two-factor (2FA) authentication feature on the user’s account. This route handler will be evoked when a POST request is made to the /api/auth/otp/disable endpoint.
To disable the 2fa feature, we’ll extract the user’s ID from the request payload and query the database to retrieve the record belonging to the provided ID.
Then, we’ll edit the user’s credentials with the following values and call the user.save() method to persist the changes to the database.
user.otp_enabled = False
user.otp_verified = False
user.otp_base32 = None
user.otp_auth_url = None
After that, the user record will be serialised and returned to the client in the JSON response.
otp_app/views.py
class DisableOTP(generics.GenericAPIView):
    serializer_class = UserSerializer
    queryset = UserModel.objects.all()

    def post(self, request):
        data = request.data
        user_id = data.get('user_id', None)

        user = UserModel.objects.filter(id=user_id).first()
        if user == None:
            return Response({"status": "fail", "message": f"No user with Id: {user_id} found"}, status=status.HTTP_404_NOT_FOUND)

        user.otp_enabled = False
        user.otp_verified = False
        user.otp_base32 = None
        user.otp_auth_url = None
        user.save()
        serializer = self.serializer_class(user)

        return Response({'otp_disabled': True, 'user': serializer.data})
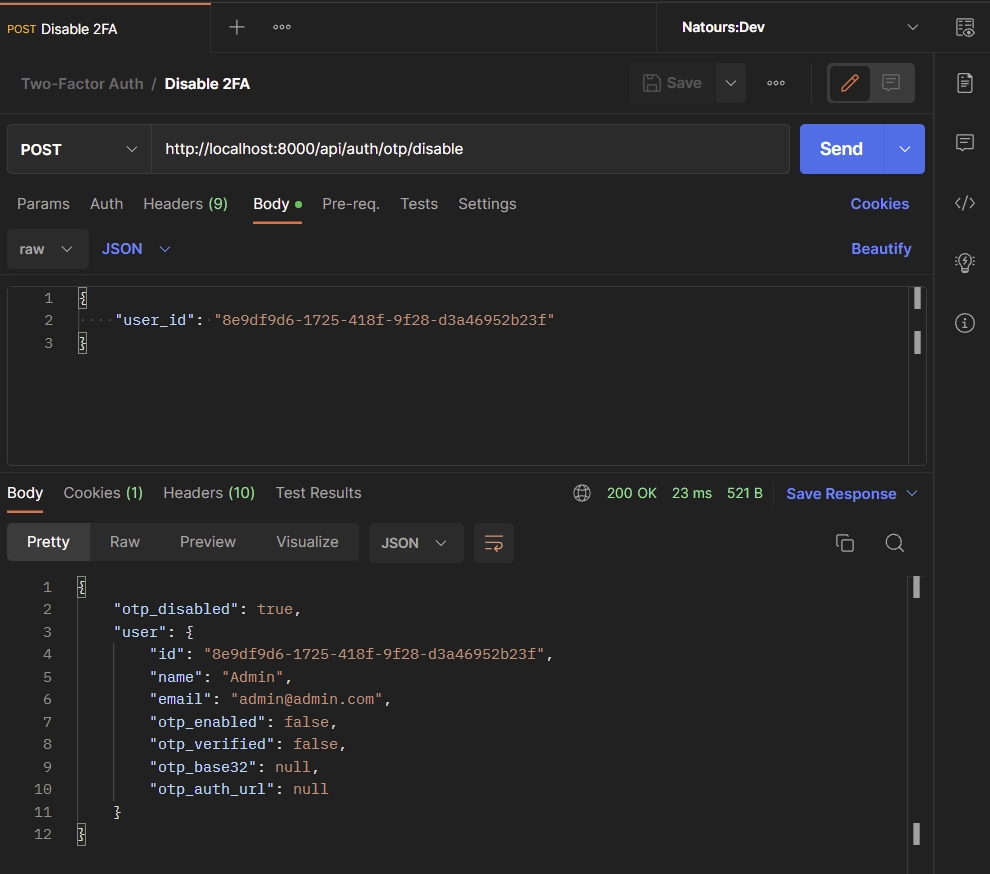
To disable the 2FA feature, add your user ID to the JSON object and make a POST request to the http://localhost:8000/api/auth/otp/disable.
{
    "user_id": "8e9df9d6-1725-418f-9f28-d3a46952b23f"
}
The Django API will then update the OTP credentials to their initial values and return the updated record in the JSON response.
Complete API Views
otp_app/views.py
from rest_framework.response import Response
from rest_framework import status, generics
from django.contrib.auth import authenticate
from otp_app.serializers import UserSerializer
from otp_app.models import UserModel
import pyotp


class RegisterView(generics.GenericAPIView):
    serializer_class = UserSerializer
    queryset = UserModel.objects.all()

    def post(self, request):
        serializer = self.serializer_class(data=request.data)
        if serializer.is_valid():
            try:
                serializer.save()
                return Response({"status": "success", 'message': "Registered successfully, please login"}, status=status.HTTP_201_CREATED)
            except:
                return Response({"status": "fail", "message": "User with that email already exists"}, status=status.HTTP_409_CONFLICT)
        else:
            return Response({"status": "fail", "message": serializer.errors}, status=status.HTTP_400_BAD_REQUEST)


class LoginView(generics.GenericAPIView):
    serializer_class = UserSerializer
    queryset = UserModel.objects.all()

    def post(self, request):
        data = request.data
        email = data.get('email')
        password = data.get('password')

        user = authenticate(username=email.lower(), password=password)

        if user is None:
            return Response({"status": "fail", "message": "Incorrect email or password"}, status=status.HTTP_400_BAD_REQUEST)

        if not user.check_password(password):
            return Response({"status": "fail", "message": "Incorrect email or password"}, status=status.HTTP_400_BAD_REQUEST)

        serializer = self.serializer_class(user)
        return Response({"status": "success", "user": serializer.data})


class GenerateOTP(generics.GenericAPIView):
    serializer_class = UserSerializer
    queryset = UserModel.objects.all()

    def post(self, request):
        data = request.data
        user_id = data.get('user_id', None)
        email = data.get('email', None)

        user = UserModel.objects.filter(id=user_id).first()
        if user == None:
            return Response({"status": "fail", "message": f"No user with Id: {user_id} found"}, status=status.HTTP_404_NOT_FOUND)

        otp_base32 = pyotp.random_base32()
        otp_auth_url = pyotp.totp.TOTP(otp_base32).provisioning_uri(
            name=email.lower(), issuer_name="codevoweb.com")

        user.otp_auth_url = otp_auth_url
        user.otp_base32 = otp_base32
        user.save()

        return Response({'base32': otp_base32, "otpauth_url": otp_auth_url})


class VerifyOTP(generics.GenericAPIView):
    serializer_class = UserSerializer
    queryset = UserModel.objects.all()

    def post(self, request):
        message = "Token is invalid or user doesn't exist"
        data = request.data
        user_id = data.get('user_id', None)
        otp_token = data.get('token', None)
        user = UserModel.objects.filter(id=user_id).first()
        if user == None:
            return Response({"status": "fail", "message": f"No user with Id: {user_id} found"}, status=status.HTTP_404_NOT_FOUND)

        totp = pyotp.TOTP(user.otp_base32)
        if not totp.verify(otp_token):
            return Response({"status": "fail", "message": message}, status=status.HTTP_400_BAD_REQUEST)
        user.otp_enabled = True
        user.otp_verified = True
        user.save()
        serializer = self.serializer_class(user)

        return Response({'otp_verified': True, "user": serializer.data})


class ValidateOTP(generics.GenericAPIView):
    serializer_class = UserSerializer
    queryset = UserModel.objects.all()

    def post(self, request):
        message = "Token is invalid or user doesn't exist"
        data = request.data
        user_id = data.get('user_id', None)
        otp_token = data.get('token', None)
        user = UserModel.objects.filter(id=user_id).first()
        if user == None:
            return Response({"status": "fail", "message": f"No user with Id: {user_id} found"}, status=status.HTTP_404_NOT_FOUND)

        if not user.otp_verified:
            return Response({"status": "fail", "message": "OTP must be verified first"}, status=status.HTTP_404_NOT_FOUND)

        totp = pyotp.TOTP(user.otp_base32)
        if not totp.verify(otp_token, valid_window=1):
            return Response({"status": "fail", "message": message}, status=status.HTTP_400_BAD_REQUEST)

        return Response({'otp_valid': True})


class DisableOTP(generics.GenericAPIView):
    serializer_class = UserSerializer
    queryset = UserModel.objects.all()

    def post(self, request):
        data = request.data
        user_id = data.get('user_id', None)

        user = UserModel.objects.filter(id=user_id).first()
        if user == None:
            return Response({"status": "fail", "message": f"No user with Id: {user_id} found"}, status=status.HTTP_404_NOT_FOUND)

        user.otp_enabled = False
        user.otp_verified = False
        user.otp_base32 = None
        user.otp_auth_url = None
        user.save()
        serializer = self.serializer_class(user)

        return Response({'otp_disabled': True, 'user': serializer.data})
Create URLs for the API Views
Now that we’ve implemented the two-factor authentication logic, let’s create API endpoint URLs for the API Views so that a client or frontend app can communicate with the server.
Create the APP URLs
In the otp_app directory, create a new file named urls.py and add the following code snippet.
otp_app/urls.py
from django.urls import path
from otp_app.views import (RegisterView, LoginView,
                           GenerateOTP, VerifyOTP, ValidateOTP, DisableOTP)

urlpatterns = [
    path('register', RegisterView.as_view()),
    path('login', LoginView.as_view()),
    path('otp/generate', GenerateOTP.as_view()),
    path('otp/verify', VerifyOTP.as_view()),
    path('otp/validate', ValidateOTP.as_view()),
    path('otp/disable', DisableOTP.as_view()),
]
Include the Base URL in the Project
Now let’s reference the otp_app/urls.py file in the root project. To do this, open the otp_project/urls.py file and include a api/auth/ path to reference the URLs defined in the otp_app/urls.py file.
otp_project/urls.py
from django.contrib import admin
from django.urls import path, include

urlpatterns = [
    path('admin/', admin.site.urls),
    path('api/auth/', include('otp_app.urls')),
]
Add CORS Middleware
Now let’s configure the server with CORS to support secure cross-origin requests and data transfers between allowed origins and the Django server. So, open your terminal and install the django-cors-headers library.
$ pip install django-cors-headers
Next, add the frontend app URL to the list of authorized origins. Also, set CORS_ALLOW_CREDENTIALS to True so that cookies can be allowed in the cross-site HTTP requests.
CORS_ALLOWED_ORIGINS = [
    "http://localhost:3000"
]
CORS_ALLOW_CREDENTIALS = True
Then, add the corsheaders app to the list of installed apps.
INSTALLED_APPS = [
    ...,
    'corsheaders',
    ...,
]
After that, place the CorsMiddleware in the first line of the middleware list.
MIDDLEWARE = [
    'corsheaders.middleware.CorsMiddleware',
    ...,
]
If you followed the above configurations correctly, your otp_project/settings.py file should look somewhat like this:
otp_project/settings.py
"""
Django settings for otp_project project.

Generated by 'django-admin startproject' using Django 4.1.4.

For more information on this file, see
https://docs.djangoproject.com/en/4.1/topics/settings/

For the full list of settings and their values, see
https://docs.djangoproject.com/en/4.1/ref/settings/
"""

from pathlib import Path

# Build paths inside the project like this: BASE_DIR / 'subdir'.
BASE_DIR = Path(__file__).resolve().parent.parent


# Quick-start development settings - unsuitable for production
# See https://docs.djangoproject.com/en/4.1/howto/deployment/checklist/

# SECURITY WARNING: keep the secret key used in production secret!
SECRET_KEY = 'django-insecure-78*2w)fltnfl3fy_)go@nww4u7!u(_i^dy(=&4frks5wu-npiv'

# SECURITY WARNING: don't run with debug turned on in production!
DEBUG = True

ALLOWED_HOSTS = []

CORS_ALLOWED_ORIGINS = [
    "http://localhost:3000"
]
CORS_ALLOW_CREDENTIALS = True


# Application definition

INSTALLED_APPS = [
    'django.contrib.admin',
    'django.contrib.auth',
    'django.contrib.contenttypes',
    'django.contrib.sessions',
    'django.contrib.messages',
    'django.contrib.staticfiles',
    'rest_framework',
    'corsheaders',
    'otp_app',
]

MIDDLEWARE = [
    'corsheaders.middleware.CorsMiddleware',
    'django.middleware.security.SecurityMiddleware',
    'django.contrib.sessions.middleware.SessionMiddleware',
    'django.middleware.common.CommonMiddleware',
    'django.middleware.csrf.CsrfViewMiddleware',
    'django.contrib.auth.middleware.AuthenticationMiddleware',
    'django.contrib.messages.middleware.MessageMiddleware',
    'django.middleware.clickjacking.XFrameOptionsMiddleware',
]


ROOT_URLCONF = 'otp_project.urls'

TEMPLATES = [
    {
        'BACKEND': 'django.template.backends.django.DjangoTemplates',
        'DIRS': [],
        'APP_DIRS': True,
        'OPTIONS': {
            'context_processors': [
                'django.template.context_processors.debug',
                'django.template.context_processors.request',
                'django.contrib.auth.context_processors.auth',
                'django.contrib.messages.context_processors.messages',
            ],
        },
    },
]

WSGI_APPLICATION = 'otp_project.wsgi.application'


# Database
# https://docs.djangoproject.com/en/4.1/ref/settings/#databases

DATABASES = {
    'default': {
        'ENGINE': 'django.db.backends.sqlite3',
        'NAME': BASE_DIR / 'db.sqlite3',
    }
}


# Password validation
# https://docs.djangoproject.com/en/4.1/ref/settings/#auth-password-validators

AUTH_PASSWORD_VALIDATORS = [
    {
        'NAME': 'django.contrib.auth.password_validation.UserAttributeSimilarityValidator',
    },
    {
        'NAME': 'django.contrib.auth.password_validation.MinimumLengthValidator',
    },
    {
        'NAME': 'django.contrib.auth.password_validation.CommonPasswordValidator',
    },
    {
        'NAME': 'django.contrib.auth.password_validation.NumericPasswordValidator',
    },
]


# Internationalization
# https://docs.djangoproject.com/en/4.1/topics/i18n/

LANGUAGE_CODE = 'en-us'

TIME_ZONE = 'UTC'

USE_I18N = True

USE_TZ = True


# Static files (CSS, JavaScript, Images)
# https://docs.djangoproject.com/en/4.1/howto/static-files/

STATIC_URL = 'static/'

# Default primary key field type
# https://docs.djangoproject.com/en/4.1/ref/settings/#default-auto-field

DEFAULT_AUTO_FIELD = 'django.db.models.BigAutoField'

AUTH_USER_MODEL = 'otp_app.UserModel'
Finally, start the Django development server and make HTTP requests to the endpoints to test the 2FA authentication.
$ python manage.py runserver
Test the Two-Factor Authentication API
At this point, we’re now ready to test the Django two-factor (2FA) authentication API with a front-end application. First, scroll to the “Run the Django 2FA API with React.js” section to spin up the frontend app. To learn more about how the two-factor authentication feature was implemented in React, read the post How to Implement Two-factor Authentication (2FA) in React.js.
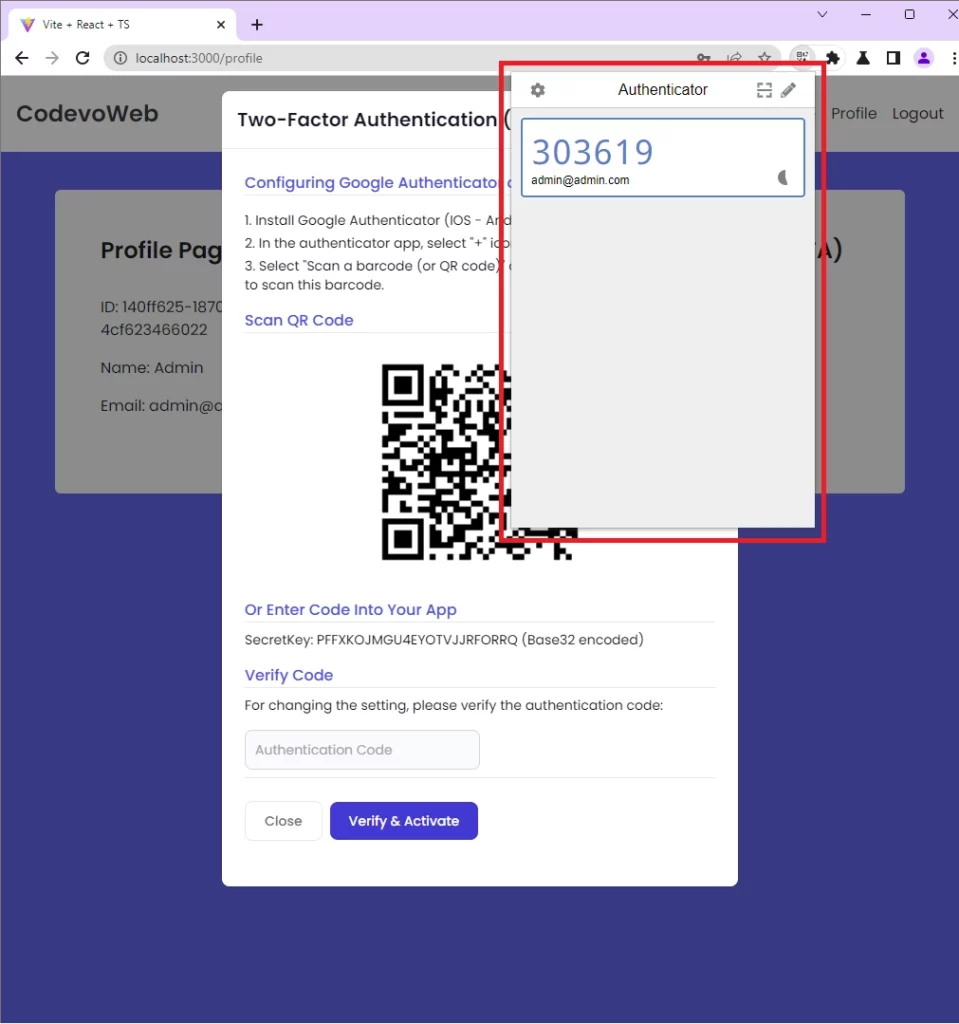
Generate the 2FA QRCode
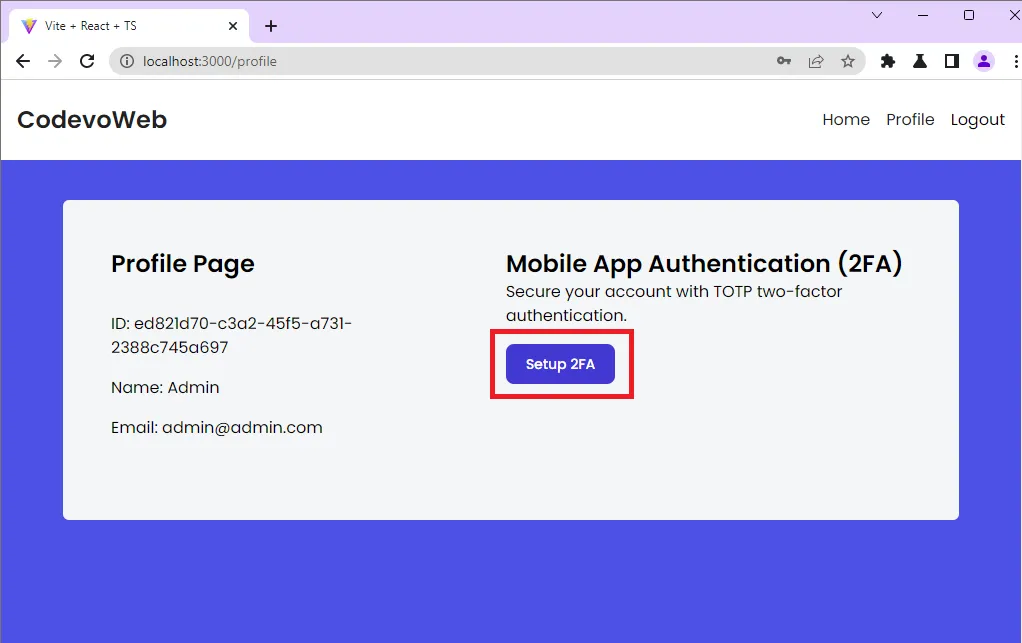
Before you can enable the 2FA feature on your account, you need to register for an account and sign in with the credentials. After logging into the app, you’ll be redirected to the profile page where can set up the two-factor authentication.
To do that, click on the “Setup 2FA” button to generate the QR Code from the provisioning URI sent by the Django API.
In addition to the provisioning URL, the Django API will send the base32 secret that you can use in any OTP app to generate the TOTP tokens. So, open your Google Authenticator or Authy app and scan the QR Code to add it to the list of OTP credentials.
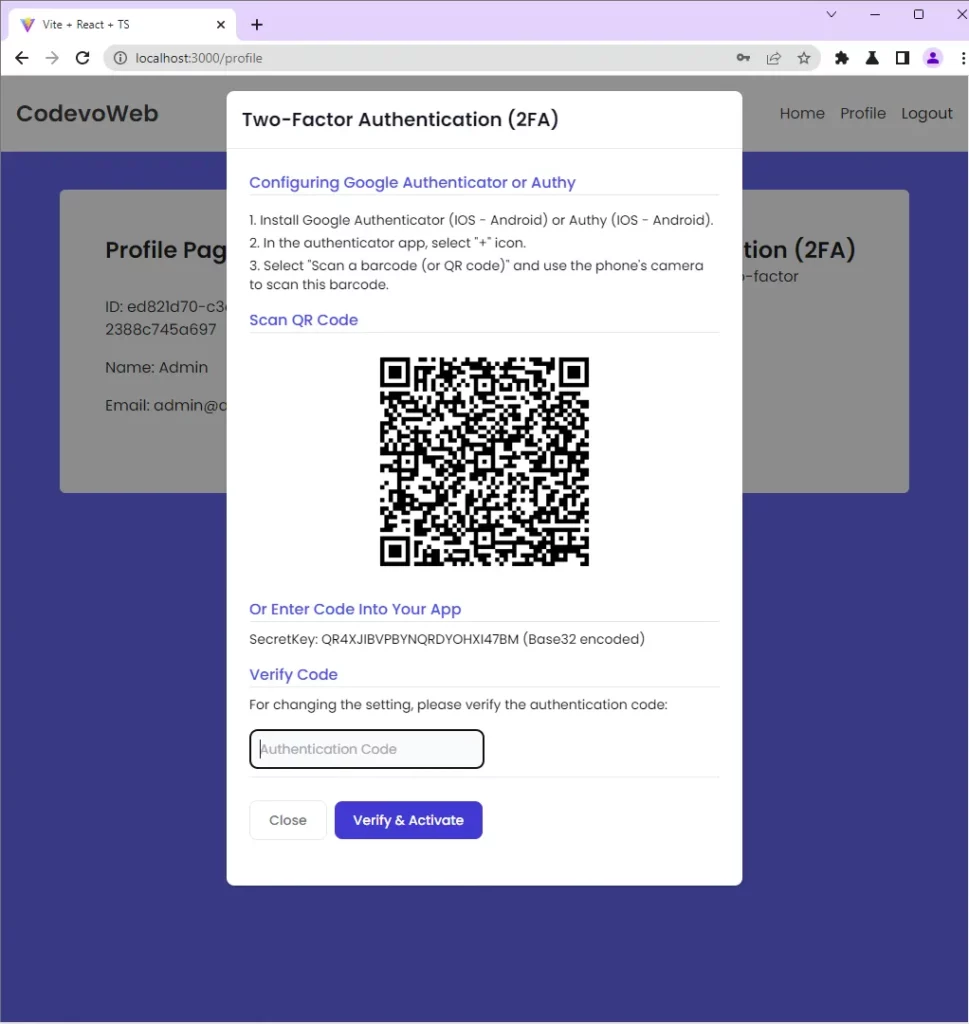
Enable the 2FA Feature
To verify the TOTP token and enable the 2FA feature on the Django backend, copy the TOTP generated by the Google Authenticator app and paste it into the “Verify Code” input field.
Then, click the “Verify & Activate” button to submit the OTP token to the Django API. After the Django API has verified the TOTP token against the one generated by the server, the 2FA feature will be enabled and a success message will be returned to the frontend app.
Once React receives the success message from the Django API, it will change the “Setup 2FA” button to “Disable 2FA“.
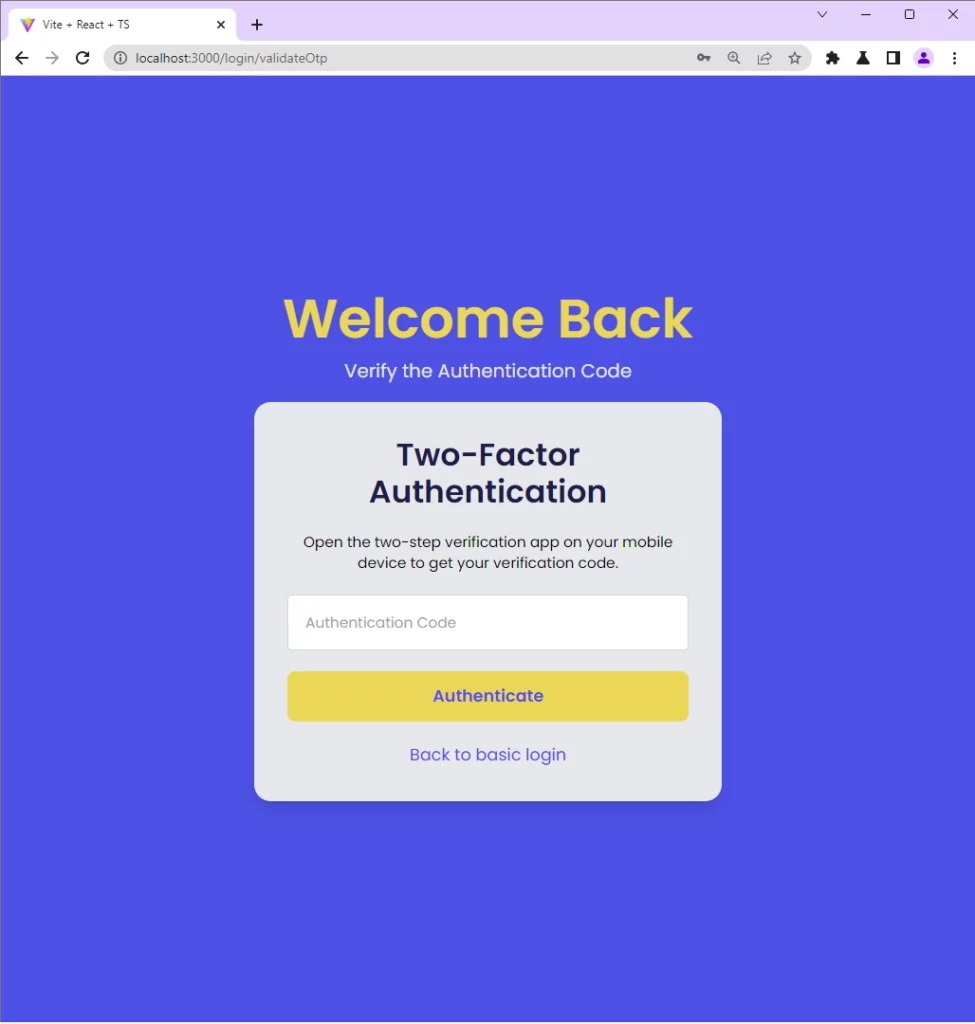
Validate the TOTP
To test if the 2FA feature is enabled, log out from the app by clicking the Logout menu. Next, log in with your credentials and you will be taken to the “Two-Factor Authentication” verification page assuming the login credentials are valid.
Copy the current TOTP token from the Authenticator app and paste it into the “Authentication Code” input field. Then, click the “Authenticate” button to submit the TOTP token to the Django API.
If the Django API validates the token and returns a successful message, React will redirect you to the profile page.
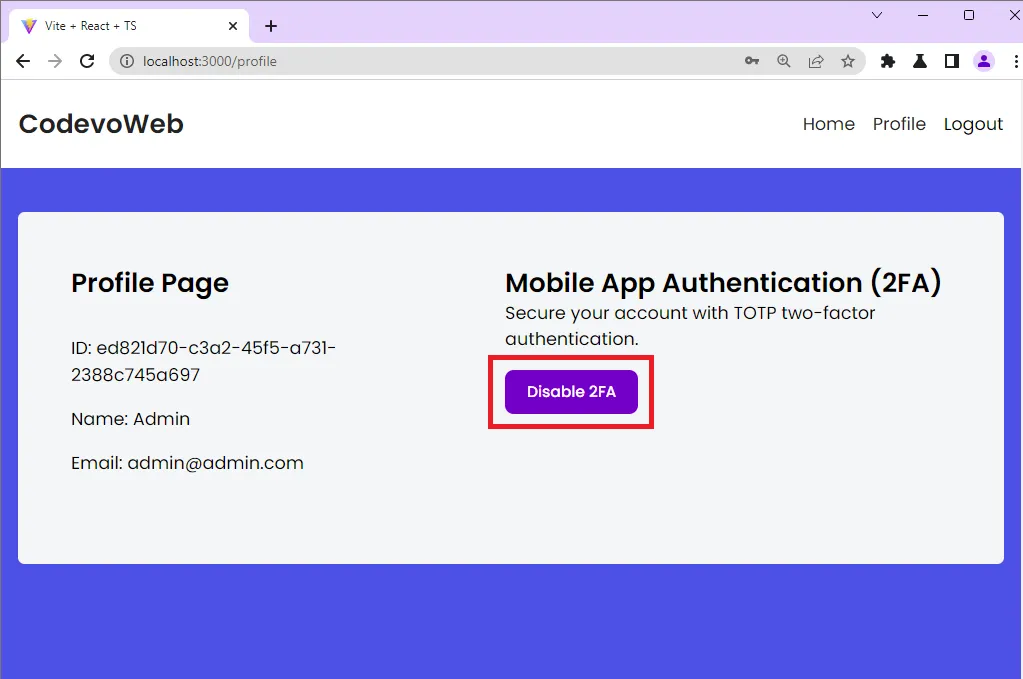
Disable the 2FA Feature
On the profile page, you can disable the 2FA feature by clicking the “Disable 2FA” button. React will fire a request to disable the feature on the Django API and once a success message is received, the “Disable 2FA” button will change to “Setup 2FA“.
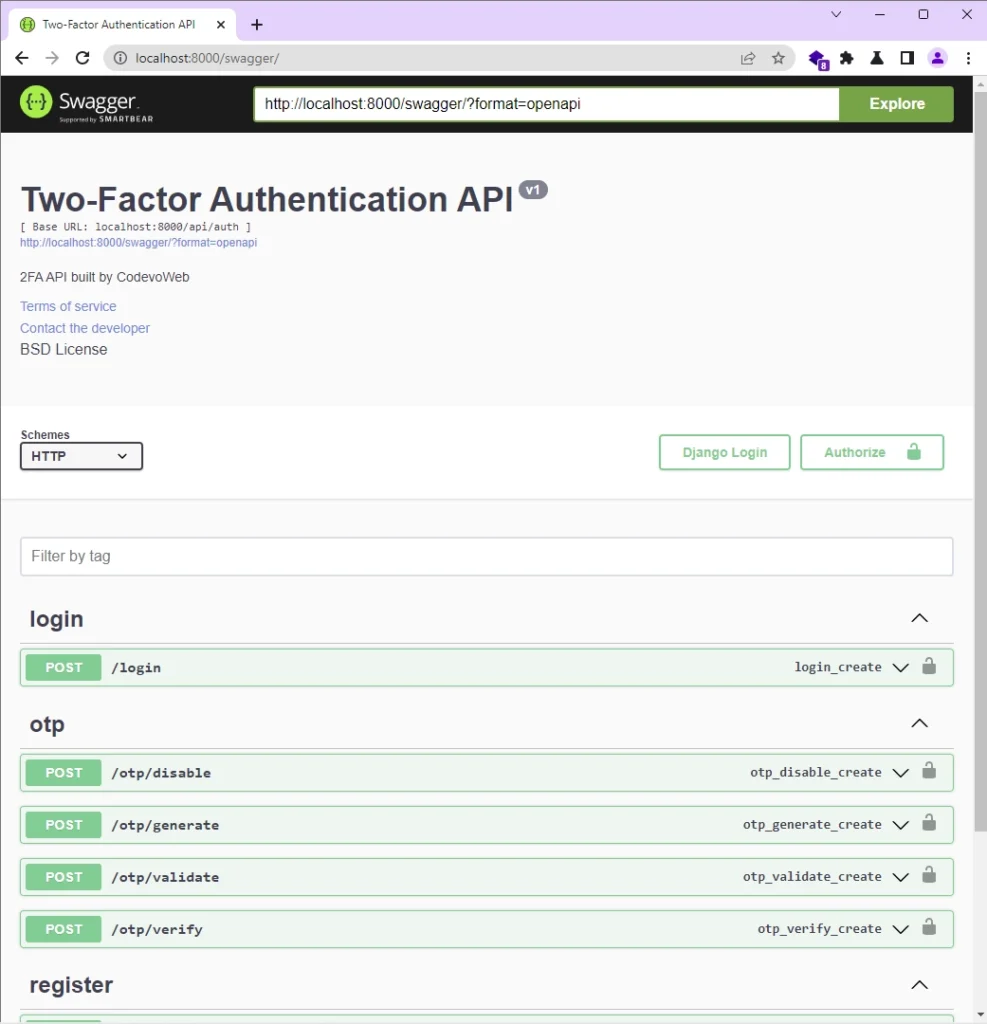
Create API Documentation
To help other developers or API consumers understand the endpoints defined on the server and how to communicate the API Views, let’s create API documentation with the drf-yasg library.
Open your terminal and install these dependencies.
coreapi– A Python client library for Core APIdrf-yasg– Automatically generate Swagger/OpenAPI 2.0 schemas from the Django REST framework code.
$ pip install coreapi
$ pip install -U drf-yasg[validation]
Now let’s add the Swagger UI and ReDoc URLs to the root project. To do this, open the otp_project/urls.py file and replace its content with the code snippets below.
otp_project/urls.py
from django.contrib import admin
from django.urls import path, include, re_path
from rest_framework import permissions
from drf_yasg.views import get_schema_view
from drf_yasg import openapi

schema_view = get_schema_view(
    openapi.Info(
        title="Two-Factor Authentication API",
        default_version='v1',
        description="2FA API built by CodevoWeb",
        terms_of_service="https://www.google.com/policies/terms/",
        contact=openapi.Contact(email="contact@snippets.local"),
        license=openapi.License(name="BSD License"),
    ),
    public=True,
    permission_classes=[permissions.AllowAny],
)

urlpatterns = [
    path('admin/', admin.site.urls),
    path('api/auth/', include('otp_app.urls')),
    re_path(r'^swagger(?P<format>\.json|\.yaml)$',
            schema_view.without_ui(cache_timeout=0), name='schema-json'),
    re_path(r'^swagger/$', schema_view.with_ui('swagger',
            cache_timeout=0), name='schema-swagger-ui'),
    re_path(r'^redoc/$', schema_view.with_ui('redoc',
            cache_timeout=0), name='schema-redoc'),
]
Then, add the drf_yasg package to the list of installed apps
otp_project/settings.py
INSTALLED_APPS = [
    'django.contrib.admin',
    'django.contrib.auth',
    'django.contrib.contenttypes',
    'django.contrib.sessions',
    'django.contrib.messages',
    'django.contrib.staticfiles',
    'rest_framework',
    'corsheaders',
    'otp_app',
    'drf_yasg',  # Add drf_yasg for Swagger Documentation
]
After that, start the Django dev server and visit http://localhost:8000/swagger/ to see the two-factor (2FA) authentication API documentation in Swagger docs.
Conclusion
Congratulations! You’ve successfully built a fully functional Django REST API to handle two-factor (2FA) authentication using the PyOTP library. You also learned how to document the API endpoints with Swagger and ReDoc.
You can find the source code of the Django 2FA API on GitHub.
the postman request just doesn’t seem to work. there is a failed connection error that constantly occurs.
Isn’t it risky to include the secret key in a response? Also, the QR code URL contains the secret key. How can we make it more secure?