

In this article, you’ll learn how to build a secure and efficient backend API in Rust with JWT access and refresh tokens functionality. We’ll leverage the high-performance Axum framework and SQLX to store data in a PostgreSQL database.
Previously, we implemented JWT authentication in Rust using the HS256 algorithm, which has its limitations in terms of security. One of the main drawbacks is that the same key is used for both signing and verifying the token, making it vulnerable to attacks if the key is compromised.
Another issue with JWTs is token revocation. Since JWTs are stateless, it’s challenging to revoke them after they’ve been signed, leaving them valid until they expire. To solve this problem, we’ll integrate Redis into our authentication and authorization flow.
With Redis, we can easily revoke tokens and log out users by clearing their session from the database. This adds an extra layer of security to our API, making it harder for attackers to gain access even if they obtain a JWT.
Finally, it’s worth mentioning that I’ve implemented the same JWT functionality using the Actix-Web framework, but I have to say that I prefer Axum. One reason for this is the flexibility I have when working with middleware in Axum, which reminds me of how middleware works in Express.js, a popular web framework in Node.js.
So without further ado, let’s jump into the article and see how we can secure an Axum API using access and refresh tokens with the help of Redis.
More practice:
- Implement Google and GitHub OAuth2 in Rust Frontend App
- JWT Authentication in Rust using Axum Framework
- Create a Simple API in Rust using the Axum Framework
- Rust CRUD API Example with Axum and PostgreSQL
- Build a Frontend Web App in Rust using the Yew.rs Framework
- Frontend App with Rust and Yew.rs: User SignUp and Login
- Rust – How to Generate and Verify (JWTs) JSON Web Tokens
- Rust and Actix Web – JWT Access and Refresh Tokens
- Rust and Yew.rs Frontend: JWT Access and Refresh Tokens
- Rust – JWT Authentication with Actix Web
- Build a Simple API with Rust and Rocket
- Build a CRUD API with Rust and MongoDB

Set up and Run the Axum API on your Machine
To get the Axum project up and running on your machine, you can follow these steps:
- First, download or clone the Rust Axum RS256 JWT project from its repository on GitHub (https://github.com/wpcodevo/rust-axum-jwt-rs256) and open the source code in your preferred code editor.
- Next, launch the PostgreSQL, Redis, and pgAdmin servers in their respective Docker containers by running the command
docker-compose up -din the terminal of the project’s root directory. - If you haven’t already, install SQLx’s command-line utility by running
cargo install sqlx-cli. Then, push the migration script to the PostgreSQL database by runningsqlx migrate run. - To install the required crates and build the project, run the command
cargo build. - To start the Axum HTTP server, run the command
cargo run. - In order to test the Axum RS256 JWT authentication flow, you can import the
Rust_JWT_RS256.postman_collection.jsonfile into Postman or the Thunder Client VS Code extension. This file contains predefined requests, their respective HTTP methods, and the necessary request bodies for the POST and PATCH requests.
Alternatively, if you prefer to use a frontend app built with Yew.rs to interact with the API, you can follow the instructions in the section below to set it up.
Run the Axum API with a Frontend App
If you’re looking for a step-by-step guide to building a frontend app in Rust using the Yew.rs framework to support RS256 JWT authentication, be sure to check out the article titled “Rust and Yew.rs Frontend: JWT Access and Refresh Tokens“.
However, if you want to get started quickly without having to write any code, just follow these simple steps:
- Before you begin, make sure you have Trunk installed on your computer. You’ll also need to install the WebAssembly target, which you can do by visiting https://yew.rs/docs/getting-started/introduction.
- Download or clone the Yew.rs project from https://github.com/wpcodevo/rust-yew-rs256-web-app and open the source code in your preferred code editor.
- Open the integrated terminal in your IDE or text editor and run the command
trunk build. This will install the necessary crates and create asset-build pipelines for the assets specified in theindex.htmltarget. - Once the installation of the necessary crates and asset build pipelines is complete, start the Yew web server by running the command
trunk serve --port 3000. This will create a local web server on your machine that you can access through your web browser atlocalhost:3000. - Finally, you can interact with the app to register, log in, and log out users, request your account details, and request a new access token when the old one has expired.
Set up the Rust Project with Cargo
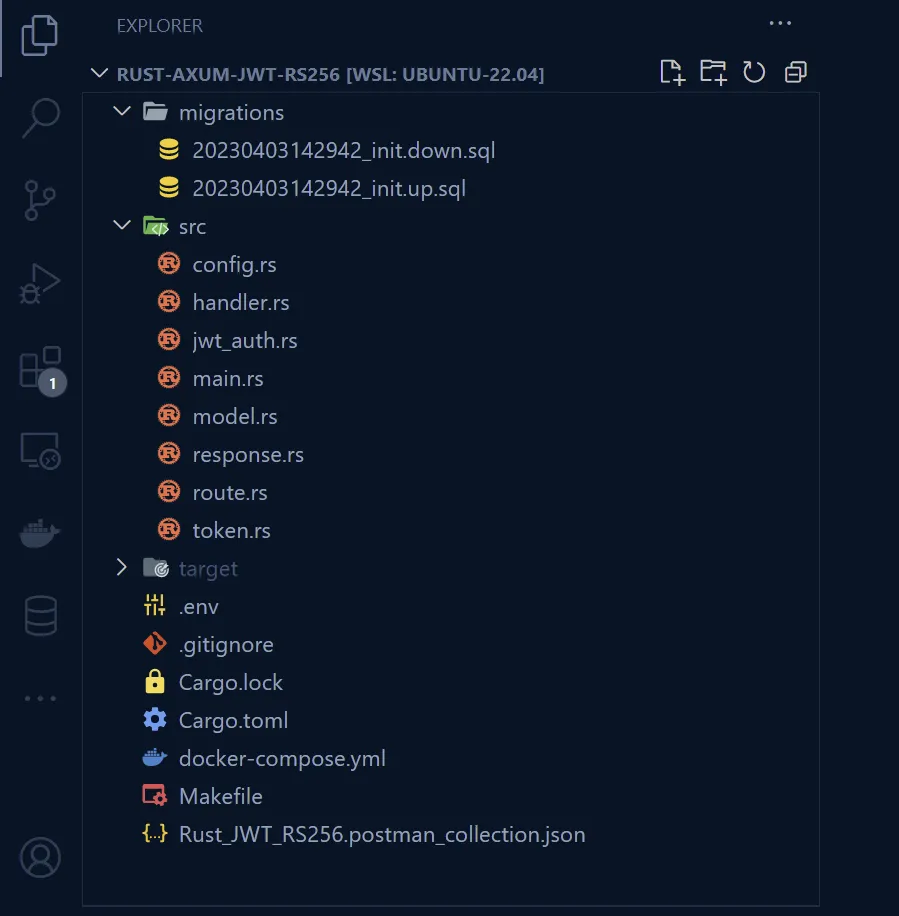
Before we dive into the project, take a look at the screenshot below to see what the file and folder structure of the final project will look like after you follow all the instructions in this article. This will serve as a helpful reference as you write your code.
Let’s begin by choosing a suitable location on your computer to store the source code for your project. Once you’ve decided on a location, open a terminal in that directory and type the following commands:
mkdir rust-axum-jwt-rs256
cd rust-axum-jwt-rs256
cargo init
These commands will create a new folder called rust-axum-jwt-rs256 and initialize your Rust project in that folder.
Next, you can open the project in your favourite IDE. From there, launch the integrated terminal and install the necessary crates using these commands.
cargo add axum
cargo add axum-extra -F cookie
cargo add time
cargo add tokio -F full
cargo add tower-http -F "cors"
cargo add serde_json
cargo add serde -F derive
cargo add chrono -F serde
cargo add dotenv
cargo add uuid -F "serde v4"
cargo add sqlx -F "runtime-async-std-native-tls postgres chrono uuid"
cargo add jsonwebtoken
cargo add argon2
cargo add rand_core --features "std"
cargo add base64
cargo add redis --features "tokio-comp"
After running the commands above, your Cargo.toml file will look similar to the one below. If you encounter any issues with the latest versions of the crates you installed earlier, it may mean that there have been breaking changes. If this happens, you can use the versions provided in the Cargo.toml file below instead.
And if you do run into any problems, be sure to leave a comment so I can update the project and the article accordingly.
Cargo.toml
[package]
name = "rust-axum-jwt-rs256"
version = "0.1.0"
edition = "2021"

# See more keys and their definitions at https://doc.rust-lang.org/cargo/reference/manifest.html

[dependencies]
argon2 = "0.5.0"
axum = "0.7.2"
axum-extra = { version = "0.9.0", features = ["cookie"] }
base64 = "0.21.0"
chrono = { version = "0.4.24", features = ["serde"] }
dotenv = "0.15.0"
jsonwebtoken = "9.2.0"
rand_core = { version = "0.6.4", features = ["std"] }
redis = { version = "0.24.0", features = ["tokio-comp"] }
serde = { version = "1.0.159", features = ["derive"] }
serde_json = "1.0.95"
sqlx = { version = "0.7.3", features = ["runtime-async-std-native-tls", "postgres", "chrono", "uuid"] }
time = "0.3.20"
tokio = { version = "1.27.0", features = ["full"] }
tower-http = { version = "0.5.0", features = ["cors"] }
uuid = { version = "1.3.0", features = ["serde", "v4"] }
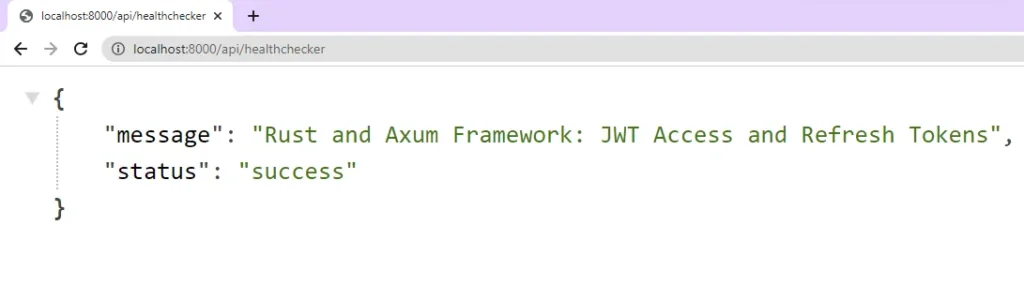
Before we dive into the authentication features, let’s create a simple Axum server to get started. This server will have a health checker route that will respond with a basic JSON object when a GET request is made to the /api/healthchecker endpoint.
To do this, open the main.rs file located in the src directory and replace its content with the following code.
src/main.rs
use axum::{response::IntoResponse, routing::get, Json, Router};

pub async fn health_checker_handler() -> impl IntoResponse {
    const MESSAGE: &str = "Rust and Axum Framework: JWT Access and Refresh Tokens";

    let json_response = serde_json::json!({
        "status": "success",
        "message": MESSAGE
    });

    Json(json_response)
}

#[tokio::main]
async fn main() {
    let app = Router::new().route("/api/healthchecker", get(health_checker_handler));

    println!("🚀 Server started successfully");
    let listener = tokio::net::TcpListener::bind("0.0.0.0:8000").await.unwrap();
    axum::serve(listener, app).await.unwrap()
}
To build and start the Axum HTTP server, run the command cargo run. However, if you want to have the luxury of hot reloading, which automatically rebuilds the project whenever a change is made to the source code, consider using the command line tool called Cargo Watch. This tool functions similarly to Nodemon in Node.js and will monitor the source code for changes and rebuild the project accordingly.
If you do not have Cargo Watch installed on your machine, you can easily do so by running the following command:
cargo install cargo-watch
After installing Cargo Watch, use the following command cargo watch -q -c -w src/ -x run to start the Axum HTTP server. This command tells Cargo Watch to keep an eye on the src directory for any changes and automatically rebuild the project whenever there’s a change.
Now, you can test the Axum server by opening your browser and visiting http://localhost:8000/api/healthchecker. If everything is set up correctly, you should see the JSON object sent by the server.
Launch PostgreSQL, Redis, and pgAdmin Servers
Previously, setting up PostgreSQL, Redis, and pgAdmin servers required downloading and installing them from their respective websites onto our local machines. While this method worked, it was not as efficient as it could be. However, with the advent of Docker, we can now launch all three servers with a single command.
Using Docker makes it much simpler to tear down these containers when they’re no longer needed, and it also makes it easier for other developers to run our project. To get started, create a docker-compose.yml file in the project’s root directory and add the following Docker Compose configurations, allowing us to launch Redis, PostgreSQL, and pgAdmin servers.
docker-compose.yml
version: "3"
services:
  postgres:
    image: postgres:latest
    container_name: postgres
    ports:
      - "6500:5432"
    volumes:
      - progresDB:/var/lib/postgresql/data
    env_file:
      - ./.env
  pgAdmin:
    image: dpage/pgadmin4
    container_name: pgAdmin
    env_file:
      - ./.env
    ports:
      - "5050:80"
  redis:
    image: redis:alpine
    container_name: redis
    ports:
      - '6379:6379'
    volumes:
      - redisDB:/data
volumes:
  progresDB:
  redisDB:
You might have noticed in the configuration above that we didn’t specify the credentials required to build the Postgres and pgAdmin images. Instead, we referenced a file named .env, which will contain those credentials.
To make these environment variables available to Docker Compose, create a file named .env in the root directory of your project, and add the following environment variables to it.
.env
POSTGRES_HOST=127.0.0.1
POSTGRES_PORT=6500
POSTGRES_USER=admin
POSTGRES_PASSWORD=password123
POSTGRES_DB=rust_jwt_rs256

PGADMIN_DEFAULT_EMAIL=admin@admin.com
PGADMIN_DEFAULT_PASSWORD=password123

DATABASE_URL=postgresql://admin:password123@localhost:6500/rust_jwt_rs256?schema=public

PORT=8000
CLIENT_ORIGIN=http://localhost:3000

REDIS_URL=redis://127.0.0.1:6379/

ACCESS_TOKEN_PRIVATE_KEY=
ACCESS_TOKEN_PUBLIC_KEY=
ACCESS_TOKEN_EXPIRED_IN=15m
ACCESS_TOKEN_MAXAGE=15


REFRESH_TOKEN_PRIVATE_KEY=
REFRESH_TOKEN_PUBLIC_KEY=
REFRESH_TOKEN_EXPIRED_IN=60m
REFRESH_TOKEN_MAXAGE=60
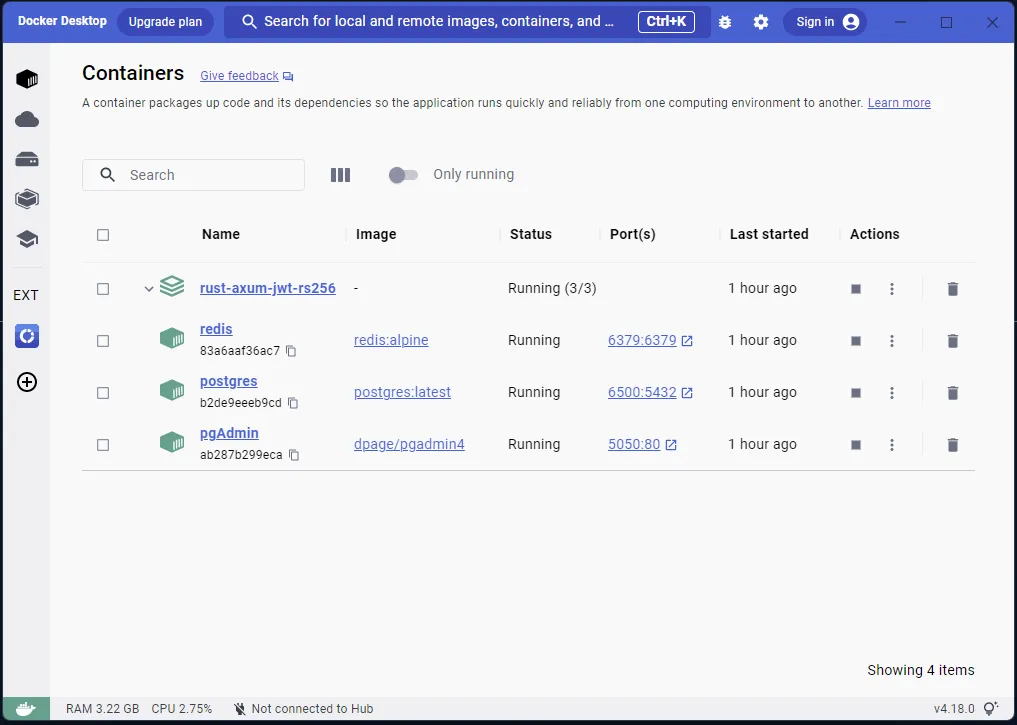
With the credentials now defined in the .env file, you can easily launch the Redis, PostgreSQL, and pgAdmin servers by executing the command docker-compose up -d. If the setup was successful, you would see informative messages in the terminal indicating that all three servers are up and running in their respective containers.
To verify this, you can run the command docker ps in the terminal, or you can check the Docker Desktop application to view the active containers.
Perform Database Migration with SQLx-CLI
Now that we have our database environment set up, it’s time to synchronize the database schema with the SQL queries defined in our project’s migration files. We’ll achieve this using SQLx’s command-line utility to generate the migration files. Once generated, we’ll add the necessary SQL queries to the files and apply the migrations to the database.
If you don’t already have the SQLx-CLI installed, don’t worry. You can easily install it by running the following command:
cargo install sqlx-cli
After installing the SQLx-CLI tool, the next step is to generate the reversible migration files using the command sqlx migrate add -r init. This will create two migration files, namely ‘up‘ and ‘down‘, in a new ‘migrations‘ folder located in the root directory of your project.
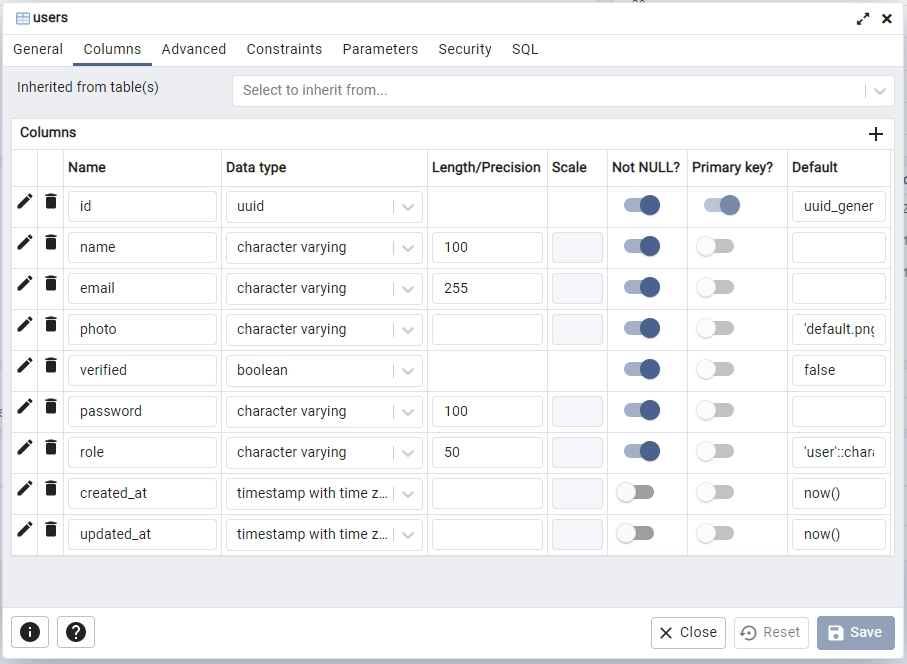
Now, we need to add the required SQL queries to the ‘up’ migration file. The first SQL query we will add is to activate the uuid-ossp module in the PostgreSQL server, which will enable us to use the uuid_generate_v4() function to generate UUIDs as primary keys for the id columns.
Additionally, we will create a users table in the database and add a unique constraint on the email column to prevent two users from having the same email addresses.
To do this, open the ‘up‘ script in the ‘migrations‘ folder and add the following SQL queries:
migrations/20230403142942_init.up.sql
-- Add up migration script here

CREATE EXTENSION IF NOT EXISTS "uuid-ossp";

CREATE TABLE
    "users" (
        id UUID NOT NULL PRIMARY KEY DEFAULT (uuid_generate_v4()),
        name VARCHAR(100) NOT NULL,
        email VARCHAR(255) NOT NULL UNIQUE,
        photo VARCHAR NOT NULL DEFAULT 'default.png',
        verified BOOLEAN NOT NULL DEFAULT FALSE,
        password VARCHAR(100) NOT NULL,
        role VARCHAR(50) NOT NULL DEFAULT 'user',
        created_at TIMESTAMP
        WITH
            TIME ZONE DEFAULT NOW(),
            updated_at TIMESTAMP
        WITH
            TIME ZONE DEFAULT NOW()
    );

CREATE INDEX users_email_idx ON users (email);
It’s important to include a ‘down‘ migration script to undo any changes made by the ‘up‘ migration script in case of errors or rollbacks. For this migration, we’ll remove the users table from the database. To do so, open the ‘down‘ migration file corresponding to the ‘up‘ script and add the following SQL code:
migrations/20230403142942_init.down.sql
-- Add down migration script here

DROP TABLE IF EXISTS "users";
Now that we have both the ‘up‘ and ‘down‘ migration scripts in place, it’s time to apply the ‘up‘ script to the PostgreSQL database. You can do this easily by running the command sqlx migrate run in the terminal. If everything goes smoothly and no errors are displayed, it means that the SQLx-CLI has successfully applied the ‘up‘ migration script to the database.
To confirm this, you can sign into the Postgres server and navigate to the ‘Tables‘ section of the rust_jwt_rs256 database. Instead of using an external Postgres client, you can access the pgAdmin container in the browser by visiting http://localhost:5050/.
Once you’re on the pgAdmin page, sign in using the credentials provided in the .env file. Next, add the Postgres server using the same credentials provided in the .env file. To find the IP address of the running PostgreSQL server, simply run the command docker inspect postgres in the terminal, and scroll down to the bottom to locate the IP address.
Load the Environment Variables into the App
We’re almost ready to connect our application to the running PostgreSQL and Redis servers. To do this, we need to create a utility function that will extract the environment variables from the .env file and store them in a Config struct.
Having this struct in place will enable us to access the environment variables across the entire application, allowing us to provide the necessary credentials to SQLX and the Redis client. This, in turn, will allow us to connect to the Redis and PostgreSQL servers seamlessly.
To begin, navigate to the src directory and create a new file named config.rs. Then, copy and paste the code provided below to the newly created file.
src/config.rs
fn get_env_var(var_name: &str) -> String {
    std::env::var(var_name).unwrap_or_else(|_| panic!("{} must be set", var_name))
}

#[derive(Debug, Clone)]
pub struct Config {
    pub database_url: String,
    pub redis_url: String,
    pub client_origin: String,

    pub access_token_private_key: String,
    pub access_token_public_key: String,
    pub access_token_expires_in: String,
    pub access_token_max_age: i64,

    pub refresh_token_private_key: String,
    pub refresh_token_public_key: String,
    pub refresh_token_expires_in: String,
    pub refresh_token_max_age: i64,
}

impl Config {
    pub fn init() -> Config {
        let database_url = get_env_var("DATABASE_URL");
        let redis_url = get_env_var("REDIS_URL");
        let client_origin = get_env_var("CLIENT_ORIGIN");

        let access_token_private_key = get_env_var("ACCESS_TOKEN_PRIVATE_KEY");
        let access_token_public_key = get_env_var("ACCESS_TOKEN_PUBLIC_KEY");
        let access_token_expires_in = get_env_var("ACCESS_TOKEN_EXPIRED_IN");
        let access_token_max_age = get_env_var("ACCESS_TOKEN_MAXAGE");

        let refresh_token_private_key = get_env_var("REFRESH_TOKEN_PRIVATE_KEY");
        let refresh_token_public_key = get_env_var("REFRESH_TOKEN_PUBLIC_KEY");
        let refresh_token_expires_in = get_env_var("REFRESH_TOKEN_EXPIRED_IN");
        let refresh_token_max_age = get_env_var("REFRESH_TOKEN_MAXAGE");

        Config {
            database_url,
            redis_url,
            client_origin,
            access_token_private_key,
            access_token_public_key,
            refresh_token_private_key,
            refresh_token_public_key,
            access_token_expires_in,
            refresh_token_expires_in,
            access_token_max_age: access_token_max_age.parse::<i64>().unwrap(),
            refresh_token_max_age: refresh_token_max_age.parse::<i64>().unwrap(),
        }
    }
}
Connect the Axum Server to the Redis and Postgres Servers
Now that we have a function we can use to load the environment variables from the .env file, it’s time to write the logic required to connect to the Redis and PostgreSQL servers in the src/main.rs file.
First, we’ll use the dotenv crate to load the environment variables into the Rust runtime. After that, we’ll call the Config::init() function to read the environment variables and store them in the Config struct. Then, we’ll provide the PostgreSQL database connection URL to SQLX, which will create 10 connection pools to the PostgreSQL server.
Next, we’ll provide the Redis connection URL to the Redis client, which will connect the app to the running Redis server. Finally, we’ll add the PostgreSQL connection pool, the environment variables stored in the Config struct, and the Redis client to the AppState struct so that we can access them throughout the project.
To implement this, open the src/main.rs file and replace its content with the code provided below:
src/main.rs
mod config;

use axum::{response::IntoResponse, routing::get, Json, Router};
use config::Config;
use std::sync::Arc;

use dotenv::dotenv;
use redis::Client;
use sqlx::{postgres::PgPoolOptions, Pool, Postgres};

pub struct AppState {
    db: Pool<Postgres>,
    env: Config,
    redis_client: Client,
}

#[tokio::main]
async fn main() {
    dotenv().ok();

    let config = Config::init();

    let pool = match PgPoolOptions::new()
        .max_connections(10)
        .connect(&config.database_url)
        .await
    {
        Ok(pool) => {
            println!("✅Connection to the database is successful!");
            pool
        }
        Err(err) => {
            println!("🔥 Failed to connect to the database: {:?}", err);
            std::process::exit(1);
        }
    };

    let redis_client = match Client::open(config.redis_url.to_owned()) {
        Ok(client) => {
            println!("✅Connection to the redis is successful!");
            client
        }
        Err(e) => {
            println!("🔥 Error connecting to Redis: {}", e);
            std::process::exit(1);
        }
    };

    let app = Router::new()
        .route("/api/healthchecker", get(health_checker_handler))
        .with_state(Arc::new(AppState {
            db: pool.clone(),
            env: config.clone(),
            redis_client: redis_client.clone(),
        }));

    println!("🚀 Server started successfully");
    axum::Server::bind(&"0.0.0.0:8000".parse().unwrap())
        .serve(app.into_make_service())
        .await
        .unwrap();
}

pub async fn health_checker_handler() -> impl IntoResponse {
    const MESSAGE: &str = "Rust and Axum Framework: JWT Access and Refresh Tokens";

    let json_response = serde_json::json!({
        "status": "success",
        "message": MESSAGE
    });

    Json(json_response)
}
After implementing the code, you can build and run the project. If everything is set up correctly, you should see messages in the terminal indicating that the application has successfully connected to the Redis and PostgreSQL servers.
Define the SQLX Database Model
Before we can use SQLX to query and mutate the users table in the PostgreSQL database, we need to create a struct that implements the sqlx::FromRow trait and has fields corresponding to the columns of the users table. By implementing the sqlx::FromRow trait, SQLX can map each field of the struct to its corresponding column.
In addition to the SQLX database model struct, we also added two more structs: RegisterUserSchema and LoginUserSchema. The RegisterUserSchema struct allows us to deserialize the request body during the account registration process, while the LoginUserSchema struct enables us to deserialize the request body during the account sign-in process. Although these two structs are supposed to be in a separate file, we have kept them in the src/model.rs file since they are only two.
Copy and paste the code below into the src/model.rs file:
src/model.rs
use chrono::prelude::*;
use serde::{Deserialize, Serialize};

#[allow(non_snake_case)]
#[derive(Debug, Deserialize, sqlx::FromRow, Serialize, Clone)]
pub struct User {
    pub id: uuid::Uuid,
    pub name: String,
    pub email: String,
    pub password: String,
    pub role: String,
    pub photo: String,
    pub verified: bool,
    #[serde(rename = "createdAt")]
    pub created_at: Option<DateTime<Utc>>,
    #[serde(rename = "updatedAt")]
    pub updated_at: Option<DateTime<Utc>>,
}

#[derive(Debug, Deserialize)]
pub struct RegisterUserSchema {
    pub name: String,
    pub email: String,
    pub password: String,
}

#[derive(Debug, Deserialize)]
pub struct LoginUserSchema {
    pub email: String,
    pub password: String,
}
Define the API Response Structs
To ensure that the outgoing JSON objects in our Rust code are properly typed, we need to provide types. This is essential not just for typing, but also to enable us to create a struct that contains only the fields we want to send to the user. This approach filters out sensitive fields and sends only non-sensitive fields in the JSON object.
To achieve this, let’s create a response.rs file in the ‘src‘ directory and add the following structures:
src/response.rs
use chrono::prelude::*;
use serde::Serialize;

#[allow(non_snake_case)]
#[derive(Debug, Serialize)]
pub struct FilteredUser {
    pub id: String,
    pub name: String,
    pub email: String,
    pub role: String,
    pub photo: String,
    pub verified: bool,
    pub createdAt: DateTime<Utc>,
    pub updatedAt: DateTime<Utc>,
}

#[derive(Serialize, Debug)]
pub struct UserData {
    pub user: FilteredUser,
}

#[derive(Serialize, Debug)]
pub struct UserResponse {
    pub status: String,
    pub data: UserData,
}
Generate the RS256 Private and Public Keys
To generate the required asymmetric keys consisting of a private and a public key, please follow the steps outlined below:
- To get started, visit the Online RSA Key Generator website and choose a key size of 4096 bits. This key size is recommended as the
jsonwebtokencrate may raise an error if we opt for a 1024-bit key size. While a key size of 2048 bits is also an option, selecting 4096 bits is a safer choice. After selecting the key size, click on the “Generate New Keys” button and wait for a moment as the keys are generated. - After generating the keys, you will need to copy the private key and convert it to base64 format using a tool like https://www.base64encode.org/. Once the key has been encoded, paste it into the
ACCESS_TOKEN_PRIVATE_KEYfield in the.envfile. - Likewise, you need to copy the public key that corresponds to the private key from the Online RSA Key Generator website. Afterwards, convert the public key to base64 format using a tool such as https://www.base64encode.org/, and paste the resulting base64-encoded key into the
.envfile, assigning it to theACCESS_TOKEN_PUBLIC_KEYfield. - To create the private and public keys for the refresh token, follow the same steps as those for generating the access token. Then, convert the private key to base64 format, and include it in the
.envfile as the value of theREFRESH_TOKEN_PRIVATE_KEYfield.
Likewise, add the base64-encoded public key that corresponds to the private key as the value of theREFRESH_TOKEN_PUBLIC_KEYfield.
Note that we convert the private and public keys to base64 format to prevent any unnecessary warnings in the terminal when Docker Compose retrieves the pgAdmin and Postgres credentials from the
.envfile.
After successfully following these steps, your .env file should now resemble the example below. If you experience difficulty generating the private and public keys, you can use the pre-defined environment variables provided.
.env
POSTGRES_HOST=127.0.0.1
POSTGRES_PORT=6500
POSTGRES_USER=admin
POSTGRES_PASSWORD=password123
POSTGRES_DB=rust_jwt_rs256

PGADMIN_DEFAULT_EMAIL=admin@admin.com
PGADMIN_DEFAULT_PASSWORD=password123

DATABASE_URL=postgresql://admin:password123@localhost:6500/rust_jwt_rs256?schema=public

PORT=8000
CLIENT_ORIGIN=http://localhost:3000

REDIS_URL=redis://127.0.0.1:6379/

ACCESS_TOKEN_PRIVATE_KEY=LS0tLS1CRUdJTiBSU0EgUFJJVkFURSBLRVktLS0tLQpNSUlKS0FJQkFBS0NBZ0VBME05dm5IWExKZFgzbk1hWXM4OHVvd1dRS21NSWRNMXVzbGN1MUhZdW01NWs1RE1yCm9pclBXcjcyQW5uVUhVZDczSmo2b3kzSGtYMmZrU3NGSkpVSitZdlQrL3RSRHpGdHlMWXJrbUxFVnJNbmVjVSsKeis0RHJVYitDdmkwUitXWmorMDRLdU1JdTNjSU5ONjh5ZWtQSjB4VVRQSm04bWNtT1ZGN1NJUVBxRXJKR3NtRgp2dTJZOEZGdmo5VkluK2Z3ZmRBeHJhRTEyem05WlhkWnloL2QvU05wZUgxWkVXYmVnSmhPTUJzWWlLcVhMS3V5Clc5bm5uRld2QUNTbGtoYjFLVlY0UW1TV0FVVnNnMEdTMGo5QlFrVkQ1TEZBVWpndDlzSzVDRWtxRGhpS1pNQXIKVFpWVU12eDcwTHRoZmpRNng0ZXljVEVNeG10dXRqam1kYXRQcmJFWGZleHNqNTRIVHlwSzNwSU1ncW1OVTFjNQpHYVFlcW5CSElNa0o2MTk1cUZ4WE5HejE5c2liQlkzTlpleE5HWmc0bkdGTjdrUW9QR2FWdHMyYXdiVU4xL0JZCnBjN0FpSnh5RFg5SkFweUFSUWgxcmxDVkdXb3daQ05WRkJ4OWNMTjBDeGpyYi9td0sxSkRmMHFmSms3QmpyVHcKTnVzL1k5NUp5TE1JSHNvTlpRYk1uL095N2pmMXVjV3dNUkRnYjhqSDdxa2tCQ2F3OW1md2djZVE0cVBtZzFsMgovMjVmQzh1eGlJdWRZWCtQZjBaSVVkQ09zTDllT2xYYWJGcTA4UG5jUmFuRzBFcHRsNnV6eTVuNi9waHdEK0R0Cmh1RE5ycURoNjVTUy9uU1JEVWRHbGtITms0RlByZGNRK0kraWtBZDM1RnJVb0l3ajRjT0VLa0JyT1Q4Q0F3RUEKQVFLQ0FnQnpCUkN4MnFEZ1lwQldwMzZON1YzL0pwMVcrOTQ0bU1DVk5EanpoM1g4K3E4UWxLOUFVTnlQWEFrZgpMQVNQYkVUcUtzcEZBSDZod2RVWG5kN2pXOFYyMUhNY3BqN3NZNG5adVo4ZXI1RC9RUWhKcDBFR1FGRitMVkRhCnNreDhIaGtNa3RzUnBLVzJ2Y2FqZU4zOVNvZXlXZlZGdlhDL3JkbjhVTW5jRkFLYjdUWUJyMmdnMTdnYkNJQ3YKZGdqZkxGL29yYm52cnBHQUJMb3pIaDh6bTRJb1lrMUN0YWxPVUovWHJnM0RxZWxGdnRJdkpSVEdTNjJ0Qy9XdAoyb0hwaXdQWWxOLzlrbktlbUtOQldlbUtMcFcvNzIrS2xhaWNvWjJRQTRydzZYeGs3MWVzVDc2S3Flc0xldENwCkZjNktPakwybmVUSlBQK1FmTFVyWXdSdlpNSXFKOVBVQjZUR1BIRVpsSmROQml5VlNya2d2S2R1NjllemJZZmgKQkRJeXh2Mnh4Q0pSTFU1VUJXb2I0YWp6RWlQZkhmSkIvUnNrOGdVNGNrc0Z2U0ZhZHpPU1hlNlZEYjNRR3NZNgozdFFlK2xsem5lOFVFWTg1NGg2L0JiRENWbHVEa2UxNTk5Ny8yam9MUnl0U0EySGxXc1N4MW41SFp5ZDZ1a1NpCkd4bXgvNHN6b2NGZ1FYVnhhMTljdVlIZXFSK2haa3FGaC9EYTh5UVNsOWRHYXh4WkF5RWplMzBWdjdIeEcxQ0MKQjM4RjZSUmh5Qm9LSnpRbnRNVlY2YXc2Q2FZMk43YS9hRFBLWjRONU5YY0dDKzZSRHh3b0M5bFNleXRrbkRCago1UWVIZmJMai9mRzhQWUU1NnRSWnNEZGNNVmg4SllDdk1acG1uUW9Qb0lUYU9PenNRUUtDQVFFQTl0bzZFOXhnCmZTa1NJMHpDYUdLNkQzMnBmdFJXbkR5QWJDVXpOYk5rcEJLOHJuSGlXanFJVDQzbVd6empGc0RvNlZwVXpscFQKYVVHWkNHMXc5THpHaWlaNllBd0F4TXBOZERzMFFOemhJNjMzS0tseHd0NGlUaGQ0aG9oYmZqdndGWHkyQ0paWgovUkkyZ1AwUEdvSENURXFMMTgzQklpYnJJR0g4dzY2K0F5cFc2L3cvdENEQ2NReFA1RE45YlNPSmFlQVI0a1NzCjg3REM1bmdNMVhJeVFpSCtvL21zaEpUS3ZhZUVpeTVmM1BaaExJNWZNQlZwN0tWTUNZY3V2NWZ4Y3pHVHZFM1YKcHcxamJmSzRDdG9xemFmK3hrdUk5ZWNjakp4TU5KRGc0QW5CNEpxWm11Y2dQWGJPdEpRR2VHaHZqZlBqTVZHZworTHhzSUFWZE8vRjFtUUtDQVFFQTJJeFNNK1VZOTFoem5vUURSbzV4WWVGS0dUeDhVZ00rWDdycURzTXp6NUVSCkRWKzh5WlNsY29NVjNlcGVSdjFHYlRodEUvTlZ4c1k2SW5yUkVJNHB2WFJqYkxqZDZPVkJYWENsYVl1YWsyV20KV2QxTVo4dDZRMUtVWXBFS0piZVRMN09SUmtibnIzTHhmWGJ2WTRPV1BaQjZyNktoaXljbTFubUNJU0hiMFh5Mwp1WHY1VVZEYVZWdklnS0RkNGhrRGZSWmEzNEZZUDYvcUFzMzkyWkJnclpvbVk0SkFMN2F0RnpmWVVZMUtlamV3CmpJWCtpQmRkdkd0cXQ0ZzYwQkgzQUxCZjJFb0Q4bkluaHRuUWtSd0d5QnRFN1pRVGdCYzRJbm5mR2tMZTRpWDkKQlZaSFgxb0VHWUp3RkVUNk1zUHFwcU8yWDhPT21YRDFFVFhUTUVjOGx3S0NBUUFmMWQwUG1xaEcrL2orM0hObQpDdlY3OGZUZUNueHhBY3grSmY0SXV1NEx5dTdTZ0pWMGxYL200cUlHdWo5L083bk4vbnhaY0lTNVdtQm1HZGNyCmVQMFI3QXgwUHBnS3lSeGNGUmFVRnVoaU5abGVnUnZPeWQ4YXV5UXNGWUhYTWR1d3FiakFPc080UTVVTDVaY0IKRUNNQ3U4cDFObS9sKzZidk1qUHErS3BBdGtFbmhneWhLbWhwTS9GSnVPcEFIUWtud21JTUVGZE54a29jZHZjUQp2LzJEVWVjSk5yWHRFMU5pU2l4cDFyMCtQZmdpU3VvenhVODMyY21Jb1FxQ1l4SWNqUlJFZ0xWQktoVGNwU1RmCklXdkx3aEsxZUNCZHRrU1VUY1AyTTRrTTI3VkpSaWJ4TjBXTko3bFl5STVkRVByeUQ3WUpNa0hVVWxpUGVLR2gKalc1aEFvSUJBQWdWQktSbk1vMVl3Y2Z5eVdTQ3dIeVV1ZjFESXFpMDhra0VZdVAyS1NMZ0dURFVsK2sySVE2cgpFYy9jaFhSRTA3SVQzdzVWa0tnQWtmN2pjcFlabURrMzlOWUQrRlJPNmllZ29xdlR5QXNrU2hja2lVdCticXZBCmswVXlnSnh6dzR5T09TZlVVYVZjdHVLbDQ3MWxGZUJxV2duZ0dnTmxqSytJalhETElMY3EzbmlQeGZoZytpVWgKYmRSUExMalpraVhEQmRVOXNKdC81MDMvZmkvMmtZVXBNYkdaRk9neSt6YllvTHc2ZDhNai9QVGhzMlJFNnZ5egpUYUpYOVVuNndhdEc2ZXphcGxjUUo2V0N6NlA2MWMzMkpwWnZabUxyZXU3ZWVaTXpWN285RExwOFErR3RMR1gvClZrdUxYNE14aUxwN2RiMFJRV3M4cWdqZ1oyZHY0VFVDZ2dFQkFMRjRiNnhRNjJJaCtMaTdsVk9lSWQ5VFVub08KUU1LUVNRN0xlWjJ4TmhCYWRPUEt0ZmJ5U0dGMGZieXZiVWk2czAyVnJpWC93S1V6T2o1WEFUbUZYQVdzYnU1dwo2M1JVR09ua2Z6cjIwWDZJWTVzOS9kdnJWZXFLNkpLdlQyZ0F0dWMwNXNCZzJPaG5CdHh2c0JDekhYVy9YRWJsCktWamVIMUxQTnZMaFNSc3BvT2FFVUhlaHpNN2c1V3FGSXhSQmRlb2J1SWNxQ1J2WjRFZGl6b05ybzVRZXFub3oKMTlyU0VVcTNBMEdIdE5Pb0xuV2Q3ZkZta2NOMEw5S3R0MTdsK2wxV0c3Y2kxVTVuSXBlOXBxZThlUUU2YmNYaApkNnlkdWd3UUpXbUxKSlpMQUs3eFpZdzd1ODhoa3ppZ2pSR2ltWHZ4VTJCMTU5OW5OT2NrNWQ0YXJTRT0KLS0tLS1FTkQgUlNBIFBSSVZBVEUgS0VZLS0tLS0=
ACCESS_TOKEN_PUBLIC_KEY=LS0tLS1CRUdJTiBQVUJMSUMgS0VZLS0tLS0KTUlJQ0lqQU5CZ2txaGtpRzl3MEJBUUVGQUFPQ0FnOEFNSUlDQ2dLQ0FnRUEwTTl2bkhYTEpkWDNuTWFZczg4dQpvd1dRS21NSWRNMXVzbGN1MUhZdW01NWs1RE1yb2lyUFdyNzJBbm5VSFVkNzNKajZveTNIa1gyZmtTc0ZKSlVKCitZdlQrL3RSRHpGdHlMWXJrbUxFVnJNbmVjVSt6KzREclViK0N2aTBSK1daaiswNEt1TUl1M2NJTk42OHlla1AKSjB4VVRQSm04bWNtT1ZGN1NJUVBxRXJKR3NtRnZ1Mlk4RkZ2ajlWSW4rZndmZEF4cmFFMTJ6bTlaWGRaeWgvZAovU05wZUgxWkVXYmVnSmhPTUJzWWlLcVhMS3V5Vzlubm5GV3ZBQ1Nsa2hiMUtWVjRRbVNXQVVWc2cwR1MwajlCClFrVkQ1TEZBVWpndDlzSzVDRWtxRGhpS1pNQXJUWlZVTXZ4NzBMdGhmalE2eDRleWNURU14bXR1dGpqbWRhdFAKcmJFWGZleHNqNTRIVHlwSzNwSU1ncW1OVTFjNUdhUWVxbkJISU1rSjYxOTVxRnhYTkd6MTlzaWJCWTNOWmV4TgpHWmc0bkdGTjdrUW9QR2FWdHMyYXdiVU4xL0JZcGM3QWlKeHlEWDlKQXB5QVJRaDFybENWR1dvd1pDTlZGQng5CmNMTjBDeGpyYi9td0sxSkRmMHFmSms3QmpyVHdOdXMvWTk1SnlMTUlIc29OWlFiTW4vT3k3amYxdWNXd01SRGcKYjhqSDdxa2tCQ2F3OW1md2djZVE0cVBtZzFsMi8yNWZDOHV4aUl1ZFlYK1BmMFpJVWRDT3NMOWVPbFhhYkZxMAo4UG5jUmFuRzBFcHRsNnV6eTVuNi9waHdEK0R0aHVETnJxRGg2NVNTL25TUkRVZEdsa0hOazRGUHJkY1ErSStpCmtBZDM1RnJVb0l3ajRjT0VLa0JyT1Q4Q0F3RUFBUT09Ci0tLS0tRU5EIFBVQkxJQyBLRVktLS0tLQ==
ACCESS_TOKEN_EXPIRED_IN=15m
ACCESS_TOKEN_MAXAGE=15


REFRESH_TOKEN_PRIVATE_KEY=LS0tLS1CRUdJTiBSU0EgUFJJVkFURSBLRVktLS0tLQpNSUlKS0FJQkFBS0NBZ0VBbGEyend2WGFoL3pmdXdWN3lQY0FHTG0rY2ZXaVExUm00QWtFZW1wUjZCNmxTMThrCjhsN2Vub0puTGNLY3pLRXhsY2lQKy9uTk5oQlZuNTc2QXh3RERHdmpoRFdqTHIrZzdiUUhYVmozZVNnaG5HUVIKNlhjMTdJNGRzZXd4NVZIYlNXbitWbEt4UkZ4a0xVQVUyUWFVOTNrTFh3UlVjeFhJMngrNFFZeUkra0JGbXdndgozRjB3QXRqS1hFTmhrcmxiMjNsUTNST2l5enRhQWJwcmVYWFVWbGhwM0tGTjZHb052VFRjbEk0MitoYjlZcndDCnN2SkEwdGVxZzdqSWlOTE1XdW41QVg3VlgxOWI0VEt2TzAzc29BMWM5aDVzRHZ2anRvTmdUV25PUFNFanFqNEEKaGhnK09ZWHF0YmROWk5Ld1F3bVhCMGlzVDdwdTEyZ1g3YWU5OWNaeVhPM0dGTkpkTmcvOURCZDBuNkdQL0ZzcQpCZ2lmdkJqNTVUR3J4VDRmNGJUanYyN0xsNzc4Y1h0U2R1aThwY0dMb0E5R2RlZmViTGJCenN0TzZTMzd2ZkR2CjZNQ1oxdHlINW5aWVAzaE5rZlJ1M1pYbUlUSDVwM01zcUpwcVowUGw5ZDVlWXFidG1LMnpIVUVUT1A3bjJpSVQKR1B0RHVWeTQ3SE9QYmVISDVteTVhYzIwQUNHeUlNeXFCSUo3SXZSVDNBUm9QV1V5T2lZKzZkNXJCZjk5ZkpCdAo0NkJZOFVxZDVrcUFULzFjYjArN0NJTm5zRSszV29xYzVQOW94UW1XbnYvRjRURnQ4RUx4em13WGtmQTVhN3JoCmtKZUZqL3JjMXdCOW5sc3J4MHBsWmxwMW80cFlzQVdGQ1hrNzZCSmZiZmtsUGduTUxwbDcxc2VDekIwQ0F3RUEKQVFLQ0FnQitTT1lJTWVKRkpnZW1CWVJoRkhVU1ozVFZOWWZJQXVnaFVicGpobHpBMlVwaEEwOXE1cnd4UkpqRgpOUk9TV3RZNUo5VERwZ21MK2RBa01yK0I3QnB1V29ERlJYUCt0MU9SK25qVU80SGd5UWxDcC9PczVSV3NGbVBiCmdBckJEb1ZUdFlnUFVRbWJRZENMbFN1QnlGbmJTbGRidlkxNjVBQnBVS1BuT2lrLzZ3WlBQV01VSzlPY00walkKKzBqUndHNU9DRmMvajVla25OamQ2R2xST3ljQ0N1cVdhY29QczVzUDdnL0ZqdyszaGJvWG1jVTFNY3VibUxhWApHRXFwbGlFdys0Tkp6YmM5Rm5tdzBWQ2pXcVd3akZYSW1mWlYxaFJVSXhnWGVKTzNZOFJ4bUlwY21RdTNBTlA4CnFVRTFOY1hkYWJQeFExR09teDkxd3ErZHBnOVFpYnN0cnMxZ00wcnRVSmtTRGhjQ2Z4S1ZVekYzSFNZejZpbk4Kc1ZETjRFRGJjTXdHY3huMWh4ZkZPS0haL1hCcmNWLzA5TllPRTdzRGN2TSt5SzF0SEJvRXVscmh0SmJ5YUUyNwpNR3VCaGovbTF0OGhUN25TemdFRnhackFLWHByTzVMdzJPSWo5UmxoenMzME9GbjVDeU04a1ZNS1MxODRkcmdYCnJ3OEV5KzFxUzE0MVdUQWp0ZE9mRW85Q3kyT1U3SGM0N2pPZjdrSS9vTmdWaGQ2QXNUc01RNFRYai93Ymh1ajIKM1l0THkyeElVVVNyRlNZRU9mNFdHTlZjeHVGakk0SnR2Rk9JRTN4MXE4blJ3NkZabDBITkd5QU9SL2tNWlcydwpKZjZWNyszL05yOXJIeHFRRVBpRWEydGx1UUpxbjV0WU9NcEx3SzNhaWh4ektsUmJpUUtDQVFFQXllcUQwUFVQCkdyeWk1WTRoWG1OcGtaaDE4dldsZ2F3eEllS2YrTGd4eEswTE9ZNDk2NW9kUDFVNTFFRUdZSGxFcVVnWW9TSDkKOFY4dFROd1JwWDF6ZTE0LzdYM2NCWHZsTEEwWDRBdm4vNXFKYm9QRUhncFIvSTZyc1pxYnVHRUFhT3N5ME9abAp0aVJNRHU4VWtkTUZBL3lYYVgycWYrRG42YktIWFRtcXVrc3dhejNmNFI0RUUvNjBheTFJeU9BeERDNlJJSnFaCnhSRXJJcWttZHFzR3k5bmEvQy9RYVlBcDJNRDRjWDRkbmVhU2h6Z2hSMWgrWmROV3h4cWhqV3JwMWRkNmMrWk4KekxQcjY0Q2Fmb3c1OWdwLzJld0xOaEFSc1dyclF6OFhLeHFmUVRnN0ZLQm8zangwNWp0WUlaS0lKV0xLZGdhUwp1UklHSUQ3eGt0cFpmd0tDQVFFQXZjVTdqNGRaTGlCVi84TmwvWkwwTXRDa1pBR2ZzWGw4dU9WQU1IZW1QM3JwCjRkbDFaNnYvb05NRjZJQXVjeWlmelR4dlJLNjg1c3dJTlVmOEFKRGRwZXBDZTFjdG1INEpHZUdMWmhic1lFc3cKOEFydTRSM1BNT0dxS0Y0OEZsbktVQTZhY050TEZmZDJvNnlvY0Y0MCtaeXh3QTdhdVllR0ljNTNEZ2FoYUd4Mwo5bitVOXVLSjYzL0FLNGV3dlhsWmhYNUhzRTdmN0sxb0pxdkRMSXRGS01CSVhwaTJVOUpUME1XRm1jK2tkMTVKCjZONTZvVEppWXplNjg0VzRGbGJqSFd4OFlTQU1ad0xpZGFZOEQzVUEvV1l3czNZWDNncG5oa3gxWUJSL3hMaUoKYW1GM3c0MUpOa2Q4UHNmVXRsSmg3UHBPWEQ3aGZSdzRoNmFGMnlYUVl3S0NBUUF1MzZCR0svMmJxVnJ2aTNVMwpva0JwcWtrSFkvdE9CUmxLMG45c2orWU4wRllnd0dLamhSMXhER25tV2tvT3IxZy9MQnQ3bkphRktDRXVESkNVCktIRmNuRjZlMVc3MFh2U3VxME4xb1kzMENuNEpCOUhKWDMvMDczSHdRd0lQWllWZzFlandFZXhld2tKZDNTYWIKUzYrSVkyVUsrajlRZkhlYUN2WGRzSHR2ei9DbmxLK2FaUXR4VU5tMVg4ZmJ5aC9Zd2g2eXdQRWRqSVRGQVJ1Swp4TjFKQ1lRS3MxYmdodjR2OFd3N2ZKbUhoSFZUcXJZZkIrNGYyVlgxMXJyV1I1R05NUDZlVlVLT1dONVZ4MzhXCkRadVBBSlQ1bEJCdU5vREUvUnNzZTBMM29MQ0R4WGdCcTlOc2RBQjNTaU9GZDZ6ZmNQV3JQSTluSTBZRXlsZnUKVFg0bEFvSUJBRzdhWnVkNXpldDI4aVdjYzlpRFhtak1uaXJaRS9ydEY2RStNWmZlWE52YUpnTkxMeHpuU1VVZAozK2FuOGZwTk1jUUcySXlMY2tkenlodXR1QlJ3aXpsZk5ZU3RNVEpSOVdrTDZvMHhPTlVyTnlRUmp1Y3JyWnRGClIwdWJlSWdwM1ZlVW9EenFyTnJoR29tVDB6VUlvdk5veUNDRHpOcnh3clcrMEtiOTBvMllSeDlUK2FXYVFheXkKaklRaEdHb21GOWcySXhSbmpzREhydjVmK1h2c3d2S0NHQVJDT3NlT0ptM2U1Q01zTzB1TFphdEZRdWNrOG5vNAoxTmxxTkZYQVhaMFRnVGlQS3crRmpObml5RlRUS1VmY3lQZ2NOT2I4dHVxcGdTc2w3bGp3M3p5b1FQaVhjTHZuCldEbW9LNlp4UzBqT0VyWXArVGhISXZLQ29OQ2FMemNDZ2dFQkFJeFdyL3MvSjdIZmovc3hUU2xWamFBNHVKdEsKMTNXaW9kMnB3bFFxai9HanZra3VSYTVZQ0g5YlVNTmFqYXpTVmhYOUtkcURoSVJSTHBaTUNSMXlSUWtGb0NSSgpGbTJJbGJCaFlybWptdzEzRzNkL0xhb1RVWFlIMkZ0YnFEQlUyYmFsMEJTNlZOQkcxZUh4dVRtSys1Sk4waldUCkUzQmhtYnl5SnZjcFZ6RUJ1eXcwY1ROeGJncTcxRWRXYlpILzVRcitJSzk4VDh3NzM5N084dFY5cEZuV2MrcVcKejhWQVNiUEc1aEVJTStUbUlzRDFhV0lrWHRsemdxbTRSaFBob3diTmVMRkVkZ1YvVnc3cjBpRUlDbXFOYjVpTgoraTlEZUlZd25WY0FKZk5hV0dwaStRekd2MGl5Szk1TDI4TncrOUtSSzJVK0VnTWZnUzQ5c1lOMW44cz0KLS0tLS1FTkQgUlNBIFBSSVZBVEUgS0VZLS0tLS0=
REFRESH_TOKEN_PUBLIC_KEY=LS0tLS1CRUdJTiBQVUJMSUMgS0VZLS0tLS0KTUlJQ0lqQU5CZ2txaGtpRzl3MEJBUUVGQUFPQ0FnOEFNSUlDQ2dLQ0FnRUFsYTJ6d3ZYYWgvemZ1d1Y3eVBjQQpHTG0rY2ZXaVExUm00QWtFZW1wUjZCNmxTMThrOGw3ZW5vSm5MY0tjektFeGxjaVArL25OTmhCVm41NzZBeHdECkRHdmpoRFdqTHIrZzdiUUhYVmozZVNnaG5HUVI2WGMxN0k0ZHNld3g1VkhiU1duK1ZsS3hSRnhrTFVBVTJRYVUKOTNrTFh3UlVjeFhJMngrNFFZeUkra0JGbXdndjNGMHdBdGpLWEVOaGtybGIyM2xRM1JPaXl6dGFBYnByZVhYVQpWbGhwM0tGTjZHb052VFRjbEk0MitoYjlZcndDc3ZKQTB0ZXFnN2pJaU5MTVd1bjVBWDdWWDE5YjRUS3ZPMDNzCm9BMWM5aDVzRHZ2anRvTmdUV25PUFNFanFqNEFoaGcrT1lYcXRiZE5aTkt3UXdtWEIwaXNUN3B1MTJnWDdhZTkKOWNaeVhPM0dGTkpkTmcvOURCZDBuNkdQL0ZzcUJnaWZ2Qmo1NVRHcnhUNGY0YlRqdjI3TGw3NzhjWHRTZHVpOApwY0dMb0E5R2RlZmViTGJCenN0TzZTMzd2ZkR2Nk1DWjF0eUg1blpZUDNoTmtmUnUzWlhtSVRINXAzTXNxSnBxClowUGw5ZDVlWXFidG1LMnpIVUVUT1A3bjJpSVRHUHREdVZ5NDdIT1BiZUhINW15NWFjMjBBQ0d5SU15cUJJSjcKSXZSVDNBUm9QV1V5T2lZKzZkNXJCZjk5ZkpCdDQ2Qlk4VXFkNWtxQVQvMWNiMCs3Q0lObnNFKzNXb3FjNVA5bwp4UW1XbnYvRjRURnQ4RUx4em13WGtmQTVhN3Joa0plRmovcmMxd0I5bmxzcngwcGxabHAxbzRwWXNBV0ZDWGs3CjZCSmZiZmtsUGduTUxwbDcxc2VDekIwQ0F3RUFBUT09Ci0tLS0tRU5EIFBVQkxJQyBLRVktLS0tLQ==
REFRESH_TOKEN_EXPIRED_IN=60m
REFRESH_TOKEN_MAXAGE=60
Create Helper Functions to Sign and Verify the JWTs
Let’s move on to the next step, which is to create utility functions that will use the private-public key pair we generated earlier to sign and verify the JWTs. First, create a new file named token.rs in the ‘src‘ directory, and add the following code:
src/token.rs
use base64::{engine::general_purpose, Engine as _};
use serde::{Deserialize, Serialize};
use uuid::Uuid;

#[derive(Debug, Serialize, Deserialize)]
pub struct TokenDetails {
    pub token: Option<String>,
    pub token_uuid: uuid::Uuid,
    pub user_id: uuid::Uuid,
    pub expires_in: Option<i64>,
}

#[derive(Debug, Serialize, Deserialize)]
pub struct TokenClaims {
    pub sub: String,
    pub token_uuid: String,
    pub exp: i64,
    pub iat: i64,
    pub nbf: i64,
}
The above code includes all the necessary crates and dependencies for creating the utility functions, along with two structs named TokenDetails and TokenClaims. The TokenDetails struct will be returned from the helper functions after signing and verifying the JWT and will serve as the JWT metadata.
Meanwhile, the TokenClaims struct will allow us to encode and decode the JWT payload.
Function to Sign the JWT using the Private Key
Let’s start by defining the first utility function, which will be responsible for signing new tokens using the RS256 algorithm with a private key. When the function is called, it will decode the private key from a base64-encoded string back to a UTF-8 string.
Then, it will create a new TokenDetails struct with the user_id, a randomly generated token_uuid, the expiration time calculated from the current time and the TTL, and an empty token field.
Next, it will create a TokenClaims struct with the user ID, token UUID, expiration time, and other standard claims such as iat (issued at) and nbf (not before).
After that, it will create a new jsonwebtoken::Header with the RS256 algorithm and use the jsonwebtoken::encode function to generate the JWT token. The function will sign the token using the decoded private key and the TokenClaims.
Finally, the function will update the token field in the TokenDetails struct with the generated token and return the TokenDetails struct.
src/token.rs
pub fn generate_jwt_token(
    user_id: uuid::Uuid,
    ttl: i64,
    private_key: String,
) -> Result<TokenDetails, jsonwebtoken::errors::Error> {
    let bytes_private_key = general_purpose::STANDARD.decode(private_key).unwrap();
    let decoded_private_key = String::from_utf8(bytes_private_key).unwrap();

    let now = chrono::Utc::now();
    let mut token_details = TokenDetails {
        user_id,
        token_uuid: Uuid::new_v4(),
        expires_in: Some((now + chrono::Duration::minutes(ttl)).timestamp()),
        token: None,
    };

    let claims = TokenClaims {
        sub: token_details.user_id.to_string(),
        token_uuid: token_details.token_uuid.to_string(),
        exp: token_details.expires_in.unwrap(),
        iat: now.timestamp(),
        nbf: now.timestamp(),
    };

    let header = jsonwebtoken::Header::new(jsonwebtoken::Algorithm::RS256);
    let token = jsonwebtoken::encode(
        &header,
        &claims,
        &jsonwebtoken::EncodingKey::from_rsa_pem(decoded_private_key.as_bytes())?,
    )?;
    token_details.token = Some(token);
    Ok(token_details)
}
Function to Verify the JWT using the Public Key
Now, we will create a function that verifies JWTs. The function will take two arguments: public_key, which is the public key used to verify the token, and token, which is the token to be verified.
When the function is called, it will first decode the public key from a base64-encoded string to a UTF-8 string. Then, it will create a new jsonwebtoken::Validation object with the RS256 algorithm.
Next, it will use the jsonwebtoken::decode function to decode the token and extract the TokenClaims. The function will verify the token signature using the decoded public key and the Validation object.
After verifying the token signature, the function will extract the user ID and token UUID from the TokenClaims and create a new TokenDetails struct with those values, along with a None value for expires_in and token.
Finally, the function will return the TokenDetails struct. Add the following code to the src/token.rs file.
src/token.rs
pub fn verify_jwt_token(
    public_key: String,
    token: &str,
) -> Result<TokenDetails, jsonwebtoken::errors::Error> {
    let bytes_public_key = general_purpose::STANDARD.decode(public_key).unwrap();
    let decoded_public_key = String::from_utf8(bytes_public_key).unwrap();

    let validation = jsonwebtoken::Validation::new(jsonwebtoken::Algorithm::RS256);

    let decoded = jsonwebtoken::decode::<TokenClaims>(
        token,
        &jsonwebtoken::DecodingKey::from_rsa_pem(decoded_public_key.as_bytes())?,
        &validation,
    )?;

    let user_id = Uuid::parse_str(decoded.claims.sub.as_str()).unwrap();
    let token_uuid = Uuid::parse_str(decoded.claims.token_uuid.as_str()).unwrap();

    Ok(TokenDetails {
        token: None,
        token_uuid,
        user_id,
        expires_in: None,
    })
}
Create an Axum JWT Middleware Guard
Let’s enhance the security of our Axum web application by creating a middleware guard that checks if the incoming request has a valid JWT before allowing it to pass to the next middleware. This middleware function is crucial in ensuring that only authenticated users can access protected resources. We’ll call it the auth function.
Initially, the middleware function will attempt to retrieve the access token from the CookieJar. If it is not present, it will try to obtain it from the authorization header. If the token is absent in both locations, the client will receive a 401 error message stating “You are not logged in, please provide a token”.
Afterwards, the middleware function will use the token::verify_jwt_token function to verify the authenticity of the previously obtained access token. If the verification succeeds, the token’s UUID will be parsed into a string, and a query will be executed to check if the token metadata (referred to as a server session) still exists in Redis.
If the user still has an active session, the middleware function will check if the user record exists in the PostgreSQL database. If it does, the middleware function will store the user record in the request extension, so that subsequent middleware functions can access it.
If everything checks out, the middleware function will allow the user to proceed to the next middleware in the application, which will then handle the user’s request.
To implement this feature, we’ll create a file called jwt_auth.rs in the src directory and add the necessary code to it.
src/jwt_auth.rs
use std::sync::Arc;

use axum::{
    extract::State,
    http::{header, Request, StatusCode},
    middleware::Next,
    response::IntoResponse,
    Json, body::Body,
};

use axum_extra::extract::cookie::CookieJar;
use serde::{Deserialize, Serialize};

use crate::{model::User, token, AppState};
use redis::AsyncCommands;

#[derive(Debug, Serialize)]
pub struct ErrorResponse {
    pub status: &'static str,
    pub message: String,
}

#[derive(Debug, Serialize, Deserialize, Clone)]
pub struct JWTAuthMiddleware {
    pub user: User,
    pub access_token_uuid: uuid::Uuid,
}

pub async fn auth(
    cookie_jar: CookieJar,
    State(data): State<Arc<AppState>>,
    mut req: Request<Body>,
    next: Next,
) -> Result<impl IntoResponse, (StatusCode, Json<ErrorResponse>)> {
    let access_token = cookie_jar
        .get("access_token")
        .map(|cookie| cookie.value().to_string())
        .or_else(|| {
            req.headers()
                .get(header::AUTHORIZATION)
                .and_then(|auth_header| auth_header.to_str().ok())
                .and_then(|auth_value| {
                    if auth_value.starts_with("Bearer ") {
                        Some(auth_value[7..].to_owned())
                    } else {
                        None
                    }
                })
        });

    let access_token = access_token.ok_or_else(|| {
        let error_response = ErrorResponse {
            status: "fail",
            message: "You are not logged in, please provide token".to_string(),
        };
        (StatusCode::UNAUTHORIZED, Json(error_response))
    })?;

    let access_token_details =
        match token::verify_jwt_token(data.env.access_token_public_key.to_owned(), &access_token) {
            Ok(token_details) => token_details,
            Err(e) => {
                let error_response = ErrorResponse {
                    status: "fail",
                    message: format!("{:?}", e),
                };
                return Err((StatusCode::UNAUTHORIZED, Json(error_response)));
            }
        };

    let access_token_uuid = uuid::Uuid::parse_str(&access_token_details.token_uuid.to_string())
        .map_err(|_| {
            let error_response = ErrorResponse {
                status: "fail",
                message: "Invalid token".to_string(),
            };
            (StatusCode::UNAUTHORIZED, Json(error_response))
        })?;

    let mut redis_client = data
        .redis_client
        .get_async_connection()
        .await
        .map_err(|e| {
            let error_response = ErrorResponse {
                status: "error",
                message: format!("Redis error: {}", e),
            };
            (StatusCode::INTERNAL_SERVER_ERROR, Json(error_response))
        })?;

    let redis_token_user_id = redis_client
        .get::<_, String>(access_token_uuid.clone().to_string())
        .await
        .map_err(|_| {
            let error_response = ErrorResponse {
                status: "error",
                message: "Token is invalid or session has expired".to_string(),
            };
            (StatusCode::UNAUTHORIZED, Json(error_response))
        })?;

    let user_id_uuid = uuid::Uuid::parse_str(&redis_token_user_id).map_err(|_| {
        let error_response = ErrorResponse {
            status: "fail",
            message: "Token is invalid or session has expired".to_string(),
        };
        (StatusCode::UNAUTHORIZED, Json(error_response))
    })?;

    let user = sqlx::query_as!(User, "SELECT * FROM users WHERE id = $1", user_id_uuid)
        .fetch_optional(&data.db)
        .await
        .map_err(|e| {
            let error_response = ErrorResponse {
                status: "fail",
                message: format!("Error fetching user from database: {}", e),
            };
            (StatusCode::INTERNAL_SERVER_ERROR, Json(error_response))
        })?;

    let user = user.ok_or_else(|| {
        let error_response = ErrorResponse {
            status: "fail",
            message: "The user belonging to this token no longer exists".to_string(),
        };
        (StatusCode::UNAUTHORIZED, Json(error_response))
    })?;

    req.extensions_mut().insert(JWTAuthMiddleware {
        user,
        access_token_uuid,
    });
    Ok(next.run(req).await)
}
Implement the JWT Authentication Route Handlers
Wow, we’ve completed quite a bit of setup! Now it’s time to move on to implementing the authentication aspect of our API. This will involve creating Axum route handlers that will handle user registration, login, logout, and token refreshing.
To showcase how authentication works, we’ll also create a route handler that returns the authenticated user’s credentials. To ensure that this route handler is only accessible by users with valid JWTs, we’ll protect it with the Axum middleware guard we created earlier.
To get started, let’s create a new file called handler.rs in the ‘src’ directory. We’ll need to import some necessary crates and dependencies at the top of the file.
src/handler.rs
use std::sync::Arc;

use argon2::{password_hash::SaltString, Argon2, PasswordHash, PasswordHasher, PasswordVerifier};
use axum::{
    extract::State,
    http::{header, HeaderMap, Response, StatusCode},
    response::IntoResponse,
    Extension, Json,
};
use axum_extra::extract::{
    cookie::{Cookie, SameSite},
    CookieJar,
};
use rand_core::OsRng;
use serde_json::json;

use crate::{
    jwt_auth::JWTAuthMiddleware,
    model::{LoginUserSchema, RegisterUserSchema, User},
    response::FilteredUser,
    token::{self, TokenDetails},
    AppState,
};

use redis::AsyncCommands;
Create Utility Functions
Before we dive into the authentication aspect of our API, we need to create some utility functions that will help us avoid repeating the same code blocks in different route handlers. These functions will be of great help, and we only need to create them once. The following are the helper functions that we’ll create:
filter_user_record: This function accepts the user record returned from the PostgreSQL database and constructs a new struct using theFilteredUserstruct to remove sensitive fields such as the hashed password.generate_token: This function uses thetoken::generate_jwt_tokenfunction to sign a JWT using a private key.save_token_data_to_redis: This function saves the JWT metadata, also known as the server session, into the Redis database.
To streamline our code and avoid repetition, let’s add the following code to the src/handler.rs file.
src/handler.rs
fn filter_user_record(user: &User) -> FilteredUser {
    FilteredUser {
        id: user.id.to_string(),
        email: user.email.to_owned(),
        name: user.name.to_owned(),
        photo: user.photo.to_owned(),
        role: user.role.to_owned(),
        verified: user.verified,
        createdAt: user.created_at.unwrap(),
        updatedAt: user.updated_at.unwrap(),
    }
}

fn generate_token(
    user_id: uuid::Uuid,
    max_age: i64,
    private_key: String,
) -> Result<TokenDetails, (StatusCode, Json<serde_json::Value>)> {
    token::generate_jwt_token(user_id, max_age, private_key).map_err(|e| {
        let error_response = serde_json::json!({
            "status": "error",
            "message": format!("error generating token: {}", e),
        });
        (StatusCode::INTERNAL_SERVER_ERROR, Json(error_response))
    })
}

async fn save_token_data_to_redis(
    data: &Arc<AppState>,
    token_details: &TokenDetails,
    max_age: i64,
) -> Result<(), (StatusCode, Json<serde_json::Value>)> {
    let mut redis_client = data
        .redis_client
        .get_async_connection()
        .await
        .map_err(|e| {
            let error_response = serde_json::json!({
                "status": "error",
                "message": format!("Redis error: {}", e),
            });
            (StatusCode::INTERNAL_SERVER_ERROR, Json(error_response))
        })?;
    redis_client
        .set_ex(
            token_details.token_uuid.to_string(),
            token_details.user_id.to_string(),
            (max_age * 60) as u64,
        )
        .await
        .map_err(|e| {
            let error_response = serde_json::json!({
                "status": "error",
                "message": format_args!("{}", e),
            });
            (StatusCode::UNPROCESSABLE_ENTITY, Json(error_response))
        })?;
    Ok(())
}
With these utility functions in place, we’re ready to move on to implementing the authentication aspect of our API.
Route Handler to Register Users
Let’s begin by taking a look at the first Axum route function that registers new users. This function will be triggered when a POST request is sent to the /api/auth/register endpoint.
Once called, the function will first search the database to verify if a user with the same email already exists. If a user with that email address is found, the function will respond with a 409 Conflict error to the client.
On the other hand, if no matching user is found, the function will generate a salt and use the Argon2 algorithm to hash the plain-text password provided in the request body.
Afterwards, the function will perform an INSERT query to add the user’s information into the database, including the hashed password.
Lastly, the function will return a successful response along with the registered user’s information. To prevent sending sensitive information in the JSON response, the function will filter the record returned from the database query to exclude confidential details such as the hashed password.
To incorporate this route function, add the following code to the src/handler.rs file.
src/handler.rs
pub async fn register_user_handler(
    State(data): State<Arc<AppState>>,
    Json(body): Json<RegisterUserSchema>,
) -> Result<impl IntoResponse, (StatusCode, Json<serde_json::Value>)> {
    let user_exists: Option<bool> =
        sqlx::query_scalar("SELECT EXISTS(SELECT 1 FROM users WHERE email = $1)")
            .bind(body.email.to_owned().to_ascii_lowercase())
            .fetch_one(&data.db)
            .await
            .map_err(|e| {
                let error_response = serde_json::json!({
                    "status": "fail",
                    "message": format!("Database error: {}", e),
                });
                (StatusCode::INTERNAL_SERVER_ERROR, Json(error_response))
            })?;

    if let Some(exists) = user_exists {
        if exists {
            let error_response = serde_json::json!({
                "status": "fail",
                "message": "User with that email already exists",
            });
            return Err((StatusCode::CONFLICT, Json(error_response)));
        }
    }

    let salt = SaltString::generate(&mut OsRng);
    let hashed_password = Argon2::default()
        .hash_password(body.password.as_bytes(), &salt)
        .map_err(|e| {
            let error_response = serde_json::json!({
                "status": "fail",
                "message": format!("Error while hashing password: {}", e),
            });
            (StatusCode::INTERNAL_SERVER_ERROR, Json(error_response))
        })
        .map(|hash| hash.to_string())?;

    let user = sqlx::query_as!(
        User,
        "INSERT INTO users (name,email,password) VALUES ($1, $2, $3) RETURNING *",
        body.name.to_string(),
        body.email.to_string().to_ascii_lowercase(),
        hashed_password
    )
    .fetch_one(&data.db)
    .await
    .map_err(|e| {
        let error_response = serde_json::json!({
            "status": "fail",
            "message": format!("Database error: {}", e),
        });
        (StatusCode::INTERNAL_SERVER_ERROR, Json(error_response))
    })?;

    let user_response = serde_json::json!({"status": "success","data": serde_json::json!({
        "user": filter_user_record(&user)
    })});

    Ok(Json(user_response))
}
Route Handler to Sign In Users
In this section, we’ll dive into the implementation of a crucial feature for our API: user authentication. To achieve this, we’ll create an Axum route function that handles user login requests. Upon invocation, the function will conduct a database query to retrieve a registered user with the provided email address.
If there’s no matching user, the function will return a generic error message stating “Invalid email or password” instead of revealing that the email does not exist. This security measure prevents hackers from inspecting the database by trying different email addresses.
If a user is found, the function will use Argon2 to compare the plain-text password provided in the request body with the hashed password stored in the database. If the password is incorrect, the function will return the same generic error message.
If the password is correct, the function will generate an access token and a refresh token using the generate_token function and save the metadata of both tokens in the Redis database using the save_token_data_to_redis function.
Then, the function will create three cookies: one for the access token, one for the refresh token, and one to indicate that the user is logged in. Finally, it will add the cookies to the response headers along with a success message and a status code of 200.
Additionally, the function will only include the access token in the JSON response to provide users with the flexibility to include the token in the Authorization header as Bearer to access protected resources.
With this explanation in mind, we can now add the following code to the src/handler.rs file to implement the login logic.
src/handler.rs
pub async fn login_user_handler(
    State(data): State<Arc<AppState>>,
    Json(body): Json<LoginUserSchema>,
) -> Result<impl IntoResponse, (StatusCode, Json<serde_json::Value>)> {
    let user = sqlx::query_as!(
        User,
        "SELECT * FROM users WHERE email = $1",
        body.email.to_ascii_lowercase()
    )
    .fetch_optional(&data.db)
    .await
    .map_err(|e| {
        let error_response = serde_json::json!({
            "status": "error",
            "message": format!("Database error: {}", e),
        });
        (StatusCode::INTERNAL_SERVER_ERROR, Json(error_response))
    })?
    .ok_or_else(|| {
        let error_response = serde_json::json!({
            "status": "fail",
            "message": "Invalid email or password",
        });
        (StatusCode::BAD_REQUEST, Json(error_response))
    })?;

    let is_valid = match PasswordHash::new(&user.password) {
        Ok(parsed_hash) => Argon2::default()
            .verify_password(body.password.as_bytes(), &parsed_hash)
            .map_or(false, |_| true),
        Err(_) => false,
    };

    if !is_valid {
        let error_response = serde_json::json!({
            "status": "fail",
            "message": "Invalid email or password"
        });
        return Err((StatusCode::BAD_REQUEST, Json(error_response)));
    }

    let access_token_details = generate_token(
        user.id,
        data.env.access_token_max_age,
        data.env.access_token_private_key.to_owned(),
    )?;
    let refresh_token_details = generate_token(
        user.id,
        data.env.refresh_token_max_age,
        data.env.refresh_token_private_key.to_owned(),
    )?;

    save_token_data_to_redis(&data, &access_token_details, data.env.access_token_max_age).await?;
    save_token_data_to_redis(
        &data,
        &refresh_token_details,
        data.env.refresh_token_max_age,
    )
    .await?;

    let access_cookie = Cookie::build(
        ("access_token",
        access_token_details.token.clone().unwrap_or_default()),
    )
    .path("/")
    .max_age(time::Duration::minutes(data.env.access_token_max_age * 60))
    .same_site(SameSite::Lax)
    .http_only(true);

    let refresh_cookie = Cookie::build(
        ("refresh_token",
        refresh_token_details.token.unwrap_or_default()),
    )
    .path("/")
    .max_age(time::Duration::minutes(data.env.refresh_token_max_age * 60))
    .same_site(SameSite::Lax)
    .http_only(true);

    let logged_in_cookie = Cookie::build(("logged_in", "true"))
        .path("/")
        .max_age(time::Duration::minutes(data.env.access_token_max_age * 60))
        .same_site(SameSite::Lax)
        .http_only(false);

    let mut response = Response::new(
        json!({"status": "success", "access_token": access_token_details.token.unwrap()})
            .to_string(),
    );
    let mut headers = HeaderMap::new();
    headers.append(
        header::SET_COOKIE,
        access_cookie.to_string().parse().unwrap(),
    );
    headers.append(
        header::SET_COOKIE,
        refresh_cookie.to_string().parse().unwrap(),
    );
    headers.append(
        header::SET_COOKIE,
        logged_in_cookie.to_string().parse().unwrap(),
    );

    response.headers_mut().extend(headers);
    Ok(response)
}
Route Handler to Refresh the JWTs
It is now time to implement a route function that refreshes the access token automatically once it expires. When this function is called, it will first retrieve the refresh token from the cookie jar and authenticate it using the token::verify_jwt_token() utility function.
The function will then check the Redis database to confirm if the user has an active session. In this context, an active session refers to the metadata of the token that was saved in the Redis database during the login process.
If the user has an active session, the function will query the PostgreSQL database to confirm if the user associated with the token still exists.
If there are no errors, the function will call the generate_token() function to create a new access token. Next, the function will save the metadata of the new token in the Redis database using the save_token_data_to_redis() function.
Afterwards, the function will generate two cookies: one for the access token and another to indicate that the user is logged in. Finally, the function will append the cookies to the request headers and return a copy of the access token in the JSON response.
To create the token refresh route function, simply add the code below to the src/handler.rs file.
src/handler.rs
pub async fn refresh_access_token_handler(
    cookie_jar: CookieJar,
    State(data): State<Arc<AppState>>,
) -> Result<impl IntoResponse, (StatusCode, Json<serde_json::Value>)> {
    let message = "could not refresh access token";

    let refresh_token = cookie_jar
        .get("refresh_token")
        .map(|cookie| cookie.value().to_string())
        .ok_or_else(|| {
            let error_response = serde_json::json!({
                "status": "fail",
                "message": message
            });
            (StatusCode::FORBIDDEN, Json(error_response))
        })?;

    let refresh_token_details =
        match token::verify_jwt_token(data.env.refresh_token_public_key.to_owned(), &refresh_token)
        {
            Ok(token_details) => token_details,
            Err(e) => {
                let error_response = serde_json::json!({
                    "status": "fail",
                    "message": format_args!("{:?}", e)
                });
                return Err((StatusCode::UNAUTHORIZED, Json(error_response)));
            }
        };

    let mut redis_client = data
        .redis_client
        .get_async_connection()
        .await
        .map_err(|e| {
            let error_response = serde_json::json!({
                "status": "error",
                "message": format!("Redis error: {}", e),
            });
            (StatusCode::INTERNAL_SERVER_ERROR, Json(error_response))
        })?;

    let redis_token_user_id = redis_client
        .get::<_, String>(refresh_token_details.token_uuid.to_string())
        .await
        .map_err(|_| {
            let error_response = serde_json::json!({
                "status": "error",
                "message": "Token is invalid or session has expired",
            });
            (StatusCode::UNAUTHORIZED, Json(error_response))
        })?;

    let user_id_uuid = uuid::Uuid::parse_str(&redis_token_user_id).map_err(|_| {
        let error_response = serde_json::json!({
            "status": "error",
            "message": "Token is invalid or session has expired",
        });
        (StatusCode::UNAUTHORIZED, Json(error_response))
    })?;

    let user = sqlx::query_as!(User, "SELECT * FROM users WHERE id = $1", user_id_uuid)
        .fetch_optional(&data.db)
        .await
        .map_err(|e| {
            let error_response = serde_json::json!({
                "status": "fail",
                "message": format!("Error fetching user from database: {}", e),
            });
            (StatusCode::INTERNAL_SERVER_ERROR, Json(error_response))
        })?;

    let user = user.ok_or_else(|| {
        let error_response = serde_json::json!({
            "status": "fail",
            "message": "The user belonging to this token no longer exists".to_string(),
        });
        (StatusCode::UNAUTHORIZED, Json(error_response))
    })?;

    let access_token_details = generate_token(
        user.id,
        data.env.access_token_max_age,
        data.env.access_token_private_key.to_owned(),
    )?;

    save_token_data_to_redis(&data, &access_token_details, data.env.access_token_max_age).await?;

    let access_cookie = Cookie::build(
        ("access_token",
        access_token_details.token.clone().unwrap_or_default()),
    )
    .path("/")
    .max_age(time::Duration::minutes(data.env.access_token_max_age * 60))
    .same_site(SameSite::Lax)
    .http_only(true);

    let logged_in_cookie = Cookie::build(("logged_in", "true"))
        .path("/")
        .max_age(time::Duration::minutes(data.env.access_token_max_age * 60))
        .same_site(SameSite::Lax)
        .http_only(false);

    let mut response = Response::new(
        json!({"status": "success", "access_token": access_token_details.token.unwrap()})
            .to_string(),
    );
    let mut headers = HeaderMap::new();
    headers.append(
        header::SET_COOKIE,
        access_cookie.to_string().parse().unwrap(),
    );
    headers.append(
        header::SET_COOKIE,
        logged_in_cookie.to_string().parse().unwrap(),
    );

    response.headers_mut().extend(headers);
    Ok(response)
}
Route Handler to Logout Users
Let’s create an Axum route function to allow users to sign out of the API. Upon receiving a request, the function will first check if there’s a refresh token stored in the cookie jar. If not, it will return a response indicating that the user is unauthorized to perform the logout operation.
If a refresh token is found, the function will use the verify_jwt_token() utility function to ensure its authenticity. If the token is valid, the function will connect to the Redis database and remove the metadata of both the refresh token and the access token, effectively logging the user out of the server.
Next, the function will create three new cookies with empty values, which will replace the old cookies that were used to store the refresh token, access token, and the user’s logged-in status. These new cookies will be set to expire immediately, effectively deleting the old ones.
Finally, the function will return a success response to the user, with the new cookies included in the headers.
To implement this functionality, add the provided code to the src/handler.rs file.
src/handler.rs
pub async fn logout_handler(
    cookie_jar: CookieJar,
    Extension(auth_guard): Extension<JWTAuthMiddleware>,
    State(data): State<Arc<AppState>>,
) -> Result<impl IntoResponse, (StatusCode, Json<serde_json::Value>)> {
    let message = "Token is invalid or session has expired";

    let refresh_token = cookie_jar
        .get("refresh_token")
        .map(|cookie| cookie.value().to_string())
        .ok_or_else(|| {
            let error_response = serde_json::json!({
                "status": "fail",
                "message": message
            });
            (StatusCode::FORBIDDEN, Json(error_response))
        })?;

    let refresh_token_details =
        match token::verify_jwt_token(data.env.refresh_token_public_key.to_owned(), &refresh_token)
        {
            Ok(token_details) => token_details,
            Err(e) => {
                let error_response = serde_json::json!({
                    "status": "fail",
                    "message": format_args!("{:?}", e)
                });
                return Err((StatusCode::UNAUTHORIZED, Json(error_response)));
            }
        };

    let mut redis_client = data
        .redis_client
        .get_async_connection()
        .await
        .map_err(|e| {
            let error_response = serde_json::json!({
                "status": "error",
                "message": format!("Redis error: {}", e),
            });
            (StatusCode::INTERNAL_SERVER_ERROR, Json(error_response))
        })?;

    redis_client
        .del(&[
            refresh_token_details.token_uuid.to_string(),
            auth_guard.access_token_uuid.to_string(),
        ])
        .await
        .map_err(|e| {
            let error_response = serde_json::json!({
                "status": "error",
                "message": format_args!("{:?}", e)
            });
            (StatusCode::INTERNAL_SERVER_ERROR, Json(error_response))
        })?;

    let access_cookie = Cookie::build(("access_token", ""))
        .path("/")
        .max_age(time::Duration::minutes(-1))
        .same_site(SameSite::Lax)
        .http_only(true);
    let refresh_cookie = Cookie::build(("refresh_token", ""))
        .path("/")
        .max_age(time::Duration::minutes(-1))
        .same_site(SameSite::Lax)
        .http_only(true);

    let logged_in_cookie = Cookie::build(("logged_in", "true"))
        .path("/")
        .max_age(time::Duration::minutes(-1))
        .same_site(SameSite::Lax)
        .http_only(false);

    let mut headers = HeaderMap::new();
    headers.append(
        header::SET_COOKIE,
        access_cookie.to_string().parse().unwrap(),
    );
    headers.append(
        header::SET_COOKIE,
        refresh_cookie.to_string().parse().unwrap(),
    );
    headers.append(
        header::SET_COOKIE,
        logged_in_cookie.to_string().parse().unwrap(),
    );

    let mut response = Response::new(json!({"status": "success"}).to_string());
    response.headers_mut().extend(headers);
    Ok(response)
}
Route Handler to Fetch the Authenticated User
Let’s create a route function that enables users to fetch their account information, with an additional layer of security. The function will only be accessible to users with valid access tokens, thanks to the JWT middleware guard we created earlier.
Once invoked, the function will retrieve the user’s record from the request extension, which was previously added by the JWT middleware guard. Next, the function will filter out any sensitive fields from the user object, using the filter_user_record() function.
Finally, the filtered user data will be returned in a JSON response with a success status code.
src/handler.rs
pub async fn get_me_handler(
    Extension(jwtauth): Extension<JWTAuthMiddleware>,
) -> Result<impl IntoResponse, (StatusCode, Json<serde_json::Value>)> {
    let json_response = serde_json::json!({
        "status":  "success",
        "data": serde_json::json!({
            "user": filter_user_record(&jwtauth.user)
        })
    });

    Ok(Json(json_response))
}
The Complete Code of the Route Handlers
src/handler.rs
use std::sync::Arc;

use argon2::{password_hash::SaltString, Argon2, PasswordHash, PasswordHasher, PasswordVerifier};
use axum::{
    extract::State,
    http::{header, HeaderMap, Response, StatusCode},
    response::IntoResponse,
    Extension, Json,
};
use axum_extra::extract::{
    cookie::{Cookie, SameSite},
    CookieJar,
};
use rand_core::OsRng;
use serde_json::json;

use crate::{
    jwt_auth::JWTAuthMiddleware,
    model::{LoginUserSchema, RegisterUserSchema, User},
    response::FilteredUser,
    token::{self, TokenDetails},
    AppState,
};

use redis::AsyncCommands;

pub async fn health_checker_handler() -> impl IntoResponse {
    const MESSAGE: &str = "Rust and Axum Framework: JWT Access and Refresh Tokens";

    let json_response = serde_json::json!({
        "status": "success",
        "message": MESSAGE
    });

    Json(json_response)
}

pub async fn register_user_handler(
    State(data): State<Arc<AppState>>,
    Json(body): Json<RegisterUserSchema>,
) -> Result<impl IntoResponse, (StatusCode, Json<serde_json::Value>)> {
    let user_exists: Option<bool> =
        sqlx::query_scalar("SELECT EXISTS(SELECT 1 FROM users WHERE email = $1)")
            .bind(body.email.to_owned().to_ascii_lowercase())
            .fetch_one(&data.db)
            .await
            .map_err(|e| {
                let error_response = serde_json::json!({
                    "status": "fail",
                    "message": format!("Database error: {}", e),
                });
                (StatusCode::INTERNAL_SERVER_ERROR, Json(error_response))
            })?;

    if let Some(exists) = user_exists {
        if exists {
            let error_response = serde_json::json!({
                "status": "fail",
                "message": "User with that email already exists",
            });
            return Err((StatusCode::CONFLICT, Json(error_response)));
        }
    }

    let salt = SaltString::generate(&mut OsRng);
    let hashed_password = Argon2::default()
        .hash_password(body.password.as_bytes(), &salt)
        .map_err(|e| {
            let error_response = serde_json::json!({
                "status": "fail",
                "message": format!("Error while hashing password: {}", e),
            });
            (StatusCode::INTERNAL_SERVER_ERROR, Json(error_response))
        })
        .map(|hash| hash.to_string())?;

    let user = sqlx::query_as!(
        User,
        "INSERT INTO users (name,email,password) VALUES ($1, $2, $3) RETURNING *",
        body.name.to_string(),
        body.email.to_string().to_ascii_lowercase(),
        hashed_password
    )
    .fetch_one(&data.db)
    .await
    .map_err(|e| {
        let error_response = serde_json::json!({
            "status": "fail",
            "message": format!("Database error: {}", e),
        });
        (StatusCode::INTERNAL_SERVER_ERROR, Json(error_response))
    })?;

    let user_response = serde_json::json!({"status": "success","data": serde_json::json!({
        "user": filter_user_record(&user)
    })});

    Ok(Json(user_response))
}

pub async fn login_user_handler(
    State(data): State<Arc<AppState>>,
    Json(body): Json<LoginUserSchema>,
) -> Result<impl IntoResponse, (StatusCode, Json<serde_json::Value>)> {
    let user = sqlx::query_as!(
        User,
        "SELECT * FROM users WHERE email = $1",
        body.email.to_ascii_lowercase()
    )
    .fetch_optional(&data.db)
    .await
    .map_err(|e| {
        let error_response = serde_json::json!({
            "status": "error",
            "message": format!("Database error: {}", e),
        });
        (StatusCode::INTERNAL_SERVER_ERROR, Json(error_response))
    })?
    .ok_or_else(|| {
        let error_response = serde_json::json!({
            "status": "fail",
            "message": "Invalid email or password",
        });
        (StatusCode::BAD_REQUEST, Json(error_response))
    })?;

    let is_valid = match PasswordHash::new(&user.password) {
        Ok(parsed_hash) => Argon2::default()
            .verify_password(body.password.as_bytes(), &parsed_hash)
            .map_or(false, |_| true),
        Err(_) => false,
    };

    if !is_valid {
        let error_response = serde_json::json!({
            "status": "fail",
            "message": "Invalid email or password"
        });
        return Err((StatusCode::BAD_REQUEST, Json(error_response)));
    }

    let access_token_details = generate_token(
        user.id,
        data.env.access_token_max_age,
        data.env.access_token_private_key.to_owned(),
    )?;
    let refresh_token_details = generate_token(
        user.id,
        data.env.refresh_token_max_age,
        data.env.refresh_token_private_key.to_owned(),
    )?;

    save_token_data_to_redis(&data, &access_token_details, data.env.access_token_max_age).await?;
    save_token_data_to_redis(
        &data,
        &refresh_token_details,
        data.env.refresh_token_max_age,
    )
    .await?;

    let access_cookie = Cookie::build(
        ("access_token",
        access_token_details.token.clone().unwrap_or_default()),
    )
    .path("/")
    .max_age(time::Duration::minutes(data.env.access_token_max_age * 60))
    .same_site(SameSite::Lax)
    .http_only(true);

    let refresh_cookie = Cookie::build(
        ("refresh_token",
        refresh_token_details.token.unwrap_or_default()),
    )
    .path("/")
    .max_age(time::Duration::minutes(data.env.refresh_token_max_age * 60))
    .same_site(SameSite::Lax)
    .http_only(true);

    let logged_in_cookie = Cookie::build(("logged_in", "true"))
        .path("/")
        .max_age(time::Duration::minutes(data.env.access_token_max_age * 60))
        .same_site(SameSite::Lax)
        .http_only(false);

    let mut response = Response::new(
        json!({"status": "success", "access_token": access_token_details.token.unwrap()})
            .to_string(),
    );
    let mut headers = HeaderMap::new();
    headers.append(
        header::SET_COOKIE,
        access_cookie.to_string().parse().unwrap(),
    );
    headers.append(
        header::SET_COOKIE,
        refresh_cookie.to_string().parse().unwrap(),
    );
    headers.append(
        header::SET_COOKIE,
        logged_in_cookie.to_string().parse().unwrap(),
    );

    response.headers_mut().extend(headers);
    Ok(response)
}

pub async fn refresh_access_token_handler(
    cookie_jar: CookieJar,
    State(data): State<Arc<AppState>>,
) -> Result<impl IntoResponse, (StatusCode, Json<serde_json::Value>)> {
    let message = "could not refresh access token";

    let refresh_token = cookie_jar
        .get("refresh_token")
        .map(|cookie| cookie.value().to_string())
        .ok_or_else(|| {
            let error_response = serde_json::json!({
                "status": "fail",
                "message": message
            });
            (StatusCode::FORBIDDEN, Json(error_response))
        })?;

    let refresh_token_details =
        match token::verify_jwt_token(data.env.refresh_token_public_key.to_owned(), &refresh_token)
        {
            Ok(token_details) => token_details,
            Err(e) => {
                let error_response = serde_json::json!({
                    "status": "fail",
                    "message": format_args!("{:?}", e)
                });
                return Err((StatusCode::UNAUTHORIZED, Json(error_response)));
            }
        };

    let mut redis_client = data
        .redis_client
        .get_async_connection()
        .await
        .map_err(|e| {
            let error_response = serde_json::json!({
                "status": "error",
                "message": format!("Redis error: {}", e),
            });
            (StatusCode::INTERNAL_SERVER_ERROR, Json(error_response))
        })?;

    let redis_token_user_id = redis_client
        .get::<_, String>(refresh_token_details.token_uuid.to_string())
        .await
        .map_err(|_| {
            let error_response = serde_json::json!({
                "status": "error",
                "message": "Token is invalid or session has expired",
            });
            (StatusCode::UNAUTHORIZED, Json(error_response))
        })?;

    let user_id_uuid = uuid::Uuid::parse_str(&redis_token_user_id).map_err(|_| {
        let error_response = serde_json::json!({
            "status": "error",
            "message": "Token is invalid or session has expired",
        });
        (StatusCode::UNAUTHORIZED, Json(error_response))
    })?;

    let user = sqlx::query_as!(User, "SELECT * FROM users WHERE id = $1", user_id_uuid)
        .fetch_optional(&data.db)
        .await
        .map_err(|e| {
            let error_response = serde_json::json!({
                "status": "fail",
                "message": format!("Error fetching user from database: {}", e),
            });
            (StatusCode::INTERNAL_SERVER_ERROR, Json(error_response))
        })?;

    let user = user.ok_or_else(|| {
        let error_response = serde_json::json!({
            "status": "fail",
            "message": "The user belonging to this token no longer exists".to_string(),
        });
        (StatusCode::UNAUTHORIZED, Json(error_response))
    })?;

    let access_token_details = generate_token(
        user.id,
        data.env.access_token_max_age,
        data.env.access_token_private_key.to_owned(),
    )?;

    save_token_data_to_redis(&data, &access_token_details, data.env.access_token_max_age).await?;

    let access_cookie = Cookie::build(
        ("access_token",
        access_token_details.token.clone().unwrap_or_default()),
    )
    .path("/")
    .max_age(time::Duration::minutes(data.env.access_token_max_age * 60))
    .same_site(SameSite::Lax)
    .http_only(true);

    let logged_in_cookie = Cookie::build(("logged_in", "true"))
        .path("/")
        .max_age(time::Duration::minutes(data.env.access_token_max_age * 60))
        .same_site(SameSite::Lax)
        .http_only(false);

    let mut response = Response::new(
        json!({"status": "success", "access_token": access_token_details.token.unwrap()})
            .to_string(),
    );
    let mut headers = HeaderMap::new();
    headers.append(
        header::SET_COOKIE,
        access_cookie.to_string().parse().unwrap(),
    );
    headers.append(
        header::SET_COOKIE,
        logged_in_cookie.to_string().parse().unwrap(),
    );

    response.headers_mut().extend(headers);
    Ok(response)
}

pub async fn logout_handler(
    cookie_jar: CookieJar,
    Extension(auth_guard): Extension<JWTAuthMiddleware>,
    State(data): State<Arc<AppState>>,
) -> Result<impl IntoResponse, (StatusCode, Json<serde_json::Value>)> {
    let message = "Token is invalid or session has expired";

    let refresh_token = cookie_jar
        .get("refresh_token")
        .map(|cookie| cookie.value().to_string())
        .ok_or_else(|| {
            let error_response = serde_json::json!({
                "status": "fail",
                "message": message
            });
            (StatusCode::FORBIDDEN, Json(error_response))
        })?;

    let refresh_token_details =
        match token::verify_jwt_token(data.env.refresh_token_public_key.to_owned(), &refresh_token)
        {
            Ok(token_details) => token_details,
            Err(e) => {
                let error_response = serde_json::json!({
                    "status": "fail",
                    "message": format_args!("{:?}", e)
                });
                return Err((StatusCode::UNAUTHORIZED, Json(error_response)));
            }
        };

    let mut redis_client = data
        .redis_client
        .get_async_connection()
        .await
        .map_err(|e| {
            let error_response = serde_json::json!({
                "status": "error",
                "message": format!("Redis error: {}", e),
            });
            (StatusCode::INTERNAL_SERVER_ERROR, Json(error_response))
        })?;

    redis_client
        .del(&[
            refresh_token_details.token_uuid.to_string(),
            auth_guard.access_token_uuid.to_string(),
        ])
        .await
        .map_err(|e| {
            let error_response = serde_json::json!({
                "status": "error",
                "message": format_args!("{:?}", e)
            });
            (StatusCode::INTERNAL_SERVER_ERROR, Json(error_response))
        })?;

    let access_cookie = Cookie::build(("access_token", ""))
        .path("/")
        .max_age(time::Duration::minutes(-1))
        .same_site(SameSite::Lax)
        .http_only(true);
    let refresh_cookie = Cookie::build(("refresh_token", ""))
        .path("/")
        .max_age(time::Duration::minutes(-1))
        .same_site(SameSite::Lax)
        .http_only(true);

    let logged_in_cookie = Cookie::build(("logged_in", "true"))
        .path("/")
        .max_age(time::Duration::minutes(-1))
        .same_site(SameSite::Lax)
        .http_only(false);

    let mut headers = HeaderMap::new();
    headers.append(
        header::SET_COOKIE,
        access_cookie.to_string().parse().unwrap(),
    );
    headers.append(
        header::SET_COOKIE,
        refresh_cookie.to_string().parse().unwrap(),
    );
    headers.append(
        header::SET_COOKIE,
        logged_in_cookie.to_string().parse().unwrap(),
    );

    let mut response = Response::new(json!({"status": "success"}).to_string());
    response.headers_mut().extend(headers);
    Ok(response)
}

pub async fn get_me_handler(
    Extension(jwtauth): Extension<JWTAuthMiddleware>,
) -> Result<impl IntoResponse, (StatusCode, Json<serde_json::Value>)> {
    let json_response = serde_json::json!({
        "status":  "success",
        "data": serde_json::json!({
            "user": filter_user_record(&jwtauth.user)
        })
    });

    Ok(Json(json_response))
}

fn filter_user_record(user: &User) -> FilteredUser {
    FilteredUser {
        id: user.id.to_string(),
        email: user.email.to_owned(),
        name: user.name.to_owned(),
        photo: user.photo.to_owned(),
        role: user.role.to_owned(),
        verified: user.verified,
        createdAt: user.created_at.unwrap(),
        updatedAt: user.updated_at.unwrap(),
    }
}

fn generate_token(
    user_id: uuid::Uuid,
    max_age: i64,
    private_key: String,
) -> Result<TokenDetails, (StatusCode, Json<serde_json::Value>)> {
    token::generate_jwt_token(user_id, max_age, private_key).map_err(|e| {
        let error_response = serde_json::json!({
            "status": "error",
            "message": format!("error generating token: {}", e),
        });
        (StatusCode::INTERNAL_SERVER_ERROR, Json(error_response))
    })
}

async fn save_token_data_to_redis(
    data: &Arc<AppState>,
    token_details: &TokenDetails,
    max_age: i64,
) -> Result<(), (StatusCode, Json<serde_json::Value>)> {
    let mut redis_client = data
        .redis_client
        .get_async_connection()
        .await
        .map_err(|e| {
            let error_response = serde_json::json!({
                "status": "error",
                "message": format!("Redis error: {}", e),
            });
            (StatusCode::INTERNAL_SERVER_ERROR, Json(error_response))
        })?;
    redis_client
        .set_ex(
            token_details.token_uuid.to_string(),
            token_details.user_id.to_string(),
            (max_age * 60) as u64,
        )
        .await
        .map_err(|e| {
            let error_response = serde_json::json!({
                "status": "error",
                "message": format_args!("{}", e),
            });
            (StatusCode::UNPROCESSABLE_ENTITY, Json(error_response))
        })?;
    Ok(())
}
Create Axum Routes for the Handler Functions
Creating the Axum route handler functions is only part of the authentication implementation. We also need to define routes that will invoke them, while ensuring that sensitive endpoints are protected by the JWT middleware guard.
To achieve this, let’s create a new file called route.rs in the src directory and add the following code to it.
src/route.rs
use std::sync::Arc;

use axum::{
    middleware,
    routing::{get, post},
    Router,
};

use crate::{
    handler::{
        get_me_handler, health_checker_handler, login_user_handler, logout_handler,
        refresh_access_token_handler, register_user_handler,
    },
    jwt_auth::auth,
    AppState,
};

pub fn create_router(app_state: Arc<AppState>) -> Router {
    Router::new()
        .route("/api/healthchecker", get(health_checker_handler))
        .route("/api/auth/register", post(register_user_handler))
        .route("/api/auth/login", post(login_user_handler))
        .route("/api/auth/refresh", get(refresh_access_token_handler))
        .route(
            "/api/auth/logout",
            get(logout_handler)
                .route_layer(middleware::from_fn_with_state(app_state.clone(), auth)),
        )
        .route(
            "/api/users/me",
            get(get_me_handler)
                .route_layer(middleware::from_fn_with_state(app_state.clone(), auth)),
        )
        .with_state(app_state)
}
Register the Axum Router and Set up CORS
To complete the authentication implementation, we need to incorporate the code we’ve written so far into the main file of our application. We’ll achieve this by importing the modules we’ve created and calling the create_router() function we defined earlier to register all the routes.
Additionally, we’ll set up CORS to allow cross-origin requests from a specific origin, which in our case is the URL of the frontend application.
To make these changes, simply replace the contents of the src/main.rs file with the following code.
src/main.rs
mod config;
mod handler;
mod jwt_auth;
mod model;
mod response;
mod route;
mod token;

use config::Config;
use std::sync::Arc;

use axum::http::{
    header::{ACCEPT, AUTHORIZATION, CONTENT_TYPE},
    HeaderValue, Method,
};
use dotenv::dotenv;
use redis::Client;
use route::create_router;
use sqlx::{postgres::PgPoolOptions, Pool, Postgres};
use tower_http::cors::CorsLayer;

pub struct AppState {
    db: Pool<Postgres>,
    env: Config,
    redis_client: Client,
}

#[tokio::main]
async fn main() {
    dotenv().ok();

    let config = Config::init();

    let pool = match PgPoolOptions::new()
        .max_connections(10)
        .connect(&config.database_url)
        .await
    {
        Ok(pool) => {
            println!("✅Connection to the database is successful!");
            pool
        }
        Err(err) => {
            println!("🔥 Failed to connect to the database: {:?}", err);
            std::process::exit(1);
        }
    };

    let redis_client = match Client::open(config.redis_url.to_owned()) {
        Ok(client) => {
            println!("✅Connection to the redis is successful!");
            client
        }
        Err(e) => {
            println!("🔥 Error connecting to Redis: {}", e);
            std::process::exit(1);
        }
    };

    let cors = CorsLayer::new()
        .allow_origin("http://localhost:3000".parse::<HeaderValue>().unwrap())
        .allow_methods([Method::GET, Method::POST, Method::PATCH, Method::DELETE])
        .allow_credentials(true)
        .allow_headers([AUTHORIZATION, ACCEPT, CONTENT_TYPE]);

    let app = create_router(Arc::new(AppState {
        db: pool.clone(),
        env: config.clone(),
        redis_client: redis_client.clone(),
    }))
    .layer(cors);

    println!("🚀 Server started successfully");
    let listener = tokio::net::TcpListener::bind("0.0.0.0:8000").await.unwrap();
    axum::serve(listener, app).await.unwrap()
}
Congratulations! You’re now ready to test the authentication flow by making API requests to the server. To make things easier for you, I’ve included a file called Rust_JWT_RS256.postman_collection.json in the project’s source code. This file contains predefined requests that you can use to test the API without having to type URLs, select HTTP methods, or enter request bodies.
To access these predefined requests, all you have to do is clone or download the repository from https://github.com/wpcodevo/rust-axum-jwt-rs256 and import the file into your API testing software, whether it’s Postman or the Thunder Client VS Code extension.
Alternatively, if you prefer a more interactive approach, you can follow the instructions in the “Run the Axum API with a Frontend App” section to run a frontend app built with the Yew.rs framework that supports RS256 algorithm JWT authentication.
Conclusion
In this article, we covered the process of implementing JWT authentication in Rust using private and public keys. We even went a step further to integrate Redis for storing JWT metadata to serve as a server session, allowing easy revocation of JWTs when necessary, such as in the event of a security breach.
While there are still additional features that can be added to the API to enhance its functionality, such as implementing role-based access control, I’ll leave it up to you as a challenge to take on. For example, you could create a middleware that restricts users to specific roles, such as allowing only admins to view all users while regular users can only access their own account information.
I hope you found this article informative and enjoyable. If you have any feedback or questions, please don’t hesitate to leave a comment.
In the routes with middleware (logout and user profile), somehow my router won’t accept my func as a handler because the existence of `Extension(auth_guard)` parameter in the handler func. But if I remove that parameter, the routes would accept it as a handler.
Do you know why this could happen?
The error:
the trait bound `fn(Extension) -> impl std::future::Future<Output = Result<impl IntoResponse, (StatusCode, axum::Json)>> {user_profile_handler}: Handler` is not satisfied
the following other types implement trait `Handler`:
Thanks for your comment! Based on my experience with Axum, I’ve noticed that the order of the arguments to the route function matters.
If you have multiple arguments in your
user_profile_handlerfunction, try moving theExtension(auth_guard)parameter to the first or second position to see if that resolves the issue.Let me know if this helps!
Thank you, I’m just starting to learn about Axum and find this very helpful. I hope you can create a CRUD API using Redis as a cache and PostgreSQL as the database
Thanks for the suggestion!
wow ! can you make add simple api use redis make cache ?
Certainly, I’ll make sure to include that topic in my upcoming content. Thanks for the suggestion!
i got this error when trying to login : error generating token: InvalidKeyFormat
for anyone looking for solutions – make sure your key pairs include the leading and trailing autogenerated comments before you apply base64
Hey, I’m just curious – since the refresh token expires after 60 mins, must the user login again (re-enter their credentials)? Shouldn’t we get a new refresh token on every refresh? Or should we extend the expiration date of a refresh token to say 30 days? Thanks.
No, you need to handle the token refresh logic on the frontend.
For example, if you are using Axios, you can use the Axios interceptor to intercept the request and check if the access token has expired. If it has expired, you make a request to the Rust backend to request a new access token before proceeding with the original request.
This way, the token will be refreshed in the background without the user knowing. So, they won’t need to log in every time the access token expires.
That makes sense, although I mean if you inspect Redis the refresh token ttl is 3600 seconds. If you make a request to /api/auth/refresh you only update the access token. Eventually the refresh token expires and is removed from Redis which results in an error when you request a refresh – Error(ExpiredSignature). So the only way to get a new refresh token is to login again? Every 60 minutes seems a little much.
Okay, I now understand the full picture. What you need to do is set the duration of the Redis TTL for the refresh token higher than the expiration of the refresh token. The Redis TTL is the period within which the user can refresh their token.
For example, if you want a user to remain signed into your app for 6 months, set the Redis TTL for the refresh token to the equivalent of 6 months in seconds, and for the refresh token itself, you can set it to maybe 3 days. This means that after every 3 days, your frontend needs to request a new access token, which the backend will provide while simultaneously generating a new refresh token that the frontend can use to request another access token.
Basically, Redis is serving as the session of the user, enabling you to revoke tokens if a user violates certain rules of your app. If the Redis cache of the refresh token is deleted, the user won’t be able to request new access tokens.
I hope I answered your question. Feel free to ask if my answer isn’t clear enough.
refresh_token_expires_in isn’t used anywhere.
… other then that great tutorial, thanks, I found it very useful and high quality.
I’m glad you found the article useful.
When do refresh token, why do not delete previous access token in database? I think it will keep increase if not delete. Any comments?
In the project, we stored the access and refresh tokens in Redis and set expiration times for each.
This ensures they are automatically deleted when they expire.