

In this article, we will delve into the implementation of JWT authentication in Rust, covering all crucial steps from generating and verifying JWT tokens with the HS256 algorithm, to registering users, signing them in, logging them out, and safeguarding private routes. We’ll build the API using the Actix-Web framework and persist data in a PostgreSQL database.
What is JWT? JSON Web Token, also commonly referred to as JWT, is an open standard that defines a compact and self-contained way of transmitting information securely between parties as a JSON object.
A JWT can securely hold claims, such as user identity, permissions, and session data, that are signed by the issuing party. The recipient of the JWT can verify its authenticity and extract the claims for use.
What is Actix-Web? Actix-web is a Rust web framework for building scalable and blazingly-fast web applications. It is built on top of the Actix framework, which is a Rust actors platform that offers a straightforward and efficient solution for managing concurrency.
Actix-web comes loaded with an array of features essential for web development, including routing, middleware, JSON serialization, Asynchronous I/O, WebSockets, and more.
More practice:
- Build a Simple API in Rust
- Build a Simple API with Rust and Rocket
- Build a CRUD API with Rust and MongoDB
- Build a Simple API with Rust and Actix Web
- Golang, GORM, & Fiber: JWT Authentication
- Golang & MongoDB: JWT Authentication and Authorization

Prerequisites
While this tutorial is intended to cater to both novice and seasoned Rust developers, it’s recommended to have the following prerequisites in place for an optimal learning experience.
- For the purposes of this tutorial, you’ll need to have Docker installed on your machine. This is necessary for running both PostgreSQL and pgAdmin.
- A basic understanding of Rust and its related technologies.
- Prior experience in any Rust web framework will be beneficial.
Run the Actix-Web JWT Project Locally
- Download or clone the Rust Actix-Web JWT authentication project from https://github.com/wpcodevo/rust-jwt-hs256 and open the source code in your preferred code editor.
- Launch the PostgreSQL server in the Docker container by executing the command
docker-compose up -din the terminal of the root directory. - To install the SQLX CLI tool, run
cargo install sqlx-cli. Then, use the commandsqlx migrate runto apply the “up” migration script to the PostgreSQL database. - Run
cargo r -rto install the necessary crates and launch the Actix Web HTTP server. - To test the Actix-Web JWT authentication flow, import the file
Rust HS256 JWT.postman_collection.jsoninto Postman or the Thunder Client extension in Visual Studio Code and send HTTP requests to the API endpoints.
Setup the Rust Project
Upon completing this guide, your folder and file arrangement should resemble the screenshot below.
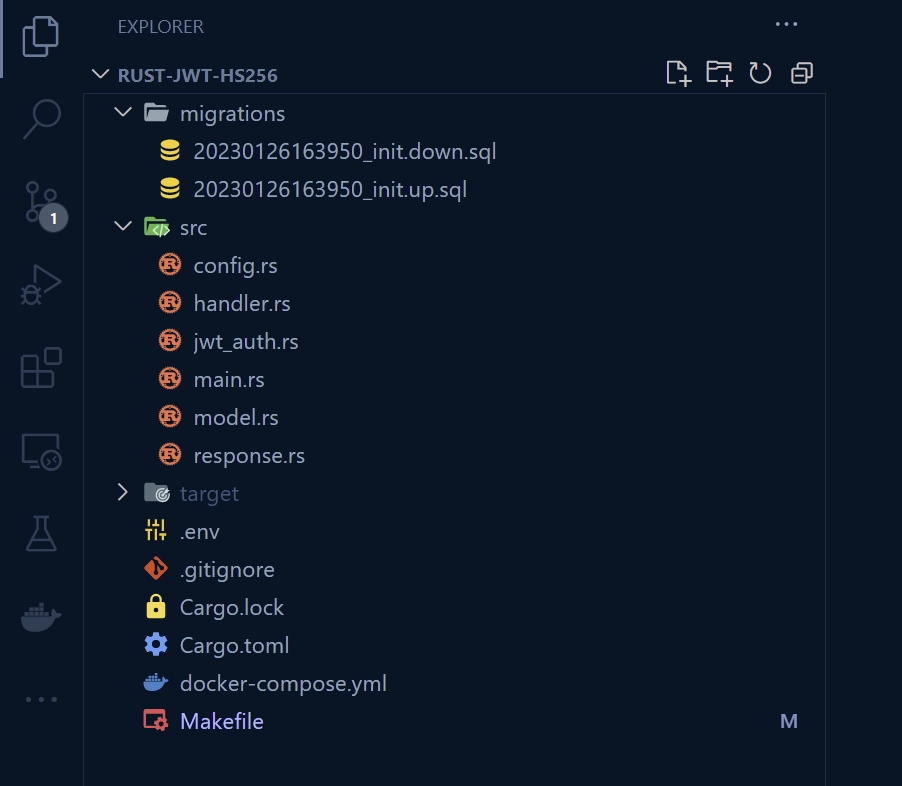
First things first, let’s create a project folder and initialize a Rust project using Cargo. To do this, navigate to your desktop or a preferred location and create a folder named rust-jwt-hs256. Next, navigate into the folder and run cargo init to initialize the Rust project.
mkdir rust-jwt-hs256
cd rust-jwt-hs256
cargo init
Executing cargo init will generate a Cargo.toml file in the root directory. This file serves as the project manifest and holds information regarding the project’s dependencies, build options, and metadata.
With the Rust project initialized, let’s proceed to install the necessary dependencies by executing the following commands.
cargo add actix-web
cargo add actix-cors
cargo add serde_json
cargo add serde --features derive
cargo add chrono --features serde
cargo add env_logger
cargo add dotenv
cargo add uuid --features "serde v4"
cargo add sqlx --features "runtime-async-std-native-tls postgres chrono uuid"
cargo add jsonwebtoken
cargo add argon2
cargo add rand_core --features "std"
# HotReload
cargo install cargo-watch
# SQLX-CLI
cargo install sqlx-cli
actix-web– Provides an asynchronous and actor-based web framework for building high-performance, scalable, and modular web applications in Rust.actix-cors– Provides a convenient way to configure CORS policies in Actix-Web applications.serde_json– For serializing and deserializing data using the JSON format.serde– Provides a convenient and flexible solution for serializing and deserializing data structures in various formats including JSON, YAML, BSON, and more using a macro-based framework in Rust.chrono– Date and time library for Rust.env_logger– Enables dynamic control of logging behaviour in Rust applications using environment variables to set log level and format.dotenv– Loads the content of a.envfile into environment variables, which can then be read by the application using standard Rust methods.uuid– A library to generate and parse UUIDs in Rust.sqlx– Provides an efficient and user-friendly interface for accessing and manipulating SQL databases in Rust, with a high-level, asynchronous API for executing SQL statements, retrieving data, and managing database transactions.sqlx-cli– Thesqlx-clibinary provides a command-line interface for managing and applying changes to a SQL database schema in a version-controlled and repeatable way, making it easier to maintain the database structure as the application evolves over time.jsonwebtoken– For encoding and decoding JSON Web Tokens in Rust.argon2– Provides functions to securely hash passwords for storage and verify the authenticity of passwords during authentication.rand_core– This crate provides low-level, core traits for random number generators (RNGs) and algorithms that use RNGs.cargo-watch– Automatically rebuilds a Rust project whenever a change is made to its source files.
In the event that the current versions of the crates cause any issues with your application, you can revert to the specified versions in the Cargo.toml file below.
Cargo.toml
[package]
name = "rust-jwt-hs256"
version = "0.1.0"
edition = "2021"

# See more keys and their definitions at https://doc.rust-lang.org/cargo/reference/manifest.html

[dependencies]
actix-cors = "0.6.4"
actix-web = "4.3.0"
argon2 = "0.4.1"
chrono = { version = "0.4.23", features = ["serde"] }
dotenv = "0.15.0"
env_logger = "0.10.0"
jsonwebtoken = "8.2.0"
rand_core = { version = "0.6.4", features = ["std"] }
serde = { version = "1.0.152", features = ["derive"] }
serde_json = "1.0.91"
sqlx = { version = "0.6.2", features = ["runtime-async-std-native-tls", "postgres", "chrono", "uuid"] }
uuid = { version = "1.2.2", features = ["serde", "v4"] }
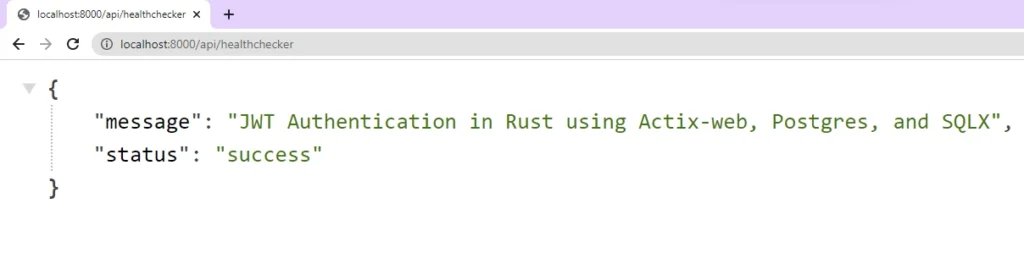
Let’s get a feel of the project by building a basic Actix-Web HTTP server that responds with a JSON object when a GET request is sent to the /api/healthchecker endpoint. To do this, open the src/main.rs file and replace its content with the following code.
src/main.rs
use actix_web::middleware::Logger;
use actix_web::{get, App, HttpResponse, HttpServer, Responder};

#[get("/api/healthchecker")]
async fn health_checker_handler() -> impl Responder {
    const MESSAGE: &str = "JWT Authentication in Rust using Actix-web, Postgres, and SQLX";

    HttpResponse::Ok().json(serde_json::json!({"status": "success", "message": MESSAGE}))
}

#[actix_web::main]
async fn main() -> std::io::Result<()> {
    if std::env::var_os("RUST_LOG").is_none() {
        std::env::set_var("RUST_LOG", "actix_web=info");
    }
    env_logger::init();

    println!("🚀 Server started successfully");

    HttpServer::new(move || {
        App::new()
            .wrap(Logger::default())
            .service(health_checker_handler)
    })
    .bind(("127.0.0.1", 8000))?
    .run()
    .await
}
By utilizing the cargo-watch binary we installed earlier, you can run the command shown below to initiate the building process for the project, and start the Actix-Web HTTP server. This will also monitor the source code for any changes, and automatically rebuild the project if any of the relevant files are modified.
cargo watch -q -c -w src/ -x run
With the server now running on port 8000, you can test its functionality by sending a GET request to the http://localhost:8000/api/healthchecker endpoint, which should return the JSON object.
Setup Postgres and pgAdmin with Docker
Let’s set up Postgres and pgAdmin with Docker. To do this, create a file named docker-compose.yml in the root directory and add the following Docker Compose configurations.
docker-compose.yml
version: '3'
services:
  postgres:
    image: postgres:latest
    container_name: postgres
    ports:
      - '6500:5432'
    volumes:
      - progresDB:/var/lib/postgresql/data
    env_file:
      - ./.env
  pgAdmin:
    image: dpage/pgadmin4
    container_name: pgAdmin
    env_file:
      - ./.env
    ports:
      - "5050:80"
volumes:
  progresDB:
To make the Postgres and pgAdmin credentials available to Docker Compose, create a .env file in the root directory and add the following environment variables. This ensures the credentials are available without directly writing them under the environment property in the docker-compose.yml file.
.env
POSTGRES_HOST=127.0.0.1
POSTGRES_PORT=6500
POSTGRES_USER=admin
POSTGRES_PASSWORD=password123
POSTGRES_DB=rust_hs256

DATABASE_URL=postgresql://admin:password123@localhost:6500/rust_hs256?schema=public

PGADMIN_DEFAULT_EMAIL=admin@admin.com
PGADMIN_DEFAULT_PASSWORD=password123

JWT_SECRET=my_ultra_secure_secret
JWT_EXPIRED_IN=60m
JWT_MAXAGE=60
In addition, the environment variables file contains crucial information for JWT token management, including the secret for signing and verifying, the token’s expiration time, and the maximum age.
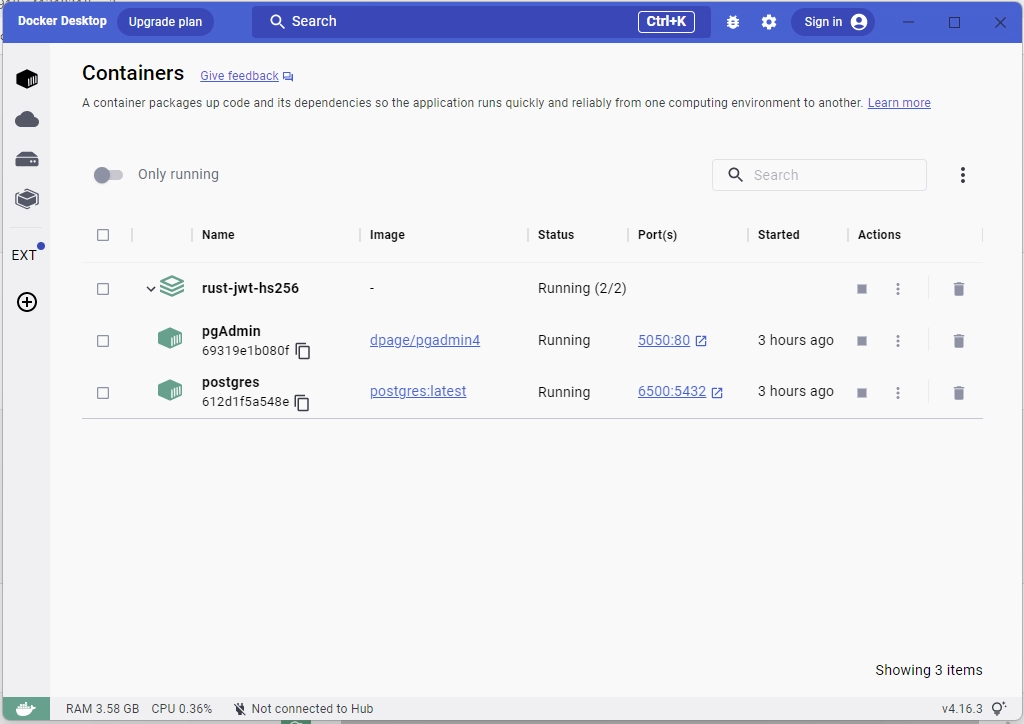
To launch the Postgres and pgAdmin containers, open your terminal and execute the command docker-compose up -d. Once the containers are up and running, you can check their status on the Docker Desktop application.
Load the Environment Variables
Now let’s create a struct to list the necessary environment variables and specify their respective data types. Subsequently, we will implement an init() function on the struct, which, when invoked, will load the environment variables into the Rust runtime, enabling our application to utilize them.
To achieve this, create a config.rs file within the src directory and add the following code.
src/config.rs
#[derive(Debug, Clone)]
pub struct Config {
    pub database_url: String,
    pub jwt_secret: String,
    pub jwt_expires_in: String,
    pub jwt_maxage: i32,
}

impl Config {
    pub fn init() -> Config {
        let database_url = std::env::var("DATABASE_URL").expect("DATABASE_URL must be set");
        let jwt_secret = std::env::var("JWT_SECRET").expect("JWT_SECRET must be set");
        let jwt_expires_in = std::env::var("JWT_EXPIRED_IN").expect("JWT_EXPIRED_IN must be set");
        let jwt_maxage = std::env::var("JWT_MAXAGE").expect("JWT_MAXAGE must be set");
        Config {
            database_url,
            jwt_secret,
            jwt_expires_in,
            jwt_maxage: jwt_maxage.parse::<i32>().unwrap(),
        }
    }
}
Create the SQL Queries and Run the Migrations
With the Postgres server running within the Docker container, let’s utilize the SQLX CLI to generate migration files and synchronise the database schema with the scripts.
If you haven’t already installed the SQLX CLI binary, execute the command cargo install sqlx-cli to install it. After the installation, run the following command to generate the up/down migration scripts.
sqlx migrate add -r init
The command mentioned above will result in the creation of a migrations folder in the root directory and the generation of up/down migration scripts inside it.
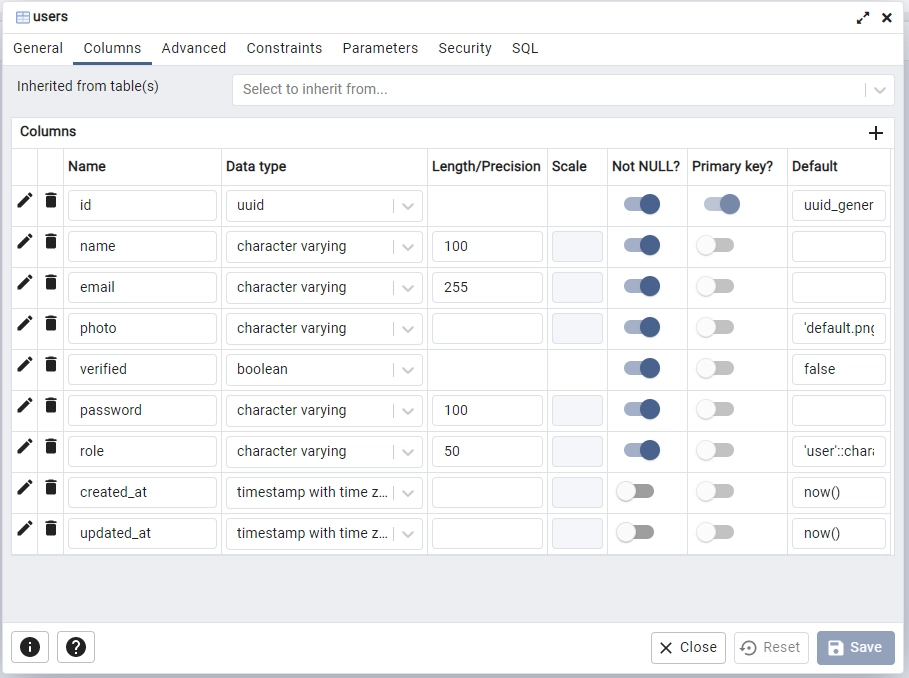
Next, open the “up” script and add the following SQL code, which will enable us to create a “users” table in the database.
migrations/20230126163950_init.up.sql
CREATE EXTENSION IF NOT EXISTS "uuid-ossp";

CREATE TABLE
    "users" (
        id UUID NOT NULL PRIMARY KEY DEFAULT (uuid_generate_v4()),
        name VARCHAR(100) NOT NULL,
        email VARCHAR(255) NOT NULL UNIQUE,
        photo VARCHAR NOT NULL DEFAULT 'default.png',
        verified BOOLEAN NOT NULL DEFAULT FALSE,
        password VARCHAR(100) NOT NULL,
        role VARCHAR(50) NOT NULL DEFAULT 'user',
        created_at TIMESTAMP
        WITH
            TIME ZONE DEFAULT NOW(),
            updated_at TIMESTAMP
        WITH
            TIME ZONE DEFAULT NOW()
    );

CREATE INDEX users_email_idx ON users (email);
To revert the changes made by the “up” migration script, open the “down” script and add the following SQL code. This will remove the “users” table from the database if it exists.
migrations/20230126163950_init.down.sql
DROP TABLE IF EXISTS "users";
Now execute the command sqlx migrate run to push the schema defined in the “up” migration script to the database and synchronise the database schema with the codebase.
To confirm that the “users” table has been successfully added to the database, access the running pgAdmin container at http://localhost:5050/, and sign in using the credentials specified in the environment variables file.
Next, execute the command docker inspect postgres to retrieve the IP address of the Postgres container, which can be found at the bottom of the output. Then, use this IP address and the credentials specified in the .env file to register the Postgres server on pgAdmin.
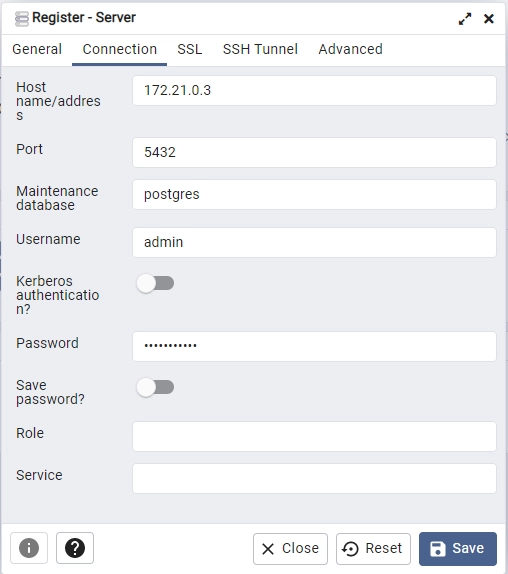
After registering the Postgres server, go to the “Tables” section in the rust_hs256 database to view the “users” table.
Create the Database Model
With the database now in sync with the codebase, let’s define a Rust struct that mirrors the structure of the “users” table. This struct will serve as a representation of the underlying SQL table, where its fields correspond to the columns of the table.
Create a model.rs file within the src directory and add the following model definitions.
src/model.rs
use chrono::prelude::*;
use serde::{Deserialize, Serialize};

#[allow(non_snake_case)]
#[derive(Debug, Deserialize, sqlx::FromRow, Serialize, Clone)]
pub struct User {
    pub id: uuid::Uuid,
    pub name: String,
    pub email: String,
    pub password: String,
    pub role: String,
    pub photo: String,
    pub verified: bool,
    #[serde(rename = "createdAt")]
    pub created_at: Option<DateTime<Utc>>,
    #[serde(rename = "updatedAt")]
    pub updated_at: Option<DateTime<Utc>>,
}

#[derive(Debug, Serialize, Deserialize)]
pub struct TokenClaims {
    pub sub: String,
    pub iat: usize,
    pub exp: usize,
}

#[derive(Debug, Deserialize)]
pub struct RegisterUserSchema {
    pub name: String,
    pub email: String,
    pub password: String,
}

#[derive(Debug, Deserialize)]
pub struct LoginUserSchema {
    pub email: String,
    pub password: String,
}
For simplicity, we’ll keep the TokenClaims, RegisterUserSchema, and LoginUserSchema structs within the src/model.rs file instead of placing them in a separate src/schema.rs file.
The RegisterUserSchema struct will validate incoming data during the account registration process, while the LoginUserSchema struct will validate incoming data during the login process.
Create the Response Structs
To secure sensitive information, such as passwords, let’s create a struct named FilteredUser that we’ll use to filter the records obtained from the Postgres database. These structs will implement the Serialize trait from the Serde library, allowing us to easily convert the structs into JSON format before sending them as a response.
Create a response.rs file within the src directory and add the following structs:
src/response.rs
use chrono::prelude::*;
use serde::Serialize;

#[allow(non_snake_case)]
#[derive(Debug, Serialize)]
pub struct FilteredUser {
    pub id: String,
    pub name: String,
    pub email: String,
    pub role: String,
    pub photo: String,
    pub verified: bool,
    pub createdAt: DateTime<Utc>,
    pub updatedAt: DateTime<Utc>,
}

#[derive(Serialize, Debug)]
pub struct UserData {
    pub user: FilteredUser,
}

#[derive(Serialize, Debug)]
pub struct UserResponse {
    pub status: String,
    pub data: UserData,
}
Create the JWT Actix-Web Middleware Guard
Let’s create an Actix-Web JWT middleware guard to protect certain resources on the server by verifying the validity of JWT tokens present in either the Authorization header or Cookies.
The JWT middleware will attempt to obtain the token from the Authorization header first. If the token is not present, it will then look in the Cookies object. In the event that the token cannot be found in either of these locations, a 401 Unauthorized error will be sent to the client.
src/jwt_auth.rs
use core::fmt;
use std::future::{ready, Ready};

use actix_web::error::ErrorUnauthorized;
use actix_web::{dev::Payload, Error as ActixWebError};
use actix_web::{http, web, FromRequest, HttpMessage, HttpRequest};
use jsonwebtoken::{decode, DecodingKey, Validation};
use serde::Serialize;

use crate::model::TokenClaims;
use crate::AppState;

#[derive(Debug, Serialize)]
struct ErrorResponse {
    status: String,
    message: String,
}

impl fmt::Display for ErrorResponse {
    fn fmt(&self, f: &mut fmt::Formatter<'_>) -> fmt::Result {
        write!(f, "{}", serde_json::to_string(&self).unwrap())
    }
}

pub struct JwtMiddleware {
    pub user_id: uuid::Uuid,
}

impl FromRequest for JwtMiddleware {
    type Error = ActixWebError;
    type Future = Ready<Result<Self, Self::Error>>;
    fn from_request(req: &HttpRequest, _: &mut Payload) -> Self::Future {
        let data = req.app_data::<web::Data<AppState>>().unwrap();

        let token = req
            .cookie("token")
            .map(|c| c.value().to_string())
            .or_else(|| {
                req.headers()
                    .get(http::header::AUTHORIZATION)
                    .map(|h| h.to_str().unwrap().split_at(7).1.to_string())
            });

        if token.is_none() {
            let json_error = ErrorResponse {
                status: "fail".to_string(),
                message: "You are not logged in, please provide token".to_string(),
            };
            return ready(Err(ErrorUnauthorized(json_error)));
        }

        let claims = match decode::<TokenClaims>(
            &token.unwrap(),
            &DecodingKey::from_secret(data.env.jwt_secret.as_ref()),
            &Validation::default(),
        ) {
            Ok(c) => c.claims,
            Err(_) => {
                let json_error = ErrorResponse {
                    status: "fail".to_string(),
                    message: "Invalid token".to_string(),
                };
                return ready(Err(ErrorUnauthorized(json_error)));
            }
        };

        let user_id = uuid::Uuid::parse_str(claims.sub.as_str()).unwrap();
        req.extensions_mut()
            .insert::<uuid::Uuid>(user_id.to_owned());

        ready(Ok(JwtMiddleware { user_id }))
    }
}
If the token is present, the middleware will use the jsonwebtoken library to validate the token and extract the claims stored in it. Then, the decoded token’s “sub” property value will be added to the request using the req.extensions_mut().insert() method.
Implement the JWT Authentication Flow
Oops, quite a lot of code. At this point, we can now proceed to create Actix-Web routes for user registration, sign-in, log-out, and retrieving the authenticated user information. To get started, create a handler.rs file within the src directory and add the following dependencies and modules.
src/handler.rs
use crate::{
    jwt_auth,
    model::{LoginUserSchema, RegisterUserSchema, TokenClaims, User},
    response::FilteredUser,
    AppState,
};
use actix_web::{
    cookie::{time::Duration as ActixWebDuration, Cookie},
    get, post, web, HttpMessage, HttpRequest, HttpResponse, Responder,
};
use argon2::{
    password_hash::{rand_core::OsRng, PasswordHash, PasswordHasher, PasswordVerifier, SaltString},
    Argon2,
};
use chrono::{prelude::*, Duration};
use jsonwebtoken::{encode, EncodingKey, Header};
use serde_json::json;
use sqlx::Row;
Next, create a filter_user_record function that will utilize the FilteredUser struct to filter the records obtained from the Postgres database.
src/handler.rs
fn filter_user_record(user: &User) -> FilteredUser {
    FilteredUser {
        id: user.id.to_string(),
        email: user.email.to_owned(),
        name: user.name.to_owned(),
        photo: user.photo.to_owned(),
        role: user.role.to_owned(),
        verified: user.verified,
        createdAt: user.created_at.unwrap(),
        updatedAt: user.updated_at.unwrap(),
    }
}
Register User Route Handler
Here, you’ll create a route handler for the #[post("/auth/register")] endpoint to handle user registration. Upon receiving the account registration request from Actix-Web, this handler will first verify the existence of a user with the submitted email address by querying the database.
In the event that a user with the submitted email already exists in the database, a 409 Conflict response will be sent to the client. If no such user exists, the password will be securely hashed using Argon2, and the newly registered user will be added to the database.
I transitioned from Bcrypt to Argon2 due to its improved speed, as creating a single hash with Bcrypt was taking an excessive amount of time. Argon2 provided a hashing speed that was twice as fast as Bcrypt.
If the operation is successful, the newly-inserted record returned by SQLX will be filtered to remove sensitive information such as the hashed password and only the remaining details will be included in the JSON response.
src/handler.rs
#[post("/auth/register")]
async fn register_user_handler(
    body: web::Json<RegisterUserSchema>,
    data: web::Data<AppState>,
) -> impl Responder {
    let exists: bool = sqlx::query("SELECT EXISTS(SELECT 1 FROM users WHERE email = $1)")
        .bind(body.email.to_owned())
        .fetch_one(&data.db)
        .await
        .unwrap()
        .get(0);

    if exists {
        return HttpResponse::Conflict().json(
            serde_json::json!({"status": "fail","message": "User with that email already exists"}),
        );
    }

    let salt = SaltString::generate(&mut OsRng);
    let hashed_password = Argon2::default()
        .hash_password(body.password.as_bytes(), &salt)
        .expect("Error while hashing password")
        .to_string();
    let query_result = sqlx::query_as!(
        User,
        "INSERT INTO users (name,email,password) VALUES ($1, $2, $3) RETURNING *",
        body.name.to_string(),
        body.email.to_string().to_lowercase(),
        hashed_password
    )
    .fetch_one(&data.db)
    .await;

    match query_result {
        Ok(user) => {
            let user_response = serde_json::json!({"status": "success","data": serde_json::json!({
                "user": filter_user_record(&user)
            })});

            return HttpResponse::Ok().json(user_response);
        }
        Err(e) => {
            return HttpResponse::InternalServerError()
                .json(serde_json::json!({"status": "error","message": format!("{:?}", e)}));
        }
    }
}
Login User Route Handler
Now that we’re able to register new users, let’s move on to creating a route handler for user sign-in. This handler will utilize the #[post("/auth/login")] macro to handle sign-in requests.
When this route function receives the sign-in request, it will query the database to retrieve the user that matches the submitted email address. Then, it will use Argon2 to compare the plain-text password to the hashed password on the record.
If no matching user is found or the password verification fails, a 400 Bad Request response with the message “Invalid email or password” will be sent to the client.
src/handler.rs
#[post("/auth/login")]
async fn login_user_handler(
    body: web::Json<LoginUserSchema>,
    data: web::Data<AppState>,
) -> impl Responder {
    let query_result = sqlx::query_as!(User, "SELECT * FROM users WHERE email = $1", body.email)
        .fetch_optional(&data.db)
        .await
        .unwrap();

    let is_valid = query_result.to_owned().map_or(false, |user| {
        let parsed_hash = PasswordHash::new(&user.password).unwrap();
        Argon2::default()
            .verify_password(body.password.as_bytes(), &parsed_hash)
            .map_or(false, |_| true)
    });

    if !is_valid {
        return HttpResponse::BadRequest()
            .json(json!({"status": "fail", "message": "Invalid email or password"}));
    }

    let user = query_result.unwrap();

    let now = Utc::now();
    let iat = now.timestamp() as usize;
    let exp = (now + Duration::minutes(60)).timestamp() as usize;
    let claims: TokenClaims = TokenClaims {
        sub: user.id.to_string(),
        exp,
        iat,
    };

    let token = encode(
        &Header::default(),
        &claims,
        &EncodingKey::from_secret(data.env.jwt_secret.as_ref()),
    )
    .unwrap();

    let cookie = Cookie::build("token", token.to_owned())
        .path("/")
        .max_age(ActixWebDuration::new(60 * 60, 0))
        .http_only(true)
        .finish();

    HttpResponse::Ok()
        .cookie(cookie)
        .json(json!({"status": "success", "token": token}))
}
However, if the authentication process is successful, a JSON Web Token (JWT) will be generated and included in the response. The user can then use this token in future requests as a Bearer token to access protected routes. Additionally, the JWT will be sent as a secure HTTP-only cookie in the response.
Logout User Route Handler
In this step, you’ll create a #[get("/auth/logout")] route to handle user sign-out requests. The handler will send an expired cookie to the user’s API client or browser, effectively deleting the existing cookie and logging out the user.
src/handler.rs
#[get("/auth/logout")]
async fn logout_handler(_: jwt_auth::JwtMiddleware) -> impl Responder {
    let cookie = Cookie::build("token", "")
        .path("/")
        .max_age(ActixWebDuration::new(-1, 0))
        .http_only(true)
        .finish();

    HttpResponse::Ok()
        .cookie(cookie)
        .json(json!({"status": "success"}))
}
Get Authenticated User Route Handler
Now let’s create a #[get("/users/me")] route to return the authenticated user’s account information. This route will be protected by a JWT middleware guard, ensuring that only users with valid JWT tokens can access it.
The JWT middleware guard will store the user’s ID in the
Extensionsobject of Actix-Web once the user has successfully completed the authentication process.
This function will retrieve the user’s ID from the Extensions object of Actix-Web and use it to query the database for the corresponding user record. It will then filter the record to remove sensitive information like the hashed password before returning the remaining details in the response.
src/handler.rs
#[get("/users/me")]
async fn get_me_handler(
    req: HttpRequest,
    data: web::Data<AppState>,
    _: jwt_auth::JwtMiddleware,
) -> impl Responder {
    let ext = req.extensions();
    let user_id = ext.get::<uuid::Uuid>().unwrap();

    let user = sqlx::query_as!(User, "SELECT * FROM users WHERE id = $1", user_id)
        .fetch_one(&data.db)
        .await
        .unwrap();

    let json_response = serde_json::json!({
        "status":  "success",
        "data": serde_json::json!({
            "user": filter_user_record(&user)
        })
    });

    HttpResponse::Ok().json(json_response)
}
Merge the Route Handlers
Now that we’ve created all the route handlers, let’s create a configuration function that uses Actix-web’s web::ServiceConfig struct and web::scope function to combine them under the same path prefix.
src/handler.rs
pub fn config(conf: &mut web::ServiceConfig) {
    let scope = web::scope("/api")
        .service(health_checker_handler)
        .service(register_user_handler)
        .service(login_user_handler)
        .service(logout_handler)
        .service(get_me_handler);

    conf.service(scope);
}
Complete Authentication Route Handlers
src/handler.rs
use crate::{
    jwt_auth,
    model::{LoginUserSchema, RegisterUserSchema, TokenClaims, User},
    response::FilteredUser,
    AppState,
};
use actix_web::{
    cookie::{time::Duration as ActixWebDuration, Cookie},
    get, post, web, HttpMessage, HttpRequest, HttpResponse, Responder,
};
use argon2::{
    password_hash::{rand_core::OsRng, PasswordHash, PasswordHasher, PasswordVerifier, SaltString},
    Argon2,
};
use chrono::{prelude::*, Duration};
use jsonwebtoken::{encode, EncodingKey, Header};
use serde_json::json;
use sqlx::Row;

#[get("/healthchecker")]
async fn health_checker_handler() -> impl Responder {
    const MESSAGE: &str = "JWT Authentication in Rust using Actix-web, Postgres, and SQLX";

    HttpResponse::Ok().json(json!({"status": "success", "message": MESSAGE}))
}

#[post("/auth/register")]
async fn register_user_handler(
    body: web::Json<RegisterUserSchema>,
    data: web::Data<AppState>,
) -> impl Responder {
    let exists: bool = sqlx::query("SELECT EXISTS(SELECT 1 FROM users WHERE email = $1)")
        .bind(body.email.to_owned())
        .fetch_one(&data.db)
        .await
        .unwrap()
        .get(0);

    if exists {
        return HttpResponse::Conflict().json(
            serde_json::json!({"status": "fail","message": "User with that email already exists"}),
        );
    }

    let salt = SaltString::generate(&mut OsRng);
    let hashed_password = Argon2::default()
        .hash_password(body.password.as_bytes(), &salt)
        .expect("Error while hashing password")
        .to_string();
    let query_result = sqlx::query_as!(
        User,
        "INSERT INTO users (name,email,password) VALUES ($1, $2, $3) RETURNING *",
        body.name.to_string(),
        body.email.to_string().to_lowercase(),
        hashed_password
    )
    .fetch_one(&data.db)
    .await;

    match query_result {
        Ok(user) => {
            let user_response = serde_json::json!({"status": "success","data": serde_json::json!({
                "user": filter_user_record(&user)
            })});

            return HttpResponse::Ok().json(user_response);
        }
        Err(e) => {
            return HttpResponse::InternalServerError()
                .json(serde_json::json!({"status": "error","message": format!("{:?}", e)}));
        }
    }
}
#[post("/auth/login")]
async fn login_user_handler(
    body: web::Json<LoginUserSchema>,
    data: web::Data<AppState>,
) -> impl Responder {
    let query_result = sqlx::query_as!(User, "SELECT * FROM users WHERE email = $1", body.email)
        .fetch_optional(&data.db)
        .await
        .unwrap();

    let is_valid = query_result.to_owned().map_or(false, |user| {
        let parsed_hash = PasswordHash::new(&user.password).unwrap();
        Argon2::default()
            .verify_password(body.password.as_bytes(), &parsed_hash)
            .map_or(false, |_| true)
    });

    if !is_valid {
        return HttpResponse::BadRequest()
            .json(json!({"status": "fail", "message": "Invalid email or password"}));
    }

    let user = query_result.unwrap();

    let now = Utc::now();
    let iat = now.timestamp() as usize;
    let exp = (now + Duration::minutes(60)).timestamp() as usize;
    let claims: TokenClaims = TokenClaims {
        sub: user.id.to_string(),
        exp,
        iat,
    };

    let token = encode(
        &Header::default(),
        &claims,
        &EncodingKey::from_secret(data.env.jwt_secret.as_ref()),
    )
    .unwrap();

    let cookie = Cookie::build("token", token.to_owned())
        .path("/")
        .max_age(ActixWebDuration::new(60 * 60, 0))
        .http_only(true)
        .finish();

    HttpResponse::Ok()
        .cookie(cookie)
        .json(json!({"status": "success", "token": token}))
}

#[get("/auth/logout")]
async fn logout_handler(_: jwt_auth::JwtMiddleware) -> impl Responder {
    let cookie = Cookie::build("token", "")
        .path("/")
        .max_age(ActixWebDuration::new(-1, 0))
        .http_only(true)
        .finish();

    HttpResponse::Ok()
        .cookie(cookie)
        .json(json!({"status": "success"}))
}

#[get("/users/me")]
async fn get_me_handler(
    req: HttpRequest,
    data: web::Data<AppState>,
    _: jwt_auth::JwtMiddleware,
) -> impl Responder {
    let ext = req.extensions();
    let user_id = ext.get::<uuid::Uuid>().unwrap();

    let user = sqlx::query_as!(User, "SELECT * FROM users WHERE id = $1", user_id)
        .fetch_one(&data.db)
        .await
        .unwrap();

    let json_response = serde_json::json!({
        "status":  "success",
        "data": serde_json::json!({
            "user": filter_user_record(&user)
        })
    });

    HttpResponse::Ok().json(json_response)
}

fn filter_user_record(user: &User) -> FilteredUser {
    FilteredUser {
        id: user.id.to_string(),
        email: user.email.to_owned(),
        name: user.name.to_owned(),
        photo: user.photo.to_owned(),
        role: user.role.to_owned(),
        verified: user.verified,
        createdAt: user.created_at.unwrap(),
        updatedAt: user.updated_at.unwrap(),
    }
}

pub fn config(conf: &mut web::ServiceConfig) {
    let scope = web::scope("/api")
        .service(health_checker_handler)
        .service(register_user_handler)
        .service(login_user_handler)
        .service(logout_handler)
        .service(get_me_handler);

    conf.service(scope);
}
Register the Routes Config and Add CORS
Let’s now integrate our configuration function into Actix-Web as a service and add CORS support to the server. This will allow it to handle cross-origin requests to and from specified domains.
Subsequently, we’ll use the SQLX crate to connect the application to the PostgreSQL server and the dotenv crate to load the environment variables into the Rust runtime.
To do this, replace the content of the src/main.rs file with the following code:
src/main.rs
mod config;
mod handler;
mod jwt_auth;
mod model;
mod response;

use actix_cors::Cors;
use actix_web::middleware::Logger;
use actix_web::{http::header, web, App, HttpServer};
use config::Config;
use dotenv::dotenv;
use sqlx::{postgres::PgPoolOptions, Pool, Postgres};

pub struct AppState {
    db: Pool<Postgres>,
    env: Config,
}

#[actix_web::main]
async fn main() -> std::io::Result<()> {
    if std::env::var_os("RUST_LOG").is_none() {
        std::env::set_var("RUST_LOG", "actix_web=info");
    }
    dotenv().ok();
    env_logger::init();

    let config = Config::init();

    let pool = match PgPoolOptions::new()
        .max_connections(10)
        .connect(&config.database_url)
        .await
    {
        Ok(pool) => {
            println!("✅Connection to the database is successful!");
            pool
        }
        Err(err) => {
            println!("🔥 Failed to connect to the database: {:?}", err);
            std::process::exit(1);
        }
    };

    println!("🚀 Server started successfully");

    HttpServer::new(move || {
        let cors = Cors::default()
            .allowed_origin("http://localhost:3000")
            .allowed_methods(vec!["GET", "POST"])
            .allowed_headers(vec![
                header::CONTENT_TYPE,
                header::AUTHORIZATION,
                header::ACCEPT,
            ])
            .supports_credentials();
        App::new()
            .app_data(web::Data::new(AppState {
                db: pool.clone(),
                env: config.clone(),
            }))
            .configure(handler::config)
            .wrap(cors)
            .wrap(Logger::default())
    })
    .bind(("127.0.0.1", 8000))?
    .run()
    .await
}
Finally, you can build the project and launch the Actix-web server again by running the command cargo watch -q -c -w src/ -x run.
Test the JWT Authentication Flow
Now that the Actix-Web server is listening on port 8000 and ready to accept requests, clone the project from https://github.com/wpcodevo/rust-jwt-hs256 and import the Rust HS256 JWT.postman_collection.json file into Postman or Thunder Client VS Code extension. Then, test the JWT authentication flow by sending HTTP requests to the API.
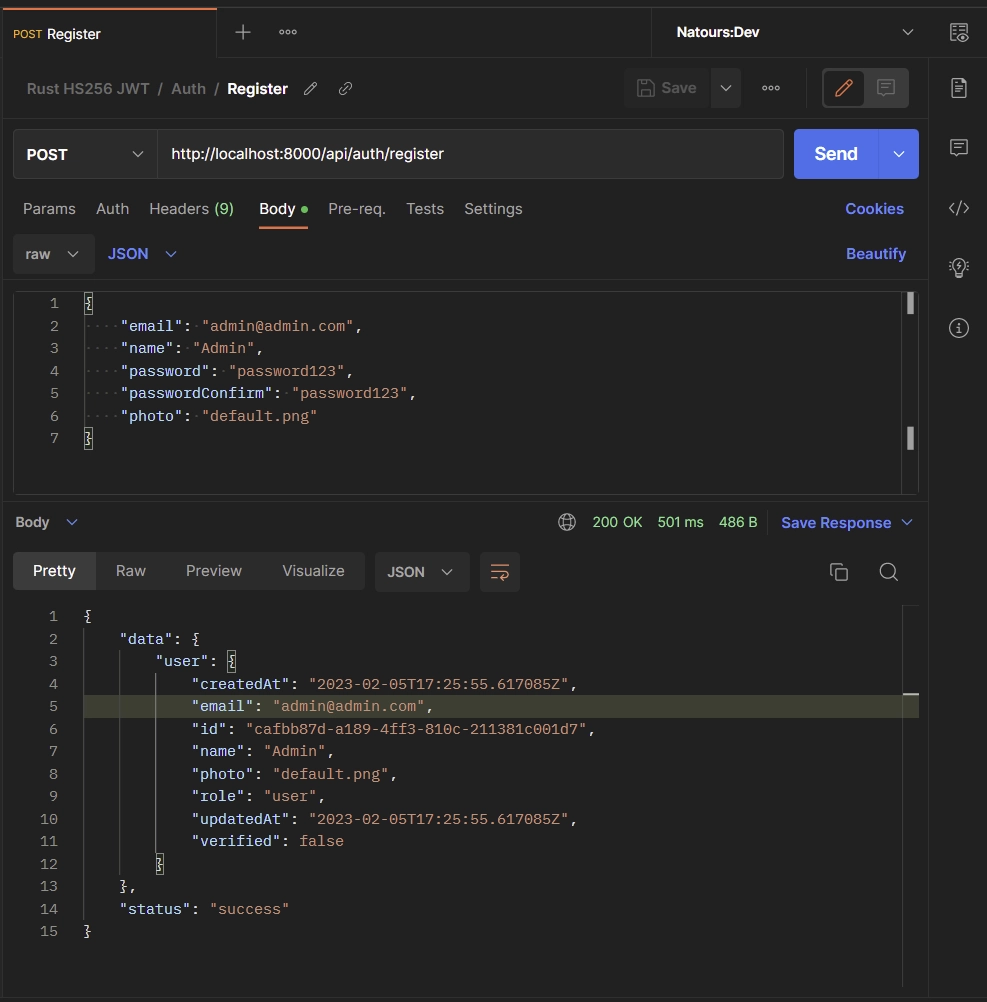
Create a New User
To create a new account, provide your credentials in a JSON format within the request body of your API client and send a POST request to the /api/auth/register endpoint.
{
    "email": "admin@admin.com",
    "name": "Admin",
    "password": "password123",
    "passwordConfirm": "password123",
    "photo": "default.png"
}
The Rust API will validate the credentials, store them in the database, and return a filtered version of the newly-created record in the JSON response.
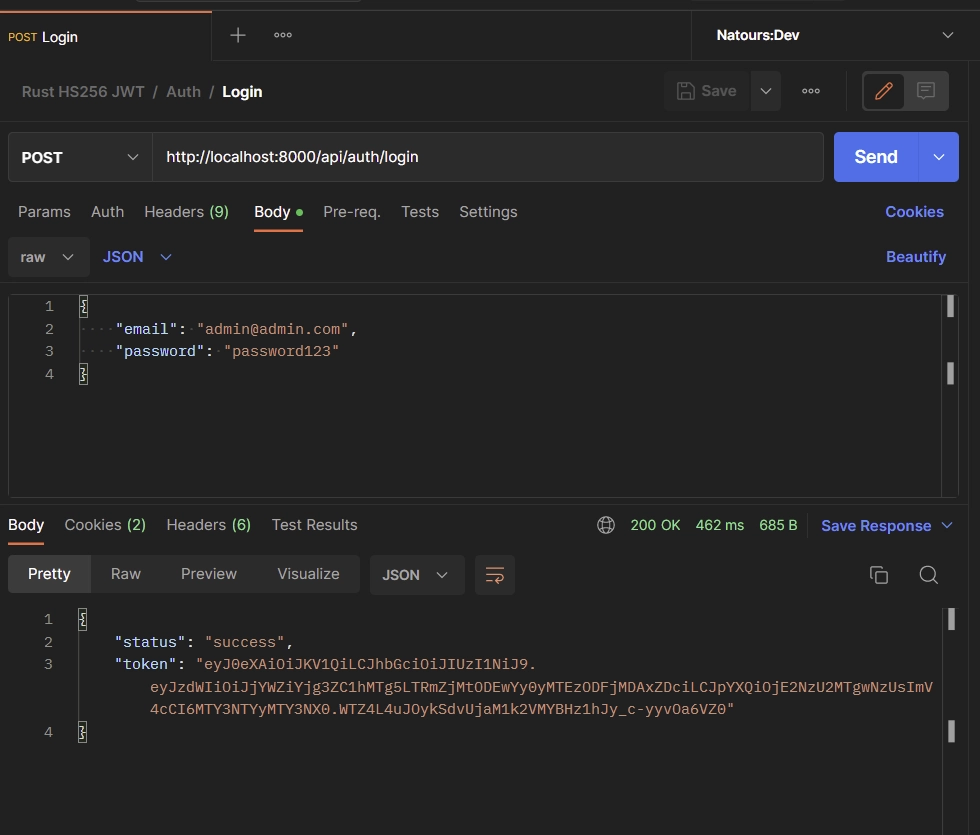
Sign-in User
To sign into your account, input your credentials in JSON format within the request body of your API client and send a POST request to the /api/auth/login endpoint.
{
    "email": "admin@admin.com",
    "password": "password123"
}
The Rust API will validate the credentials, generate a JWT token, and include it in the response as an HTTP-only cookie.
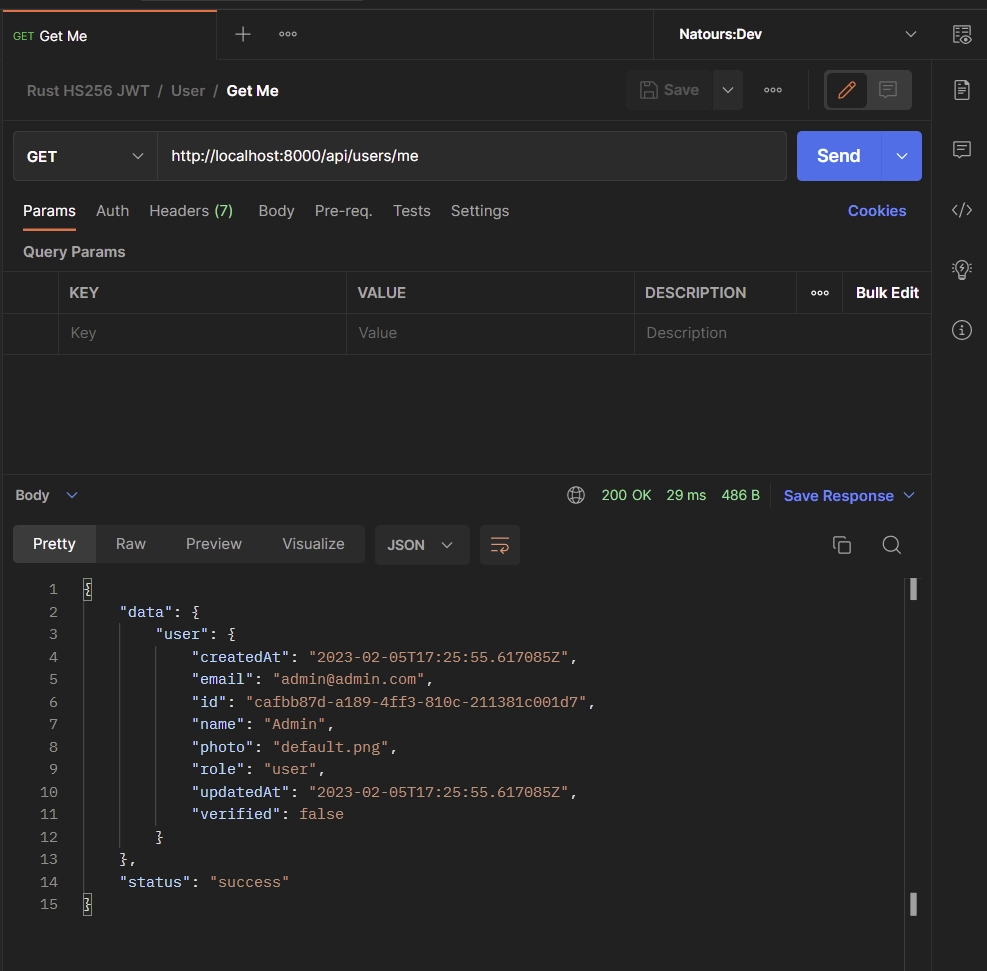
Access Protected Route
Now that you’ve obtained a JWT token, retrieve your account information by sending a GET request to the /api/users/me endpoint. You can include the token in the Authorization header or let your API client send it as a cookie with the request.
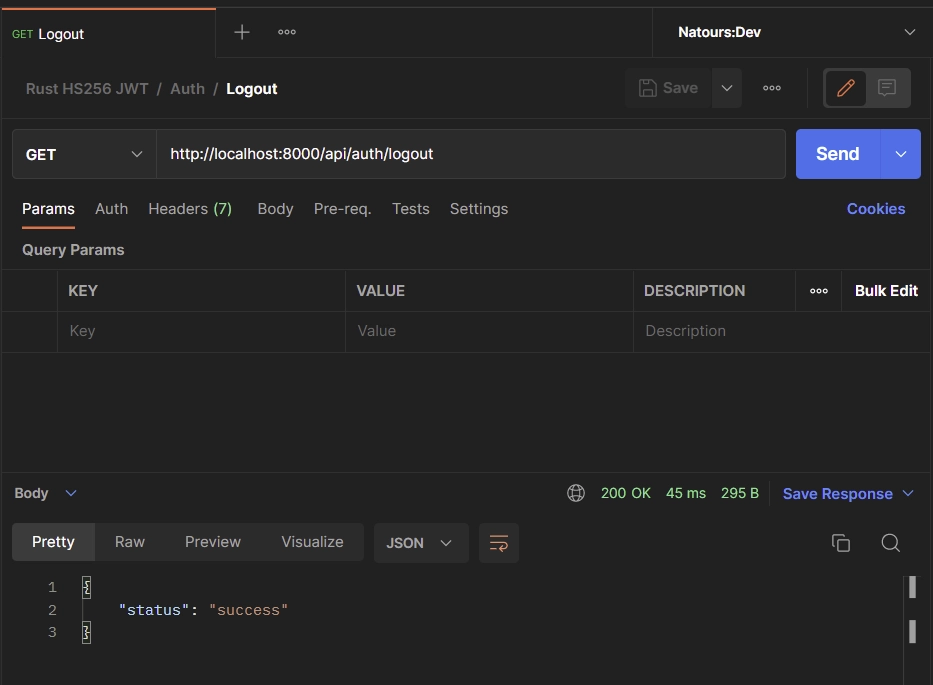
Logout User
To log out from the API, include the JWT token as a Bearer in the Authorization header and send a GET request to the /api/auth/logout endpoint. Alternatively, you can let your API client send the token as a cookie with the request.
Conclusion
And we are done! You can find the complete source code of the Rust Actix-Web JWT authentication project on GitHub.
In this article, we implemented JWT authentication in a Rust application using the Actix-Web framework, SQLX, and PostgreSQL. The API offers complete user management capabilities including user registration, sign-in, log-out, and secure access to protected routes.
I read through a few different articles and I found yours excellent. It was explained clearly and presented well, thank you.
Could you possibly add an example route handler with a re-useable “guard” to restrict routes like orders/posts/etc. to that authenticated user’s data?
Thank you for your kind words and positive feedback on my articles, it means a lot to me!
Based on what you mentioned, it seems like you’re interested in an authentication guard that can protect an entire route.
If that’s correct, then I will definitely consider creating a separate article titled “Rust -JWT Authentication and Authorization with Actix Web” where I can demonstrate the implementation in more detail.
I should mention that the Actix Web implementation of such a middleware guard can be a bit complex, but I’m committed to providing a thorough explanation to make it easy to understand.
I’ve also had a chance to explore the middleware implementation with Axum, and it does feel similar to how it’s done in other frameworks like Express.
Rest assured, I have all of these topics on my to-do list and will do my best to work on them and release them as soon as possible.
Thanks again for your interest in my work and stay tuned for more!
Hi Edem, thanks for the middleware information it does seem a little convoluted. I’ve been checking out Axum lately I much prefer their syntax.
For Actix it seems they also have extractors¹ that can be used here. Do you agree with this comment² and implementation³?
1. https://actix.rs/docs/extractors/
2. https://stackoverflow.com/a/65785300/1026969
3. https://mureithi.me/blog/simple-authentication-approach-with-actix-web
Thanks for your input and again for the great articles.
Cheers
The
impl FromRequestextractor in Actix Web is designed to extract data from incoming requests within the route handler function. It cannot be used to protect an entire route by itself.To create a middleware that provides authentication functionality to protect an entire route, you will need to use a different approach.
One way to do this is by implementing the
Transformtrait, which acts as a middleware for incoming requests.Inside the
callmethod of the Transform struct, you can define the authentication logic and then use the.wrap()method to apply the middleware to the entire application or specific routes.By using this approach, you can create a custom middleware that provides authentication functionality to protect an entire route, without relying solely on the
impl FromRequestextractor.You can refer to the Actix Web middleware documentation at https://actix.rs/docs/middleware for more information on this approach.
Hi Edem, ah I see what you mean that makes sense, middleware seems like a better approach, especially as applications scale.
Thanks again for the valuable feedback it’s a big help.
Hello Edem. Thanks for sharing the your knowledge. It’s was very helpful for me. I’ve got a doubt. Even after logging out of the application, I can still access the “users/me” route. I’m passing the token through the header. Can you help me out, please? Thanks a bunch!
You’re absolutely right! Even after logging out, you can still access the
/users/meendpoint if the JSON Web Token has not yet expired. This is because the JWT is only deleted from the browser or API client upon logout, but if the token was obtained before that, it can still be used to access protected routes until it expires.This is one of the limitations of relying solely on JSON Web Tokens for authentication, as they are stateless and can only be invalidated upon expiry.
To address this issue, one possible solution is to incorporate Redis as a session storage.
During the login process, you can store the JWT metadata in the Redis database, which includes the user’s ID and the token expiration time, before sending the JWT cookie to the user’s browser or API client. You should ensure that the JWT metadata in the Redis database has the same expiration time as the JWT token, so when the JWT expires, the metadata will also be deleted from Redis.
When the user logs out, you should delete the JWT metadata from the Redis database and remove any existing cookies from the user’s browser or API client.
To further enhance security, you should add a check in the route protection middleware. After verifying the JWT, you can query the Redis database to see if the user’s JWT metadata is still present.
If it’s not, you can return an error message to the user indicating that their session has expired and they need to log in again. This will prevent attackers from using a previously obtained JWT to access protected routes.
To help you with the implementation process, you may find this article useful: JWT Token Revocation in Rust using Actix-Web and Redis.
It demonstrates how to use Redis as session storage in Rust’s Actix Web framework.
Nice one Edem. Thanks for sharing you knowledge. Another way you can invalidate the JWT is to set a short valid duration , say, 30 secs. Then, the client would have to retry refresh the token whenever it expires. To do this, you can set a unique status code to signal token expiry then have the client hit the refresh endpoint whenever it recieves the status code. This will save you managing a redis cluster
Thanks for sharing!
Great article! I used some few tricks here with the crate `actix-web-httpauth`.