

Are you looking to build a lightning-fast RESTful API with Rust? Then you’re in the right place! In this article, we’ll explore how to create a robust API that supports Create, Read, Update, and Delete operations using the Axum framework and MongoDB. But before we dive in, let’s first understand what RESTful APIs and CRUD operations are and why they matter. Buckle up, and let’s get started!
What do we mean by RESTful API? A RESTful API is a way for computers to communicate with each other over the internet in a standardized way. It’s like a set of rules that allows different software applications to talk to each other and exchange information, kind of like a common language.
This makes it easier for developers to create web services and applications that work together seamlessly. The word “RESTful” stands for “Representational State Transfer“, which means that the API follows a set of principles for how information is represented and transferred between different systems.
What are CRUD operations? CRUD operations are a set of basic actions that can be performed on data stored in a database or other data storage system. CRUD stands for Create, Read, Update, and Delete, and represents the four basic operations that can be done on data. These operations allow users to easily manage and manipulate data in an organized and efficient way.
With the incredible power of Axum and the flexibility of the MongoDB driver, you have the perfect tools to build a high-performance API capable of handling large volumes of traffic. So, if you’re ready to dive into the world of Rust programming and build an API that packs a punch!
More practice:
- Implement Google and GitHub OAuth2 in Rust Frontend App
- Rust CRUD API Example with Axum Framework and MySQL
- Rust CRUD API Example with Axum and PostgreSQL
- Create a Simple API in Rust using the Axum Framework
- Build a Frontend Web App in Rust using the Yew.rs Framework
- Frontend App with Rust and Yew.rs: User SignUp and Login
- Rust – How to Generate and Verify (JWTs) JSON Web Tokens
- Rust and Actix Web – JWT Access and Refresh Tokens
- Rust and Yew.rs Frontend: JWT Access and Refresh Tokens
- Rust – JWT Authentication with Actix Web
- Build a Simple API with Rust and Rocket
- Build a CRUD API with Rust and MongoDB

Run the Axum MongoDB API Project
Follow these steps to run the Axum MongoDB API project:
- Download or clone the Axum MongoDB project from https://github.com/wpcodevo/rust-axum-mongodb and open the source code in your favorite IDE.
- Start the MongoDB server in a Docker container by executing the command
docker-compose up -din the root directory terminal. - Install all the project’s dependencies and build the project by running the command
cargo build. - Start the Axum HTTP server by running
cargo run. - To test the API endpoints, import the
Note App.postman_collection.jsonfile into Postman or Thunder Client VS Code extension. This file contains predefined requests that you can use to interact with the API.
Alternatively, if you prefer a visual way to interact with the API, set up the React app by following the instructions outlined below.
Run the Axum API with a Frontend App
If you’re looking for a detailed guide on how to build a React.js app that supports CRUD functionalities, you may want to check out the article titled ‘Build a React.js CRUD App using a RESTful API‘. However, if you’re looking to get up and running quickly without writing any code, you can follow the steps below:
- Make sure you have Node.js and Yarn installed on your machine.
- Clone or download the React project from https://github.com/wpcodevo/reactjs-crud-note-app and open the source code in your preferred code editor.
- Install the project’s dependencies by running
yarnoryarn installin the console from the root directory. - Start the Vite development server by running
yarn dev. - Visit
http://localhost:3000/to open the app in your browser and interact with it to send HTTP requests and test the API endpoints. Note: Be sure not to open the React app onhttp://127.0.0.1:3000, as doing so could result in a ‘site can’t be reached’ or CORS error.
Setup the Rust Project
Before we get started on setting up the project, I just want to take a moment to share my excitement with you. I am thrilled to be working on this project and writing an article about it. Although it was challenging working with the MongoDB Rust driver and handling its various errors, I was able to assemble everything successfully, and I feel happy about it. Anyway, let’s get back to the task at hand.
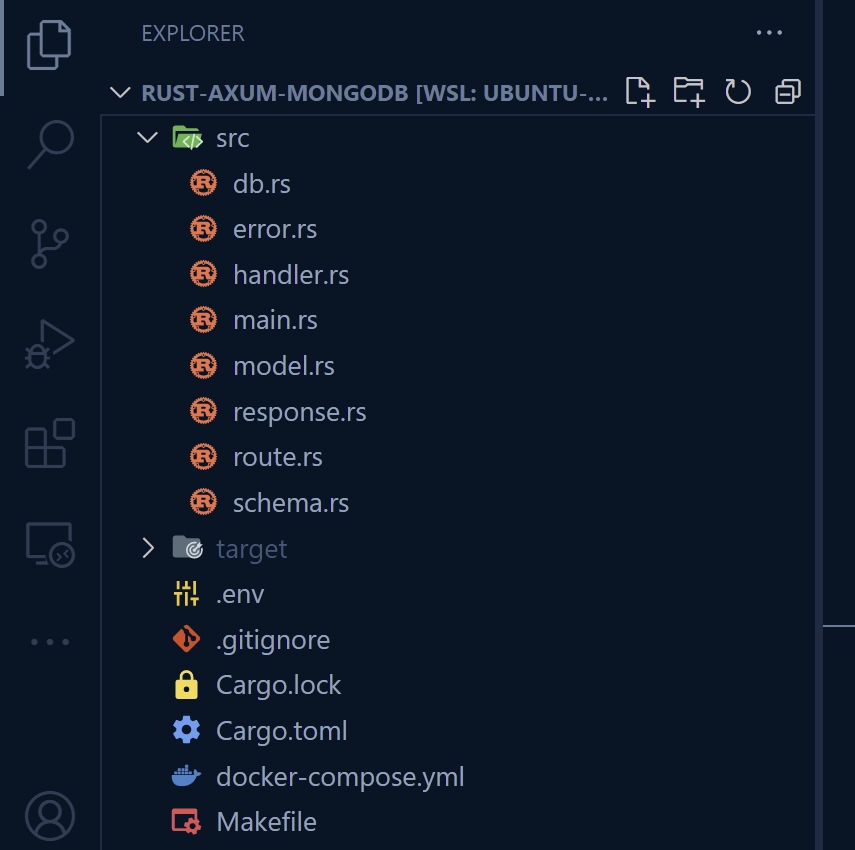
Once you’ve completed this article, your file and folder organization should resemble the one shown in the screenshot below. This will guide you as you follow along with the tutorial.
To begin, let’s create a project folder to store the source code. Simply navigate to a convenient folder on your computer and open a new terminal there. From there, run the following commands:
mkdir rust-axum-mongodb
cd rust-axum-mongodb
cargo init
After that, a folder called rust-axum-mongodb will be created and the Rust project will be initialized in it. Once the project is initialized, you can run the following commands to install all the crates required for the project.
cargo add axum
cargo add tower-http -F 'cors'
cargo add mongodb -F 'bson-chrono-0_4'
cargo add futures --features async-await --no-default-features
cargo add serde -F derive
cargo add serde_json
cargo add thiserror
cargo add chrono -F serde
cargo add tokio -F full
cargo add dotenv
Since Rust needs to download and compile the necessary crates, you can use the cargo build command to initiate the process. Once the installation is complete, you can open the project in your preferred IDE or text editor and view the Cargo.toml file to see the dependencies we installed earlier.
It’s important to keep in mind that there may be breaking changes to these crates in the future, which could cause errors in your application. If you encounter any issues, you can revert to the versions specified in the Cargo.toml file provided below. And if you still face any difficulties, feel free to leave a comment and let me know which crates caused the problem, so that I can make necessary updates to the source code and the article.
Cargo.toml
[package]
name = "rust-axum-mongodb"
version = "0.1.0"
edition = "2021"

# See more keys and their definitions at https://doc.rust-lang.org/cargo/reference/manifest.html

[dependencies]
axum = "0.7.2"
chrono = { version = "0.4.24", features = ["serde"] }
dotenv = "0.15.0"
futures = { version = "0.3.28", default-features = false, features = ["async-await"] }
mongodb = { version = "2.5.0", features = ["bson-chrono-0_4"] }
serde = { version = "1.0.160", features = ["derive"] }
serde_json = "1.0.96"
thiserror = "1.0.40"
tokio = { version = "1.27.0", features = ["full"] }
tower-http = { version = "0.5.0", features = ["cors"] }
Let’s start with something simple and fun before we dive into the more complex stuff with the MongoDB driver. We’ll create a basic Axum server with a single endpoint that checks the server’s health to get our feet wet. This is a warm-up exercise to help us get comfortable with the code.
So, go ahead and open the src/main.rs file and replace the existing code with the following snippets:
src/main.rs
use axum::{response::IntoResponse, routing::get, Json, Router};

async fn health_checker_handler() -> impl IntoResponse {
    const MESSAGE: &str = "RESTful API in Rust using Axum Framework and MongoDB";

    let json_response = serde_json::json!({
        "status": "success",
        "message": MESSAGE
    });

    Json(json_response)
}

#[tokio::main]
async fn main() {
    let app = Router::new().route("/api/healthchecker", get(health_checker_handler));

    println!("🚀 Server started successfully");
    let listener = tokio::net::TcpListener::bind("0.0.0.0:8000").await.unwrap();
    axum::serve(listener, app).await.unwrap()
}
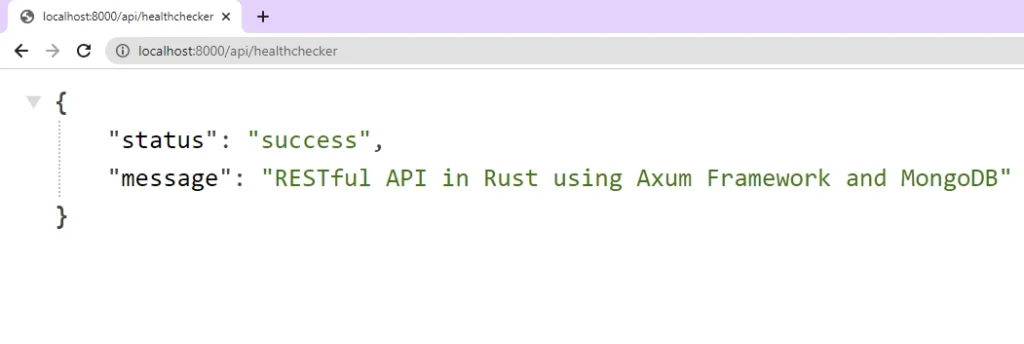
Now that we have the code in place, it’s time to start up our Axum HTTP server and see it in action! To do that, simply run the command cargo run and wait for the server to start listening on port 3000.
Once it’s ready to accept requests, head over to http://localhost:8000/api/healthchecker in your browser. If everything has been set up correctly, you should see the JSON object that we returned from the health checker route function.
To make our workflow more efficient, we can use a command-line tool called Cargo Watch. Think of it as Nodemon for Node.js but for Rust. With Cargo Watch, we can automatically rebuild our project whenever we make changes to the source code, saving us time and effort.
If you haven’t installed Cargo Watch yet, don’t worry – you can easily install it by running the command cargo install cargo-watch. Once installed, you can stop the previously running server and start the Axum HTTP server using the command cargo watch -q -c -w src/ -x run. With the specified command arguments, Cargo Watch will watch only the files in the ‘src‘ directory and automatically rebuild the project when changes are made to the source code.
Setup MongoDB Server with Docker
If you already have a running MongoDB server, feel free to skip this section. However, if you don’t have one yet, Docker is a quick and easy way to set one up.
To get started, all you need to do is create a docker-compose.yml file in your project’s root directory and copy in the Docker Compose configurations provided below.
docker-compose.yml
version: '3'
services:
  mongo:
    image: mongo:latest
    container_name: mongo
    env_file:
      - ./.env
    volumes:
      - mongo:/data/db
    ports:
      - '6000:27017'

volumes:
  mongo:
In the above Docker Compose settings, we referenced a .env file under the env_file field that contains the credentials needed to build the Mongo image. To make these credentials available to Docker Compose, create a .env file in the root directory of the project and add the following environment variables:
.env
MONGO_INITDB_ROOT_USERNAME=admin
MONGO_INITDB_ROOT_PASSWORD=password123
MONGO_INITDB_DATABASE=rust_mongodb

MONGODB_NOTE_COLLECTION=notes
DATABASE_URL=mongodb://admin:password123@localhost:6000/rust_mongodb?authSource=admin
Now that you’ve added the credentials to the .env file, it’s time to start the MongoDB server. Simply run the command docker-compose up -d to launch the server. After the execution is complete, you can verify that the MongoDB container is running either by using the docker ps command or by checking the Docker Desktop application.
Create the MongoDB Database Model
With our MongoDB server up and running, it’s time to dive into the fun part – creating the database model! By defining the structure of our documents, we’ll be able to easily manage the data we’ll be storing in our database.
For our note-taking application API, we’ll be creating a NoteModel struct that will contain all the necessary fields for a note item. To get started, simply create a new file called model.rs in the ‘src‘ directory and copy in the code below.
src/model.rs
use chrono::prelude::*;
use mongodb::bson::{self, oid::ObjectId};
use serde::{Deserialize, Serialize};

#[allow(non_snake_case)]
#[derive(Serialize, Deserialize, Debug, Clone)]
pub struct NoteModel {
    #[serde(rename = "_id")]
    pub id: ObjectId,
    pub title: String,
    pub content: String,
    pub category: Option<String>,
    pub published: Option<bool>,
    #[serde(with = "bson::serde_helpers::chrono_datetime_as_bson_datetime")]
    pub createdAt: DateTime<Utc>,
    #[serde(with = "bson::serde_helpers::chrono_datetime_as_bson_datetime")]
    pub updatedAt: DateTime<Utc>,
}
Create the API Request Structs
To properly handle incoming requests, we’ll create some structs that will deserialize the request bodies and parameters. These structs will not only ensure that the incoming JSON payload has the required fields but also that those fields have the correct data types.
Although we could use the validator crate to define additional validation rules on the fields of the structs, we’ll keep things simple for this project. So, go ahead and create a schema.rs file in the ‘src‘ directory, and add the following struct definitions:
src/schema.rs
use serde::{Deserialize, Serialize};

#[derive(Deserialize, Debug, Default)]
pub struct FilterOptions {
    pub page: Option<usize>,
    pub limit: Option<usize>,
}

#[derive(Deserialize, Debug)]
pub struct ParamOptions {
    pub id: String,
}

#[derive(Serialize, Deserialize, Debug)]
pub struct CreateNoteSchema {
    pub title: String,
    pub content: String,
    #[serde(skip_serializing_if = "Option::is_none")]
    pub category: Option<String>,
    #[serde(skip_serializing_if = "Option::is_none")]
    pub published: Option<bool>,
}

#[derive(Serialize, Deserialize, Debug)]
pub struct UpdateNoteSchema {
    #[serde(skip_serializing_if = "Option::is_none")]
    pub title: Option<String>,
    #[serde(skip_serializing_if = "Option::is_none")]
    pub content: Option<String>,
    #[serde(skip_serializing_if = "Option::is_none")]
    pub category: Option<String>,
    #[serde(skip_serializing_if = "Option::is_none")]
    pub published: Option<bool>,
}
Create the API Response Structs
Let’s create some useful structs that not only transform Rust data types into JSON but also provide a way to filter out sensitive fields from the MongoDB documents.
To do this, we’ll create a new file called response.rs in the ‘src‘ directory and add the following struct definitions:
src/response.rs
use chrono::{DateTime, Utc};
use serde::Serialize;

#[derive(Serialize)]
pub struct GenericResponse {
    pub status: String,
    pub message: String,
}

#[allow(non_snake_case)]
#[derive(Serialize, Debug)]
pub struct NoteResponse {
    pub id: String,
    pub title: String,
    pub content: String,
    pub category: String,
    pub published: bool,
    pub createdAt: DateTime<Utc>,
    pub updatedAt: DateTime<Utc>,
}

#[derive(Serialize, Debug)]
pub struct NoteData {
    pub note: NoteResponse,
}

#[derive(Serialize, Debug)]
pub struct SingleNoteResponse {
    pub status: &'static str,
    pub data: NoteData,
}

#[derive(Serialize, Debug)]
pub struct NoteListResponse {
    pub status: &'static str,
    pub results: usize,
    pub notes: Vec<NoteResponse>,
}
Handle the MongoDB Errors
Error handling is a crucial part of any API, and our note-taking application is no exception. It’s important to send clear and informative error messages to the user, while keeping sensitive information hidden from potential attackers.
To achieve this, we’ll define an enum of error types that can be returned by our API operations. It’s worth noting that I didn’t come up with these errors out of thin air – I relied on the Rust analyzer to guide me in defining the appropriate error types.
In order to streamline our error handling process and improve the maintainability of our code, we will incorporate the use of the thiserror crate. This crate effectively reduces the amount of boilerplate code that is typically required for error handling and provides a simple method for linking errors together in order to track their origins.
To get started, create a new file named error.rs in the ‘src‘ directory, and include the following code to define our error types:
src/error.rs
use axum::{http::StatusCode, Json};
use serde::Serialize;

#[derive(thiserror::Error, Debug)]
pub enum MyError {
    #[error("MongoDB error")]
    MongoError(#[from] mongodb::error::Error),
    #[error("duplicate key error: {0}")]
    MongoErrorKind(mongodb::error::ErrorKind),
    #[error("duplicate key error: {0}")]
    MongoDuplicateError(mongodb::error::Error),
    #[error("error during mongodb query: {0}")]
    MongoQueryError(mongodb::error::Error),
    #[error("error serializing BSON")]
    MongoSerializeBsonError(#[from] mongodb::bson::ser::Error),
    #[error("validation error")]
    MongoDataError(#[from] mongodb::bson::document::ValueAccessError),
    #[error("invalid ID: {0}")]
    InvalidIDError(String),
    #[error("Note with ID: {0} not found")]
    NotFoundError(String),
}

#[derive(Serialize)]
struct ErrorResponse {
    status: &'static str,
    message: String,
}

impl Into<(axum::http::StatusCode, Json<serde_json::Value>)> for MyError {
    fn into(self) -> (axum::http::StatusCode, Json<serde_json::Value>) {
        let (status, error_response) = match self {
            MyError::MongoErrorKind(e) => (
                StatusCode::INTERNAL_SERVER_ERROR,
                ErrorResponse {
                    status: "error",
                    message: format!("MongoDB error kind: {}", e),
                },
            ),
            MyError::MongoDuplicateError(_) => (
                StatusCode::CONFLICT,
                ErrorResponse {
                    status: "fail",
                    message: "Note with that title already exists".to_string(),
                },
            ),
            MyError::InvalidIDError(id) => (
                StatusCode::BAD_REQUEST,
                ErrorResponse {
                    status: "fail",
                    message: format!("invalid ID: {}", id),
                },
            ),
            MyError::NotFoundError(id) => (
                StatusCode::NOT_FOUND,
                ErrorResponse {
                    status: "fail",
                    message: format!("Note with ID: {} not found", id),
                },
            ),
            MyError::MongoError(e) => (
                StatusCode::INTERNAL_SERVER_ERROR,
                ErrorResponse {
                    status: "error",
                    message: format!("MongoDB error: {}", e),
                },
            ),
            MyError::MongoQueryError(e) => (
                StatusCode::INTERNAL_SERVER_ERROR,
                ErrorResponse {
                    status: "error",
                    message: format!("MongoDB error: {}", e),
                },
            ),
            MyError::MongoSerializeBsonError(e) => (
                StatusCode::INTERNAL_SERVER_ERROR,
                ErrorResponse {
                    status: "error",
                    message: format!("MongoDB error: {}", e),
                },
            ),
            MyError::MongoDataError(e) => (
                StatusCode::INTERNAL_SERVER_ERROR,
                ErrorResponse {
                    status: "error",
                    message: format!("MongoDB error: {}", e),
                },
            ),
        };
        (status, Json(serde_json::to_value(error_response).unwrap()))
    }
}

impl From<MyError> for (StatusCode, ErrorResponse) {
    fn from(err: MyError) -> (StatusCode, ErrorResponse) {
        err.into()
    }
}
In the above code, we define an enum called MyError, which represents the various error types that can occur in the application.
To handle these errors, we then define two impl blocks. The first impl block converts instances of the MyError enum into appropriate HTTP status codes and JSON error responses. This is accomplished by implementing the Into trait for MyError, which defines a mapping from each variant of the MyError enum to an appropriate HTTP status code and ErrorResponse instance.
The second impl block implements the From trait for MyError. This trait converts a MyError instance into a tuple of an HTTP status code and an ErrorResponse instance. Together, these two impl blocks streamline error handling by allowing for easy conversion of errors into HTTP responses with associated error messages.
Connect the Axum Server to MongoDB
Now that we have our database model and error-handling mechanism in place, it’s time to connect our Axum server to the MongoDB server. To accomplish this, we’ll create a DB struct that will hold our MongoDB collections. We’ll then define methods on this struct to enable us to perform CRUD operations on the MongoDB database.
To keep things simple for now, we’ll start by defining an init() method that establishes the connection between our application and the MongoDB server. Begin by creating a new file named db.rs in the ‘src‘ directory and add the code below to get started.
src/db.rs
use crate::error::MyError;
use crate::model::NoteModel;
use mongodb::bson::Document;
use mongodb::{options::ClientOptions, Client, Collection};

#[derive(Clone, Debug)]
pub struct DB {
    pub note_collection: Collection<NoteModel>,
    pub collection: Collection<Document>,
}

type Result<T> = std::result::Result<T, MyError>;

impl DB {
    pub async fn init() -> Result<Self> {
        let mongodb_uri = std::env::var("DATABASE_URL").expect("DATABASE_URL must be set.");
        let database_name =
            std::env::var("MONGO_INITDB_DATABASE").expect("MONGO_INITDB_DATABASE must be set.");
        let collection_name =
            std::env::var("MONGODB_NOTE_COLLECTION").expect("MONGODB_NOTE_COLLECTION must be set.");

        let mut client_options = ClientOptions::parse(mongodb_uri).await?;
        client_options.app_name = Some(database_name.to_string());

        let client = Client::with_options(client_options)?;
        let database = client.database(database_name.as_str());

        let note_collection = database.collection(collection_name.as_str());
        let collection = database.collection::<Document>(collection_name.as_str());

        println!("✅ Database connected successfully");

        Ok(Self {
            note_collection,
            collection,
        })
    }
}
Now that we have the init() method defined on the DB struct, we need to call it from the main() function and make its return value available to all route handler functions. To do this, we’ll update the src/main.rs file with the following code:
src/main.rs
mod db;
mod error;
mod model;
use std::sync::Arc;

use axum::{response::IntoResponse, routing::get, Json, Router};
use db::DB;
use dotenv::dotenv;
use error::MyError;

pub struct AppState {
    db: DB,
}

#[tokio::main]
async fn main() -> Result<(), MyError> {
    dotenv().ok();

    let db = DB::init().await?;

    let app = Router::new()
        .route("/api/healthchecker", get(health_checker_handler))
        .with_state(Arc::new(AppState { db: db.clone() }));

    println!("🚀 Server started successfully");
    let listener = tokio::net::TcpListener::bind("0.0.0.0:8000").await.unwrap();
    axum::serve(listener, app).await.unwrap();

    Ok(())
}

async fn health_checker_handler() -> impl IntoResponse {
    const MESSAGE: &str = "RESTful API in Rust using Axum Framework and MongoDB";

    let json_response = serde_json::json!({
        "status": "success",
        "message": MESSAGE
    });

    Json(json_response)
}
In the code above, we imported the modules we have created so far using mod. We then defined a new struct named AppState to hold an instance of the DB.
In the main() function, we loaded the environment variables with the Dotenv crate to ensure that the init() method can access them via std::env::var(). After that, we established a connection between the MongoDB server and our application by calling the DB::init() function.
Lastly, we passed an instance of the AppState to the Axum router. We used the Arc::new() function to ensure it’s shared among all route handler functions, thus giving each handler function access to the DB instance.
Create Some Helper Functions
Before we dive into implementing the CRUD functions using the MongoDB driver, we need to define two utility functions that will allow us to write reusable code blocks. To do this, we must first update the crate and dependencies imports in the src/db.rs file by adding the following.
src/db.rs
use crate::error::MyError;
use crate::response::{NoteData, NoteListResponse, NoteResponse, SingleNoteResponse};
use crate::{
    error::MyError::*, model::NoteModel, schema::CreateNoteSchema, schema::UpdateNoteSchema,
};
use chrono::prelude::*;
use futures::StreamExt;
use mongodb::bson::{doc, oid::ObjectId, Document};
use mongodb::options::{FindOneAndUpdateOptions, FindOptions, IndexOptions, ReturnDocument};
use mongodb::{bson, options::ClientOptions, Client, Collection, IndexModel};
use std::str::FromStr;
Function to Transform the Database Model
Let’s spice up our DB struct by adding a handy utility method called doc_to_note! This method will take a reference to a NoteModel object and transforms it into a NoteResponse object. Its purpose is to provide a layer of abstraction that filters out sensitive fields from the document returned by the MongoDB driver.
Although our implementation does not have any sensitive fields, the method will only map the fields in NoteModel to the fields in NoteResponse. To get started, copy and paste the doc_to_note method shown in the code below into the src/db.rs file.
src/db.rs
#[derive(Clone, Debug)]
pub struct DB {
    pub note_collection: Collection<NoteModel>,
    pub collection: Collection<Document>,
}

impl DB {

    fn doc_to_note(&self, note: &NoteModel) -> Result<NoteResponse> {
        let note_response = NoteResponse {
            id: note.id.to_hex(),
            title: note.title.to_owned(),
            content: note.content.to_owned(),
            category: note.category.to_owned().unwrap(),
            published: note.published.unwrap(),
            createdAt: note.createdAt,
            updatedAt: note.updatedAt,
        };

        Ok(note_response)
    }
}
Function to Create a MongoDB Document
Moving right along, we’ll now create another handy utility method called create_note_document. This method takes in the data from a request payload and converts it into a MongoDB document, which we’ll use to create a new note. The resulting document will include timestamps for createdAt and updatedAt, a boolean value for published, and the note’s category.
Copy and paste the create_note_document method shown below into the DB struct in the src/db.rs file.
src/db.rs
#[derive(Clone, Debug)]
pub struct DB {
    pub note_collection: Collection<NoteModel>,
    pub collection: Collection<Document>,
}

impl DB {

    fn create_note_document(
        &self,
        body: &CreateNoteSchema,
        published: bool,
        category: String,
    ) -> Result<bson::Document> {
        let serialized_data = bson::to_bson(body).map_err(MongoSerializeBsonError)?;
        let document = serialized_data.as_document().unwrap();

        let datetime = Utc::now();

        let mut doc_with_dates = doc! {
            "createdAt": datetime,
            "updatedAt": datetime,
            "published": published,
            "category": category
        };
        doc_with_dates.extend(document.clone());

        Ok(doc_with_dates)
    }
}
Perform the CRUD Operations
Let’s level up our database interactions and create methods on the DB struct that enable us to perform CRUD operations on MongoDB. These higher-level functions act as a bridge between the lower-level CRUD methods provided by the MongoDB driver and our Axum route handlers.
By invoking these methods with the required arguments, we’ll be able to perform the necessary database operations and handle requests seamlessly.
Function to Retrieve all the Documents
The first method we’ll add to the DB struct is fetch_notes, which retrieves a list of note documents from the MongoDB collection. This method includes a pagination feature to avoid sending large payloads in the JSON response when the collection contains millions of documents.
To retrieve the desired notes, we’ll build a FindOptions object to specify the limit and skip values for the query. We’ll then execute the query using the find method on the note_collection collection with the specified filter options, which will return a cursor of the matching documents.
With the cursor, we’ll iterate over the results using a while let loop and retrieve each document using the next method. We’ll then use the doc_to_note method to convert the retrieved document into a NoteResponse object.
Finally, we’ll construct a NoteListResponse object to hold the list of notes along with the number of notes returned from the database.
src/db.rs
#[derive(Clone, Debug)]
pub struct DB {
    pub note_collection: Collection<NoteModel>,
    pub collection: Collection<Document>,
}

impl DB {

    pub async fn fetch_notes(&self, limit: i64, page: i64) -> Result<NoteListResponse> {
        let find_options = FindOptions::builder()
            .limit(limit)
            .skip(u64::try_from((page - 1) * limit).unwrap())
            .build();

        let mut cursor = self
            .note_collection
            .find(None, find_options)
            .await
            .map_err(MongoQueryError)?;

        let mut json_result: Vec<NoteResponse> = Vec::new();
        while let Some(doc) = cursor.next().await {
            json_result.push(self.doc_to_note(&doc.unwrap())?);
        }

        Ok(NoteListResponse {
            status: "success",
            results: json_result.len(),
            notes: json_result,
        })
    }
}
Function to Insert a Document
Let’s implement a method that adds a new note document to the MongoDB collection. This method takes a reference to a CreateNoteSchema object, which provides the details of the new note.
First, the method will extract the published and category fields from the CreateNoteSchema object and set default values if they are not provided. Then it will use the extracted fields to create a new note document using the create_note_document method.
After creating the new document, the method will create a unique index on the title field of the note_collection collection to prevent duplicate titles. If the index creation is successful, the method will proceed to insert the new document into the collection.
If the insertion is successful, the method will retrieve the inserted document from the note_collection collection using the find_one method with the newly created _id value. Then, it will convert the retrieved document into a NoteData object using the doc_to_note method and return a SingleNoteResponse object containing the created note data.
If any of the database operations fail, the method returns an error object indicating the cause of the failure.
src/db.rs
#[derive(Clone, Debug)]
pub struct DB {
pub note_collection: Collection<NoteModel>,
pub collection: Collection<Document>,
}
impl DB {
pub async fn create_note(&self, body: &CreateNoteSchema) -> Result<SingleNoteResponse> {
let published = body.published.to_owned().unwrap_or(false);
let category = body.category.to_owned().unwrap_or_default();
let document = self.create_note_document(body, published, category)?;
let options = IndexOptions::builder().unique(true).build();
let index = IndexModel::builder()
.keys(doc! {"title": 1})
.options(options)
.build();
match self.note_collection.create_index(index, None).await {
Ok(_) => {}
Err(e) => return Err(MongoQueryError(e)),
};
let insert_result = match self.collection.insert_one(&document, None).await {
Ok(result) => result,
Err(e) => {
if e.to_string()
.contains("E11000 duplicate key error collection")
{
return Err(MongoDuplicateError(e));
}
return Err(MongoQueryError(e));
}
};
let new_id = insert_result
.inserted_id
.as_object_id()
.expect("issue with new _id");
let note_doc = match self
.note_collection
.find_one(doc! {"_id": new_id}, None)
.await
{
Ok(Some(doc)) => doc,
Ok(None) => return Err(NotFoundError(new_id.to_string())),
Err(e) => return Err(MongoQueryError(e)),
};
Ok(SingleNoteResponse {
status: "success",
data: NoteData {
note: self.doc_to_note(¬e_doc)?,
},
})
}
}
Function to Fetch a Single Document
We can now implement a new method to retrieve a single note document from the MongoDB collection by providing its ID. This method takes the id of the note as an argument.
Initially, the method converts the provided id string into an ObjectId. This object ID is then passed as a parameter to the find_one method of the note collection, which retrieves the document that matches the query.
Once a document with the given ID is found, the method will extract the note data from the document and use the doc_to_note method to convert it into the NoteData object.
Finally, a SingleNoteResponse object with the note data is constructed and returned. However, if no note with that ID exists, the method will return a 404 error along with a corresponding message.
src/db.rs
#[derive(Clone, Debug)]
pub struct DB {
    pub note_collection: Collection<NoteModel>,
    pub collection: Collection<Document>,
}


impl DB {

    pub async fn get_note(&self, id: &str) -> Result<SingleNoteResponse> {
        let oid = ObjectId::from_str(id).map_err(|_| InvalidIDError(id.to_owned()))?;

        let note_doc = self
            .note_collection
            .find_one(doc! {"_id":oid }, None)
            .await
            .map_err(MongoQueryError)?;

        match note_doc {
            Some(doc) => {
                let note = self.doc_to_note(&doc)?;
                Ok(SingleNoteResponse {
                    status: "success",
                    data: NoteData { note },
                })
            }
            None => Err(NotFoundError(id.to_string())),
        }
    }
}
Function to Edit a Document
To update an existing note document in the MongoDB collection, we will implement a method called edit_note. This method takes two arguments: the id of the note to update and a reference to an UpdateNoteSchema object, which contains the new data for the note.
First, the method converts the id string to an ObjectId and uses it to construct a query for the note_collection collection.
Next, the method creates an update document using the provided UpdateNoteSchema object. The update document is constructed using the $set operator, which replaces the values of the specified fields with the new values provided in the UpdateNoteSchema object.
Then, the method uses the find_one_and_update method to update the document that matches the query with the new data. The options parameter is set to return the updated document after the update operation is complete.
If the update operation succeeds and a document is returned, the method extracts the note data from the updated document and uses the doc_to_note method to convert it into a NoteData object.
Finally, the method constructs a SingleNoteResponse object with the updated note data and returns it. If no note with the provided id is found, the method returns a 404 error with a message.
src/db.rs
#[derive(Clone, Debug)]
pub struct DB {
    pub note_collection: Collection<NoteModel>,
    pub collection: Collection<Document>,
}


impl DB {

    pub async fn edit_note(&self, id: &str, body: &UpdateNoteSchema) -> Result<SingleNoteResponse> {
        let oid = ObjectId::from_str(id).map_err(|_| InvalidIDError(id.to_owned()))?;

        let update = doc! {
            "$set": bson::to_document(body).map_err(MongoSerializeBsonError)?,
        };

        let options = FindOneAndUpdateOptions::builder()
            .return_document(ReturnDocument::After)
            .build();

        if let Some(doc) = self
            .note_collection
            .find_one_and_update(doc! {"_id": oid}, update, options)
            .await
            .map_err(MongoQueryError)?
        {
            let note = self.doc_to_note(&doc)?;
            let note_response = SingleNoteResponse {
                status: "success",
                data: NoteData { note },
            };
            Ok(note_response)
        } else {
            Err(NotFoundError(id.to_string()))
        }
    }
}
Function to Delete a Document
To delete a note document from the MongoDB collection, we will create a method called delete_note. This method takes in the id of the note to be deleted as an argument.
First, the method converts the ID string into an ObjectId and creates a filter using this ID. Then, it uses the delete_one method provided by the collection to delete the note document matching the provided filter.
If a document is deleted successfully, the method returns an Ok result, indicating a successful deletion. If the note with the provided ID is not found in the collection, the method returns an error with a NotFoundError containing the ID that was not found.
src/db.rs
#[derive(Clone, Debug)]
pub struct DB {
    pub note_collection: Collection<NoteModel>,
    pub collection: Collection<Document>,
}


impl DB {

    pub async fn delete_note(&self, id: &str) -> Result<()> {
        let oid = ObjectId::from_str(id).map_err(|_| InvalidIDError(id.to_owned()))?;
        let filter = doc! {"_id": oid };

        let result = self
            .collection
            .delete_one(filter, None)
            .await
            .map_err(MongoQueryError)?;

        match result.deleted_count {
            0 => Err(NotFoundError(id.to_string())),
            _ => Ok(()),
        }
    }
}
The Complete Code of the CRUD Functions
src/db.rs
use crate::error::MyError;
use crate::response::{NoteData, NoteListResponse, NoteResponse, SingleNoteResponse};
use crate::{
error::MyError::*, model::NoteModel, schema::CreateNoteSchema, schema::UpdateNoteSchema,
};
use chrono::prelude::*;
use futures::StreamExt;
use mongodb::bson::{doc, oid::ObjectId, Document};
use mongodb::options::{FindOneAndUpdateOptions, FindOptions, IndexOptions, ReturnDocument};
use mongodb::{bson, options::ClientOptions, Client, Collection, IndexModel};
use std::str::FromStr;
#[derive(Clone, Debug)]
pub struct DB {
pub note_collection: Collection<NoteModel>,
pub collection: Collection<Document>,
}
type Result<T> = std::result::Result<T, MyError>;
impl DB {
pub async fn init() -> Result<Self> {
let mongodb_uri = std::env::var("DATABASE_URL").expect("DATABASE_URL must be set.");
let database_name =
std::env::var("MONGO_INITDB_DATABASE").expect("MONGO_INITDB_DATABASE must be set.");
let collection_name =
std::env::var("MONGODB_NOTE_COLLECTION").expect("MONGODB_NOTE_COLLECTION must be set.");
let mut client_options = ClientOptions::parse(mongodb_uri).await?;
client_options.app_name = Some(database_name.to_string());
let client = Client::with_options(client_options)?;
let database = client.database(database_name.as_str());
let note_collection = database.collection(collection_name.as_str());
let collection = database.collection::<Document>(collection_name.as_str());
println!("✅ Database connected successfully");
Ok(Self {
note_collection,
collection,
})
}
pub async fn fetch_notes(&self, limit: i64, page: i64) -> Result<NoteListResponse> {
let find_options = FindOptions::builder()
.limit(limit)
.skip(u64::try_from((page - 1) * limit).unwrap())
.build();
let mut cursor = self
.note_collection
.find(None, find_options)
.await
.map_err(MongoQueryError)?;
let mut json_result: Vec<NoteResponse> = Vec::new();
while let Some(doc) = cursor.next().await {
json_result.push(self.doc_to_note(&doc.unwrap())?);
}
Ok(NoteListResponse {
status: "success",
results: json_result.len(),
notes: json_result,
})
}
pub async fn create_note(&self, body: &CreateNoteSchema) -> Result<SingleNoteResponse> {
let published = body.published.to_owned().unwrap_or(false);
let category = body.category.to_owned().unwrap_or_default();
let document = self.create_note_document(body, published, category)?;
let options = IndexOptions::builder().unique(true).build();
let index = IndexModel::builder()
.keys(doc! {"title": 1})
.options(options)
.build();
match self.note_collection.create_index(index, None).await {
Ok(_) => {}
Err(e) => return Err(MongoQueryError(e)),
};
let insert_result = match self.collection.insert_one(&document, None).await {
Ok(result) => result,
Err(e) => {
if e.to_string()
.contains("E11000 duplicate key error collection")
{
return Err(MongoDuplicateError(e));
}
return Err(MongoQueryError(e));
}
};
let new_id = insert_result
.inserted_id
.as_object_id()
.expect("issue with new _id");
let note_doc = match self
.note_collection
.find_one(doc! {"_id": new_id}, None)
.await
{
Ok(Some(doc)) => doc,
Ok(None) => return Err(NotFoundError(new_id.to_string())),
Err(e) => return Err(MongoQueryError(e)),
};
Ok(SingleNoteResponse {
status: "success",
data: NoteData {
note: self.doc_to_note(¬e_doc)?,
},
})
}
pub async fn get_note(&self, id: &str) -> Result<SingleNoteResponse> {
let oid = ObjectId::from_str(id).map_err(|_| InvalidIDError(id.to_owned()))?;
let note_doc = self
.note_collection
.find_one(doc! {"_id":oid }, None)
.await
.map_err(MongoQueryError)?;
match note_doc {
Some(doc) => {
let note = self.doc_to_note(&doc)?;
Ok(SingleNoteResponse {
status: "success",
data: NoteData { note },
})
}
None => Err(NotFoundError(id.to_string())),
}
}
pub async fn edit_note(&self, id: &str, body: &UpdateNoteSchema) -> Result<SingleNoteResponse> {
let oid = ObjectId::from_str(id).map_err(|_| InvalidIDError(id.to_owned()))?;
let update = doc! {
"$set": bson::to_document(body).map_err(MongoSerializeBsonError)?,
};
let options = FindOneAndUpdateOptions::builder()
.return_document(ReturnDocument::After)
.build();
if let Some(doc) = self
.note_collection
.find_one_and_update(doc! {"_id": oid}, update, options)
.await
.map_err(MongoQueryError)?
{
let note = self.doc_to_note(&doc)?;
let note_response = SingleNoteResponse {
status: "success",
data: NoteData { note },
};
Ok(note_response)
} else {
Err(NotFoundError(id.to_string()))
}
}
pub async fn delete_note(&self, id: &str) -> Result<()> {
let oid = ObjectId::from_str(id).map_err(|_| InvalidIDError(id.to_owned()))?;
let filter = doc! {"_id": oid };
let result = self
.collection
.delete_one(filter, None)
.await
.map_err(MongoQueryError)?;
match result.deleted_count {
0 => Err(NotFoundError(id.to_string())),
_ => Ok(()),
}
}
fn doc_to_note(&self, note: &NoteModel) -> Result<NoteResponse> {
let note_response = NoteResponse {
id: note.id.to_hex(),
title: note.title.to_owned(),
content: note.content.to_owned(),
category: note.category.to_owned().unwrap(),
published: note.published.unwrap(),
createdAt: note.createdAt,
updatedAt: note.updatedAt,
};
Ok(note_response)
}
fn create_note_document(
&self,
body: &CreateNoteSchema,
published: bool,
category: String,
) -> Result<bson::Document> {
let serialized_data = bson::to_bson(body).map_err(MongoSerializeBsonError)?;
let document = serialized_data.as_document().unwrap();
let datetime = Utc::now();
let mut doc_with_dates = doc! {
"createdAt": datetime,
"updatedAt": datetime,
"published": published,
"category": category
};
doc_with_dates.extend(document.clone());
Ok(doc_with_dates)
}
}
Create the Axum Route Functions
Now that we’ve implemented the necessary CRUD methods in the DB struct, it’s time to create Axum route functions that will utilize them. Since all the business logic has already been implemented in the src/db.rs file, the route functions will be concise and will only invoke the appropriate CRUD methods.
This is a recommended approach when building APIs, especially when writing tests to ensure different parts of the application are functioning correctly. Thus, the route functions will only be responsible for handling application logic.
To get started, let’s create a handler.rs file in the src directory and add the following crates and dependencies.
src/handler.rs
use std::sync::Arc;

use axum::{
    extract::{Path, Query, State},
    http::StatusCode,
    response::IntoResponse,
    Json,
};

use crate::{
    error::MyError,
    schema::{CreateNoteSchema, FilterOptions, UpdateNoteSchema},
    AppState,
};
Axum Route Function to Fetch All Notes
The first Axum route handler we’ll create is note_list_handler. This function will handle GET requests to the /api/notes endpoint.
Inside the function, we’ll set default values for the limit and page fields in case they’re not specified in the request URL. If no values are provided, the function will return the first 10 results.
Next, we’ll call the fetch_notes method to retrieve notes based on the specified filtering options. If the notes are successfully retrieved, the function will return a JSON response with the result. On the other hand, if an error occurs while retrieving the notes, the function will return an error response with the corresponding error message.
To implement this route function, add the following code to the src/handler.rs file:
src/handler.rs
pub async fn note_list_handler(
    opts: Option<Query<FilterOptions>>,
    State(app_state): State<Arc<AppState>>,
) -> Result<impl IntoResponse, (StatusCode, Json<serde_json::Value>)> {
    let Query(opts) = opts.unwrap_or_default();

    let limit = opts.limit.unwrap_or(10) as i64;
    let page = opts.page.unwrap_or(1) as i64;

    match app_state
        .db
        .fetch_notes(limit, page)
        .await
        .map_err(MyError::from)
    {
        Ok(res) => Ok(Json(res)),
        Err(e) => Err(e.into()),
    }
}
Axum Route Function to Add a Note
Next, we’ll define an Axum route handler to handle HTTP POST requests to the /api/notes endpoint.
In the function, we’ll call the create_note method of the app_state.db instance and pass the request body as an argument. If the note is created successfully, the function will respond with a 201 CREATED status code and a JSON representation of the created note.
Otherwise, if an error occurs during the creation process, the function will return an error response containing the error message.
src/handler.rs
pub async fn create_note_handler(
    State(app_state): State<Arc<AppState>>,
    Json(body): Json<CreateNoteSchema>,
) -> Result<impl IntoResponse, (StatusCode, Json<serde_json::Value>)> {
    match app_state.db.create_note(&body).await.map_err(MyError::from) {
        Ok(res) => Ok((StatusCode::CREATED, Json(res))),
        Err(e) => Err(e.into()),
    }
}
Axum Route Function to Get a Note
This Axum route handler is responsible for handling GET requests to the /api/notes/:id endpoint.
Inside the function, we will call the get_note method on the app_state.db instance, passing in the note ID extracted from the request URL as an argument.
If the note is successfully retrieved, the function will return a JSON response with the retrieved note. If an error occurs during the retrieval process, the function will return an error response with the error message.
src/handler.rs
pub async fn get_note_handler(
    Path(id): Path<String>,
    State(app_state): State<Arc<AppState>>,
) -> Result<impl IntoResponse, (StatusCode, Json<serde_json::Value>)> {
    match app_state.db.get_note(&id).await.map_err(MyError::from) {
        Ok(res) => Ok(Json(res)),
        Err(e) => Err(e.into()),
    }
}
Axum Route Function to Edit a Note
Now, let’s move on to the next Axum route handler, which will handle PATCH requests to the /api/notes/:id endpoint.
Within this function, we’ll utilize the edit_note method provided by the app_state.db instance, which takes in both the note ID and the request body as arguments. If the editing process is successful, the function will return a JSON response containing the edited note. In the event of an error during editing, an error response with the corresponding error message will be returned.
src/handler.rs
pub async fn edit_note_handler(
    Path(id): Path<String>,
    State(app_state): State<Arc<AppState>>,
    Json(body): Json<UpdateNoteSchema>,
) -> Result<impl IntoResponse, (StatusCode, Json<serde_json::Value>)> {
    match app_state
        .db
        .edit_note(&id, &body)
        .await
        .map_err(MyError::from)
    {
        Ok(res) => Ok(Json(res)),
        Err(e) => Err(e.into()),
    }
}
Axum Route Function to Delete a Note
The last Axum route handler we will create is delete_note_handler and it will be responsible for handling DELETE requests to the /api/notes/:id endpoint.
Inside the function, the delete_note method available on the app_state.db instance will be called, passing in the note ID extracted from the request URL as an argument.
If the note is successfully deleted, the function will return a response with a status code of 204 NO CONTENT. If an error occurs during the deletion process, the function will return an error response with the error message.
src/handler.rs
pub async fn delete_note_handler(
    Path(id): Path<String>,
    State(app_state): State<Arc<AppState>>,
) -> Result<impl IntoResponse, (StatusCode, Json<serde_json::Value>)> {
    match app_state.db.delete_note(&id).await.map_err(MyError::from) {
        Ok(_) => Ok(StatusCode::NO_CONTENT),
        Err(e) => Err(e.into()),
    }
}
The Complete Code of the Axum Route Functions
src/handler.rs
use std::sync::Arc;

use axum::{
    extract::{Path, Query, State},
    http::StatusCode,
    response::IntoResponse,
    Json,
};

use crate::{
    error::MyError,
    schema::{CreateNoteSchema, FilterOptions, UpdateNoteSchema},
    AppState,
};

pub async fn health_checker_handler() -> impl IntoResponse {
    const MESSAGE: &str = "RESTful API in Rust using Axum Framework and MongoDB";

    let json_response = serde_json::json!({
        "status": "success",
        "message": MESSAGE
    });

    Json(json_response)
}

pub async fn note_list_handler(
    opts: Option<Query<FilterOptions>>,
    State(app_state): State<Arc<AppState>>,
) -> Result<impl IntoResponse, (StatusCode, Json<serde_json::Value>)> {
    let Query(opts) = opts.unwrap_or_default();

    let limit = opts.limit.unwrap_or(10) as i64;
    let page = opts.page.unwrap_or(1) as i64;

    match app_state
        .db
        .fetch_notes(limit, page)
        .await
        .map_err(MyError::from)
    {
        Ok(res) => Ok(Json(res)),
        Err(e) => Err(e.into()),
    }
}

pub async fn create_note_handler(
    State(app_state): State<Arc<AppState>>,
    Json(body): Json<CreateNoteSchema>,
) -> Result<impl IntoResponse, (StatusCode, Json<serde_json::Value>)> {
    match app_state.db.create_note(&body).await.map_err(MyError::from) {
        Ok(res) => Ok((StatusCode::CREATED, Json(res))),
        Err(e) => Err(e.into()),
    }
}

pub async fn get_note_handler(
    Path(id): Path<String>,
    State(app_state): State<Arc<AppState>>,
) -> Result<impl IntoResponse, (StatusCode, Json<serde_json::Value>)> {
    match app_state.db.get_note(&id).await.map_err(MyError::from) {
        Ok(res) => Ok(Json(res)),
        Err(e) => Err(e.into()),
    }
}

pub async fn edit_note_handler(
    Path(id): Path<String>,
    State(app_state): State<Arc<AppState>>,
    Json(body): Json<UpdateNoteSchema>,
) -> Result<impl IntoResponse, (StatusCode, Json<serde_json::Value>)> {
    match app_state
        .db
        .edit_note(&id, &body)
        .await
        .map_err(MyError::from)
    {
        Ok(res) => Ok(Json(res)),
        Err(e) => Err(e.into()),
    }
}

pub async fn delete_note_handler(
    Path(id): Path<String>,
    State(app_state): State<Arc<AppState>>,
) -> Result<impl IntoResponse, (StatusCode, Json<serde_json::Value>)> {
    match app_state.db.delete_note(&id).await.map_err(MyError::from) {
        Ok(_) => Ok(StatusCode::NO_CONTENT),
        Err(e) => Err(e.into()),
    }
}
Create the Axum API Router
Let’s connect all the pieces by creating an Axum router that will receive incoming requests and direct them to the appropriate handler. This might seem intimidating, but it’s actually pretty straightforward.
First, create a new file called route.rs in the src directory. Inside this file, we’ll define a function called ‘create_router‘ that takes the AppState as an argument and returns a router instance. This router will match the incoming HTTP requests to a specific route based on the method and URL path of the request, and then route it to the appropriate handler function.
The create_router function registers each handler function with its corresponding route and HTTP method using the route method from the Axum crate. Finally, the function returns the router instance. Later, we’ll call create_router in the main function to register all the routes.
Here’s the code to include in your route.rs file:
src/route.rs
use std::sync::Arc;

use axum::{
    routing::{get, post},
    Router,
};

use crate::{
    handler::{
        create_note_handler, delete_note_handler, edit_note_handler, get_note_handler,
        health_checker_handler, note_list_handler,
    },
    AppState,
};

pub fn create_router(app_state: Arc<AppState>) -> Router {
    Router::new()
        .route("/api/healthchecker", get(health_checker_handler))
        .route("/api/notes/", post(create_note_handler))
        .route("/api/notes", get(note_list_handler))
        .route(
            "/api/notes/:id",
            get(get_note_handler)
                .patch(edit_note_handler)
                .delete(delete_note_handler),
        )
        .with_state(app_state)
}
Register the API Router and Set up CORS
To complete our server implementation, we need to bring everything together in the main.rs file. This involves importing all the necessary modules and invoking the create_router function to register our API routes.
In addition, we’ll add a CORS middleware to the router to enable cross-origin requests. This will allow the server to accept requests from clients running on different origins.
To set this up, open your src/main.rs file and replace its contents with the code below.
src/main.rs
mod db;
mod error;
mod handler;
mod model;
mod response;
mod route;
mod schema;

use std::sync::Arc;

use axum::http::{
    header::{ACCEPT, AUTHORIZATION, CONTENT_TYPE},
    HeaderValue, Method,
};
use db::DB;
use dotenv::dotenv;
use error::MyError;
use route::create_router;
use tower_http::cors::CorsLayer;

pub struct AppState {
    db: DB,
}

#[tokio::main]
async fn main() -> Result<(), MyError> {
    dotenv().ok();

    let db = DB::init().await?;

    let cors = CorsLayer::new()
        .allow_origin("http://localhost:3000".parse::<HeaderValue>().unwrap())
        .allow_methods([Method::GET, Method::POST, Method::PATCH, Method::DELETE])
        .allow_credentials(true)
        .allow_headers([AUTHORIZATION, ACCEPT, CONTENT_TYPE]);

    let app = create_router(Arc::new(AppState { db: db.clone() })).layer(cors);

    println!("🚀 Server started successfully");
    let listener = tokio::net::TcpListener::bind("0.0.0.0:8000").await.unwrap();
    axum::serve(listener, app).await.unwrap();

    Ok(())
}
Congratulations on completing this project! You’ve now built a powerful RESTful API with Rust, Axum, and MongoDB that supports all CRUD operations. The next step is to test your API and make sure everything works as intended.
To make your testing process more convenient, I’ve included a Postman collection called Note App.postman_collection.json in the project repository. By importing this collection into either Postman or the Thunder Client VS Code extension, you can easily test your API’s CRUD endpoints without manually entering request URLs, methods, and bodies.
But if you’re a visual person and prefer to interact with the API through a frontend app, don’t worry! I’ve got you covered as well. In the “Run the Axum API with a Frontend App” section, I’ve outlined the steps you need to follow to set up a frontend app built with React.js that can seamlessly communicate with your API. Best of all, you can get your app up and running without writing a single line of code!
Conclusion
Great job, you’ve reached the end of this tutorial! In this guide, we’ve covered how to create a RESTful API in Rust using the Axum framework, and how to use the MongoDB driver to store data in a MongoDB database. Additionally, we took it a step further by implementing robust error handling to catch all possible MongoDB errors and return well-formatted error messages to the user.
I hope you found this tutorial informative and engaging, and that it has given you the tools you need to create your own APIs in Rust. If you have any questions or feedback, please don’t hesitate to leave a comment below. I’ll be sure to respond as soon as possible.
Thank you for this article. I think it would be great to see a similar tutorial that features SurrealDB, since it is coded in Rust. Their public cloud will be released next month, so I think including that too would go a long ways for the learner.
Cheers
Thanks for the suggestion.
Can this work with MongoDB Atlas? Could you help me understand how to integrate my Rust web API with MongoDB Atlas/hosted instances? Thanks!
Can I reuse the sample code in another project? There isn’t a license file in the repo so I’m not sure what you allow.
Feel free and use the source code in your projects.