
This article will teach you how to build a full-stack tRPC CRUD (Create, Read, Update, and Delete) app with Next.js. The tRPC API will be built on Next.js edge runtime and the tRPC client will be created with React.js. For data storage, we’ll use Prisma ORM to query and mutate an SQLite database.
Prior to the release of TypeScript Remote Procedure Call, also commonly referred to as tRPC, GraphQL was the dominant language for building type-safe frontend and backend applications. However, GraphQL introduced more complexities since developers had to learn the query language before building projects with it.
Due to the downsides of GraphQL, tRPC was developed to bring some of the good parts of GraphQL into RESTful architecture to make the building of end-to-end type-safe applications seamless for developers.
Related articles:
- How to Setup tRPC API Server & Client with Next.js and Prisma
- Build tRPC API with Next.js & PostgreSQL: Access & Refresh Tokens
- Full-Stack Next.js tRPC App: User Registration & Login Example
- Build a tRPC CRUD API Example with Next.js

Prerequisites
Despite designing this tutorial with beginner developers in mind, these are the prerequisites needed to get the most out of this guide:
- Have the latest or LTS version of Node.js installed
- You should have a basic knowledge of React.js and Next.js
- You should know how to use Tailwind CSS
- You should have a basic understanding of CRUD patterns and API designs.
Run the Next.js tRPC CRUD App Locally
- Download or clone the Next.js tRPC source code from https://github.com/wpcodevo/nextjs-trpc-crud-app and open the project with an IDE.
- Open the integrated terminal in your IDE and run
yarnoryarn installto install all the required dependencies. - Run
yarn db:migrate && yarn db:pushto generate the Prisma Client and push the schema to the SQLite database. - Start both the tRPC client and API by running
yarn dev - Navigate to http://localhost:3000 in a new tab to test the Next.js tRPC CRUD app.
Setup Next.js as a Monorepo
In this section, you’ll generate a Next.js boilerplate project with Tailwind CSS already configured using the Next.js scaffolding tool. After that, we’ll tweak the folder structure to convert the project into a monolithic repository.
Run the following commands to generate the Next.js project. In this example, I named the project nextjs-trpc-crud-app but feel free to change the name.
yarn create next-app --example with-tailwindcss nextjs-trpc-crud-app
# or
npx create-next-app --example with-tailwindcss nextjs-trpc-crud-app
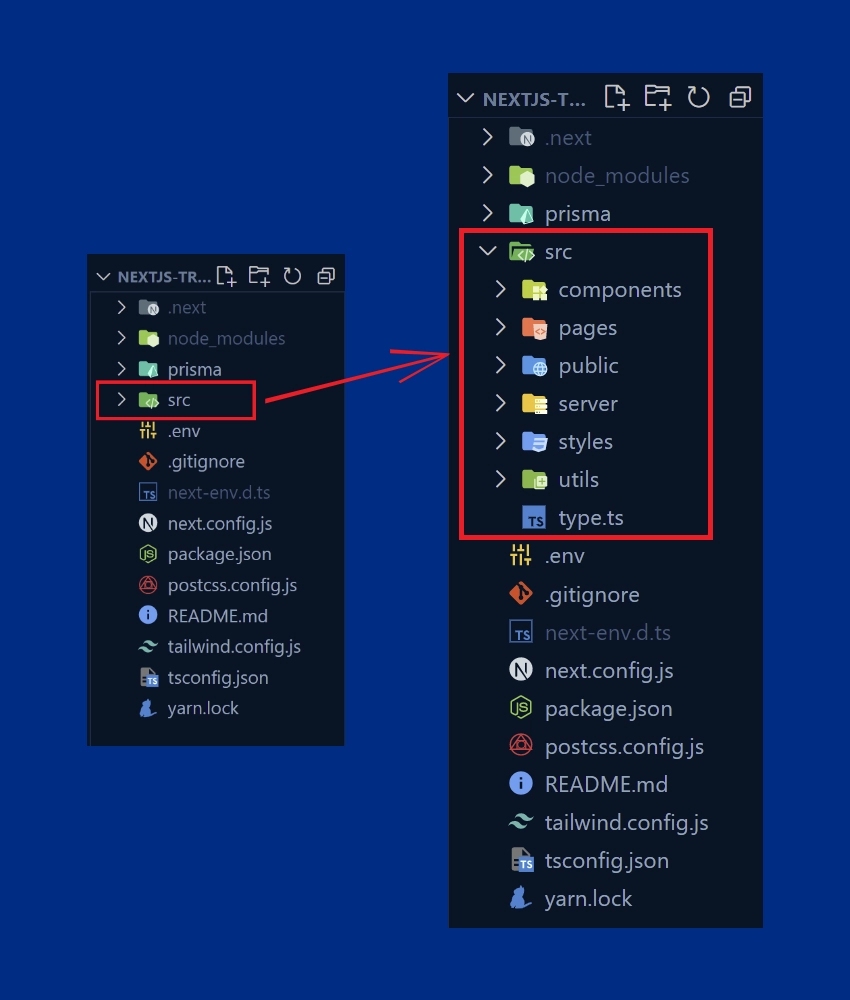
After the project has been generated, open it with an IDE and create an src folder in the root directory. To convert the project into a monorepo, move the pages, styles, and public folders into the newly-created src folder.
By default, Next.js comes with its own tsconfig.json configurations but open the tsconfig.json file and replace its content with the following configurations I got from the tRPC Next.js example source code.
tsconfig.json
{
  "compilerOptions": {
    "target": "es6",
    "lib": ["dom", "dom.iterable", "esnext"],
    "allowJs": true,
    "skipLibCheck": true,
    "strict": true,
    "strictNullChecks": true,
    "forceConsistentCasingInFileNames": true,
    "noEmit": true,
    "esModuleInterop": true,
    "module": "esnext",
    "moduleResolution": "node",
    "resolveJsonModule": true,
    "noUncheckedIndexedAccess": true,
    "isolatedModules": true,
    "jsx": "preserve",
    "incremental": true,
    "baseUrl": ".",
    "paths": {
      "~/*": ["src/*"]
    }
  },
  "include": [
    "next-env.d.ts",
    "**/*.ts",
    "**/*.tsx",
    "./*.js",
    "./src/**/*.js"
  ],
  "exclude": ["node_modules"]
}
Also, open the tailwind.config.js file and replace its content with the following Tailwind CSS configurations.
tailwind.config.js
/** @type {import('tailwindcss').Config} */
module.exports = {
  content: [
    './src/pages/**/*.{js,ts,jsx,tsx}',
    './src/components/**/*.{js,ts,jsx,tsx}',
  ],
  theme: {
    extend: {
      colors: {
        "ct-dark-600": "#222",
        "ct-dark-200": "#575757",
        "ct-dark-100": "#6d6d6d",
        "ct-blue-600": "#88abff",
        "ct-blue-700": "#6a93f8",
        "ct-yellow-600": "#f9d13e",
      },
      fontFamily: {
        Poppins: ["Poppins, sans-serif"],
      },
      container: {
        center: true,
        padding: "1rem",
        screens: {
          lg: "1125px",
          xl: "1125px",
          "2xl": "1125px",
          "3xl": "1500px",
        },
      },
    },
  },
  plugins: [],
}
Now open the src/styles/globals.css file and replace the tailwind CSS directives with the following:
src/styles/globals.css
@import url('https://fonts.googleapis.com/css2?family=Poppins:wght@300;400;500;600;700&display=swap');

@tailwind base;
@tailwind components;
@tailwind utilities;

html {
    font-family: 'Poppins', sans-serif;
}

body {
    background-color: #88abff;
}
With that out of the way, we are now ready to initialize Prisma in the project and define the database schema.
Setup Prisma and Create the Database Model
What is Prisma? Prisma is an ORM (Object–Relational Mapper) tool for TypeScript and Node.js. In this project, we’ll use an SQLite database for data storage but you can tweak the code to work with any Prisma-supported database.
Open your terminal and run this command to install the Prisma CLI and Client:
yarn add -D prisma && yarn add @prisma/client
# or
npm install -D prisma && npm install @prisma/client
After the installations, run this command to initialize Prisma in the project:
yarn prisma init --datasource-provider sqlite
# or
npx prisma init --datasource-provider sqlite
Prisma uses PostgreSQL as a default database so providing the --datasource-provider sqlite flag will tell Prisma to use SQLite instead. The above code will generate a schema file and create an .env file that holds the SQLite database connection URL.
Now open the newly-generated prisma/schema.prisma file and replace its content with the following schema.
generator client {
  provider = "prisma-client-js"
}

datasource db {
  provider = "sqlite"
  url      = env("DATABASE_URL")
}

model Note {
  id        String   @id @default(uuid())
  title     String   @unique
  content   String
  category  String?
  published Boolean? @default(false)

  createdAt DateTime @default(now())
  updatedAt DateTime @updatedAt

  @@map(name: "notes")
}
We defined a model that will be used by the Prisma engine to generate the underlying SQL table. By default, Prisma uses the model name as the SQL table name so adding the @@map(name: "notes") attribute will tell Prisma to use the provided name for the table.
Also, the @default(uuid()) attribute tells Prisma to generate a UUID value for the ID column before persisting the record to the database.
Now that we have the schema defined, let’s generate the Prisma Client from it and push it to the SQLite database. Before that, add the following Prisma scripts to the package.json file.
package.json
{
 "db:migrate": "npx prisma migrate dev --name note-entity --create-only && yarn prisma generate",
    "db:push": "npx prisma db push"
}
db:migrate– This command will generate the migration file and Prisma Client from the model.db:push– This command will push the schema to the SQLite database.
With that explanation, run the following commands to generate the Prisma Client and push the Prisma schema to the database.
yarn db:migrate && yarn db:push
# or
npm run db:migrate && npm run db:push
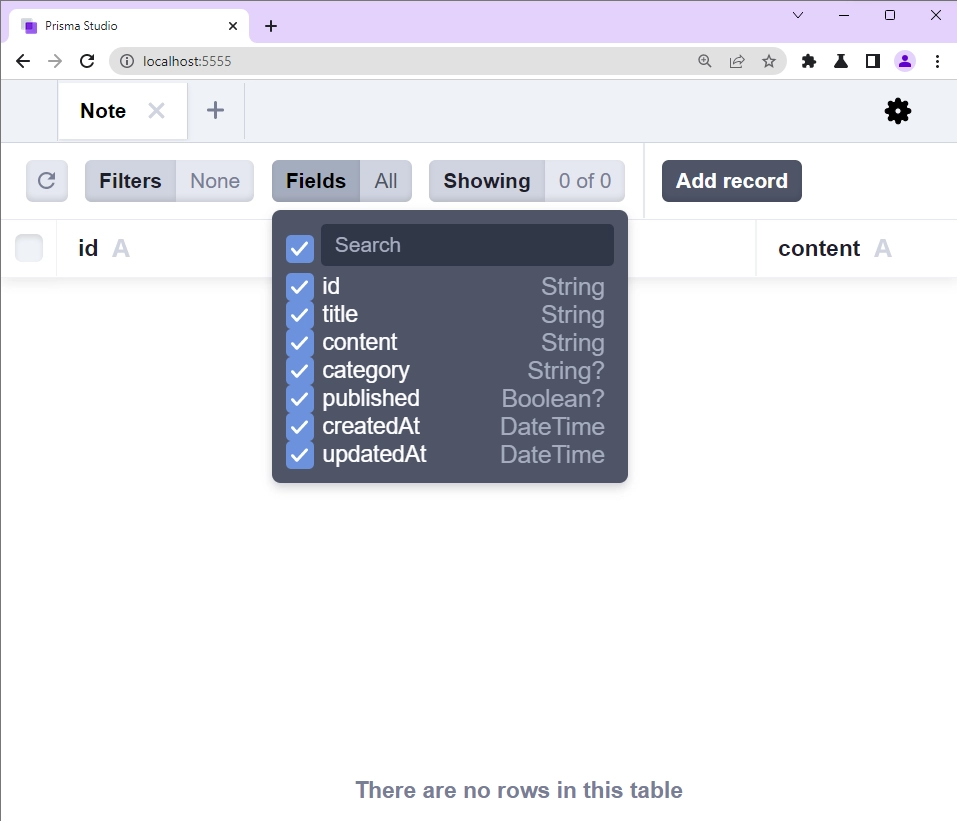
To check if everything was done correctly, run this command to open the Prisma studio in your browser.
yarn prisma studio
# or
npx prisma studio
In the Prisma Studio, you should see the SQL table created by Prisma.
Create the Next.js tRPC API
In this section, you’ll create Zod validation schemas that will be used by the tRPC framework to validate incoming payloads and the tRPC procedures that will be evoked to perform the CRUD operations.
Before that, install the tRPC library and its peer dependencies:
yarn add @trpc/server@next @trpc/client@next @trpc/react-query@next @trpc/next@next @tanstack/react-query @tanstack/react-query-devtools zod superjson
# or
npm install @trpc/server@next @trpc/client@next @trpc/react-query@next @trpc/next@next @tanstack/react-query @tanstack/react-query-devtools zod superjson
@trpc/server– For creating the tRPC server@trpc/client– For creating the tRPC client@trpc/react-query– Connects the tRPC server to React@trpc/next– Connects the tRPC router to Next.js@tanstack/react-query– A server state management library for React@tanstack/react-query-devtools– A GUI for React Queryzod– A TypeScript-first schema validation librarysuperjson– Allows us to easily serialize JavaScript expressions to a superset of JSON
Create Zod Validation Schemas
To ensure that the tRPC API processes only valid data, let’s create the validation schemas that we’ll add to the tRPC procedures to validate the incoming request payloads. tRPC supports a couple of validators like Zod, Yup, Myzod, and Superstruct, or even custom validators we define ourselves.
Create a src/server/note.schema.ts file and add the following schemas defined with Zod.
src/server/note.schema.ts
import { z } from "zod";

export const createNoteSchema = z.object({
  title: z.string({
    required_error: "Title is required",
  }),
  content: z.string({
    required_error: "Content is required",
  }),
  category: z.string().optional(),
  published: z.boolean().optional(),
});

export const params = z.object({
  noteId: z.string(),
});

export const updateNoteSchema = z.object({
  params,
  body: z
    .object({
      title: z.string(),
      content: z.string(),
      category: z.string(),
      published: z.boolean(),
    })
    .partial(),
});

export const filterQuery = z.object({
  limit: z.number().default(1),
  page: z.number().default(10),
});

export type ParamsInput = z.TypeOf<typeof params>;
export type FilterQueryInput = z.TypeOf<typeof filterQuery>;
export type CreateNoteInput = z.TypeOf<typeof createNoteSchema>;
export type UpdateNoteInput = z.TypeOf<typeof updateNoteSchema>;
We created four validation schemas with Zod and exported both the schemas and their corresponding types from the file.
Create the tRPC Procedures
With the validation schemas defined, let’s create five tRPC procedures that will be evoked on the client to perform the CRUD (Create, Read, Update, and Delete) operations against the SQLite database. These CRUD functions can be considered as higher-level whereas the CRUD functions provided by Prisma ORM are lower-level.
createNoteController– This tRPC procedure will be evoked to add a new record to the database.updateNoteController– This tRPC procedure will be evoked to update an existing record in the database.findNoteController– This tRPC procedure will be evoked to retrieve a single record from the database.findAllNotesController– This tRPC procedure will be evoked to retrieve all the records from the database or a paginated list of the found records.deleteNoteController– This tRPC procedure will be evoked to delete a record in the database.
Now create a src/server/note.controller.ts file and add the following RPC procedures.
src/server/note.controller.ts
import { Prisma, PrismaClient } from "@prisma/client";
import { TRPCError } from "@trpc/server";
import {
  CreateNoteInput,
  FilterQueryInput,
  ParamsInput,
  UpdateNoteInput,
} from "./note.schema";

const prisma = new PrismaClient();

export const createNoteController = async ({
  input,
}: {
  input: CreateNoteInput;
}) => {
  try {
    const note = await prisma.note.create({
      data: {
        title: input.title,
        content: input.content,
        category: input.category,
        published: input.published,
      },
    });

    return {
      status: "success",
      data: {
        note,
      },
    };
  } catch (error) {
    if (error instanceof Prisma.PrismaClientKnownRequestError) {
      if (error.code === "P2002") {
        throw new TRPCError({
          code: "CONFLICT",
          message: "Note with that title already exists",
        });
      }
    }
    throw error;
  }
};

export const updateNoteController = async ({
  paramsInput,
  input,
}: {
  paramsInput: ParamsInput;
  input: UpdateNoteInput["body"];
}) => {
  try {
    const updatedNote = await prisma.note.update({
      where: { id: paramsInput.noteId },
      data: input,
    });

    return {
      status: "success",
      note: updatedNote,
    };
  } catch (error) {
    if (error instanceof Prisma.PrismaClientKnownRequestError) {
      if (error.code === "P2025") {
        throw new TRPCError({
          code: "CONFLICT",
          message: "Note with that title already exists",
        });
      }
    }
    throw error;
  }
};

export const findNoteController = async ({
  paramsInput,
}: {
  paramsInput: ParamsInput;
}) => {
  try {
    const note = await prisma.note.findFirst({
      where: { id: paramsInput.noteId },
    });

    if (!note) {
      throw new TRPCError({
        code: "NOT_FOUND",
        message: "Note with that ID not found",
      });
    }

    return {
      status: "success",
      note,
    };
  } catch (error) {
    throw error;
  }
};

export const findAllNotesController = async ({
  filterQuery,
}: {
  filterQuery: FilterQueryInput;
}) => {
  try {
    const page = filterQuery.page || 1;
    const limit = filterQuery.limit || 10;
    const skip = (page - 1) * limit;

    const notes = await prisma.note.findMany({ skip, take: limit });

    return {
      status: "success",
      results: notes.length,
      notes,
    };
  } catch (error) {
    throw error;
  }
};

export const deleteNoteController = async ({
  paramsInput,
}: {
  paramsInput: ParamsInput;
}) => {
  try {
    await prisma.note.delete({ where: { id: paramsInput.noteId } });

    return {
      status: "success",
    };
  } catch (error) {
    if (error instanceof Prisma.PrismaClientKnownRequestError) {
      if (error.code === "P2025") {
        throw new TRPCError({
          code: "NOT_FOUND",
          message: "Note with that ID not found",
        });
      }
    }
    throw error;
  }
};
Create the tRPC Server
Now that we have both the validation schemas and tRPC procedures, let’s create the tRPC router to evoke the RPCs and use the defined validation schemas. The table below shows the routes that will be available on the tRPC API and their corresponding functionalities.
| TYPE | ENDPOINT | DESCRIPTION |
|---|---|---|
| Query | /api/trpc/getHello | Get hello message |
| Mutation | /api/trpc/createNote | Create a note |
| Mutation | /api/trpc/updateNote | Update a note |
| Mutation | /api/trpc/deleteNote | Delete a note |
| Query | /api/trpc/getNote | Retrieve a single note |
| Query | /api/trpc/getNotes | Retrieve all notes |
Create a src/server/app.router.ts file and add the code below:
src/server/app.router.ts
import { initTRPC } from "@trpc/server";
import superjson from "superjson";
import {
  createNoteController,
  deleteNoteController,
  findAllNotesController,
  findNoteController,
  updateNoteController,
} from "./note.controller";
import {
  createNoteSchema,
  filterQuery,
  params,
  updateNoteSchema,
} from "./note.schema";

const t = initTRPC.create({
  transformer: superjson
});

export const appRouter = t.router({
  getHello: t.procedure.query((req) => {
    return { message: "Welcome to Full-Stack tRPC CRUD App with Next.js" };
  }),
  createNote: t.procedure
    .input(createNoteSchema)
    .mutation(({ input }) => createNoteController({ input })),
  updateNote: t.procedure
    .input(updateNoteSchema)
    .mutation(({ input }) =>
      updateNoteController({ paramsInput: input.params, input: input.body })
    ),
  deleteNote: t.procedure
    .input(params)
    .mutation(({ input }) => deleteNoteController({ paramsInput: input })),
  getNote: t.procedure
    .input(params)
    .query(({ input }) => findNoteController({ paramsInput: input })),
  getNotes: t.procedure
    .input(filterQuery)
    .query(({ input }) => findAllNotesController({ filterQuery: input })),
});

export type AppRouter = typeof appRouter;
Quite a lot is going on in the above code, let’s break it down. At the top level, we imported all the dependencies, initialized the tRPC server, and add superjson as the transformer.
Next, we created the tRPC router, added the queries and mutations, inferred types from the router, and assigned it to AppRouter before exporting it from the file.
Connect the tRPC Router to Next.js
We are now ready to connect the tRPC router to the Next.js API router. To do that, create a src/pages/api/trpc/[trpc].ts file and add the following code.
src/pages/api/trpc/[trpc].ts
import * as trpcNext from "@trpc/server/adapters/next";
import { appRouter } from "~/server/app.router";

export default trpcNext.createNextApiHandler({
  router: appRouter,
});
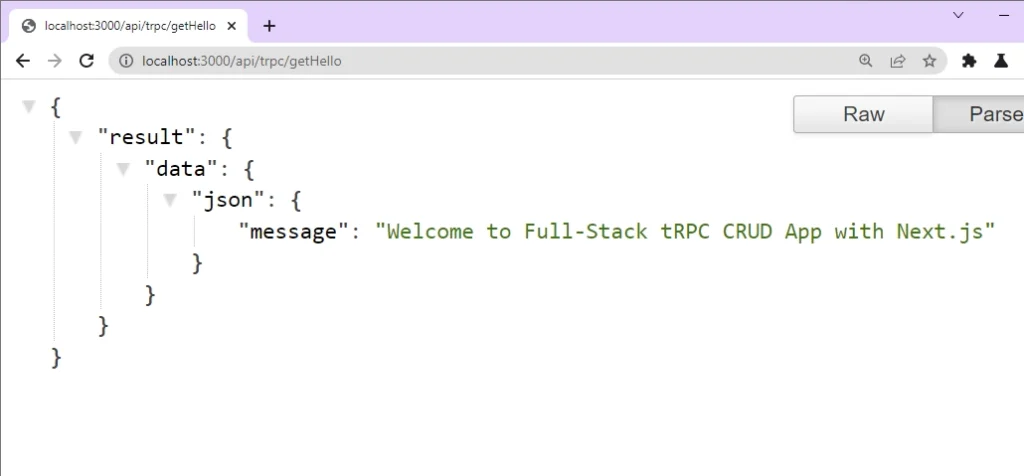
Oops, quite a lot of code. If you made it this far, kudos to you. Now let’s test the API to make sure we did everything correctly. Open your terminal and run yarn dev or npm run dev depending on the package manager you are using in the project.
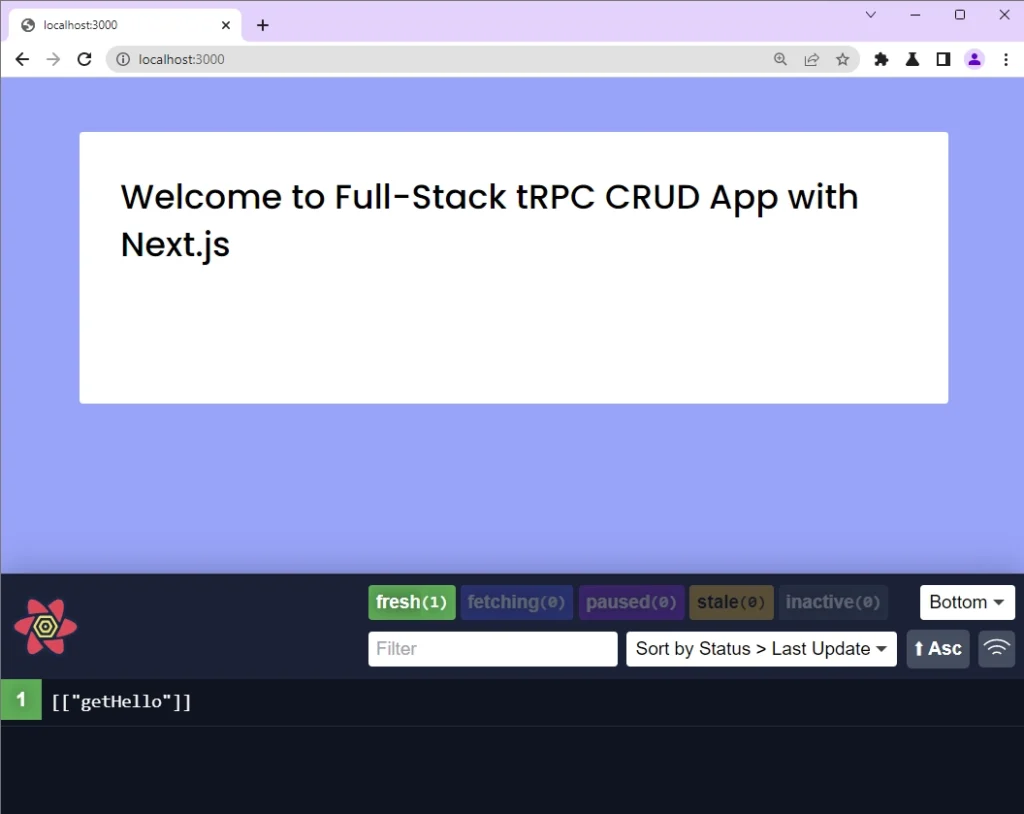
This will start the Next.js development server on port 3000. Navigate to http://localhost:3000/api/trpc/getHello to evoke the getHello procedure. After a few seconds, you should get the message returned from the getHello query.
Create the Next.js tRPC Client
Now that we have the tRPC server listening on port 3000 and ready to receive requests, let’s create the tRPC client to interact with the API. Before that, install the following dependencies:
yarn add tailwind-merge react-toastify react-hook-form date-fns @hookform/resolvers
# or
npm install tailwind-merge react-toastify react-hook-form date-fns @hookform/resolvers
tailwind-merge– Allows you to merge Tailwind CSS classes without style conflictsreact-toastify– Allows you to add notifications to a React appreact-hook-form– A form validation librarydate-fns– A JavaScript date utility library@hookform/resolvers– A React-Hook-Form resolver that allows you to use any external validation library.
We are now ready to create the tRPC hooks based on the AppRouter type we exported from the src/server/app.router.ts file. The AppRouter type holds information about all the queries, mutations, and subscriptions available on the tRPC API. To do this, create a src/utils/trpc.ts file and add the code below:
src/utils/trpc.ts
import { getFetch, httpBatchLink } from "@trpc/client";
import { createTRPCNext } from "@trpc/next";
import superjson from "superjson";
import { AppRouter } from "~/server/app.router";

export const trpc = createTRPCNext<AppRouter>({
  config({ ctx }) {
    const url = process.env.NEXT_PUBLIC_VERCEL_URL
      ? `https://${process.env.NEXT_PUBLIC_VERCEL_URL}/api/trpc`
      : "http://localhost:3000/api/trpc/";

    if (typeof window !== "undefined") {
      return {
        transformer: superjson,
        links: [
          httpBatchLink({
            url: "/api/trpc",
          }),
        ],
      };
    }

    return {
      queryClientConfig: {
        defaultOptions: {
          queries: {
            staleTime: 5 * 1000,
          },
        },
      },
      headers() {
        if (ctx?.req) {
          return {
            ...ctx.req.headers,
            "x-ssr": "1",
          };
        }
        return {};
      },
      links: [
        httpBatchLink({
          url,
          fetch: async (input, init?) => {
            const fetch = getFetch();
            return fetch(input, {
              ...init,
              credentials: "include",
            });
          },
        }),
      ],
      transformer: superjson,
    };
  },
  ssr: true,
});
Now that we’ve created the tRPC hooks based on our API’s type signature, let’s make the hooks available to the Next.js app by wrapping the trpc.withTRPC() higher-order component around the top-level Next.js app component. So, open the src/pages/_app.tsx file and add the following code.
src/pages/_app.tsx
import "../styles/globals.css";
import "react-toastify/dist/ReactToastify.css";
import type { AppProps } from "next/app";
import { ReactQueryDevtools } from "@tanstack/react-query-devtools";
import { ToastContainer } from "react-toastify";
import { trpc } from "~/utils/trpc";

function MyApp({ Component, pageProps }: AppProps) {
  return (
    <>
      <ToastContainer />
      <ReactQueryDevtools initialIsOpen={false} />
      <Component {...pageProps} />
    </>
  );
}

export default trpc.withTRPC(MyApp);
Since we will be using icons in the project and React portal to display a modal in the DOM hierarchy, create a src/pages/_document.tsx file and add the following code. Don’t worry we’ll create the react portal in a bit.
src/pages/_document.tsx
import { Html, Head, Main, NextScript } from "next/document";

export default function Document() {
  return (
    <Html>
      <Head>
        <link
          href="https://unpkg.com/boxicons@2.1.2/css/boxicons.min.css"
          rel="stylesheet"
        ></link>
      </Head>
      <body>
        <Main />
        <NextScript />
        <div id="note-modal"></div>
      </body>
    </Html>
  );
}
With all the above configurations, we are now ready to test the tRPC API with the Next.js app. Open the src/pages/index.tsx file and replace its content with the following.
src/pages/index.tsx
import type { NextPage } from "next";
import { trpc } from "~/utils/trpc";

const Home: NextPage = () => {
  const hello = trpc.getHello.useQuery();
  return (
    <div className="max-w-lg mx-auto h-40 p-6 mt-8 text-xl font-medium rounded-sm bg-white">
      {hello.data?.message}
    </div>
  );
};

export default Home;
After that, start the Next.js development server to spin up both the tRPC client and server. Open a new tab in your browser and visit http://localhost:3000/ to see the message returned by the getHello RPC.
Create Reusable React Components
Before we start creating the components that will evoke their respective tRPC procedures on the API to perform the CRUD operations, let’s create these reusable components with tailwind CSS to avoid duplicating the same block of code in any component that needs it.
Let’s start by creating a Spinner component that will be shown whenever a request is being processed by the tRPC API. In this component, we’ll utilize the tailwind-merge package to safely merge the tailwind CSS classes with the classes the component will receive as props.
src/components/Spinner.tsx
import React from 'react';
import { twMerge } from 'tailwind-merge';
type SpinnerProps = {
  width?: number;
  height?: number;
  color?: string;
  bgColor?: string;
};
const Spinner: React.FC<SpinnerProps> = ({
  width = 5,
  height = 5,
  color,
  bgColor,
}) => {
  return (
    <svg
      role='status'
      className={twMerge(
        'w-5 h-5 mr-2 text-gray-200 animate-spin dark:text-gray-600 fill-blue-600',
        `w-${width} h-${height} ${color} ${bgColor}`
      )}
      viewBox='0 0 100 101'
      fill='none'
      xmlns='http://www.w3.org/2000/svg'
    >
      <path
        d='M100 50.5908C100 78.2051 77.6142 100.591 50 100.591C22.3858 100.591 0 78.2051 0 50.5908C0 22.9766 22.3858 0.59082 50 0.59082C77.6142 0.59082 100 22.9766 100 50.5908ZM9.08144 50.5908C9.08144 73.1895 27.4013 91.5094 50 91.5094C72.5987 91.5094 90.9186 73.1895 90.9186 50.5908C90.9186 27.9921 72.5987 9.67226 50 9.67226C27.4013 9.67226 9.08144 27.9921 9.08144 50.5908Z'
        fill='currentColor'
      />
      <path
        d='M93.9676 39.0409C96.393 38.4038 97.8624 35.9116 97.0079 33.5539C95.2932 28.8227 92.871 24.3692 89.8167 20.348C85.8452 15.1192 80.8826 10.7238 75.2124 7.41289C69.5422 4.10194 63.2754 1.94025 56.7698 1.05124C51.7666 0.367541 46.6976 0.446843 41.7345 1.27873C39.2613 1.69328 37.813 4.19778 38.4501 6.62326C39.0873 9.04874 41.5694 10.4717 44.0505 10.1071C47.8511 9.54855 51.7191 9.52689 55.5402 10.0491C60.8642 10.7766 65.9928 12.5457 70.6331 15.2552C75.2735 17.9648 79.3347 21.5619 82.5849 25.841C84.9175 28.9121 86.7997 32.2913 88.1811 35.8758C89.083 38.2158 91.5421 39.6781 93.9676 39.0409Z'
        fill='currentFill'
      />
    </svg>
  );
};

export default Spinner;
The next component will be a LoadingButton which will utilize the Spinner component we created above. The Spinner component will be hidden by default, however, when a request is in flight, it will be displayed to indicate that the request is been processed by the tRPC API.
src/components/LoadingButton.tsx
import React from "react";
import { twMerge } from "tailwind-merge";
import Spinner from "./Spinner";

type LoadingButtonProps = {
  loading: boolean;
  btnColor?: string;
  textColor?: string;
  children: React.ReactNode;
};

export const LoadingButton: React.FC<LoadingButtonProps> = ({
  textColor = "text-white",
  btnColor = "bg-ct-blue-700",
  children,
  loading = false,
}) => {
  return (
    <button
      type="submit"
      className={twMerge(
        `w-full py-3 font-semibold ${btnColor} rounded-lg outline-none border-none flex justify-center`,
        `${loading && "bg-[#ccc]"}`
      )}
    >
      {loading ? (
        <div className="flex items-center gap-3">
          <Spinner />
          <span className="text-white inline-block">Loading...</span>
        </div>
      ) : (
        <span className={`text-lg font-normal ${textColor}`}>{children}</span>
      )}
    </button>
  );
};
We can make use of z-index to create the modal but this strategy can be tedious since we’ll have to set a high z-index value to bring the child to the top layer. With React portals, we can create the modal element that will be rendered outside the default DOM hierarchy without disrupting the parent-child relationship between the components.
src/components/note.modal.tsx
import ReactDom from "react-dom";
import React, { FC } from "react";

type INoteModal = {
  openNoteModal: boolean;
  setOpenNoteModal: (open: boolean) => void;
  children: React.ReactNode;
};

const NoteModal: FC<INoteModal> = ({
  openNoteModal,
  setOpenNoteModal,
  children,
}) => {
  if (!openNoteModal) return null;
  return ReactDom.createPortal(
    <>
      <div
        className="fixed inset-0 bg-[rgba(0,0,0,.5)] z-[1000]"
        onClick={() => setOpenNoteModal(false)}
      ></div>
      <div className="max-w-lg w-full rounded-md fixed top-[5%] xl:top-[10%] left-1/2 -translate-x-1/2 bg-white z-[1001] p-6">
        {children}
      </div>
    </>,
    document.getElementById("note-modal") as HTMLElement
  );
};

export default NoteModal;
The modal will be rendered inside the <div id="note-modal"></div> element we added to the _document.tsx file.
React Query Create Record Mutation
The CreateNote component contains a form built with the React-Hook-Form library and the form validation rules are defined with the Zod schema validation library. The defined schema rules will be feed into React-Hook-Form’s useForm() hook via the zodResolver() function.
When the form is submitted and there’re no validation errors, the onSubmitHandler function will be evoked which will in turn trigger the createNote mutation on the tRPC API to add the new record to the database.
src/components/notes/create.note.tsx
import { FC } from "react";
import { SubmitHandler, useForm } from "react-hook-form";
import { twMerge } from "tailwind-merge";
import { object, string, TypeOf } from "zod";
import { zodResolver } from "@hookform/resolvers/zod";
import { LoadingButton } from "../LoadingButton";
import { toast } from "react-toastify";
import { trpc } from "~/utils/trpc";
import { useQueryClient } from "@tanstack/react-query";

type ICreateNoteProps = {
  setOpenNoteModal: (open: boolean) => void;
};

const createNoteSchema = object({
  title: string().min(1, "Title is required"),
  content: string().min(1, "Content is required"),
});

type CreateNoteInput = TypeOf<typeof createNoteSchema>;

const CreateNote: FC<ICreateNoteProps> = ({ setOpenNoteModal }) => {
  const queryClient = useQueryClient();
  const { isLoading, mutate: createNote } = trpc.createNote.useMutation({
    onSuccess() {
      queryClient.invalidateQueries([["getNotes"], { limit: 10, page: 1 }]);
      setOpenNoteModal(false);
      toast("Note created successfully", {
        type: "success",
        position: "top-right",
      });
    },
    onError(error) {
      setOpenNoteModal(false);
      toast(error.message, {
        type: "error",
        position: "top-right",
      });
    },
  });
  const methods = useForm<CreateNoteInput>({
    resolver: zodResolver(createNoteSchema),
  });

  const {
    register,
    handleSubmit,
    formState: { errors },
  } = methods;

  const onSubmitHandler: SubmitHandler<CreateNoteInput> = async (data) => {
    createNote(data);
  };
  return (
    <section>
      <div className="flex justify-between items-center mb-3 pb-3 border-b border-gray-200">
        <h2 className="text-2xl text-ct-dark-600 font-semibold">Create Note</h2>
        <div
          onClick={() => setOpenNoteModal(false)}
          className="text-2xl text-gray-400 hover:bg-gray-200 hover:text-gray-900 rounded-lg p-1.5 ml-auto inline-flex items-center cursor-pointer"
        >
          <i className="bx bx-x"></i>
        </div>
      </div>
      <form className="w-full" onSubmit={handleSubmit(onSubmitHandler)}>
        <div className="mb-2">
          <label className="block text-gray-700 text-lg mb-2" htmlFor="title">
            Title
          </label>
          <input
            className={twMerge(
              `appearance-none border border-gray-400 rounded w-full py-3 px-3 text-gray-700 mb-2  leading-tight focus:outline-none`,
              `${errors["title"] && "border-red-500"}`
            )}
            {...methods.register("title")}
          />
          <p
            className={twMerge(
              `text-red-500 text-xs italic mb-2 invisible`,
              `${errors["title"] && "visible"}`
            )}
          >
            {errors["title"]?.message as string}
          </p>
        </div>
        <div className="mb-2">
          <label className="block text-gray-700 text-lg mb-2" htmlFor="title">
            Content
          </label>
          <textarea
            className={twMerge(
              `appearance-none border border-gray-400 rounded w-full py-3 px-3 text-gray-700 mb-2 leading-tight focus:outline-none`,
              `${errors.content && "border-red-500"}`
            )}
            rows={6}
            {...register("content")}
          />
          <p
            className={twMerge(
              `text-red-500 text-xs italic mb-2`,
              `${errors.content ? "visible" : "invisible"}`
            )}
          >
            {errors.content && errors.content.message}
          </p>
        </div>
        <LoadingButton loading={isLoading}>Create Note</LoadingButton>
      </form>
    </section>
  );
};

export default CreateNote;
On successful mutation the getNotes query will be invalidated by the query client which will evoke the getNotes RPC to return the most recent data from the database. On the other hand, when the mutation resolves in an error, an alert notification will be rendered to display the error returned by the tRPC API.
React Query Update Record Mutation
The UpdateNote component contains a form built with React-Hook-Form that is used for editing notes. The form validation rules are defined with the Zod schema validation library and passed to the useForm() hook via the @hookform/resolvers/zod library, and the validation errors are provided to the form template via the formState: { errors } .
src/components/notes/update.note.tsx
import React, { FC, useEffect } from "react";
import { SubmitHandler, useForm } from "react-hook-form";
import { twMerge } from "tailwind-merge";
import { object, string, TypeOf } from "zod";
import { zodResolver } from "@hookform/resolvers/zod";
import { LoadingButton } from "../LoadingButton";
import { toast } from "react-toastify";
import { trpc } from "../../utils/trpc";
import { INote } from "../../type";
import { useQueryClient } from "@tanstack/react-query";

type IUpdateNoteProps = {
  note: INote;
  setOpenNoteModal: (open: boolean) => void;
};

const updateNoteSchema = object({
  title: string().min(1, "Title is required"),
  content: string().min(1, "Content is required"),
});

type UpdateNoteInput = TypeOf<typeof updateNoteSchema>;

const UpdateNote: FC<IUpdateNoteProps> = ({ note, setOpenNoteModal }) => {
  const queryClient = useQueryClient();
  const { isLoading, mutate: updateNote } = trpc.updateNote.useMutation({
    onSuccess() {
      queryClient.invalidateQueries([["getNotes"], { limit: 10, page: 1 }]);
      setOpenNoteModal(false);
      toast("Note updated successfully", {
        type: "success",
        position: "top-right",
      });
    },
    onError(error) {
      setOpenNoteModal(false);
      toast(error.message, {
        type: "error",
        position: "top-right",
      });
    },
  });
  const methods = useForm<UpdateNoteInput>({
    resolver: zodResolver(updateNoteSchema),
  });

  const {
    register,
    handleSubmit,
    formState: { errors },
  } = methods;

  useEffect(() => {
    if (note) {
      methods.reset(note);
    }
    // eslint-disable-next-line react-hooks/exhaustive-deps
  }, []);

  const onSubmitHandler: SubmitHandler<UpdateNoteInput> = async (data) => {
    updateNote({ params: { noteId: note.id }, body: data });
  };
  return (
    <section>
      <div className="flex justify-between items-center mb-4">
        <h2 className="text-2xl text-ct-dark-600 font-semibold">Update Note</h2>
        <div
          onClick={() => setOpenNoteModal(false)}
          className="text-2xl text-gray-400 hover:bg-gray-200 hover:text-gray-900 rounded-lg p-1.5 ml-auto inline-flex items-center cursor-pointer"
        >
          <i className="bx bx-x"></i>
        </div>
      </div>{" "}
      <form className="w-full" onSubmit={handleSubmit(onSubmitHandler)}>
        <div className="mb-2">
          <label className="block text-gray-700 text-lg mb-2" htmlFor="title">
            Title
          </label>
          <input
            className={twMerge(
              `appearance-none border border-gray-400 rounded w-full py-3 px-3 text-gray-700 mb-2 leading-tight focus:outline-none`,
              `${errors["title"] && "border-red-500"}`
            )}
            {...methods.register("title")}
          />
          <p
            className={twMerge(
              `text-red-500 text-xs italic mb-2 invisible`,
              `${errors["title"] && "visible"}`
            )}
          >
            {errors["title"]?.message as string}
          </p>
        </div>
        <div className="mb-2">
          <label className="block text-gray-700 text-lg mb-2" htmlFor="title">
            Content
          </label>
          <textarea
            className={twMerge(
              `appearance-none border rounded w-full py-3 px-3 text-gray-700 mb-2 leading-tight focus:outline-none`,
              `${errors.content ? "border-red-500" : "border-gray-400"}`
            )}
            rows={6}
            {...register("content")}
          />
          <p
            className={twMerge(
              `text-red-500 text-xs italic mb-2`,
              `${errors.content ? "visible" : "invisible"}`
            )}
          >
            {errors.content && errors.content.message}
          </p>
        </div>
        <LoadingButton loading={isLoading}>Update Note</LoadingButton>
      </form>
    </section>
  );
};

export default UpdateNote;
When the form is submitted and there are no validation errors, the onSubmitHandler function will be called which will in turn evoke the updateNote tRPC procedure to update the note with that ID in the database. On successful mutation, the getNotes procedure will be evoked to return the most current data from the database.
React Query Delete Record Mutation
Now that we are able to create and update records, let’s implement the DELETE functionality. Before that, create a src/type.ts file and add this TypeScript type.
src/type.ts
export type INote = {
  id: string;
  title: string;
  content: string;
  category: string | null;
  published: boolean | null;
  createdAt: Date;
  updatedAt: Date;
};
The NoteItem component displays a note in the UI and contains buttons for updating and deleting notes. The Edit button sets the openNoteModal to true which displays the UpdateNote modal for the data to be edited.
When the Delete button is clicked, the onDeleteHandler function will be called and the user will be prompted to either confirm or cancel the action. When the user confirms the action, the deleteNote tRPC procedure will be evoked to delete the record with that ID from the database.
src/components/notes/note.component.tsx
import { FC, useState } from "react";
import { format, parseISO } from "date-fns";
import { twMerge } from "tailwind-merge";
import NoteModal from "../note.modal";
import UpdateNote from "./update.note";
import { toast } from "react-toastify";
import { INote } from "~/type";
import { trpc } from "~/utils/trpc";
import { useQueryClient } from "@tanstack/react-query";

type NoteItemProps = {
  note: INote;
};

const NoteItem: FC<NoteItemProps> = ({ note }) => {
  const [openSettings, setOpenSettings] = useState(false);
  const [openNoteModal, setOpenNoteModal] = useState(false);

  const queryClient = useQueryClient();
  const { mutate: deleteNote } = trpc.deleteNote.useMutation({
    onSuccess() {
      queryClient.invalidateQueries([["getNotes"], { limit: 10, page: 1 }]);
      setOpenNoteModal(false);
      toast("Note deleted successfully", {
        type: "success",
        position: "top-right",
      });
    },
    onError(error) {
      setOpenNoteModal(false);
      toast(error.message, {
        type: "error",
        position: "top-right",
      });
    },
  });

  const onDeleteHandler = (noteId: string) => {
    if (window.confirm("Are you sure")) {
      deleteNote({ noteId: noteId });
    }
  };
  return (
    <>
      <div className="p-4 bg-white rounded-lg border border-gray-200 shadow-md flex flex-col justify-between">
        <div className="details">
          <h4 className="mb-2 text-2xl font-semibold tracking-tight text-gray-900">
            {note.title.length > 20
              ? note.title.substring(0, 20) + "..."
              : note.title}
          </h4>
          <p className="mb-3 font-normal text-ct-dark-200">
            {note.content.length > 210
              ? note.content.substring(0, 210) + "..."
              : note.content}
          </p>
        </div>
        <div className="relative border-t border-slate-300 flex justify-between items-center">
          <span className="text-ct-dark-100 text-sm">
            {format(parseISO(note.createdAt.toISOString()), "PPP")}
          </span>
          <div
            onClick={() => setOpenSettings(!openSettings)}
            className="text-ct-dark-100 text-lg cursor-pointer"
          >
            <i className="bx bx-dots-horizontal-rounded"></i>
          </div>
          <div
            id="settings-dropdown"
            className={twMerge(
              `absolute right-0 bottom-3 z-10 w-28 text-base list-none bg-white rounded divide-y divide-gray-100 shadow`,
              `${openSettings ? "block" : "hidden"}`
            )}
          >
            <ul className="py-1" aria-labelledby="dropdownButton">
              <li
                onClick={() => {
                  setOpenSettings(false);
                  setOpenNoteModal(true);
                }}
                className="py-2 px-4 text-sm text-gray-700 hover:bg-gray-100 cursor-pointer"
              >
                <i className="bx bx-pencil"></i> Edit
              </li>
              <li
                onClick={() => {
                  setOpenSettings(false);
                  onDeleteHandler(note.id);
                }}
                className="py-2 px-4 text-sm text-red-600 hover:bg-gray-100 cursor-pointer"
              >
                <i className="bx bx-trash"></i> Delete
              </li>
            </ul>
          </div>
        </div>
      </div>
      <NoteModal
        openNoteModal={openNoteModal}
        setOpenNoteModal={setOpenNoteModal}
      >
        <UpdateNote note={note} setOpenNoteModal={setOpenNoteModal} />
      </NoteModal>
    </>
  );
};

export default NoteItem;
React Query Fetch All Records Query
The Home component displays a list of notes by feeding the data returned into the <NoteItem /> component. On component load the getNotes procedure will be evoked to retrieve the first 10 records from the database and the data will be displayed in the UI via the <NoteItem /> component.
src/pages/index.tsx
import type { NextPage } from "next";
import { useState } from "react";
import { toast } from "react-toastify";
import NoteModal from "~/components/note.modal";
import CreateNote from "~/components/notes/create.note";
import NoteItem from "~/components/notes/note.component";
import { trpc } from "~/utils/trpc";

const Home: NextPage = () => {
  const [openNoteModal, setOpenNoteModal] = useState(false);
  const { data: notes } = trpc.getNotes.useQuery(
    { limit: 10, page: 1 },
    {
      staleTime: 5 * 1000,
      select: (data) => data.notes,
      onError(err) {
        toast(err.message, {
          type: "error",
          position: "top-right",
        });
      },
    }
  );
  return (
    <div className="2xl:max-w-[90rem] max-w-[68rem] mx-auto">
      <div className="m-8 grid grid-cols-[repeat(auto-fill,_320px)] gap-7">
        <div className="p-4 h-72 bg-white rounded-lg border border-gray-200 shadow-md flex flex-col items-center justify-center">
          <div
            onClick={() => setOpenNoteModal(true)}
            className="flex items-center justify-center h-20 w-20 border-2 border-dashed border-ct-blue-600 rounded-full text-ct-blue-600 text-5xl cursor-pointer"
          >
            <i className="bx bx-plus"></i>
          </div>
          <h4
            onClick={() => setOpenNoteModal(true)}
            className="text-lg font-medium text-ct-blue-600 mt-5 cursor-pointer"
          >
            Add new note
          </h4>
        </div>
        {/* Note Items */}

        {notes?.map((note) => (
          <NoteItem key={note.id} note={note} />
        ))}

        {/* Create Note Modal */}
        <NoteModal
          openNoteModal={openNoteModal}
          setOpenNoteModal={setOpenNoteModal}
        >
          <CreateNote setOpenNoteModal={setOpenNoteModal} />
        </NoteModal>
      </div>
    </div>
  );
};

export default Home;
Deploy the Next.js tRPC App to Vercel
In this section, you’ll deploy the Next.js tRPC app to Vercel. First, we need to switch SQLite to a cloud-hosted database since the project will be deployed in a serverless environment.
SQLite needs a central permanent storage to store data permanently and since the project will be running in a serverless environment, It won’t work because storage is ephemeral with serverless functions.
Create a Cloud Database
To create a cloud database, we’ll use Supabase since it offers a free plan which includes a hosted PostgreSQL database.
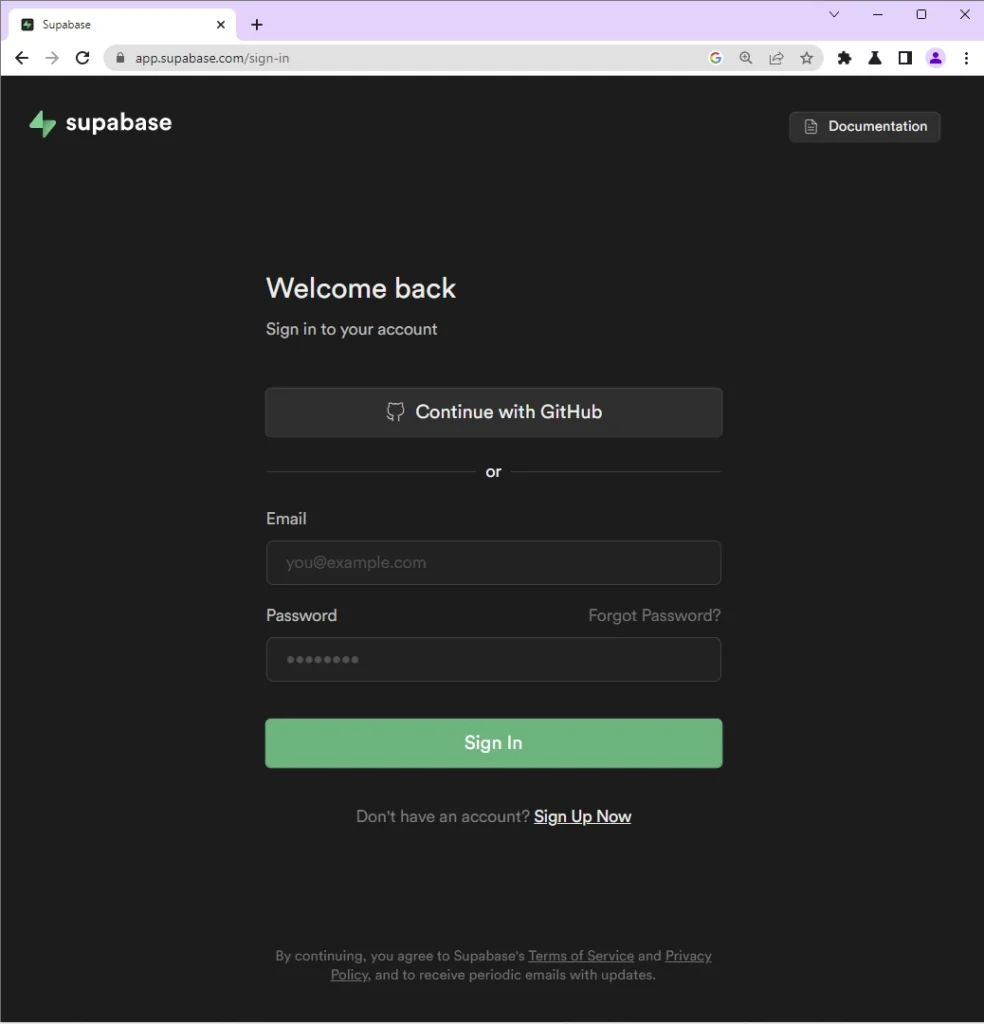
Step 1: Navigate to Supabase and sign in with your GitHub account.
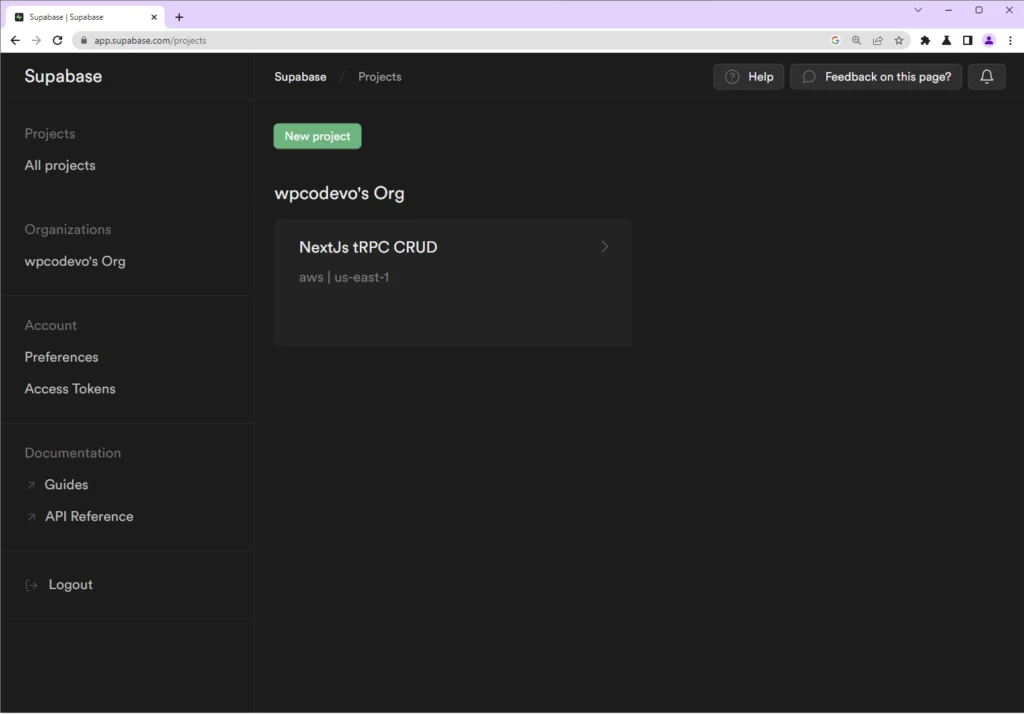
Step 2: Create a new project by clicking the “New project” button. Then, select the organization that Supabase created with your GitHub username.
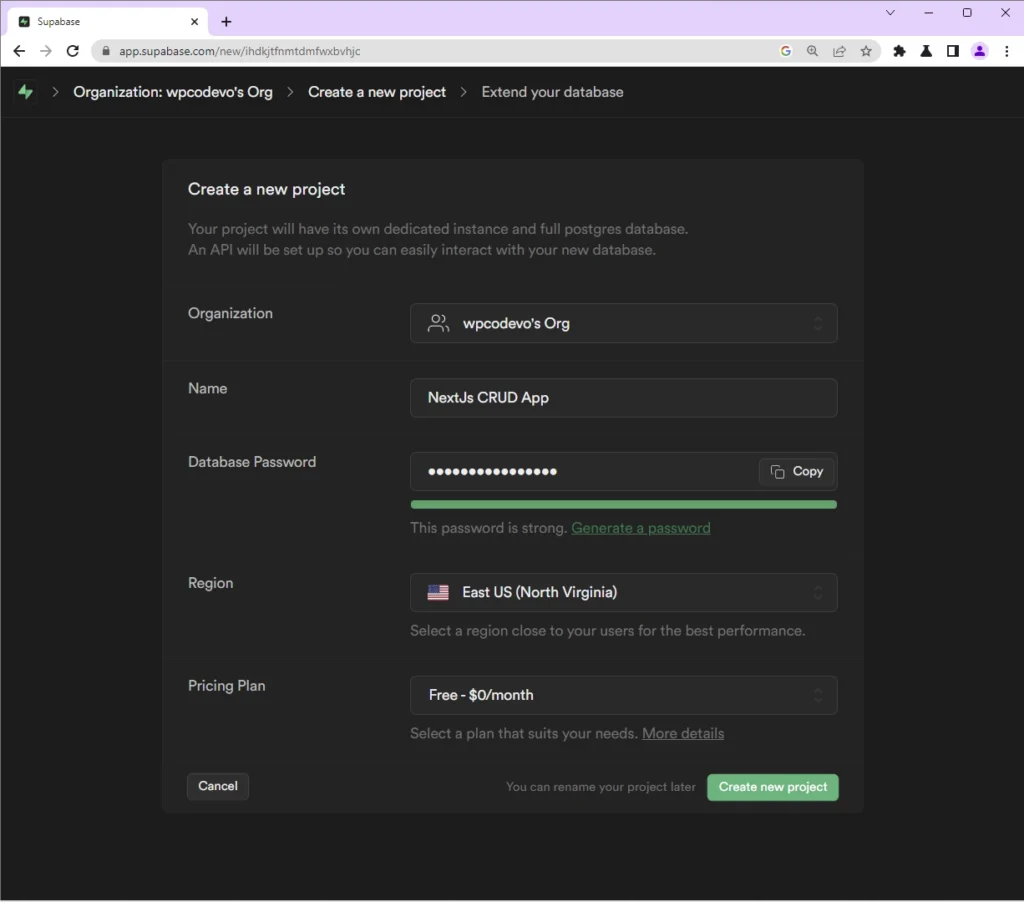
Step 3: Provide a name and password for the new project. Copy and paste the password into a Notepad since we’ll need it later. Finally, click on the “Create new project” button.
Wait for ~2 minutes for Supabase to create the project.
Step 4: Once the project has been created, click on it. Then, click on the gear icon on the left sidebar to display the settings page. Under the “Project Settings“, click on the Database menu and scroll down to the “Connection string” section.
Under the “Connection string” section, click on the “URI” tab to display the PostgreSQL connection URL. Copy and paste the Postgres connection URL into a Notepad.
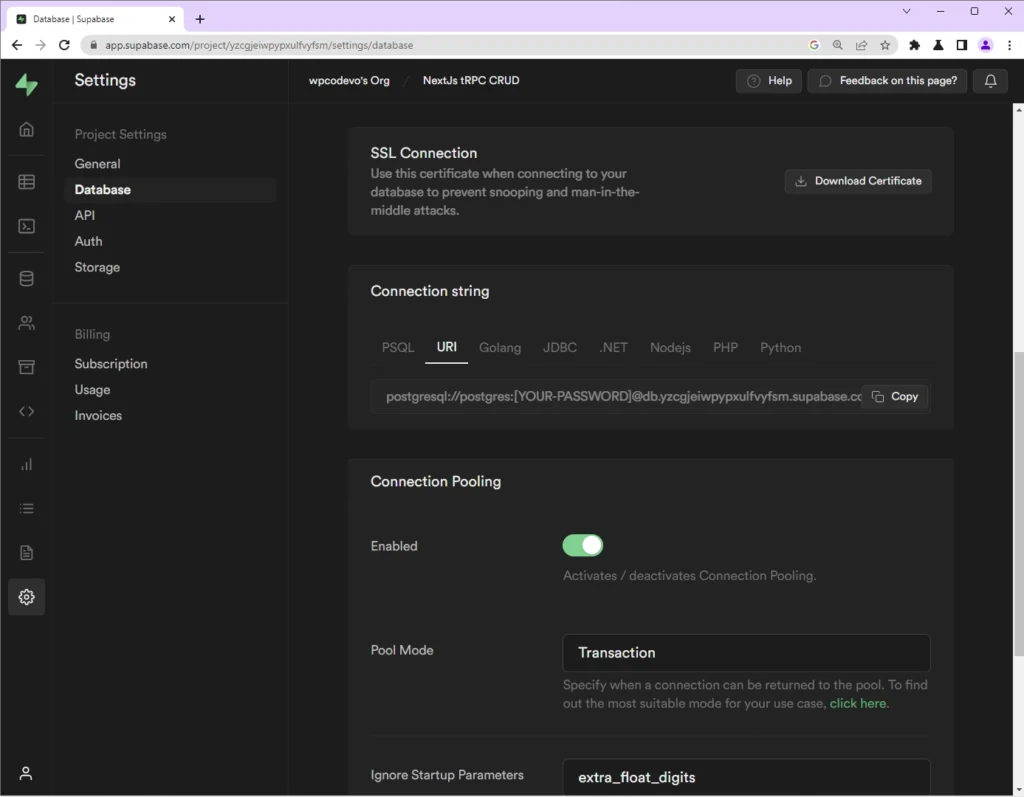
In the Notepad, replace the [YOUR-PASSWORD] placeholder in the URL with the project’s password.
Next, add the PostgreSQL database URL to the .env file as DATABASE_URL . Don’t forget to add the .env to the .gitignore file.
Modify the Project Files
Now that we have a cloud-hosted PostgreSQL database, let’s change the Prisma database provider to PostgreSQL and add a Vercel script to the package.json file.
Open the prisma/schema.prisma file and replace sqlite with postgresql as the database provider.
prisma/schema.prisma
generator client {
  provider = "prisma-client-js"
}

datasource db {
  provider = "postgresql"
  url      = env("DATABASE_URL")
}

model Note {
  id        String   @id @default(uuid())
  title     String   @unique
  content   String
  category  String?
  published Boolean? @default(false)

  createdAt DateTime @default(now())
  updatedAt DateTime @updatedAt

  @@map(name: "notes")
}
After that, delete the migration folder and the dev.db file in the Prisma directory. Run the command below to create a new database migration file and push the schema to the cloud PostgreSQL database.
npx prisma migrate dev --name "changed-sqlite-to-postgres" --create-only && npx prisma generate && npx prisma db push
At this point, you can test the Next.js tRPC app locally. Now open the package.json file and add this postinstall script:
package.json
{
"postinstall": "prisma db push && prisma generate"
}
Deploy to Vercel
Now that we’ve all the configurations in place, create a GitHub repository and push the project to GitHub. Navigate to your Vercel account and deploy the project.
During the deployment phase, click on the “Environment Variables” dropdown and add the PostgreSQL database URL as DATABASE_URL.
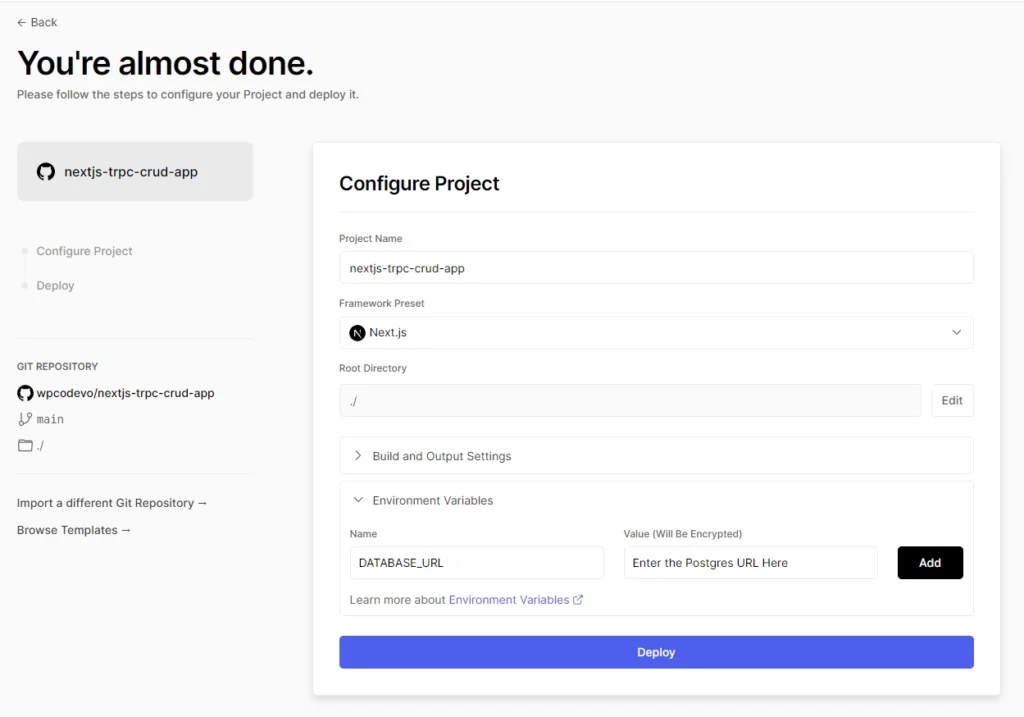
After that, click on the Deploy button. If you’ve already deployed the project, you can go to Project Settings -> Environment Variables and add the PostgreSQL database URL as DATABASE_URL.
Finally, open the URL Vercel assigned to the project in a new tab and test the app.
Conclusion
Congrats on reaching the end. In this article, you learned how to build a full-stack tRPC CRUD App with Next.js and Prisma ORM. For more details about the tRPC framework, visit their official documentation.
You can find the complete Next.js tRPC source code on GitHub
Thank you for this excellent article. I tried deploying it to Vercel. I ran into CORS issues, can you please try at your end and check. You may consider adding a deployment section to your tutorial.
I have put this comment on your another article by mistake.
I’ve updated the article to include the deployment section. To resolve the CORS error, I made some changes to the
src/utils/trpc.tsfile.So, to avoid any further errors, clone or pull the latest version of the project and follow the deployment section to deploy the project to Vercel.
Thank you for your quick action.