
This article will teach you how to add JSON Web Token (JWT) authentication to your FastAPI app using PyMongo, Pydantic, FastAPI JWT Auth package, and Docker-compose.
FastAPI is a modern, production-ready, high-performance Python web framework built on top of Starlette and Pydantic to perform at par with NodeJs and Go.
Lately, FastAPI has been gaining a lot of traction due to its ease of use, fewer bugs, and minimized code. Also, APIs built with FastAPI is fully compatible with the standards of OpenAPI and JSON Schema.
API with Python, FastAPI, and MongoDB JWT Auth Series:
- API with Python, FastAPI, and MongoDB: JWT Authentication
- RESTful API with Python & FastAPI: Send HTML Emails
- CRUD RESTful API Server with Python, FastAPI, and MongoDB
Related Articles:
- RESTful API with Python & FastAPI: Access and Refresh Tokens
- GraphQL API with Node.js & MongoDB: JWT Authentication
- Build Golang gRPC Server and Client: Access & Refresh Tokens
- Node.js + Prisma + PostgreSQL: Access & Refresh Tokens
- Golang & MongoDB: JWT Authentication and Authorization
- API with Node.js + PostgreSQL + TypeORM: JWT Authentication
- Node.js + TypeScript + MongoDB: JWT Authentication
- Node.js + TypeScript + MongoDB: JWT Refresh Token
Prerequisites
Before you start, you should:
- Have Python version 3.6+ installed on your system
- Be comfortable with the basics of Python
- Have Docker and Docker-compose installed
How to Setup FastAPI with MongoDB
FastAPI has built-in support for NoSQL and SQL databases, making it a good fit for building microservices.
You can easily adapt your code to work with databases like:
- MySQL
- PostgreSQL
- MongoDB
- SQLite, and many more.
The quickest and easiest method to get the MongoDB server running on your machine is to use Docker and Docker-compose. Before we start with the configuration aspect, am going to assume you already have Docker installed on your system.
Throughout this tutorial, am going to use VS Code (Visual Studio Code) as my text editor.
The type of text editor or IDE you use doesn’t affect the code we will be writing so feel free to use whatever you are comfortable with.
First and foremost, let’s create a new folder named fastapi_mongodb to contain the FastAPI project:
$ mkdir fastapi_mongodb
$ cd fastapi_mongodb
$ code . # opens the project with VS Code
Now open the integrated terminal in your text editor or IDE and run the following commands to create a virtual environment.
Windows Machine:
$ py -3 -m venv venvmacOS Machine:
$ python3 -m venv venvIn the root directory, create a docker-compose.yml file and add the following configurations to set up the MongoDB server.
docker-compose.yml
version: '3'
services:
  mongo:
    image: mongo:latest
    container_name: mongo
    env_file:
      - ./.env
    environment:
      MONGO_INITDB_ROOT_USERNAME: ${MONGO_INITDB_ROOT_USERNAME}
      MONGO_INITDB_ROOT_PASSWORD: ${MONGO_INITDB_ROOT_PASSWORD}
      MONGO_INITDB_DATABASE: ${MONGO_INITDB_DATABASE}
    volumes:
      - mongo:/data/db
    ports:
      - '6000:27017'

volumes:
  mongo:
Now let’s create a .env file to contain the credentials required by the Mongo Docker image.
.env
MONGO_INITDB_ROOT_USERNAME=admin
MONGO_INITDB_ROOT_PASSWORD=password123
MONGO_INITDB_DATABASE=fastapi
Create a .gitignore file and add the following to omit the environment variables from the Git commit.
.gitignore
__pycache__
venv/
.env
With that out of the way, run the following command to start the MongoDB Docker container:
$ docker-compose up -dStop the running container with this command:
$ docker-compose downInstall FastAPI
To begin, create a app/main.py file for VS Code to prepare the Python development environment.
Next, close and reopen the integrated terminal for Visual Studio Code to activate the virtual environment.
Now create an empty app/__init__.py file to turn the app directory into a Python package.
Run this command to install FastAPI and its peer dependencies:
pip install fastapi[all]
Starting the FastAPI Server
Add the following code snippets to the app/main.py file to start the FastAPI server.
from fastapi import FastAPI

app = FastAPI()


@app.get("/api/healthchecker")
def root():
    return {"message": "Welcome to FastAPI with MongoDB"}
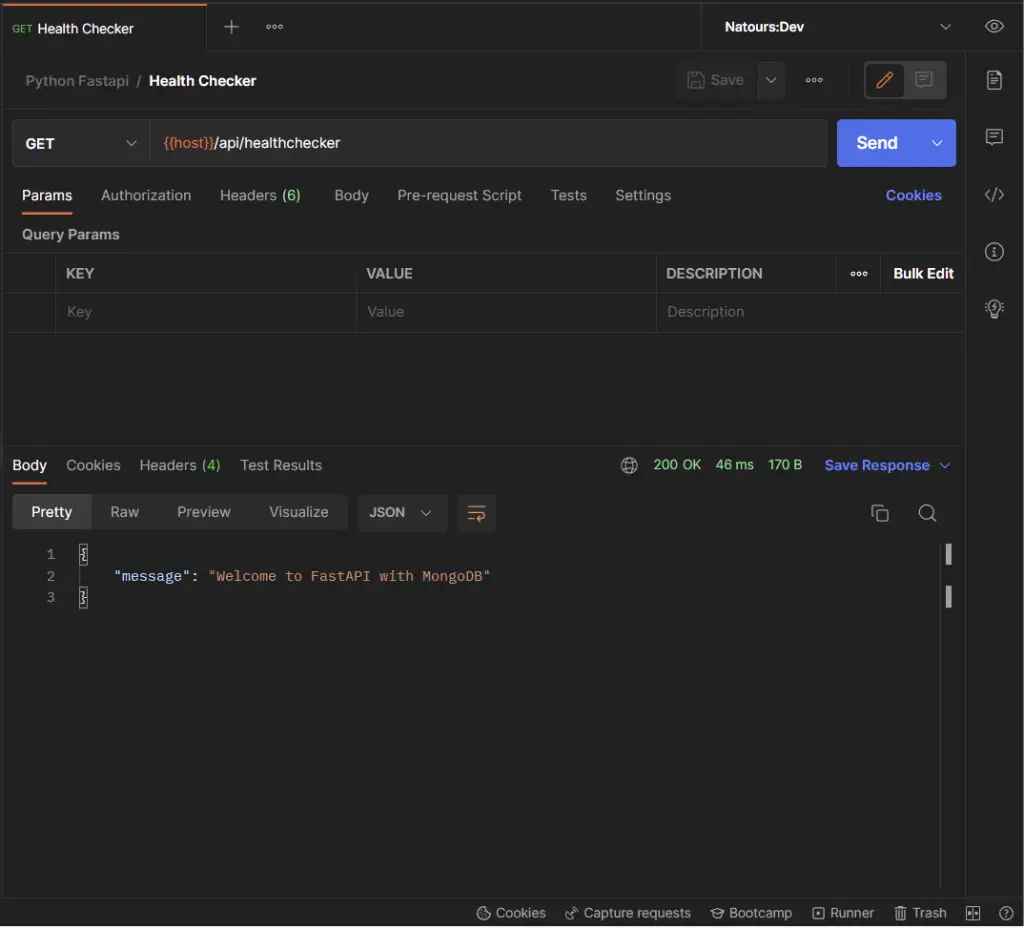
Execute this command to initialize the FastAPI server with Uvicorn:
uvicorn app.main:app --host localhost --port 8000 --reload
uvicorn– a high-performance ASGI web serverapp.main: theapp/main.pyfileapp: the object returned by callingFASTAPI()--host: Bind the socket to the specified host. Defaults to127.0.0.1--port: Bind the socket to the specified port. Defaults to8000.--reload: Enable auto-reload
Open any API testing tool and make a GET request to http://localhost:8000/api/healthchecker . You should see the message we sent in the JSON response.
Set up Environment Variables with Pydantic
Out-of-the-box, Pydantic has a feature for loading environment variables from a configuration file into the Python environment.
Now to load and validate the environment variables, we need to create a model class that inherits the BaseSettings class. This ensures that the model initializer reads the content of the environment variables file if the values of any fields are not passed as keyword arguments.
Update the content of the .env file with the following:
.env
MONGO_INITDB_ROOT_USERNAME=admin
MONGO_INITDB_ROOT_PASSWORD=password123
MONGO_INITDB_DATABASE=fastapi

DATABASE_URL=mongodb://admin:password123@localhost:6000/fastapi?authSource=admin

ACCESS_TOKEN_EXPIRES_IN=15
REFRESH_TOKEN_EXPIRES_IN=60
JWT_ALGORITHM=RS256

CLIENT_ORIGIN=http://localhost:3000


JWT_PRIVATE_KEY=LS0tLS1CRUdJTiBSU0EgUFJJVkFURSBLRVktLS0tLQpNSUlCT2dJQkFBSkJBSSs3QnZUS0FWdHVQYzEzbEFkVk94TlVmcWxzMm1SVmlQWlJyVFpjd3l4RVhVRGpNaFZuCi9KVHRsd3h2a281T0pBQ1k3dVE0T09wODdiM3NOU3ZNd2xNQ0F3RUFBUUpBYm5LaENOQ0dOSFZGaHJPQ0RCU0IKdmZ2ckRWUzVpZXAwd2h2SGlBUEdjeWV6bjd0U2RweUZ0NEU0QTNXT3VQOXhqenNjTFZyb1pzRmVMUWlqT1JhUwp3UUloQU84MWl2b21iVGhjRkltTFZPbU16Vk52TGxWTW02WE5iS3B4bGh4TlpUTmhBaUVBbWRISlpGM3haWFE0Cm15QnNCeEhLQ3JqOTF6bVFxU0E4bHUvT1ZNTDNSak1DSVFEbDJxOUdtN0lMbS85b0EyaCtXdnZabGxZUlJPR3oKT21lV2lEclR5MUxaUVFJZ2ZGYUlaUWxMU0tkWjJvdXF4MHdwOWVEejBEWklLVzVWaSt6czdMZHRDdUVDSUVGYwo3d21VZ3pPblpzbnU1clBsTDJjZldLTGhFbWwrUVFzOCtkMFBGdXlnCi0tLS0tRU5EIFJTQSBQUklWQVRFIEtFWS0tLS0t
JWT_PUBLIC_KEY=LS0tLS1CRUdJTiBQVUJMSUMgS0VZLS0tLS0KTUZ3d0RRWUpLb1pJaHZjTkFRRUJCUUFEU3dBd1NBSkJBSSs3QnZUS0FWdHVQYzEzbEFkVk94TlVmcWxzMm1SVgppUFpSclRaY3d5eEVYVURqTWhWbi9KVHRsd3h2a281T0pBQ1k3dVE0T09wODdiM3NOU3ZNd2xNQ0F3RUFBUT09Ci0tLS0tRU5EIFBVQkxJQyBLRVktLS0tLQ==
Next, create a app/config.py file and add the following code snippets:
app/config.py
from pydantic import BaseSettings


class Settings(BaseSettings):
    DATABASE_URL: str
    MONGO_INITDB_DATABASE: str

    JWT_PUBLIC_KEY: str
    JWT_PRIVATE_KEY: str
    REFRESH_TOKEN_EXPIRES_IN: int
    ACCESS_TOKEN_EXPIRES_IN: int
    JWT_ALGORITHM: str

    CLIENT_ORIGIN: str

    class Config:
        env_file = './.env'


settings = Settings()
Connect to the MongoDB Database
When it comes to working with MongoDB in Python, we have two popular options:
- PyMongo – the official MongoDB driver for synchronous Python applications
- Motor – another official MongoDB driver for asynchronous Python applications
With these two options available, I decided to use PyMongo to interact with the MongoDB server in this tutorial.
Install PyMongo with this command:
pip install pymongo
Create a app/database.py file and add the following code to connect to the MongoDB server.
app/database.py
from pymongo import mongo_client
import pymongo
from app.config import settings

client = mongo_client.MongoClient(
    settings.DATABASE_URL, serverSelectionTimeoutMS=5000)

try:
    conn = client.server_info()
    print(f'Connected to MongoDB {conn.get("version")}')
except Exception:
    print("Unable to connect to the MongoDB server.")

db = client[settings.MONGO_INITDB_DATABASE]
User = db.users
User.create_index([("email", pymongo.ASCENDING)], unique=True)
In the above, we created a database named fastapi with this command client[settings.MONGO_INITDB_DATABASE] after the connection to the MongoDB server succeeds.
Also, we created a users collection in the fastapi database and added a unique constraint to the email field.
Adding the unique constraint to the email field will ensure that we do not end up having two users with the same email addresses.
Creating the Schemas with Pydantic
Now that we have the code to connect to the MongoDB database, let’s create the schemas to parse and validate the requests and responses with Pydantic.
Create a app/schemas.py file and add the following code snippets:
app/schemas.py
from datetime import datetime
from pydantic import BaseModel, EmailStr, constr


class UserBaseSchema(BaseModel):
    name: str
    email: str
    photo: str
    role: str | None = None
    created_at: datetime | None = None
    updated_at: datetime | None = None

    class Config:
        orm_mode = True


class CreateUserSchema(UserBaseSchema):
    password: constr(min_length=8)
    passwordConfirm: str
    verified: bool = False


class LoginUserSchema(BaseModel):
    email: EmailStr
    password: constr(min_length=8)


class UserResponseSchema(UserBaseSchema):
    id: str
    pass


class UserResponse(BaseModel):
    status: str
    user: UserResponseSchema
Create Serializers for the MongoDB BSON Documents
Since MongoDB uses BSON documents, let’s create some serializers to unmarshal them into Python dictionaries.
Create a app/serializers/userSerializers.py file and add the following code:
app/serializers/userSerializers.py
def userEntity(user) -> dict:
    return {
        "id": str(user["_id"]),
        "name": user["name"],
        "email": user["email"],
        "role": user["role"],
        "photo": user["photo"],
        "verified": user["verified"],
        "password": user["password"],
        "created_at": user["created_at"],
        "updated_at": user["updated_at"]
    }


def userResponseEntity(user) -> dict:
    return {
        "id": str(user["_id"]),
        "name": user["name"],
        "email": user["email"],
        "role": user["role"],
        "photo": user["photo"],
        "created_at": user["created_at"],
        "updated_at": user["updated_at"]
    }


def embeddedUserResponse(user) -> dict:
    return {
        "id": str(user["_id"]),
        "name": user["name"],
        "email": user["email"],
        "photo": user["photo"]
    }


def userListEntity(users) -> list:
    return [userEntity(user) for user in users]
Password Management in FastAPI
When it comes to user authentication that involves email and password, it’s always a good practice to hash the plain-text password provided by the user before persisting the document to the database.
To hash the passwords, we use salt rounds or cost factor, which is the amount of time needed to calculate a single hash.
The higher the cost factor, the more the hashing rounds, and the more difficult it is brute-force.
There are many password hashing libraries in Python but we are going to use the passlib library since it supports many hashing algorithms, including the deprecated ones.
Install passlib with this command:
pip install "passlib[bcrypt]"
Next, let’s create two helper functions in the app/utils.py file to help with the hashing and verification of the passwords.
app/utils.py
from passlib.context import CryptContext

pwd_context = CryptContext(schemes=["bcrypt"], deprecated="auto")


def hash_password(password: str):
    return pwd_context.hash(password)


def verify_password(password: str, hashed_password: str):
    return pwd_context.verify(password, hashed_password)
hash_password– this method is responsible for hashing the plain-text passwords.verify_password– this method is responsible for verifying the passwords.
Creating Utility Functions to Sign and Verify JWTs
Normally, we use the python-jose package to sign and verify JSON Web Tokens (JWTs) in Python, but we are going to use the FastAPI JWT Auth extension to sign and verify the access and refresh tokens.
Run this command to install the FastAPI JWT Auth extension
pip install 'fastapi-jwt-auth[asymmetric]'
Optional: Generating the Private and Public Keys
This section is optional since I already included the base64 encoded private and public keys in the .env file. However, you can go through the following steps to create them yourself.
Step 1: Open this website in a new tab, and click the “Generate New Keys” button to create the private and public keys.
Step 2: Copy the generated private key and open this base64 encode website to convert it to Base64.
We need to encode the keys in base64 to avoid getting unnecessary warnings in the terminal when building the Docker images.
Step 3: Copy the base64 encoded key and add it to the .env file as JWT_PRIVATE_KEY .
Step 4: Navigate back to the public/private keys generation site and copy the corresponding public key.
Step 5: Go back to the base64 encoding website to convert the public key to base64 and add it to the .env file as JWT_PUBLIC_KEY .
Create an app/oauth2.py file and add the following code to configure the fastapi_jwt_auth package to use the public and private keys, the RS256 algorithm, and to set the token location to cookies.
You can read more about the available configurations on the FastAPI JWT Auth extension website.
app/oauth2.py
import base64
from typing import List
from fastapi_jwt_auth import AuthJWT
from pydantic import BaseModel

from .config import settings

class Settings(BaseModel):
    authjwt_algorithm: str = settings.JWT_ALGORITHM
    authjwt_decode_algorithms: List[str] = [settings.JWT_ALGORITHM]
    authjwt_token_location: set = {'cookies', 'headers'}
    authjwt_access_cookie_key: str = 'access_token'
    authjwt_refresh_cookie_key: str = 'refresh_token'
    authjwt_cookie_csrf_protect: bool = False
    authjwt_public_key: str = base64.b64decode(
        settings.JWT_PUBLIC_KEY).decode('utf-8')
    authjwt_private_key: str = base64.b64decode(
        settings.JWT_PRIVATE_KEY).decode('utf-8')


@AuthJWT.load_config
def get_config():
    return Settings()
In the code snippets above, we decoded the public and private keys back to “UTF-8” strings before assigning them to the constants.
Creating the Authentication Controllers in FastAPI
Now that we have everything set up, let’s create authentication path operation functions to:
- Register a user
- Sign in the registered user
- Refresh the expired access token
- Log out the user
Create a app/router/auth.py file and add the imports below
app/routers/auth.py
from datetime import datetime, timedelta
from bson.objectid import ObjectId
from fastapi import APIRouter, Response, status, Depends, HTTPException

from app import oauth2
from app.database import User
from app.serializers.userSerializers import userEntity
from .. import schemas, utils
from app.oauth2 import AuthJWT
from ..config import settings


router = APIRouter()
ACCESS_TOKEN_EXPIRES_IN = settings.ACCESS_TOKEN_EXPIRES_IN
REFRESH_TOKEN_EXPIRES_IN = settings.REFRESH_TOKEN_EXPIRES_IN
# [...] imports
User Registration Handler
Now let’s add the path operation function to register new users.
app/routers/auth.py
# [...] imports
# [...] register user
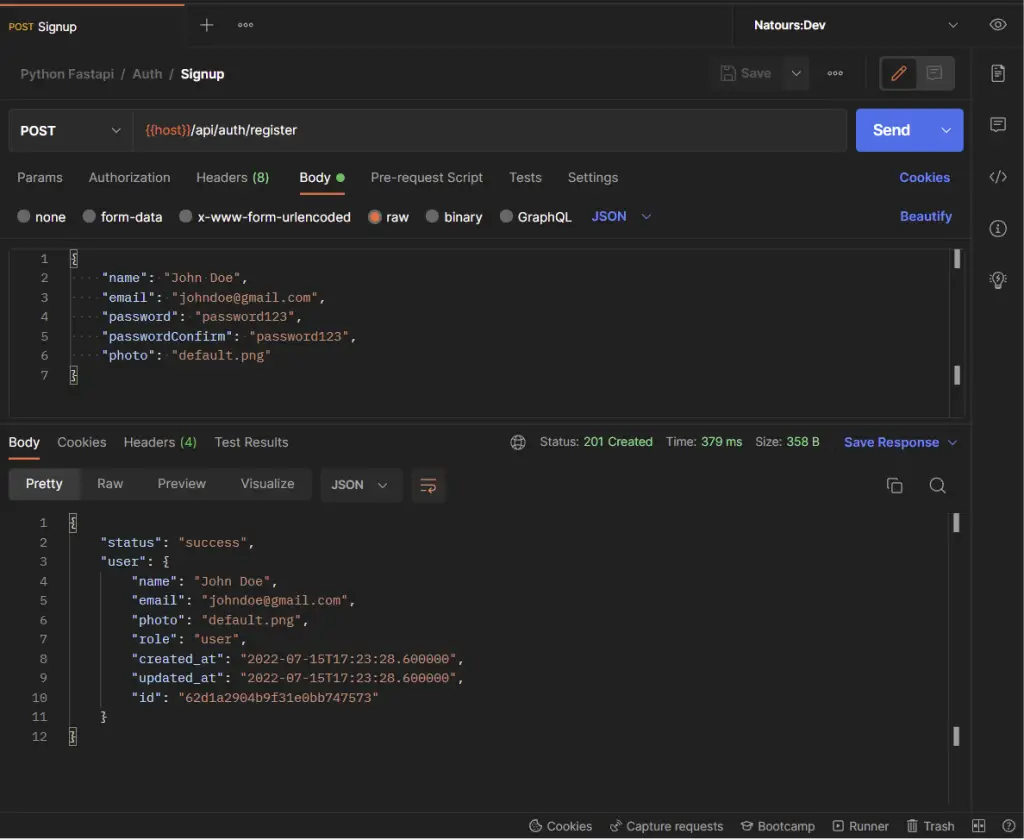
@router.post('/register', status_code=status.HTTP_201_CREATED, response_model=schemas.UserResponse)
async def create_user(payload: schemas.CreateUserSchema):
# Check if user already exist
user = User.find_one({'email': payload.email.lower()})
if user:
raise HTTPException(status_code=status.HTTP_409_CONFLICT,
detail='Account already exist')
# Compare password and passwordConfirm
if payload.password != payload.passwordConfirm:
raise HTTPException(
status_code=status.HTTP_400_BAD_REQUEST, detail='Passwords do not match')
# Hash the password
payload.password = utils.hash_password(payload.password)
del payload.passwordConfirm
payload.role = 'user'
payload.verified = True
payload.email = payload.email.lower()
payload.created_at = datetime.utcnow()
payload.updated_at = payload.created_at
result = User.insert_one(payload.dict())
new_user = userResponseEntity(User.find_one({'_id': result.inserted_id}))
return {"status": "success", "user": new_user}
In the create_user() function, we added the CreateUserSchema class as a parameter to enable FastAPI to validate the request body with the rules specified with Pydantic.
Also, we wrapped the User.find_one() method in the userResponseEntity() serializer to filter the data returned by MongoDB. This ensures that sensitive credentials are removed from the data.
User Sign-in Handler
Since we are able to register a user, let’s create a controller to log in the registered user.
app/routers/auth.py
# [...] imports
# [...] register user
# [...] login user
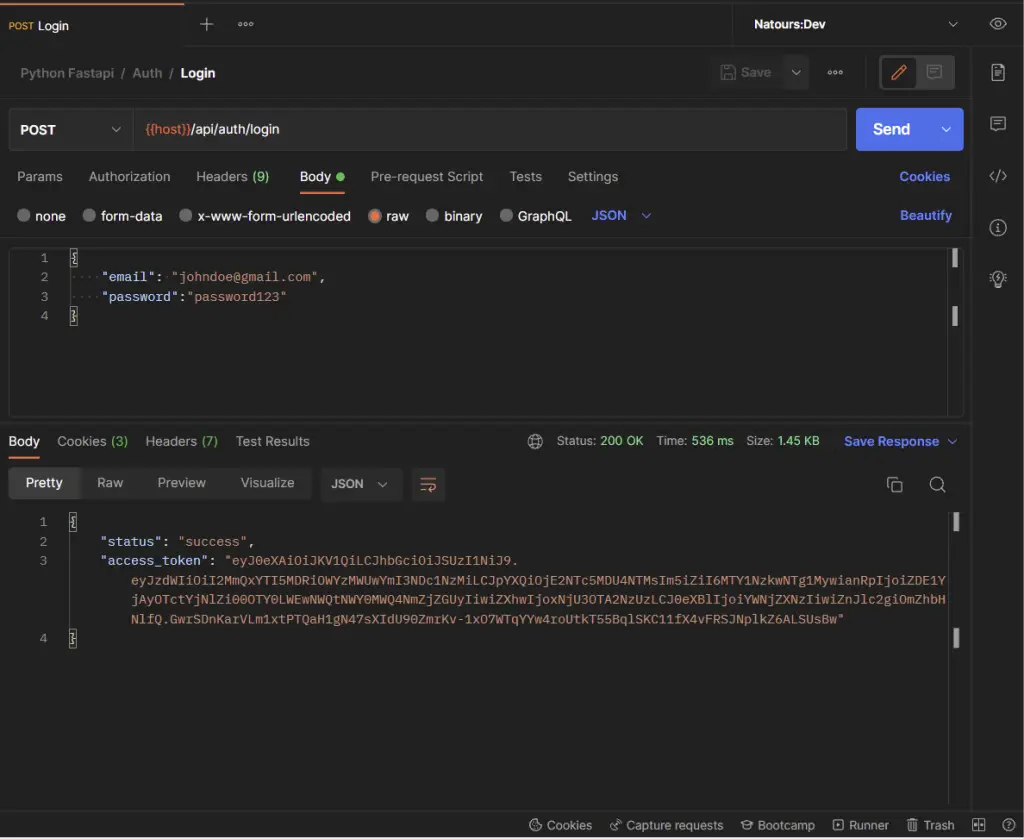
@router.post('/login')
def login(payload: schemas.LoginUserSchema, response: Response, Authorize: AuthJWT = Depends()):
# Check if the user exist
db_user = User.find_one({'email': payload.email.lower()})
if not db_user:
raise HTTPException(status_code=status.HTTP_400_BAD_REQUEST,
detail='Incorrect Email or Password')
user = userEntity(db_user)
# Check if the password is valid
if not utils.verify_password(payload.password, user['password']):
raise HTTPException(status_code=status.HTTP_400_BAD_REQUEST,
detail='Incorrect Email or Password')
# Create access token
access_token = Authorize.create_access_token(
subject=str(user["id"]), expires_time=timedelta(minutes=ACCESS_TOKEN_EXPIRES_IN))
# Create refresh token
refresh_token = Authorize.create_refresh_token(
subject=str(user["id"]), expires_time=timedelta(minutes=REFRESH_TOKEN_EXPIRES_IN))
# Store refresh and access tokens in cookie
response.set_cookie('access_token', access_token, ACCESS_TOKEN_EXPIRES_IN * 60,
ACCESS_TOKEN_EXPIRES_IN * 60, '/', None, False, True, 'lax')
response.set_cookie('refresh_token', refresh_token,
REFRESH_TOKEN_EXPIRES_IN * 60, REFRESH_TOKEN_EXPIRES_IN * 60, '/', None, False, True, 'lax')
response.set_cookie('logged_in', 'True', ACCESS_TOKEN_EXPIRES_IN * 60,
ACCESS_TOKEN_EXPIRES_IN * 60, '/', None, False, False, 'lax')
# Send both access
return {'status': 'success', 'access_token': access_token}
Too much stuff going on in the above, let’s break it down:
- First and foremost, we added the
LoginUserSchemawe created with Pydantic as a parameter to help FastAPI validate the request body. - Then we called the
User.find_one()method to check if a user with that email exists in the database. - Next, we called the
verify_password()utility function to compare the plain-text password with the hashed one stored in the database. - Lastly, we generated the access and refresh tokens and sent them to the user as HTTPOnly cookies.
Refresh Access Token Handler
app/routers/auth.py
# [...] imports
# [...] register user
# [...] login user
# [...] refresh token
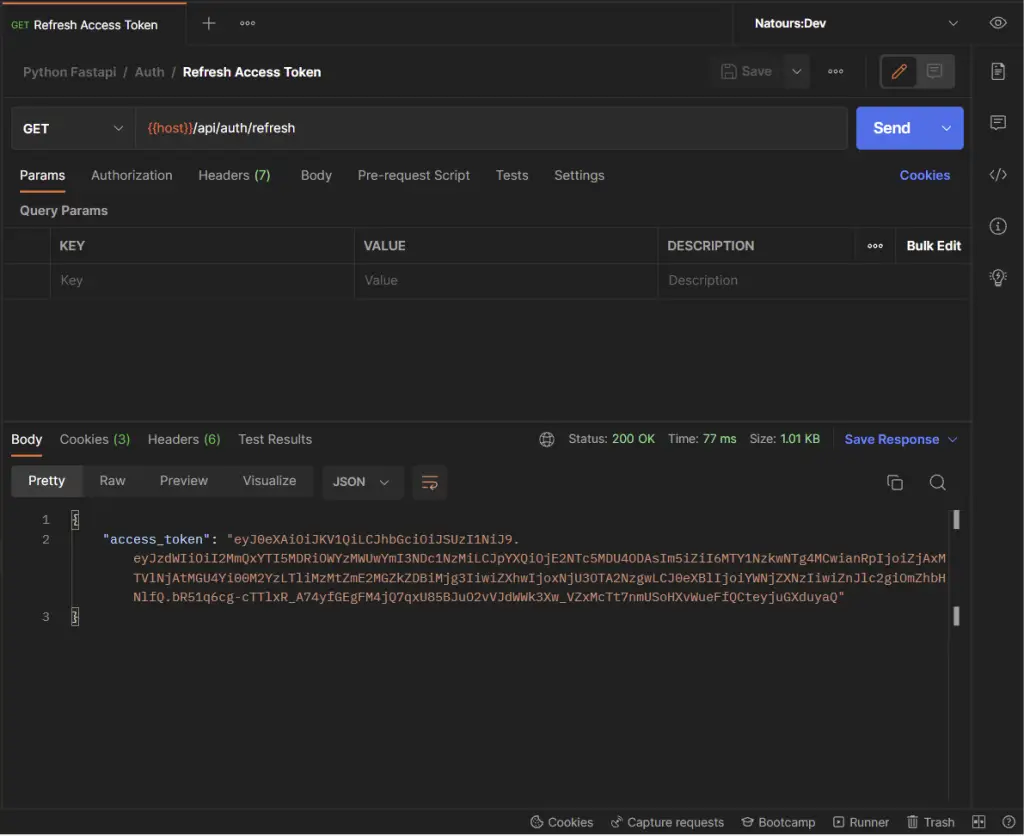
@router.get('/refresh')
def refresh_token(response: Response, Authorize: AuthJWT = Depends()):
try:
Authorize.jwt_refresh_token_required()
user_id = Authorize.get_jwt_subject()
if not user_id:
raise HTTPException(status_code=status.HTTP_401_UNAUTHORIZED,
detail='Could not refresh access token')
user = userEntity(User.find_one({'_id': ObjectId(str(user_id))}))
if not user:
raise HTTPException(status_code=status.HTTP_401_UNAUTHORIZED,
detail='The user belonging to this token no logger exist')
access_token = Authorize.create_access_token(
subject=str(user["id"]), expires_time=timedelta(minutes=ACCESS_TOKEN_EXPIRES_IN))
except Exception as e:
error = e.__class__.__name__
if error == 'MissingTokenError':
raise HTTPException(
status_code=status.HTTP_400_BAD_REQUEST, detail='Please provide refresh token')
raise HTTPException(
status_code=status.HTTP_400_BAD_REQUEST, detail=error)
response.set_cookie('access_token', access_token, ACCESS_TOKEN_EXPIRES_IN * 60,
ACCESS_TOKEN_EXPIRES_IN * 60, '/', None, False, True, 'lax')
response.set_cookie('logged_in', 'True', ACCESS_TOKEN_EXPIRES_IN * 60,
ACCESS_TOKEN_EXPIRES_IN * 60, '/', None, False, False, 'lax')
return {'access_token': access_token}
In the code snippets above, we evoked the jwt_refresh_token_required() method to ensure that the refresh token cookie was included in the incoming request.
Next, we evoked the get_jwt_subject() method to retrieve the payload stored in the token.
Then we used the payload which in this case is the user’s ID to query the database to check if the user still exists.
Finally, assuming there weren’t any errors, we generate the access token and sent it to the user as an HTTPOnly cookie.
Sign out User Handler
Logging out the user is really simple, you just need to call the unset_jwt_cookies() method and the cookies will be removed from the user’s browser or client.
app/routers/auth.py
# [...] imports
# [...] register user
# [...] login user
# [...] refresh token

# [...] logout user
@router.get('/logout', status_code=status.HTTP_200_OK)
def logout(response: Response, Authorize: AuthJWT = Depends(), user_id: str = Depends(oauth2.require_user)):
    Authorize.unset_jwt_cookies()
    response.set_cookie('logged_in', '', -1)

    return {'status': 'success'}
Complete Code for the Auth Handlers
app/routers/auth.py
from datetime import datetime, timedelta
from bson.objectid import ObjectId
from fastapi import APIRouter, Response, status, Depends, HTTPException

from app import oauth2
from app.database import User
from app.serializers.userSerializers import userEntity, userResponseEntity
from .. import schemas, utils
from app.oauth2 import AuthJWT
from ..config import settings


router = APIRouter()
ACCESS_TOKEN_EXPIRES_IN = settings.ACCESS_TOKEN_EXPIRES_IN
REFRESH_TOKEN_EXPIRES_IN = settings.REFRESH_TOKEN_EXPIRES_IN


@router.post('/register', status_code=status.HTTP_201_CREATED, response_model=schemas.UserResponse)
async def create_user(payload: schemas.CreateUserSchema):
    # Check if user already exist
    user = User.find_one({'email': payload.email.lower()})
    if user:
        raise HTTPException(status_code=status.HTTP_409_CONFLICT,
                            detail='Account already exist')
    # Compare password and passwordConfirm
    if payload.password != payload.passwordConfirm:
        raise HTTPException(
            status_code=status.HTTP_400_BAD_REQUEST, detail='Passwords do not match')
    #  Hash the password
    payload.password = utils.hash_password(payload.password)
    del payload.passwordConfirm
    payload.role = 'user'
    payload.verified = True
    payload.email = payload.email.lower()
    payload.created_at = datetime.utcnow()
    payload.updated_at = payload.created_at
    result = User.insert_one(payload.dict())
    new_user = userResponseEntity(User.find_one({'_id': result.inserted_id}))
    return {"status": "success", "user": new_user}


@router.post('/login')
def login(payload: schemas.LoginUserSchema, response: Response, Authorize: AuthJWT = Depends()):
    # Check if the user exist
    db_user = User.find_one({'email': payload.email.lower()})
    if not db_user:
        raise HTTPException(status_code=status.HTTP_400_BAD_REQUEST,
                            detail='Incorrect Email or Password')
    user = userEntity(db_user)

    # Check if the password is valid
    if not utils.verify_password(payload.password, user['password']):
        raise HTTPException(status_code=status.HTTP_400_BAD_REQUEST,
                            detail='Incorrect Email or Password')

    # Create access token
    access_token = Authorize.create_access_token(
        subject=str(user["id"]), expires_time=timedelta(minutes=ACCESS_TOKEN_EXPIRES_IN))

    # Create refresh token
    refresh_token = Authorize.create_refresh_token(
        subject=str(user["id"]), expires_time=timedelta(minutes=REFRESH_TOKEN_EXPIRES_IN))

    # Store refresh and access tokens in cookie
    response.set_cookie('access_token', access_token, ACCESS_TOKEN_EXPIRES_IN * 60,
                        ACCESS_TOKEN_EXPIRES_IN * 60, '/', None, False, True, 'lax')
    response.set_cookie('refresh_token', refresh_token,
                        REFRESH_TOKEN_EXPIRES_IN * 60, REFRESH_TOKEN_EXPIRES_IN * 60, '/', None, False, True, 'lax')
    response.set_cookie('logged_in', 'True', ACCESS_TOKEN_EXPIRES_IN * 60,
                        ACCESS_TOKEN_EXPIRES_IN * 60, '/', None, False, False, 'lax')

    # Send both access
    return {'status': 'success', 'access_token': access_token}


@router.get('/refresh')
def refresh_token(response: Response, Authorize: AuthJWT = Depends()):
    try:
        Authorize.jwt_refresh_token_required()

        user_id = Authorize.get_jwt_subject()
        if not user_id:
            raise HTTPException(status_code=status.HTTP_401_UNAUTHORIZED,
                                detail='Could not refresh access token')
        user = userEntity(User.find_one({'_id': ObjectId(str(user_id))}))
        if not user:
            raise HTTPException(status_code=status.HTTP_401_UNAUTHORIZED,
                                detail='The user belonging to this token no logger exist')
        access_token = Authorize.create_access_token(
            subject=str(user["id"]), expires_time=timedelta(minutes=ACCESS_TOKEN_EXPIRES_IN))
    except Exception as e:
        error = e.__class__.__name__
        if error == 'MissingTokenError':
            raise HTTPException(
                status_code=status.HTTP_400_BAD_REQUEST, detail='Please provide refresh token')
        raise HTTPException(
            status_code=status.HTTP_400_BAD_REQUEST, detail=error)

    response.set_cookie('access_token', access_token, ACCESS_TOKEN_EXPIRES_IN * 60,
                        ACCESS_TOKEN_EXPIRES_IN * 60, '/', None, False, True, 'lax')
    response.set_cookie('logged_in', 'True', ACCESS_TOKEN_EXPIRES_IN * 60,
                        ACCESS_TOKEN_EXPIRES_IN * 60, '/', None, False, False, 'lax')
    return {'access_token': access_token}


@router.get('/logout', status_code=status.HTTP_200_OK)
def logout(response: Response, Authorize: AuthJWT = Depends(), user_id: str = Depends(oauth2.require_user)):
    Authorize.unset_jwt_cookies()
    response.set_cookie('logged_in', '', -1)

    return {'status': 'success'}
How to Protect Private Routes
Now let’s create a function that we will inject into private path operation functions using dependency injection, a popular programming paradigm.
This will ensure that the user is authenticated before accessing protected resources on the server.
Replace the content of the app/oauth2.py file with the following:
app/oauth2.py
import base64
from typing import List
from fastapi import Depends, HTTPException, status
from fastapi_jwt_auth import AuthJWT
from pydantic import BaseModel
from bson.objectid import ObjectId

from app.serializers.userSerializers import userEntity

from .database import User
from .config import settings


class Settings(BaseModel):
    authjwt_algorithm: str = settings.JWT_ALGORITHM
    authjwt_decode_algorithms: List[str] = [settings.JWT_ALGORITHM]
    authjwt_token_location: set = {'cookies', 'headers'}
    authjwt_access_cookie_key: str = 'access_token'
    authjwt_refresh_cookie_key: str = 'refresh_token'
    authjwt_cookie_csrf_protect: bool = False
    authjwt_public_key: str = base64.b64decode(
        settings.JWT_PUBLIC_KEY).decode('utf-8')
    authjwt_private_key: str = base64.b64decode(
        settings.JWT_PRIVATE_KEY).decode('utf-8')


@AuthJWT.load_config
def get_config():
    return Settings()


class NotVerified(Exception):
    pass


class UserNotFound(Exception):
    pass


def require_user(Authorize: AuthJWT = Depends()):
    try:
        Authorize.jwt_required()
        user_id = Authorize.get_jwt_subject()
        user = userEntity(User.find_one({'_id': ObjectId(str(user_id))}))

        if not user:
            raise UserNotFound('User no longer exist')

        if not user["verified"]:
            raise NotVerified('You are not verified')

    except Exception as e:
        error = e.__class__.__name__
        print(error)
        if error == 'MissingTokenError':
            raise HTTPException(
                status_code=status.HTTP_401_UNAUTHORIZED, detail='You are not logged in')
        if error == 'UserNotFound':
            raise HTTPException(
                status_code=status.HTTP_401_UNAUTHORIZED, detail='User no longer exist')
        if error == 'NotVerified':
            raise HTTPException(
                status_code=status.HTTP_401_UNAUTHORIZED, detail='Please verify your account')
        raise HTTPException(
            status_code=status.HTTP_401_UNAUTHORIZED, detail='Token is invalid or has expired')
    return user_id
Quite a lot is happening above, let’s break it down:
- We evoked the
jwt_required()method to ensure that the access token cookie is included in the request. - Next, we extracted the payload with the
get_jwt_subject()method and queried the database to check if the user belonging to the token still exists. - Once there weren’t any errors, we return the user’s ID to the path operation function.
Creating a User Handler
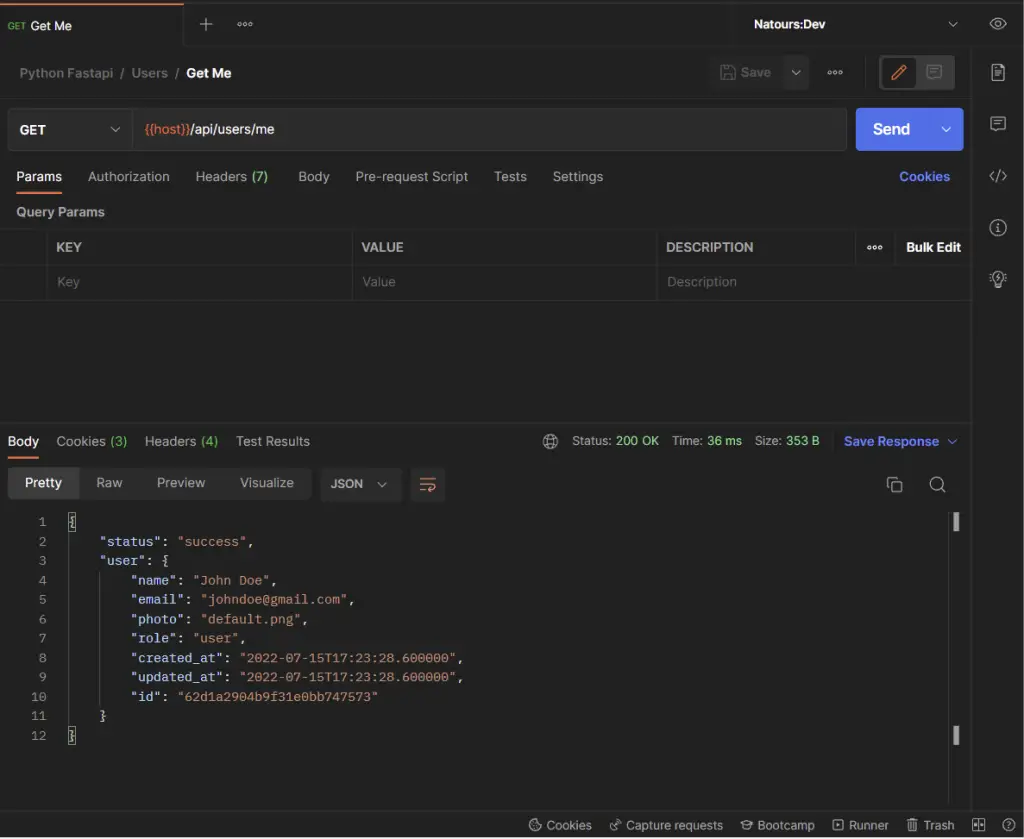
Here, let’s create a path operation function to return the authenticated user’s profile information. This route handler will be called when a GET request is made to the /api/users/me endpoint.
app/routers/user.py
from fastapi import APIRouter, Depends
from bson.objectid import ObjectId
from app.serializers.userSerializers import userResponseEntity

from app.database import User
from .. import schemas, oauth2

router = APIRouter()


@router.get('/me', response_model=schemas.UserResponse)
def get_me(user_id: str = Depends(oauth2.require_user)):
    user = userResponseEntity(User.find_one({'_id': ObjectId(str(user_id))}))
    return {"status": "success", "user": user}
The oauth2.require_user dependency will ensure that a valid access token was included in the request cookies and assign the authenticated user’s ID to the user_id variable. Next, the User.find_one() method will be called to retrieve the user’s credentials from the MongoDB database.
After that, the MongoDB document returned from the query will be serialized into a Python object and assigned to the user variable. Finally, the serialized document will be sent to the client in the JSON response.
Adding the Routes and CORS to the Main File
Oops, quite a lot of code. If you made it this far, am proud of you. Now let’s configure the server to accept cross-origin requests and register the routers in the app.
To do this, open the app/main.py file and replace its content with the following code.
app/main.py
from fastapi import FastAPI
from fastapi.middleware.cors import CORSMiddleware

from app.config import settings
from app.routers import auth, user

app = FastAPI()

origins = [
    settings.CLIENT_ORIGIN,
]

app.add_middleware(
    CORSMiddleware,
    allow_origins=origins,
    allow_credentials=True,
    allow_methods=["*"],
    allow_headers=["*"],
)


app.include_router(auth.router, tags=['Auth'], prefix='/api/auth')
app.include_router(user.router, tags=['Users'], prefix='/api/users')


@app.get("/api/healthchecker")
def root():
    return {"message": "Welcome to FastAPI with MongoDB"}
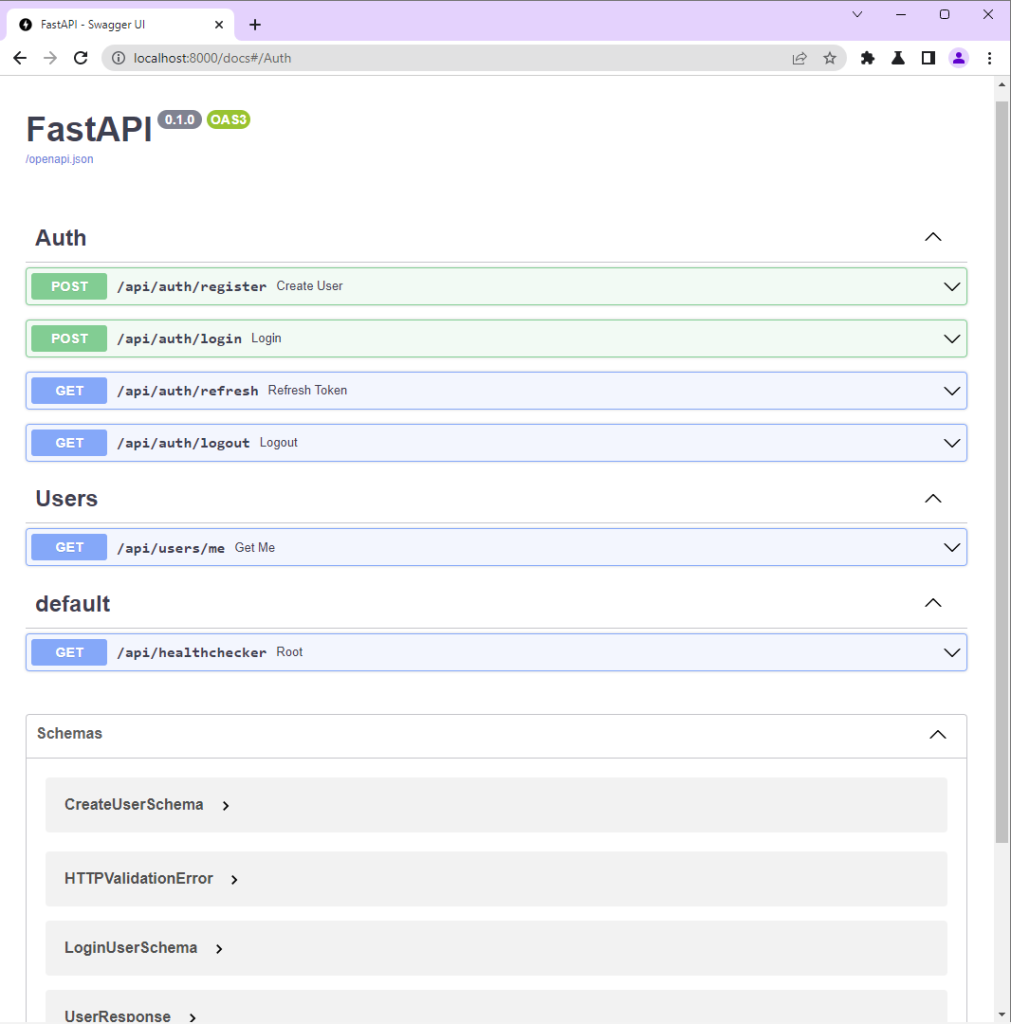
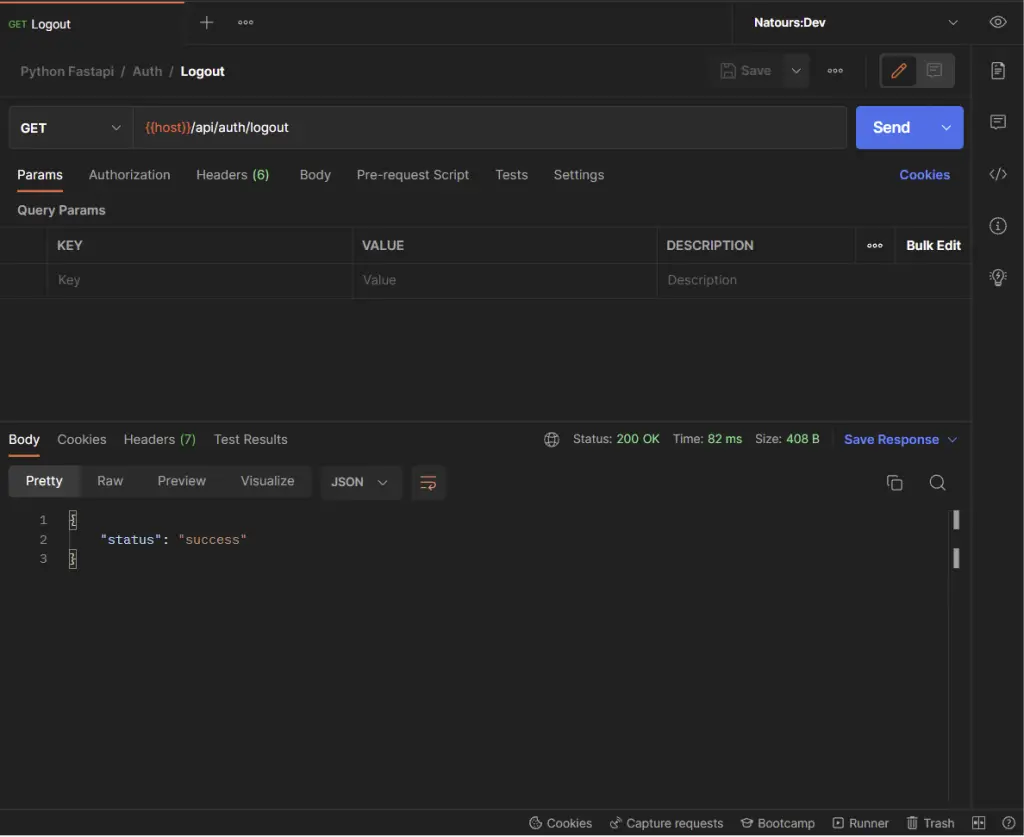
Testing the API with Postman
By default, FastAPI generates the API docs that comply with OpenAPI standards but am going to use Postman to test the API.
You can import the collection I used into your Postman to make your life easier.
-Register the new user
-Sign in the user
-Refresh the access token
-Get the authenticated user
-Logout the user
Conclusion
With this FastAPI, MongoDB, Pydantic, PyMongo, and Docker example in Python, you’ve learned how to implement access and refresh token functionalities in your FastAPI applications.
FastAPI, PyMongo, and Pydantic Source Code
You can find the complete source code in this GitHub repository.
Is it possible to change default mongo username and password. I’ve tried several times and cannot accept other different from “admin”/”password123”
To change the MongoDB database username and password, open the
.envfile and update the following variables:After that, update the MongoDB connection URL with the new username and password:
DATABASE_URL=mongodb://new_username:new_password@localhost:6000/fastapi?authSource=admin
Run
docker-compose up -dto start the MongoDB docker container. Then, start the FastAPI server.please i have some errors like that
DATABASE_URL
field required (type=value_error.missing)
MONGO_INITDB_DATABASE
field required (type=value_error.missing)
JWT_PUBLIC_KEY
field required (type=value_error.missing)
JWT_PRIVATE_KEY
field required (type=value_error.missing)
REFRESH_TOKEN_EXPIRES_IN
field required (type=value_error.missing)
ACCESS_TOKEN_EXPIRES_IN
field required (type=value_error.missing)
JWT_ALGORITHM
field required (type=value_error.missing)
CLIENT_ORIGIN
field required (type=value_error.missing)
That’s because those variables are not available in the
.envfile.To resolve this issue, add the respective environment variables to the
.envfile. Alternatively, you can clone the project to have access to the.envfile.hey getting error
raise TypeError(“Config must be pydantic ‘BaseSettings’ or list of tuple”)
TypeError: Config must be pydantic ‘BaseSettings’ or list of tuple
on JWT_PRIVATE_KEY: str
I just cloned the project, tested it on Windows and Ubuntu, and I didn’t find any errors.
Please make sure the variables provided in the
app/config.pyfile are available in the.envfile.Hello,
I am having issues using the api together with a front-end in reactjs.
When I login, the cookies are not saved. Also, even if I add the front end (localhost:3000) to fastapi’s CORS, I’m getting CORS errors.
Any suggestions ̣?
Hi Alves, sorry to hear that you’re having trouble with integrating the API with a ReactJS front-end. Based on the issues you described, it sounds like there might be a couple of things going on.
Regarding the issue of cookies not being saved after login, one potential solution could be to adjust how you’re making requests to the API.
If you’re using Axios, you’ll need to add the
withCredentials: trueoption, or if you’re using the Fetch API, you’ll need to includecredentials: "include".Including either of these options, depending on the library you’re using, will allow the cookies to be stored in the browser.
Additionally, make sure to include the necessary options whenever you’re accessing a route on the API that is restricted to only logged-in users.
Regarding the CORS errors, this is a common issue that occurs when attempting to make cross-origin requests between different domains. To resolve this, try adding
http://localhost:3000to the CORS options on the FastAPI server.If you still encounter issues after trying these recommendations, please feel free to reply to my comment, and I’ll be happy to assist you further. Good luck!
Desktop/mongo-auth/.venv/lib/python3.10/site-packages/pydantic/_internal/_generate_schema.py”, line 192, in apply_each_item_validators
raise TypeError(
TypeError: `@validator(…, each_item=True)` cannot be applied to fields with a schema of json-or-python
couldnot figure out the solution, hlp pls
This helped in quick setup of the auth endpoints.
Thanks
pydantic_core._pydantic_core.ValidationError: 2 validation errors for Settings
mongo_initdb_root_username, mongo_initdb_root_password
Extra inputs are not permitted
Good guide but in the JWT key generating section it says this is optional, you shouldn’t use other peoples keys this defeats the point of security offered by using the keys. Don’t use an online websites to generate keys as they could easily be stolen. Use OpenSSH ssh-keygen on linux/windows to generate keys and base64 using python base64 library.