
In this article, you’ll learn how to send HTML emails with Python, FastAPI, PostgreSQL, Jinja2, and Docker-compose. Also, you’ll learn how to dynamically generate HTML templates with the Jinja2 package.
FastAPI is a modern, lightweight, high-performance, Python web framework tailored specifically for building APIs. It was designed to perform at par with popular backend frameworks like Express & Fastify for Node.js, and Gin Gonic for Golang.
API with Python and FastAPI Series:
- RESTful API with Python & FastAPI: Access and Refresh Tokens
- RESTful API with Python & FastAPI: Send HTML Emails
- CRUD RESTful API Server with Python, FastAPI, and PostgreSQL
Related Articles:
- Build Golang gRPC Server and Client: SignUp User & Verify Email
- CRUD API with Node.js and PostgreSQL: Send HTML Emails
- API with Golang + MongoDB: Send HTML Emails with Gomail
- API with Node.js + PostgreSQL + TypeORM: Send Emails
Prerequisites
Before you begin, you should:
- Have fundamental knowledge of Python
- Have Python 3.6+ installed on your system
- Have Docker installed on your machine
Send HTML Email with jinja2 and FastAPI Overview
Here a user inputs the required credentials to register for an account
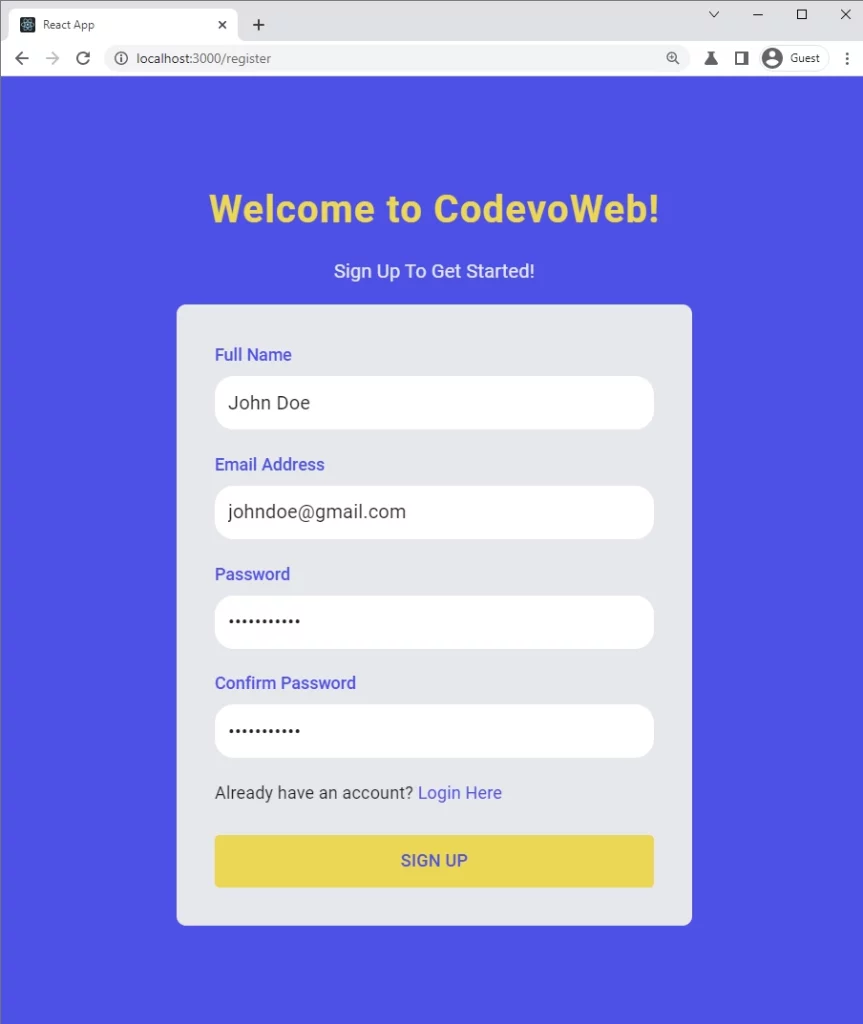
The FastAPI server validates the provided credentials, adds the user to the database, generates the Email verification template, and sends the verification code to the user’s email.
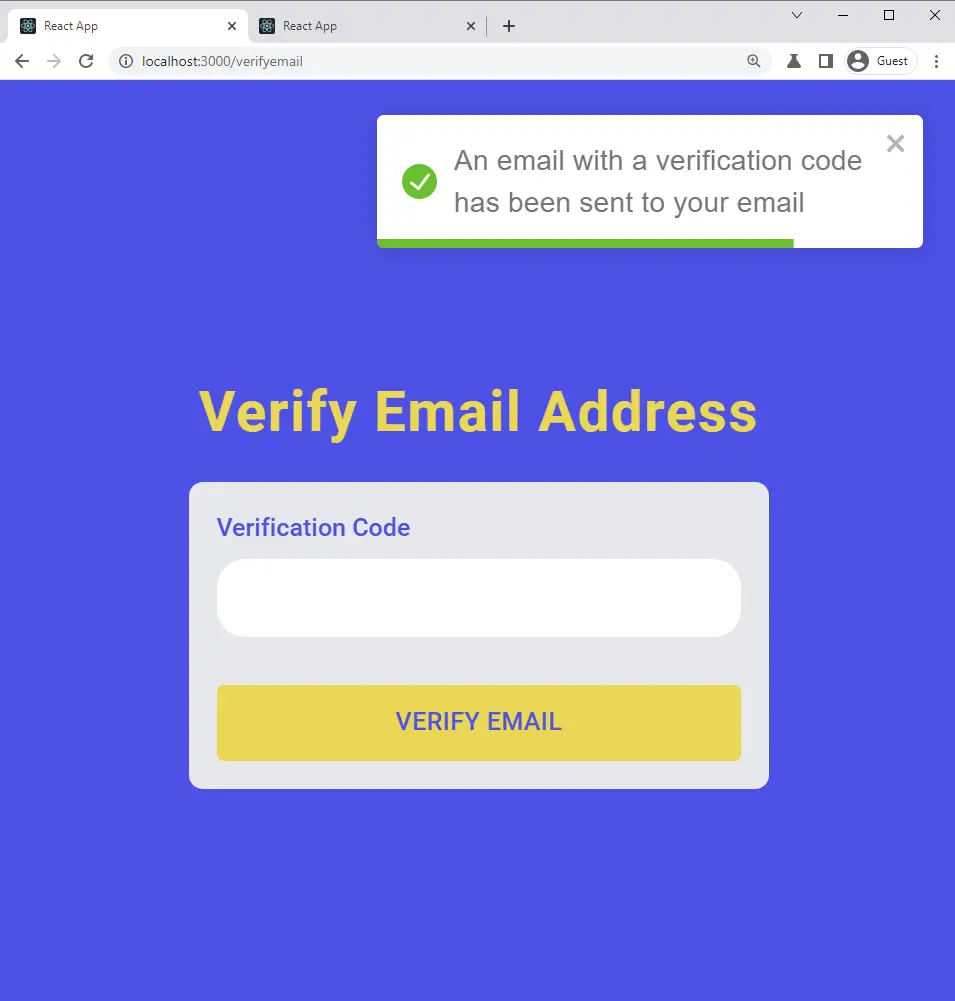
The user then opens the email after receiving the success message from the FastAPI server.
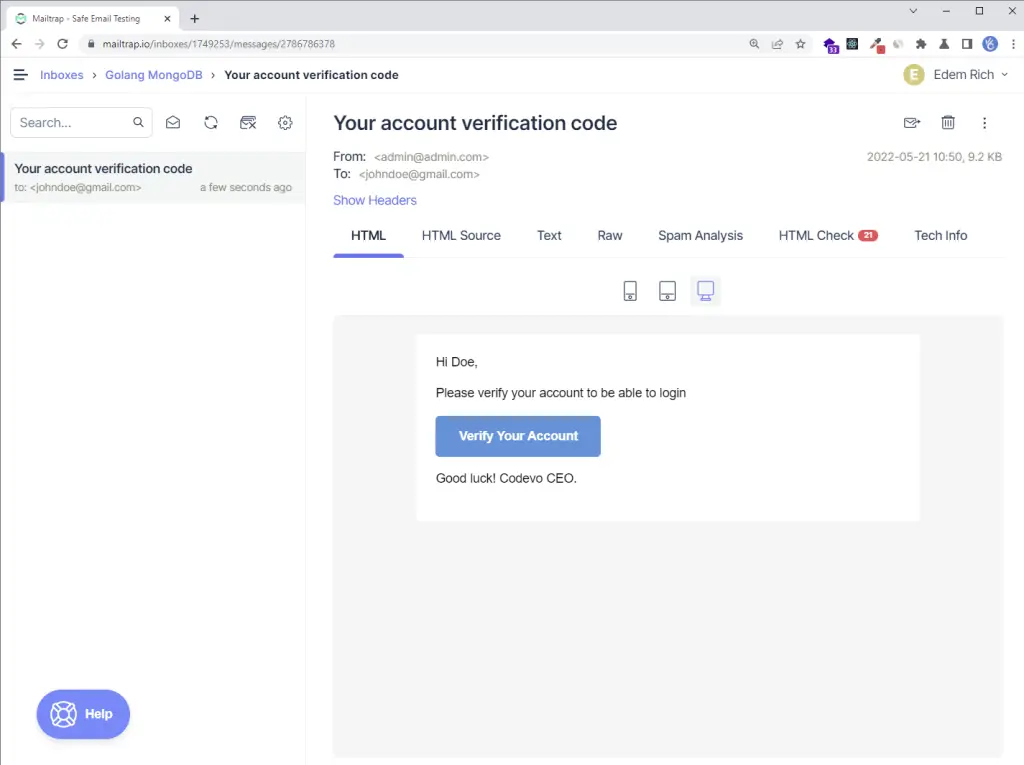
After the user clicks the “Verify Your Account” button, the user is redirected to the email verification page where the code is pre-filled in the input field.
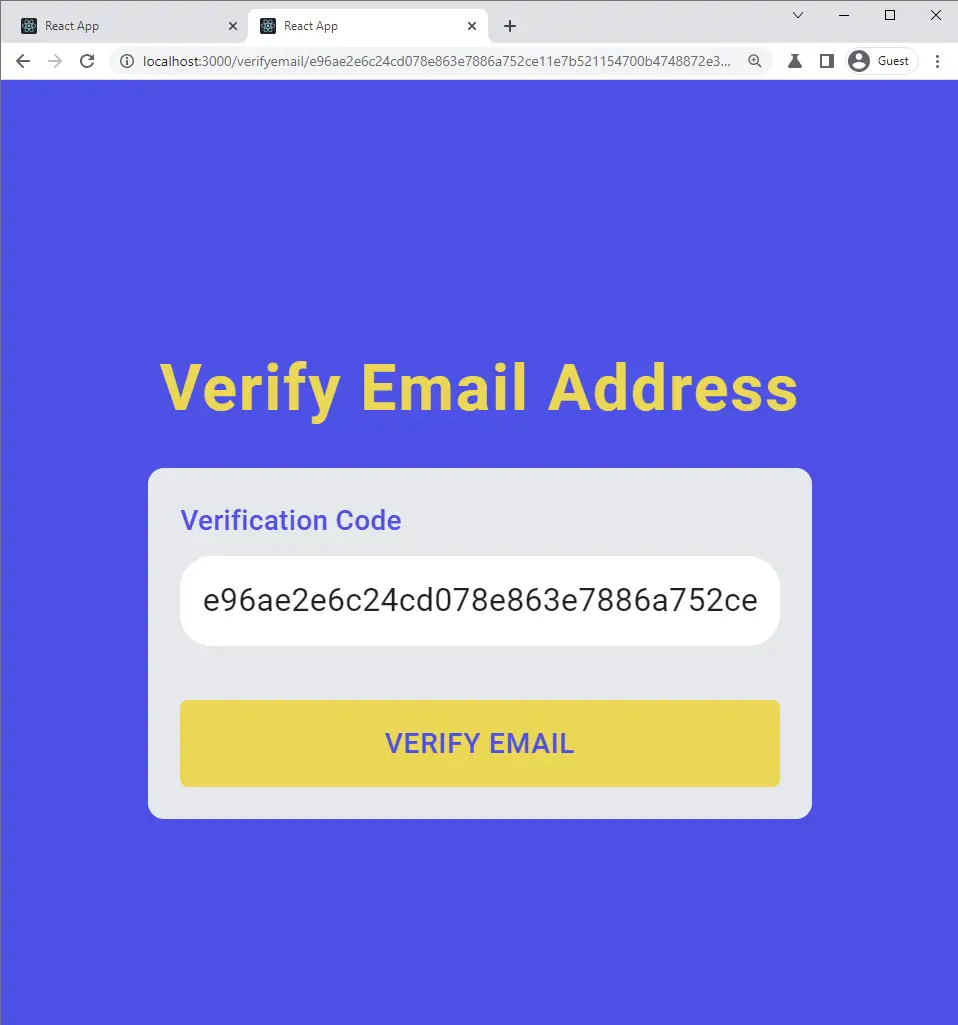
When the user clicks on the “VERIFY EMAIL” button, a GET request is made with the verification code to the FastAPI server.
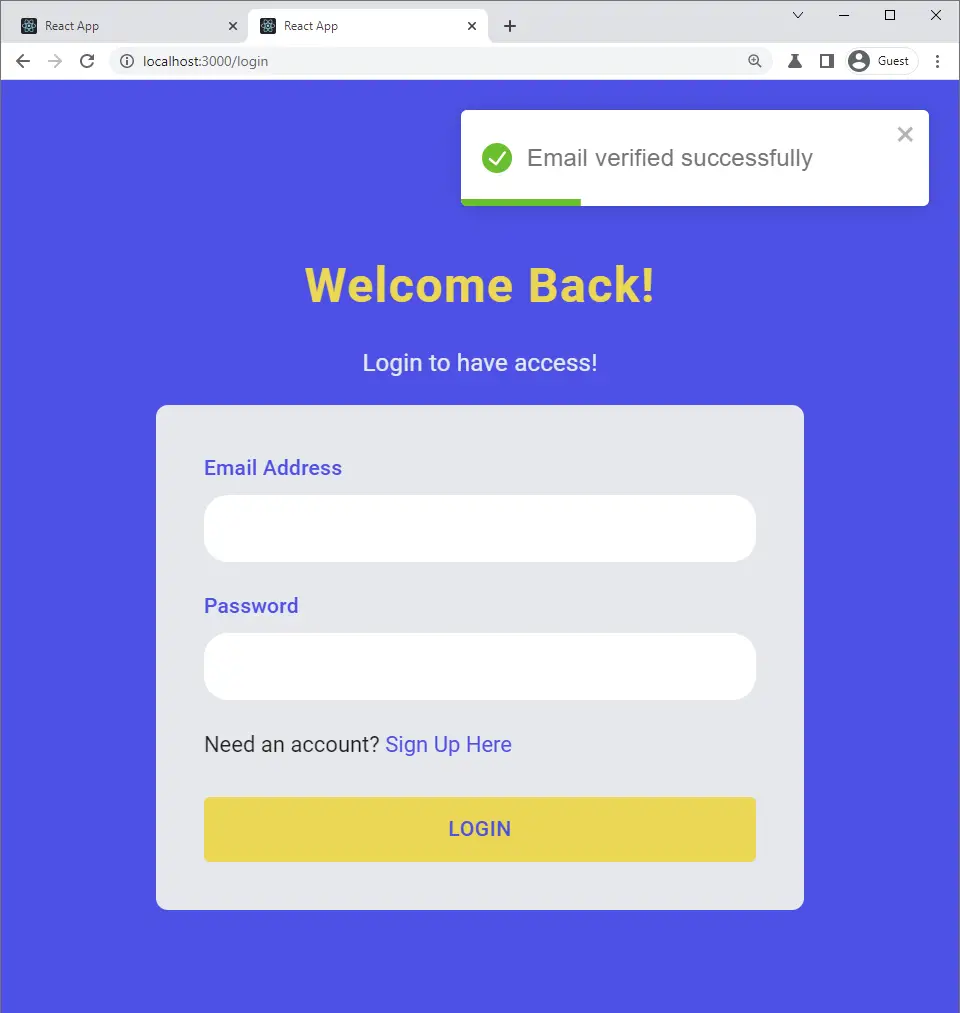
The FastAPI server verifies the code and updates the verified field in the database to true .
After the verification process is completed, FastAPI returns a success message to the client, and the user is redirected to the login page.
Creating an SMTP Provider Account
If you are building a production-ready application, I will recommend you to use a popular SMTP provider (SMTP.com, SendGrid, Mailgun, etc) to send real emails to your users.
However, since we are in a development environment, I’m going to use Mailtrap to capture the development emails.
Follow the steps below to create and set up a Mailtrap account:
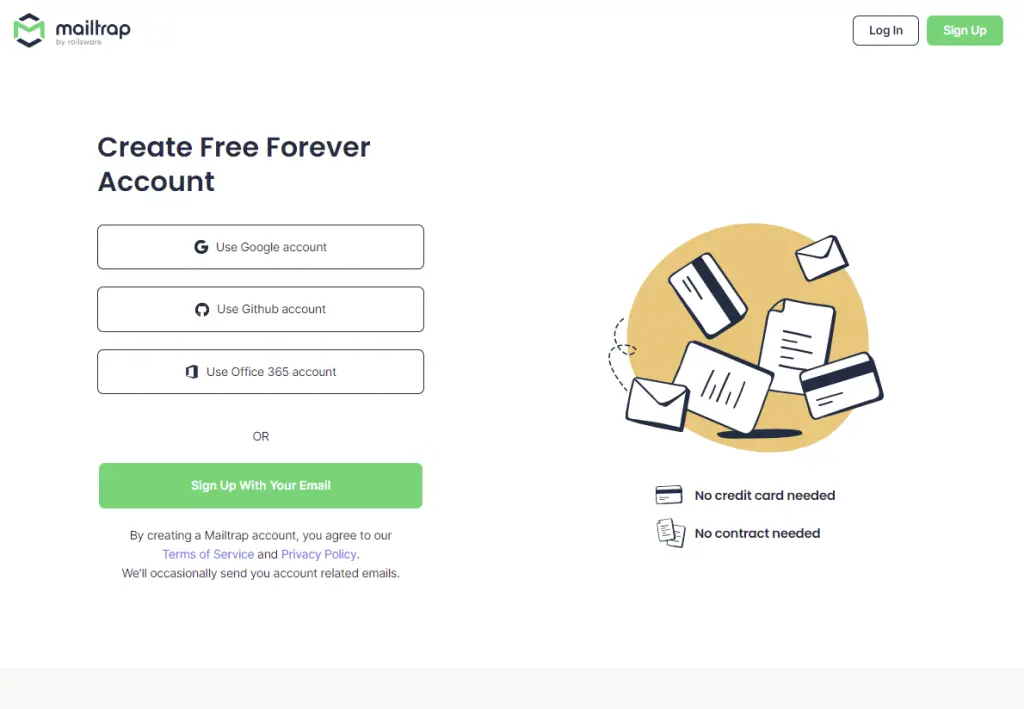
Step 1: Go to Mailtrap and create a new account
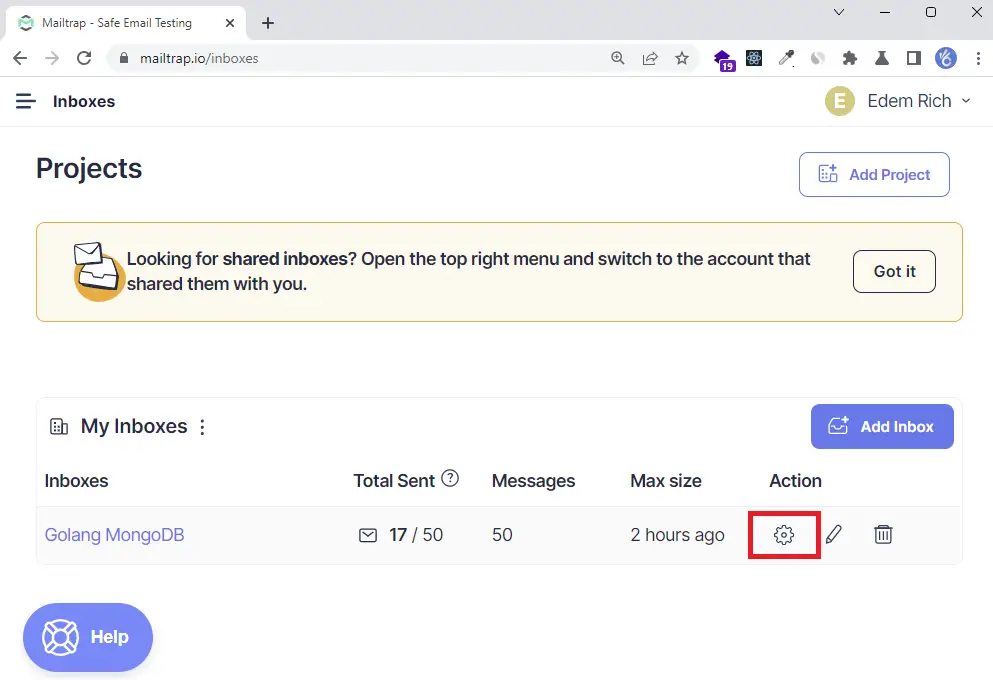
Step 2: Sign in to your account and click on the “Add Inbox” button. Give the inbox a name and click on the “Save” button.
Next, click on the Settings icon under the “Action” section to display the credentials page.
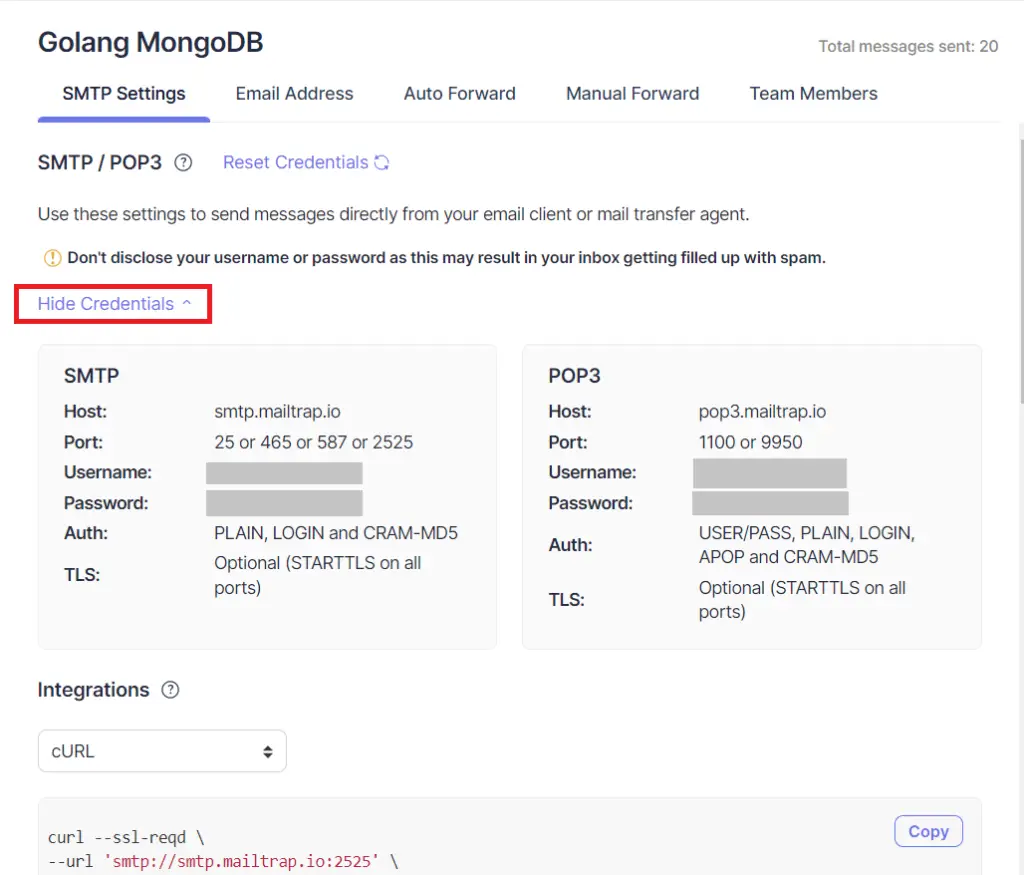
On the settings screen, click on the “Show Credentials” dropdown link to display the SMTP credentials.
Update the Environment Variables File
Copy the SMTP credentials and add them to the .env file.
.env
EMAIL_HOST=smtp.mailtrap.io
EMAIL_PORT=587
EMAIL_USERNAME=4aeca0c9318dd2
EMAIL_PASSWORD=a987a0e0eac00d
EMAIL_FROM=admin@admin.com
After adding the SMTP credentials, your .env file you look like this:
.env
DATABASE_PORT=6500
POSTGRES_PASSWORD=password123
POSTGRES_USER=postgres
POSTGRES_DB=fastapi
POSTGRES_HOST=postgres
POSTGRES_HOSTNAME=127.0.0.1

ACCESS_TOKEN_EXPIRES_IN=15
REFRESH_TOKEN_EXPIRES_IN=60
JWT_ALGORITHM=RS256

CLIENT_ORIGIN=http://localhost:3000

EMAIL_HOST=smtp.mailtrap.io
EMAIL_PORT=587
EMAIL_USERNAME=4aeca0c9318dd2
EMAIL_PASSWORD=a987a0e0eac00d
EMAIL_FROM=admin@admin.com

JWT_PRIVATE_KEY=LS0tLS1CRUdJTiBSU0EgUFJJVkFURSBLRVktLS0tLQpNSUlCT2dJQkFBSkJBSSs3QnZUS0FWdHVQYzEzbEFkVk94TlVmcWxzMm1SVmlQWlJyVFpjd3l4RVhVRGpNaFZuCi9KVHRsd3h2a281T0pBQ1k3dVE0T09wODdiM3NOU3ZNd2xNQ0F3RUFBUUpBYm5LaENOQ0dOSFZGaHJPQ0RCU0IKdmZ2ckRWUzVpZXAwd2h2SGlBUEdjeWV6bjd0U2RweUZ0NEU0QTNXT3VQOXhqenNjTFZyb1pzRmVMUWlqT1JhUwp3UUloQU84MWl2b21iVGhjRkltTFZPbU16Vk52TGxWTW02WE5iS3B4bGh4TlpUTmhBaUVBbWRISlpGM3haWFE0Cm15QnNCeEhLQ3JqOTF6bVFxU0E4bHUvT1ZNTDNSak1DSVFEbDJxOUdtN0lMbS85b0EyaCtXdnZabGxZUlJPR3oKT21lV2lEclR5MUxaUVFJZ2ZGYUlaUWxMU0tkWjJvdXF4MHdwOWVEejBEWklLVzVWaSt6czdMZHRDdUVDSUVGYwo3d21VZ3pPblpzbnU1clBsTDJjZldLTGhFbWwrUVFzOCtkMFBGdXlnCi0tLS0tRU5EIFJTQSBQUklWQVRFIEtFWS0tLS0t
JWT_PUBLIC_KEY=LS0tLS1CRUdJTiBQVUJMSUMgS0VZLS0tLS0KTUZ3d0RRWUpLb1pJaHZjTkFRRUJCUUFEU3dBd1NBSkJBSSs3QnZUS0FWdHVQYzEzbEFkVk94TlVmcWxzMm1SVgppUFpSclRaY3d5eEVYVURqTWhWbi9KVHRsd3h2a281T0pBQ1k3dVE0T09wODdiM3NOU3ZNd2xNQ0F3RUFBUT09Ci0tLS0tRU5EIFBVQkxJQyBLRVktLS0tLQ==
Validating the Environment Variables
Now that we added the credentials to the .env file, let’s add the variables to the app/config.py for Pydantic to load and validate them.
app/config.py
from pydantic import BaseSettings, EmailStr


class Settings(BaseSettings):
    DATABASE_PORT: int
    POSTGRES_PASSWORD: str
    POSTGRES_USER: str
    POSTGRES_DB: str
    POSTGRES_HOST: str
    POSTGRES_HOSTNAME: str

    JWT_PUBLIC_KEY: str
    JWT_PRIVATE_KEY: str
    REFRESH_TOKEN_EXPIRES_IN: int
    ACCESS_TOKEN_EXPIRES_IN: int
    JWT_ALGORITHM: str

    CLIENT_ORIGIN: str

    EMAIL_HOST: str
    EMAIL_PORT: int
    EMAIL_USERNAME: str
    EMAIL_PASSWORD: str
    EMAIL_FROM: EmailStr

    class Config:
        env_file = './.env'


settings = Settings()
Create a Database Model with Sqlalchemy
If you came from the previous article, update the user model to have the verification_code field.
import uuid
from .database import Base
from sqlalchemy import TIMESTAMP, Column, String, Boolean, text
from sqlalchemy.dialects.postgresql import UUID


class User(Base):
    __tablename__ = 'users'
    id = Column(UUID(as_uuid=True), primary_key=True, nullable=False,
                default=uuid.uuid4)
    name = Column(String,  nullable=False)
    email = Column(String, unique=True, nullable=False)
    password = Column(String, nullable=False)
    photo = Column(String, nullable=True)
    verified = Column(Boolean, nullable=False, server_default='False')
    verification_code = Column(String, nullable=True, unique=True)
    role = Column(String, server_default='user', nullable=False)
    created_at = Column(TIMESTAMP(timezone=True),
                        nullable=False, server_default=text("now()"))
    updated_at = Column(TIMESTAMP(timezone=True),
                        nullable=False, server_default=text("now()"))
Creating the HTML Email Templates with Jinja2
There are numerous templating engines in Python, like:
However, we are going to use Jinja2 since it’s a popular Python templating engine written as a self-contained open source project.
Run this command to install Jinja2
pip install Jinja2
After installing the Jinja2 package, create a app/templates folder.
Now let’s create a app/templates/_styles.html file to contain the CSS styles for the Email template.
app/templates/_styles.html
<style>
  /* -------------------------------------
          GLOBAL RESETS
      ------------------------------------- */

  /*All the styling goes here*/

  img {
    border: none;
    -ms-interpolation-mode: bicubic;
    max-width: 100%;
  }

  body {
    background-color: #f6f6f6;
    font-family: sans-serif;
    -webkit-font-smoothing: antialiased;
    font-size: 14px;
    line-height: 1.4;
    margin: 0;
    padding: 0;
    -ms-text-size-adjust: 100%;
    -webkit-text-size-adjust: 100%;
  }

  table {
    border-collapse: separate;
    mso-table-lspace: 0pt;
    mso-table-rspace: 0pt;
    width: 100%;
  }
  table td {
    font-family: sans-serif;
    font-size: 14px;
    vertical-align: top;
  }

  /* -------------------------------------
          BODY & CONTAINER
      ------------------------------------- */

  .body {
    background-color: #f6f6f6;
    width: 100%;
  }

  /* Set a max-width, and make it display as block so it will automatically stretch to that width, but will also shrink down on a phone or something */
  .container {
    display: block;
    margin: 0 auto !important;
    /* makes it centered */
    max-width: 580px;
    padding: 10px;
    width: 580px;
  }

  /* This should also be a block element, so that it will fill 100% of the .container */
  .content {
    box-sizing: border-box;
    display: block;
    margin: 0 auto;
    max-width: 580px;
    padding: 10px;
  }

  /* -------------------------------------
          HEADER, FOOTER, MAIN
      ------------------------------------- */
  .main {
    background: #ffffff;
    border-radius: 3px;
    width: 100%;
  }

  .wrapper {
    box-sizing: border-box;
    padding: 20px;
  }

  .content-block {
    padding-bottom: 10px;
    padding-top: 10px;
  }

  .footer {
    clear: both;
    margin-top: 10px;
    text-align: center;
    width: 100%;
  }
  .footer td,
  .footer p,
  .footer span,
  .footer a {
    color: #999999;
    font-size: 12px;
    text-align: center;
  }

  /* -------------------------------------
          TYPOGRAPHY
      ------------------------------------- */
  h1,
  h2,
  h3,
  h4 {
    color: #000000;
    font-family: sans-serif;
    font-weight: 400;
    line-height: 1.4;
    margin: 0;
    margin-bottom: 30px;
  }

  h1 {
    font-size: 35px;
    font-weight: 300;
    text-align: center;
    text-transform: capitalize;
  }

  p,
  ul,
  ol {
    font-family: sans-serif;
    font-size: 14px;
    font-weight: normal;
    margin: 0;
    margin-bottom: 15px;
  }
  p li,
  ul li,
  ol li {
    list-style-position: inside;
    margin-left: 5px;
  }

  a {
    color: #3498db;
    text-decoration: underline;
  }

  /* -------------------------------------
          BUTTONS
      ------------------------------------- */
  .btn {
    box-sizing: border-box;
    width: 100%;
  }
  .btn > tbody > tr > td {
    padding-bottom: 15px;
  }
  .btn table {
    width: auto;
  }
  .btn table td {
    background-color: #ffffff;
    border-radius: 5px;
    text-align: center;
  }
  .btn a {
    background-color: #ffffff;
    border: solid 1px #3498db;
    border-radius: 5px;
    box-sizing: border-box;
    color: #3498db;
    cursor: pointer;
    display: inline-block;
    font-size: 14px;
    font-weight: bold;
    margin: 0;
    padding: 12px 25px;
    text-decoration: none;
    text-transform: capitalize;
  }

  .btn-primary table td {
    background-color: #3498db;
  }

  .btn-primary a {
    background-color: #3498db;
    border-color: #3498db;
    color: #ffffff;
  }

  /* -------------------------------------
          OTHER STYLES THAT MIGHT BE USEFUL
      ------------------------------------- */
  .last {
    margin-bottom: 0;
  }

  .first {
    margin-top: 0;
  }

  .align-center {
    text-align: center;
  }

  .align-right {
    text-align: right;
  }

  .align-left {
    text-align: left;
  }

  .clear {
    clear: both;
  }

  .mt0 {
    margin-top: 0;
  }

  .mb0 {
    margin-bottom: 0;
  }

  .preheader {
    color: transparent;
    display: none;
    height: 0;
    max-height: 0;
    max-width: 0;
    opacity: 0;
    overflow: hidden;
    mso-hide: all;
    visibility: hidden;
    width: 0;
  }

  .powered-by a {
    text-decoration: none;
  }

  hr {
    border: 0;
    border-bottom: 1px solid #f6f6f6;
    margin: 20px 0;
  }

  /* -------------------------------------
          RESPONSIVE AND MOBILE FRIENDLY STYLES
      ------------------------------------- */
  @media only screen and (max-width: 620px) {
    table.body h1 {
      font-size: 28px !important;
      margin-bottom: 10px !important;
    }
    table.body p,
    table.body ul,
    table.body ol,
    table.body td,
    table.body span,
    table.body a {
      font-size: 16px !important;
    }
    table.body .wrapper,
    table.body .article {
      padding: 10px !important;
    }
    table.body .content {
      padding: 0 !important;
    }
    table.body .container {
      padding: 0 !important;
      width: 100% !important;
    }
    table.body .main {
      border-left-width: 0 !important;
      border-radius: 0 !important;
      border-right-width: 0 !important;
    }
    table.body .btn table {
      width: 100% !important;
    }
    table.body .btn a {
      width: 100% !important;
    }
    table.body .img-responsive {
      height: auto !important;
      max-width: 100% !important;
      width: auto !important;
    }
  }

  /* -------------------------------------
          PRESERVE THESE STYLES IN THE HEAD
      ------------------------------------- */
  @media all {
    .ExternalClass {
      width: 100%;
    }
    .ExternalClass,
    .ExternalClass p,
    .ExternalClass span,
    .ExternalClass font,
    .ExternalClass td,
    .ExternalClass div {
      line-height: 100%;
    }
    .apple-link a {
      color: inherit !important;
      font-family: inherit !important;
      font-size: inherit !important;
      font-weight: inherit !important;
      line-height: inherit !important;
      text-decoration: none !important;
    }
    #MessageViewBody a {
      color: inherit;
      text-decoration: none;
      font-size: inherit;
      font-family: inherit;
      font-weight: inherit;
      line-height: inherit;
    }
    .btn-primary table td:hover {
      background-color: #34495e !important;
    }
    .btn-primary a:hover {
      background-color: #34495e !important;
      border-color: #34495e !important;
    }
  }
</style>
Next, let’s create the app/templates/base.html file that we will extend to generate any kind of HTML template like:
- Email verification HTML template
- Password reset HTML template
- Welcome Email HTML template
Jinja2 allows us to use variables in the template by passing a defined context dictionary to the template.
To include the _styles.html file in the base.html template, we use the include tag provided by Jinja2 to render the _styles.html template and output the result into the base.html template.
Also, we use {% block %} tags to define a simple HTML skeleton that will be overridden by a child template.
app/templates/base.html
<!DOCTYPE html>
<html>
<head>
<meta name="viewport" content="width=device-width, initial-scale=1.0" />
<meta http-equiv="Content-Type" content="text/html; charset=UTF-8" />
<title>{{subject}}</title>
{% include '_styles.html' %}
</head>
<body>
<table
role="presentation"
border="0"
cellpadding="0"
cellspacing="0"
class="body"
>
<tr>
<td> </td>
<td class="container">
<div class="content">
<!-- START CENTERED WHITE CONTAINER -->
<table role="presentation" class="main">
<!-- START MAIN CONTENT AREA -->
<tr>
<td class="wrapper">
<table
role="presentation"
border="0"
cellpadding="0"
cellspacing="0"
>
<tr>
<td>{% block content %} {% endblock %}</td>
</tr>
</table>
</td>
</tr>
<!-- END MAIN CONTENT AREA -->
</table>
<!-- END CENTERED WHITE CONTAINER -->
</div>
</td>
<td> </td>
</tr>
</table>
</body>
</html>
Finally, we use the {% extends %} tag to tell the template engine that the verification.html template extends the base.html template.
This ensures that the content between the {% block content %}...{% endblock %} overrides the content block in the base template.
app/templates/verification.html
{% extends 'base.html' %} {% block content %}

<p>Hi {{first_name}},</p>
<p>
  Thanks for creating an account with us. Please verify your email address by
  clicking the button below.
</p>
<table
  role="presentation"
  border="0"
  cellpadding="0"
  cellspacing="0"
  class="btn btn-primary"
>
  <tbody>
    <tr>
      <td align="left">
        <table role="presentation" border="0" cellpadding="0" cellspacing="0">
          <tbody>
            <tr>
              <td>
                <a href="{{url}}" target="_blank">Verify email address</a>
              </td>
            </tr>
          </tbody>
        </table>
      </td>
    </tr>
  </tbody>
</table>
<p>Good luck! Hope it works.</p>

{% endblock %}
Set up SMTP Email Sender
Python comes with a built-in smtplib module for sending emails, however, we gonna use the fastapi-mail package since it works out-of-the-box with Jinja2.
Run this command to install the fastapi-mail package:
pip install fastapi-mail
After the installation is complete, create a app/email.py file and add the following imports:
app/email.py
from typing import List
from fastapi_mail import FastMail, MessageSchema, ConnectionConfig
from pydantic import EmailStr, BaseModel
from . import models
from .config import settings
from jinja2 import Environment, select_autoescape, PackageLoader
To load the HTML templates from the templates folder, we will use thePackageLoader method provided by Jinja2.
With the PackageLoader method, you need to make sure the templates folder is in a Python package.
You can easily turn the folder containing the templates folder into a Python package by creating an empty __init__.py file in it.
Alternatively, you can use the FileSystemLoader() method provided by Jinja2 to load the templates from a directory in the file system.
app/email.py
# imports (..)

env = Environment(
    loader=PackageLoader('app', 'templates'),
    autoescape=select_autoescape(['html', 'xml'])
)
With that out of the way, let’s create a utility class that we can use to send multiple emails at once by simply appending the methods.
app/email.py
from typing import List
from fastapi_mail import FastMail, MessageSchema, ConnectionConfig
from pydantic import EmailStr, BaseModel
from . import models
from .config import settings
from jinja2 import Environment, select_autoescape, PackageLoader


env = Environment(
    loader=PackageLoader('app', 'templates'),
    autoescape=select_autoescape(['html', 'xml'])
)


class EmailSchema(BaseModel):
    email: List[EmailStr]


class Email:
    def __init__(self, user: models.User, url: str, email: List[EmailStr]):
        self.name = user.name
        self.sender = 'Codevo <admin@admin.com>'
        self.email = email
        self.url = url
        pass

    async def sendMail(self, subject, template):
        # Define the config
        conf = ConnectionConfig(
            MAIL_USERNAME=settings.EMAIL_USERNAME,
            MAIL_PASSWORD=settings.EMAIL_PASSWORD,
            MAIL_FROM=settings.EMAIL_FROM,
            MAIL_PORT=settings.EMAIL_PORT,
            MAIL_SERVER=settings.EMAIL_HOST,
            MAIL_STARTTLS=False,
            MAIL_SSL_TLS=False,
            USE_CREDENTIALS=True,
            VALIDATE_CERTS=True
        )
        # Generate the HTML template base on the template name
        template = env.get_template(f'{template}.html')

        html = template.render(
            url=self.url,
            first_name=self.name,
            subject=subject
        )

        # Define the message options
        message = MessageSchema(
            subject=subject,
            recipients=self.email,
            body=html,
            subtype="html"
        )

        # Send the email
        fm = FastMail(conf)
        await fm.send_message(message)

    async def sendVerificationCode(self):
        await self.sendMail('Your verification code (Valid for 10min)', 'verification')
How to Send the HTML Email
First and foremost, we need to generate a random 10-byte string and hash it using the sha256 algorithm. Feel free to change the size of the random byte.
We then need to save the hashed string in the database and send the unhashed string to the user’s email.
To send the email, we first construct the URL and call the sendVerificationCode() method we defined in the Email class.
 try:
        # Send Verification Email
        token = randbytes(10)
        hashedCode = hashlib.sha256()
        hashedCode.update(token)
        verification_code = hashedCode.hexdigest()
        user_query.update(
            {'verification_code': verification_code}, synchronize_session=False)
        db.commit()
        url = f"{request.url.scheme}://{request.client.host}:{request.url.port}/api/auth/verifyemail/{token.hex()}"
        await Email(new_user, url, [payload.email]).sendVerificationCode()
    except Exception as error:
        print('Error', error)
        user_query.update(
            {'verification_code': None}, synchronize_session=False)
        db.commit()
        raise HTTPException(status_code=status.HTTP_500_INTERNAL_SERVER_ERROR,
                            detail='There was an error sending email')
Update the SignUp Path Operation Function
Now edit the create_user() operation function to send the verification email after the user has been successfully added to the database.
app/routers/auth.py
@router.post('/register', status_code=status.HTTP_201_CREATED)
async def create_user(payload: schemas.CreateUserSchema, request: Request, db: Session = Depends(get_db)):
    # Check if user already exist
    user_query = db.query(models.User).filter(
        models.User.email == EmailStr(payload.email.lower()))
    user = user_query.first()
    if user:
        raise HTTPException(status_code=status.HTTP_409_CONFLICT,
                            detail='Account already exist')
    # Compare password and passwordConfirm
    if payload.password != payload.passwordConfirm:
        raise HTTPException(
            status_code=status.HTTP_400_BAD_REQUEST, detail='Passwords do not match')
    #  Hash the password
    payload.password = utils.hash_password(payload.password)
    del payload.passwordConfirm
    payload.role = 'user'
    payload.verified = False
    payload.email = EmailStr(payload.email.lower())
    new_user = models.User(**payload.dict())
    db.add(new_user)
    db.commit()
    db.refresh(new_user)

    try:
        # Send Verification Email
        token = randbytes(10)
        hashedCode = hashlib.sha256()
        hashedCode.update(token)
        verification_code = hashedCode.hexdigest()
        user_query.update(
            {'verification_code': verification_code}, synchronize_session=False)
        db.commit()
        url = f"{request.url.scheme}://{request.client.host}:{request.url.port}/api/auth/verifyemail/{token.hex()}"
        await Email(new_user, url, [payload.email]).sendVerificationCode()
    except Exception as error:
        print('Error', error)
        user_query.update(
            {'verification_code': None}, synchronize_session=False)
        db.commit()
        raise HTTPException(status_code=status.HTTP_500_INTERNAL_SERVER_ERROR,
                            detail='There was an error sending email')
    return {'status': 'success', 'message': 'Verification token successfully sent to your email'}
Create a Controller to Verify the Code
Finally, let’s create a path operation function to validate the email verification code and update the user’s information assuming the code is valid.
@router.get('/verifyemail/{token}')
def verify_me(token: str, db: Session = Depends(get_db)):
    hashedCode = hashlib.sha256()
    hashedCode.update(bytes.fromhex(token))
    verification_code = hashedCode.hexdigest()
    user_query = db.query(models.User).filter(
        models.User.verification_code == verification_code)
    db.commit()
    user = user_query.first()
   if not user:
        raise HTTPException(
            status_code=status.HTTP_403_FORBIDDEN, detail="Invalid code or user doesn't exist")
    if user.verified:
        raise HTTPException(
            status_code=status.HTTP_403_FORBIDDEN, detail='Email can only be verified once')
    user_query.update(
        {'verified': True, 'verification_code': None}, synchronize_session=False)
    db.commit()
    return {
        "status": "success",
        "message": "Account verified successfully"
    }
Conclusion
Congrats on reaching the end. In this article, you learned how to send HTML emails in FastAPI and Python using Jinja2 and FastApi-MAIL packages.
Send HTML Emails with FastAPI Source Code
Check out the source codes: