
In this article, you’ll learn how to add JSON Web Token (JWT) Authentication to your Node.js app with TypeScript, MongoDB, Mongoose, Typegoose, Docker, Redis, and Zod.
Node.js, TypeScript, and MongoDB Tutorial Series:
- Node.js + TypeScript + MongoDB: JWT Authentication
- Node.js + TypeScript + MongoDB: JWT Refresh Token
- Google OAuth Authentication React.js and Node.js(No Passport)
You can also read:
- Form Validation with React Hook Form, Material UI, React and TypeScript
- How to Setup Material-UI v5 with React JS and TypeScript
- 16 Complicated Programming Terms You Need To Know
Introduction
In this course, you’ll learn how to build a Node.js backend with TypeScript, implement user authentication and authorization with JWT, store data in Redis, and spawn Docker containers with docker-compose.
The JWT Authentication Architecture is built with:
- Node.js – a JavaScript run-time scripting language
- Expressjs – serves as a Node.js framework
- Typegoose – serves as a wrapper around Mongoose to allow us to write Mongoose models with TypeScript classes.
- Mongoose – an ODM (Object Document Mapping) for accessing and mutating the database
- Bcryptjs – for hashing the passwords
- JsonWebToken – generating JWTs
- Redis – as caching storage for storing the user’s session
- MongoDB – as NoSQL database
- Zod – for validating user inputs
- cors – To allow Cross-Origin Resource Sharing between the backend and frontend
What the course will cover
- How to use TypeScript in Node.js and Express
- How to model data with Mongoose, Typegoose, and TypeScript
- How to spawn docker containers with docker-compose
- JWT Authentication with Private and Public keys
- How to store data in Redis
Prerequisites
To follow along with this tutorial, make sure you have the following:
Software
- Node.js – for scripting the backend logic
- Docker – allows us to package applications into containers
- MongoDB compass (optional) – A GUI for querying, mutating, analyzing, and aggregating MongoDB data.
VS Code Extensions
- Docker (optional) – Manage docker containers directly in VS Code
- DotENV – Get syntax highlighting in the environment variables file
- HTTP Client – For making HTTP requests to the server. You can also use Postman or REST Client
- MySQL – Database client for VS Code. Allows us to see what’s in the Redis database.
Assumed Knowledge
The course assumes:
- You have basic knowledge of Node.js
- You have basic knowledge of TypeScript and JavaScript
- Have basic knowledge of NoSQL databases
- Have basic knowledge of Mongoose
- You have basic knowledge of Docker
Run the Frontend and Backend Apps
To successfully run both the backend and frontend projects on your machine, follow these step-by-step instructions:
- Begin by downloading or cloning the project from its GitHub repository: https://github.com/wpcodevo/JWT_Authentication_React. Open the source code in your preferred text editor.
- In the integrated terminal of your IDE or text editor, execute the command
docker-compose up -dto launch the MongoDB and Redis Docker containers. - Navigate to the backend directory using the command
cd ./backend. Runyarn installto install all required dependencies. - Open the
backend/src/app.tsfile and uncomment the Nodemailer code.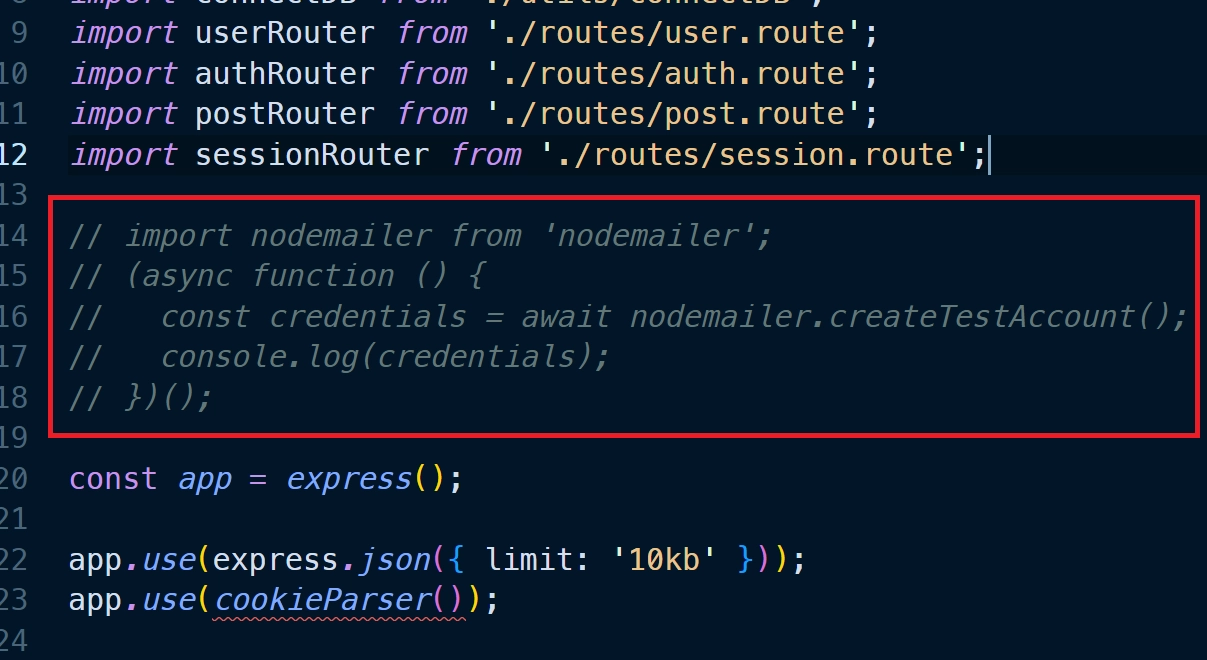
Then, run the commandyarn startto initiate the Node.js development server. You should see the Nodemailer SMTP credentials printed in the terminal. Copy the values of the ‘user‘ and ‘pass‘ fields and add them to their respective variables in thebackend/.envfile. Afterward, comment out the Nodemailer code in thebackend/src/app.tsfile, and save the file to restart the Node.js development server. - In another terminal, move to the frontend directory from the root level using the command
cd ./frontend. Runyarn installto install all necessary dependencies. Once the installation is complete, executeyarn devto start the Vite development server. - Open the application in your browser by visiting
http://localhost:3000/and explore the app’s features. During the registration and password reset process, a Nodemailer link will be printed in the terminal of the backend server that you can click to open the mailbox.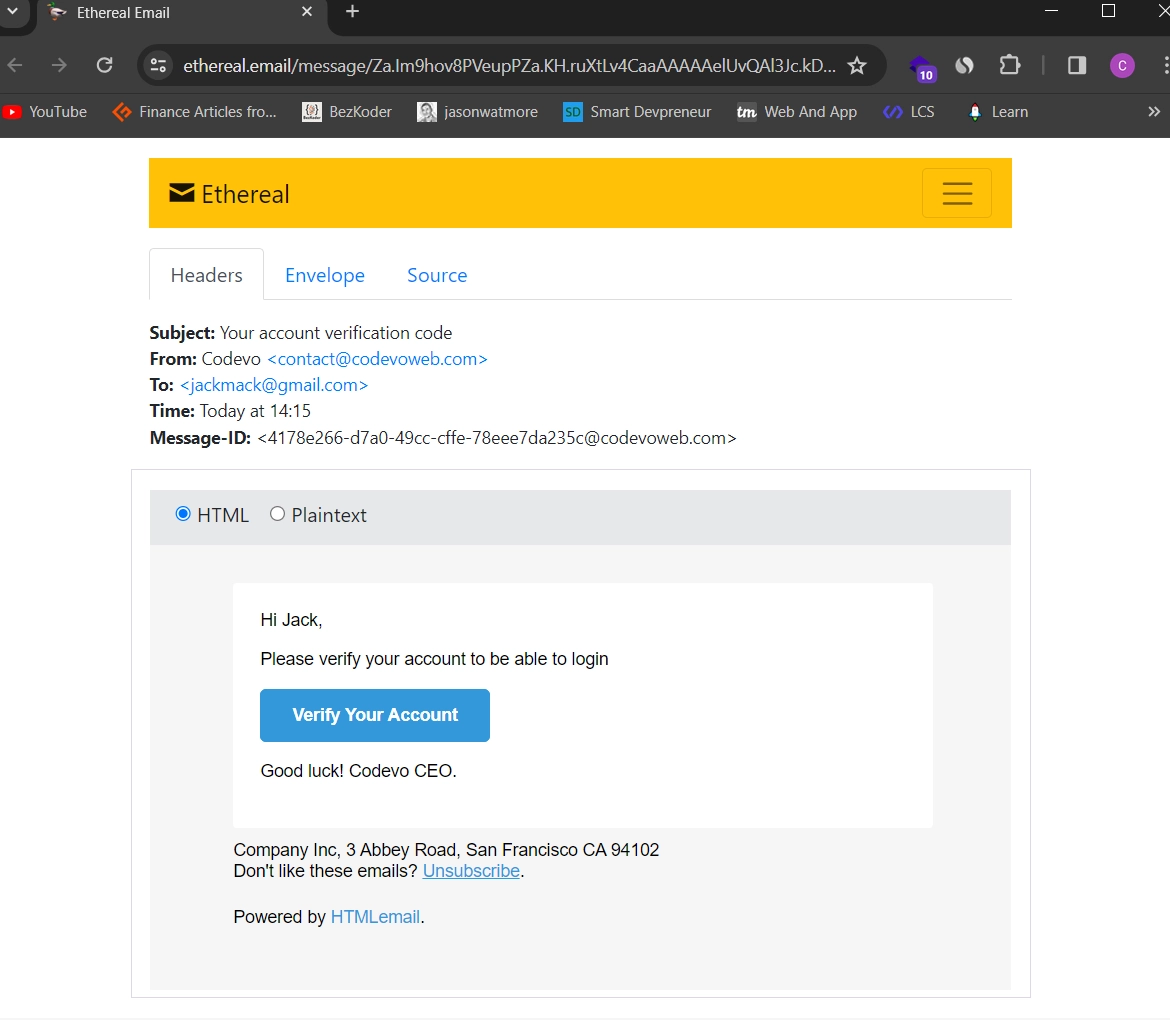
Note: Do not visit the app usinghttp://127.0.0.1:3000/to avoid getting CORS errors.
Setup Development Environment (Optional)
To follow along with this course, you need to have Node.js, Docker, and MongoDB Compass installed on your machine.
Download and Install Node.js
To download Node.js, visit the official download page of Node.js and download the current or LTS (Long Term Support) version of Node.js.
After the installation is complete, run the installer wizard and accept the default options.
Download and Install Docker
To download Docker, visit the official download page of Docker and download the right version for your operating system.
The Docker installer will automatically install Docker-compose.
Download and Install MongoDB Compass
To download and install MongoDB Compass, visit the official MongoDB Compass download page and download the right version for your operating system.
Node.js, Redis, MongoDB, Typegoose, Docker: JWT Authentication example
With this JWT Authentication Rest API, the user will be able to do the following:
- Signup for a new account with a Name, Email, Password, and Password Confirm fields.
- Login with the Email and Password credentials.
- Get the profile information only if he is logged in.
- Admin will be able to get all the users in the database.
These are the API endpoints we need for this Rest API
| RESOURCE | HTTP METHOD | ROUTE | DESCRIPTION |
|---|---|---|---|
| users | GET | /api/users | returns all the users and their information |
| users | GET | /api/users/me | return the logged-in user’s information |
| auth | POST | /api/auth/register | Create a new user |
| auth | POST | /api/auth/login | Logs the user in |
JWT Authentication Flow with Redis, MongoDB, and Node.js
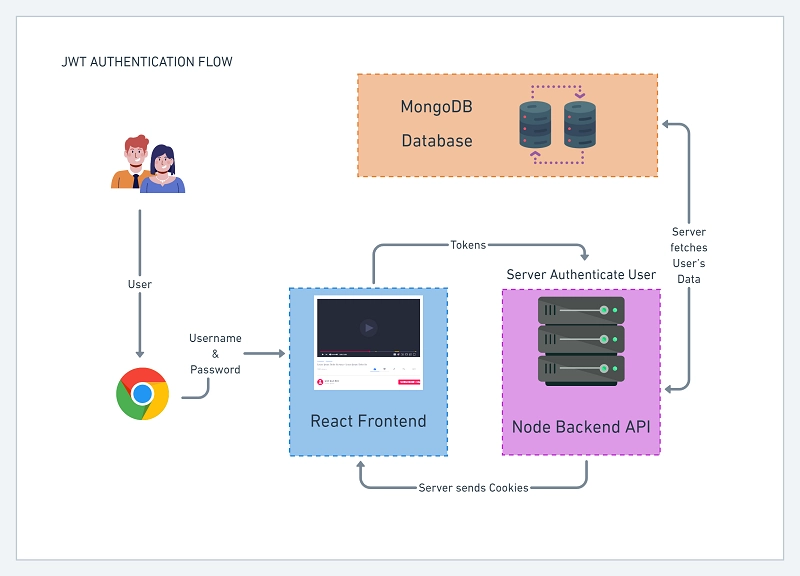
This is the JWT Authentication flow we will follow in this tutorial. The user visits our app in the browser and provides his username and password to log into our application.
The frontend app will then make a request to the backend with the user’s credentials. The backend will then authenticate the user and send back some cookies if the credentials are valid.
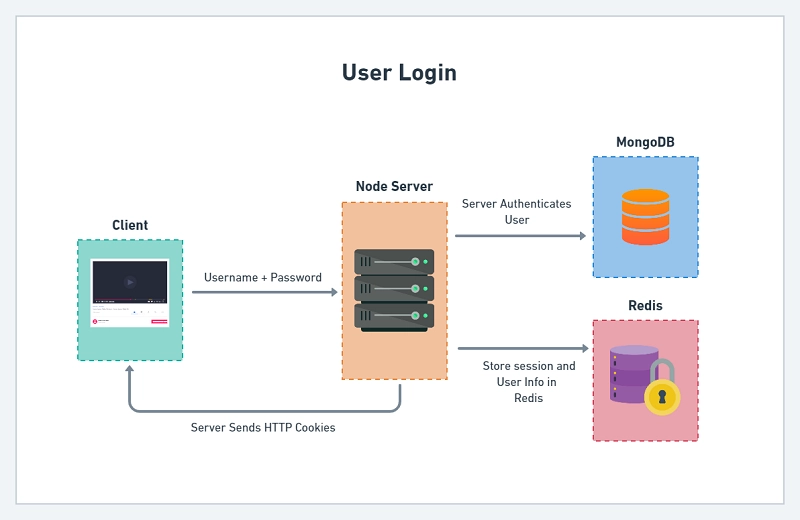
The diagram below illustrates the user login flow in our application
The diagram below shows the user registration flow in the JWT Authentication flow.

Project Structure
jwt_authentication_authorization_node/
├── .vscode/
│ └── extensions.json
├── config/
│ ├── custom-environment-variables.ts
│ └── default.ts
├── http/
│ ├── getUsers.http-request
│ ├── login.http-request
│ ├── me.http-request
│ └── register.http-request
├── src/
│ ├── controllers/
│ │ ├── auth.controller.ts
│ │ └── user.controller.ts
│ ├── middleware/
│ │ ├── deserializeUser.ts
│ │ ├── requireUser.ts
│ │ ├── restrictTo.ts
│ │ └── validate.ts
│ ├── models/
│ │ └── user.model.ts
│ ├── routes/
│ │ ├── auth.route.ts
│ │ └── user.route.ts
│ ├── schema/
│ │ └── user.schema.ts
│ ├── services/
│ │ └── user.service.ts
│ ├── utils/
│ │ ├── appError.ts
│ │ ├── connectDB.ts
│ │ ├── connectRedis.ts
│ │ └── jwt.ts
│ └── app.ts
├── .env
├── .gitignore
├── docker-compose.yml
├── package.json
├── tsconfig.json
└── yarn.lock
Project Setup
Create a new project folder with the following command
mkdir jwt_auth
cd jwt_auth
Initialize a Node.js Project with TypeScript
The first thing we always do before coding a Node.js project that will require external libraries is to initialize a new project with the following command.
# with yarn
yarn init
# with npm
npm init
You will be prompted to provide some answers. If you don’t want to answer questions then use the -y flag.
You should see logs like this in your terminal if you answered the prompted questions.
$ yarn init
yarn init v1.22.18
question name (test): Jwt_Auth
question version (1.0.0):
question description: Jwt Authentication with Node.js, Typegoose, mongoD
B, Mongoose, Docker, Redis, and JsonWebToken
question entry point (index.js): app.ts
question repository url:
question author: Codevo
question license (MIT):
question private:
success Saved package.json
Done in 21.33s.
Run the command below to install TypeScript as a dev dependency. This will allow us compile the TypeScript code into pure JavaScript using the TypeScript compiler.
# with yarn
yarn add -D typescript
# with npm
npm init -y
npm install -D typescript
Run the following command to initialize a TypeScript project. A tsconfig.json file will be created in your root directory.
npx tsc --init
TypeScript tsconfig.json file configurations
Add the following configuration options to your tsconfig.json file to allow us use decorators and more in our code.
{
  "compilerOptions": {
    "target": "es2016",
    "experimentalDecorators": true,
    "emitDecoratorMetadata": true,
    "module": "commonjs",
    "esModuleInterop": true,
    "forceConsistentCasingInFileNames": true,
    "strict": true,
    "strictPropertyInitialization": false,
    "skipLibCheck": true
  }
}
Important configurations in the tsconfig.json
- experimentalDecorators: true
- emitDecoratorMetadata: true
- strictPropertyInitialization: false
Install the Required Libraries
Install the Dependencies
# npm
npm install @typegoose/typegoose bcryptjs config cookie-parser dotenv express jsonwebtoken lodash mongoose redis ts-node-dev zod cors

# yarn
yarn add @typegoose/typegoose bcryptjs config cookie-parser dotenv express jsonwebtoken lodash mongoose redis ts-node-dev zod cors
dotenv– loads environment variables from a.envfile intoprocess.env@typegoose/typegoose– writing Mongoose models with TypeScript classbcryptjs– to hash the password dataconfig– allow us to provide TypeScript types for the environment variables we import from the.envfilecookie-parser– to parse the cookies in the request headers and attach them toreq.cookiesjsonwebtoken– to sign and verify JWTslodash– contains utilities for simplifying common programming tasks.ts-node-dev– allow us run the server. An alternative solution isnodemonandts-node.
Install the devDependencies
# npm
npm install -D morgan typescript
# yarn
yarn add -D morgan typescript
Install the Type Definition files
These type definition files are needed for TypeScript to function properly.
# npm
npm install -D @types/bcryptjs @types/config @types/cookie-parser @types/express @types/jsonwebtoken @types/lodash @types/morgan @types/node @types/cors
# yarn
yarn add -D @types/bcryptjs @types/config @types/cookie-parser @types/express @types/jsonwebtoken @types/lodash @types/morgan @types/node @types/cors
Initialize and Start the Express Server
Create an src folder in the root directory and within the src folder create a file named app.ts .
Copy and paste the boilerplate code for the express server.
src/app.ts
require('dotenv').config();
import express from 'express';
import config from 'config';

const app = express();

const port = config.get<number>('port');
app.listen(port, () => {
  console.log(`Server started on port: ${port}`);
});
In the code snippets above, I imported the dotenv package and configured it at the top level of the app.ts file.
Then I created an instance of the express class and called the listen method with the port we want to run the server on and a callback function.
Since we are making use of environment variables it makes sense to create a .env file in the root directory.
Now create a .env file in the root directory and add the following code.
.env
NODE_ENV=development
MONGODB_USERNAME=codevoweb
MONGODB_PASSWORD=password123
MONGODB_DATABASE_NAME=jwtAuth

ACCESS_TOKEN_PRIVATE_KEY=LS0tLS1CRUdJTiBSU0EgUFJJVkFURSBLRVktLS0tLQpNSUlCT2dJQkFBSkJBTlFLQStSV2ZQZFdHR25iYS9WRVo1TUs5cG1nMUlQay9paEE5dXF2Ny8rNVlzRjNUVURoCnFHZXN1bGJhdFFGdkNPaHVmSlNJQmFWT3RjbVZrTWZoWmRrQ0F3RUFBUUpBYkVlTkF6NnpaQzhBR3BhbGc4TmgKelBJdFNmaWFiWnd6dWVTcTh0L1RoRmQrUGhqN2IxTmphdjBMTjNGamhycjlzV3B2UjBBNW13OFpoSUFUNzZMUgpzUUloQU95Zmdhdy9BSTVoeGs3NmtWaVRRV0JNdjdBeERwdi9oSG1aUFdxclpyL1ZBaUVBNVdjalpmK0NaYlhTCnlpV3dUbEVENGVZQ3BSNk16Qk8wbFVhbExKdVRFL1VDSUhWTWZSUE9CNUNObDZqL1BaNFRJWTJEZm1MeGJyU1cKYmkxNWNhQzNaekFoQWlBNmUrVG1hQkdTWkp4c3ROY1I0RTJoRmNhdTJlOERTRExOcThrSWFsRkEwUUloQUlwUApUODFlWlNzYmVrNTlidGJPZ3J3bTJBdzJqUVk4TitJa3FMSTNySWFFCi0tLS0tRU5EIFJTQSBQUklWQVRFIEtFWS0tLS0t
ACCESS_TOKEN_PUBLIC_KEY=LS0tLS1CRUdJTiBQVUJMSUMgS0VZLS0tLS0KTUZ3d0RRWUpLb1pJaHZjTkFRRUJCUUFEU3dBd1NBSkJBTlFLQStSV2ZQZFdHR25iYS9WRVo1TUs5cG1nMUlQawovaWhBOXVxdjcvKzVZc0YzVFVEaHFHZXN1bGJhdFFGdkNPaHVmSlNJQmFWT3RjbVZrTWZoWmRrQ0F3RUFBUT09Ci0tLS0tRU5EIFBVQkxJQyBLRVktLS0tLQ==
Within the .env file, I added public and private access token keys which are base64 encoded.
I also provided the MongoDB database credentials we will need for the mongo docker container.
I will later show how you can generate those private and public keys. Also, make sure you change the database credentials.
Next, create a config folder in the root directory and create two files named default.ts and custom-environment-variables.ts in the config folder.
Open the default.ts file and add the following code
config/default.ts
export default {
  port: 8000,
  accessTokenExpiresIn: 15,
origin: 'http://localhost:3000',
};
Next, add the following code to the custom-environment-variables.ts file.
config/custom-environment-variables.ts
export default {
  dbName: 'MONGODB_USERNAME',
  dbPass: 'MONGODB_PASSWORD',
  accessTokenPrivateKey: 'ACCESS_TOKEN_PRIVATE_KEY',
  accessTokenPublicKey: 'ACCESS_TOKEN_PUBLIC_KEY',
};
The custom-environment-variables.ts file will allow us to import the environment variables we defined in the .env file.
Now add the start script to the package.json file
"scripts": {
    "start": "ts-node-dev --respawn --transpile-only src/app.ts"
  }
If you followed all the instructions above, your final package.json file should look somehow like this:
package.json
{
  "name": "JWT_Auth",
  "version": "1.0.0",
  "main": "index.js",
  "license": "MIT",
  "scripts": {
    "start": "ts-node-dev --respawn --transpile-only src/app.ts"
  },
  "dependencies": {
    "@typegoose/typegoose": "^9.8.0",
    "bcryptjs": "^2.4.3",
    "config": "^3.3.7",
    "cookie-parser": "^1.4.6",
    "dotenv": "^16.0.0",
    "express": "^4.17.3",
    "jsonwebtoken": "^8.5.1",
    "lodash": "^4.17.21",
    "mongoose": "^6.3.0",
    "redis": "^4.0.6",
    "ts-node-dev": "^1.1.8",
    "zod": "^3.14.4"
  },
  "devDependencies": {
    "@types/bcryptjs": "^2.4.2",
    "@types/config": "^0.0.41",
    "@types/cookie-parser": "^1.4.2",
    "@types/express": "^4.17.13",
    "@types/jsonwebtoken": "^8.5.8",
    "@types/lodash": "^4.14.182",
    "@types/morgan": "^1.9.3",
    "@types/node": "^17.0.25",
    "morgan": "^1.10.0",
    "typescript": "^4.6.3"
  }
}
Finally, open your terminal and run the start script to start the Express server.
yarn start
This will start the Express server on port 8000 or the port you specified.
Click on this http://localhost:8000/healthChecker link and you should see this in a new tab.
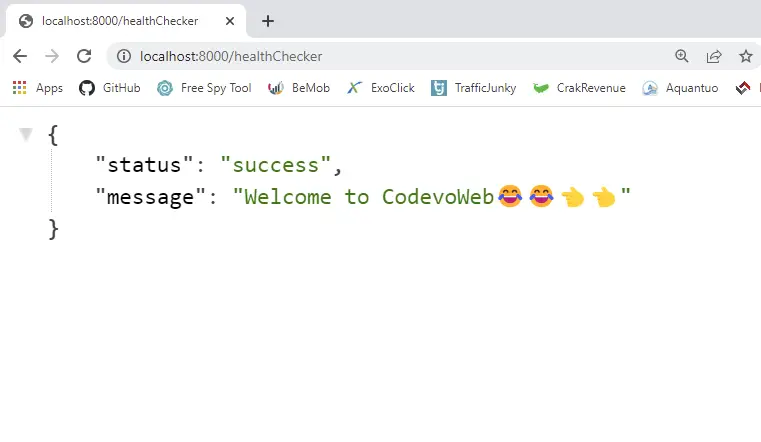
Once you see the Welcome message then it means you did everything correctly.
Setting up Redis and MongoDB with Docker Compose
I assume you already have docker installed on your computer. In the root directory create a docker-compose.yml file and add the code below.
docker-compose.yml
version: '3.8'
services:
  mongo:
    image: mongo:latest
    container_name: mongo
    environment:
      MONGO_INITDB_ROOT_USERNAME: ${MONGODB_USERNAME}
      MONGO_INITDB_ROOT_PASSWORD: ${MONGODB_PASSWORD}
      MONGO_INITDB_DATABASE: ${MONGODB_DATABASE_NAME}
    env_file:
      - ./.env
    volumes:
      - mongo:/data/db
    ports:
      - '6000:27017'
  redis:
    image: redis:latest
    container_name: redis
    ports:
      - '6379:6379'
    volumes:
      - redis:/data
volumes:
  mongo:
  redis:
With the mongo container, I exposed port 6000 so that we can log into the mongo container on port 6000 in MongoDB Compass.
Also, I exposed port 6379 on the Redis container to allow us to connect to the Redis container with the MySQL VS Code client extension.
Now, open your terminal and run the command below to spawn the Mongo and Redis containers.
# start the docker containers
docker-compose up -d
Connecting to the MongoDB Docker Container with Mongoose
Since we have our MongoDB database up and running, we need to connect our Express app to it with Mongoose.
In the src folder, create a utils folder, and within this utils folder create a connectDB.ts file and paste this code into it.
src/utils/connectDB.ts
import mongoose from 'mongoose';
import config from 'config';

const dbUrl = `mongodb://${config.get('dbName')}:${config.get(
  'dbPass'
)}@localhost:6000/jwtAuth?authSource=admin`;

const connectDB = async () => {
  try {
    await mongoose.connect(dbUrl);
    console.log('Database connected...');
  } catch (error: any) {
    console.log(error.message);
    setTimeout(connectDB, 5000);
  }
};

export default connectDB;
What we just did above:
- imported mongoose and the config library
- constructed the database connection string with the properties we defined in the
custom-environment-variables.tsfile. - I called the mongoose
connectfunction and passed the database connection string as an argument. - Lastly, I used setTimeout to call the
connectDBfunction after every 5s when there is a connection error.
The database connection URL has the following structure:
const dbUrl = `mongodb://username:password@host:port/database?authSource=admin`
| NAME | PLACEHOLDER | DESCRIPTION |
|---|---|---|
| Host | host | The domain of the database server, eg: localhost |
| Port | port | The port on which the database server is running on, eg: 27017 |
| User | username | The database username |
| Password | password | The password of the database user |
| Database | database | The name of the database |
| Options | authSource | The database to use when authenticating with user and pass |
Connecting to Redis Docker Container
Next, let’s connect our express app to the Redis container.
Inside the utils folder, create a new connectRedis.ts file then copy and paste the code snippets below into it.
src/utils/connectRedis.ts
import { createClient } from 'redis';

const redisUrl = `redis://localhost:6379`;
const redisClient = createClient({
  url: redisUrl,
});

const connectRedis = async () => {
  try {
    await redisClient.connect();
    console.log('Redis client connected...');
  } catch (err: any) {
    console.log(err.message);
    setTimeout(connectRedis, 5000);
  }
};

connectRedis();

redisClient.on('error', (err) => console.log(err));

export default redisClient;
Here is a breakdown of what I did in the connectRedis.ts file:
- I imported the
createClientfunction from theredislibrary - I created the Redis connection URL and assigned it to redisUrl
- I called the
createClientfunction and passed an object with the connection URL. I assigned the object returned by thecreateClientfunction to the redisClient variable. - I then created a
connectRedisfunction and called the connect method on theredisClientobject. - Lastly, I used setTimeout to call the
connectRedisfunction after every 5s when the connection fails.
Now, open app.ts and import the connectDB function we defined in theconnectDB.ts file then call it below the console.log() in the callback we passed to the listen function.
src/app.ts
require('dotenv').config();
import express from 'express';
import config from 'config';
import connectDB from './utils/connectDB';

const app = express();

const port = config.get<number>('port');
app.listen(port, () => {
  console.log(`Server started on port: ${port}`);
  // ? call the connectDB function here
  connectDB();
});
You will see the DB connection message in the terminal assuming your server is still running.
Creating the Database Schema with Typegoose
Now create a models folder in the src folder and within the models’ folder create a user.model.ts file.
Typegoose makes heavy use of decorators to define a Mongoose model.
src/models/user.model.ts
import {
  DocumentType,
  getModelForClass,
  index,
  modelOptions,
  pre,
  prop,
} from '@typegoose/typegoose';
import bcrypt from 'bcryptjs';

@index({ email: 1 })
@pre<User>('save', async function () {
  // Hash password if the password is new or was updated
  if (!this.isModified('password')) return;

  // Hash password with costFactor of 12
  this.password = await bcrypt.hash(this.password, 12);
})
@modelOptions({
  schemaOptions: {
    // Add createdAt and updatedAt fields
    timestamps: true,
  },
})

// Export the User class to be used as TypeScript type
export class User {
  @prop()
  name: string;

  @prop({ unique: true, required: true })
  email: string;

  @prop({ required: true, minlength: 8, maxLength: 32, select: false })
  password: string;

  @prop({ default: 'user' })
  role: string;

  // Instance method to check if passwords match
  async comparePasswords(hashedPassword: string, candidatePassword: string) {
    return await bcrypt.compare(candidatePassword, hashedPassword);
  }
}

// Create the user model from the User class
const userModel = getModelForClass(User);
export default userModel;
Breakdown of what I did above:
- I created a User class and added all the properties our model requires with the Typegoose decorators and exported the class.
- I used the utility function
getModelForClassto create a Mongoose model from the User class we defined above. - I used a pre-save hook to hash the password only if the password is new or was modified.
- I then added the email field as an index.
How to Generate Private and Public keys for JWT Authentication
Generating the private and public keys yourself can be challenging so am going to use this website to easily generate them.
On the website, you can use either 2048 bits or 4096 bits as the key size but am going to use 2048 bits. After selecting the key size, click on the “Generate New Key” button to generate the keys.
Now let’s visit this website to encode both keys in base64. Copy each of the keys and paste it into the “Encode to Base64 format” Textarea then click on the “Encode” button.
After each encoding copy the encoded key and paste it into the .env file respectively.
Define Middleware to Sign and Verify JWTs
Next, create a middleware folder in the src folder and create a file named jwt.ts file in the middleware folder.
Copy and paste the code below into the jwt.ts file.
src/utils/jwt.ts
import jwt, { SignOptions } from 'jsonwebtoken';
import config from 'config';

export const signJwt = (payload: Object, options: SignOptions = {}) => {
  const privateKey = Buffer.from(
    config.get<string>('accessTokenPrivateKey'),
    'base64'
  ).toString('ascii');
  return jwt.sign(payload, privateKey, {
    ...(options && options),
    algorithm: 'RS256',
  });
};

export const verifyJwt = <T>(token: string): T | null => {
  try {
    const publicKey = Buffer.from(
      config.get<string>('accessTokenPublicKey'),
      'base64'
    ).toString('ascii');
    return jwt.verify(token, publicKey) as T;
  } catch (error) {
    return null;
  }
};
Let me explain what I did in the jwt.ts file:
- I exported a
signJwtandverifyJwtfunctions - The
signJwtfunction is responsible for signing a new JsonWebToken. ThesignJwtfunction takes two parameters, a payload object and a SignOptions object. - In the
signJwtfunction, I converted the encoded private key we stored in the.envfile to an ASCII string. - Next, I made the
verifyJwtfunction a generic function so that it can return the generic type or null. - When the
verifyJwtfunction turns null then it means the token is invalid or has expired
Define a Custom Error Handler in Express
Next, let’s create a custom Express Error Handler by extending the Error class.
src/utils/appError.ts
export default class AppError extends Error {
  status: string;
  isOperational: boolean;

  constructor(public message: string, public statusCode: number = 500) {
    super(message);
    this.status = `${statusCode}`.startsWith('4') ? 'fail' : 'error';
    this.isOperational = true;

    Error.captureStackTrace(this, this.constructor);
  }
}
Whenever we want to send an error to the user we’ll call the next function and pass an instance of the AppError class with the message and the status code.
In Express when you call the next function with an argument, Express assumes it’s an error so it will skip all the middleware functions and directly send the error to the error handler in the middleware pipe.
In our JWT Authentication app, Express will immediately send the error we passed to the next function to the middleware below.
app.use((err: any, req: Request, res: Response, next: NextFunction) => {
  err.status = err.status || 'error';
  err.statusCode = err.statusCode || 500;

  res.status(err.statusCode).json({
    status: err.status,
    message: err.message,
  });
});
The error controller will then perform some logic before sending the actual message and status code to the user who made the request.
Error handling in Express can be very challenging but I simplified the error handling process in this article because I noticed the article was getting too long.
Define the Zod Validation Schema
With every backend application, it’s always good not to trust the user’s input. You should always validate the user’s input in your backend application.
Mongoose itself comes with schema validation but since we are using TypeScript, we can add Zod schema validation.
Below are the schema validation rules for both the login and register functions.
src/schemas/user.schema.ts
import { object, string, TypeOf } from 'zod';

export const createUserSchema = object({
  body: object({
    name: string({ required_error: 'Name is required' }),
    email: string({ required_error: 'Email is required' }).email(
      'Invalid email'
    ),
    password: string({ required_error: 'Password is required' })
      .min(8, 'Password must be more than 8 characters')
      .max(32, 'Password must be less than 32 characters'),
    passwordConfirm: string({ required_error: 'Please confirm your password' }),
  }).refine((data) => data.password === data.passwordConfirm, {
    path: ['passwordConfirm'],
    message: 'Passwords do not match',
  }),
});

export const loginUserSchema = object({
  body: object({
    email: string({ required_error: 'Email is required' }).email(
      'Invalid email or password'
    ),
    password: string({ required_error: 'Password is required' }).min(
      8,
      'Invalid email or password'
    ),
  }),
});

export type CreateUserInput = TypeOf<typeof createuserschema="">['body'];
export type LoginUserInput = TypeOf<typeof loginuserschema="">['body'];
I also used the TypeOf function from Zod to infer the TypeScript types of our schemas and exported them from the file.
Create a Middleware to Validate the User Inputs
This function is responsible for validating the user input based on the schema passed to it as an argument.
src/middleware/validate.ts
import { NextFunction, Request, Response } from 'express';
import { AnyZodObject, ZodError } from 'zod';

export const validate =
  (schema: AnyZodObject) =>
  (req: Request, res: Response, next: NextFunction) => {
    try {
      schema.parse({
        params: req.params,
        query: req.query,
        body: req.body,
      });

      next();
    } catch (err: any) {
      if (err instanceof ZodError) {
        return res.status(400).json({
          status: 'fail',
          error: err.errors,
        });
      }
      next(err);
    }
  };
Create a Service to Communicate with the Database
It’s recommended to always have services that communicate with the database for a couple of reasons.
Don’t let your controllers access and mutate the database directly if you want to scale and easily test your Express app.
Below are the functions that communicate with the database. I also added the logic to sign new JWT tokens.
src/services/user.service.ts
import { omit, get } from 'lodash';
import { FilterQuery, QueryOptions } from 'mongoose';
import config from 'config';
import userModel, { User } from '../models/user.model';
import { excludedFields } from '../controllers/auth.controller';
import { signJwt } from '../utils/jwt';
import redisClient from '../utils/connectRedis';
import { DocumentType } from '@typegoose/typegoose';

// CreateUser service
export const createUser = async (input: Partial<User>) => {
  const user = await userModel.create(input);
  return omit(user.toJSON(), excludedFields);
};

// Find User by Id
export const findUserById = async (id: string) => {
  const user = await userModel.findById(id).lean();
  return omit(user, excludedFields);
};

// Find All users
export const findAllUsers = async () => {
  return await userModel.find();
};

// Find one user by any fields
export const findUser = async (
  query: FilterQuery<User>,
  options: QueryOptions = {}
) => {
  return await userModel.findOne(query, {}, options).select('+password');
};

// Sign Token
export const signToken = async (user: DocumentType<User>) => {
  // Sign the access token
  const access_token = signJwt(
    { sub: user._id },
    {
      expiresIn: `${config.get<number>('accessTokenExpiresIn')}m`,
    }
  );

  // Create a Session
  redisClient.set(user._id, JSON.stringify(user), {
    EX: 60 * 60,
  });

  // Return access token
  return { access_token };
};
Important things to note in the above code:
- In the
signTokenfunction, I first generated the access token and specified expiration time in minutes. - I then called the set method on the redisClient object and used the user id as the key and the user’s info as the value to be stored in Redis. I also gave the data an expiration time.
Create the Authentication Controller
The authentication controller is responsible for anything regarding user authentication. Here are some of the jobs the controller can perform:
- Registering new user
- Logging the user into his account
- Sending a password reset email to a user who forgets his email or password
- Reset the user’s password
- Updating the currently logged in user’s password
- Authentication with Google OAuth
- Authentication with GitHub OAuth
src/controllers/auth.controller.ts
import config from 'config';
import { CookieOptions, NextFunction, Request, Response } from 'express';
import { CreateUserInput, LoginUserInput } from '../schema/user.schema';
import { createUser, findUser, signToken } from '../services/user.service';
import AppError from '../utils/appError';

// Exclude this fields from the response
export const excludedFields = ['password'];

// Cookie options
const accessTokenCookieOptions: CookieOptions = {
  expires: new Date(
    Date.now() + config.get<number>('accessTokenExpiresIn') * 60 * 1000
  ),
  maxAge: config.get<number>('accessTokenExpiresIn') * 60 * 1000,
  httpOnly: true,
  sameSite: 'lax',
};

// Only set secure to true in production
if (process.env.NODE_ENV === 'production')
  accessTokenCookieOptions.secure = true;

export const registerHandler = async (
  req: Request<{}, {}, CreateUserInput>,
  res: Response,
  next: NextFunction
) => {
  try {
    const user = await createUser({
      email: req.body.email,
      name: req.body.name,
      password: req.body.password,
    });

    res.status(201).json({
      status: 'success',
      data: {
        user,
      },
    });
  } catch (err: any) {
    if (err.code === 11000) {
      return res.status(409).json({
        status: 'fail',
        message: 'Email already exist',
      });
    }
    next(err);
  }
};

export const loginHandler = async (
  req: Request<{}, {}, LoginUserInput>,
  res: Response,
  next: NextFunction
) => {
  try {
    // Get the user from the collection
    const user = await findUser({ email: req.body.email });

    // Check if user exist and password is correct
    if (
      !user ||
      !(await user.comparePasswords(user.password, req.body.password))
    ) {
      return next(new AppError('Invalid email or password', 401));
    }

    // Create an Access Token
    const { accessToken } = await signToken(user);

    // Send Access Token in Cookie
    res.cookie('accessToken', accessToken, accessTokenCookieOptions);
    res.cookie('logged_in', true, {
      ...accessTokenCookieOptions,
      httpOnly: false,
    });

    // Send Access Token
    res.status(200).json({
      status: 'success',
      accessToken,
    });
  } catch (err: any) {
    next(err);
  }
};
Here is a breakdown of what I did in the auth.controller.ts file:
- We have two functions, a
registerHandlerandloginHandler. - When the user provides his email, name and password to register for an account, the
registerHandlerwill be called then theregisterHandlerwill also call thecreateUserservice with the required user credentials. - The
createUserservice will then communicate with the user model to create the new user. - In the catch block of the
registerHandlerI checked if the error has a code of 11000 which is a MongoDB error code of a duplicate unique field. When the error code is 11000 then it means the user already exists so we send the appropriate error message and status code. - Next, in the
loginHandlerI checked if the user with that email exists in our MongoDB database. - If the user exists then we check if the password is the same as the encrypted one in the database.
- Then we create a new JWT access token and send it to the user as a response and a cookie.
Create the User Controller to Test Authorization
In the user controller there are two functions:
- The
getMeHandlerreturns the currently logged in user’s profile info. - The
getAllUsersHandlerfunction is only for the Admin to get all users.
src/controllers/user.controller.ts
import { NextFunction, Request, Response } from 'express';
import { findAllUsers } from '../services/user.service';

export const getMeHandler = (
  req: Request,
  res: Response,
  next: NextFunction
) => {
  try {
    const user = res.locals.user;
    res.status(200).json({
      status: 'success',
      data: {
        user,
      },
    });
  } catch (err: any) {
    next(err);
  }
};

export const getAllUsersHandler = async (
  req: Request,
  res: Response,
  next: NextFunction
) => {
  try {
    const users = await findAllUsers();
    res.status(200).json({
      status: 'success',
      result: users.length,
      data: {
        users,
      },
    });
  } catch (err: any) {
    next(err);
  }
};
Define a function to deserialize the User
This middleware is responsible for getting the JWT Authorization bearer token and cookie from the headers and cookie object respectively.
It then validates the token, checks if the user has a valid session, check if the user still exists and adds the user to res.locals if there wasn’t any error.
src/middleware/deserializeUser.ts
import { NextFunction, Request, Response } from 'express';
import { findUserById } from '../services/user.service';
import AppError from '../utils/appError';
import redisClient from '../utils/connectRedis';
import { verifyJwt } from '../utils/jwt';

export const deserializeUser = async (
  req: Request,
  res: Response,
  next: NextFunction
) => {
  try {
    // Get the token
    let access_token;
    if (
      req.headers.authorization &&
      req.headers.authorization.startsWith('Bearer')
    ) {
      access_token = req.headers.authorization.split(' ')[1];
    } else if (req.cookies.access_token) {
      access_token = req.cookies.access_token;
    }

    if (!access_token) {
      return next(new AppError('You are not logged in', 401));
    }

    // Validate Access Token
    const decoded = verifyJwt<{ sub: string }>(access_token);

    if (!decoded) {
      return next(new AppError(`Invalid token or user doesn't exist`, 401));
    }

    // Check if user has a valid session
    const session = await redisClient.get(decoded.sub);

    if (!session) {
      return next(new AppError(`User session has expired`, 401));
    }

    // Check if user still exist
    const user = await findUserById(JSON.parse(session)._id);

    if (!user) {
      return next(new AppError(`User with that token no longer exist`, 401));
    }

    // This is really important (Helps us know if the user is logged in from other controllers)
    // You can do: (req.user or res.locals.user)
    res.locals.user = user;

    next();
  } catch (err: any) {
    next(err);
  }
};
Define a function to check if the user is logged in
This middleware will be called after the deserializeUser middleware to check if the user exists on res.locals.
src/middleware/requireUser.ts
import { NextFunction, Request, Response } from 'express';
import AppError from '../utils/appError';

export const requireUser = (
  req: Request,
  res: Response,
  next: NextFunction
) => {
  try {
    const user = res.locals.user;
    if (!user) {
      return next(new AppError(`Invalid token or session has expired`, 401));
    }

    next();
  } catch (err: any) {
    next(err);
  }
};
Define a Middleware to Restrict Unauthorized Access
This middleware checks if the user role exists in the allowedRoles array. If the role is in the array then it means the user is allowed to perform that action else it will throw an error.
src/middleware/restrictTo.ts
import { NextFunction, Request, Response } from 'express';
import AppError from '../utils/appError';

export const restrictTo =
  (...allowedRoles: string[]) =>
  (req: Request, res: Response, next: NextFunction) => {
    const user = res.locals.user;
    if (!allowedRoles.includes(user.role)) {
      return next(
        new AppError('You are not allowed to perform this action', 403)
      );
    }

    next();
  };
Create the Authentication Routes
Now, create two routes folders named user.route.ts and auth.route.ts in the src folder.
A route in Express is considered as a mini-app. Whenever a request matches the route in the middleware stack, Express will delegate the request to the route handler of that route.
src/routes/user.route.ts
import express from 'express';
import {
  getAllUsersHandler,
  getMeHandler,
} from '../controllers/user.controller';
import { deserializeUser } from '../middleware/deserializeUser';
import { requireUser } from '../middleware/requireUser';
import { restrictTo } from '../middleware/restrictTo';

const router = express.Router();
router.use(deserializeUser, requireUser);

// Admin Get Users route
router.get('/', restrictTo('admin'), getAllUsersHandler);

// Get my info route
router.get('/me', getMeHandler);

export default router;
The user.route.ts contains the routes to:
- Get all users (only by Admin)
- Get the currently logged-in credentials
src/routes/auth.route.ts
import express from 'express';
import { loginHandler, registerHandler } from '../controllers/auth.controller';
import { validate } from '../middleware/validate';
import { createUserSchema, loginUserSchema } from '../schema/user.schema';

const router = express.Router();

// Register user route
router.post('/register', validate(createUserSchema), registerHandler);

// Login user route
router.post('/login', validate(loginUserSchema), loginHandler);

export default router;
The auth.route.ts contains the routes to:
- Login a user
- Register a user
Update the app.ts file to use the route
Next, update the app.ts to use the following middleware:
- Body Parser middleware to parse the request body and attach it to
req.body - Morgan to log the HTTP request logs in the terminal
- Cors for Cross-Origin Resource Sharing
- Cookie Parser to parse the cookie and attach it to
req.cookies - User router
src/app.ts
require('dotenv').config();
import express, { NextFunction, Request, Response } from 'express';
import morgan from 'morgan';
import config from 'config';
import cors from 'cors';
import cookieParser from 'cookie-parser';
import connectDB from './utils/connectDB';
import userRouter from './routes/user.route';
import authRouter from './routes/auth.route';

const app = express();

// Middleware

// 1. Body Parser
app.use(express.json({ limit: '10kb' }));

// 2. Cookie Parser
app.use(cookieParser());

// 3. Logger
if (process.env.NODE_ENV === 'development') app.use(morgan('dev'));

// 4. Cors
app.use(
  cors({
    origin: config.get<string>('origin'),
    credentials: true,
  })
);

// 5. Routes
app.use('/api/users', userRouter);
app.use('/api/auth', authRouter);

// Testing
app.get('/healthChecker', (req: Request, res: Response, next: NextFunction) => {
  res.status(200).json({
    status: 'success',
    message: 'Welcome to CodevoWeb????',
  });
});

// UnKnown Routes
app.all('*', (req: Request, res: Response, next: NextFunction) => {
  const err = new Error(`Route ${req.originalUrl} not found`) as any;
  err.statusCode = 404;
  next(err);
});

// Global Error Handler
app.use((err: any, req: Request, res: Response, next: NextFunction) => {
  err.status = err.status || 'error';
  err.statusCode = err.statusCode || 500;

  res.status(err.statusCode).json({
    status: err.status,
    message: err.message,
  });
});

const port = config.get<number>('port');
app.listen(port, () => {
  console.log(`Server started on port: ${port}`);
  // ? call the connectDB function here
  connectDB();
});
Testing the JWT Authentication Rest API
Run this command to spawn the MongoDB and Redis Docker containers:
docker-compose up -d
You should see the following logs:
$ docker-compose up -d
Creating network "jwt_auth_default" with the default driver
Creating redis ... done
Creating mongo ... done
Run yarn start in the terminal and you should see the following logs:
$ yarn start
yarn run v1.22.18
$ ts-node-dev --respawn --transpile-only src/app.ts
[INFO] 08:49:09 ts-node-dev ver. 1.1.8 (using ts-node ver. 9.1.1, typescript ver. 4.6.3)
Server started on port: 8000
Redis client connected...
Database connected...
Register users
Let’s register some users. You can use Postman but am going to use the HTTP client VS Code extension.
Register some users with http://localhost:8000/api/auth/register route
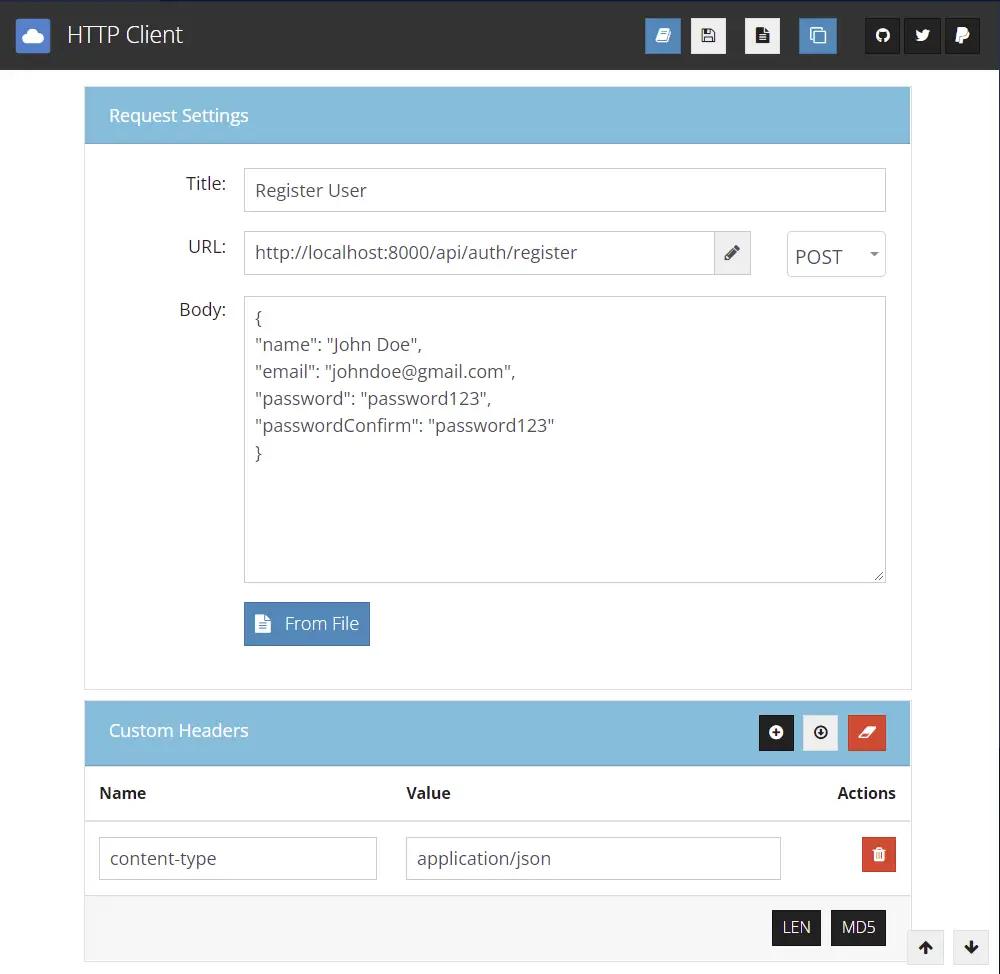
Here is the response you’ll get after registering a new user
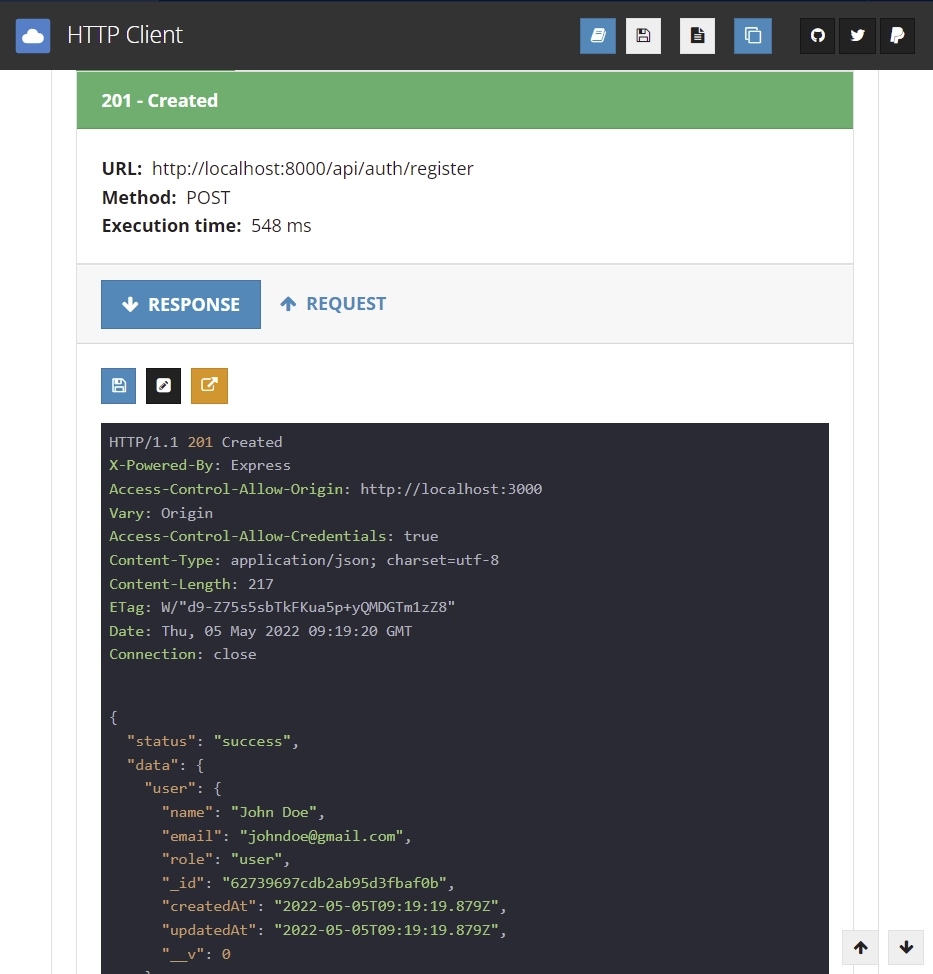
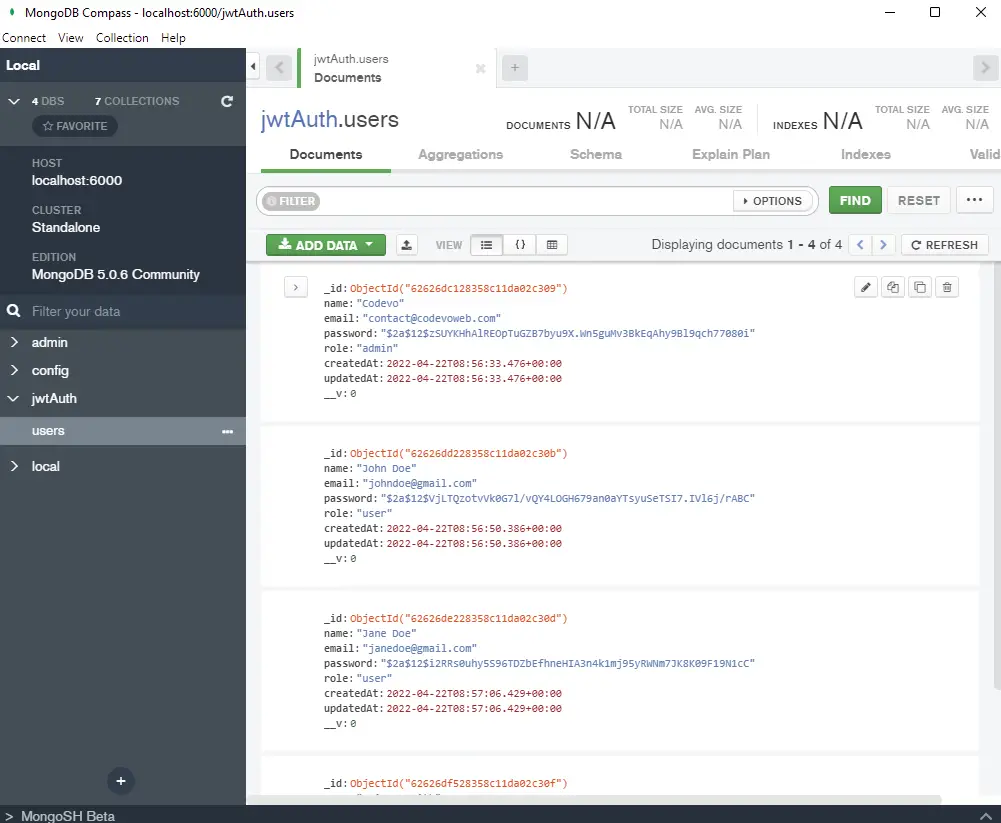
Open MongoDB Compass then click on the users collection and you should see the registered users.
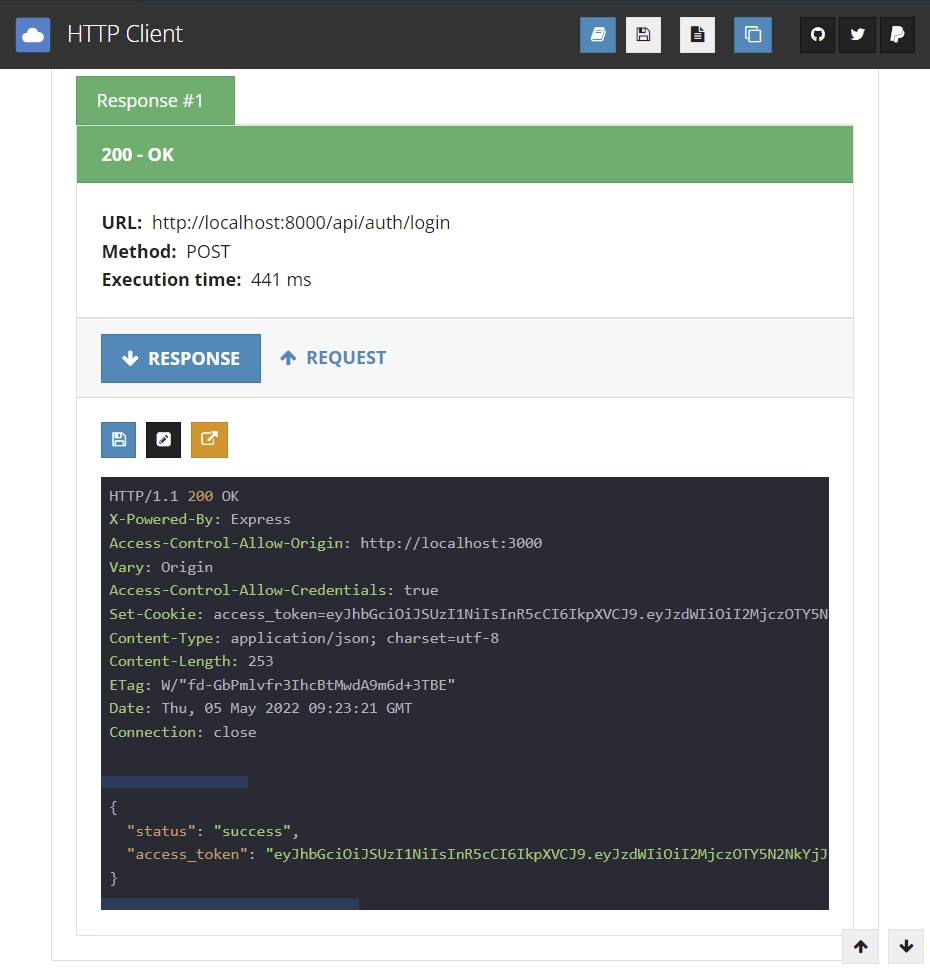
Login user
Let’s login with the login credentials of any of the users you created
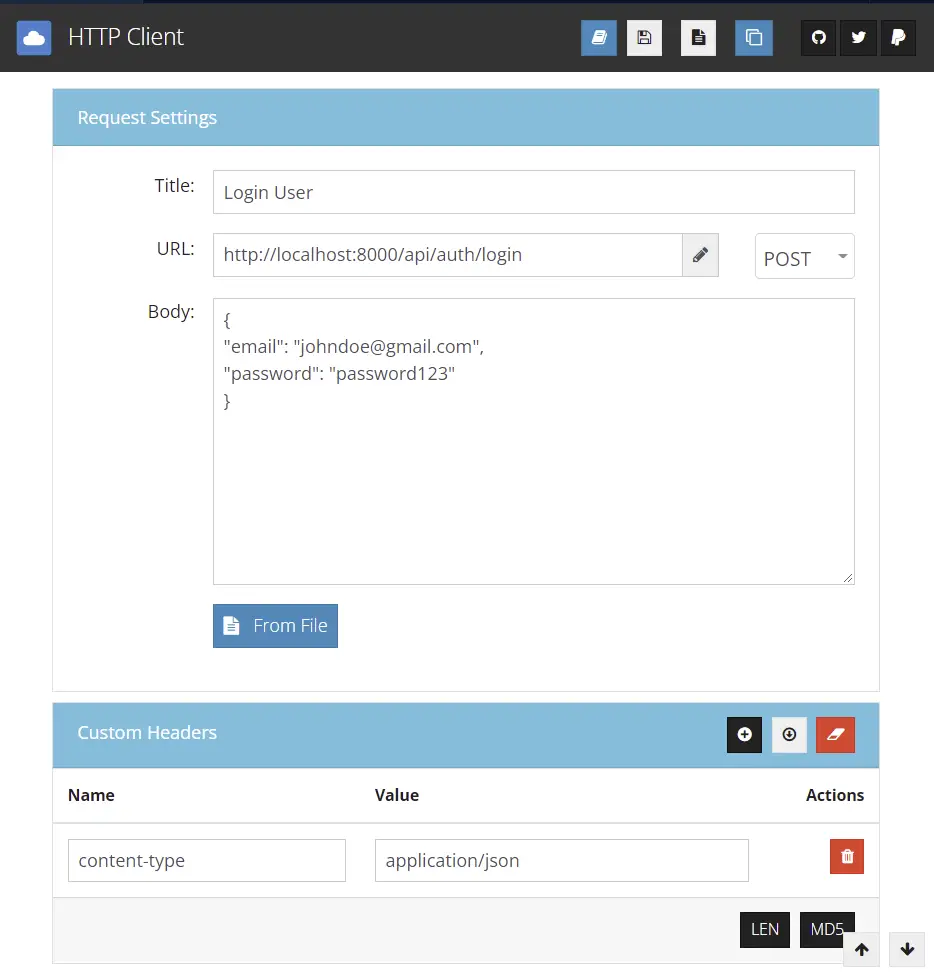
You should get a response with an access token. We sent a cookie with the response but this extension doesn’t show cookies. If you are using Postman then you will see the cookies in the cookie tab.
Now, let’s connect to the Redis Docker container to see the logged-in users’ credentials. We are storing the credentials in Redis to serve as a form of session.
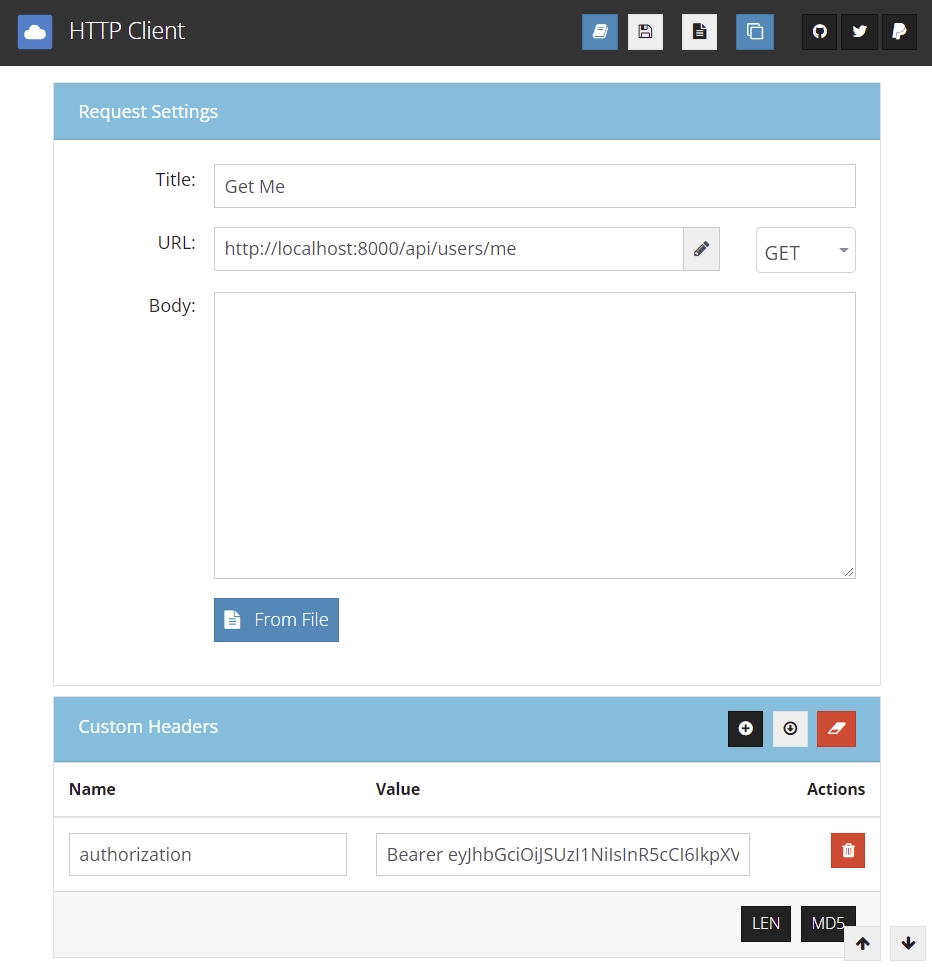
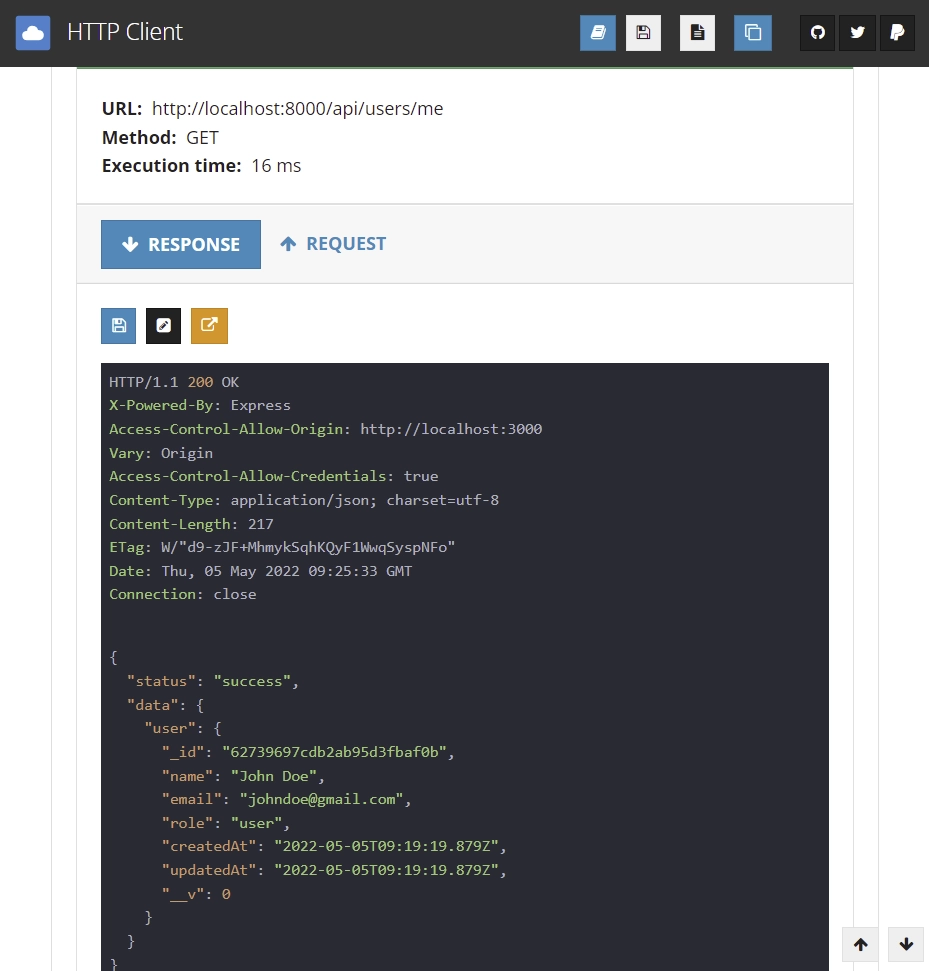
Get Currently Logged in User’s Credentials
After logging in, copy the access token and add the authorization header with the token attached to the bearer string value.
You should get the users’ credentials as a response if the access token is valid
Admin Get All Users
Get back to MongoDB Compass and change one of the users’ role to admin and login with that email.
Copy and paste the access token and make a request to http://localhost:8000/users route in order to get all the users in the database.

You should get all the users if that email is the admin’s email.

Conclusion
In this article, we looked at how you can add JWT Authentication to your app with Node.js, Express, MongoDB, Zod, TypeScript, Docker-compose, Redis, and Mongoose.
Checkout source code on GitHub
Great article! I was able to follow it and apply it to upgrade my old JWT auth flow on one of my personal projects I am returning to.
For anyone who got the same error as me with the PGP keys, you have to copy the whole key including the lines that say —–BEGIN RSA PRIVATE KEY—– and the one at the end.
Very good article. Thank you!
It is possible to create an article similar to this but where we can see the relationships one to many…etc. For example, a user who has a number of products…
It’s possible but I would have to allocate time for such a project.
Can you explain why we need to use Buffer.from() to convert key string, or is that optional?
The reason why we used the
Buffer.from()method was to convert the keys from base64 back into their original state which is ASCII.We had to encode the keys in base64 before adding them to the
.envfile to avoid getting unnecessary warnings in the terminal when building the Docker containers.However, if you want to use the keys directly without encoding them in base64 then you don’t have to go through the conversion process.
Thank you, I now understand that part. Just found out your articles in this website and I learnt a lot. One more question, do we really need to use session in this case, I see you set the Redis session for 1 hour and access token for only 15 minutes, doesn’t that mean after 15 minutes we always have to re-login even when the session is not expired? And if later I implement refresh token rotation (user can be kept logged in for a very long time if they are regularly active), do the Redis session get in the way?
To implement the token refresh rotation, you must ensure the Redis session and refresh token expire simultaneously. Redis has to be included in the token refresh rotation flow to serve as an extra layer of security since the only way the tokens can be invalidated is when they’ve expired.
Let’s consider the following assumptions:
When a user logs into the API, the server will send both the access token and refresh tokens to the user as HTTPOnly cookies. After 10 minutes, the user logs out of the API. Even though the user has logged out, the access and refresh tokens are still valid and can be used by anyone who has access to them to make requests to the API.
To prevent this, you need to delete the user’s session in the Redis database when they make a request to out of the API and in your authentication flow, you must check if the user has a valid session in the Redis database before processing their request.
In brief, the user can only refresh the access token only if he has a valid session in the Redis database. On the frontend app, you can use interceptors to automatically refresh the user’s access token when it expires before processing their original request.
For example, when you are using Axios, this can be achieved by utilizing Axios interceptors. Redux Toolkit also has a similar feature that you can use to refresh the access token without the user knowing. This will keep the user logged into the app as long as he has valid tokens and session.
Now everything is clear to me, thank you so much Edem.
Hey i want to ask if the client has access token and refresh token , once access token expires he will ask for new set of tokens which will be granted if user have appropriate refresh token.
In this role of session is to make sure that user have valid session that is if session expires then he will not be able to refresh the token.
If am wrong please correct me.
Thank you for your comment on my article. You’re absolutely right that a user can only obtain a new access token with a valid refresh token after the access token has expired.
However, if the server session has already expired before the refresh token, the server won’t refresh the access token.
It’s crucial to note that a new refresh token should not be sent with the new access token for security reasons. The refresh token should only be used to obtain a new access token.
Using server sessions along with stateless JWTs is important for the following reasons:
While there are other reasons for using server sessions along with stateless JWTs, these are some of the most important ones.
For more information on why relying solely on stateless JWTs can be risky, please refer to this article: https://redis.com/blog/json-web-tokens-jwt-are-dangerous-for-user-sessions/.
thanks for your reply ,
You are welcome!
Hi, this post looks awesome. Is there a version without using Redis?
I’m happy to hear that you found the post enjoyable!
At the moment, there are already implementations available that don’t involve Redis, but they’re written in other programming languages such as Golang and Rust.
However, I’m planning to create an implementation in Node.js that doesn’t require Redis, and I’ll be sure to write an article about it soon. So, stay tuned!
Hi, I download your code and run in my machine using wsl2. But when I run API /auth/login throw this error
{
“status”: “error”,
“message”: “secretOrPrivateKey has a minimum key size of 2048 bits for RS256”
}
please check and help me.Thanks
Thank you for bringing this to my attention. The error message suggests that the minimum key size for RS256 in JWT (JSON Web Tokens) should be at least 2048 bits. Previously, this requirement wasn’t enforced, but the JWT specification has been updated, and now a key size of 2048 bits or more is necessary.
To address this, I’ve made the necessary adjustments in the code and increased the key size to 4096 bits in the
.envfile. To get the latest changes, please rungit pullin your terminal to fetch the updated code from the repository. Additionally, I’ve made some changes to the packages, so please runyarn installto ensure you have the updated dependencies installed.After these steps, you should be able to run the API
/api/auth/loginwithout encountering the “minimum key size” error.Thanks Edem
Hi, I like this post. Steps looks clear. But why I don’t have the same result in the first test “http://localhost:8000/healthChecker”. Can you help please, thank you
It seems you are using the master branch. For the master branch, you can access the health checker endpoint at
http://localhost:8000/api/healthChecker.However, if you need to use the branch referenced in the article, switch the Git branch to
Access_Token, and then you can access the health checker endpoint athttp://localhost:8000/healthChecker.I have downloaded the code and tried. my first two routes worked very well but these two routes // Admin Get Users route
router.get(‘/’, restrictTo(‘admin’), getAllUsersHandler);
// Get my info route
router.get(‘/me’, getMeHandler); are showing 400/401 error. properly authorization beraer given in header of postman. can not figure out why?
The API is configured in such a way that, when the JWT is not provided in the Authorization header as Bearer, it retrieves it from the cookies sent along with the request.
I just cloned the project, corrected a minor Redis error in the u
ser.service.tsfile, and tested it using the Thunder Client VS Code extension and Postman. Everything seems to work correctly.I’ve included the Postman collection in the updated source code.
Run
git pullto access it and import it into the VS Code Thunder Client extension or Postman, then use it to make the requests. You do not need to include the JWT in the header manually; Postman or Thunder Client will automatically send them along with the request as cookies.