
In this article, you’ll learn how to build a CRUD API with Django and Django REST framework. The RESTful API will have endpoints for performing CRUD operations against an SQLite database. Django REST framework is a powerful and flexible toolkit for building web APIs.
To help other developers understand the structure of the API and how to interact with it, we’ll use the drf_yasg package to generate Swagger API documentation for the endpoints.
More practice:
- CRUD RESTful API Server with Python, FastAPI, and MongoDB
- Build a CRUD App with FastAPI and SQLAlchemy
- Build a CRUD App with FastAPI and PyMongo
- Node.js, Express, TypeORM, PostgreSQL: CRUD Rest API
- Build CRUD RESTful API Server with Golang, Gin, and MongoDB
- Next.js Full-Stack App with React Query, and GraphQL-CodeGen
- Build Full-Stack tRPC CRUD Application with Node.js, and React.js
- GraphQL CRUD API with Next.js, MongoDB, and TypeGraphQL
Prerequisites
To make the best out of this comprehensive guide, you should meet the following prerequisites:
- You should have basic knowledge of Python
- You should have at least beginner-level knowledge of Django and Django REST framework.
- You should have a basic understanding of REST API and CRUD architecture.
Run the Django CRUD API Locally
- Install the latest version of Python from https://www.python.org/downloads/.
- Visit https://github.com/wpcodevo/Django_Crud_Project to download or clone the Django CRUD API project and open it with an IDE.
- In the integrated terminal of your IDE or text editor, run this command to create a virtual environment in the root project directory.
- Windows OS –
python -m venv venv - Mac or Linux OS –
python3 -m venv venv
- Windows OS –
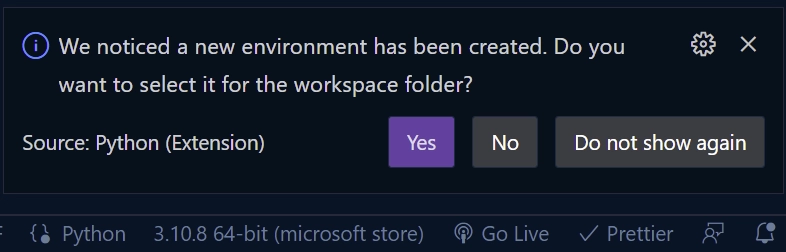
- Once the new virtual environment has been created, your IDE or code editor will prompt you to activate it for the workspace folder. Click “Yes” to accept the action.
Note: You need to close the previously opened terminal in your IDE and open a new terminal to activate the virtual environment in the terminal.
If your IDE or text editor didn’t prompt you to activate the new virtual environment, run the command below from the terminal of the root directory to manually activate it.- Windows OS (Command Prompt ) –
venv\Scripts\activate.bat. - Windows OS (Git Bash) –
venv/Scripts/activate.bat. - Mac or Linux OS –
source venv/bin/activate
- Windows OS (Command Prompt ) –
- Run
pip install -r requirements.txtto install all the required modules. - After that, migrate the database schema to the SQLite database with
python manage.py migrate. - Start the Django development server by running
python manage.py runserver - Test the API endpoints from an API testing tool like Postman or Thunder Client VS Code extension. You can also set up the React.js app to interact with the Django CRUD API.
Run a React.js App with the Django API
For a complete guide on how to build the React.js CRUD app see the post Build a React.js CRUD App using a RESTful API. Nevertheless, follow these steps to quickly spin up the React app.
- Download Node.js from https://nodejs.org/ and run
npm i -g yarnto install the Yarn package manager globally. - Download or clone the React.js CRUD project from https://github.com/wpcodevo/reactjs-crud-note-app and open it with an IDE.
- After that, open the integrated terminal in your IDE or code editor and run
yarnoryarn installto install all the required dependencies. - Start the Vite dev server by running
yarn devfrom the console of the root directory. - Open http://localhost:3000/ in a new tab to perform the CRUD operations against the Django API. Note: When you visit the React app on
http://127.0.0.1:3000, you will get a site can’t be reached or CORS error. The Django API is configured to accept requests from only http://localhost:3000/
Setup Django
The first step in creating any project is to create the project’s work directory. So navigate to your Desktop or any location on your machine and create a folder named Django_Crud_Project . After that, open the newly-created folder in an IDE or code editor (I will use Visual Studio Code in this project)
mkdir Django_Crud_Project
cd Django_Crud_Project && code .
Now let’s create a virtual environment to isolate dependencies. To do this, open the integrated terminal in your IDE and run this command.
- Windows OS –
python -m venv venv - Mac or Linux OS –
python3 -m venv venv
After that, run the command below to activate the virtual environment in the current workspace.
- Windows OS (Command Prompt ) –
venv\Scripts\activate.bat. - Windows OS (Git Bash) –
venv/Scripts/activate.bat. - Mac or Linux OS –
source venv/bin/activate
Because we are using both Django and Django REST framework, run this command in the console of the root directory to install them in the virtual environment.
pip install django djangorestframework
django– A Python web framework that follows the model–template–views architectural pattern.djangorestframework– A powerful and flexible toolkit for building Web APIs.
At this point, we are ready to create the Django project. Run this command to create a Django project named notes in the current workspace folder. The dot (.) after the project’s name will tell Django-admin to generate the project in the current directory.
django-admin startproject notes .
After the project has been generated, run this command to activate the initial database migrations of the built-in user model.
python manage.py migrate
Now that we’ve generated the Django project and migrated the database schema, let’s start the dev server to make sure we did everything correctly. So, start the Django development server with this command.
python manage.py runserver
This will start the HTTP server on http://127.0.0.1:8000/ . When you visit http://127.0.0.1:8000/ in a new tab, you will see the Django welcome page.
Django provides a reusability feature that we can leverage to organize our code into reusable apps. That means we will create an app to handle every request made to the “notes” endpoints. So, run this command to create a Django app called note_api.
django-admin startapp node_api
Next, add the rest_framework and note_api apps to the INSTALLED_APPS list inside the notes/settings.py file:
notes/settings.py
INSTALLED_APPS = [
    'django.contrib.admin',
    'django.contrib.auth',
    'django.contrib.contenttypes',
    'django.contrib.sessions',
    'django.contrib.messages',
    'django.contrib.staticfiles',
    'note_api',
    'rest_framework'
]
Create the Django Models
In this section, you’ll create a database model that the API will use to perform the CRUD operations and a serializer model that the Django REST framework will use to convert the models into serialized JSON objects.
Database Model
In Django, a model is a built-in feature that Django uses to generate the underlying database tables, their columns, relationships between the tables, and various constraints.
So, create a models.py file in the note_api app and add the following model definitions. Instead of using incremental integers for the primary key of the table, we’ll use UUIDs to prevent attackers from scanning the table with a range of integers to explore leakages.
note_api/models.py
import uuid
from django.db import models


class NoteModel(models.Model):
    id = models.UUIDField(primary_key=True, default=uuid.uuid4, editable=False)
    title = models.CharField(max_length=255, unique=True)
    content = models.TextField()
    category = models.CharField(max_length=100, null=True, blank=True)
    createdAt = models.DateTimeField(auto_now_add=True)
    updatedAt = models.DateTimeField(auto_now_add=True)

    class Meta:
        db_table = "notes"
        ordering = ['-createdAt']

        def __str__(self) -> str:
            return self.title
The models.UUIDField() attribute will tell Django to generate a UUID for the ID field by evoking the uuid4() function.
We added a unique constraint on the title field to ensure that no two records in the table end up with the same title.
The db_table property provided in the Meta Options will tell Django to change the table name to the specified value. Also, the ordering property will tell Django to order the lists of objects in ascending order of the createdAt timestamp.
Model Serializer
Serializers in Django REST framework convert the object or list of objects returned by the database into data types that frontend frameworks and API testing tools can understand. Also, serializers can be used to deserialize data into complex types after the incoming request data has been validated.
Django REST framework comes with a handful of serializers but in this tutorial, we’ll only use the ModelSerializer. The ModelSerializer class provides a shortcut to create a serializer whose fields correspond to the Model fields.
In the note_api app directory, create a serializers.py file and add the serializer below.
note_api/serializers.py
from rest_framework import serializers
from note_api.models import NoteModel


class NoteSerializer(serializers.ModelSerializer):
    class Meta:
        model = NoteModel
        fields = '__all__'
Inheriting the ModelSerializer class will:
- Automatically generate a set of fields for the NoteSerializer
- Automatically generate validators for the serializer
- Create default implementations of
.create()and.update()
Create the CRUD API Views in Django
In this section, you’ll create five API views to implement the CRUD (Create, Read, Update, and Delete) functionalities. In Django, views are divided into two major types; function-based views (FBVs) and class-based views (CBVs).
function-based views– Are functions that leverage the@api_viewdecorator and return HTTP responses after processing the business logic of the API.class-based views– Python objects that allow us to create views from inherited classes.
These views handle the application logic of the API and return information as responses to the client or frontend application. As a matter of best practice, we always keep the application logic in a views.py file.
To simplify the process, we’ll use the GenericAPIView class provided by the Django REST framework to create the views. Using the GenericAPIView class is quite similar to the regular View class since the incoming request will be delegated to an appropriate handler method such as .get() or .post().
We’ll group the API views under two classes, Notes and NoteDetail. The Notes API view class will handle requests made to the /api/notes endpoint and the NoteDetail API view class will handle requests made to the api/notes/<str:pk> endpoint.
Before the CRUD implementation, create a views.py file inside the note_api app directory and add the following module imports.
note_api/views.py
from rest_framework.response import Response
from rest_framework import status, generics
from note_api.models import NoteModel
from note_api.serializers import NoteSerializer
import math
from datetime import datetime
GET and POST API Views
Here, you’ll create a Notes class that inherits the GenericAPIView class to handle POST and GET requests. The Notes view will have two handler methods:
get()– The get() handler will return a paginated list of records to the client. By default, the handler will only return the first 10 records to the client if the limit and page parameters are absent in the request URL.post()– This handler will be evoked by the REST framework to add the new record to the database when a POST request hits the server at/api/notes.
note_api/views.py
class Notes(generics.GenericAPIView):
    serializer_class = NoteSerializer
    queryset = NoteModel.objects.all()

    def get(self, request):
        page_num = int(request.GET.get("page", 1))
        limit_num = int(request.GET.get("limit", 10))
        start_num = (page_num - 1) * limit_num
        end_num = limit_num * page_num
        search_param = request.GET.get("search")
        notes = NoteModel.objects.all()
        total_notes = notes.count()
        if search_param:
            notes = notes.filter(title__icontains=search_param)
        serializer = self.serializer_class(notes[start_num:end_num], many=True)
        return Response({
            "status": "success",
            "total": total_notes,
            "page": page_num,
            "last_page": math.ceil(total_notes / limit_num),
            "notes": serializer.data
        })

    def post(self, request):
        serializer = self.serializer_class(data=request.data)
        if serializer.is_valid():
            serializer.save()
            return Response({"status": "success", "data": {"note": serializer.data}}, status=status.HTTP_201_CREATED)
        else:
            return Response({"status": "fail", "message": serializer.errors}, status=status.HTTP_400_BAD_REQUEST)
GET, PATCH, and DELETE API Views
Here, you’ll create a NoteDetail class that inherits the GenericAPIView class to handle GET, PATCH, and DELETE requests. The NoteDetail view will have three handler methods:
get()– This handler will be called to find a record by ID and return the found record to the client or frontend app.patch()– This handler will be evoked by the REST framework to find a record that matches an ID and update the fields of the found record.delete()– This handler will be evoked to find a record by ID and delete the found record from the database.
note_api/views.py
class NoteDetail(generics.GenericAPIView):
    queryset = NoteModel.objects.all()
    serializer_class = NoteSerializer

    def get_note(self, pk):
        try:
            return NoteModel.objects.get(pk=pk)
        except:
            return None

    def get(self, request, pk):
        note = self.get_note(pk=pk)
        if note == None:
            return Response({"status": "fail", "message": f"Note with Id: {pk} not found"}, status=status.HTTP_404_NOT_FOUND)

        serializer = self.serializer_class(note)
        return Response({"status": "success", "data": {"note": serializer.data}})

    def patch(self, request, pk):
        note = self.get_note(pk)
        if note == None:
            return Response({"status": "fail", "message": f"Note with Id: {pk} not found"}, status=status.HTTP_404_NOT_FOUND)

        serializer = self.serializer_class(
            note, data=request.data, partial=True)
        if serializer.is_valid():
            serializer.validated_data['updatedAt'] = datetime.now()
            serializer.save()
            return Response({"status": "success", "data": {"note": serializer.data}})
        return Response({"status": "fail", "message": serializer.errors}, status=status.HTTP_400_BAD_REQUEST)

    def delete(self, request, pk):
        note = self.get_note(pk)
        if note == None:
            return Response({"status": "fail", "message": f"Note with Id: {pk} not found"}, status=status.HTTP_404_NOT_FOUND)

        note.delete()
        return Response(status=status.HTTP_204_NO_CONTENT)
Complete APIViews
note_api/views.py
from rest_framework.response import Response
from rest_framework import status, generics
from note_api.models import NoteModel
from note_api.serializers import NoteSerializer
import math
from datetime import datetime


class Notes(generics.GenericAPIView):
    serializer_class = NoteSerializer
    queryset = NoteModel.objects.all()

    def get(self, request):
        page_num = int(request.GET.get("page", 1))
        limit_num = int(request.GET.get("limit", 10))
        start_num = (page_num - 1) * limit_num
        end_num = limit_num * page_num
        search_param = request.GET.get("search")
        notes = NoteModel.objects.all()
        total_notes = notes.count()
        if search_param:
            notes = notes.filter(title__icontains=search_param)
        serializer = self.serializer_class(notes[start_num:end_num], many=True)
        return Response({
            "status": "success",
            "total": total_notes,
            "page": page_num,
            "last_page": math.ceil(total_notes / limit_num),
            "notes": serializer.data
        })

    def post(self, request):
        serializer = self.serializer_class(data=request.data)
        if serializer.is_valid():
            serializer.save()
            return Response({"status": "success", "data": {"note": serializer.data}}, status=status.HTTP_201_CREATED)
        else:
            return Response({"status": "fail", "message": serializer.errors}, status=status.HTTP_400_BAD_REQUEST)


class NoteDetail(generics.GenericAPIView):
    queryset = NoteModel.objects.all()
    serializer_class = NoteSerializer

    def get_note(self, pk):
        try:
            return NoteModel.objects.get(pk=pk)
        except:
            return None

    def get(self, request, pk):
        note = self.get_note(pk=pk)
        if note == None:
            return Response({"status": "fail", "message": f"Note with Id: {pk} not found"}, status=status.HTTP_404_NOT_FOUND)

        serializer = self.serializer_class(note)
        return Response({"status": "success", "data": {"note": serializer.data}})

    def patch(self, request, pk):
        note = self.get_note(pk)
        if note == None:
            return Response({"status": "fail", "message": f"Note with Id: {pk} not found"}, status=status.HTTP_404_NOT_FOUND)

        serializer = self.serializer_class(
            note, data=request.data, partial=True)
        if serializer.is_valid():
            serializer.validated_data['updatedAt'] = datetime.now()
            serializer.save()
            return Response({"status": "success", "data": {"note": serializer.data}})
        return Response({"status": "fail", "message": serializer.errors}, status=status.HTTP_400_BAD_REQUEST)

    def delete(self, request, pk):
        note = self.get_note(pk)
        if note == None:
            return Response({"status": "fail", "message": f"Note with Id: {pk} not found"}, status=status.HTTP_404_NOT_FOUND)

        note.delete()
        return Response(status=status.HTTP_204_NO_CONTENT)
Add the CRUD Routes
A request in Django first comes to urls.py in the main project and then goes to the urls.py of an app before the matching function in views.py will be called to process the request.
So, to make users interact with the API views defined in the note_api app, we need to create URLs that map to them.
Add the CRUD API URLs
To add the CRUD API views to the middleware stack, create a urls.py file in the note_api app directory and add the code below.
note_api/urls.py
from django.urls import path
from note_api.views import Notes, NoteDetail

urlpatterns = [
    path('', Notes.as_view()),
    path('<str:pk>', NoteDetail.as_view())
]
Add the Base URL of the CRUD App to the Project
Now that we’ve defined the CRUD API routes in the note_api/urls.py file, let’s add a base URL that references the URLs defined in the note_api app to the notes project.
from django.contrib import admin
from django.urls import path, include

urlpatterns = [
    path('admin/', admin.site.urls),
    path('api/notes/', include('note_api.urls'))
]
Setup CORS in Django
Now that we’ve implemented the CRUD functionalities, let’s configure the Django project to enable CORS on the server. Adding CORS will ensure that the server accepts requests from specified cross-origin domains. Follow the steps below to enable CORS on the Django server.
First, install the django-cors-headers library.
pip install django-cors-headers
Add the corsheaders package to the list of INSTALLED_APPS
notes/settings.py
INSTALLED_APPS = [
    ...
    'corsheaders',
    ...
]
Add this middleware class to listen in on responses. Note: The CorsMiddleware should be placed before any middleware that can generate responses.
notes/settings.py
MIDDLEWARE = [
    ...,
    'corsheaders.middleware.CorsMiddleware',
    'django.middleware.common.CommonMiddleware',
    ...,
]
Now let’s configure the CORS middleware’s behavior by specifying the domains for CORS. Also, add CORS_ALLOW_CREDENTIALS = True so that cookies can be allowed in cross-site HTTP requests.
notes/settings.py
CORS_ALLOWED_ORIGINS = [
    "http://localhost:3000"
]
CORS_ALLOW_CREDENTIALS = True
After all the above configurations, your notes/settings.py file should look somewhat like this.
notes/settings.py
from pathlib import Path

# Build paths inside the project like this: BASE_DIR / 'subdir'.
BASE_DIR = Path(__file__).resolve().parent.parent


# Quick-start development settings - unsuitable for production
# See https://docs.djangoproject.com/en/4.1/howto/deployment/checklist/

# SECURITY WARNING: keep the secret key used in production secret!
SECRET_KEY = 'django-insecure-zt8*frb&#-fs&qe&x+qr!*z@9$ig)3w!^d#uie-q56@$ny^ap$'

# SECURITY WARNING: don't run with debug turned on in production!
DEBUG = True

ALLOWED_HOSTS = []

CORS_ALLOWED_ORIGINS = [
    "http://localhost:3000"
]
CORS_ALLOW_CREDENTIALS = True


# Application definition

INSTALLED_APPS = [
    'django.contrib.admin',
    'django.contrib.auth',
    'django.contrib.contenttypes',
    'django.contrib.sessions',
    'django.contrib.messages',
    'django.contrib.staticfiles',
    'corsheaders',
    'note_api',
    'rest_framework'
]

MIDDLEWARE = [
    'corsheaders.middleware.CorsMiddleware',
    'django.middleware.security.SecurityMiddleware',
    'django.contrib.sessions.middleware.SessionMiddleware',
    'django.middleware.common.CommonMiddleware',
    'django.middleware.csrf.CsrfViewMiddleware',
    'django.contrib.auth.middleware.AuthenticationMiddleware',
    'django.contrib.messages.middleware.MessageMiddleware',
    'django.middleware.clickjacking.XFrameOptionsMiddleware',
]

ROOT_URLCONF = 'notes.urls'

TEMPLATES = [
    {
        'BACKEND': 'django.template.backends.django.DjangoTemplates',
        'DIRS': [],
        'APP_DIRS': True,
        'OPTIONS': {
            'context_processors': [
                'django.template.context_processors.debug',
                'django.template.context_processors.request',
                'django.contrib.auth.context_processors.auth',
                'django.contrib.messages.context_processors.messages',
            ],
        },
    },
]

WSGI_APPLICATION = 'notes.wsgi.application'


# Database
# https://docs.djangoproject.com/en/4.1/ref/settings/#databases

DATABASES = {
    'default': {
        'ENGINE': 'django.db.backends.sqlite3',
        'NAME': BASE_DIR / 'db.sqlite3',
    }
}


# Password validation
# https://docs.djangoproject.com/en/4.1/ref/settings/#auth-password-validators

AUTH_PASSWORD_VALIDATORS = [
    {
        'NAME': 'django.contrib.auth.password_validation.UserAttributeSimilarityValidator',
    },
    {
        'NAME': 'django.contrib.auth.password_validation.MinimumLengthValidator',
    },
    {
        'NAME': 'django.contrib.auth.password_validation.CommonPasswordValidator',
    },
    {
        'NAME': 'django.contrib.auth.password_validation.NumericPasswordValidator',
    },
]


# Internationalization
# https://docs.djangoproject.com/en/4.1/topics/i18n/

LANGUAGE_CODE = 'en-us'

TIME_ZONE = 'UTC'

USE_I18N = True

USE_TZ = True


# Static files (CSS, JavaScript, Images)
# https://docs.djangoproject.com/en/4.1/howto/static-files/

STATIC_URL = 'static/'

# Default primary key field type
# https://docs.djangoproject.com/en/4.1/ref/settings/#default-auto-field

DEFAULT_AUTO_FIELD = 'django.db.models.BigAutoField'
Create the Migration File and Start the Server
Let’s create a database migration file for the NoteModel. The migration files will instruct Django on how to create the database tables. Run this command to generate the migration file.
python manage.py makemigrations
Now run the migrate command to push the migrations to the database
python manage.py migrate
After Django has pushed the schema to the database and synced the database schema with our model, run this command to start the HTTP server.
python manage.py runserver
Test the Django CRUD API
It’s now time to test the Django CRUD API. To do this, we’ll use an API testing tool like Postman, Insomnia, or Thunder client VS Code extension. You can import the collection I used in testing the API into Thunder client or Postman by following the steps below.
These steps are for Postman but the process should be similar for the Thunder client extension.
Step 1: Click on the Import button and then click the Choose Files button.
Step 2: In the file explorer, navigate to the Note App.postman_collection.json file in the Django project and choose it.
Step 3: Click on the Import button in the Import Elements tab to add the collection.
Create Note
To create a new note, make a POST request to the http://localhost:8000/api/notes/ endpoint with the JSON object.
{
    "title": "You'll learn how to build a CRUD API with Django",
    "content": "Django REST framework is really easy to use",
    "category": "Python"
}
The Django API will then validate the request body, add the new record to the database, and return the newly-created record to the API client or frontend app.

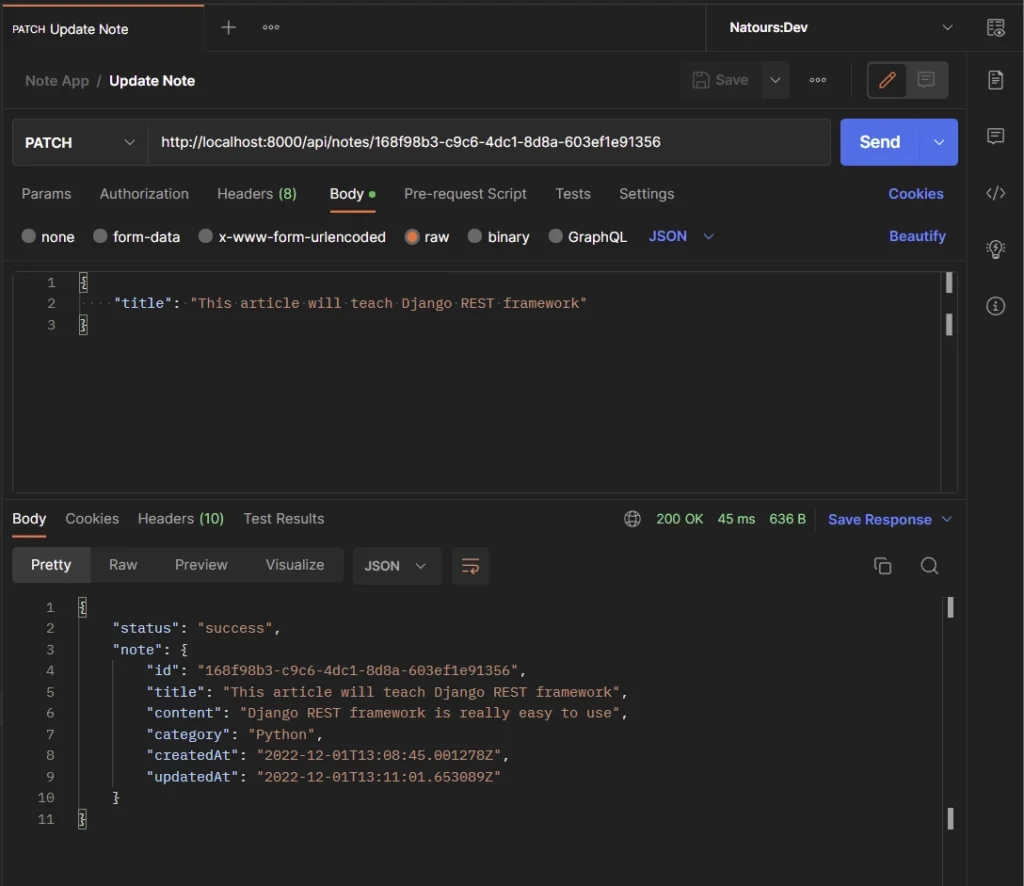
Update Note
To edit an existing note in the database, make a PATCH request to the http://localhost:8000/api/notes/{noteId} endpoint with the new data provided in the JSON object.
{
    "title": "This article will teach Django REST framework"
}
The Django API will validate the request payload, query the database to find the record that matches the provided ID, and update the fields in the found record.
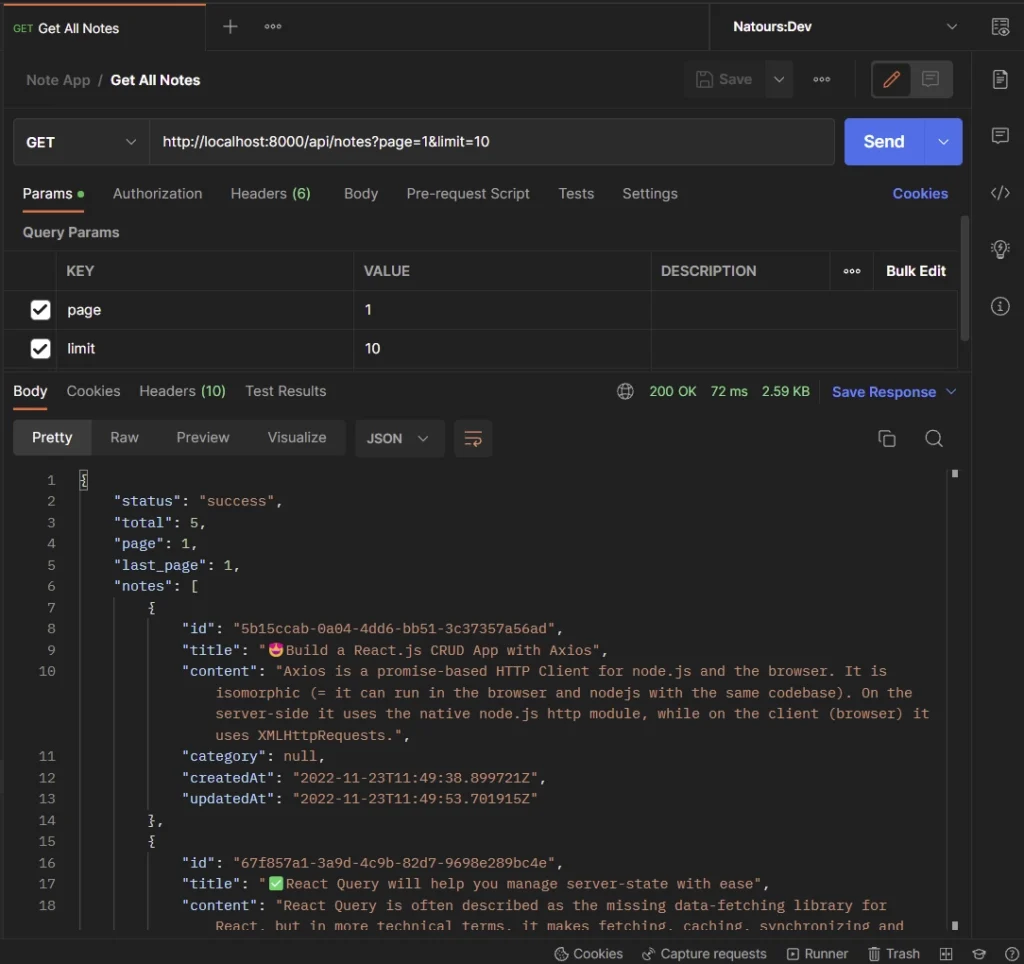
Get All Notes
To retrieve a list of records, make a GET request to the http://localhost:8000/api/notes/ endpoint. The Django API has a pagination feature so you can add a limit and page parameters in the URL to get a selected number of records.
If you don’t provide the page and limit parameters in the URL, the Django API will only return the first 10 records.
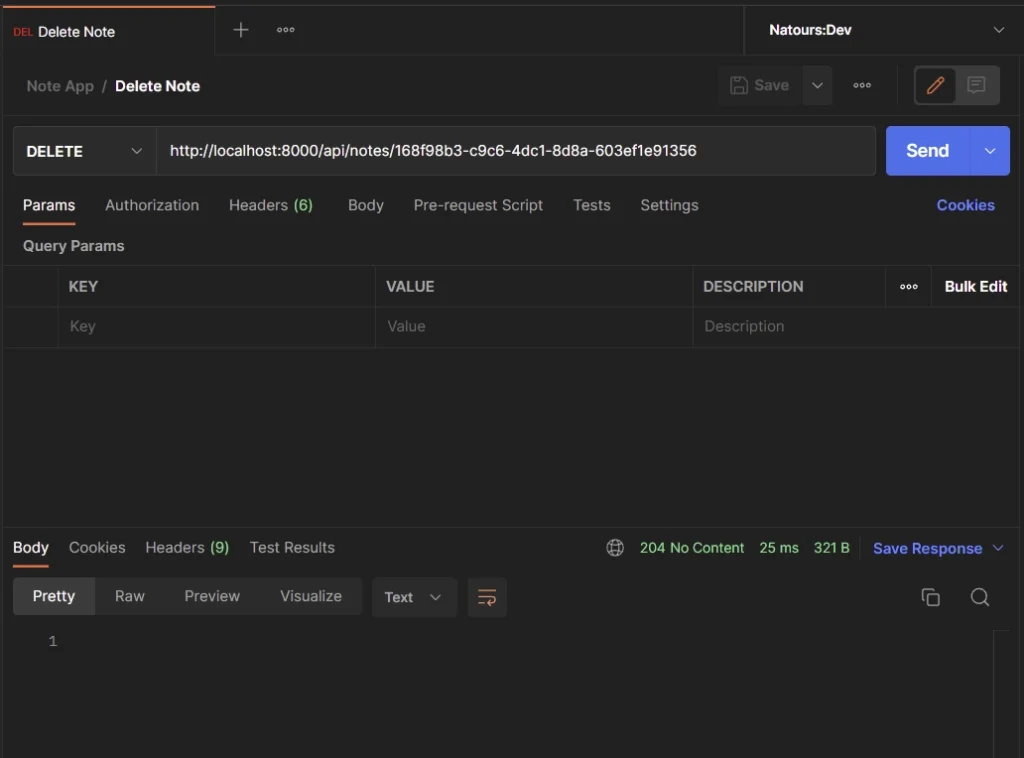
Delete Note
To delete a note item in the database, make a DELETE request to the http://localhost:8000/api/notes/{noteId} endpoint.
The Django API will query the database to find the record that matches the provided ID and remove the found record from the database.
After that, a 204 status code will be returned to the client or frontend app to indicate that the record was deleted.
Create Documentation for the CRUD API
It’s a good practice to provide documentation for an API to help other people understand the various endpoints of the API and how to interact with it. We’ll use the drf-yasg package to automatically generate Swagger/OpenAPI 2.0 schemas from the Django REST framework code.
Install drf-yasg and coreapi libraries with this command. The coreapi package will add schema support for the Django REST framework.
pip install -U drf-yasg[validation] coreapi
In the notes/settings.py file, add the drf_yasg package to the list of installed apps.
INSTALLED_APPS = [
    'django.contrib.admin',
    'django.contrib.auth',
    'django.contrib.contenttypes',
    'django.contrib.sessions',
    'django.contrib.messages',
    'django.contrib.staticfiles',
    'corsheaders',
    'note_api',
    'rest_framework',
    'drf_yasg',
]
To add the Swagger UI and ReDoc URLs to the project, open the notes/urls.py file and replace its content with the following code.
from django.contrib import admin
from django.urls import path, include, re_path
from rest_framework import permissions
from drf_yasg.views import get_schema_view
from drf_yasg import openapi

schema_view = get_schema_view(
    openapi.Info(
        title="Notes API",
        default_version='v1',
        description="Note API built by CodevoWeb",
        terms_of_service="https://www.google.com/policies/terms/",
        contact=openapi.Contact(email="contact@snippets.local"),
        license=openapi.License(name="BSD License"),
    ),
    public=True,
    permission_classes=[permissions.AllowAny],
)

urlpatterns = [
    path('admin/', admin.site.urls),
    path('api/notes/', include('note_api.urls')),
    re_path(r'^swagger(?P<format>\.json|\.yaml)$',
            schema_view.without_ui(cache_timeout=0), name='schema-json'),
    re_path(r'^swagger/$', schema_view.with_ui('swagger',
            cache_timeout=0), name='schema-swagger-ui'),
    re_path(r'^redoc/$', schema_view.with_ui('redoc',
            cache_timeout=0), name='schema-redoc'),
]
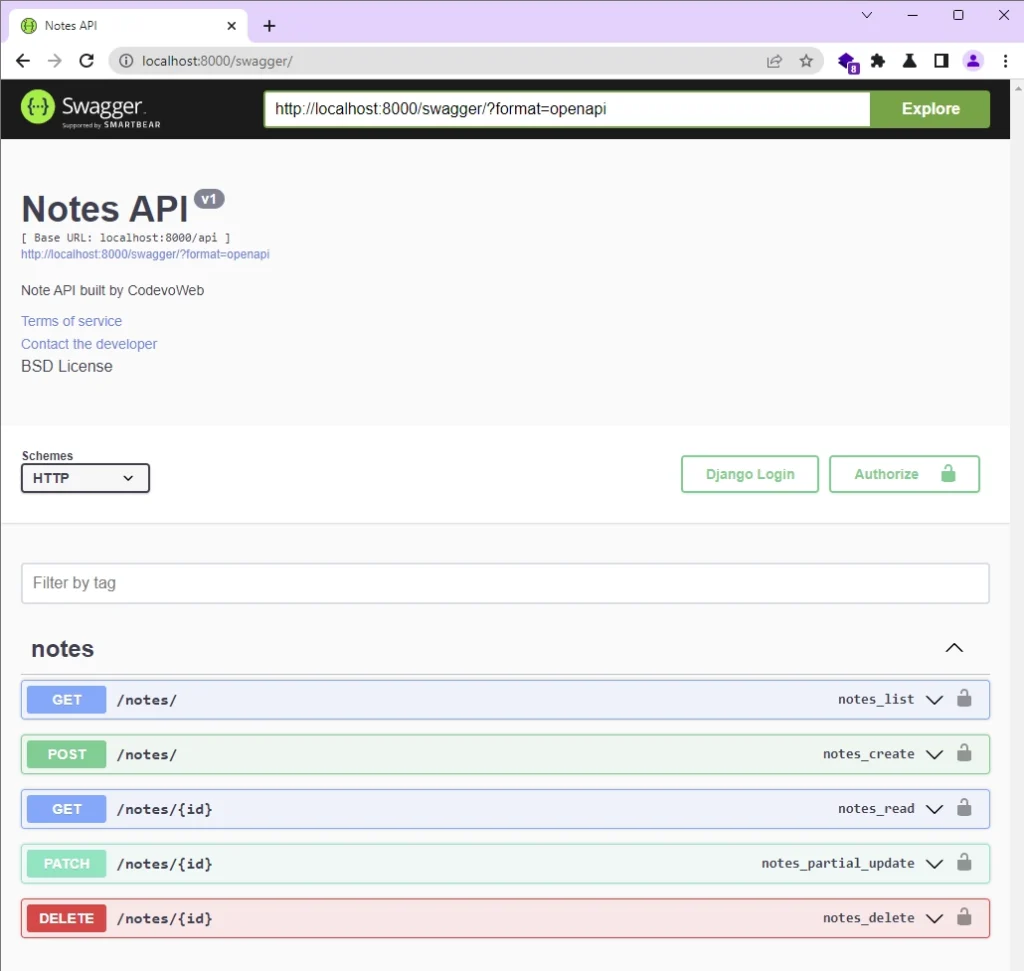
After that, start the Django HTTP server and visit http://localhost:8000/swagger/ to see the CRUD API documentation in Swagger docs.
Conclusion
Oops, quite a lot of code. If you made it this far, am proud of you. In this article, you learned how to build a CRUD API with Django REST framework. You also learned how to generate API documentation for the API endpoints.
You can find the source code of the Django CRUD API on GitHub.