
In this article, I’ll provide you with a simple and straightforward guide on how you can build a CRUD app with FastAPI and SQLAlchemy. The FastAPI app will run on a Starlette web server, use Pydantic for data validation, and store data in an SQLite database.
The default database for this article is SQLite but I’ll allocate a section in this tutorial to guide you on how to set up a Postgres server with Docker and adjust the code to work with the running PostgreSQL database.
More practice:
- CRUD RESTful API Server with Python, FastAPI, and MongoDB
- Node.js, Express, TypeORM, PostgreSQL: CRUD Rest API
- Build CRUD RESTful API Server with Golang, Gin, and MongoDB
- Next.js Full-Stack App with React Query, and GraphQL-CodeGen
- Build Full-Stack tRPC CRUD Application with Node.js, and React.js
- GraphQL CRUD API with Next.js, MongoDB, and TypeGraphQL

Prerequisites
Before proceeding with this tutorial, these prerequisites are needed to get the most out of the course.
- Have the latest version of Python installed on your machine. For FastAPI to work correctly, your Python version must be 3.7+.
- Some basic knowledge of Python will be beneficial
- Have basic knowledge of API designs
Run the SQLAlchemy FastAPI App Locally
- Download or clone the SQLAlchemy CRUD source code from https://github.com/wpcodevo/fastapi_sqlalchemy and open the project with an IDE.
- Open the integrated terminal in your IDE or text editor and run the following command to create a virtual environment:
- Windows OS –
python -m venv venv - Mac or Linux OS –
python3 -m venv venv
- Windows OS –
- If prompted by your IDE, click “Yes” to activate the virtual environment for the workspace.

If by any chance your IDE or text editor didn’t prompt you to activate the virtual environment, run the command below to manually activate it in the workspace.- Windows OS (Command Prompt ) –
venv\Scripts\activate.bat. - Windows OS (Git Bash) –
venv/Scripts/activate.bat. - Mac or Linux OS –
source venv/bin/activate
- Windows OS (Command Prompt ) –
- Install all the modules required for the project by running
pip install -r requirements.txt - Run
uvicorn app.main:app --reloadto start the FastAPI HTTP server on port 8000. - Set up the frontend app to test the CRUD API or make the requests from an API testing tool.
Run the Frontend App Locally
- Download or clone the React.js CRUD app source code from https://github.com/wpcodevo/reactjs-crud-note-app and open the project with an IDE or text editor.
- Open the integrated terminal in your text editor and run
yarnoryarn installto install all the required dependencies. - Start the Vite development server on port 3000 with
yarn dev - Open a new tab in your browser and visit http://localhost:3000/ to test the CRUD app against the backend API.
Setup FastAPI and Run the HTTP Server
At the end of this comprehensive guide, your folder structure will look like this:
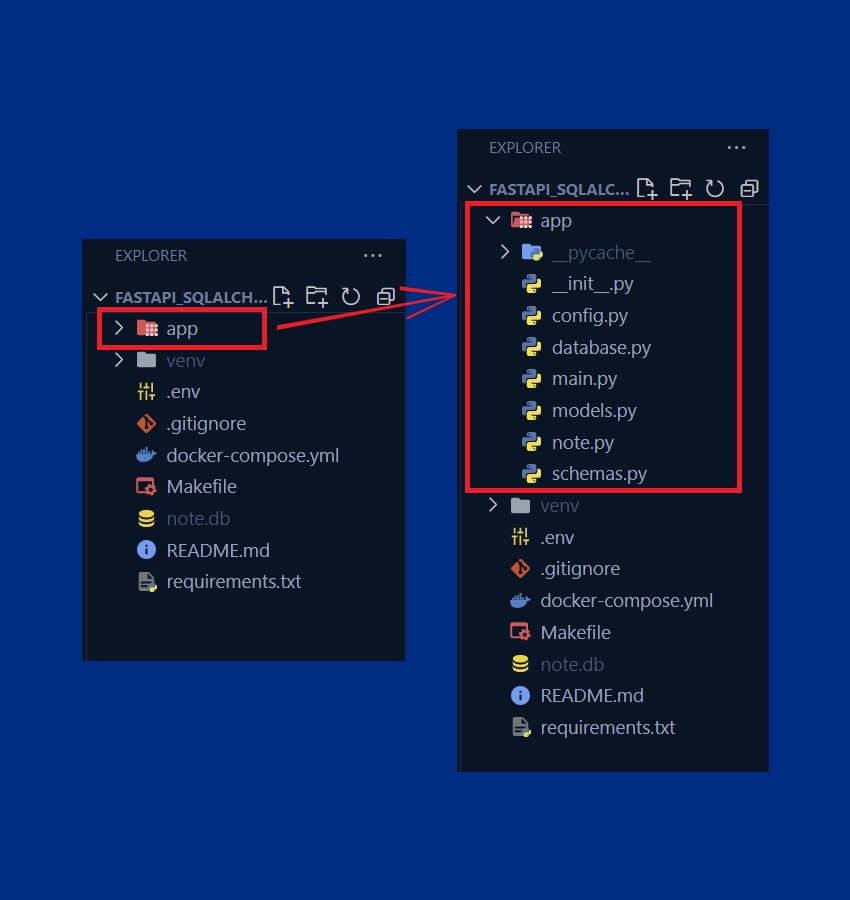
I’ll use VS Code throughout the whole tutorial since it has all the features I need to develop a Python API. However, feel free to use any IDE or text editor.
First things first, create a new project directory at the location where you want the project source code to reside and open it with your preferred IDE. You can name the project fastapi_sqlalchemy .
$ mkdir fastapi_sqlalchemy
$ cd fastapi_sqlalchemy
$ code . # opens the project with VS Code
Before we can install the project’s dependencies, we need to create and activate a virtual environment in the current workspace. To create the virtual environment, run the command below based on your operating system.
Windows Machine:
$ py -3 -m venv venvmacOS Machine:
$ python3 -m venv venvWhen your IDE or text editor prompts you to activate the virtual environment in the workspace, click on the “Yes” button.
Alternatively, create a app/main.py file to make your IDE or text editor prepare the Python development environment and run the following command to manually activate the virtual environment.
- Windows OS (Command Prompt ) –
venv\Scripts\activate.bat. - Windows OS (Git Bash) –
venv/Scripts/activate.bat. - Mac or Linux OS –
source venv/bin/activate
If by any chance you’re also using VS Code, you can close and reopen your integrated terminal to activate the virtual environment.
Now create an empty app/__init__.py file to turn the app directory into a Python module.
Use this command to install FastAPI and its peer dependencies:
pip install fastapi[all]
Next, open the app/main.py file and add this code:
from fastapi import FastAPI

app = FastAPI()


@app.get("/api/healthchecker")
def root():
    return {"message": "Welcome to FastAPI with SQLAlchemy"}
In the above, we imported the FastAPI class, initialized the app by evoking theFastAPI() method, and added a /api/healthchecker route to the middleware pipeline.
Run this command to start the FastAPI HTTP server with Uvicorn.
uvicorn app.main:app --host localhost --port 8000 --reload
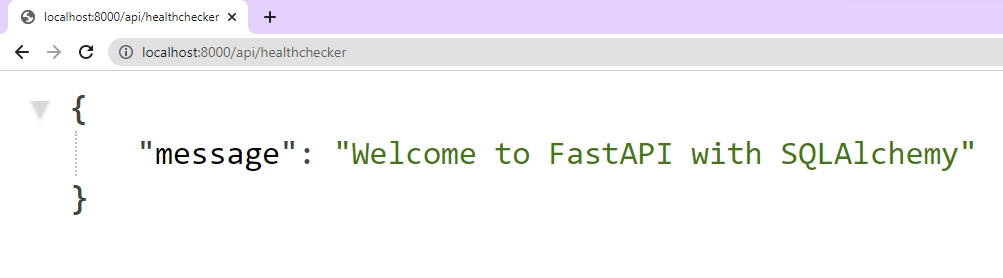
Once the FastAPI server is listening on port 8000, open a new tab in your browser and visit http://localhost:8000/api/healthchecker to see the JSON object sent by the server.
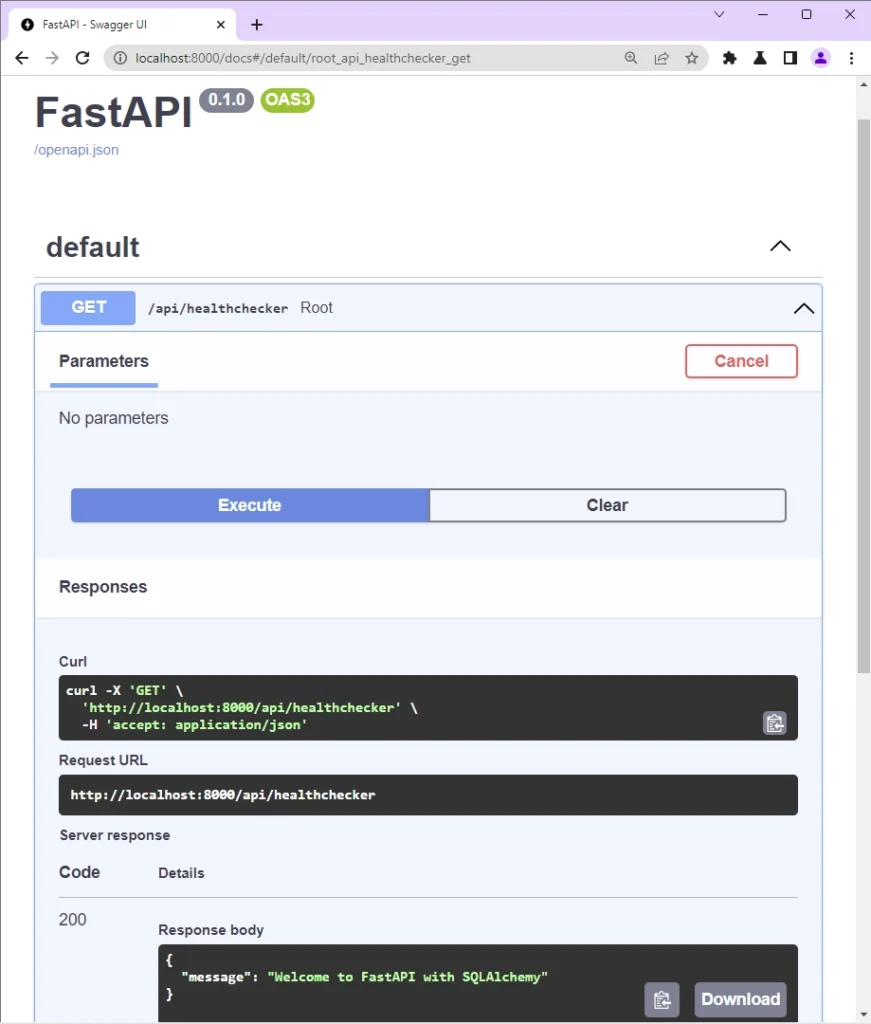
Alternatively, you can make the same request on the Swagger docs generated by FastAPI. Navigate to http://localhost:8000/docs to see the API documentation.
Designing the CRUD API
The main objective of this article is to design a RESTful API that has CRUD functionalities. SQLAchemy already provides us with low-level CRUD functions that we can use to retrieve and mutate data in the database but we’ll create our own higher-level CRUD functions called path operation functions to evoke the lower-level CRUD methods.
Below is a table containing the routes that we’ll define on the API, and their corresponding HTTP verbs.
| RESOURCE | HTTP METHOD | ROUTE | DESCRIPTION |
|---|---|---|---|
| notes | GET | /api/notes | Retrieve all notes |
| notes | POST | /api/notes | Add a new note |
| notes | GET | /api/notes/{noteId} | Get a single note |
| notes | PATCH | /api/notes/{noteId} | Edit a note |
| notes | DELETE | /api/notes/{noteId} | Remove a note |
As you can see, the HTTP verb dictates the type of operation that will be performed on the database. For example, the endpoint responsible for editing a record has the PATCH HTTP method. The {noteId} is simply a placeholder that will be replaced with the ID of a record.
To get our feet wet, open the app/main.py file and replace its content with the following CRUD path operation functions.
app/main.py
from fastapi import FastAPI, APIRouter, status

app = FastAPI()
router = APIRouter()


@router.get('/')
def get_notes():
    return "return a list of note items"


@router.post('/', status_code=status.HTTP_201_CREATED)
def create_note():
    return "create note item"


@router.patch('/{noteId}')
def update_note(noteId: str):
    return f"update note item with id {noteId}"


@router.get('/{noteId}')
def get_note(noteId: str):
    return f"get note item with id {noteId}"


@router.delete('/{noteId}')
def delete_note(noteId: str):
    return f"delete note item with id {noteId}"


app.include_router(router, tags=['Notes'], prefix='/api/notes')


@app.get("/api/healthchecker")
def root():
    return {"message": "Welcome to FastAPI with SQLAlchemy"}
Quite a lot is going on in the above, let’s break it down:
- First, we imported the necessary modules at the top level of the file.
- Then, we instantiated the FastAPI class and assigned it to an app variable. Also, we created an instance of the APIRouter class and assigned it to a router variable.
- After that, we created the CRUD path operation functions on the router and registered the router on the app with the
app.include_router()method.
Now start the FastAPI HTTP server by running this command in the terminal of the root directory.
uvicorn app.main:app --host localhost --port 8000 --reload
Once the server is ready to accept requests on port 8000, navigate to http://localhost:8000/docs to see the auto-generated Swagger docs. The API documentation is based on the endpoints we defined on the FastAPI server.
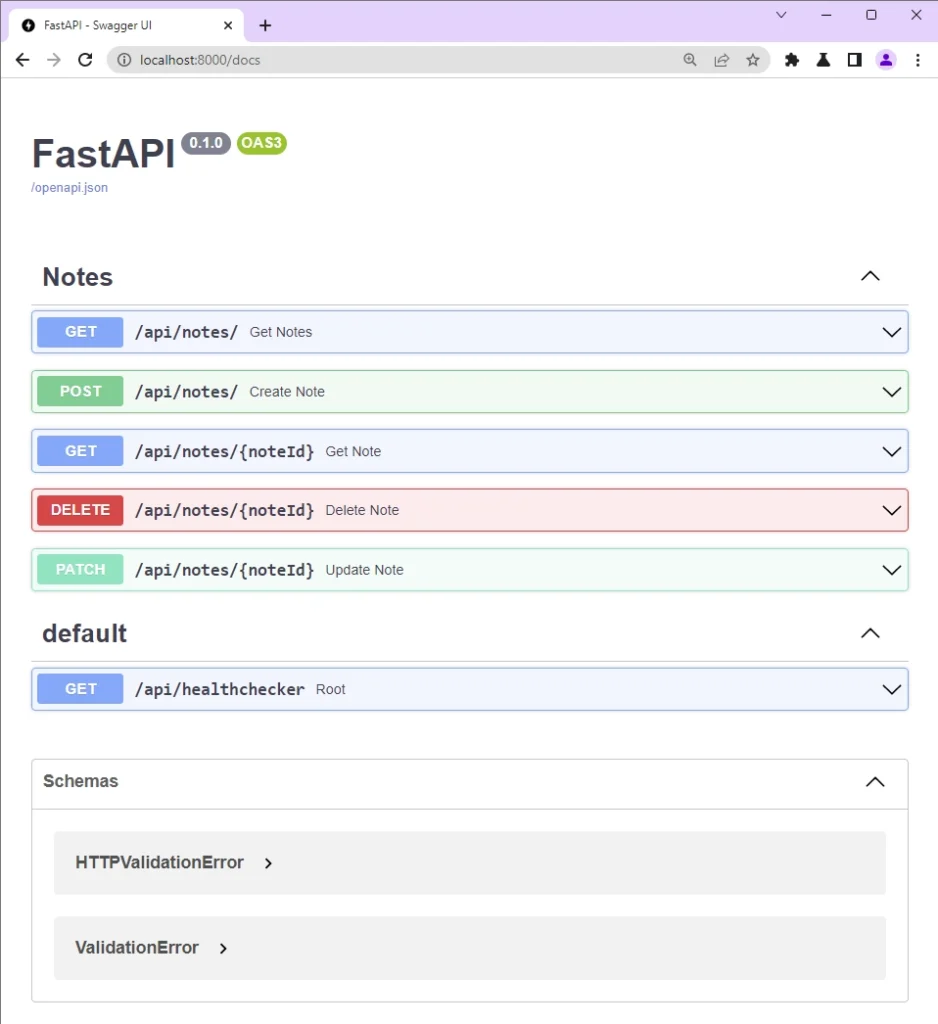
To test each route, click on the dropdown and click the “Try it out” button.
Setup SQLAlchemy with SQLite
In this section, you’ll create a SQLAlchemy engine and connect the app to a SQLite database. Before that, open your terminal and install these dependencies.
pip install SQLAlchemy fastapi-utils
SQLAlchemy– An ORM for Pythonfastapi-utils– This package includes a hand full of utilities including the function that we’ll use to generate UUID for each record.
As you may have noticed, we didn’t install any SQLite driver since all modern versions of Python come with the sqlite3 module.
Now create a app/database.py file and add the following code.
app/database.py
from sqlalchemy import create_engine
from sqlalchemy.ext.declarative import declarative_base
from sqlalchemy.orm import sessionmaker

SQLITE_DATABASE_URL = "sqlite:///./note.db"

engine = create_engine(
    SQLITE_DATABASE_URL, echo=True, connect_args={"check_same_thread": False}
)
SessionLocal = sessionmaker(autocommit=False, autoflush=False, bind=engine)

Base = declarative_base()


def get_db():
    db = SessionLocal()
    try:
        yield db
    finally:
        db.close()
Let’s break down the above code:
- First, we imported the parts of SQLAlchemy and created the SQLite database URL.
- Then, we created the SQLAlchemy engine and provided it with the database URL. By default, SQLite only allows one thread for communication in order to prevent different requests from sharing the same connection.
Since we are using FastAPI, we need to provide the"check_same_thread": Falseoption in the connection arguments because each path operation function will get its own database session in a dependency, so there’s no need for that default mechanism. - Next, we created SessionLocal and Base classes by evoking
sessionmaker()anddeclarative_base()respectively. - Finally, we created a get_db function that will create a new database session and close the session after the operation has ended.
Setup SQLAlchemy with PostgreSQL
Follow the steps in this section If you prefer a PostgreSQL database instead of SQLite. However, if you decided to go with SQLite then skip this section.
The goal of this section is to help you set up a PostgreSQL instance with Docker and connect the instance to the FastAPI app using SQLAlchemy. To do this, open your terminal and install these modules.
pip install SQLAlchemy fastapi-utils psycopg2
SQLAlchemy– An ORM for Pythonfastapi-utils– A utility package that will help us generate GUIDs for the ID columns.psycopg2– A PostgreSQL database adapter for SQLAlchemy
With that out of the way, create a docker-compose.yml file in the root directory and add the following Docker Compose configurations.
docker-compose.yml
version: '3'
services:
  postgres:
    image: postgres
    container_name: postgres
    ports:
      - '6500:5432'
    restart: always
    env_file:
      - ./.env
    volumes:
      - postgres-db:/var/lib/postgresql/data
volumes:
  postgres-db:
When the above code is executed, Docker Compose will pull the latest Postgres image from Docker-Hub, build the image with the credentials provided in a .env file, and map port 6500 to the running Postgres instance.
To make the credentials available to Docker-compose, create a .env file and add the following environment variables.
.env
DATABASE_PORT=6500
POSTGRES_PASSWORD=password123
POSTGRES_USER=postgres
POSTGRES_DB=fastapi
POSTGRES_HOST=postgres
POSTGRES_HOSTNAME=127.0.0.1
Run this command to start the Postgres server:
docker-compose up -d
Now that we have the Postgres server running in the Docker container, let’s write some code to make the environment variables available to the FastAPI app. Luckily, Pydantic has a feature for doing that, so create a app/config.py file and add the following code.
app/config.py
from pydantic import BaseSettings


class Settings(BaseSettings):
    DATABASE_PORT: int
    POSTGRES_PASSWORD: str
    POSTGRES_USER: str
    POSTGRES_DB: str
    POSTGRES_HOST: str
    POSTGRES_HOSTNAME: str

    class Config:
        env_file = './.env'


settings = Settings()
To connect the FastAPI app to the running Postgres instance, create a app/database.py file and add this code.
app/database.py
from sqlalchemy import create_engine
from sqlalchemy.ext.declarative import declarative_base
from sqlalchemy.orm import sessionmaker
from .config import settings
from fastapi_utils.guid_type import setup_guids_postgresql

POSTGRES_URL = f"postgresql://{settings.POSTGRES_USER}:{settings.POSTGRES_PASSWORD}@{settings.POSTGRES_HOSTNAME}:{settings.DATABASE_PORT}/{settings.POSTGRES_DB}"

engine = create_engine(
    POSTGRES_URL, echo=True
)
setup_guids_postgresql(engine)
SessionLocal = sessionmaker(autocommit=False, autoflush=False, bind=engine)

Base = declarative_base()


def get_db():
    db = SessionLocal()
    try:
        yield db
    finally:
        db.close()
We constructed the PostgreSQL database connection URL with the variables stored in the .env file and passed it SQLAlchemy’s create_engine() method.
The UUIDs can only be generated if the pgcrypto extension is installed on the Postgres instance, so the setup_guids_postgresql() function will tell Postgres to install the extension if it doesn’t exist.
Create Database Model with SQLAlchemy
We are now ready to create the database models that SQLAlchemy will use to generate the SQL tables in the database. To avoid confusion between the SQLAlchemy and Pydantic models, we’ll use the file models.py for the SQLAlchemy models and schemas.py for the Pydantic models.
Database Model for SQLite Database
If you went with an SQLite database, create a app/models.py file and add the code below.
app/models.py
from .database import Base
from sqlalchemy import TIMESTAMP, Column, String, Boolean
from sqlalchemy.sql import func
from fastapi_utils.guid_type import GUID, GUID_DEFAULT_SQLITE


class Note(Base):
    __tablename__ = 'notes'
    id = Column(GUID, primary_key=True, default=GUID_DEFAULT_SQLITE)
    title = Column(String, nullable=False)
    content = Column(String, nullable=False)
    category = Column(String, nullable=True)
    published = Column(Boolean, nullable=False, default=True)
    createdAt = Column(TIMESTAMP(timezone=True),
                       nullable=False, server_default=func.now())
    updatedAt = Column(TIMESTAMP(timezone=True),
                       default=None, onupdate=func.now())
We imported the Base class from the app/database.py file and created a database model that has the fields required to add a new record to the database. The __tablename__ attribute tells SQLAlchemy to use the provided string as the table name in the database.
Database Model for Postgres Database
If you choose a PostgreSQL database, create a app/models.py file and add the code below.
app/models.py
from .database import Base
from sqlalchemy import TIMESTAMP, Column, String, Boolean
from sqlalchemy.sql import func
from fastapi_utils.guid_type import GUID, GUID_SERVER_DEFAULT_POSTGRESQL


class Note(Base):
    __tablename__ = 'notes'
    id = Column(GUID, primary_key=True,
                server_default=GUID_SERVER_DEFAULT_POSTGRESQL)
    title = Column(String, nullable=False)
    content = Column(String, nullable=False)
    category = Column(String, nullable=True)
    published = Column(Boolean, nullable=False, server_default='True')
    createdAt = Column(TIMESTAMP(timezone=True),
                       nullable=False, server_default=func.now())
    updatedAt = Column(TIMESTAMP(timezone=True),
                       default=None, onupdate=func.now())
Create Validation Schemas with Pydantic
Let’s create the Pydantic schemas that FastAPI will use to parse and validate the incoming request payloads.
app/schemas.py
from datetime import datetime
from typing import List
from pydantic import BaseModel


class NoteBaseSchema(BaseModel):
    id: str | None = None
    title: str
    content: str
    category: str | None = None
    published: bool = False
    createdAt: datetime | None = None
    updatedAt: datetime | None = None

    class Config:
        orm_mode = True
        allow_population_by_field_name = True
        arbitrary_types_allowed = True


class ListNoteResponse(BaseModel):
    status: str
    results: int
    notes: List[NoteBaseSchema]
Setting orm_mode = True in the Config class tells Pydantic to map the models to ORM objects. This is required since we’re using SQLAlchemy ORM in the project.
Define the Path Operation Functions
In this section, you’ll create five path operation functions that FastAPI will use to perform the CRUD operations against the database. These route handlers are considered to be higher-level and they’ll have the ability to call the lower-level CRUD functions provided by SQLAlchemy.
get_notes– This path operation function will retrieve a selected number of note items from the database.create_note– This path operation function will add a new note item to the database.update_note– This path operation function will edit an existing note item in the database.get_post– This path operation function will retrieve a single note item from the database.delete_post– This path operation function will delete a note item in the database.
To begin, create a app/note.py file and add the following dependencies. Also, create a new router by evoking the APIRouter class.
app/note.py
from . import schemas, models
from sqlalchemy.orm import Session
from fastapi import Depends, HTTPException, status, APIRouter, Response
from .database import get_db

router = APIRouter()
Get All Records
The first path operation function will perform a READ operation and it will be called to retrieve a paginated list of the records in the database. When a GET request hits the /api/notes endpoint, FastAPI will evoke this controller to handle the request.
The features included in this path operation function include:
- Search Feature
- Result limiting Feature
- Pagination Feature
app/note.py
# [...] get all records
@router.get('/')
def get_notes(db: Session = Depends(get_db), limit: int = 10, page: int = 1, search: str = ''):
    skip = (page - 1) * limit

    notes = db.query(models.Note).filter(
        models.Note.title.contains(search)).limit(limit).offset(skip).all()
    return {'status': 'success', 'results': len(notes), 'notes': notes}
Let’s evaluate the above code:
- First, we created a statement that calculates the number of records to skip in the database using the page and limit parameters provided in the request URL.
- Then, we constructed the database query by chaining SQLAlchemy’s
.query(),.filter(),.limit(), and.offset()methods. - After that, we executed the query by calling the
.all()method to return all the records that match our query as a list of objects.
Create a Record
The second path operation function will perform a CREATE operation and it will be called to add a new record to the database. When a POST request is made to the /api/notes endpoint, FastAPI will call this route handler to add the data provided in the request body to the database.
app/note.py
# [...] get all records

# [...] create record
@router.post('/', status_code=status.HTTP_201_CREATED)
def create_note(payload: schemas.NoteBaseSchema, db: Session = Depends(get_db)):
    new_note = models.Note(**payload.dict())
    db.add(new_note)
    db.commit()
    db.refresh(new_note)
    return {"status": "success", "note": new_note}
We created an instance of the SQLAlchemy model and passed the instance to the .add() method. The add() method only registers a transaction operation without communicating it to the database.
Once the transaction has been created, the .commit() method will be called to persist the data permanently in the database. The refresh method will then get an up-to-date version of the newly-created record.
Update a Record
The third path operation function will handle the UPDATE operation and it will be called to edit a record in the database. When a PATCH request gets to the server, FastAPI will call this route controller to handle the request.
app/note.py
# [...] get all records

# [...] create record

# [...] edit record
@router.patch('/{noteId}')
def update_note(noteId: str, payload: schemas.NoteBaseSchema, db: Session = Depends(get_db)):
    note_query = db.query(models.Note).filter(models.Note.id == noteId)
    db_note = note_query.first()

    if not db_note:
        raise HTTPException(status_code=status.HTTP_404_NOT_FOUND,
                            detail=f'No note with this id: {noteId} found')
    update_data = payload.dict(exclude_unset=True)
    note_query.filter(models.Note.id == noteId).update(update_data,
                                                       synchronize_session=False)
    db.commit()
    db.refresh(db_note)
    return {"status": "success", "note": db_note}
In the above code, we created the database query by chaining the .query() and .filter() methods. After that, we evoked the .first() method to return the first record that matches our query.
Next, we called the .dict() method on the payload JSON object and assigned the result to the update_data variable before passing it to the .update() method.
Finally, we called the .commit() method to persist the data in the database and returned the updated record to the client.
Retrieve a Single Record
The fourth path operation function will also perform a READ operation to return a single record from the database. When a GET request is made to the /api/notes/{noteId} endpoint, FastAPI will evoke this route controller to retrieve the record that matches the query from the database and return the result to the client.
app/note.py
# [...] get all records

# [...] create record

# [...] edit record

# [...] get single record
@router.get('/{noteId}')
def get_post(noteId: str, db: Session = Depends(get_db)):
    note = db.query(models.Note).filter(models.Note.id == noteId).first()
    if not note:
        raise HTTPException(status_code=status.HTTP_404_NOT_FOUND,
                            detail=f"No note with this id: {id} found")
    return {"status": "success", "note": note}
Delete a Single Record
The fifth and final path operation function will perform a DELETE operation to remove a single record from the database. When a DELETE request is made to the /api/notes/{noteId} endpoint, FastAPI will evoke this route controller to remove the record that matches the query.
app/note.py
# [...] get all records

# [...] create record

# [...] edit record

# [...] get single record

# [...] delete record
@router.delete('/{noteId}')
def delete_post(noteId: str, db: Session = Depends(get_db)):
    note_query = db.query(models.Note).filter(models.Note.id == noteId)
    note = note_query.first()
    if not note:
        raise HTTPException(status_code=status.HTTP_404_NOT_FOUND,
                            detail=f'No note with this id: {id} found')
    note_query.delete(synchronize_session=False)
    db.commit()
    return Response(status_code=status.HTTP_204_NO_CONTENT)
The route handler will first query the database to check if a record with that ID exists before the .delete() method will be called to remove that record from the database.
Complete Path Operation Functions
app/note.py
from datetime import datetime
from . import schemas, models
from sqlalchemy.orm import Session
from fastapi import Depends, HTTPException, status, APIRouter, Response
from .database import get_db

router = APIRouter()


@router.get('/')
def get_notes(db: Session = Depends(get_db), limit: int = 10, page: int = 1, search: str = ''):
    skip = (page - 1) * limit

    notes = db.query(models.Note).filter(
        models.Note.title.contains(search)).limit(limit).offset(skip).all()
    return {'status': 'success', 'results': len(notes), 'notes': notes}


@router.post('/', status_code=status.HTTP_201_CREATED)
def create_note(payload: schemas.NoteBaseSchema, db: Session = Depends(get_db)):
    new_note = models.Note(**payload.dict())
    db.add(new_note)
    db.commit()
    db.refresh(new_note)
    return {"status": "success", "note": new_note}


@router.patch('/{noteId}')
def update_note(noteId: str, payload: schemas.NoteBaseSchema, db: Session = Depends(get_db)):
    note_query = db.query(models.Note).filter(models.Note.id == noteId)
    db_note = note_query.first()

    if not db_note:
        raise HTTPException(status_code=status.HTTP_404_NOT_FOUND,
                            detail=f'No note with this id: {noteId} found')
    update_data = payload.dict(exclude_unset=True)
    note_query.filter(models.Note.id == noteId).update(update_data,
                                                       synchronize_session=False)
    db.commit()
    db.refresh(db_note)
    return {"status": "success", "note": db_note}


@router.get('/{noteId}')
def get_post(noteId: str, db: Session = Depends(get_db)):
    note = db.query(models.Note).filter(models.Note.id == noteId).first()
    if not note:
        raise HTTPException(status_code=status.HTTP_404_NOT_FOUND,
                            detail=f"No note with this id: {id} found")
    return {"status": "success", "note": note}


@router.delete('/{noteId}')
def delete_post(noteId: str, db: Session = Depends(get_db)):
    note_query = db.query(models.Note).filter(models.Note.id == noteId)
    note = note_query.first()
    if not note:
        raise HTTPException(status_code=status.HTTP_404_NOT_FOUND,
                            detail=f'No note with this id: {id} found')
    note_query.delete(synchronize_session=False)
    db.commit()
    return Response(status_code=status.HTTP_204_NO_CONTENT)
Connect the API Router to the App
Now that we have defined all the CRUD path operation functions, let’s add the router to the FastAPI app, evoke the .metadata.create_all() method to create the SQL table in the SQLite database, and configure the app to accept cross-origin domains.
To achieve that, open the app/main.py file and replace its content with the following code.
app/main.py
from app import models, note
from fastapi import FastAPI
from fastapi.middleware.cors import CORSMiddleware
from .database import engine

models.Base.metadata.create_all(bind=engine)

app = FastAPI()

origins = [
    "http://localhost:3000",
]

app.add_middleware(
    CORSMiddleware,
    allow_origins=origins,
    allow_credentials=True,
    allow_methods=["*"],
    allow_headers=["*"],
)


app.include_router(note.router, tags=['Notes'], prefix='/api/notes')


@app.get("/api/healthchecker")
def root():
    return {"message": "Welcome to FastAPI with SQLAlchemy"}
Quite a lot is happening in the above, let’s break it down:
- At the top level of the file, we imported the required modules including the CORSMiddleware class and the engine we defined in the
app/database.pyfile. - We evoked the
.Base.metadata.create_all()method available on the SQLAlchemy model to create the SQL table stored in the metadata. - Then, we created a list of the allowed origins and evoked the
.add_middleware()method with the necessary CORS configurations. - Finally, we used the
.include_router()method to add the router to the middleware stack.
Conclusion
In this tutorial, you learned how to create a CRUD app with FastAPI, SQLAlchemy ORM, and a SQLite database. Also, you learned how to create validation schemas with Pydantic, and database models with SQLAlchemy.
You can find the complete source code of the FastAPI CRUD App at https://github.com/wpcodevo/fastapi_sqlalchemy.