Visual Studio Code, also commonly referred to as VS Code, is undoubtedly one of the most popular Integrated Development Environments (IDEs) because it is highly extensible and has over 35,000 extensions in the marketplace to supercharge it.
In this article, I will share a curated list of the top 10 VS Code extensions for SvelteKit and Svelte developers that will improve your productivity and make you more efficient.
The extensions are going to be based on two categories – visual and functional extensions. Visual extensions are an aesthetic upgrade to the IDE in terms of colors, themes, fonts, and formats. Functional extensions on the other hand add more superpower to the IDE making it perform tasks more efficiently and faster.
You can also read:
- Top 10 Best VS Code Extensions for React Developers
- Top 10 Best VS Code Extensions for Vue.js Developers
- 25 VS Code Productivity Tips and Speed Hacks
- Top 21 VS Code Shortcuts Every Programmer Should Master
- Top 10 VS Code Extensions for C# and .NET Development

1. Svelte for VS Code

By default, Svelte components or code in VS Code have no syntax highlighting or IntelliSense. When you open a Svelte code without the Svelte for VS Code extension installed, you should see something like this which isn’t pretty.
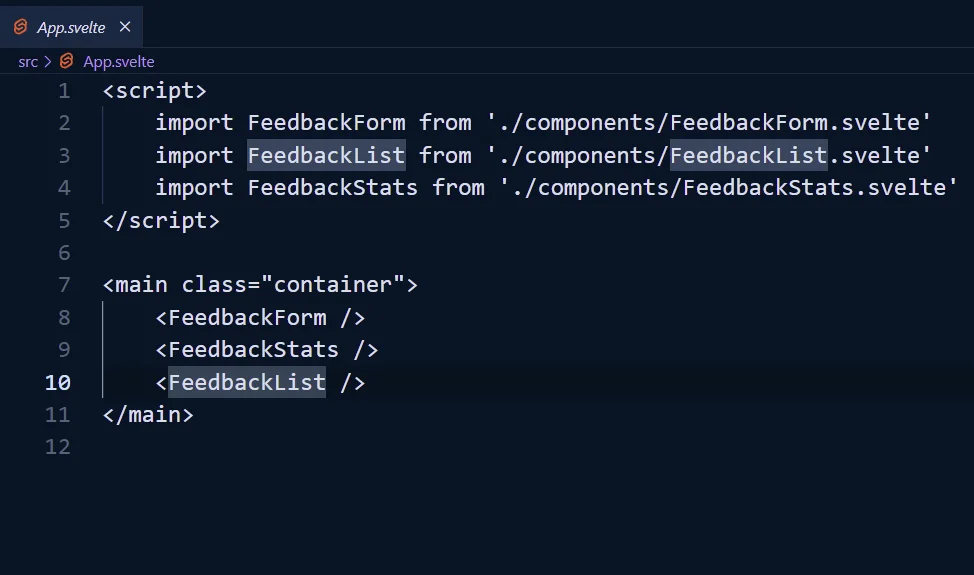
VS Code will automatically detect the Svelte code and show a popup asking you to install the recommended extensions.

When you click on the install button, VS Code will go ahead and install the Svelte for VS Code extension. With the Svelte for VS Code extension enabled, you should get beautiful syntax highlighting, code formatting via prettier-plugin-svelte, autocompletion, CSS Color highlighting, error checking, hover info, and many more features.
The extension also comes bundled with a TypeScript plugin, which VS Code will automatically show a popup asking you to enable it after the Svelte extension has been installed.
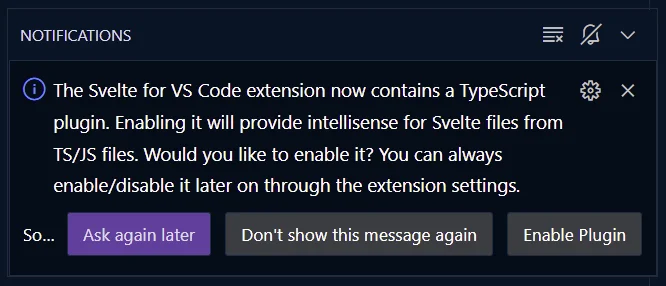
Once you enable the TypeScript plugin, you will get great IntelliSense within JavaScript and TypeScript files for interacting with Svelte files.
2. Svelte Intellisense
Despite the official Svelte extension for VS Code having some IntelliSense backed into it, the Svelte Intellisense extension takes IntelliSense to the next level. This extension provides IntelliSense for data, events, slots, bind, import statements, and many more in Svelte components.
By default, the extension supports the go-to definition VSCode feature that allows you to quickly navigate between components and references.
You can also hover over a component in the template markup, import statement, and components section to see its documentation.
Visit the Svelte Intellisense extension page in the VS Code extension marketplace to see a visual demonstration of all the features the extension provides.
3. Svelte 3 Snippets
One of the things most Svelte developers struggle with is the basic syntax. Therefore, the Svelte 3 Snippets extension was developed to provide snippets for common patterns in Svelte and SvelteKit. These snippets are based on or follow the official Svelte documentation.
All the snippets are prefixed with “s-” for simplicity and scoped for their appropriate placement in the Svelte files.
For example, let’s say I forgot the syntax for an if/else statement, I can type “s-if” and IntelliSense will kick in to show all the snippets that match the symbol.
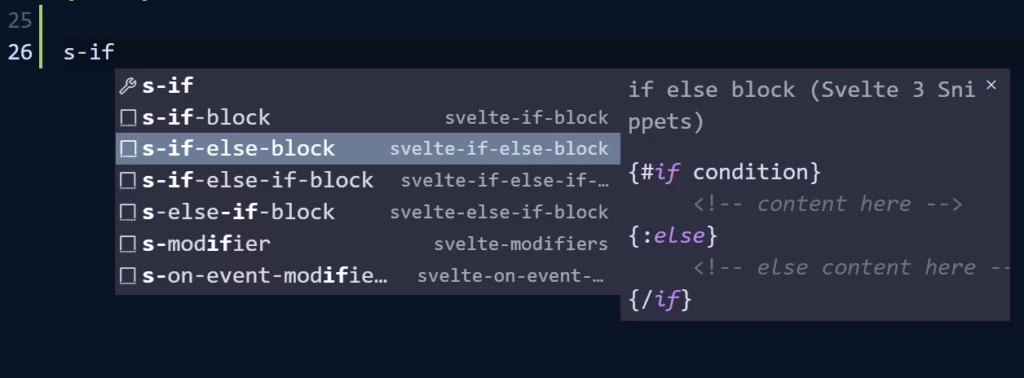
You can use the up/down arrow keys to navigate through the options and click on the snippet you want to generate.
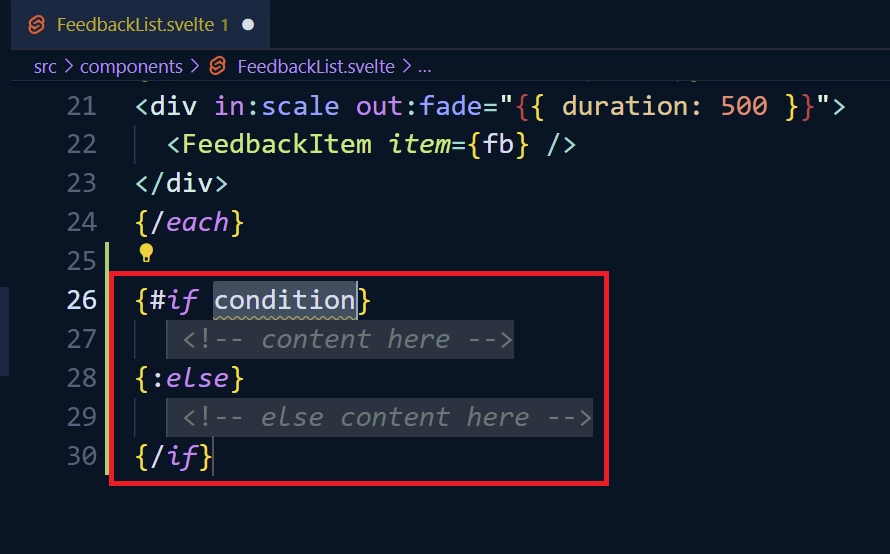
This is a no-brainer extension because it comes with a lot of snippets to speed up your development workflow and save you a lot of time when working with Svelte and SvelteKit. Visit the extension page in the VS Code marketplace to see all the available snippet shortcuts.
4. Tailwind CSS IntelliSense

Tailwind CSS is a framework packed with utility classes which makes it really easy to build stylish websites quickly. There is no doubt that tailwind CSS helps you write CSS very quickly but at some point in your development journey, you may forget some of the utility classes.
For these reasons, the Tailwind Labs team developed and released an official plugin that adds autocomplete, syntax highlighting and linting to your VSCode environment, and it only takes a few clicks to be installed.
The Autocomplete feature uses intelligent suggestions to help you apply appropriate utility class names to your markup easily. This eliminates the guesswork we usually do when we forget a particular utility class and also at a glance we can see relevant information about any utility class.
5. Better Comments

Better Comments gives developers the ability to write human-friendly comments by helping them annotate and document code more efficiently using customizable tagging systems.
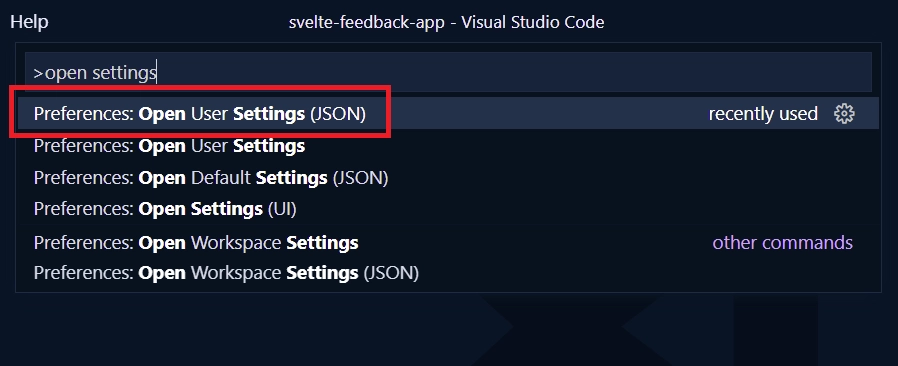
After installing the Better Comments extension, press CTRL + SHIFT + P to open the VS Code palette, type “open settings” and click on “Open User Settings(JSON)” option.
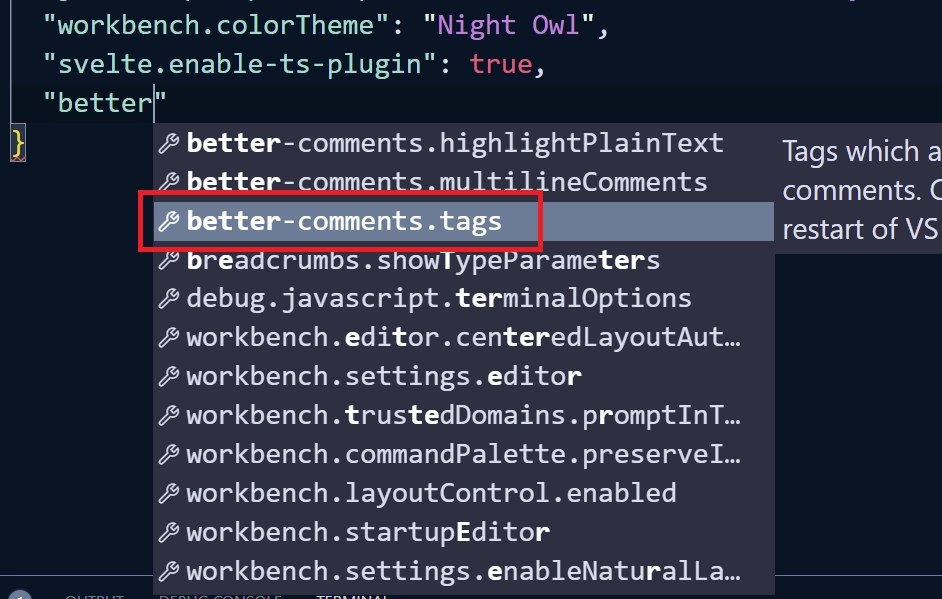
Next, type “Better” and IntelliSense will kick in to show some better comments-related options. Go ahead and click on the “better-comments.tags” option to see all the default settings and the tag annotations that come out of the box with Better Comments.
You should see a couple of annotation tags like alert, error, warning, question, strikethrough, catch-all, and TODO.
Each of the tags can be customized to meet your preference or you can add your own tag like a bug tag.
{
      "tag": "bug",
      "color": "#0703fa",
      "strikethrough": false,
      "underline": false,
      "backgroundColor": "transparent",
      "bold": false,
      "italic": false
    }
After adding your custom annotation tag, reload VS Code for the changes to take effect.
6. GitLens — Git supercharged
By default, VSCode has built-in Git tools for basic version control operations like adding your source code to the staging environment, committing the changes, pushing the source code to a remote repository, and even creating/changing branches. However, to supercharge VS Code to perform any kind of stuff that can be done with Git, you need to install the GitLens — Git supercharged extension.
To make the extension take effect immediately, reload VS Code by pressing CTRL + SHIFT + P, then type reload and click on the “Developer: Reload Window” option.
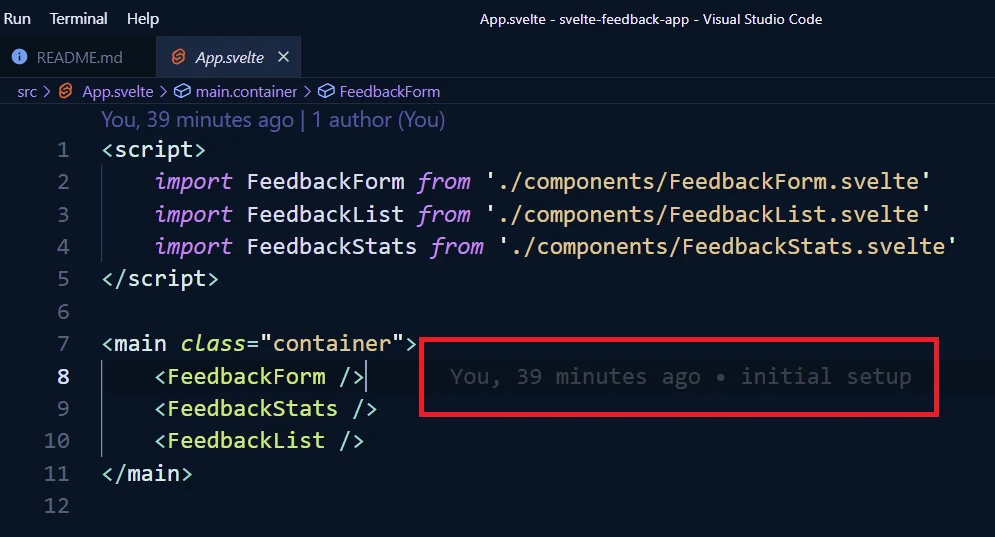
After the extension has been activated, wherever you put your cursor there will be an unobtrusive annotation displaying the Git commit author, the commit date, and the Git commit message.
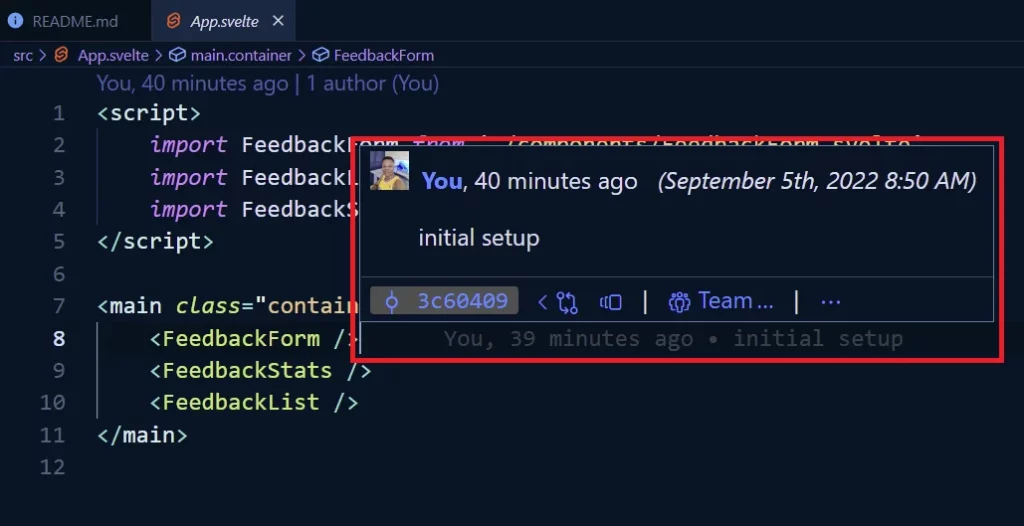
When you hover over the annotation, you will get a better visualization of all the information about your commit. On the bottom-left of the popup, you will see the commit number.
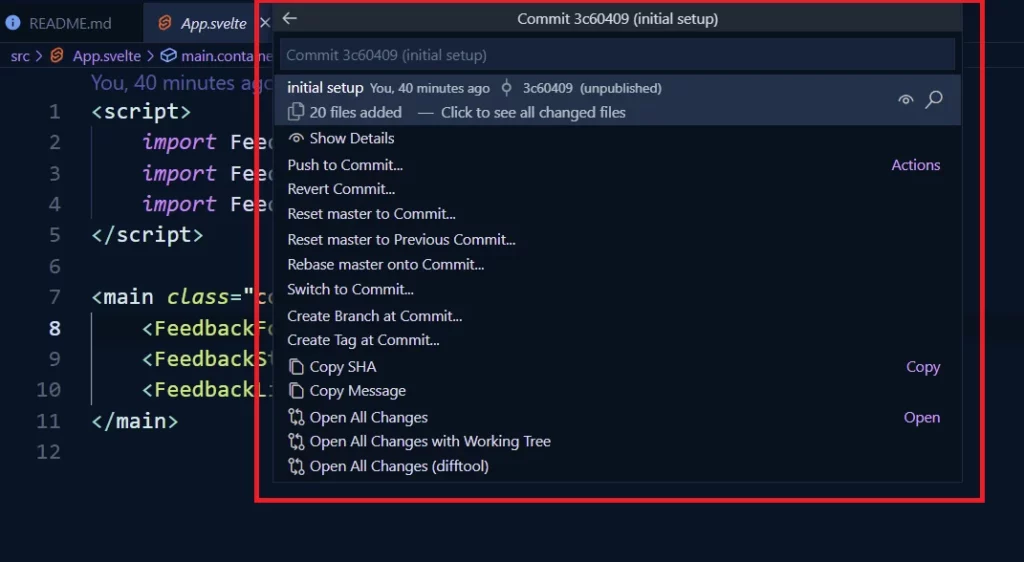
When you click on the commit number, the Gitlens palette will be displayed where you can reveal the commit in the sidebar, revert, reset, rebase, merge, push the commit to a remote repository, and many more.
GitLens is a very useful tool that can help you perform various version control operations directly in the editor without opening the terminal.
7. Thunder Client

Usually, when we build APIs with SvelteKit, we use API testing tools like Postman, Insomnia, and many more to test the endpoints of our API. Those API testing tools are great but the Thunder Client VS Code extension has similar features to help you test your API endpoints or external APIs directly in VS Code.
Thunder Client VS Code extension is comparable to Postman but with a simpler and cleaner design making it perfect for VS Code.
Similar to Postman, the extension also has a GraphQL API Client that can be used to test GraphQL API endpoints.
8. GitHub Copilot

GitHub Copilot is an AI Pair Programmer developed by OpenAI and GitHub. Its purpose is to help developers code faster by suggesting code snippets based on descriptions of the code they write, function names, or comments.
Copilot is no longer free, you have to pay $10 per month or $100 per year.
9. MySQL by Weijan Chen

The MySQL by Weijan Chen extension is a database management client for VS Code that supports MySQL/MariaDB, MongoDB, PostgreSQL, SQLite, Redis, SQL Server, S3, and more. It also works as an SSH client.
For example, when you are building a SvelteKit API that uses a MongoDB database, you can easily connect and manage the data stored in the database with the MySQL by Weijan Chen extension.
To do that, click on the NoSQL tab on the left sidebar and click on the Create Connection button.
Next, select the server type which in this case is MongoDB, and provide the required credentials. Then, click on the Connect button to connect VS Code to the database server.
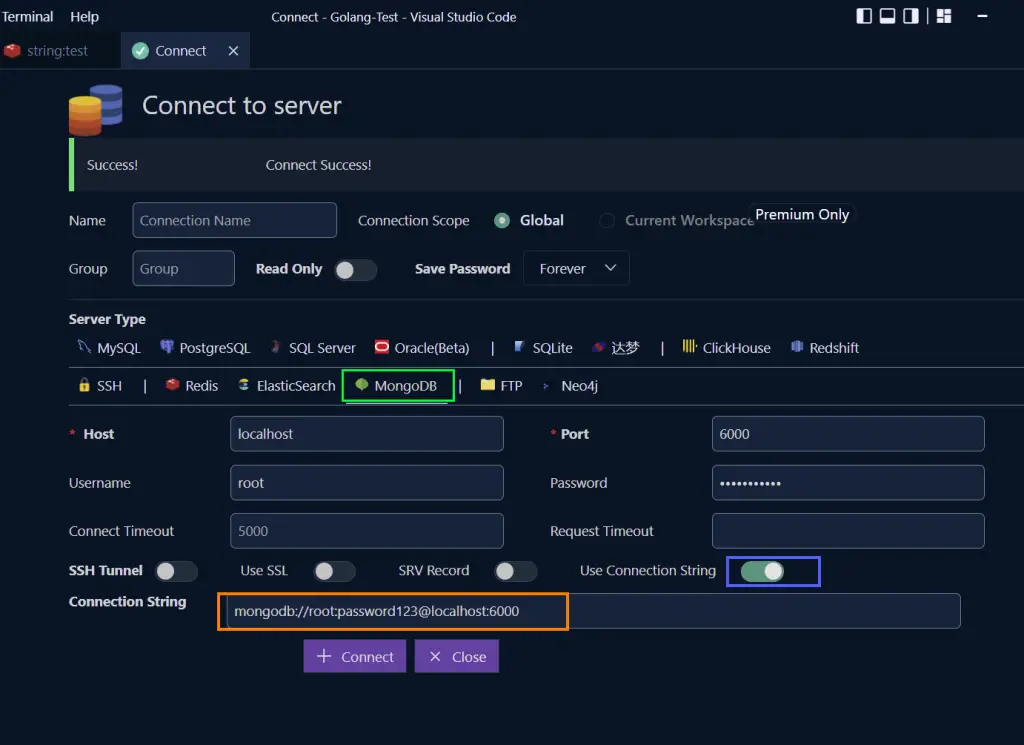
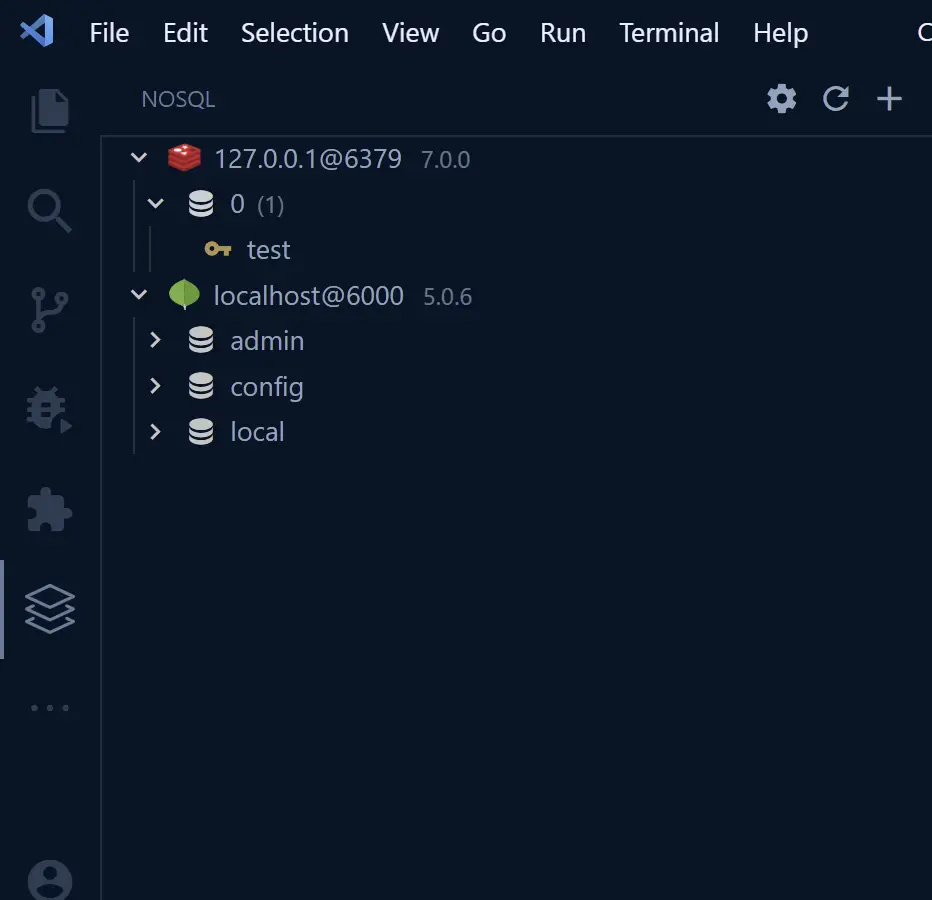
Once the connection has been successfully created, you can access and manage the data directly in the GUI provided by the MySQL extension.
10. Docker

The VS Code Docker extension comes with a lot of tools to make the building, managing, debugging, and deployment of containerized applications a breeze in Visual Studio Code.
One interesting feature of this extension is you can easily generate the appropriate Dockerfile and Docker-compose files for your project with just one click.
To generate a Dockerfile, docker-compose.yml, and docker-compose.debug.yml files for your project, press CTRL + SHIFT + P to open the VS Code command palette then type “Docker: Add” and click on the “Docker: Add Docker files to Workspace…” command.

Next, select your preferred language from the provided list and fill in the necessary details.
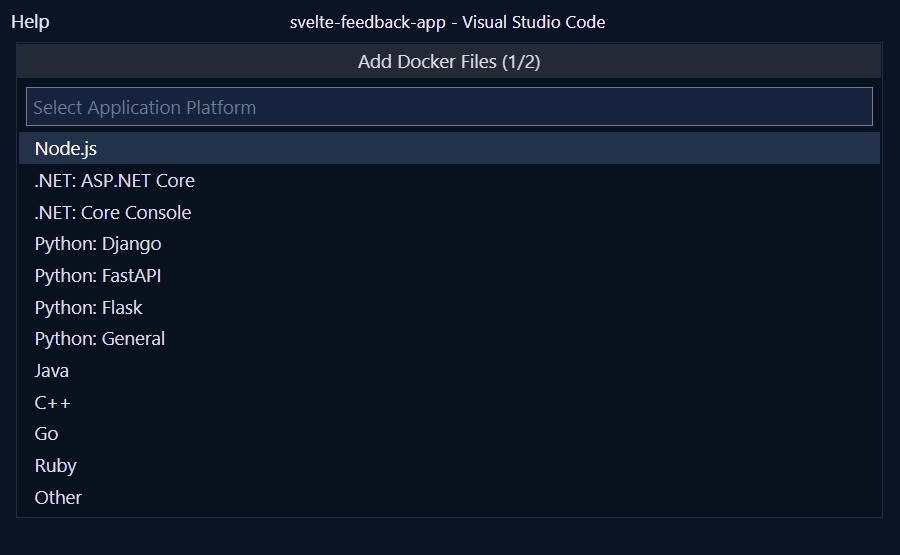
With the required information provided, VS Code will go ahead and pull the latest Docker image of the selected framework or language from the Docker hub.
Now to build the Docker image, right-click the Dockerfile in the files explorer panel and select “Build image“.
There are numerous things you can do with the VS Code Docker extension. For example, the extension comes with a bunch of commands to manage your Docker images and containers directly from the Command Palette without the need to type a single command in the terminal.

bro i want to give you one suggestion regarding your website please add dark mode in your website
Thanks for the suggestion.