

Deno, created by Ryan Dahl (the same genius guy who developed Node.js) is a simple, modern, and secure runtime for JavaScript, TypeScript, and WebAssembly built on top of the robust Google V8 Engine.
Deno was officially released in May 2018 during the “10 Things I Regret About Node.js” 2018 JSConf EU where Ryan Dahl admitted there were a few capabilities he could have improved on Node.js – security, modules, dependencies, and many more.
If you are familiar with Node.js then getting up and running with Deno will be quite easy. Deno is very similar to its predecessor Node.js but with more improvements in areas where Node.js fell short.
When it comes to learning a new framework or language, the first thing that comes to our mind is creating a Todo app that has all the basic CRUD functionalities. So in this article, we will create a Todo CRUD RESTful API in a Deno environment that runs on an Oak middleware server and uses a MongoDB database.
Articles in this series:
- How to Setup and Use MongoDB with Deno
- How to Set up Deno RESTful CRUD Project with MongoDB
- Authentication with Bcrypt, JWT, and Cookies in Deno
- Complete Deno CRUD RESTful API with MongoDB
More practice:
- How to Setup Golang GORM RESTful API Project with Postgres
- API with Golang + GORM + PostgreSQL: Access & Refresh Tokens
- Golang and GORM – User Registration and Email Verification
- Forgot/Reset Passwords in Golang with HTML Email
- Build a RESTful CRUD API with Golang

What is Deno Oak Middleware Framework?
Oak is a high-performant middleware framework built on top of Deno’s native HTTP server. It was inspired by Koa, an expressive HTTP middleware framework for Node.js that uses ES2017 async functions.
Similar to Koa, the Oak middleware stack also flows in a stack-like pattern, allowing developers to perform actions downstream and then filter before manipulating the response upstream.
Prerequisites
Before continuing with this tutorial, you should have:
- Basic knowledge of JavaScript and TypeScript.
- Some knowledge of any web framework like Express.js, Gin Gonic, Fastify, FastAPI, and more will be beneficial.
- The Deno VS Code extension installed.
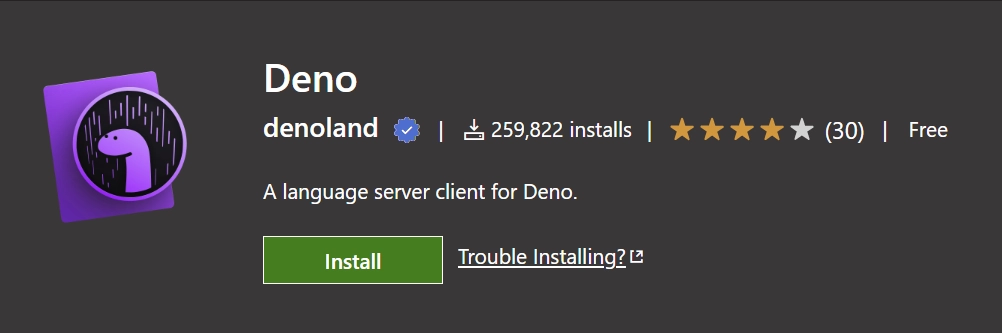
This extension brings Deno support to Visual Studio Code. Note: The extension requires the Deno binary executable to be installed on your system before it can work. - Basic knowledge of MongoDB and how NoSQL databases work will be highly beneficial.
- Some understanding of RESTful APIs
- A MongoDB GUI client (MySQL VS Code extension or MongoDB Compass) to manage the database
After installing the Deno VS Code extension, create a .vscode/settings.json file and add the following configurations.
{
  "deno.enable": true,
  "deno.unstable": true
}
The above configuration will explicitly tell VS Code to enable Deno in the project.
Step 1 – Installing Deno
First things first, let’s install the Deno executable on our system. Install the Deno binary executable specific to your operating system with the following installers, or download a release binary from the releases page.
Shell (Mac, Linux):
curl -fsSL https://deno.land/install.sh | shPowerShell (Windows):
irm https://deno.land/install.ps1 | iexHomebrew (Mac):
brew install denoYou can read more about other installation options from the deno_install guide.
Once you have the binary installed on your machine, close the current terminal, open a new one and execute this command to test if the installation was successful:
deno --versionIf the above command prints the version of Deno in the terminal then it means the installation was successful.

Step 2 – Setup Oak Middleware and Routing
If you came from a Node.js background, you will notice that Deno’s way of doing things is a bit different. Instead of using a package.json file to manage all the downloaded dependencies in your project, Deno uses file paths or URLs to reference module imports.
The downloaded modules in Deno are cached globally instead of locally as seen in Node.js. This approach eliminates a lot of the bloat that is inherent in Node.js and its node_modules directory.
To imitate a package.json file, let’s create a src/deps.ts file to contain all the project’s dependencies. This will allow us to easily manage the dependencies from one centralized place.
export { Application, Router, helpers } from 'https://deno.land/x/oak/mod.ts';
export type { RouterContext, Context } from 'https://deno.land/x/oak/mod.ts';
export { config as dotenvConfig } from 'https://deno.land/x/dotenv/mod.ts';
export { z } from 'https://deno.land/x/zod@v3.16.1/mod.ts';
export {
  Database,
  MongoClient,
  Bson,
  ObjectId,
} from 'https://deno.land/x/mongo@v0.30.1/mod.ts';
oak– This middleware framework contains tools for building APIs with Denodotenv– This package will allow us to load the environment variables from any file.mongo– This is the MongoDB driver for Deno.zod– A TypeScript-first schema validation library that will help us to validate the request bodies.
Now create a src/.env file to hold all the project’s environment variables.
src/.env
NODE_ENV=development
PORT=8000

MONGODB_DATABASE_NAME=deno_mongodb
MONGODB_URI=mongodb://admin:password123@localhost:6000
Then, create a src/config/default.ts file to help us load the environment variables and provide the TypeScript types for the variables.
src/config/default.ts
import { dotenvConfig } from '../deps.ts';
dotenvConfig({ export: true, path: './src/.env' });

const config: {
  port: number;
  dbUri: string;
  dbName: string;
} = {
  port: parseInt(Deno.env.get('PORT') as unknown as string),
  dbUri: Deno.env.get('MONGODB_URI') as unknown as string,
  dbName: Deno.env.get('MONGODB_DATABASE_NAME') as unknown as string,
};

export default config;
Create a src/server.ts file and add the following code to help us start the Deno Oak server.
src/server.ts
import { Application, Router } from './deps.ts';
import type { RouterContext } from './deps.ts';
import config from './config/default.ts';

const app = new Application();

const router = new Router(); // Create router

// Middleware Logger
app.use(async (ctx, next) => {
  await next();
  const rt = ctx.response.headers.get("X-Response-Time");
  console.log(`${ctx.request.method} ${ctx.request.url} - ${rt}`);
});


// Test the API
router.get<string>('/api/healthchecker', (ctx: RouterContext<string>) => {
  ctx.response.body = {
    status: "success",
    message: "Welcome to Deno and MongoDB"
  };
});

app.use(router.routes()); // Implement our router
app.use(router.allowedMethods()); // Allow router HTTP methods

app.addEventListener('listen', ({ port, secure }) => {
  console.log(
    `? Server started on ${secure ? 'https://' : 'http://'}localhost:${port}`
  );
});

const port = config.port;
app.listen({ port });
If you are familiar with nodemon in Node.js then run the following command to install the denon package. You can use the default deno CLI to run the server, however, since we want to hot-reload the server upon any file change, you need to install the denon package.
deno install -qAf --unstable https://deno.land/x/denon/denon.ts
Visit the denon website for more details.
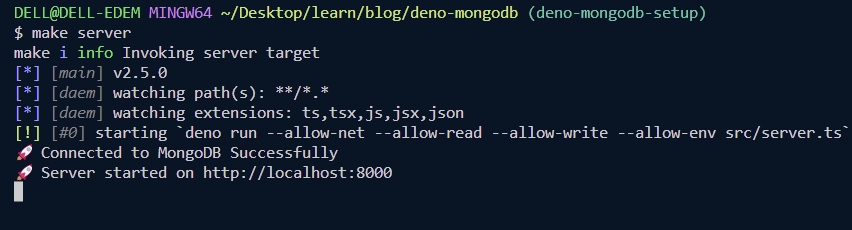
Now that you have the denon package installed, run the following command to start the Deno Oak server on port 8000.
denon run --allow-net --allow-read --allow-write --allow-env src/server.ts
By default, Deno takes security very seriously. Therefore, we need to specify the permission flags for them to be granted to the server.
Now our Oak server should be listening on port 8000. To test the API, we can use any API testing tool like Postman, Insomnia, or Thunder Client extension in VS Code.
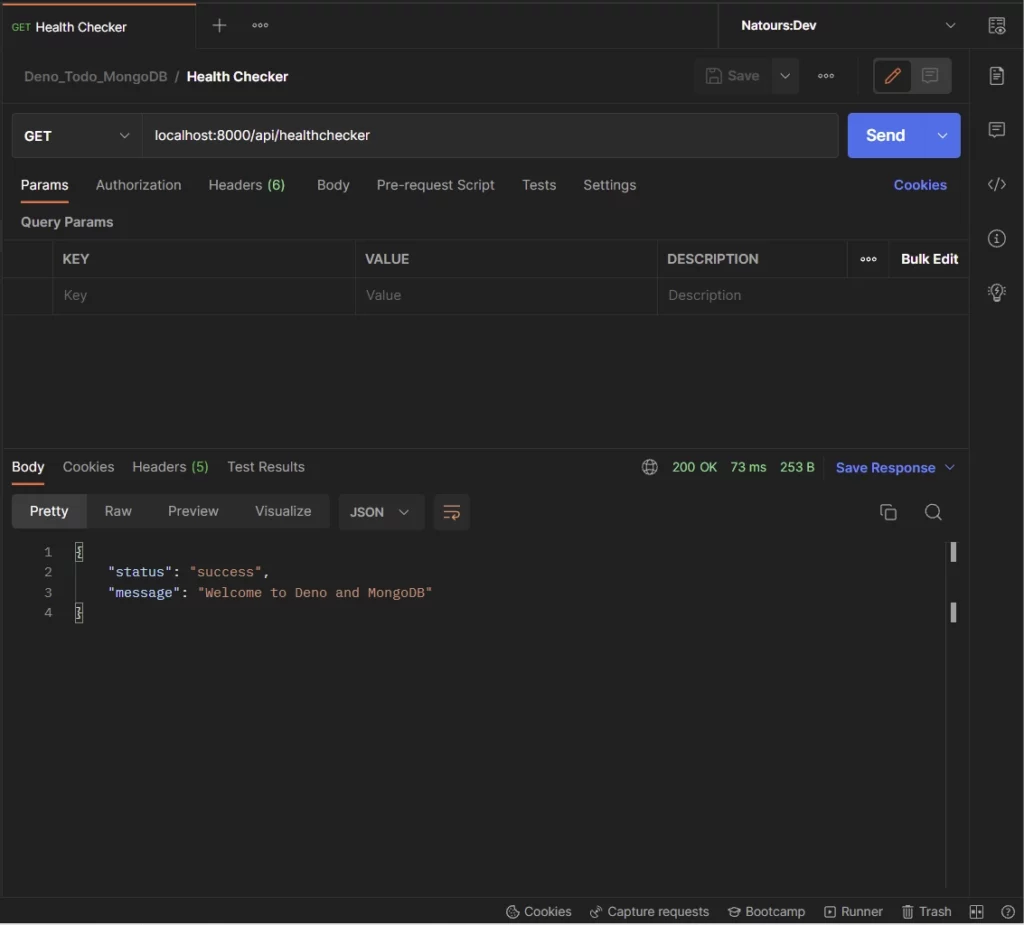
Alternatively, you can open a new tab in your browser and enter this URL http://localhost:8000/api/healthchecker to see the JSON response sent by the Deno server.
Step 3 – Setup MongoDB Server with Docker
If you’ve ever developed an application that needs to be deployed on a remote server other than your local machine, you know that the probability of your application delivering the desired functionalities on different operating systems is very small.
Due to these reasons, technologies like Docker were developed to solve the problem of different environments and provide tools to simplify and automate the deployment and continuous Integration aspect of software development.
Now let’s use Docker to run the MongoDB database server on our local machine without having to install it from the MongoDB website.
When you install Docker, you also get Docker Compose bundled with Docker Desktop for your operating system (Windows and Mac OS). However, on Linux, you have to install it separately, visit the installation page for more details.
Create a docker-compose.yml file in the root directory and add the following Docker configurations.
docker-compose.yml
version: '3.9'
services:
  mongo:
    image: mongo:latest
    container_name: mongo
    environment:
      MONGO_INITDB_ROOT_USERNAME: ${MONGO_INITDB_ROOT_USERNAME}
      MONGO_INITDB_ROOT_PASSWORD: ${MONGO_INITDB_ROOT_PASSWORD}
      MONGO_INITDB_DATABASE: ${MONGO_INITDB_DATABASE}
    env_file:
      - ./.env
    volumes:
      - mongo:/data/db
    ports:
      - '6000:27017'
volumes:
  mongo:
Next, create a .env in the root directory and add the following credentials needed by the Mongo Docker image.
.env
MONGO_INITDB_ROOT_USERNAME=admin
MONGO_INITDB_ROOT_PASSWORD=password123
MONGO_INITDB_DATABASE=deno_mongodb
Then, run the command below to build the Mongo Docker image and run the container:
docker-compose up -d
Stop the container with this command:
docker-compose down
Step 4 – Connect Deno to MongoDB Server
Now that we have the MongoDB Docker container running, let’s create a utility function to connect the Deno application to the running MongoDB server.
src/utils/connectDB.ts
import { MongoClient } from '../deps.ts';
import config from '../config/default.ts';

const {dbUri, dbName} = config

const client: MongoClient = new MongoClient();
await client.connect(dbUri);
console.log('? Connected to MongoDB Successfully');

export const db = client.database(dbName);
We used the MongoDB database driver to create a connection pool between the Deno application and the MongoDB server running in the Docker container.
Step 5 – Create the MongoDB Database Models
Like Mongoose in Node.js, the Deno MongoDB driver also allows us to define the structure of the documents in the database using TypeScript interfaces.
The TypeScript interface will be mapped to form the shape of the underlying MongoDB document within the collection.
src/models/todo.model.ts
import { db } from '../utils/connectDB.ts';
import { ObjectId } from '../deps.ts';

export interface TodoSchema {
  _id?: ObjectId;
  title: string;
  content: string;
  status: string;
  createdAt: Date;
  updatedAt: Date;
}

export const Todo = db.collection<TodoSchema>('todos');
Here, we evoked the db.collection() function which takes the defined schema as a generic and the collection name as an argument.
The db.collection() returns an object containing a bunch of methods to help us access and mutate the data stored in the collection.
Step 6 – Create the Request Validation Schemas
We are now ready to create schemas that will be used by the Oak framework to validate the request payloads to ensure that users provide the required data.
Create a src/schema/todo.schema.ts file and add the following Zod schemas.
src/schema/todo.schema.ts
import { z } from '../deps.ts';

export const createTodoSchema = z.object({
  body: z.object({
    title: z.string({
      required_error: 'Title is required',
    }),
    content: z.string({
      required_error: 'Content is required',
    }),
    status: z.string({
      required_error: 'Status is required',
    }),
  }),
});

const params = {
  params: z.object({
    todoId: z.string(),
  }),
};

export const getTodoSchema = z.object({
  ...params,
});

export const updateTodoSchema = z.object({
  ...params,
  body: z
    .object({
      title: z.string(),
      content: z.string(),
      status: z.string(),
    })
    .partial(),
});

export const deleteTodoSchema = z.object({
  ...params,
});

export type CreateTodoInput = z.TypeOf<typeof createTodoSchema>['body'];
export type GetTodoInput = z.TypeOf<typeof getTodoSchema>['params'];
export type UpdateTodoInput = z.TypeOf<typeof updateTodoSchema>;
export type DeleteTodoInput = z.TypeOf<typeof deleteTodoSchema>['params'];
In the above, we used the z.TypeOf<> operator provided by Zod to infer the TypeScript types from the schemas.
Since we have all the schemas defined, let’s create a middleware function to parse and validate the request bodies before the requests get delegated to the controllers.
src/middleware/validate.ts
import { z, RouterContext, helpers } from '../deps.ts';

const validate =
  (schema: z.AnyZodObject) =>
  async (ctx: RouterContext<string>, next: () => any): Promise<void> => {
    try {
      schema.parse({
        params: ctx.params,
        query: helpers.getQuery(ctx),
        body: await ctx.request.body().value,
      });

      await next();
    } catch (err: any) {
      if (err instanceof z.ZodError) {
        ctx.response.status = 400;
        ctx.response.body = {
          status: 'fail',
          error: err.errors,
        };
        return;
      }
      await next();
    }
  };
export default validate;
The validation middleware will parse and validate the request body against the defined Zod schema and return a well-formatted validation error to the user when any of the rules are violated.
Step 7 – Create the Route Controllers
In this section, you will create the CRUD operation functions that will be called to:
- Create a new Todo item
- Update a Todo item
- Retrieve a single Todo item
- Retrieve all the Todo items or a paginated list of the results.
- Delete a Todo item
Add the Dependency Imports
Before writing the code for the route controllers, create a src/controllers/todo.controller.ts file and add the following imports.
src/controllers/todo.controller.ts
import type { RouterContext } from '../deps.ts';
import { Bson } from '../deps.ts';
import { Todo } from '../models/todo.model.ts';
import type {
  CreateTodoInput,
  UpdateTodoInput,
} from '../schema/todo.schema.ts';
Create Document Controller
Now we can finally start creating our first route controller function. We’ll call this controller createTodoController . This controller will be called to add a new Todo item to the database collection.
src/controllers/todo.controller.ts
// [...] Create Todo Controller
const createTodoController = async ({
  request,
  response,
}: RouterContext<string>) => {
  try {
    const { title, content, status }: CreateTodoInput =
      await request.body().value;
    const totoExists = await Todo.findOne({ title });
    if (totoExists) {
      response.status = 409;
      response.body = {
        status: 'fail',
        message: 'Todo with that title already exists',
      };
      return;
    }

    const createdAt = new Date();
    const updatedAt = createdAt;

    const todoId: string | Bson.ObjectId = await Todo.insertOne({
      title,
      content,
      status,
      createdAt,
      updatedAt,
    });

    if (!todoId) {
      response.status = 500;
      response.body = { status: 'error', message: 'Error creating user' };
      return;
    }

    const todo = await Todo.findOne({_id: todoId})

    response.status = 201;
    response.body = {
      status: 'success',
      data: { todo },
    };
  } catch (error) {
    response.status = 500;
    response.body = { status: 'error', message: error.message };
    return;
  }
};
Quite a lot happening in the above code, let’s break it down. First, we extracted the request payload and queried the database to check if a todo with the provided title already exists.
Then, we called the insertOne method to insert the new document into the database. Since querying and mutating the database is inherently asynchronous, we used a try..catch block to handle the returned promise.
Next, we used the ObjectId returned by the insertOne function to fetch the newly-created document from the database.
As long as everything goes smoothly, we returned a status of 201 and the newly-created document to the client.
Update Document Controller
Now that we can add new documents, let’s set up a controller to make changes to the existing documents. We’ll call this controller updateTodoController .
src/controllers/todo.controller.ts
// [...] Create Todo Controller

// [...] Update Todo Controller
const updateTodoController = async ({
  params,
  request,
  response,
}: RouterContext<string>) => {
  try {
    const payload: UpdateTodoInput['body'] = await request.body().value;

    const updatedInfo = await Todo.updateOne(
      { _id: new Bson.ObjectId(params.todoId) },
      { $set: { ...payload, updatedAt: new Date() } },
      { ignoreUndefined: true }
    );

    if (!updatedInfo.matchedCount) {
      response.status = 404;
      response.body = {
        status: 'fail',
        message: 'No todo with that Id exists',
      };
      return;
    }

    const updatedTodo = await Todo.findOne({ _id: updatedInfo.upsertedId });

    response.status = 200;
    response.body = {
      status: 'success',
      data: { todo: updatedTodo },
    };
  } catch (error) {
    response.status = 500;
    response.body = { status: 'error', message: error.message };
    return;
  }
};
This controller will accept three arguments: params , request , and response . The params will contain the ID of the document to be updated and the request will contain the payload object.
Next, we used the updateOne() method and provided the filter and the update in the query.
The filter indicates the document to be updated and the update will use the $set operator to update the document fields.
Finally, we used the ObjectId returned by the updateOne() method to retrieve the newly-updated document before returning it to the client.
Read a Single Document Controller
Here, you will create the controller that will be called to return a single document from the database. We’ll call this controller findTodoController .
src/controllers/todo.controller.ts
// [...] Create Todo Controller

// [...] Update Todo Controller

// [...] Find One Todo Controller
const findTodoController = async ({
  params,
  response,
}: RouterContext<string>) => {
  try {
    const todo = await Todo.findOne({ _id: new Bson.ObjectId(params.todoId) });

    if (!todo) {
      response.status = 404;
      response.body = {
        status: 'success',
        message: 'No todo with that Id exists',
      };
      return;
    }

    response.status = 200;
    response.body = {
      status: 'success',
      data: { todo },
    };
  } catch (error) {
    response.status = 500;
    response.body = { status: 'error', message: error.message };
    return;
  }
};
In the above, we obtained the ID of the todo item from the URL parameter and used the new Bson.ObjectId() method to convert it into a MongoDB ObjectId.
Then, we evoked the findOne() method to return the document that matches the provided ID.
Read All Documents Controller
In this section, you will learn how to implement a basic aggregation pipeline to retrieve a paginated list of the documents in the database. We’ll call this controller findAllTodosController .
src/controllers/todo.controller.ts
// [...] Create Todo Controller

// [...] Update Todo Controller

// [...] Find One Todo Controller

// [...] Find All Todos Controller
const findAllTodosController = async ({
  request,
  response,
}: RouterContext<string>) => {
  try {
    const page = request.url.searchParams.get('page');
    const limit = request.url.searchParams.get('limit');
    const intPage = page ? parseInt(page) : 1;
    const intLimit = limit ? parseInt(limit) : 10;
    const skip = (intPage - 1) * intLimit;
    const pipeline = [
      { $match: {} },
      {
        $skip: skip,
      },
      {
        $limit: intLimit,
      },
    ];

    const cursor = Todo.aggregate(pipeline);
    const cursorTodos = cursor.map((todo) => todo);
    const todos = await cursorTodos;

    response.status = 200;
    response.body = {
      status: 'success',
      results: todos.length,
      data: { todos },
    };
  } catch (error) {
    response.status = 500;
    response.body = { status: 'error', message: error.message };
    return;
  }
};
Here, we extracted the page and limit parameters from the request URL before parsing them into integers.
Then, we defined the aggregation pipeline and evoked the aggregate() method to retrieve the documents.
Next, we mapped through the cursor returned by the aggregate() method to obtain an array of the found documents.
Delete Document Controller
Finally, let’s create a controller to remove a document from the database. We’ll call this controller deleteTodoController .
src/controllers/todo.controller.ts
// [...] Create Todo Controller

// [...] Update Todo Controller

// [...] Find One Todo Controller

// [...] Find All Todos Controller

// [...] Delete Todo Controller
const deleteTodoController = async ({
  params,
  response,
}: RouterContext<string>) => {
  try {
    const numberOfTodo = await Todo.deleteOne({
      _id: new Bson.ObjectId(params.todoId),
    });

    if (!numberOfTodo) {
      response.status = 404;
      response.body = {
        status: 'success',
        message: 'No todo with that Id exists',
      };
      return;
    }

    response.status = 204;
  } catch (error) {
    response.status = 500;
    response.body = { status: 'error', message: error.message };
    return;
  }
};
Here, we evoked the deleteOne() method with the ID of the document to be removed from the collection.
Export the Controllers
Now that we have all the controllers defined, let’s export them from the file.
src/controllers/todo.controller.ts
export default {
  createTodoController,
  updateTodoController,
  findTodoController,
  findAllTodosController,
  deleteTodoController,
};
Complete Code of the Controllers
src/controllers/todo.controller.ts
import type { RouterContext } from '../deps.ts';
import { Bson } from '../deps.ts';
import { Todo } from '../models/todo.model.ts';
import type {
  CreateTodoInput,
  UpdateTodoInput,
} from '../schema/todo.schema.ts';

const createTodoController = async ({
  request,
  response,
}: RouterContext<string>) => {
  try {
    const { title, content, status }: CreateTodoInput =
      await request.body().value;
    const totoExists = await Todo.findOne({ title });
    if (totoExists) {
      response.status = 409;
      response.body = {
        status: 'fail',
        message: 'Todo with that title already exists',
      };
      return;
    }

    const createdAt = new Date();
    const updatedAt = createdAt;

    const todoId: string | Bson.ObjectId = await Todo.insertOne({
      title,
      content,
      status,
      createdAt,
      updatedAt,
    });

    if (!todoId) {
      response.status = 500;
      response.body = { status: 'error', message: 'Error creating user' };
      return;
    }

    const todo = await Todo.findOne({_id: todoId})

    response.status = 201;
    response.body = {
      status: 'success',
      data: { todo },
    };
  } catch (error) {
    response.status = 500;
    response.body = { status: 'error', message: error.message };
    return;
  }
};

const updateTodoController = async ({
  params,
  request,
  response,
}: RouterContext<string>) => {
  try {
    const payload: UpdateTodoInput['body'] = await request.body().value;

    const updatedInfo = await Todo.updateOne(
      { _id: new Bson.ObjectId(params.todoId) },
      { $set: { ...payload, updatedAt: new Date() } },
      { ignoreUndefined: true }
    );

    if (!updatedInfo.matchedCount) {
      response.status = 404;
      response.body = {
        status: 'fail',
        message: 'No todo with that Id exists',
      };
      return;
    }

    const updatedTodo = await Todo.findOne({ _id: updatedInfo.upsertedId });

    response.status = 200;
    response.body = {
      status: 'success',
      data: { todo: updatedTodo },
    };
  } catch (error) {
    response.status = 500;
    response.body = { status: 'error', message: error.message };
    return;
  }
};

const findTodoController = async ({
  params,
  response,
}: RouterContext<string>) => {
  try {
    const todo = await Todo.findOne({ _id: new Bson.ObjectId(params.todoId) });

    if (!todo) {
      response.status = 404;
      response.body = {
        status: 'success',
        message: 'No todo with that Id exists',
      };
      return;
    }

    response.status = 200;
    response.body = {
      status: 'success',
      data: { todo },
    };
  } catch (error) {
    response.status = 500;
    response.body = { status: 'error', message: error.message };
    return;
  }
};

const findAllTodosController = async ({
  request,
  response,
}: RouterContext<string>) => {
  try {
    const page = request.url.searchParams.get('page');
    const limit = request.url.searchParams.get('limit');
    const intPage = page ? parseInt(page) : 1;
    const intLimit = limit ? parseInt(limit) : 10;
    const skip = (intPage - 1) * intLimit;
    const pipeline = [
      { $match: {} },
      {
        $skip: skip,
      },
      {
        $limit: intLimit,
      },
    ];

    const cursor = Todo.aggregate(pipeline);
    const cursorTodos = cursor.map((todo) => todo);
    const todos = await cursorTodos;

    response.status = 200;
    response.body = {
      status: 'success',
      results: todos.length,
      data: { todos },
    };
  } catch (error) {
    response.status = 500;
    response.body = { status: 'error', message: error.message };
    return;
  }
};

const deleteTodoController = async ({
  params,
  response,
}: RouterContext<string>) => {
  try {
    const numberOfTodo = await Todo.deleteOne({
      _id: new Bson.ObjectId(params.todoId),
    });

    if (!numberOfTodo) {
      response.status = 404;
      response.body = {
        status: 'success',
        message: 'No todo with that Id exists',
      };
      return;
    }

    response.status = 204;
  } catch (error) {
    response.status = 500;
    response.body = { status: 'error', message: error.message };
    return;
  }
};

export default {
  createTodoController,
  updateTodoController,
  findTodoController,
  findAllTodosController,
  deleteTodoController,
};
Step 8 – Create/Merge the API Routes
Now let’s work on the routing aspect of the CRUD API. Similar to Express or any web framework, we need to create the routers that will delegate the requests to the controllers.
Create a src/routes/todo.routes.ts file and add the following code to set up the routes of the CRUD API.
src/routes/todo.routes.ts
import { Router } from '../deps.ts';
import todoController from '../controllers/todo.controller.ts';
import { createTodoSchema, updateTodoSchema } from '../schema/todo.schema.ts'
import validate from "../middleware/validate.ts"


const router = new Router();

router.get<string>('/', todoController.findAllTodosController);
router.post<string>(
  '/',
  validate(createTodoSchema),
  todoController.createTodoController
);
router.patch<string>(
  '/:todoId',
  validate(updateTodoSchema),
  todoController.updateTodoController
);
router.get<string>('/:todoId', todoController.findTodoController);
router.delete<string>('/:todoId', todoController.deleteTodoController);

export default router;
With that out of the way, create a src/routes/index.ts file to help us to merge all the routes. In this example, we only have one route file but in a real-world project you might have multiple route files, and using this approach will make your project cleaner and easier to manage.
src/routes/index.ts
import { Application } from '../deps.ts';
import todoRouter from './todo.routes.ts';

function init(app: Application) {
  app.use(todoRouter.prefix('/api/todos/').routes());
}

export default {
  init,
};
Finally, import the routes/index.ts file into the src/server.ts file and evoke the init() function to register the routes.
src/server.ts
import { Application, Router } from './deps.ts';
import type { RouterContext } from './deps.ts';
import config from './config/default.ts';
import appRouter from './routes/index.ts';

const app = new Application();

const router = new Router(); // Create router

// Middleware Logger
app.use(async (ctx, next) => {
  await next();
  const rt = ctx.response.headers.get("X-Response-Time");
  console.log(`${ctx.request.method} ${ctx.request.url} - ${rt}`);
});


// Test the API
router.get<string>('/api/healthchecker', (ctx: RouterContext<string>) => {
  ctx.response.body = {
    status: "success",
    message: "Welcome to Deno and MongoDB"
  };
});

// ? Evoke the routers here
appRouter.init(app)
app.use(router.routes()); // Implement our router
app.use(router.allowedMethods()); // Allow router HTTP methods

app.addEventListener('listen', ({ port, secure }) => {
  console.log(
    `? Server started on ${secure ? 'https://' : 'http://'}localhost:${port}`
  );
});

const port = config.port;
app.listen({ port });
Run the command below to start the Deno Oak server on port 8000.
denon run --allow-net --allow-read --allow-write --allow-env src/server.ts
Step 9 – Test the Deno API with Postman
We are now ready to test the Deno CRUD API. Open this link in a new tab and copy the Postman collection JSON document.
Next, click on the import tab in your Postman software, select Raw text and paste the copied JSON document.
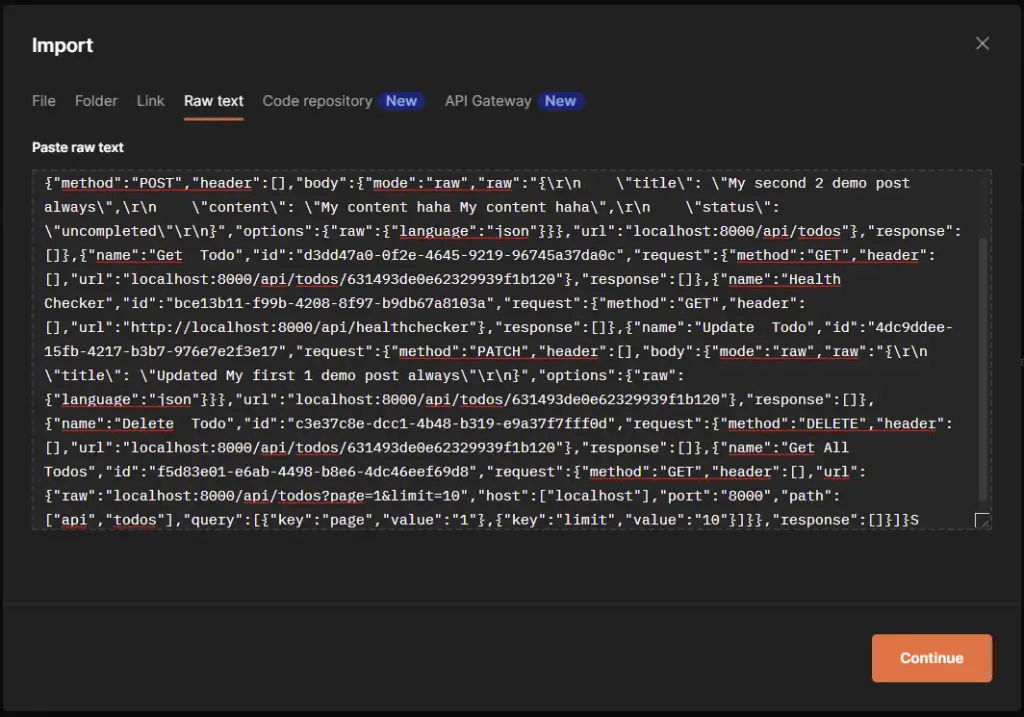
Then, click on the “Continue” button and the “Import” button on the next screen to import the collection.
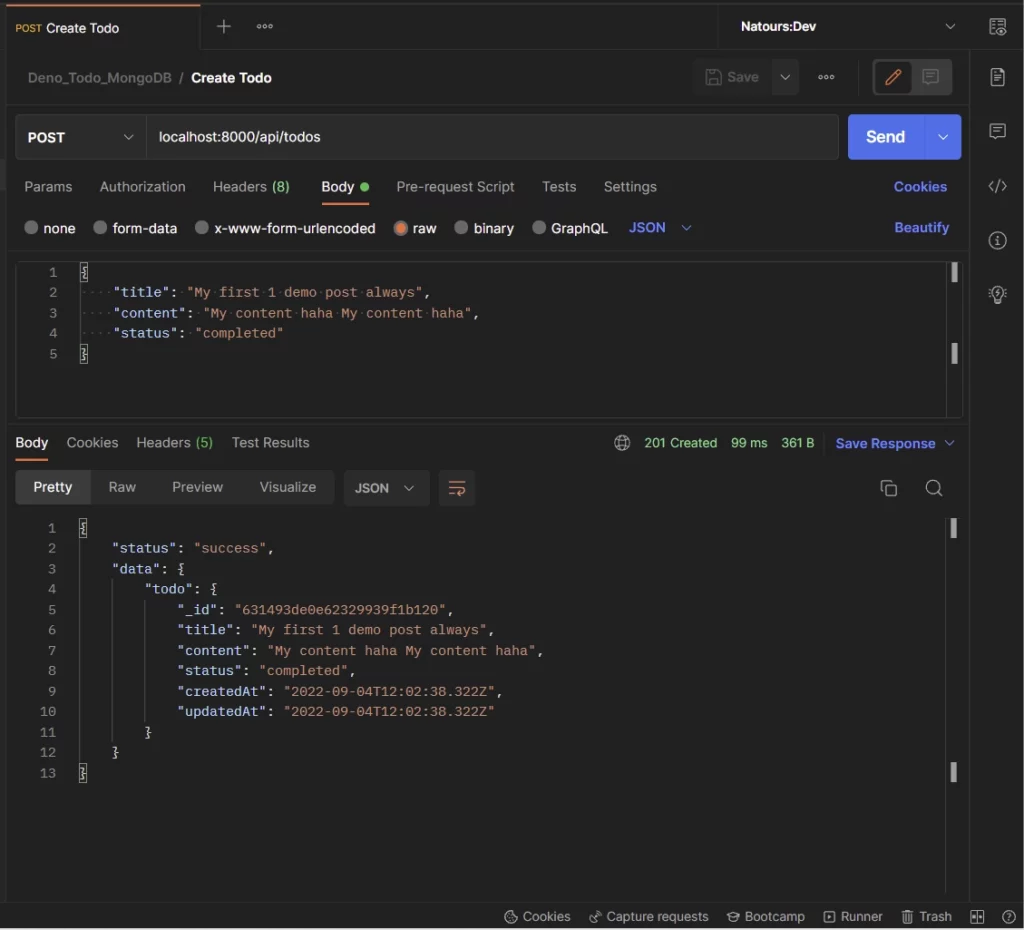
Create a new document
To insert a new document into the database, make a POST request with the payload to the localhost:8000/api/todos endpoint.
The Deno Oak server will then validate the request body and evoke the appropriate controller to insert the document into the database.
Then, the Deno server will return the newly-created document in a JSON response to the client.
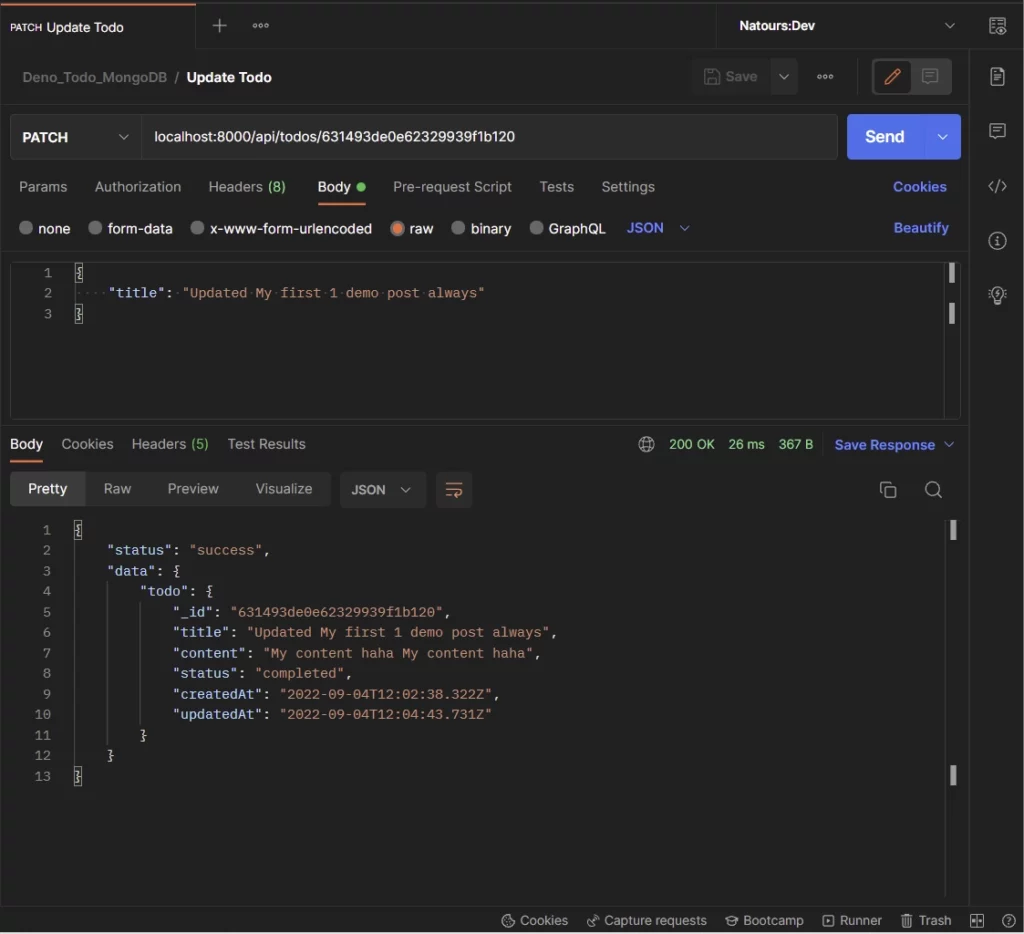
Update an existing document
To update an existing document in the MongoDB collection, make a PATCH request to the localhost:8000/api/todos/:todoId endpoint with the ID of the document to be updated and the payload.
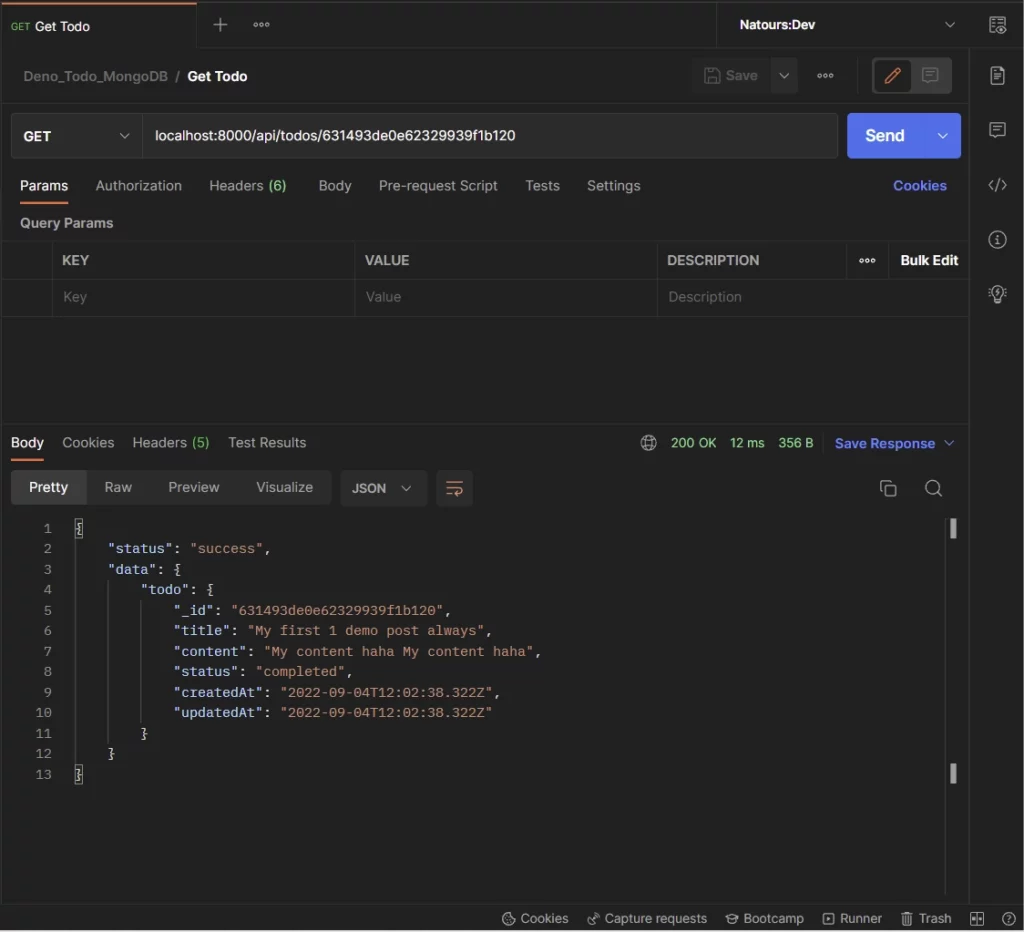
Get a single document
To retrieve a single document from the collection, make a GET request with the ID of the document in the URL to the localhost:8000/api/todos/:todoId endpoint.
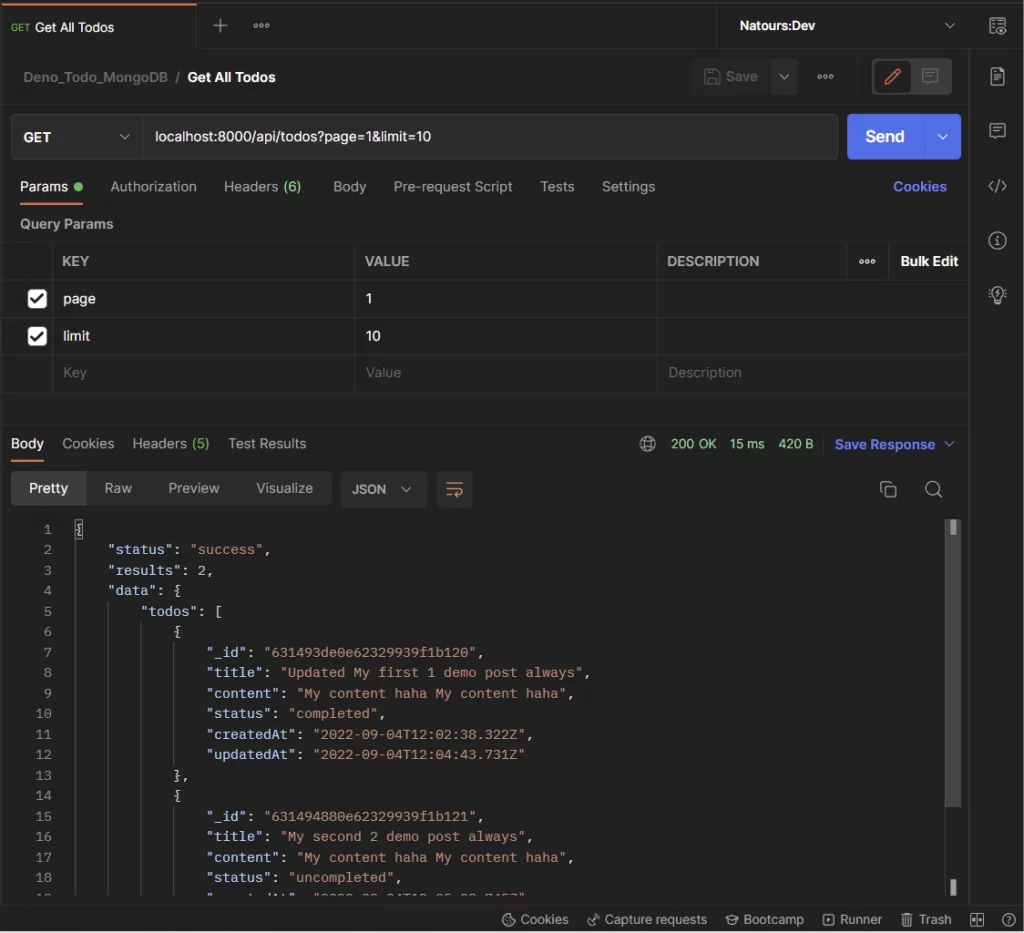
Get all the documents
To retrieve a paginated list of the results or all the documents in the database, make a GET request to the localhost:8000/api/todos?page=1&limit=10 . This query will return the first 10 documents in the collection.
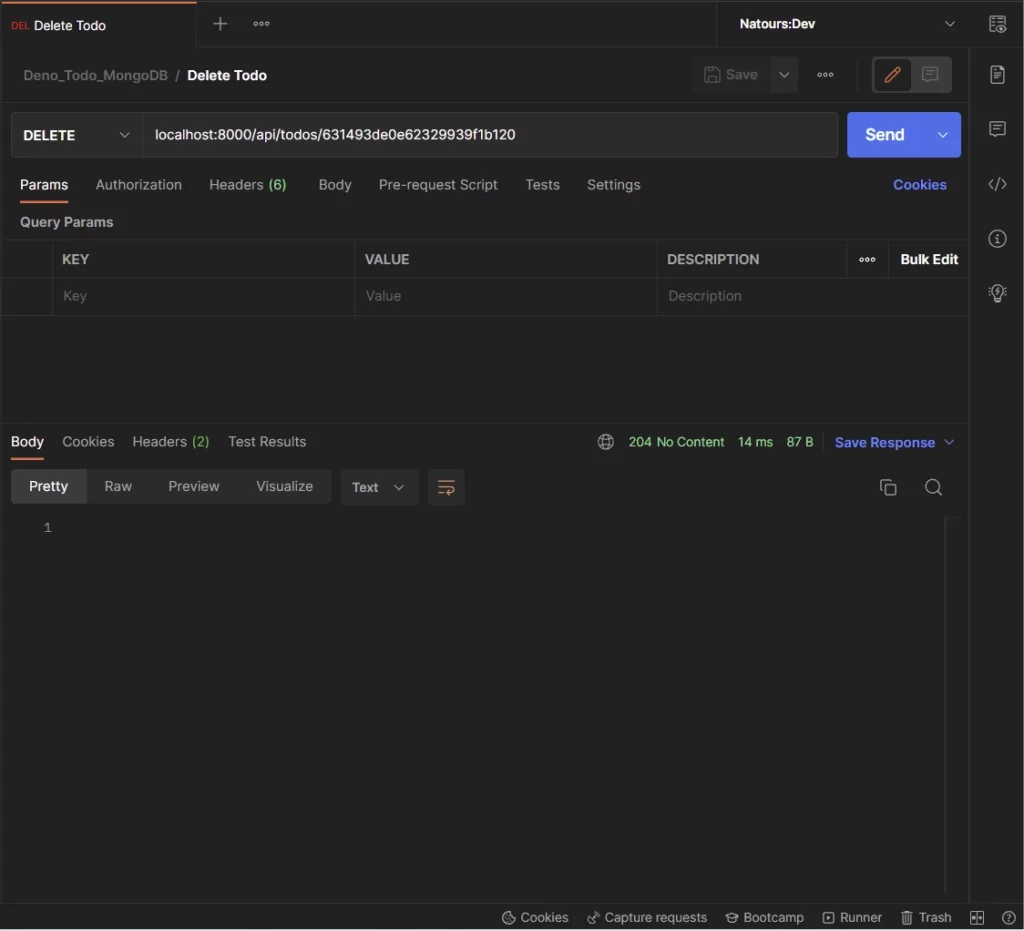
Delete a document
To remove a document from the collection, make a GET request to thelocalhost:8000/api/todos/:todoId endpoint with the ID of the document to be deleted in the URL.
Conclusion
In this comprehensive guide, we created a Deno HTTP server with the Oak middleware framework to Create, Read, Update, and Delete (CRUD) documents in the MongoDB database. We also used the MongoDB aggregation pipeline to retrieve a paginated list of documents in the selected collection.
You can find the complete source code on this GitHub repository.