
In this article, you’ll learn how to send development and production-ready emails with Nodemailer, Node.js, PostgreSQL, and TypeORM.
Related Post: Backend
- API with Node.js + PostgreSQL + TypeORM: Project Setup
- API with Node.js + PostgreSQL + TypeORM: JWT Authentication
- API with Node.js + PostgreSQL + TypeORM: Send Emails
- Node.js, Express, TypeORM, PostgreSQL: CRUD Rest API
- Node.js and PostgreSQL: Upload and Resize Multiple Images
Related Articles:
- React + Redux Toolkit: JWT Authentication and Authorization
- React.js + Redux Toolkit: Refresh Tokens Authentication
Send Emails with Node.js, PostgreSQL, TypeORM Overview
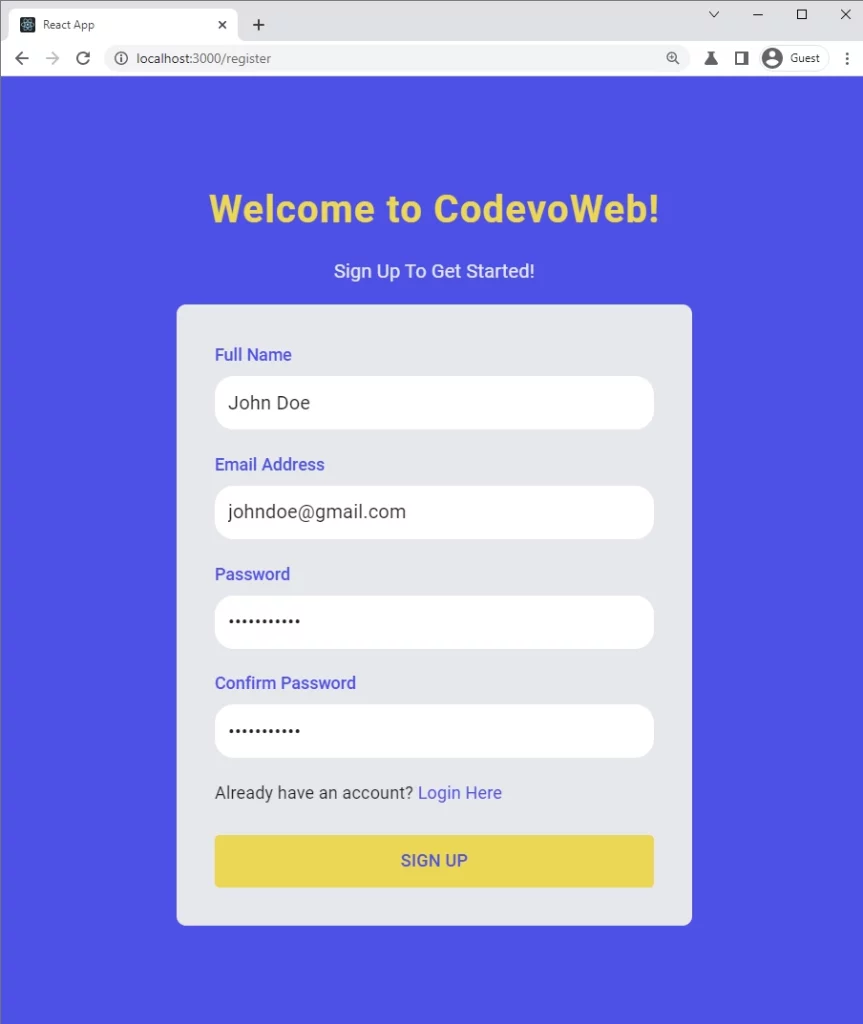
The user provides his credentials to register for an account
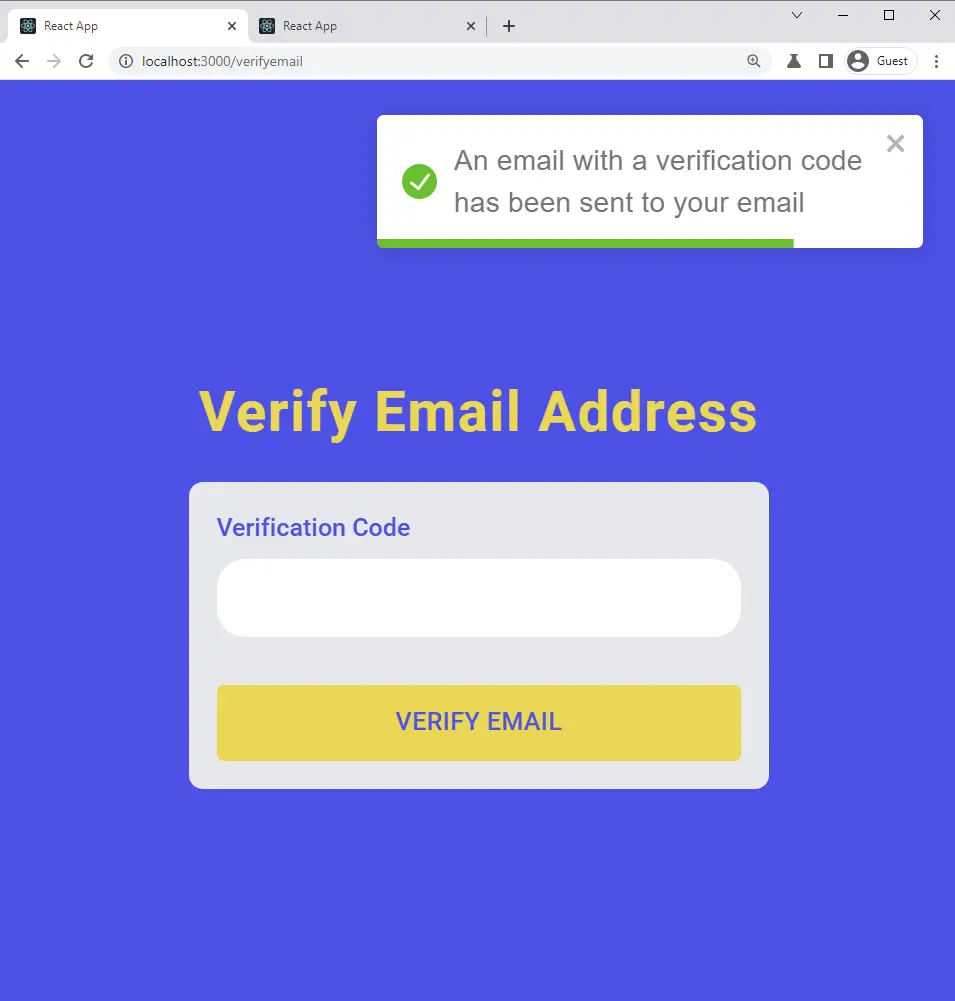
The verification code is sent to the user’s email
The user opens the verification email and then clicks on the ‘Verify Your Account’ button.
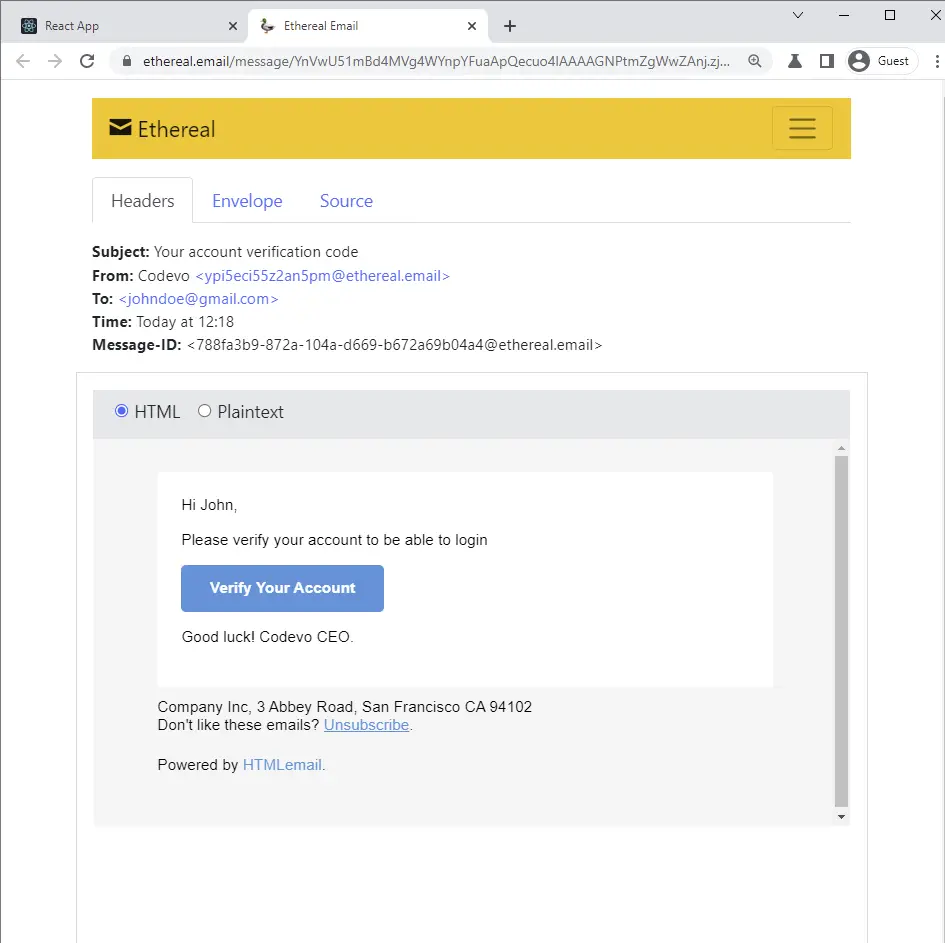
The user is then redirected to the Email verification page and the verification code will be pre-filled.
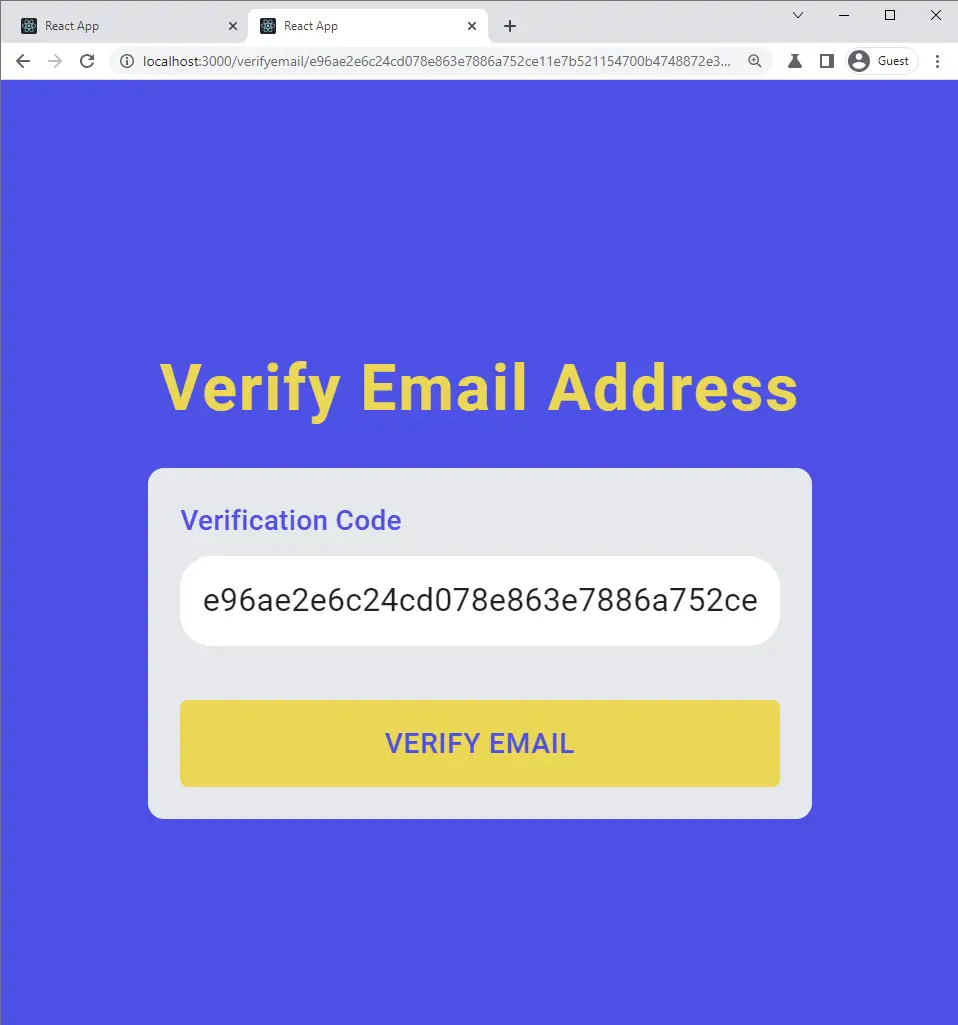
Now, when the user clicks on the ‘Verify Email’ button, the server will then verify the code and update the user’s information assuming the verification code is valid.
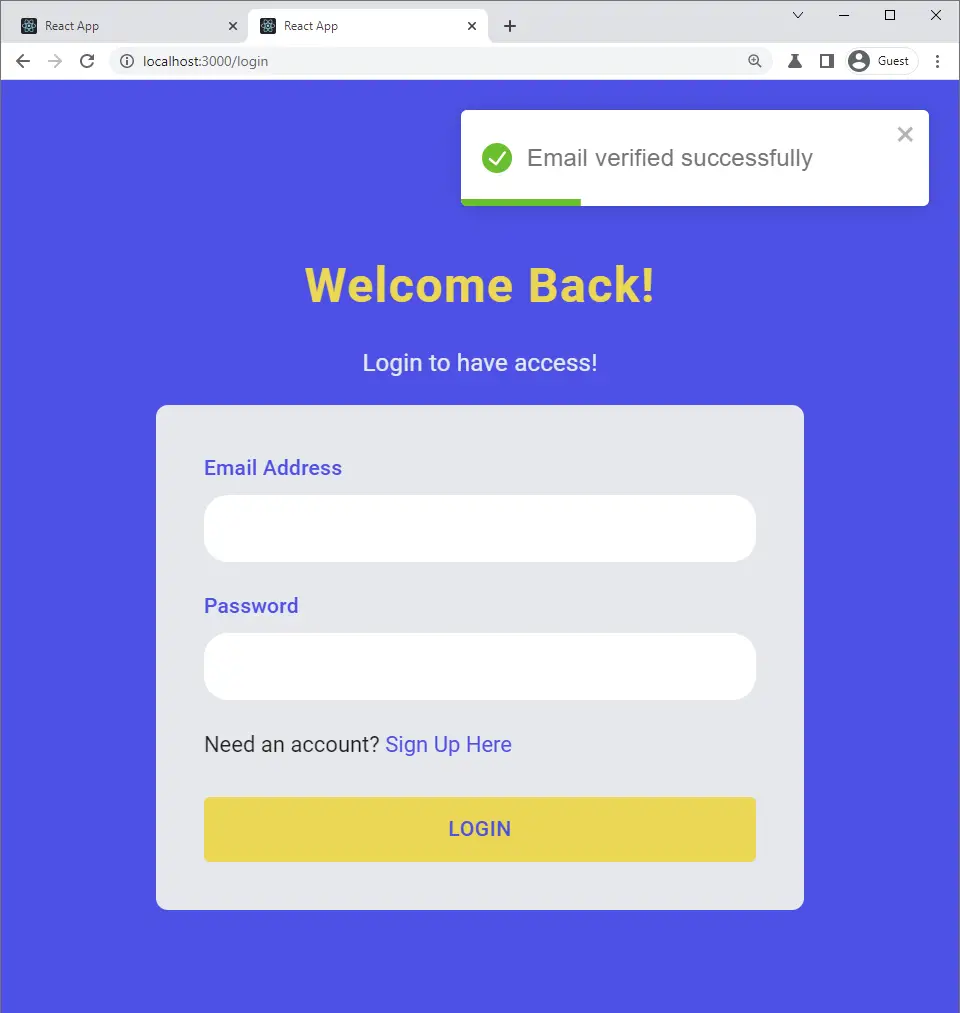
The frontend will then receive the success message and redirect the user to the login page.
Setting up ExpressJs Templating Engine
A template engine allows us to create reusable components called partials and base files. We can then import the partial files and reuse them in other files.
One interesting feature of templating engines is they allow us to dynamically change variables in any of the files.
There are a lot of templating engines out there and some of the popular ones include Pug, Handlebars, Swig, Mustache, EJS, and so on.
In this article, we’ll use Pug as the templating engine to create the email templates.
Most of the popular templating engines work out-of-the-box with ExpressJs. You only need to tell ExpressJs the template engine you want to use.
Run this command to install the necessary dependencies:
yarn add nodemailer pug html-to-text && yarn add -D @types/nodemailer @types/html-to-text @types/pug
nodemailer: For sending Emails in Node.jspug: Templating enginehtml-to-text: To convert HTML to Text
Configure ExpressJs to use Pug as the Templating Engine
Now, let’s use the app.set(name, value) method to configure the behavior of the ExpressJs server.
To configure Express to use Pug as its templating engine under the hood, we use app.set('view engine', 'pug') .
Also, we need to tell ExpressJs the folder in which the Pug files will be located with app.set('views', '${__dirname}/views'); .
src/app.ts
AppDataSource.initialize()
  .then(async () => {
  //  (...)

    const app = express();

    // TEMPLATE ENGINE
    app.set('view engine', 'pug');
    app.set('views', `${__dirname}/views`);

    // (...)
  })
  .catch((error) => console.log(error));
We need to provide Nodemailer with SMTP server credentials. There are many services that provide SMTP capabilities but in this article, we are going to use the SMTP server that comes with Nodemailer.
Run these code snippets above the App initializer to generate the SMTP server credentials and delete the code after.
src/app.ts
import nodemailer from 'nodemailer';
(async function () {
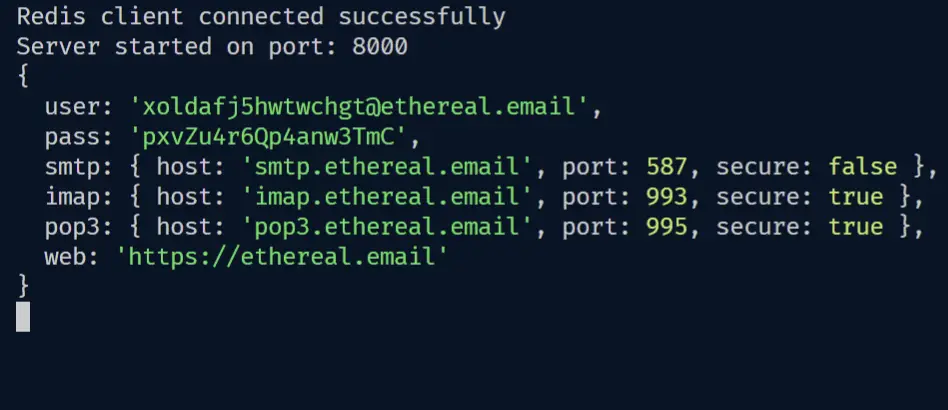
const credentials = await nodemailer.createTestAccount();
console.log(credentials);
})();
// (...)
Assuming your app is running, you should get the credentials in the terminal.
Copy and update the .env file with the credentials.
.env
EMAIL_USER=ypi5eci55z2an5pm@ethereal.email
EMAIL_PASS=5B2N9Pn1ETvmXxDCye
EMAIL_HOST=smtp.ethereal.email
EMAIL_PORT=587
Also, update the custom-environment-variables.ts file with the SMTP credentials you provided in the .env file.
config/custom-environment-variables.ts
export default {
  port: 'PORT',
  postgresConfig: {
    host: 'POSTGRES_HOST',
    port: 'POSTGRES_PORT',
    username: 'POSTGRES_USER',
    password: 'POSTGRES_PASSWORD',
    database: 'POSTGRES_DB',
  },

  accessTokenPrivateKey: 'JWT_ACCESS_TOKEN_PRIVATE_KEY',
  accessTokenPublicKey: 'JWT_ACCESS_TOKEN_PUBLIC_KEY',
  refreshTokenPrivateKey: 'JWT_REFRESH_TOKEN_PRIVATE_KEY',
  refreshTokenPublicKey: 'JWT_REFRESH_TOKEN_PUBLIC_KEY',

  smtp: {
    host: 'EMAIL_HOST',
    pass: 'EMAIL_PASS',
    port: 'EMAIL_PORT',
    user: 'EMAIL_USER',
  },
};
Lastly, update the validateEnv.ts to ensure that the variables we provided in the .env have the correct TypeScript types.
src/utils/validateEnv.ts
import { cleanEnv, port, str } from 'envalid';

const validateEnv = () => {
  cleanEnv(process.env, {
    NODE_ENV: str(),
    PORT: port(),

    POSTGRES_HOST: str(),
    POSTGRES_PORT: port(),
    POSTGRES_USER: str(),
    POSTGRES_PASSWORD: str(),
    POSTGRES_DB: str(),

    JWT_ACCESS_TOKEN_PRIVATE_KEY: str(),
    JWT_ACCESS_TOKEN_PUBLIC_KEY: str(),
    JWT_REFRESH_TOKEN_PRIVATE_KEY: str(),
    JWT_REFRESH_TOKEN_PUBLIC_KEY: str(),

    EMAIL_USER: str(),
    EMAIL_PASS: str(),
    EMAIL_HOST: str(),
    EMAIL_PORT: port(),
  });
};

export default validateEnv;
Complete App.ts code
Below is what your app.ts file should look like after configuring the App to use Pug as the templating engine.
src/app.ts
require('dotenv').config();
import express, { NextFunction, Request, Response } from 'express';
import config from 'config';
import morgan from 'morgan';
import cookieParser from 'cookie-parser';
import cors from 'cors';
import { AppDataSource } from './utils/data-source';
import AppError from './utils/appError';
import authRouter from './routes/auth.routes';
import userRouter from './routes/user.routes';
import validateEnv from './utils/validateEnv';
import redisClient from './utils/connectRedis';

AppDataSource.initialize()
  .then(async () => {
    // VALIDATE ENV
    validateEnv();

    const app = express();

    // TEMPLATE ENGINE
    app.set('view engine', 'pug');
    app.set('views', `${__dirname}/views`);

    // MIDDLEWARE

    // 1. Body parser
    app.use(express.json({ limit: '10kb' }));

    // 2. Logger
    if (process.env.NODE_ENV === 'development') app.use(morgan('dev'));

    // 3. Cookie Parser
    app.use(cookieParser());

    // 4. Cors
    app.use(
      cors({
        origin: config.get<string>('origin'),
        credentials: true,
      })
    );

    // ROUTES
    app.use('/api/auth', authRouter);
    app.use('/api/users', userRouter);

    // HEALTH CHECKER
    app.get('/api/healthChecker', async (_, res: Response) => {
      const message = await redisClient.get('try');

      res.status(200).json({
        status: 'success',
        message,
      });
    });

    // UNHANDLED ROUTE
    app.all('*', (req: Request, res: Response, next: NextFunction) => {
      next(new AppError(404, `Route ${req.originalUrl} not found`));
    });

    // GLOBAL ERROR HANDLER
    app.use(
      (error: AppError, req: Request, res: Response, next: NextFunction) => {
        error.status = error.status || 'error';
        error.statusCode = error.statusCode || 500;

        res.status(error.statusCode).json({
          status: error.status,
          message: error.message,
        });
      }
    );

    const port = config.get<number>('port');
    app.listen(port);

    console.log(`Server started on port: ${port}`);
  })
  .catch((error) => console.log(error));
Create a Utility Class to Send Emails
Here comes the actual logic for sending any kind of email. I decided to use a Class where we can chain methods to send different kinds of emails.
Require the Nodemailer Credentials
Let’s get the Nodemailer SMTP credentials with the config package.
src/utils/email.ts
const smtp = config.get<{
  host: string;
  port: number;
  user: string;
  pass: string;
}>('smtp');
Define the Email Class Attributes
Next, let’s define the class and the necessary attributes we need for the Mail Options.
src/utils/email.ts
// ? SMTP configurations

export default class Email {
  firstName: string;
  to: string;
  from: string;
  constructor(public user: User, public url: string) {
    this.firstName = user.name.split(' ')[0];
    this.to = user.email;
    this.from = `Codevo ${config.get<string>('emailFrom')}`;
  }

  // (...)
}
Create a Nodemailer Transporter
Next, define a private method in the Class to return the Nodemailer transport. The nodemailer.createTransport({}) method accepts an argument object containing the SMTP configuration options.
src/utils/email.ts
// ? SMTP configurations

export default class Email {
  // ? Constructor

  private newTransport() {
    // if (process.env.NODE_ENV === 'production') {
    //   console.log('Hello')
    // }

    return nodemailer.createTransport({
      ...smtp,
      auth: {
        user: smtp.user,
        pass: smtp.pass,
      },
    });
  }
}
Create a Method to Generate the Email Templates
Now, with the help of pug.renderFile() method, let’s programmatically access any of the Pug files in the views directory and populate them with the email options.
Also, let’s provide the sendMail() method on the transport object with the mail option object.
src/utils/email.ts
// ? SMTP configurations

export default class Email {
// ? Constructor

// ? Transport

  private async send(template: string, subject: string) {
    // Generate HTML template based on the template string
    const html = pug.renderFile(`${__dirname}/../views/${template}.pug`, {
      firstName: this.firstName,
      subject,
      url: this.url,
    });
    // Create mailOptions
    const mailOptions = {
      from: this.from,
      to: this.to,
      subject,
      text: convert(html),
      html,
    };

    // Send email
    const info = await this.newTransport().sendMail(mailOptions);
    console.log(nodemailer.getTestMessageUrl(info));
  }
}
Create a Method to Send the Emails
Next, let’s define the public methods that will call the send('name of template', 'email subject') with the template name without the .pug extension and the email subject.
Here I defined two methods to send the email verification code and a password reset code.
src/utils/email.ts
/ ? SMTP configurations

export default class Email {
  // ? Constructor

  // ? Transport

  // ? Method to send emails

  async sendVerificationCode() {
    await this.send('verificationCode', 'Your account verification code');
  }

  async sendPasswordResetToken() {
    await this.send(
      'resetPassword',
      'Your password reset token (valid for only 10 minutes)'
    );
  }
}
Complete Send Email Utility Class Code
src/utils/email.ts
import nodemailer from 'nodemailer';
import { User } from '../entities/user.entity';
import config from 'config';
import pug from 'pug';
import { convert } from 'html-to-text';

const smtp = config.get<{
  host: string;
  port: number;
  user: string;
  pass: string;
}>('smtp');

export default class Email {
  firstName: string;
  to: string;
  from: string;
  constructor(public user: User, public url: string) {
    this.firstName = user.name.split(' ')[0];
    this.to = user.email;
    this.from = `Codevo ${config.get<string>('emailFrom')}`;
  }

  private newTransport() {
    // if (process.env.NODE_ENV === 'production') {
    //   console.log('Hello')
    // }

    return nodemailer.createTransport({
      ...smtp,
      auth: {
        user: smtp.user,
        pass: smtp.pass,
      },
    });
  }

  private async send(template: string, subject: string) {
    // Generate HTML template based on the template string
    const html = pug.renderFile(`${__dirname}/../views/${template}.pug`, {
      firstName: this.firstName,
      subject,
      url: this.url,
    });
    // Create mailOptions
    const mailOptions = {
      from: this.from,
      to: this.to,
      subject,
      text: convert(html),
      html,
    };

    // Send email
    const info = await this.newTransport().sendMail(mailOptions);
    console.log(nodemailer.getTestMessageUrl(info));
  }

  async sendVerificationCode() {
    await this.send('verificationCode', 'Your account verification code');
  }

  async sendPasswordResetToken() {
    await this.send(
      'resetPassword',
      'Your password reset token (valid for only 10 minutes)'
    );
  }
}
Creating the Email Templates with Pug
Click here to download the email template files. After the download is complete extract the views folder then move it to the src folder of the project.
Updating the User Entity
Next, let’s define a static method on the user entity to generate the verification code and return the hashed and unhashed code from the method.
src/entities/user.entity.ts
import crypto from 'crypto';
import { Entity } from 'typeorm';
import Model from './model.entity';

@Entity('users')
export class User extends Model {
//  (...)

  static createVerificationCode() {
    const verificationCode = crypto.randomBytes(32).toString('hex');

    const hashedVerificationCode = crypto
      .createHash('sha256')
      .update(verificationCode)
      .digest('hex');

    return { verificationCode, hashedVerificationCode };
  }
}
Complete User Entity Code
src/entities/user.entity.ts
import crypto from 'crypto';
import { Entity, Column, Index, BeforeInsert } from 'typeorm';
import bcrypt from 'bcryptjs';
import Model from './model.entity';

export enum RoleEnumType {
  USER = 'user',
  ADMIN = 'admin',
}

@Entity('users')
export class User extends Model {
  @Column()
  name: string;

  @Index('email_index')
  @Column({
    unique: true,
  })
  email: string;

  @Column()
  password: string;

  @Column({
    type: 'enum',
    enum: RoleEnumType,
    default: RoleEnumType.USER,
  })
  role: RoleEnumType.USER;

  @Column({
    default: 'default.png',
  })
  photo: string;

  @Column({
    default: false,
  })
  verified: boolean;

  @Index('verificationCode_index')
  @Column({
    type: 'text',
    nullable: true,
  })
  verificationCode!: string | null;

  @BeforeInsert()
  async hashPassword() {
    this.password = await bcrypt.hash(this.password, 12);
  }

  static async comparePasswords(
    candidatePassword: string,
    hashedPassword: string
  ) {
    return await bcrypt.compare(candidatePassword, hashedPassword);
  }

  static createVerificationCode() {
    const verificationCode = crypto.randomBytes(32).toString('hex');

    const hashedVerificationCode = crypto
      .createHash('sha256')
      .update(verificationCode)
      .digest('hex');

    return { verificationCode, hashedVerificationCode };
  }
}
Running TypeORM Migration to Update PostgreSQL
Next, let’s run the TypeORM migration to update the PostgreSQL database.
package.json
{
 "scripts": {
    "start": "ts-node-dev --respawn --transpile-only --exit-child src/app.ts",
    "build": "tsc -p .",
    "typeorm": "typeorm-ts-node-commonjs",
    "migrate": "rm -rf build && yarn build && yarn typeorm migration:generate ./src/migrations/added-entity -d ./src/utils/data-source.ts",
    "db:push": "rm -rf build && yarn build && yarn typeorm migration:run -d src/utils/data-source.ts"
  }
}
Run this command to create a new migration and push the changes to the PostgreSQL database.
yarn migrate && yarn db:push
Update the User Register Controller
Now, let’s update the user registration logic to send the verification email after the user has been created and added to the database.
src/controllers/auth.controller.ts
import Email from '../utils/email';

export const registerUserHandler = async (
  req: Request<{}, {}, CreateUserInput>,
  res: Response,
  next: NextFunction
) => {
  try {
    const { name, password, email } = req.body;

    const newUser = await createUser({
      name,
      email: email.toLowerCase(),
      password,
    });

    const { hashedVerificationCode, verificationCode } =
      User.createVerificationCode();
    newUser.verificationCode = hashedVerificationCode;
    await newUser.save();

    // Send Verification Email
    const redirectUrl = `${config.get<string>(
      'origin'
    )}/verifyemail/${verificationCode}`;

    try {
      await new Email(newUser, redirectUrl).sendVerificationCode();

      res.status(201).json({
        status: 'success',
        message:
          'An email with a verification code has been sent to your email',
      });
    } catch (error) {
      newUser.verificationCode = null;
      await newUser.save();

      return res.status(500).json({
        status: 'error',
        message: 'There was an error sending email, please try again',
      });
    }
  } catch (err: any) {
    if (err.code === '23505') {
      return res.status(409).json({
        status: 'fail',
        message: 'User with that email already exist',
      });
    }
    next(err);
  }
};
Here is a breakdown of what I did above:
- First, I registered the user
- Then I called the
User.createVerificationCode()static method to generate the hash and unhashed verification code. - Next, I sent the unhashed code to the user’s email and stored the hashed code in the database.
- Lastly, I set the
verificationCodecolumn in the database tonullwhen an error occurs during the sending of the email.
Add a Controller to Verify the Email
Next, let’s define the schema for the params that will come from the Email verification route. This step is only needed for TypeScript IntelliSense.
src/schemas/user.schema.ts
export const verifyEmailSchema = object({
  params: object({
    verificationCode: string(),
  }),
});

export type VerifyEmailInput = TypeOf<typeof verifyEmailSchema>['params'];
To verify the verification code we sent to the user’s email, we need to define a controller that will be called when the user makes a GET request to /api/auth/verifyemail/verificationCode route.
src/controllers/auth.controller.ts
import crypto from 'crypto';

export const verifyEmailHandler = async (
  req: Request<VerifyEmailInput>,
  res: Response,
  next: NextFunction
) => {
  try {
    const verificationCode = crypto
      .createHash('sha256')
      .update(req.params.verificationCode)
      .digest('hex');

    const user = await findUser({ verificationCode });

    if (!user) {
      return next(new AppError(401, 'Could not verify email'));
    }

    user.verified = true;
    user.verificationCode = null;
    await user.save();

    res.status(200).json({
      status: 'success',
      message: 'Email verified successfully',
    });
  } catch (err: any) {
    next(err);
  }
};
Here is what I did above:
- First, I created a hashed form of the verification code sent by the user.
- Since we already have the hashed verification code in the database, I then made a query to find the user with that hashed verification code.
- If the user doesn’t exist in the database then it means the verification code provided by the user is invalid.
- I then updated the
verified = trueandverificationCode = nullif the user exists in the database.
Next, add the email verification code route handler to the routes files.
src/routes/auth.routes.ts
// Verify Email Address
router.get(
  '/verifyemail/:verificationCode',
  validate(verifyEmailSchema),
  verifyEmailHandler
);
Update the Login Controller
Also, update the login controller logic to check if the user is verified before proceeding to check if the password is correct.
export const loginUserHandler = async (
  req: Request<{}, {}, LoginUserInput>,
  res: Response,
  next: NextFunction
) => {
  try {
    const { email, password } = req.body;
    const user = await findUserByEmail({ email });

    // 1. Check if user exist
    if (!user) {
      return next(new AppError(400, 'Invalid email or password'));
    }

    // 2. Check if the user is verified
    if (!user.verified) {
      return next(new AppError(400, 'You are not verified'));
    }

    //3. Check if password is valid
    if (!(await User.comparePasswords(password, user.password))) {
      return next(new AppError(400, 'Invalid email or password'));
    }

    // 4. Sign Access and Refresh Tokens
    const { access_token, refresh_token } = await signTokens(user);

    // 5. Add Cookies
    res.cookie('access_token', access_token, accessTokenCookieOptions);
    res.cookie('refresh_token', refresh_token, refreshTokenCookieOptions);
    res.cookie('logged_in', true, {
      ...accessTokenCookieOptions,
      httpOnly: false,
    });

    // 6. Send response
    res.status(200).json({
      status: 'success',
      access_token,
    });
  } catch (err: any) {
    next(err);
  }
};
Conclusion
In this article, you learned how to send any kind of email with Node.js, TypeScript, Nodemailer, TypeORM, PostgreSQL, and Docker.
Check out the source code on GitHub
Hello, I am following along and am stuck at the migration. I get this error:
‘No changes in database schema were found – cannot generate a migration. To create a new empty migration use “typeorm migration:create” command’
I have tried the changing the package.json to “create” but it just gives me further errors. Do you have any idea what this might be from?