

In my previous article titled “How to Write Unit Tests for Your Rust API“, we explored unit tests in Rust and created them for the API we’ve been building throughout this tutorial series, encompassing roughly 90% of usage scenarios. So far, we’ve harnessed Docker to run both the Postgres and pgAdmin servers. However, one key component we haven’t yet explored is running our API project within a Docker environment.
I understand that the article’s title mentions an “SQL database“, whereas we’re specifically utilizing PostgreSQL in this tutorial. The reason for this lies in our choice of the SQLx toolkit, which provides us with the flexibility to work with a wide range of SQL databases. While minor settings adjustments may be necessary, you’ll find it straightforward to adapt the database layer code to function seamlessly with any SQLx-supported database of your choice.
Before we dive into the process, I’d like to provide a quick preview. In this phase, we’ll be dockerizing our Rust API project within our development environment. In the upcoming article within this tutorial series, we will take our deployment game to the next level by leveraging Docker and GitHub Actions to deploy not only the API but also the PostgreSQL and pgAdmin servers onto a VPS server.
Articles in This Series
- Building a Rust API with Unit Testing in Mind
- How to Add Swagger UI, Redoc and RapiDoc to a Rust API
- JWT Authentication and Authorization in a Rust API using Actix-Web
- How to Write Unit Tests for Your Rust API
- Dockerizing a Rust API Project: SQL Database and pgAdmin
- Deploy Rust App on VPS with GitHub Actions and Docker
Requirements
To ensure a smooth journey through this article, I’ve designed it to cater to both beginners and seasoned developers. However, there are some prerequisites you’ll need:
- Operating System: You should have a Windows, Linux, or Mac machine at your disposal.
- Docker Desktop: Make sure you have Docker Desktop installed on your system.
- Docker Knowledge: Some familiarity with Docker commands will be helpful.
- Rust Experience: Having some experience with Rust programming will be beneficial.
- Visual Studio Code (VS Code): You’ll need Visual Studio Code (VS Code) as your code editor.
Running the Rust API Project in Docker
To run the Rust API project with Docker, follow these simple steps:
- Download or clone the project from its GitHub repository at https://github.com/wpcodevo/complete-restful-api-in-rust and open the source code in your preferred text editor.
- Explore the project files in your text editor to gain an understanding of its components, including database migrations, unit tests, SQLx models, and API endpoints.
- Open your code editor’s integrated terminal and execute the command
docker-compose -f docker-compose.yml -f docker-compose.dev.yml up -d. This command will launch the Rust API, pgAdmin, and Postgres images within separate Docker containers. - Access the Swagger documentation by visiting
http://localhost:8000/. Alternatively, you can test endpoints using the Redoc UI athttp://localhost:8000/redocor the Rapidoc UI athttp://localhost:8000/rapidoc. These user interfaces provide a convenient way to interact with the API endpoints.
Running the Rust API Project on Your Machine
To run the Rust project on your local machine and execute the accompanying unit tests, follow the steps outlined below:
- Download or clone the project from its GitHub repository at https://github.com/wpcodevo/complete-restful-api-in-rust and open the source code in your preferred code editor.
- Start the Postgres and pgAdmin Docker containers by running the command
docker-compose -f docker-compose.no_api.yml up -d. - Apply the database migrations to the PostgreSQL database by running
sqlx migrate run. If you don’t already have the SQLx-CLI installed on your computer, you can do so by running the commandcargo install sqlx-cli --no-default-features --features postgres. - In the terminal of the root directory, run the command
cargo testwhich will first build the project and run the 49 unit tests that come with the Rust project. - Once the tests have been completed successfully, run the command
cargo runto start the Actix-web development server. - You can access the Swagger documentation by navigating to
http://localhost:8000/. Additionally, you have the option to use the Redoc UI available athttp://localhost:8000/redocor the Rapidoc UI accessible throughhttp://localhost:8000/rapidoc. These user interfaces offer a user-friendly approach to interact with the API endpoints and explore their functionality.
What is Docker Compose?
Docker Compose is a tool that simplifies managing multiple Docker containers. It’s like a handy script that follows instructions to start and organize your containers. You provide those instructions in a file called docker-compose.yml, where you specify what containers you want, how they should be set up, and how they should interact.
Instead of dealing with complex Docker commands for each container, you just run:
docker-compose up
Behind the scenes, Docker Compose takes care of implementing a myriad of configurations, eliminating the need for intricate Bash scripts or similar workarounds.
Within the docker-compose.yml file, you’ll specify critical elements, including the desired version of the Compose file format, at least one service definition, and optionally, the declaration of volumes and networks:
version: "3.7"
services:
  ...
volumes:
  ...
networks:
  ...
Setting Up Rust API with Docker Support
I’ll assume you either already have a Rust API project in mind that you’d like to containerize, or you’re following along with our tutorial series. However, if you’re starting from scratch and need a Rust API project, you can effortlessly obtain one by cloning the source code from our GitHub repository at https://github.com/wpcodevo/complete-restful-api-in-rust.
Once you’ve cloned the project, open it in your preferred code editor. Take a moment to explore the project’s files to get a sense of what it contains and how it’s structured.
After you’ve familiarized yourself with the project, switch to the Git branch labeled dockerize-rust-api-project. This ensures that we’re all starting from the same point in the tutorial, regardless of whether you’re using an existing Rust API or the sample project.
Configuring PostgreSQL and pgAdmin Containers with Docker Compose
Now, let’s dive into configuring PostgreSQL and pgAdmin containers using Docker Compose. To get started, create a docker-compose.yml file in your project’s root directory and insert the following Docker Compose configurations. I’ve added comments for clarity at each step:
docker-compose.yml
version: '3'  # Compose file version

services:  # Define the services to run
  postgres:  # PostgreSQL service
    image: postgres:15.3-alpine  # Use the PostgreSQL image from Docker Hub
    container_name: postgres  # Assign a name to the container
    environment:  # Set environment variables for PostgreSQL
      POSTGRES_USER: ${POSTGRES_USER}
      POSTGRES_PASSWORD: ${POSTGRES_PASSWORD}
      POSTGRES_DB: ${POSTGRES_DB}
    volumes:  # Create a volume to store PostgreSQL data
      - postgres:/var/lib/postgresql/data
    healthcheck:  # Define a health check for the container
      test: ["CMD", "pg_isready", "-h", "postgres", "-U", "${POSTGRES_USER}"]
      interval: 5s
      timeout: 5s
      retries: 5
    networks:  # Connect the container to a network
      - rust_app_network

  pgadmin:  # pgAdmin service
    image: dpage/pgadmin4  # Use the pgAdmin image from Docker Hub
    container_name: pgadmin  # Assign a name to the container
    environment:  # Set environment variables for pgAdmin
      PGADMIN_DEFAULT_EMAIL: ${PGADMIN_DEFAULT_EMAIL}
      PGADMIN_DEFAULT_PASSWORD: ${PGADMIN_DEFAULT_PASSWORD}
      PGADMIN_LISTEN_PORT: ${PGADMIN_LISTEN_PORT}
    volumes:  # Create a volume to store pgAdmin data
      - pgadmin-data:/var/lib/pgadmin
    restart: always  # Restart the container if it stops
    depends_on:  # Specify that this service depends on the PostgreSQL service
      - postgres
    networks:  # Connect the container to a network
      - rust_app_network

volumes:  # Define named volumes for data storage
  postgres:
  pgadmin-data:

networks:  # Define a custom network for the containers
  rust_app_network:
Setting PostgreSQL and pgAdmin Ports for Development
With the docker-compose.yml file in place, we now have two services: postgres and pgadmin. PostgreSQL serves as our database, while pgAdmin provides an intuitive interface for database management.
To ensure seamless development, we’ve set up port mappings for these services in a separate file, docker-compose.dev.yml. This allows us to access PostgreSQL via port 6500 and pgAdmin via port 5050.
Here’s what docker-compose.dev.yml looks like:
docker-compose.dev.yml
version: '3'

services:
  postgres:
    ports:
    - 6500:5432  # Map local port 6500 to PostgreSQL port 5432

  pgadmin:
    ports:
      - 5050:80  # Map local port 5050 to pgAdmin port 80
With these configurations, your PostgreSQL and pgAdmin containers are ready for use with Docker Compose. To start them, execute the following command:
docker-compose -f docker-compose.yml -f docker-compose.dev.yml up -d
Executing this command will initialize the containers and detach them from the current terminal session, enabling them to operate in the background. If the PostgreSQL and pgAdmin Docker images are not yet present on your system, they will be automatically fetched from DockerHub, built, and then launched within their respective containers.
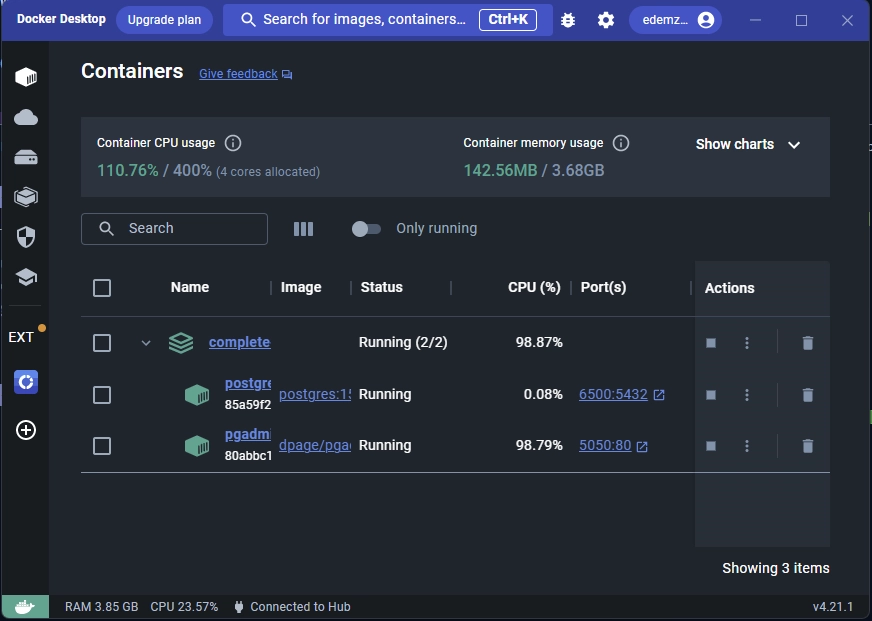
To confirm that the containers are running, you can check the list of active containers within the Docker Desktop application.
Generating the SQLx Prepared Queries
In our Rust API code, we’ve made extensive use of the sqlx::query_as! macro, a powerful tool provided by the SQLx toolkit. This macro not only facilitates the execution of SQL queries but also performs compile-time validation of these queries.
However, in order to successfully build our application in “offline mode” using sqlx::query_as!, we need to take a crucial step: generating prepared queries. This step is essential to prevent errors when Docker Compose executes the cargo build command, which we will specify in the subsequent section’s Dockerfile.
To initiate this process, we need to begin by applying SQLx migrations to our PostgreSQL database. Ensure that your PostgreSQL Docker container is running before executing this operation:
sqlx migrate run
Once the migrations have been synchronized with the PostgreSQL schema, you can proceed to generate the prepared queries by running the following command:
cargo sqlx prepare
Executing the command above prompts the SQLx-CLI to establish a connection with the PostgreSQL database, generate query metadata, and subsequently output them into a folder named .sqlx within the current directory.
Configuring Rust API Container with Docker Compose
To dockerize our Rust API, we need to make some adjustments to our Docker Compose files. Let’s start by stopping the running containers:
docker-compose -f docker-compose.yml -f docker-compose.dev.yml down
Setting Up Dockerfile for the Rust Project
In this section, we’ll delve into the Dockerfile configuration for containerizing our Rust project. A Dockerfile is a fundamental component in creating Docker images, allowing us to specify how our application should be packaged and run within a container.
To begin, you’ll need to create a file named “Dockerfile” within the root directory of your project and insert the following Dockerfile configurations:
Dockerfile
# Builder Stage
FROM rust:1.71 as builder
ENV SQLX_OFFLINE=true

# Create a new Rust project
RUN USER=root cargo new --bin complete-restful-api-in-rust
WORKDIR /complete-restful-api-in-rust

# Copy and build dependencies
COPY Cargo.toml Cargo.lock ./
RUN cargo build --release --locked
RUN rm src/*.rs

# Copy the source code and build the application
COPY . .
RUN cargo build --release --locked

# Production Stage
FROM debian:buster-slim
ARG APP=/usr/src/app

RUN apt-get update \
    && apt-get install -y ca-certificates tzdata \
    && rm -rf /var/lib/apt/lists/*

ENV TZ=Etc/UTC \
    APP_USER=appuser

RUN groupadd $APP_USER \
    && useradd -g $APP_USER $APP_USER \
    && mkdir -p ${APP}

COPY --from=builder /complete-restful-api-in-rust/target/release/complete-restful-api-in-rust ${APP}/complete-restful-api-in-rust

RUN chown -R $APP_USER:$APP_USER ${APP}

USER $APP_USER
WORKDIR ${APP}

ENTRYPOINT ["./complete-restful-api-in-rust"]
EXPOSE 8000
The above code accomplishes several tasks. Let’s break them down for a better understanding:
- Builder Stage: This section starts by setting up a builder stage using the Rust 1.71 base image. It also configures an environment variable
SQLX_OFFLINEastrue. This mode helps optimize dependency resolution and compilation. - Create a New Rust Project: It creates a new Rust project within a directory named
complete-restful-api-in-rustand sets it as the working directory. - Copy and Build Dependencies: The Dockerfile copies the project’s
Cargo.tomlandCargo.lockfiles, allowing for dependency resolution and building. - Copy the Source Code and Build the Application: It then copies the entire source code into the container and builds the Rust application.
- Production Stage: In this stage, the Dockerfile switches to using a Debian Buster Slim image as the base. It sets up various configurations, including timezone and user/group management.
- Copy the Built Application: The previously built Rust application is copied from the builder stage to the production stage.
- User Configuration: The Dockerfile creates a non-root user
appuserto run the application and sets the appropriate permissions. - Work Directory and Entry Point: It defines the working directory and specifies the entry point for the container, which is the Rust application. Additionally, it exposes port 8000 for communication.
Setting Up Docker Compose for the Rust API
With our Dockerfile in place, it’s time to configure a service in the Docker Compose file. This service will build a Docker image based on the instructions provided in the Dockerfile. Follow these steps to set it up:
- Open the
docker-compose.ymlfile in your project directory. - Add the following
api-rustservice configuration to thedocker-compose.ymlfile:
docker-compose.yml
version: '3'

services:
  api-rust:
    image: /api-rust
    container_name: api-rust
    restart: unless-stopped
    environment:
      DATABASE_URL: ${DATABASE_URL}
      JWT_SECRET_KEY: ${JWT_SECRET_KEY}
      JWT_MAXAGE: ${JWT_MAXAGE}
    build:
      context: .
      dockerfile: Dockerfile
    networks:
      - rust_app_network
In the image field, replace the placeholder <your_username> with your DockerHub username. This step is crucial for Docker Compose to correctly locate the image. Make sure to make this modification.
Here’s what happens next:
- Docker Compose will check your local system for the image
<your_username>/api-rust. If it’s not found, it will attempt to fetch it from your DockerHub account. - If the image is not present on DockerHub either, Docker Compose will build the image using the instructions defined in your Dockerfile.
After making these adjustments, your docker-compose.yml file should now have the following configurations:
docker-compose.yml
version: '3'

services:
  api-rust:
    image: edemziddah/api-rust
    container_name: api-rust
    restart: unless-stopped
    environment:
      DATABASE_URL: ${DATABASE_URL}
      JWT_SECRET_KEY: ${JWT_SECRET_KEY}
      JWT_MAXAGE: ${JWT_MAXAGE}
    build:
      context: .
      dockerfile: Dockerfile
    networks:
      - rust_app_network

  postgres:
    image: postgres:15.3-alpine
    container_name: postgres
    environment:
      POSTGRES_USER: ${POSTGRES_USER}
      POSTGRES_PASSWORD: ${POSTGRES_PASSWORD}
      POSTGRES_DB: ${POSTGRES_DB}
    volumes:
      - postgres:/var/lib/postgresql/data
    healthcheck:
      test: ["CMD", "pg_isready", "-h", "postgres", "-U", "${POSTGRES_USER}"]
      interval: 5s
      timeout: 5s
      retries: 5
    networks:
      - rust_app_network

  pgadmin:
    image: dpage/pgadmin4
    container_name: pgadmin
    environment:
      PGADMIN_DEFAULT_EMAIL: ${PGADMIN_DEFAULT_EMAIL}
      PGADMIN_DEFAULT_PASSWORD: ${PGADMIN_DEFAULT_PASSWORD}
      PGADMIN_LISTEN_PORT: ${PGADMIN_LISTEN_PORT}
    volumes:
      - pgadmin-data:/var/lib/pgadmin
    restart: always
    depends_on:
      - postgres
    networks:
      - rust_app_network

volumes:
  postgres:
  pgadmin-data:

networks:
  rust_app_network:
Setting Container Port and Database URL for Development
Now that we have added the api-rust service to the docker-compose.yml, it’s essential to configure port mapping for accessing the API from outside the container. Follow these steps to set up the necessary port mapping:
Open the docker-compose.dev.yml file and incorporate the following code into the existing configurations:
docker-compose.dev.yml
version: '3'

services:
  api-rust:
    ports:
      - "8000:8000"
    environment:
      DATABASE_URL: ${DATABASE_CONTAINER_URL}
In this code snippet, port 8000 is mapped to the default port that the API operates on. This mapping enables external access to the API via port 8000. Additionally, a new environment variable, DATABASE_CONTAINER_URL, is introduced for the database connection URL.
If you examine the .env file and inspect the DATABASE_URL and DATABASE_CONTAINER_URL variables, you’ll notice that postgres is used in place of ‘localhost‘ in the DATABASE_CONTAINER_URL. Utilizing postgres within the connection URL ensures that the Rust application can successfully connect to the PostgreSQL database, even though it’s running in a separate container.
Here’s a snippet of the .env file for reference:
# -----------------------------------------------------------------------------
# Database (PostgreSQL - Docker)
# -----------------------------------------------------------------------------
DATABASE_URL=postgresql://postgres:password123@localhost:6500/rust_app?schema=public
DATABASE_CONTAINER_URL=postgresql://postgres:password123@postgres:5432/rust_app?schema=public
Once you’ve made these modifications, your docker-compose.dev.yml file should now resemble the following content:
docker-compose.dev.yml
version: '3'

services:
  api-rust:
    ports:
      - "8000:8000"
    environment:
      DATABASE_URL: ${DATABASE_CONTAINER_URL}
  postgres:
    ports:
    - 6500:5432

  pgadmin:
    ports:
      - 5050:80
To ensure that the Docker image contains only the necessary files and avoids including development-related artifacts, create a .dockerignore file and include the following content:
/target
.git
.gitignore
.vscode
Running the Rust API with Docker Compose
Now that all the necessary configurations are in place, it’s time to fire up the Docker containers. To do so, execute the following command in your terminal:
docker-compose -f docker-compose.yml -f docker-compose.dev.yml up -d
This command will attempt to retrieve the <your_username>/api-rust image from your DockerHub repository. Since we haven’t pushed this image to the repository, Docker Compose will build the image on your local machine, based on the instructions outlined in the Dockerfile. Once the image is ready, it will launch the postgres, pgadmin, and api-rust services within their respective Docker containers.
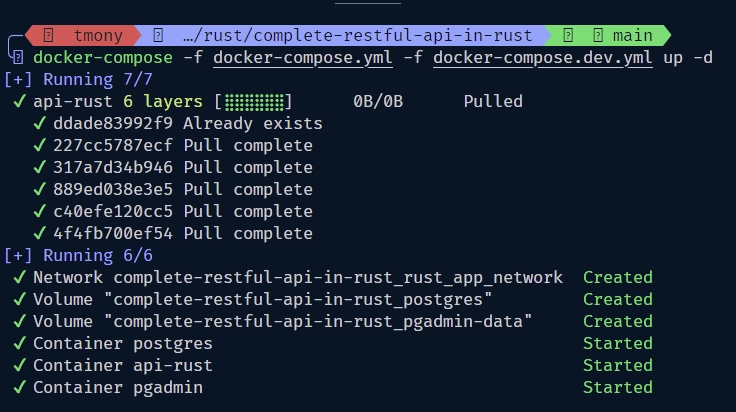
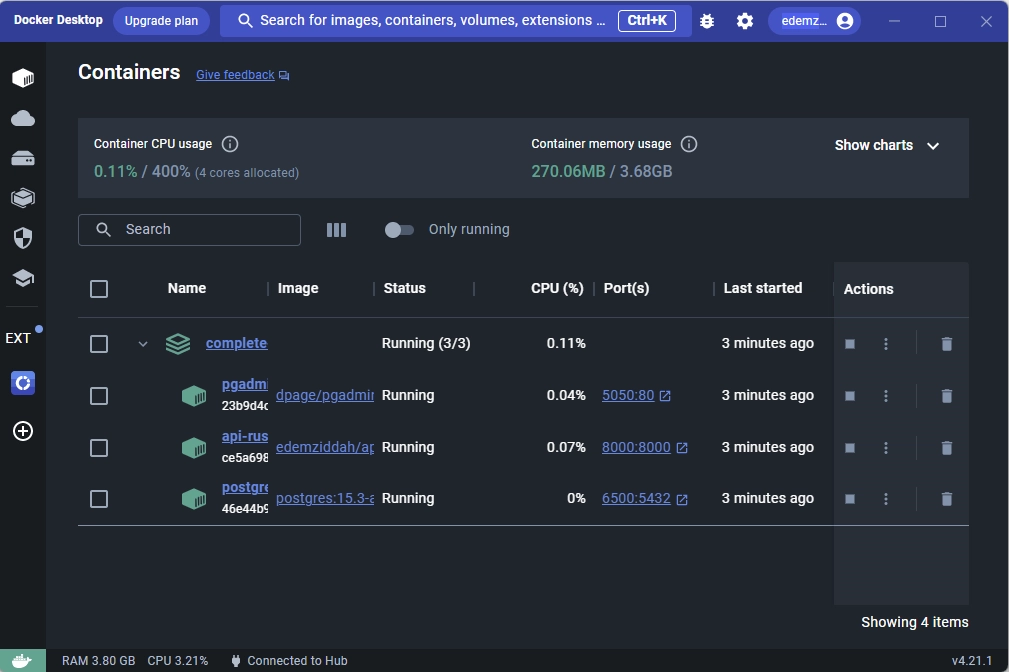
Once this process concludes, you can verify that the containers are up and running either by using the docker ps command or by checking the active containers through the Docker Desktop application.
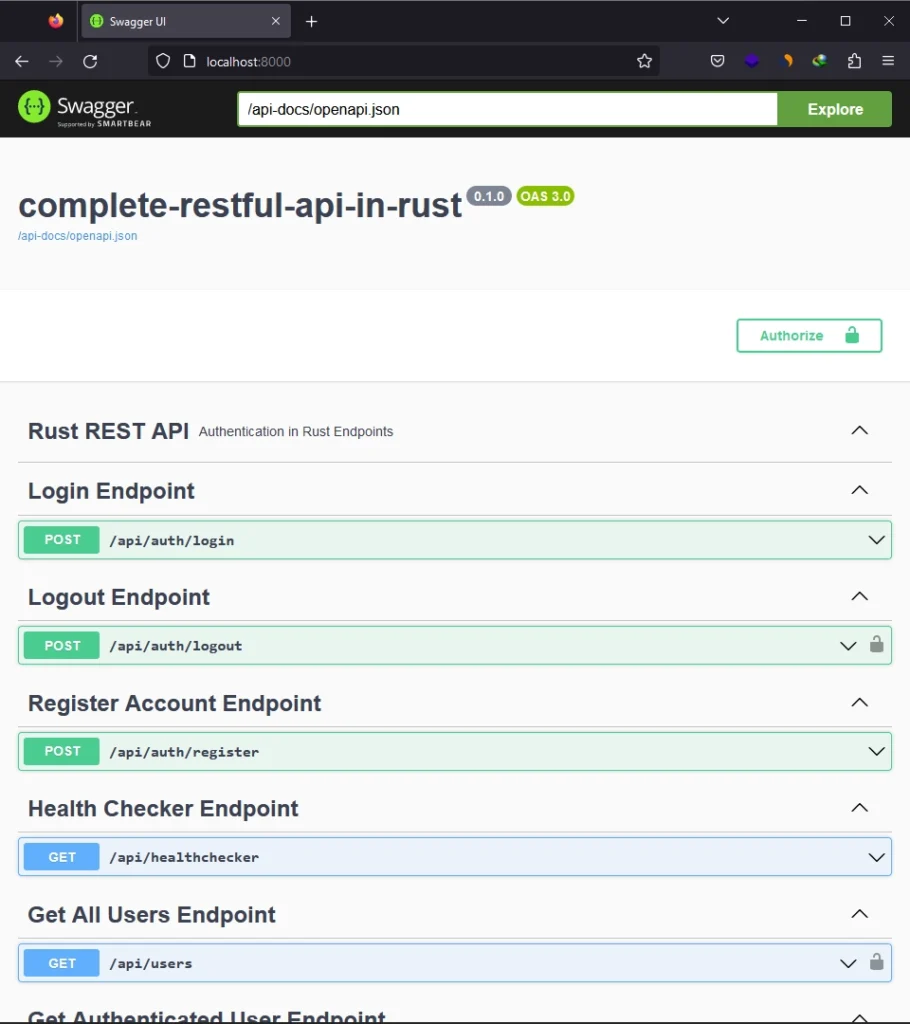
Testing the Rust API using Swagger Docs
At this stage, we’ve successfully set up the Rust API project, as well as the PostgreSQL and pgAdmin servers, each running within its dedicated Docker container. Now, let’s verify the functionality of our API endpoints to ensure everything is functioning as expected.
To begin, open your web browser and navigate to the API’s Swagger documentation by visiting the following URL: http://localhost:8000/. Within the Swagger documentation, carry out all the required authentication operations, including registering a new account, signing in with your credentials, retrieving your profile information, and logging out.
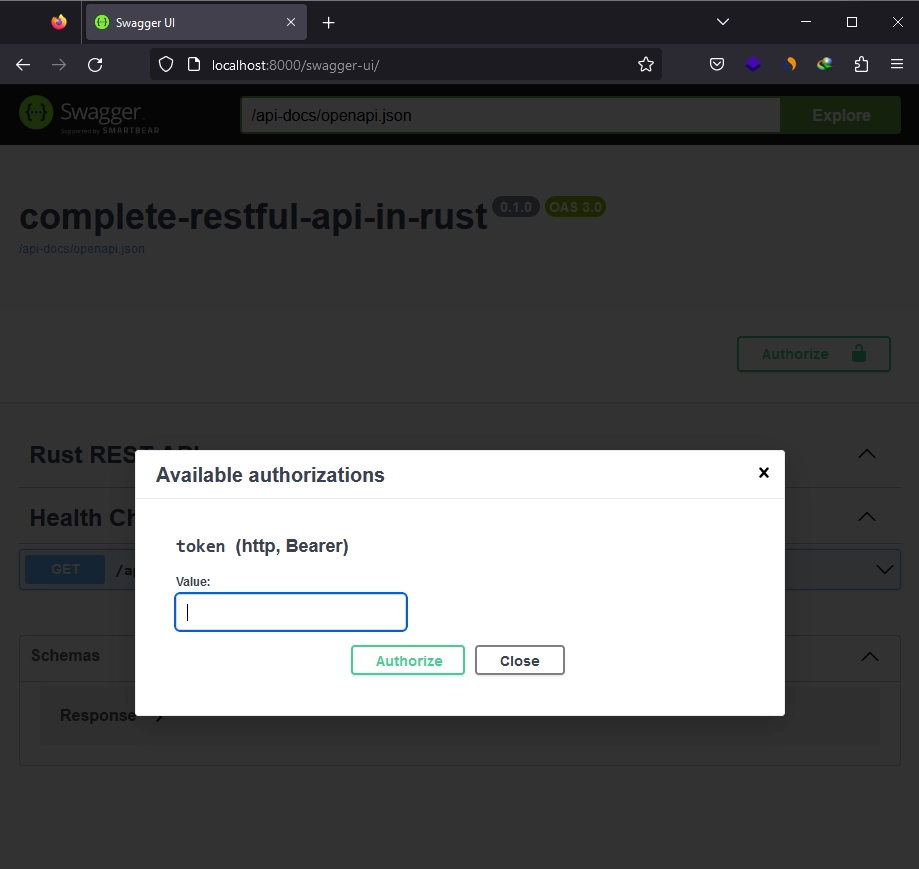
To access the secured endpoints, follow these steps:
- Copy the JWT (JSON Web Token) from the JSON response you received when you logged into the API.
- Paste the copied JWT into the “Value” input field within the “Available authorizations” popup.
- Click the “Authorize” button to log in on the Swagger documentation page.
By completing these steps, Swagger Docs will include the JWT with your requests, allowing you to access the protected endpoints seamlessly.
When attempting to retrieve the list of all users through the /api/users endpoint, you may encounter a 403 Unauthorized error. This occurs because only users with an ‘admin‘ role have access to this endpoint. To gain access, you must update your role from ‘user‘ to ‘admin‘.
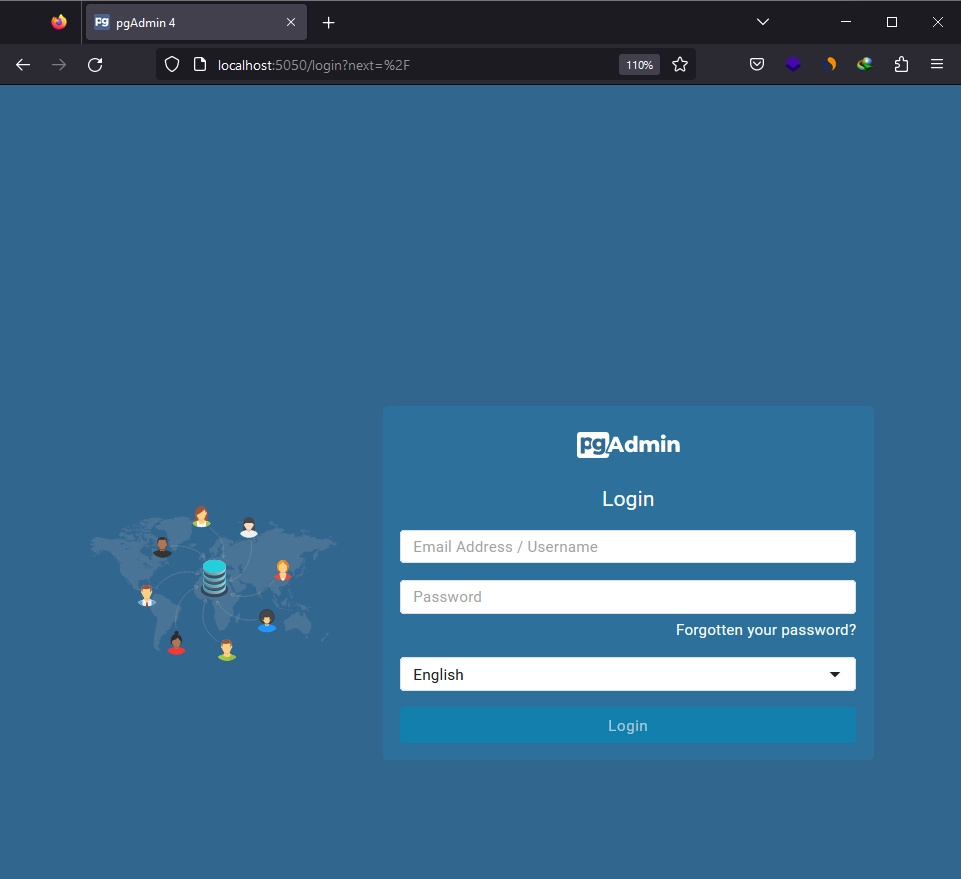
Accessing the pgAdmin Container from your Browser
Now, let’s move on and access the pgAdmin UI through your browser. This will allow us to sign in to the PostgreSQL database and view the stored data. Simply open your web browser and go to http://localhost:5050/ to access the pgAdmin UI. Then, sign in using the credentials provided in the .env file.
After successfully signing in, proceed by clicking the “Add New Server” button. You will need to enter the necessary credentials as shown in the image below. For the password, use password123 as specified in the .env file. Finally, click the “Save” button to register the PostgreSQL server.

After successfully registering the PostgreSQL server, follow these steps:
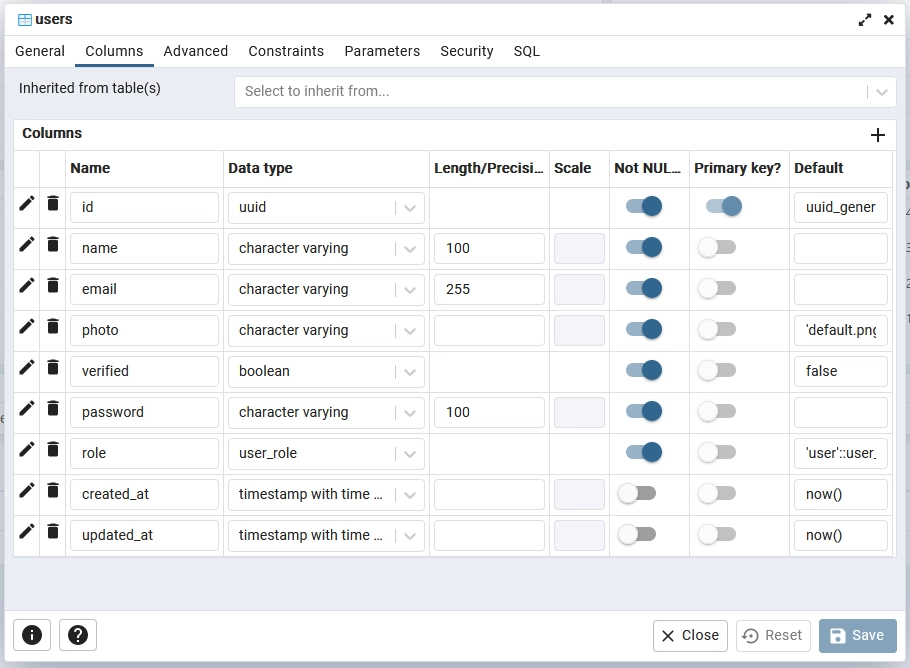
- Navigate to Databases -> rust_app -> Schemas -> public -> Tables.
- You will find two tables:
usersand_sqlx_migrations. - Right-click on the
userstable and select “Properties” from the available options. - In the displayed popup, click on the “Columns” tab to view all the columns of the
userstable.
To change your account’s role from ‘user‘ to ‘admin‘, follow these steps:
- Close the popup after viewing the ‘users‘ table’s properties.
- Right-click on the ‘users‘ table again, but this time, choose the “Query Tool” option.
- Execute the following SQL statement to display all available users:
select * from "users";- Copy the ID of the user whose role you want to change.
- Execute the following SQL statement to update the user’s role:
update users set role = 'admin' where id = '<id_copied>' returning *;Make sure to replace <id_copied> with the ID you copied earlier before executing the query. Once you’ve changed the role, try accessing all available users via the /api/users endpoint on the Swagger docs, and you should now receive the complete list since you have the “admin” role.
Conclusion
And that concludes our tutorial. Throughout this guide, we’ve covered the process of containerizing a Rust API project alongside PostgreSQL and pgAdmin servers using Docker. I trust you found this tutorial informative and enjoyable. If you have any questions or feedback, please don’t hesitate to share them in the comments section. Thank you for reading!