

RTK Query is a server state management library for ReactJs. This article will teach you how to implement JWT Authentication and Authorization with React, Redux Toolkit, RTK Query, Material UI, React Hook Form, and Zod.
Related Articles:
- React Query, and Axios Interceptors JWT Authentication
- Vue.js, Pinia, Vue Query, Axios Interceptors JWT Authentication
Here is what you’ll learn:
- JWT Authentication and Authorization Flow with React and Redux Toolkit.
- How to make HTTP requests with Redux Toolkit and RTK Query.
- How to create login and registration forms with form validations.
- How to protect certain pages (Authentication)
- How to restrict access to certain pages (Authorization).
- How to verify a user’s email address with RTK Query

Overview of React, Redux Toolkit, RTK Query JWT Authentication example
We’ll build a React.js JWT authentication application with Material UI where:
- The form validation of both the register and login forms will be done with React-hook-form and Zod.
- The Navbar will be re-rendered based on the login status and role of the user.
Here are some screenshots:
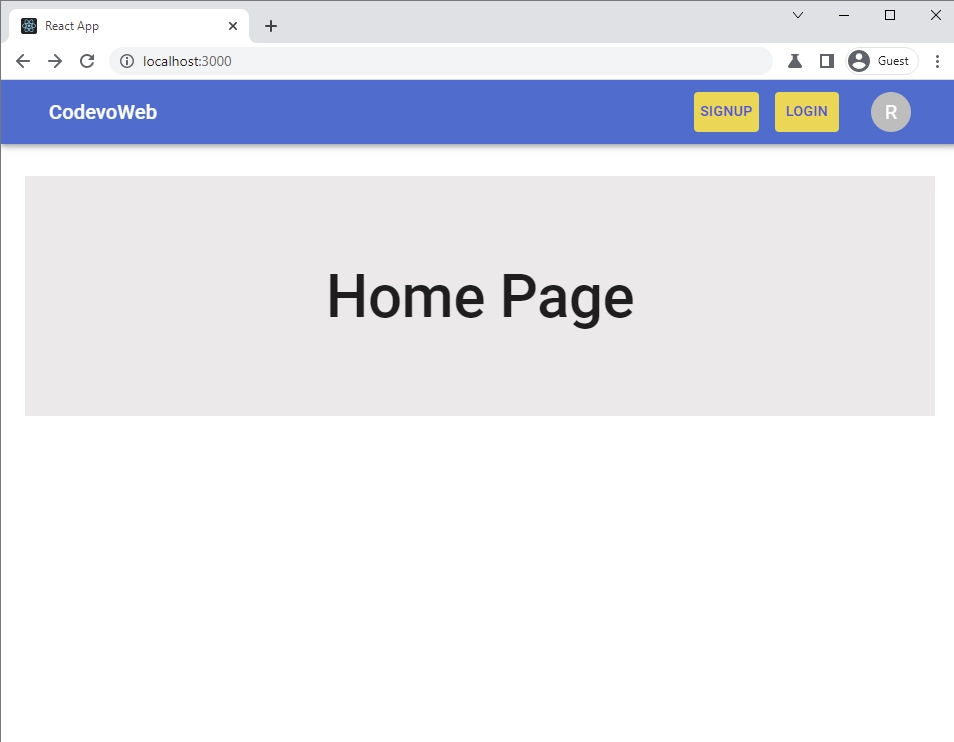
– Home Page
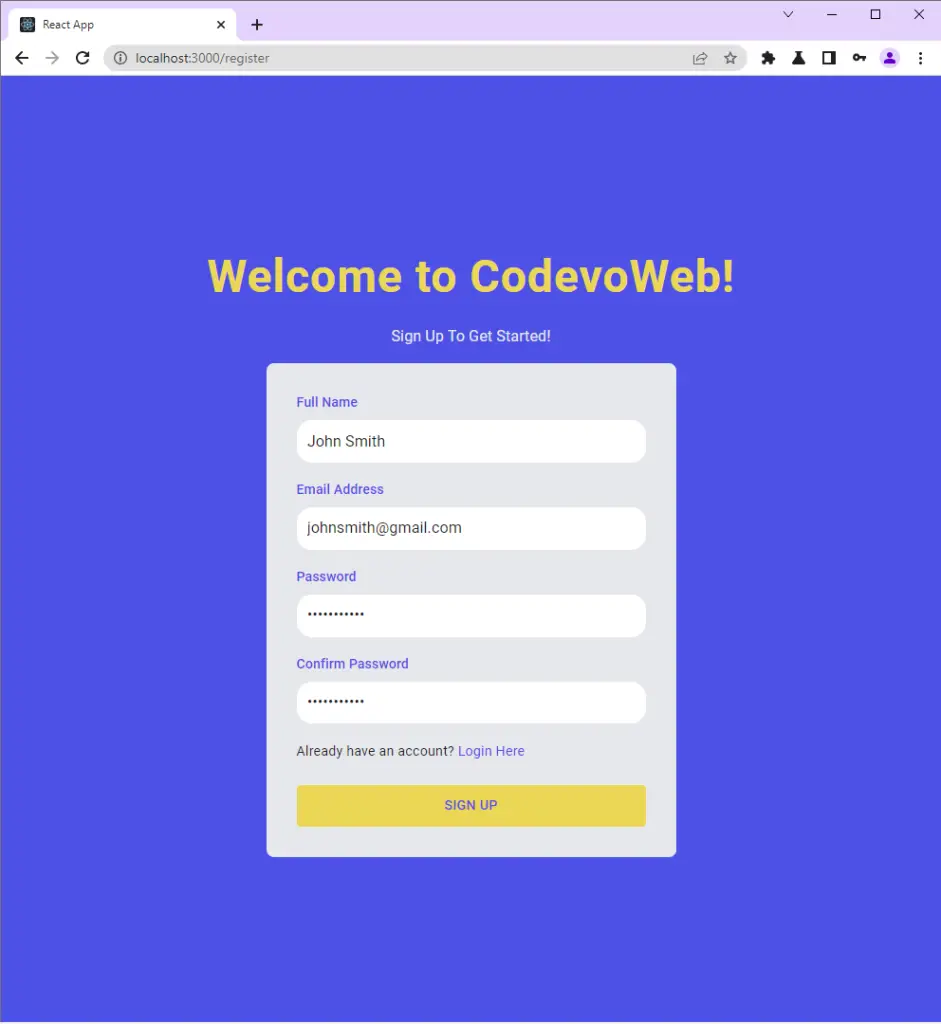
-On the signup page, the user provides the required information and makes a POST request with RTK Query to the server by clicking the “SIGN UP” button.
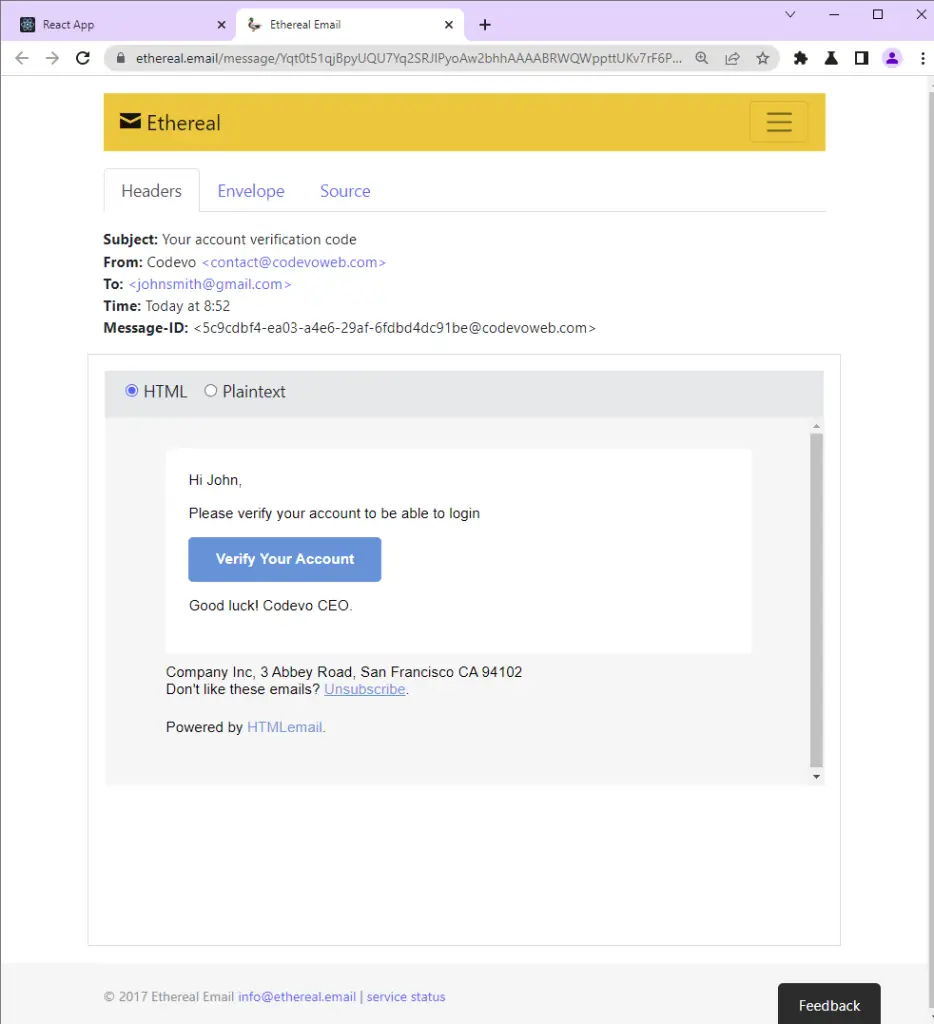
-The server then validates the credentials and sends a verification email to the user’s email address.
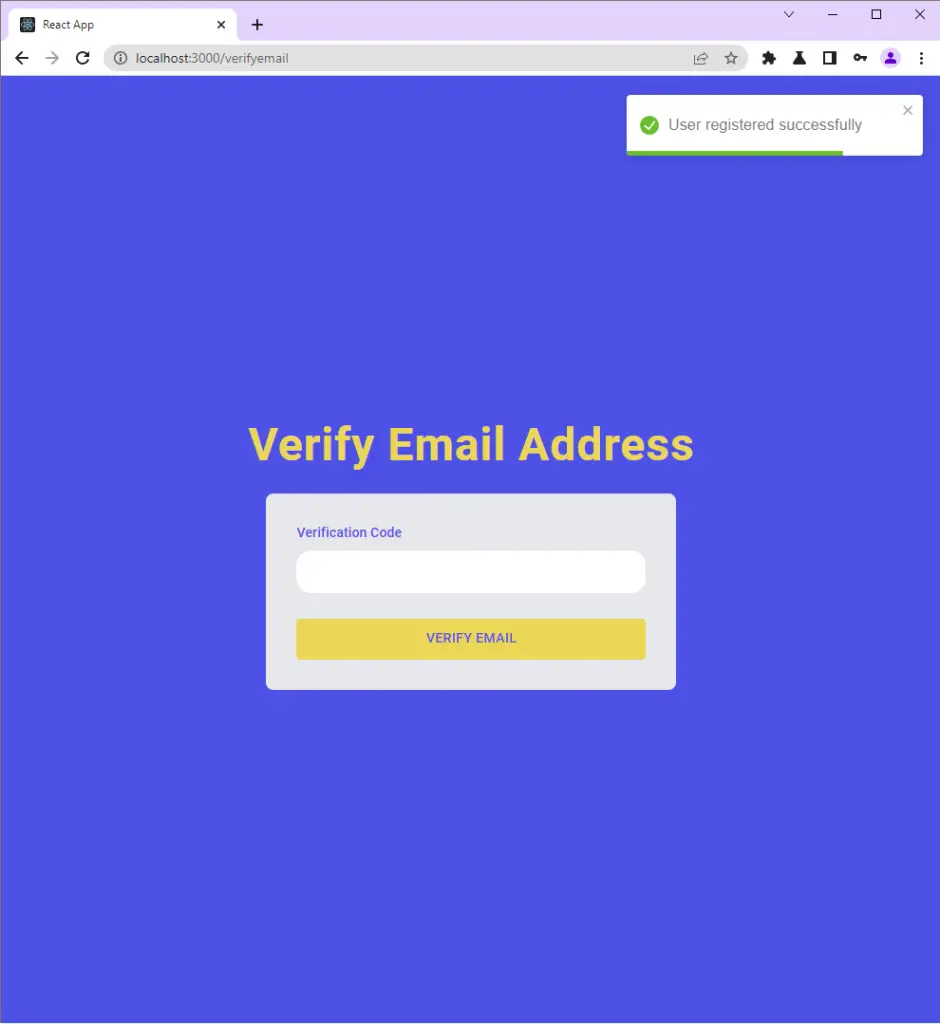
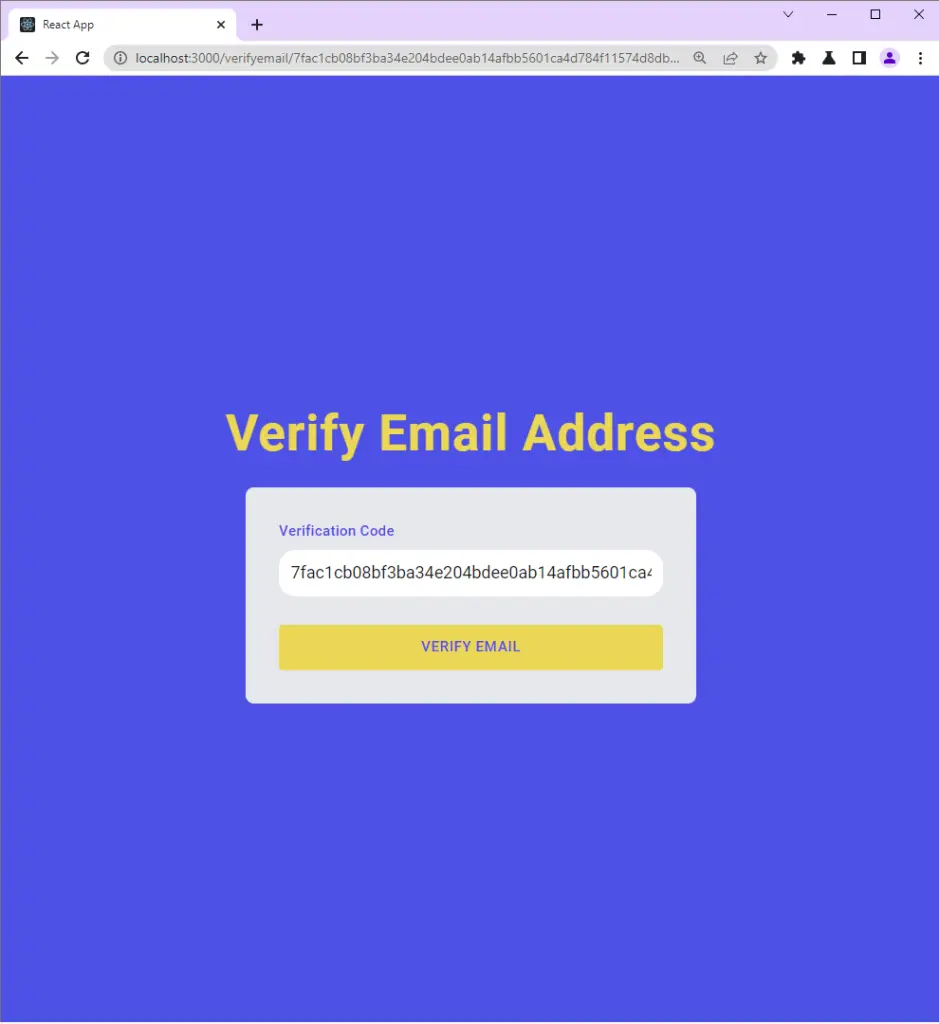
-The user opens the email and clicks the “Verify Your Account” button.
-The user is then redirected to the email verification page where the verification code will be automatically filled in the input field.
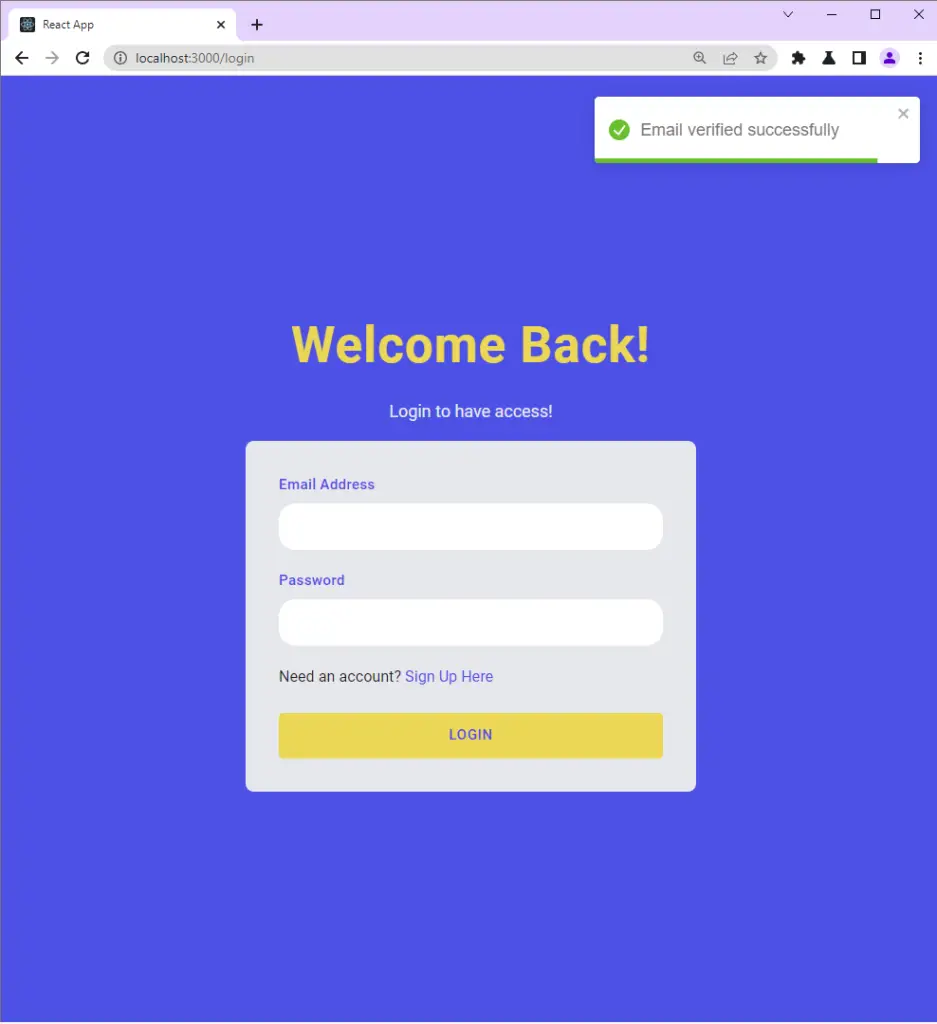
-After the user’s email is verified, React then redirects the user to the login page.
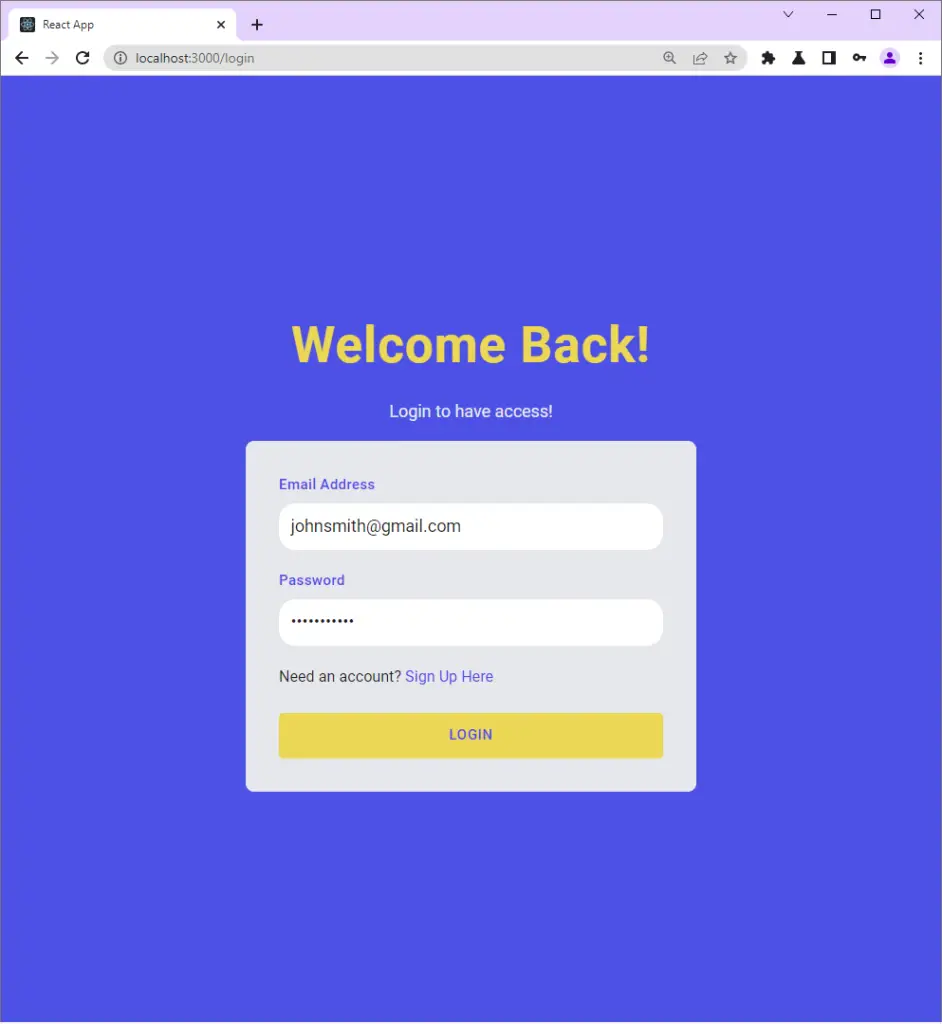
-The user then provides the credentials and makes a POST request with RTK Query to the server by clicking the “LOGIN” button.
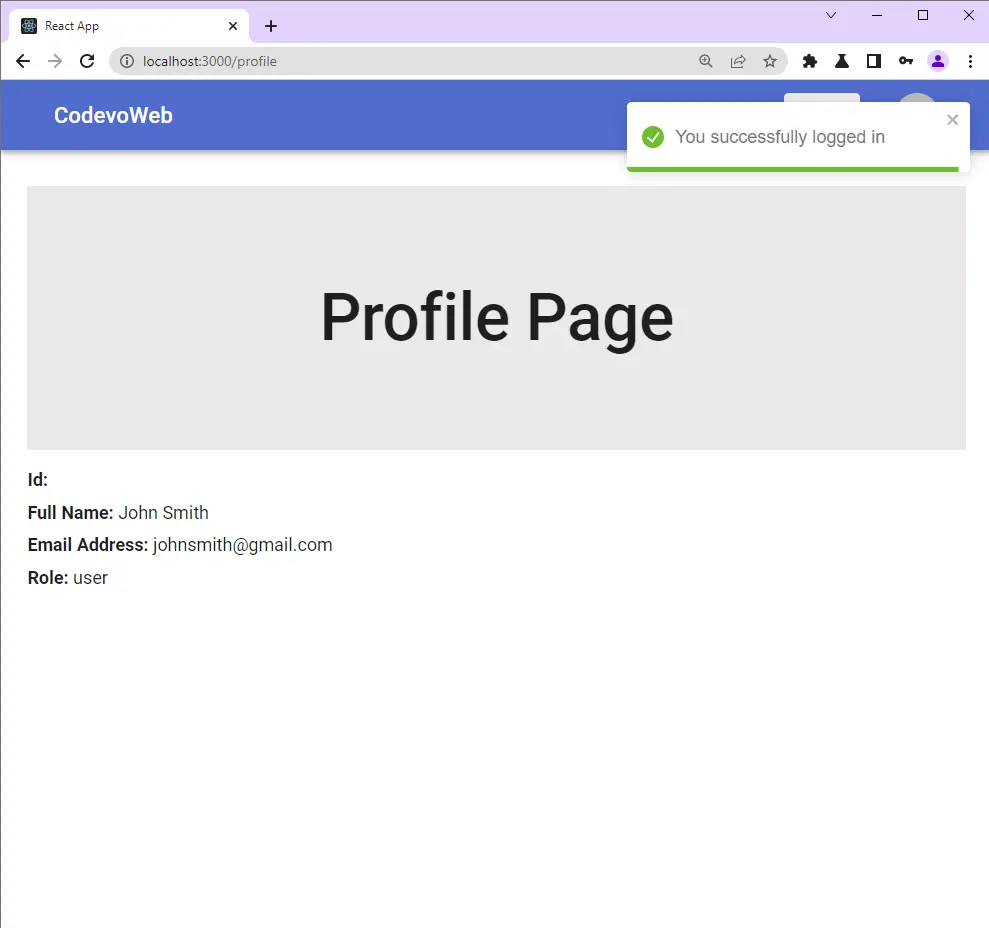
-After the user is authenticated on the server, React then redirects the user to the profile page.
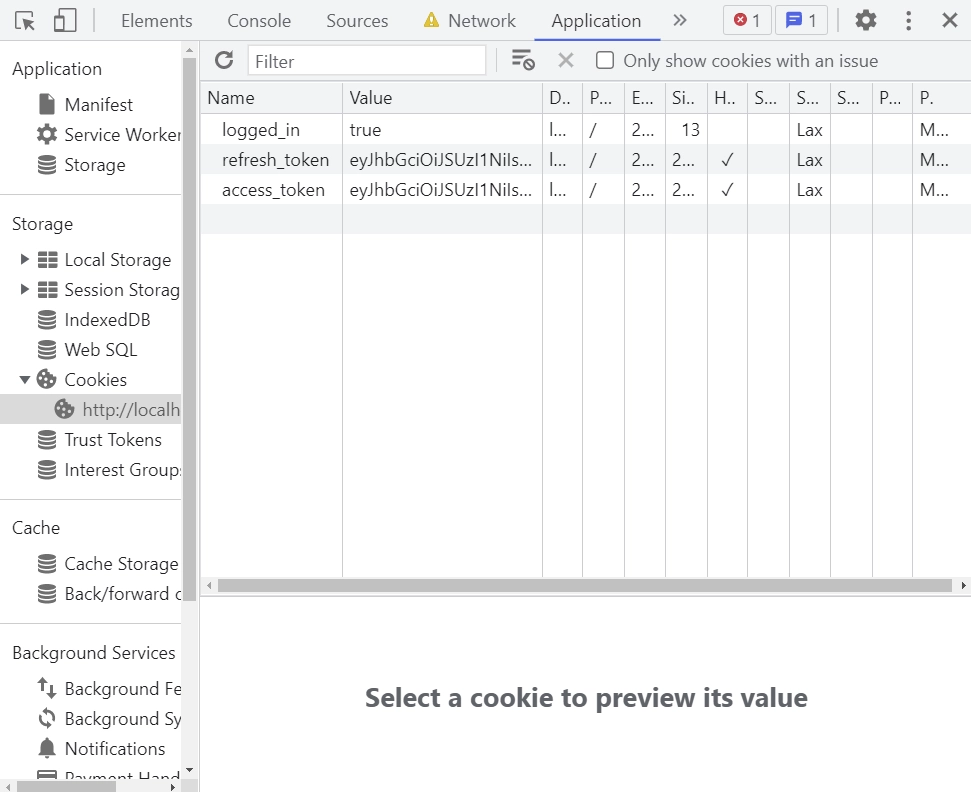
-You can also check the browser dev tools to see the cookies sent by the server after the user was authenticated.
Run the Frontend and Backend Apps
To successfully run both the backend and frontend projects on your machine, follow these step-by-step instructions:
- Begin by downloading or cloning the project from its GitHub repository: https://github.com/wpcodevo/JWT_Authentication_React. Open the source code in your preferred text editor.
- In the integrated terminal of your IDE or text editor, execute the command
docker-compose up -dto launch the MongoDB and Redis Docker containers. - Navigate to the backend directory using the command
cd ./backend. Runyarn installto install all required dependencies. - Open the
backend/src/app.tsfile and uncomment the Nodemailer code.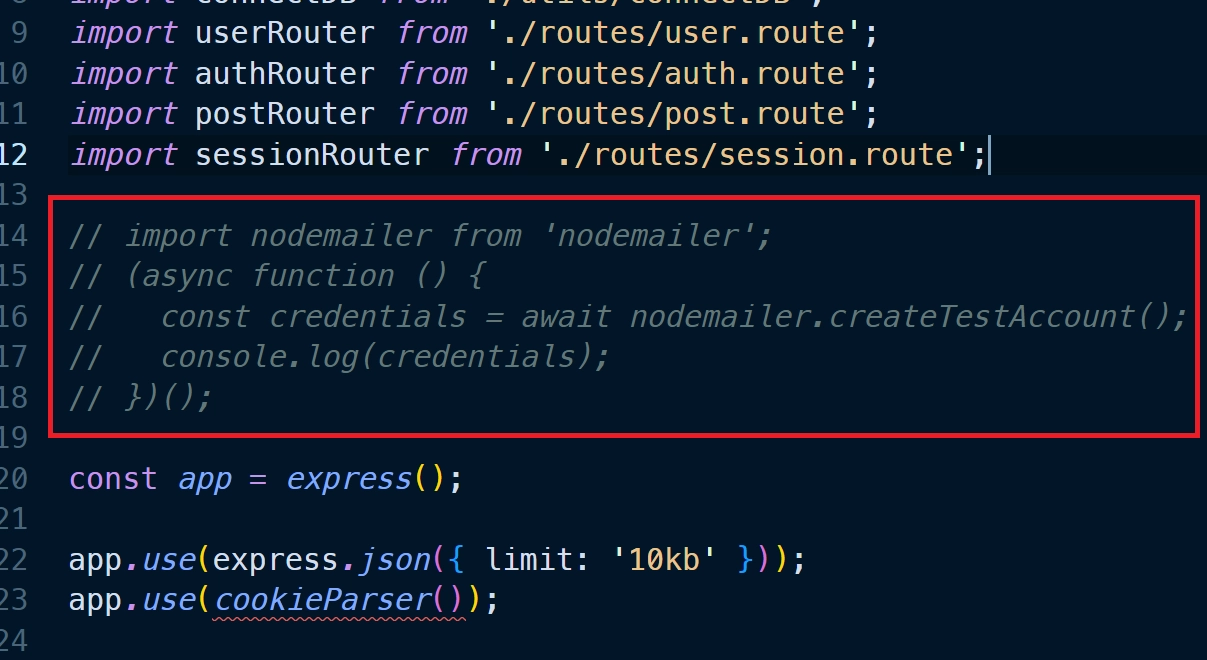
Then, run the commandyarn startto initiate the Node.js development server. You should see the Nodemailer SMTP credentials printed in the terminal. Copy the values of the ‘user‘ and ‘pass‘ fields and add them to their respective variables in thebackend/.envfile. Afterward, comment out the Nodemailer code in thebackend/src/app.tsfile, and save the file to restart the Node.js development server. - In another terminal, move to the frontend directory from the root level using the command
cd ./frontend. Runyarn installto install all necessary dependencies. Once the installation is complete, executeyarn devto start the Vite development server. - Open the application in your browser by visiting
http://localhost:3000/and explore the app’s features. During the registration and password reset process, a Nodemailer link will be printed in the terminal of the backend server that you can click to open the mailbox.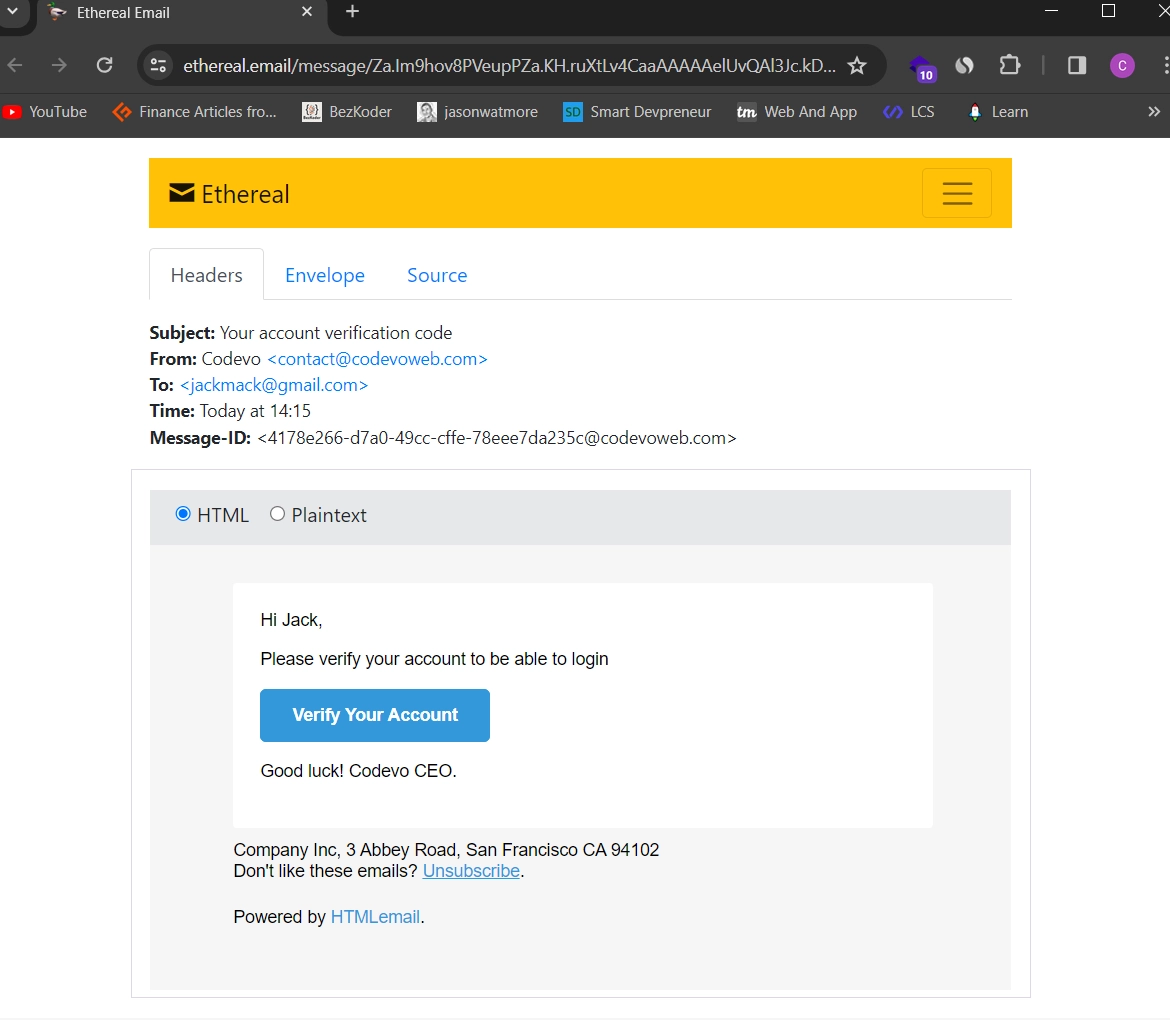
Note: Do not visit the app usinghttp://127.0.0.1:3000/to avoid getting CORS errors.
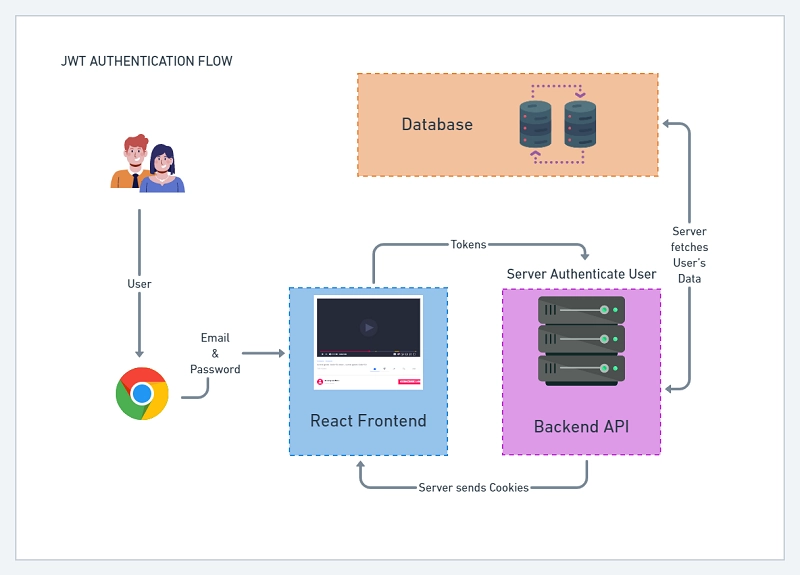
User Registration and Login Flow with RTK Query & React
To authenticate a user we are going to call three routes:
- RTK Query POST request
api/auth/register– to register the new user - RTK Query POST request
api/auth/login– to sign in the registered user - RTK Query GET request
api/auth/verifyemail/verificationCode– to verify the user’s email address
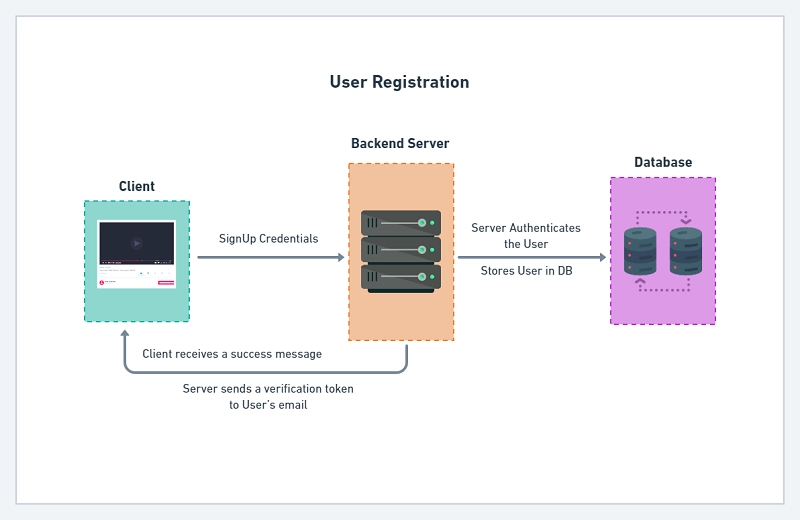
Below is a diagram describing the user registration flow we’ll follow
Here is the JWT Authentication flow with the frontend and backend.
You can find step-by-step implementation of the backend APIs in the following tutorials:
- Node.js + TypeScript + MongoDB: JWT Authentication
- Node.js + TypeScript + MongoDB: JWT Refresh Token
- Build Golang gRPC Server and Client: Access & Refresh Tokens
- Node.js + Prisma + PostgreSQL: Access & Refresh Tokens
- Golang & MongoDB: JWT Authentication and Authorization
- API with Node.js + PostgreSQL + TypeORM: JWT Authentication
Technologies
- React
- Material UI
- typescript
- zod
- react-toastify
- react-router-dom
- react-hook-form
- react-cookie
- @reduxjs/toolkit
- react-redux
Project Structure
Here is the project structure for the JWT Authentication & Authorization with React, Redux Toolkit, RTK Query, MUI, and React-Hook-Form.
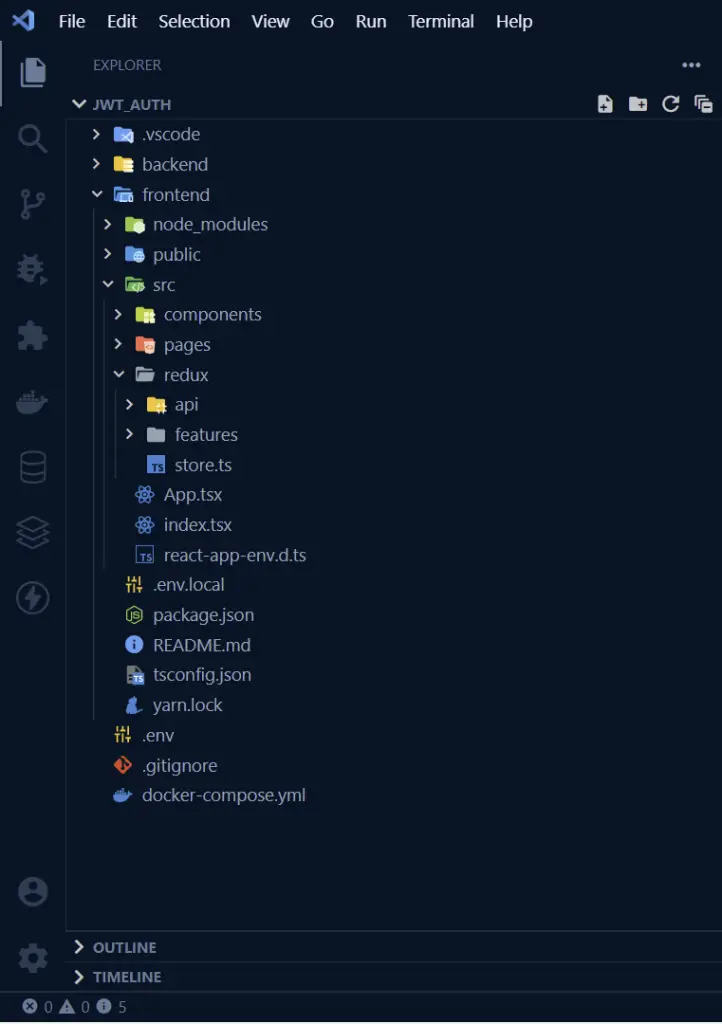
frontend/
├── public/
│ ├── favicon.ico
│ ├── index.html
│ ├── logo192.png
│ ├── logo512.png
│ ├── manifest.json
│ └── robots.txt
├── src/
│ ├── components/
│ │ ├── FormInput.tsx
│ │ ├── FullScreenLoader.tsx
│ │ ├── Header.tsx
│ │ ├── layout.tsx
│ │ └── requireUser.tsx
│ ├── pages/
│ │ ├── admin.page.tsx
│ │ ├── home.page.tsx
│ │ ├── login.page.tsx
│ │ ├── profile.page.tsx
│ │ ├── register.page.tsx
│ │ ├── unauthorize.page.tsx
│ │ └── verifyemail.page.tsx
│ ├── redux/
│ │ ├── api/
│ │ │ ├── authApi.ts
│ │ │ ├── types.ts
│ │ │ └── userApi.ts
│ │ ├── features/
│ │ │ └── userSlice.ts
│ │ └── store.ts
│ ├── App.tsx
│ ├── index.tsx
│ └── react-app-env.d.ts
├── .env.local
├── package.json
├── README.md
├── tsconfig.json
└── yarn.lock
Boilerplate and Configuration
Initialize a TypeScript React Project with Create-React-App
First, we need to initialize a new React project. This can be achieved by using the Create-React-App template that has TypeScript already configured.
Open the terminal in the project you want to create the frontend and run this command:
yarn create react-app frontend --template typescript
Install the Necessary Dependencies
Run the command below to install all the dependencies we’ll need in this project.
yarn add zod react-toastify react-router-dom react-redux react-cookie react-hook-form @reduxjs/toolkit @hookform/resolvers @mui/material @mui/lab @emotion/styled @emotion/react
react-cookie– A package that can be used to set and access cookies in Reactreact-toastify– A package for displaying messages for a short period of time.zod– A validation library for both frontend and backend.@hookform/resolvers– contains validation resolvers for popular validation libraries
Create Redux Store with TypeScript
The redux store is located in src/redux/store.tsx – is the central station of our Redux Toolkit application.
The store makes use of RTK’s configureStore API which is an abstraction over the regular createStore function. It adds some default store configurations for a better developer experience.
Since we are using TypeScript, we need to extract the RootState and AppDispatch from the store.
You can read How I Setup Redux Toolkit and RTK Query the right way for more details.
Next, create a typed version of useDispatch and useSelector hooks to avoid importing RootState and AppDispatch types whenever you want to use useDispatch and useSelector hooks in any file.
import { configureStore } from '@reduxjs/toolkit';
import { TypedUseSelectorHook, useDispatch, useSelector } from 'react-redux';

export const store = configureStore({
  reducer: {},
  devTools: process.env.NODE_ENV === 'development',
  middleware: (getDefaultMiddleware) => getDefaultMiddleware({}).concat([]),
});

export type RootState = ReturnType<typeof store.getState>;
export type AppDispatch = typeof store.dispatch;
export const useAppDispatch = () => useDispatch<AppDispatch>();
export const useAppSelector: TypedUseSelectorHook<RootState> = useSelector;
Provide the Store and React-Router-Dom to the App
To make the data from the Redux store available to all our React components, the Provider component from react-redux is used to wrap the root App.
Also, I wrapped the BrowserRouter component from react-router-dom around the entire app to make React Router Dom control the navigation between the different pages.
src/index.tsx
import React from 'react';
import ReactDOM from 'react-dom/client';
import { Provider } from 'react-redux';
import { BrowserRouter as Router } from 'react-router-dom';
import App from './App';
import { store } from './redux/store';

const root = ReactDOM.createRoot(
  document.getElementById('root') as HTMLElement
);
root.render(
  <React.StrictMode>
    <Provider store={store}>
      <Router>
            <App />
      </Router>
    </Provider>
  </React.StrictMode>
);
Create a State Slice with Redux Toolkit
Redux Toolkit combines reducers, actions, and constants in a single file called a slice.
So, let’s create a slice to store the currently logged-in user’s information. The createSlice API returns an object having reducers and actions that can be used for injection with other middleware.
The userSlice provides the following important actions:
- logout – for resetting the
userStateslice in the store - setUser – for adding the user’s information to the
userStateslice in the store.
src/redux/features/userSlice.ts
import { createSlice, PayloadAction } from '@reduxjs/toolkit';
import { IUser } from '../api/types';

interface IUserState {
  user: IUser | null;
}

const initialState: IUserState = {
  user: null,
};

export const userSlice = createSlice({
  initialState,
  name: 'userSlice',
  reducers: {
    logout: () => initialState,
    setUser: (state, action: PayloadAction<IUser>) => {
      state.user = action.payload;
    },
  },
});

export default userSlice.reducer;

export const { logout, setUser } = userSlice.actions;
Create API Services with Redux Toolkit and RTK Query
Before creating the queries and mutations for modifying and accessing the server state, let’s define the necessary TypeScript types.
Now define the user interface in src/redux/api/types.ts file.
src/redux/api/types.ts
export interface IUser {
  name: string;
  email: string;
  role: string;
  _id: string;
  createdAt: Date;
  updatedAt: Date;
  __v: number;
}

export interface IGenericResponse {
  status: string;
  message: string;
}
When using RTK Query it’s recommended by the Redux community to put all the API definitions relating to a particular resource in one file.
This pattern becomes handy when dealing with large applications with several endpoints.
The API definitions relating to authentication will reside in the src/redux/api/authApi.ts file.
registerUser– Makes a POST request with RTK Query to register the userloginUser– Makes a POST request with RTK Query to sign in the registered userverifyEmail– Makes a GET request with RTK Query to verify the registered user’s email addresslogoutUser– Makes a GET request with RTK Query to logout the user
src/redux/api/authApi.ts
import { createApi, fetchBaseQuery } from '@reduxjs/toolkit/query/react';
import { LoginInput } from '../../pages/login.page';
import { RegisterInput } from '../../pages/register.page';
import { IGenericResponse } from './types';
import { userApi } from './userApi';

const BASE_URL = process.env.REACT_APP_SERVER_ENDPOINT as string;

export const authApi = createApi({
  reducerPath: 'authApi',
  baseQuery: fetchBaseQuery({
    baseUrl: `${BASE_URL}/api/auth/`,
  }),
  endpoints: (builder) => ({
    registerUser: builder.mutation<IGenericResponse, RegisterInput>({
      query(data) {
        return {
          url: 'register',
          method: 'POST',
          body: data,
        };
      },
    }),
    loginUser: builder.mutation<
      { access_token: string; status: string },
      LoginInput
    >({
      query(data) {
        return {
          url: 'login',
          method: 'POST',
          body: data,
          credentials: 'include',
        };
      },
      async onQueryStarted(args, { dispatch, queryFulfilled }) {
        try {
          await queryFulfilled;
          await dispatch(userApi.endpoints.getMe.initiate(null));
        } catch (error) {}
      },
    }),
    verifyEmail: builder.mutation<
      IGenericResponse,
      { verificationCode: string }
    >({
      query({ verificationCode }) {
        return {
          url: `verifyemail/${verificationCode}`,
          method: 'GET',
        };
      },
    }),
    logoutUser: builder.mutation<void, void>({
      query() {
        return {
          url: 'logout',
          credentials: 'include',
        };
      },
    }),
  }),
});

export const {
  useLoginUserMutation,
  useRegisterUserMutation,
  useLogoutUserMutation,
  useVerifyEmailMutation,
} = authApi;
Note: You must set
credentials: 'include'to enable RTK Query to send the cookies along with the request.
Details on some methods relating to RTK Query
transformResponse– This property allows us to manipulate the data returned by a query or mutation before it hits the cache.onQueryStarted– This function will allow us to automatically fetch the currently logged-in user’s information if the login was successful.
Next, let’s define the API query to fetch the currently logged-in user’s information.
The getMe method will make a GET request with the cookies we stored in the browser to the server in exchange for the user’s information.
src/redux/api/userApi.ts
import { createApi, fetchBaseQuery } from '@reduxjs/toolkit/query/react';
import { setUser } from '../features/userSlice';
import { IUser } from './types';

const BASE_URL = process.env.REACT_APP_SERVER_ENDPOINT as string;

export const userApi = createApi({
  reducerPath: 'userApi',
  baseQuery: fetchBaseQuery({
    baseUrl: `${BASE_URL}/api/users/`,
  }),
  tagTypes: ['User'],
  endpoints: (builder) => ({
    getMe: builder.query<IUser, null>({
      query() {
        return {
          url: 'me',
          credentials: 'include',
        };
      },
      transformResponse: (result: { data: { user: IUser } }) =>
        result.data.user,
      async onQueryStarted(args, { dispatch, queryFulfilled }) {
        try {
          const { data } = await queryFulfilled;
          dispatch(setUser(data));
        } catch (error) {}
      },
    }),
  }),
});
Let me explain what I did in the onQueryStarted function.
- First I waited for the query to resolve.
- I then destructured the data returned by the server if the query is successful and dispatched the
setUseraction with the user’s information as the payload. - The
setUseraction will then update the store with the user’s information.
Update the Redux Store
Now, include the API and slice reducers in the configureStore reducer object for the Redux store to work properly.
Also, include the middleware each API provides to the configureStore middleware property. Adding the middleware will enable caching, invalidation, polling, and other essential features of RTK Query.
import { configureStore } from '@reduxjs/toolkit';
import { TypedUseSelectorHook, useDispatch, useSelector } from 'react-redux';
import { authApi } from './api/authApi';
import { userApi } from './api/userApi';
import userReducer from './features/userSlice';

export const store = configureStore({
  reducer: {
    [authApi.reducerPath]: authApi.reducer,
    [userApi.reducerPath]: userApi.reducer,
    userState: userReducer,
  },
  devTools: process.env.NODE_ENV === 'development',
  middleware: (getDefaultMiddleware) =>
    getDefaultMiddleware({}).concat([authApi.middleware, userApi.middleware]),
});

export type RootState = ReturnType<typeof store.getState>;
export type AppDispatch = typeof store.dispatch;
export const useAppDispatch = () => useDispatch<AppDispatch>();
export const useAppSelector: TypedUseSelectorHook<RootState> = useSelector;
Create a Reusable MUI and React Hook Form Components
The next step is to create a FormInput component with Material UI and React Hook Form.
I used the useFormContext hook to provide the form context to the custom input component. The useFormContext hook will give us access to all the methods returned by the useForm hook.
You can read React, Material UI, and React Hook Form: Log in and Signup Forms for a better understanding of form validation.
src/components/FormInput.tsx
import {
  FormHelperText,
  Typography,
  FormControl,
  Input as _Input,
  InputProps,
} from '@mui/material';
import { styled } from '@mui/material/styles';
import { FC } from 'react';
import { Controller, useFormContext } from 'react-hook-form';

const Input = styled(_Input)`
  background-color: white;
  padding: 0.4rem 0.7rem;
`;

type IFormInputProps = {
  name: string;
  label: string;
} & InputProps;

const FormInput: FC<IFormInputProps> = ({ name, label, ...otherProps }) => {
  const {
    control,
    formState: { errors },
  } = useFormContext();

  return (
    <Controller
      control={control}
      defaultValue=''
      name={name}
      render={({ field }) => (
        <FormControl fullWidth sx={{ mb: 2 }}>
          <Typography
            variant='body2'
            sx={{ color: '#2363eb', mb: 1, fontWeight: 500 }}
          >
            {label}
          </Typography>
          <Input
            {...field}
            fullWidth
            disableUnderline
            sx={{ borderRadius: '1rem' }}
            error={!!errors[name]}
            {...otherProps}
          />
          <FormHelperText error={!!errors[name]}>
            {errors[name] ? errors[name].message : ''}
          </FormHelperText>
        </FormControl>
      )}
    />
  );
};

export default FormInput;
Redux Toolkit and RTK Query Register User
Here we are going to need zod for the schema validation and react-hook-form for the form validation.
These are the fields we need to provide in the form:
name– required, must be less than 100 characters-
email– required, must be a valid email address. password– required, must be between 8 and 32 characterspasswordConfirm– required, must be equal topassword.
src/pages/register.page.tsx
import { Box, Container, Typography } from '@mui/material';
import { styled } from '@mui/material/styles';
import { FormProvider, SubmitHandler, useForm } from 'react-hook-form';
import { object, string, TypeOf } from 'zod';
import { zodResolver } from '@hookform/resolvers/zod';
import FormInput from '../components/FormInput';
import { useEffect } from 'react';
import { Link, useNavigate } from 'react-router-dom';
import { useRegisterUserMutation } from '../redux/api/authApi';
import { LoadingButton as _LoadingButton } from '@mui/lab';
import { toast } from 'react-toastify';

const LoadingButton = styled(_LoadingButton)`
  padding: 0.6rem 0;
  background-color: #f9d13e;
  color: #2363eb;
  font-weight: 500;

  &:hover {
    background-color: #ebc22c;
    transform: translateY(-2px);
  }
`;

const LinkItem = styled(Link)`
  text-decoration: none;
  color: #2363eb;
  &:hover {
    text-decoration: underline;
  }
`;

const registerSchema = object({
  name: string().min(1,'Full name is required').max(100),
  email: string()
    .min(1,'Email address is required')
    .email('Email Address is invalid'),
  password: string()
    .min(1,'Password is required')
    .min(8, 'Password must be more than 8 characters')
    .max(32, 'Password must be less than 32 characters'),
  passwordConfirm: string().min(1,'Please confirm your password'),
}).refine((data) => data.password === data.passwordConfirm, {
  path: ['passwordConfirm'],
  message: 'Passwords do not match',
});

export type RegisterInput = TypeOf<typeof registerSchema>;

const RegisterPage = () => {
  const methods = useForm<RegisterInput>({
    resolver: zodResolver(registerSchema),
  });

  // ? Calling the Register Mutation
  const [registerUser, { isLoading, isSuccess, error, isError }] =
    useRegisterUserMutation();

  const navigate = useNavigate();

  const {
    reset,
    handleSubmit,
    formState: { isSubmitSuccessful },
  } = methods;

  useEffect(() => {
    if (isSuccess) {
      toast.success('User registered successfully');
      navigate('/verifyemail');
    }

    if (isError) {
      console.log(error);
      if (Array.isArray((error as any).data.error)) {
        (error as any).data.error.forEach((el: any) =>
          toast.error(el.message, {
            position: 'top-right',
          })
        );
      } else {
        toast.error((error as any).data.message, {
          position: 'top-right',
        });
      }
    }
    // eslint-disable-next-line react-hooks/exhaustive-deps
  }, [isLoading]);

  useEffect(() => {
    if (isSubmitSuccessful) {
      reset();
    }
    // eslint-disable-next-line react-hooks/exhaustive-deps
  }, [isSubmitSuccessful]);

  const onSubmitHandler: SubmitHandler<RegisterInput> = (values) => {
    // ? Executing the RegisterUser Mutation
    registerUser(values);
  };

  return (
    <Container
      maxWidth={false}
      sx={{
        display: 'flex',
        justifyContent: 'center',
        alignItems: 'center',
        height: '100vh',
        backgroundColor: '#2363eb',
      }}
    >
      <Box
        sx={{
          display: 'flex',
          justifyContent: 'center',
          alignItems: 'center',
          flexDirection: 'column',
        }}
      >
        <Typography
          textAlign='center'
          component='h1'
          sx={{
            color: '#f9d13e',
            fontSize: { xs: '2rem', md: '3rem' },
            fontWeight: 600,
            mb: 2,
            letterSpacing: 1,
          }}
        >
          Welcome to CodevoWeb!
        </Typography>
        <Typography component='h2' sx={{ color: '#e5e7eb', mb: 2 }}>
          Sign Up To Get Started!
        </Typography>

        <FormProvider {...methods}>
          <Box
            component='form'
            onSubmit={handleSubmit(onSubmitHandler)}
            noValidate
            autoComplete='off'
            maxWidth='27rem'
            width='100%'
            sx={{
              backgroundColor: '#e5e7eb',
              p: { xs: '1rem', sm: '2rem' },
              borderRadius: 2,
            }}
          >
            <FormInput name='name' label='Full Name' />
            <FormInput name='email' label='Email Address' type='email' />
            <FormInput name='password' label='Password' type='password' />
            <FormInput
              name='passwordConfirm'
              label='Confirm Password'
              type='password'
            />
            <Typography sx={{ fontSize: '0.9rem', mb: '1rem' }}>
              Already have an account?{' '}
              <LinkItem to='/login'>Login Here</LinkItem>
            </Typography>

            <LoadingButton
              variant='contained'
              sx={{ mt: 1 }}
              fullWidth
              disableElevation
              type='submit'
              loading={isLoading}
            >
              Sign Up
            </LoadingButton>
          </Box>
        </FormProvider>
      </Box>
    </Container>
  );
};

export default RegisterPage;
Here is what I did in the above snippets:
- First I imported all the necessary dependencies.
- I then customized the
LoadingButtoncomponent from@mui/labwith my own styles. - Next, I also added some styles to the
Linkcomponent fromreact-router-dom - I then defined the form registration schema with
zodand inferred the TypeScript type from it using theTypeOfgeneric. - Next, I evoked the
useFormhook and provided it with theregisterSchemaandRegisterInput. - Here comes the good part. I called the
useRegisterUserMutationhook we exported fromsrc/redux/api/authApi.tsfile to have access to theregisterUsermethod. - Next, I then evoked the
registerUsermutation method with the form data returned by theonSubmitHandler.
Note: When you include the custom FormInput component in the form you need to provide it with the form context using the FormProvider component from react-hook-form .
Redux Toolkit and RTK Query Login User
The Login Page is similar to the Registration Page. Just copy and paste then modify the required fields.
For the form validation, these are the fields we need:
email– required, must be a valid email addresspassword– required, must be between 8 and 32 characters
src/pages/login.page.tsx
import { Box, Container, Typography } from '@mui/material';
import { styled } from '@mui/material/styles';
import { FormProvider, SubmitHandler, useForm } from 'react-hook-form';
import { object, string, TypeOf } from 'zod';
import { zodResolver } from '@hookform/resolvers/zod';
import FormInput from '../components/FormInput';
import { useEffect } from 'react';
import { Link, useLocation, useNavigate } from 'react-router-dom';
import { LoadingButton as _LoadingButton } from '@mui/lab';
import { toast } from 'react-toastify';
import { useLoginUserMutation } from '../redux/api/authApi';

const LoadingButton = styled(_LoadingButton)`
  padding: 0.6rem 0;
  background-color: #f9d13e;
  color: #2363eb;
  font-weight: 500;

  &:hover {
    background-color: #ebc22c;
    transform: translateY(-2px);
  }
`;

const LinkItem = styled(Link)`
  text-decoration: none;
  color: #2363eb;
  &:hover {
    text-decoration: underline;
  }
`;

const loginSchema = object({
  email: string()
    .min(1,'Email address is required')
    .email('Email Address is invalid'),
  password: string()
    .min(1,'Password is required')
    .min(8, 'Password must be more than 8 characters')
    .max(32, 'Password must be less than 32 characters'),
});

export type LoginInput = TypeOf<typeof loginSchema>;

const LoginPage = () => {
  const methods = useForm<LoginInput>({
    resolver: zodResolver(loginSchema),
  });

  // ? API Login Mutation
  const [loginUser, { isLoading, isError, error, isSuccess }] =
    useLoginUserMutation();

  const navigate = useNavigate();
  const location = useLocation();

  const from = ((location.state as any)?.from.pathname as string) || '/profile';

  const {
    reset,
    handleSubmit,
    formState: { isSubmitSuccessful },
  } = methods;

  useEffect(() => {
    if (isSuccess) {
      toast.success('You successfully logged in');
      navigate(from);
    }
    if (isError) {
      if (Array.isArray((error as any).data.error)) {
        (error as any).data.error.forEach((el: any) =>
          toast.error(el.message, {
            position: 'top-right',
          })
        );
      } else {
        toast.error((error as any).data.message, {
          position: 'top-right',
        });
      }
    }
    // eslint-disable-next-line react-hooks/exhaustive-deps
  }, [isLoading]);

  useEffect(() => {
    if (isSubmitSuccessful) {
      reset();
    }
    // eslint-disable-next-line react-hooks/exhaustive-deps
  }, [isSubmitSuccessful]);

  const onSubmitHandler: SubmitHandler<LoginInput> = (values) => {
    // ? Executing the loginUser Mutation
    loginUser(values);
  };

  return (
    <Container
      maxWidth={false}
      sx={{
        display: 'flex',
        justifyContent: 'center',
        alignItems: 'center',
        height: '100vh',
        backgroundColor: '#2363eb',
      }}
    >
      <Box
        sx={{
          display: 'flex',
          justifyContent: 'center',
          alignItems: 'center',
          flexDirection: 'column',
        }}
      >
        <Typography
          textAlign='center'
          component='h1'
          sx={{
            color: '#f9d13e',
            fontWeight: 600,
            fontSize: { xs: '2rem', md: '3rem' },
            mb: 2,
            letterSpacing: 1,
          }}
        >
          Welcome Back!
        </Typography>
        <Typography
          variant='body1'
          component='h2'
          sx={{ color: '#e5e7eb', mb: 2 }}
        >
          Login to have access!
        </Typography>

        <FormProvider {...methods}>
          <Box
            component='form'
            onSubmit={handleSubmit(onSubmitHandler)}
            noValidate
            autoComplete='off'
            maxWidth='27rem'
            width='100%'
            sx={{
              backgroundColor: '#e5e7eb',
              p: { xs: '1rem', sm: '2rem' },
              borderRadius: 2,
            }}
          >
            <FormInput name='email' label='Email Address' type='email' />
            <FormInput name='password' label='Password' type='password' />

            <Typography sx={{ fontSize: '0.9rem', mb: '1rem' }}>
              Need an account? <LinkItem to='/register'>Sign Up Here</LinkItem>
            </Typography>

            <LoadingButton
              variant='contained'
              sx={{ mt: 1 }}
              fullWidth
              disableElevation
              type='submit'
              loading={isLoading}
            >
              Login
            </LoadingButton>
          </Box>
        </FormProvider>
      </Box>
    </Container>
  );
};

export default LoginPage;
We gonna evoke the loginUser mutation with the form data if there is no validation error.
The loginUser mutation will make a POST request to the server with the credentials provided. The server will then return some cookies to the browser assuming the credentials are valid.
The user will be redirected to the protected page or the profile page if the login was successful.
Redux Toolkit and RTK Query Verify Email Address
Now let’s create a React Material UI component to verify the registered user’s email address.
src/pages/verifyemail.page.tsx
import { Box, Container, Typography } from '@mui/material';
import { styled } from '@mui/material/styles';
import { FormProvider, SubmitHandler, useForm } from 'react-hook-form';
import { object, string, TypeOf } from 'zod';
import { zodResolver } from '@hookform/resolvers/zod';
import FormInput from '../components/FormInput';
import { useEffect } from 'react';
import { useNavigate, useParams } from 'react-router-dom';
import { LoadingButton as _LoadingButton } from '@mui/lab';
import { toast } from 'react-toastify';
import { useVerifyEmailMutation } from '../redux/api/authApi';

const LoadingButton = styled(_LoadingButton)`
  padding: 0.6rem 0;
  background-color: #f9d13e;
  color: #2363eb;
  font-weight: 500;

  &:hover {
    background-color: #ebc22c;
    transform: translateY(-2px);
  }
`;

const verificationCodeSchema = object({
  verificationCode: string().min(1, 'Verification code is required'),
});

export type VerificationCodeInput = TypeOf<typeof verificationCodeSchema>;

const EmailVerificationPage = () => {
  const { verificationCode } = useParams();

  const methods = useForm<VerificationCodeInput>({
    resolver: zodResolver(verificationCodeSchema),
  });

  // ? API Login Mutation
  const [verifyEmail, { isLoading, isSuccess, data, isError, error }] =
    useVerifyEmailMutation();

  const navigate = useNavigate();

  const {
    reset,
    handleSubmit,
    formState: { isSubmitSuccessful },
  } = methods;

  useEffect(() => {
    if (verificationCode) {
      reset({ verificationCode });
    }
    // eslint-disable-next-line react-hooks/exhaustive-deps
  }, []);

  useEffect(() => {
    if (isSuccess) {
      toast.success(data?.message);
      navigate('/login');
    }
    if (isError) {
      if (Array.isArray((error as any).data.error)) {
        (error as any).data.error.forEach((el: any) =>
          toast.error(el.message, {
            position: 'top-right',
          })
        );
      } else {
        toast.error((error as any).data.message, {
          position: 'top-right',
        });
      }
    }
    // eslint-disable-next-line react-hooks/exhaustive-deps
  }, [isLoading]);

  useEffect(() => {
    if (isSubmitSuccessful) {
      reset();
    }
    // eslint-disable-next-line react-hooks/exhaustive-deps
  }, [isSubmitSuccessful]);

  const onSubmitHandler: SubmitHandler<VerificationCodeInput> = ({
    verificationCode,
  }) => {
    // ? Executing the verifyEmail Mutation
    verifyEmail({ verificationCode });
  };

  return (
    <Container
      maxWidth={false}
      sx={{
        display: 'flex',
        justifyContent: 'center',
        alignItems: 'center',
        minHeight: '100vh',
        backgroundColor: '#2363eb',
      }}
    >
      <Box
        sx={{
          display: 'flex',
          justifyContent: 'center',
          alignItems: 'center',
          flexDirection: 'column',
        }}
      >
        <Typography
          textAlign='center'
          component='h1'
          sx={{
            color: '#f9d13e',
            fontWeight: 600,
            fontSize: { xs: '2rem', md: '3rem' },
            mb: 2,
            letterSpacing: 1,
          }}
        >
          Verify Email Address
        </Typography>

        <FormProvider {...methods}>
          <Box
            component='form'
            onSubmit={handleSubmit(onSubmitHandler)}
            noValidate
            autoComplete='off'
            maxWidth='27rem'
            width='100%'
            sx={{
              backgroundColor: '#e5e7eb',
              p: { xs: '1rem', sm: '2rem' },
              borderRadius: 2,
            }}
          >
            <FormInput name='verificationCode' label='Verification Code' />

            <LoadingButton
              variant='contained'
              sx={{ mt: 1 }}
              fullWidth
              disableElevation
              type='submit'
              loading={isLoading}
            >
              Verify Email
            </LoadingButton>
          </Box>
        </FormProvider>
      </Box>
    </Container>
  );
};

export default EmailVerificationPage;
Redux Toolkit and RTK Query Testing Authorization
pages/
├── admin.page.tsx
├── home.page.tsx
├── profile.page.tsx
└── unauthorize.page.tsx
The admin page can only be accessed by the user having a role of admin . I actually implemented two roles on the server (user and admin).
When a normal user tries to access the admin page the user will be automatically redirected to an unauthorized page.
src/pages/admin.page.tsx
import { Box, Container, Typography } from '@mui/material';

const AdminPage = () => {
  return (
    <Container maxWidth='lg'>
      <Box
        sx={{
          backgroundColor: '#ece9e9',
          mt: '2rem',
          height: '15rem',
          display: 'flex',
          alignItems: 'center',
          justifyContent: 'center',
        }}
      >
        <Typography
          variant='h2'
          component='h1'
          sx={{ color: '#1f1e1e', fontWeight: 500 }}
        >
          Admin Page
        </Typography>
      </Box>
    </Container>
  );
};

export default AdminPage;
The profile page can only be accessed if the user is logged in. On this page, I accessed and displayed the user’s information we stored in the Redux store.
src/pages/profile.page.tsx
import { Box, Container, Typography } from '@mui/material';
import { useAppSelector } from '../redux/store';

const ProfilePage = () => {
  const user = useAppSelector((state) => state.userState.user);

  return (
    <Container maxWidth='lg'>
      <Box
        sx={{
          backgroundColor: '#ece9e9',
          mt: '2rem',
          height: '15rem',
          display: 'flex',
          alignItems: 'center',
          justifyContent: 'center',
        }}
      >
        <Typography
          variant='h2'
          component='h1'
          sx={{ color: '#1f1e1e', fontWeight: 500 }}
        >
          Profile Page
        </Typography>
      </Box>
      <Box sx={{ mt: 2 }}>
        <Typography gutterBottom>
          <strong>Id:</strong> {user?._id}
        </Typography>
        <Typography gutterBottom>
          <strong>Full Name:</strong> {user?.name}
        </Typography>
        <Typography gutterBottom>
          <strong>Email Address:</strong> {user?.email}
        </Typography>
        <Typography gutterBottom>
          <strong>Role:</strong> {user?.role}
        </Typography>
      </Box>
    </Container>
  );
};

export default ProfilePage;
The home page is accessible to everyone, you don’t need to log in before accessing this page.
src/pages/home.page.tsx
import { Box, Container, Typography } from '@mui/material';

const HomePage = () => {
  return (
    <Container maxWidth='lg'>
      <Box
        sx={{
          backgroundColor: '#ece9e9',
          mt: '2rem',
          height: '15rem',
          display: 'flex',
          alignItems: 'center',
          justifyContent: 'center',
        }}
      >
        <Typography
          variant='h2'
          component='h1'
          sx={{ color: '#1f1e1e', fontWeight: 500 }}
        >
          Home Page
        </Typography>
      </Box>
    </Container>
  );
};

export default HomePage;
This is where any unauthorized logged-in user will be redirected to.
src/pages/unauthorize.page.tsx
import { Box, Container, Typography } from '@mui/material';

const UnauthorizePage = () => {
  return (
    <Container maxWidth='lg'>
      <Box
        sx={{
          backgroundColor: '#ece9e9',
          mt: '2rem',
          height: '15rem',
          display: 'flex',
          alignItems: 'center',
          justifyContent: 'center',
        }}
      >
        <Typography
          variant='h2'
          component='h1'
          sx={{ color: '#1f1e1e', fontWeight: 500 }}
        >
          Unauthorized Page
        </Typography>
      </Box>
    </Container>
  );
};

export default UnauthorizePage;
Create an Authentication and Authorization Guard
This is the most important part of the whole application. Please make sure you understand the logic in this file.
src/components/requireUser.tsx
import { useCookies } from 'react-cookie';
import { Navigate, Outlet, useLocation } from 'react-router-dom';
import { userApi } from '../redux/api/userApi';
import FullScreenLoader from './FullScreenLoader';

const RequireUser = ({ allowedRoles }: { allowedRoles: string[] }) => {
  const [cookies] = useCookies(['logged_in']);
  const location = useLocation();

  const { isLoading, isFetching } = userApi.endpoints.getMe.useQuery(null, {
    skip: false,
    refetchOnMountOrArgChange: true,
  });

  const loading = isLoading || isFetching;

  const user = userApi.endpoints.getMe.useQueryState(null, {
    selectFromResult: ({ data }) => data,
  });

  if (loading) {
    return <FullScreenLoader />;
  }

  return (cookies.logged_in || user) &&
    allowedRoles.includes(user?.role as string) ? (
    <Outlet />
  ) : cookies.logged_in && user ? (
    <Navigate to='/unauthorized' state={{ from: location }} replace />
  ) : (
    <Navigate to='/login' state={{ from: location }} replace />
  );
};

export default RequireUser;
Below is the breakdown of what I did in the above snippets:
- I created a
RequireUsercomponent that will receive an array of user roles as props. This component will check if the user is logged in or authorized to access a particular page. - The server will send three cookies – (access and refresh tokens which are HTTPOnly cookies) and a logged_in cookie which is not an HTTPOnly cookie.
Thelogged_incookie has the same expiration time as theaccess_token.
I then usedreact-cookieto access thelogged_incookie value since it’s not an HTTP-only cookie. - Next, I used the
getMequery to conditionally fetch the user’s information if the logged_in token hasn’t expired. - If the user is logged in and the user’s role is available in the
allowedRolesarray then I allow them to access the required protected page. - I then redirected the user to an unauthorized page if the user’s role is not available in the
allowedRolesarray. - Also, I redirected the user to the login page if there is no
logged_incookie. That means the access token has expired or it’s not available.
import React from 'react';
import { useCookies } from 'react-cookie';
import FullScreenLoader from '../components/FullScreenLoader';
import { userApi } from '../redux/api/userApi';

type AuthMiddlewareProps = {
  children: React.ReactElement;
};

const AuthMiddleware: React.FC<AuthMiddlewareProps> = ({ children }) => {
  const [cookies] = useCookies(['logged_in']);

  const { isLoading, isFetching } = userApi.endpoints.getMe.useQuery(null, {
    skip: !!cookies.logged_in,
  });

  console.log(cookies.logged_in);

  const loading = isLoading || isFetching;

  if (loading) {
    return <FullScreenLoader />;
  }

  return children;
};

export default AuthMiddleware;
Create Reusable React Components
components/
├── FullScreenLoader.tsx
├── Header.tsx
├── layout.tsx
The Header component will dynamically re-render based on the login status and role of the user.
SignUpandLogin– displayed if the user hasn’t logged in.Logout– displayed if the user is logged in.Admin– displayed if the user has a role of admin.- Avatar – When clicked will take the user to the profile page or redirect the user to the login page if not logged in.
src/components/Header.tsx
import {
  AppBar,
  Avatar,
  Box,
  Container,
  IconButton,
  Toolbar,
  Tooltip,
  Typography,
} from '@mui/material';
import { styled } from '@mui/material/styles';
import { useNavigate } from 'react-router-dom';
import { useAppSelector } from '../redux/store';
import { useLogoutUserMutation } from '../redux/api/authApi';
import { useEffect } from 'react';
import { toast } from 'react-toastify';
import { LoadingButton as _LoadingButton } from '@mui/lab';

const LoadingButton = styled(_LoadingButton)`
  padding: 0.4rem;
  background-color: #f9d13e;
  color: #2363eb;
  font-weight: 500;

  &:hover {
    background-color: #ebc22c;
    transform: translateY(-2px);
  }
`;

const Header = () => {
  const navigate = useNavigate();
  const user = useAppSelector((state) => state.userState.user);

  const [logoutUser, { isLoading, isSuccess, error, isError }] =
    useLogoutUserMutation();

  useEffect(() => {
    if (isSuccess) {
      // window.location.href = '/login';
      navigate('/login');
    }

    if (isError) {
      if (Array.isArray((error as any).data.error)) {
        (error as any).data.error.forEach((el: any) =>
          toast.error(el.message, {
            position: 'top-right',
          })
        );
      } else {
        toast.error((error as any).data.message, {
          position: 'top-right',
        });
      }
    }
    // eslint-disable-next-line react-hooks/exhaustive-deps
  }, [isLoading]);

  const onLogoutHandler = async () => {
    logoutUser();
  };

  return (
    <AppBar position='static'>
      <Container maxWidth='lg'>
        <Toolbar>
          <Typography
            variant='h6'
            onClick={() => navigate('/')}
            sx={{ cursor: 'pointer' }}
          >
            CodevoWeb
          </Typography>
          <Box display='flex' sx={{ ml: 'auto' }}>
            {!user && (
              <>
                <LoadingButton
                  sx={{ mr: 2 }}
                  onClick={() => navigate('/register')}
                >
                  SignUp
                </LoadingButton>
                <LoadingButton onClick={() => navigate('/login')}>
                  Login
                </LoadingButton>
              </>
            )}
            {user && (
              <LoadingButton
                sx={{ backgroundColor: '#eee' }}
                onClick={onLogoutHandler}
                loading={isLoading}
              >
                Logout
              </LoadingButton>
            )}
            {user && user?.role === 'admin' && (
              <LoadingButton
                sx={{ backgroundColor: '#eee', ml: 2 }}
                onClick={() => navigate('/admin')}
              >
                Admin
              </LoadingButton>
            )}
            <Box sx={{ ml: 4 }}>
              <Tooltip
                title='Post settings'
                onClick={() => navigate('/profile')}
              >
                <IconButton sx={{ p: 0 }}>
                  <Avatar alt='Remy Sharp' src='/static/images/avatar/2.jpg' />
                </IconButton>
              </Tooltip>
            </Box>
          </Box>
        </Toolbar>
      </Container>
    </AppBar>
  );
};

export default Header;
This loader will be shown when the loading state of a query or mutation is true.
src/components/FullScreenLoader.tsx
import { Box, CircularProgress, Container } from '@mui/material';

const FullScreenLoader = () => {
  return (
    <Container sx={{ height: '95vh' }}>
      <Box
        display='flex'
        alignItems='center'
        justifyContent='center'
        sx={{ height: '100%' }}
      >
        <CircularProgress />
      </Box>
    </Container>
  );
};

export default FullScreenLoader;
The Layout component will render a child route below the Header component.
src/components/layout.tsx
import { Outlet } from 'react-router-dom';
import Header from './Header';

const Layout = () => {
  return (
    <>
      <Header />
      <Outlet />
    </>
  );
};

export default Layout;
Update the App Page
Now let’s modify the src/App.tsx file by including the different pages with the help of react-router-dom v6.
Two things to note:
- I wrapped the
Layoutcomponent around all the pages that need theHeadercomponent. - I also wrapped the
RequireUsercomponent around the protected pages and provided it with theallowdRolesprops.
src/App.tsx
import { CssBaseline } from '@mui/material';
import { Route, Routes } from 'react-router-dom';
import Layout from './components/layout';
import ProfilePage from './pages/profile.page';
import HomePage from './pages/home.page';
import LoginPage from './pages/login.page';
import RegisterPage from './pages/register.page';
import UnauthorizePage from './pages/unauthorize.page';
import RequireUser from './components/requireUser';
import { ToastContainer } from 'react-toastify';
import 'react-toastify/dist/ReactToastify.css';
import AdminPage from './pages/admin.page';
import EmailVerificationPage from './pages/verifyemail.page';

function App() {
  return (
    <>
      <CssBaseline />
      <ToastContainer />
      <Routes>
        <Route path='/' element={<Layout />}>
          <Route index element={<HomePage />} />

          {/* Private Route */}
          <Route element={<RequireUser allowedRoles={['user', 'admin']} />}>
            <Route path='profile' element={<ProfilePage />} />
          </Route>
          <Route element={<RequireUser allowedRoles={['admin']} />}>
            <Route path='admin' element={<AdminPage />} />
          </Route>
          <Route path='unauthorized' element={<UnauthorizePage />} />
        </Route>
        <Route path='verifyemail' element={<EmailVerificationPage />}>
          <Route path=':verificationCode' element={<EmailVerificationPage />} />
        </Route>
        <Route path='login' element={<LoginPage />} />
        <Route path='register' element={<RegisterPage />} />
      </Routes>
    </>
  );
}

export default App;
Conclusion
Congratulations on reading the article to the end. In this article, you learned how to implement JWT Authentication and Authorization with React, Redux Toolkit, RTK Query, Material UI, React Hook Form, and Zod.
You can also read:
- React, Material UI and React Hook Form: Login and Signup Forms
- How I Setup Redux Toolkit and RTK Query the right way
- Form Validation with React Hook Form, Material UI, React and TypeScript
Redux Toolkit and RTK Query JWT Authentication Source Code
Check out the source code on GitHub
On clicking register verification code is not receiving in my mail. I checked my mail twice but it’s not there any help will be appreciated ?
Create a mail service account on Mailtrap or Sendinblue and add the SMTP credentials to the
.envfile to receive the verification email.Use Mailtrap when you are testing the app in a development environment.
Could you please kindly specify which branch is the proper one to use? There is different types of errors coming for different branches:)
The most relevant one seems to “origin/react_node_crud_app” but there in the backend the /api/post looks not to be defined…
In any case great work and explanation, many thanks for your support
Thank you for bringing that issue to my attention. I’ve now implemented all the functionalities in the Node.js backend.
Follow these steps to test the frontend and backend application:
git pullto pull the recent changesdocker-compose up -dto start the Redis and MongoDB servers in the Docker containerscd backend/and runyarnoryarn installto install all the depedenciesbackend/src/app.tsfile and uncomment the Nodemailer codeyarn startto start the Express HTTP server, copy the SMTP credentials from the terminal and add them to thebackend/.envcd frontend/, and runyarnoryarn installto install the project’s dependenciesyarn startto start the React Dev serverHeyy, great post. Thanks for sharing this knowledge. Can you find an optimal solution for this?
if (isError) {
if (Array.isArray((error as any).data.error)) {
(error as any).data.error.forEach((el: any) =>
toast.error(el.message, {
position: ‘top-right’,
})
);
} else {
toast.error((error as any).data.message, {
position: ‘top-right’,
});
}
}
Thanks for your question!
This is one way to handle errors sent by the Node.js server, especially if you’re using Zod for validation which sends the errors in an array.
By checking if the error data is an array, you can iterate through each element and display individual error messages which can be helpful for better error handling and user experience.
However, whether or not it’s the best way to handle errors really depends on the specific needs and requirements of your project.
There may be other ways to handle errors that are more suitable for your particular use case. So, it’s always a good idea to explore different options and choose the one that works best for you.
====> I have an issue with components folder in requireUser.tsx.
const user = userApi.endpoints.getMe.useQueryState(null, {
selectFromResult: ({ data }) => data,
});
===> here selectFromresult has an issue.
(property) selectFromResult?: QueryStateSelector<UseQueryStateDefaultResult<QueryDefinition<null, BaseQueryFn, “User”, IUser, “userApi”>>, QueryDefinition> | undefined
===> And
return (cookies.logged_in || user) &&
allowedRoles.includes(user?.role as string) ? (
) : cookies.logged_in && user ? (
) : (
);
====> user?.role
Property ‘role’ does not exist on type ‘UseQueryStateDefaultResult<QueryDefinition<null, BaseQueryFn, “User”, IUser, “userApi”>>’.
my server on login send that response
{
user: …, // user object
token: … // JWT token
}
I should put that token in authorization header in any request to server endpoints
so can I use that token like cookie or should be other way than yours?
Yes, you can store the token as cookie to enable the API client or browser send the cookie along with the requests to your server.
Good afternoon! Tell me how to add mail data to receive an email for registration and authorization. Detailed instructions are available . Thanks
You can find the instructions for Mailtrap in this article: How to Send HTML Emails in Rust via SMTP, which will enable you to receive development emails.
However, if you want real emails, you need to use an SMTP provider like Sendinblue, SendGrid, etc. Alternatively, you can configure Gmail to use their SMTP providers. You can look up tutorials on how to do that.
Do you have more detailed instructions on where to insert and how to run it , very good code and a project , but it is not clear how to run and what is needed for this .
I’ve updated the dependencies for both the frontend and backend, and I’ve also switched from create-react-app to Vite for the frontend. Please run
git pullto fetch the recent changes.Once you’ve completed that, follow the steps outlined at https://codevoweb.com/react-redux-toolkit-jwt-authentication-and-authorization/#run-the-frontend-and-backend-apps to execute both the frontend and backend applications.
Hello, great article!
Will there be an addition with a “forgot password” page?
Thank you 🙂
Hi, great article!
Will there be an article with the implementation of the password recovery page?
Thank you!
I think I have an article for that on the blog