

Vue Query is a server state managing library that can be integrated into any Vue.js application. In this article, we’ll learn how to implement JWT Authentication with Vue.js, Pinia, Vue Query, Vue-Router, and Axios Interceptors.
In Vue.js, there are four types of states:
- Local state – This state is managed within a Vue component and can not be affected by other components.
- Global State – This state is shared and managed across multiple components.
- Server State – the data that comes from an external server.
- URL State – data stored in URLs, including the pathname and query parameters.

What and Why Vue Query?
Vue Query is a server state management library for Vue.js. In brief, it eliminates the need to manually implement data fetching, caching, polling, synchronizing, cache invalidation, and updating server state logic in your Vue.js applications.
Over the last couple of months, the Vue.js community has come to realize that most state management libraries including Vuex and Pinia work really well with client states but do not have built-in tools to manage server states.
In most of the applications we build, we often find the need to fetch data from an external server or API in order to display it in the UI. The front end also needs to update the data, send the updated data to the server and keep the data stored on the server in sync with the cached data on the client.
This architectural choice can become complicated when the need arises to implement more advanced features:
- Handling loading, error, and data state to display an alert or loading spinner in the UI.
- Handling memory and garbage collection of server state.
- Deduping multiple requests for the same data into a single request.
- Invalidating cached data when it’s “out of date“
- Performance optimizations when dealing with pagination and lazy loading of data.
Vue Query, Typescript, and Axios Example
We will build a Vue.js, Tailwind CSS, and Typescript client before adding Vue Query and Axios to implement the access and refresh tokens logic.
The registration and login form validation will be done with Vee-validate and Zod.
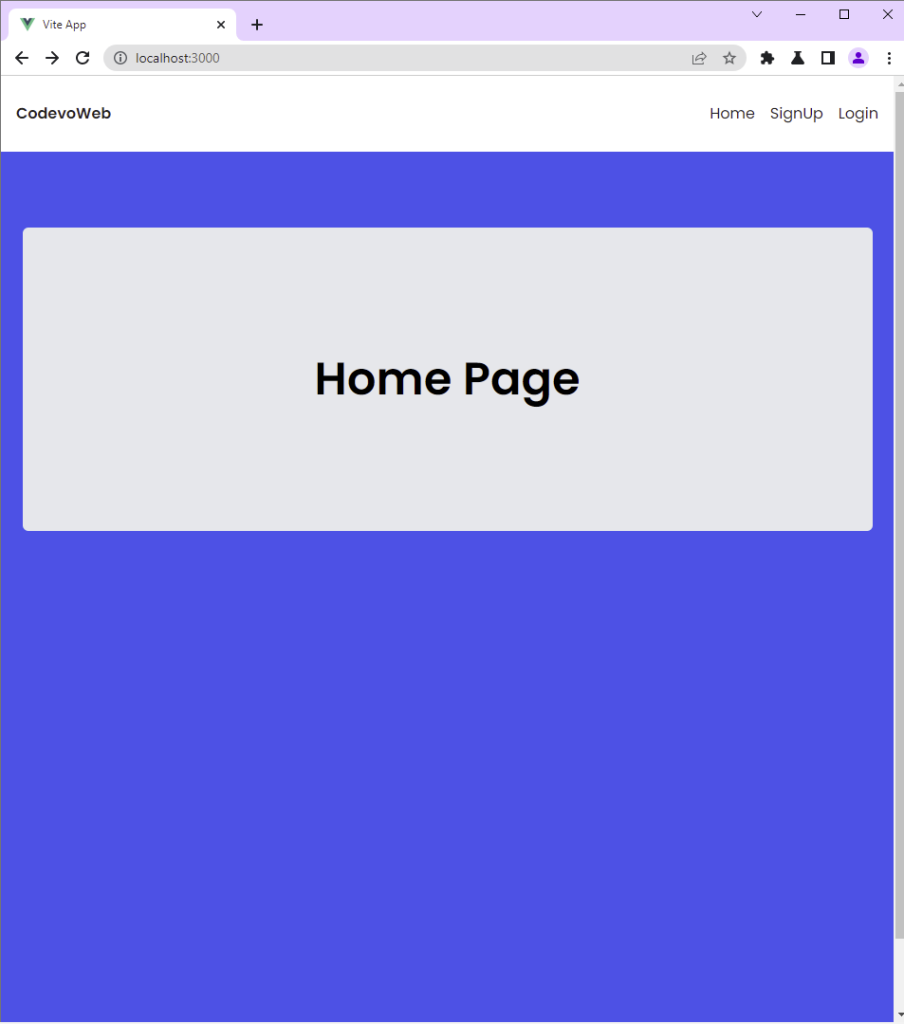
Below are some screenshots:
-On the homepage, a user clicks on the SignUp button to register for an account.
-The user provides the necessary credentials and makes a POST request to the server by clicking the “Sign Up” button.
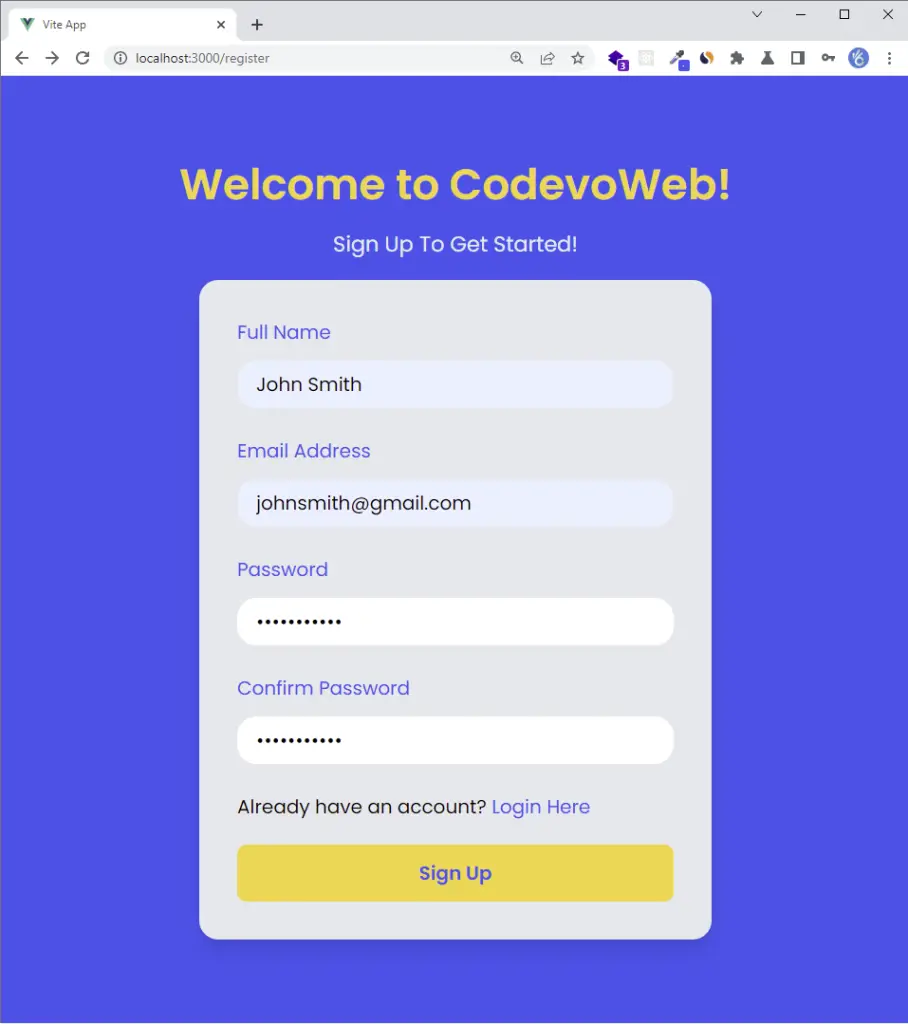
-The backend server then validates the user’s credentials and sends a verification code to the provided email address.
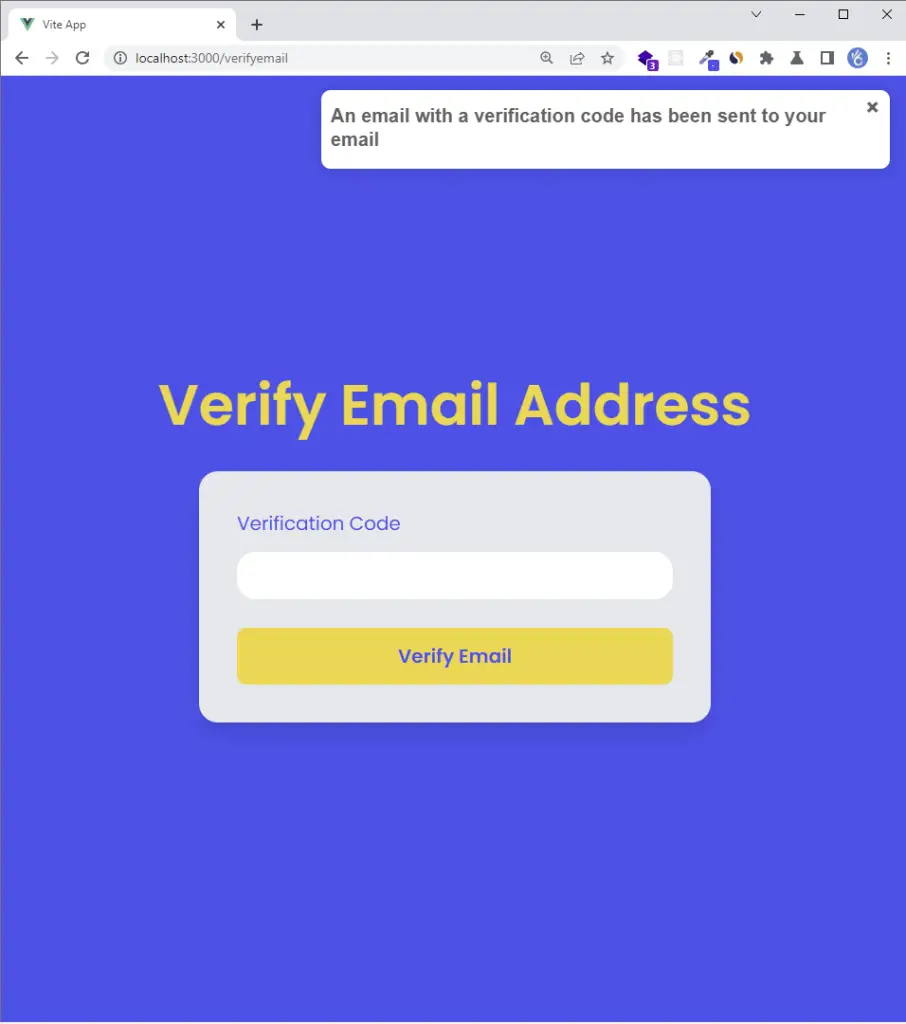
-The user then clicks on the “Verify Your Account” button from the email sent by the server.

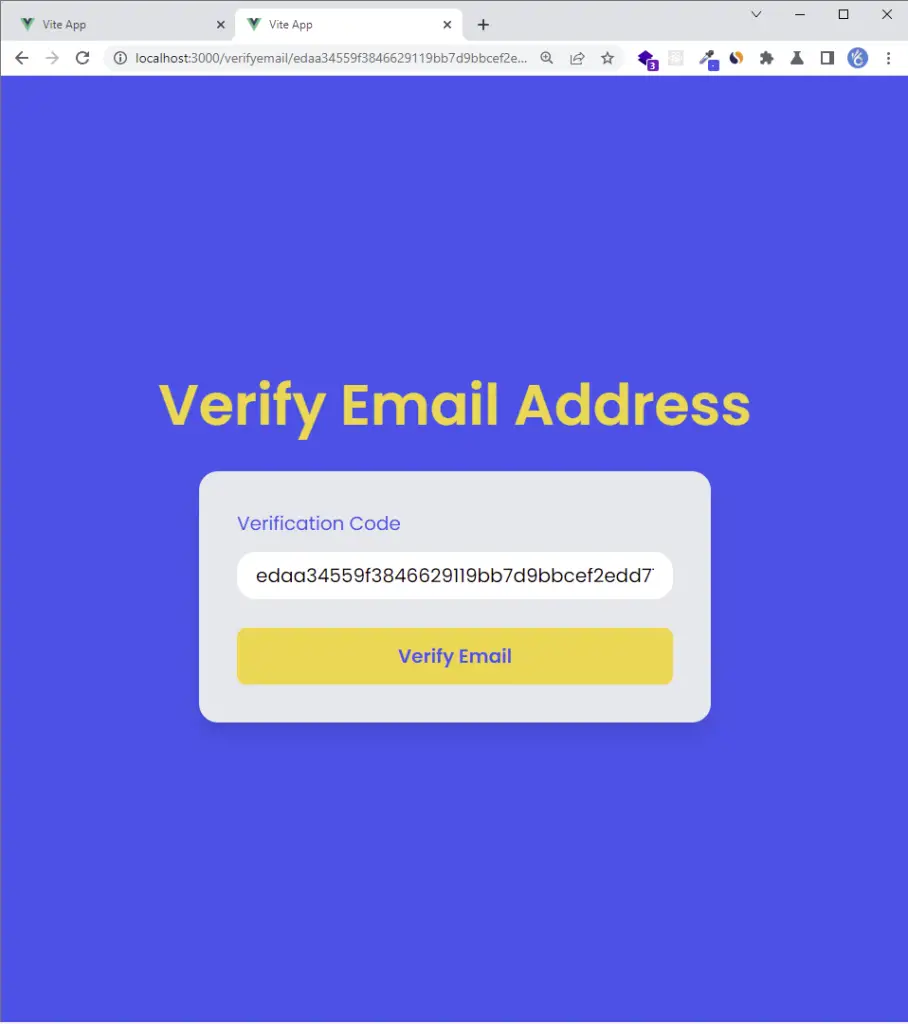
-The user is then taken to the email verification page where the verification code is automatically filled in the input field.
Next, the user makes a GET request with the verification code to the server by clicking the “Verify Email” button.
-The backend server then validates the verification code and returns a success message to the Vue.js app.
The Vue.js app then redirects the user to the login page upon receiving the success message.
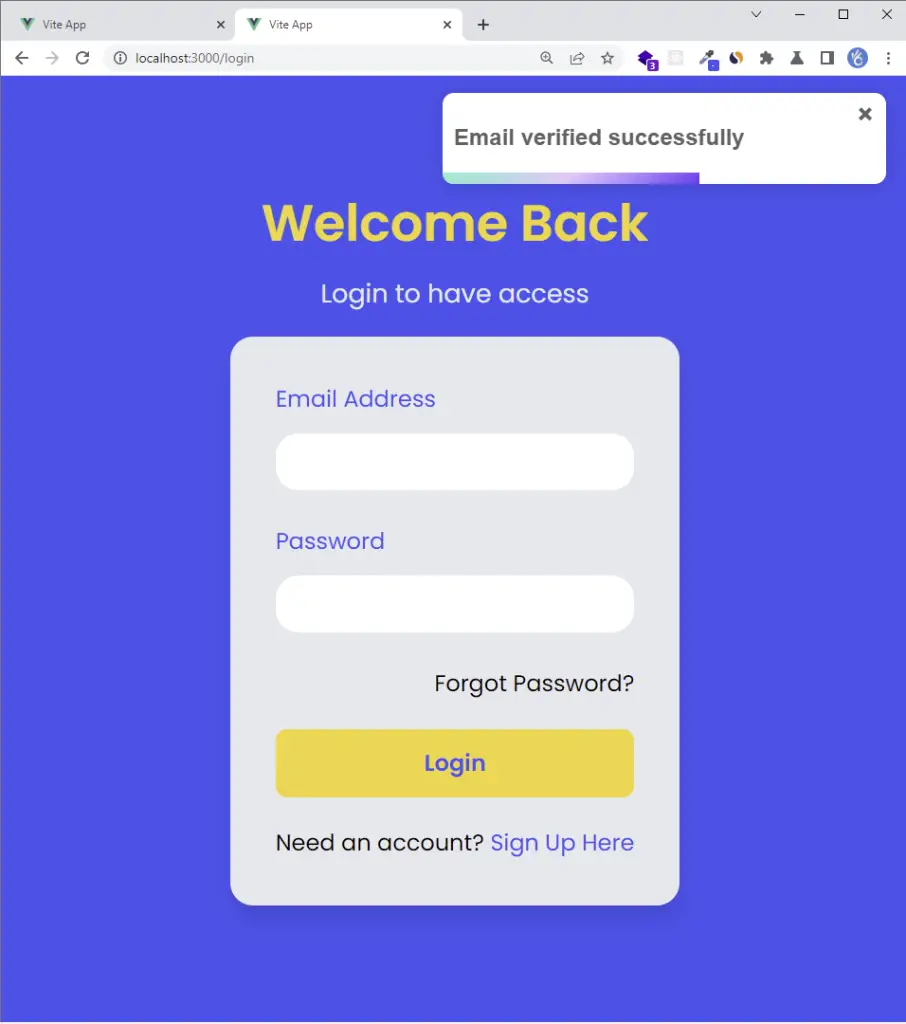
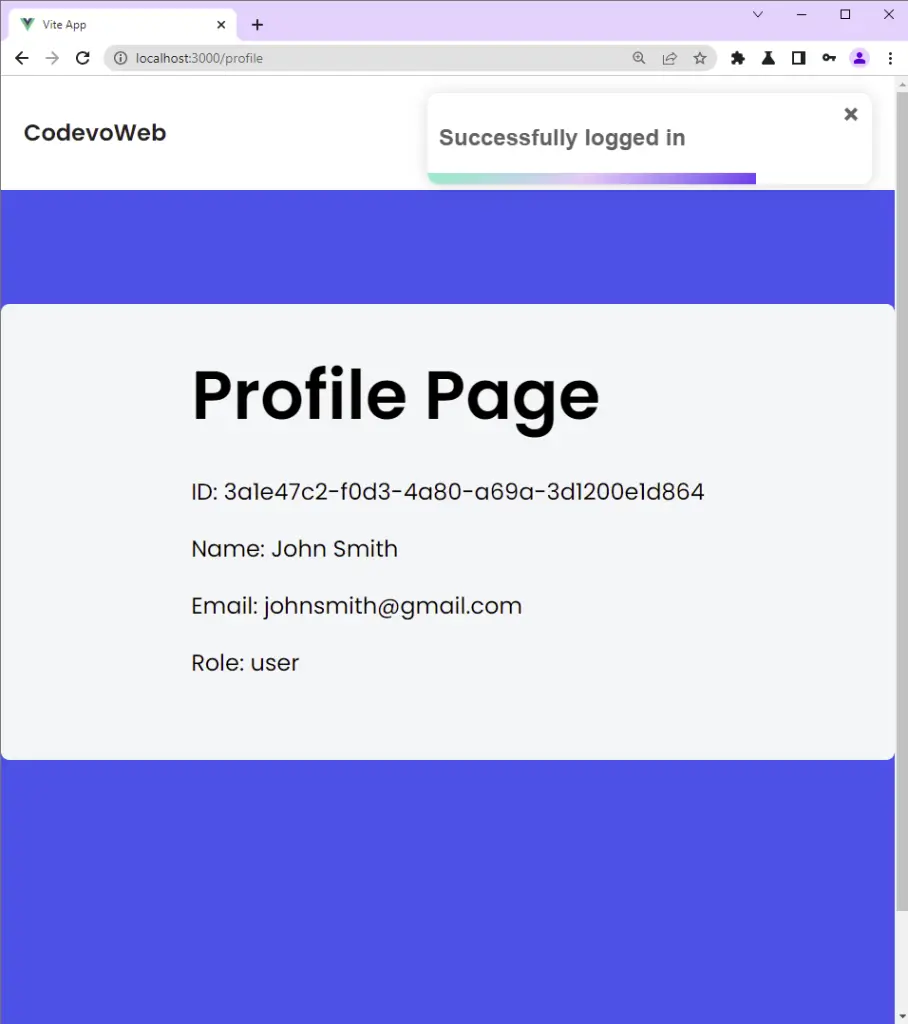
-After the user signs in with his credentials, he is then redirected to the profile page.
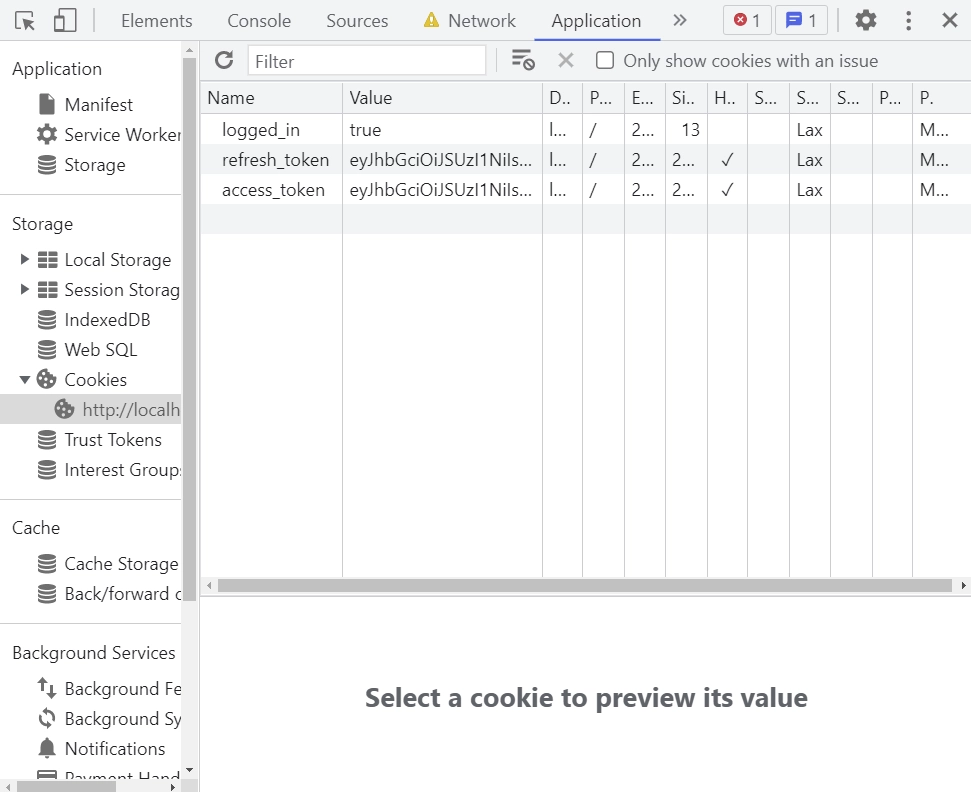
-In addition, you can use the browser dev tools to check the cookies returned by the server after the user is authenticated.
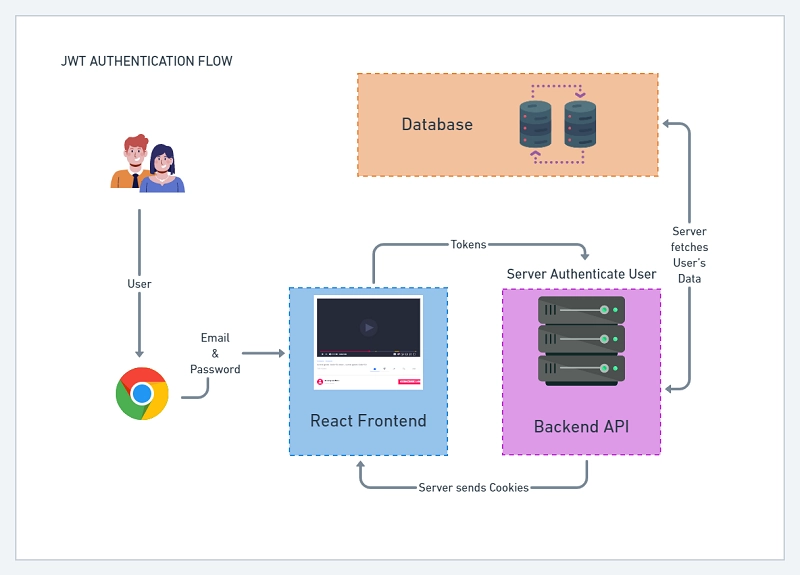
Vue Query and Axios JWT Authentication Flow
To register and authenticate the user, we will need four routes:
- Vue Query Axios POST request
api/auth/register– to create a new account - Vue Query Axios GET request
api/auth/verifyemail– to verify the email address - Vue Query Axios POST request
api/auth/login– to sign in the registered user. - Vue Query Axios GET request
api/auth/logout– to logout the user - Vue Query Axios Interceptors GET request
api/auth/refresh– to obtain a new access token.
Below is a diagram showing the user registration flow:
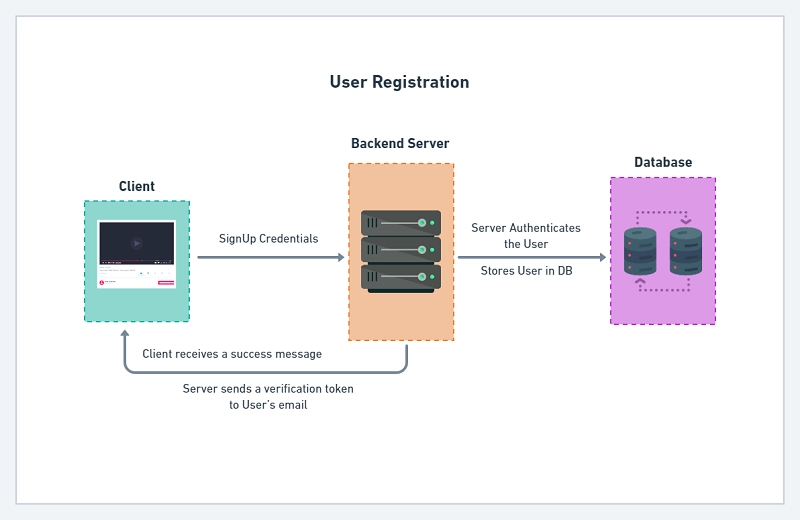
JWT Authentication flow with Vue Query, Axios, Typescript, and a backend API.
You can find a detailed implementation of the backend APIs in the following articles:
- Node.js + TypeScript + MongoDB: JWT Authentication
- Node.js + TypeScript + MongoDB: JWT Refresh Token
- Build Golang gRPC Server and Client: Access & Refresh Tokens
- Node.js + Prisma + PostgreSQL: Access & Refresh Tokens
- Golang & MongoDB: JWT Authentication and Authorization
- API with Node.js + PostgreSQL + TypeORM: JWT Authentication
Setup Vue Query, Tailwind CSS, and Typescript Project
First and foremost, let’s generate a basic Vue.js application with Vite.
Run this command in your terminal to create a Vue.js boilerplate application in a vue-query-axios directory.
npm init vue@latest
This command will install and execute the Vue project scaffolding tool create-vue and you will be presented with prompts for a number of optional features such as TypeScript, state manager, router, and testing support:
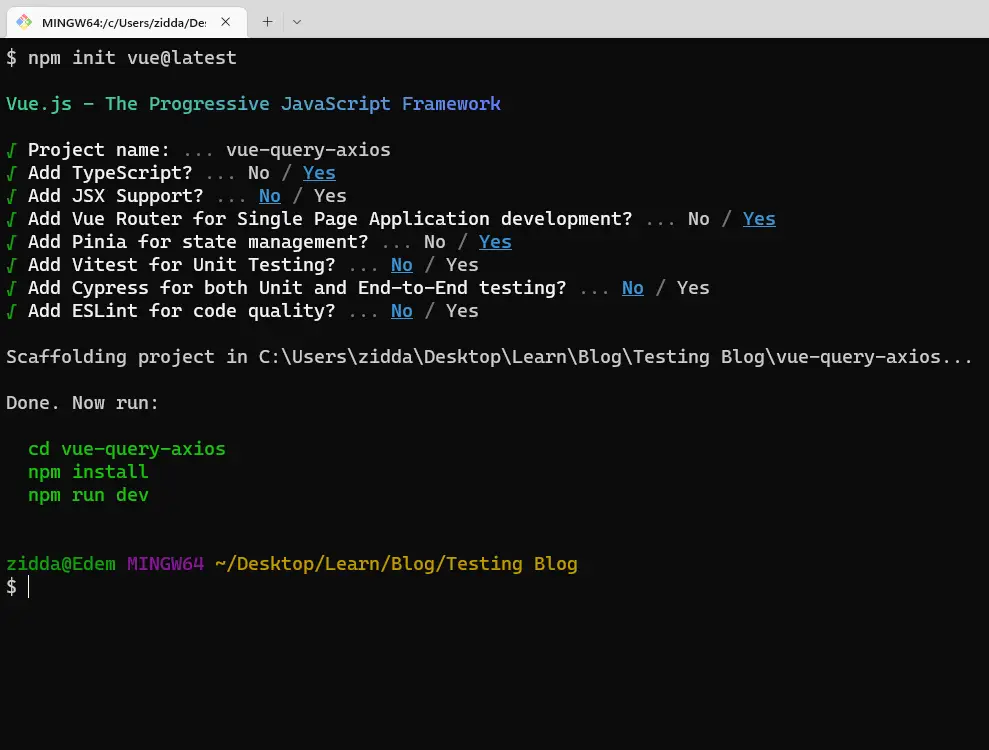
Choose Yes for Router, Typescript, and Pinia support since this article is based around them.
Setup tailwindCss with Vue.js
Install tailwindCss and its dependencies
First, open the generated Vue project with your preferred text editor.
Now install tailwindCss and its peer dependencies via npm or yarn.
npm install -D tailwindcss postcss autoprefixer
# or
yarn add -D tailwindcss postcss autoprefixer
Run the init command to generate both tailwind.config.js and postcss.config.js files.
npx tailwindcss init -p
Configure your template paths
Next, add the paths to all of your template files in the tailwind.config.js file, and also, remember to include your custom colors and fonts.
tailwind.config.js
/** @type {import('tailwindcss').Config} */
module.exports = {
  content: ['./index.html', './src/**/*.{vue,js,ts,jsx,tsx}'],
  theme: {
    extend: {
      colors: {
        'ct-dark-600': '#222',
        'ct-dark-200': '#e5e7eb',
        'ct-dark-100': '#f5f6f7',
        'ct-blue-600': '#2363eb',
        'ct-yellow-600': '#f9d13e',
      },
      fontFamily: {
        Poppins: ['Poppins, sans-serif'],
      },
      container: {
        center: true,
        padding: '1rem',
        screens: {
          lg: '1125px',
          xl: '1125px',
          '2xl': '1125px',
        },
      },
    },
  },
  plugins: [],
};
Add the tailwindCss directives to your CSS
Create a ./src/index.css file and add the @tailwind directives. You also need to include your font to override the default tailwindCss font.
@import url('https://fonts.googleapis.com/css2?family=Poppins:wght@300;400;500;600;700&display=swap');

@tailwind base;
@tailwind components;
@tailwind utilities;
Import the CSS file
Now, import the newly-created ./src/index.css file into the ./src/main.ts file.
src/main.ts
import { createApp } from 'vue';
import { createPinia } from 'pinia';
import './index.css';

import App from './App.vue';
import router from './router';

const app = createApp(App);

app.use(createPinia());
app.use(router);

app.mount('#app');
Install Axios, Vee-Validate, Zod, and Vue Query
yarn add vue-query axios vee-validate zod @vee-validate/zod mosha-vue-toastify
# or
npm install vue-query axios vee-validate zod @vee-validate/zod mosha-vue-toastify
vue-query– Has hooks for fetching, caching, and updating asynchronous data in Vue.jsaxios– For making HTTP requestsvee-validate– Used for synchronous, asynchronous, field-level, or form-level validation.mosha-vue-toastify– For showing alertszod– A TypeScript-first schema declaration and validation library
Next, import the mosha-vue-toastify CSS and add vue-query to the middleware stack in ./src/main.ts file.
import { createApp } from 'vue';
import { createPinia } from 'pinia';
import { VueQueryPlugin } from 'vue-query';
import './index.css';
import 'mosha-vue-toastify/dist/style.css';

import App from './App.vue';
import router from './router';

const app = createApp(App);

app.use(createPinia());
app.use(router);
app.use(VueQueryPlugin);

app.mount('#app');
Create the Request and Response Types
With all the above configurations in place, it’s now time to create the Typescript interfaces.
Now define and export the request and response interfaces in a ./src/api/types.ts file.
src/api/types.ts
export interface IUser {
  name: string;
  email: string;
  role: string;
  photo: string;
  _id: string;
  id: string;
  created_at: string;
  updated_at: string;
  __v: number;
}

export interface GenericResponse {
  status: string;
  message: string;
}

export interface ILoginInput {
  email: string;
  password: string;
}

export interface ISignUpInput {
  name: string;
  email: string;
  password: string;
  passwordConfirm: string;
}

export interface ILoginResponse {
  status: string;
  access_token: string;
}

export interface ISignUpResponse {
  status: string;
  message: string;
}

export interface IUserResponse {
  status: string;
  data: {
    user: IUser;
  };
}
Define the API Services with Axios
Before we start implementing the JWT authentication, let’s configure Axios to use some default configurations.
Create a ./src/api/authApi.ts file and add the following code to create an Axios instance.
import axios from 'axios';
const BASE_URL = 'http://localhost:8000/api/';

const authApi = axios.create({
  baseURL: BASE_URL,
  withCredentials: true,
});

authApi.defaults.headers.common['Content-Type'] = 'application/json';
// (...)
Next, let’s create an Axios interceptor to refresh the access token when it expires.
import axios from 'axios';
import { LoginInput } from '../pages/login.page';
import { RegisterInput } from '../pages/register.page';
import { GenericResponse, ILoginResponse, IUserResponse } from './types';

// Axios instance and default configuration

export const refreshAccessTokenFn = async () => {
  const response = await authApi.get<ILoginResponse>('auth/refresh');
  return response.data;
};

authApi.interceptors.response.use(
  (response) => {
    return response;
  },
  async (error) => {
    const originalRequest = error.config;
    const errMessage = error.response.data.message as string;
    if (errMessage.includes('not logged in') && !originalRequest._retry) {
      originalRequest._retry = true;
      await refreshAccessTokenFn();
      return authApi(originalRequest);
    }
    return Promise.reject(error);
  }
);
In the response interceptor, I checked for the not logged in error message instead of a 401 Unauthorized status code in the if statement because there were many scenarios where my server returned a 401 Unauthorized error to the client.
Moreover, the backend server will return a 401 Unauthorized error along with a message indicating that the access token wasn’t included in the request cookies or authorization headers.
The Axios response interceptor checks to see if the error message contains “not logged in” and immediately triggers the refreshAccessTokenFn() service to refresh the access token.
The access and refresh tokens are stored in HTTPOnly cookies to prevent hackers from using Javascript to access and manipulate them.
Remember to set
withCredentials: truein the Axios config for the browser to send the cookies along with the requests.
src/api/authApi.ts
import axios from 'axios';
import { LoginInput } from '../pages/login.page';
import { RegisterInput } from '../pages/register.page';
import { GenericResponse, ILoginResponse, IUserResponse } from './types';

const BASE_URL = 'http://localhost:8000/api/';

const authApi = axios.create({
  baseURL: BASE_URL,
  withCredentials: true,
});

authApi.defaults.headers.common['Content-Type'] = 'application/json';

export const refreshAccessTokenFn = async () => {
  const response = await authApi.get<ILoginResponse>('auth/refresh');
  return response.data;
};

authApi.interceptors.response.use(
  (response) => {
    return response;
  },
  async (error) => {
    const originalRequest = error.config;
    const errMessage = error.response.data.message as string;
    if (errMessage.includes('not logged in') && !originalRequest._retry) {
      originalRequest._retry = true;
      await refreshAccessTokenFn();
      return authApi(originalRequest);
    }
    return Promise.reject(error);
  }
);

export const signUpUserFn = async (user: RegisterInput) => {
  const response = await authApi.post<GenericResponse>('auth/register', user);
  return response.data;
};

export const loginUserFn = async (user: LoginInput) => {
  const response = await authApi.post<ILoginResponse>('auth/login', user);
  return response.data;
};

export const verifyEmailFn = async (verificationCode: string) => {
  const response = await authApi.get<GenericResponse>(
    `auth/verifyemail/${verificationCode}`
  );
  return response.data;
};

export const logoutUserFn = async () => {
  const response = await authApi.get<GenericResponse>('auth/logout');
  return response.data;
};

export const getMeFn = async () => {
  const response = await authApi.get<IUserResponse>('users/me');
  return response.data;
};
refreshAccessTokenFn: Makes a GET request to get a new access token.signUpUserFn: Makes a POST request to create a new user.loginUserFn: Makes a POST request to log in the user.verifyEmailFn: Makes a GET request to verify the email address of the user.logoutUserFn: To log out the user.getMeFn: Makes a GET request to get the logged-in user’s profile information.
Create a Vue.js Store with Pinia
To define a store with Pinia, we use the defineStore function. Each store you create should have a unique id for Pinia to mount the store to the dev tools.
Also, Pinia uses state, getters, and actions that are similar to data, computed, and methods in components:
import { defineStore } from 'pinia';

export const useCounterStore = defineStore({
  id: 'counter',
  state: () => ({}),
  getters: {},
  actions: {},
});
- The
stateis a function that returns the initial state - The
gettersare functions that can be used to perform operations based on the current state. - The
actionsare functions that can be used to manipulate the state.
The store we’ll define is for the authenticated user. In the stores directory, rename counter.ts to authStore.ts and replace its content with the following:
import type { IUser } from '@/api/types';
import { defineStore } from 'pinia';

export type AuthStoreState = {
  authUser: IUser | null;
};

export const useAuthStore = defineStore({
  id: 'authStore',
  state: () =>
    ({
      authUser: null,
    } as AuthStoreState),
  getters: {},
  actions: {
    setAuthUser(user: IUser | null) {
      this.authUser = user;
    },
  },
});
Creating Components with tailwindCss
Loading Spinner Icon
src/components/icons/Spinner.vue
<template>
  <svg
    role="status"
    class="w-5 h-5 mr-2 text-gray-200 animate-spin dark:text-gray-600 fill-blue-600"
    viewBox="0 0 100 101"
    fill="none"
    xmlns="http://www.w3.org/2000/svg"
  >
    <path
      d="M100 50.5908C100 78.2051 77.6142 100.591 50 100.591C22.3858 100.591 0 78.2051 0 50.5908C0 22.9766 22.3858 0.59082 50 0.59082C77.6142 0.59082 100 22.9766 100 50.5908ZM9.08144 50.5908C9.08144 73.1895 27.4013 91.5094 50 91.5094C72.5987 91.5094 90.9186 73.1895 90.9186 50.5908C90.9186 27.9921 72.5987 9.67226 50 9.67226C27.4013 9.67226 9.08144 27.9921 9.08144 50.5908Z"
      fill="currentColor"
    />
    <path
      d="M93.9676 39.0409C96.393 38.4038 97.8624 35.9116 97.0079 33.5539C95.2932 28.8227 92.871 24.3692 89.8167 20.348C85.8452 15.1192 80.8826 10.7238 75.2124 7.41289C69.5422 4.10194 63.2754 1.94025 56.7698 1.05124C51.7666 0.367541 46.6976 0.446843 41.7345 1.27873C39.2613 1.69328 37.813 4.19778 38.4501 6.62326C39.0873 9.04874 41.5694 10.4717 44.0505 10.1071C47.8511 9.54855 51.7191 9.52689 55.5402 10.0491C60.8642 10.7766 65.9928 12.5457 70.6331 15.2552C75.2735 17.9648 79.3347 21.5619 82.5849 25.841C84.9175 28.9121 86.7997 32.2913 88.1811 35.8758C89.083 38.2158 91.5421 39.6781 93.9676 39.0409Z"
      fill="currentFill"
    />
  </svg>
</template>
Loading Button Component
src/components/LoadingButton.vue
<template>
  <button
    type="submit"
    class="w-full py-3 font-semibold bg-ct-yellow-600 rounded-lg outline-none border-none flex justify-center"
    :disabled="loading"
    :style="[loading ? { backgroundColor: '#ccc' } : {}]"
  >
    <div v-if="loading" class="flex items-center gap-3">
      <Spinner />
      <span class="text-ct-blue-600">Loading...</span>
    </div>
    <span v-else class="text-ct-blue-600"><slot></slot></span>
  </button>
</template>

<script setup lang="ts">
import Spinner from '@/components/icons/Spinner.vue';
defineProps<{
  loading: boolean;
}>();
</script>
Header Component
src/components/Header.vue
<template>
  <header class="bg-white h-20">
    <nav class="h-full flex justify-between container items-center">
      <div>
        <router-link to="/" class="text-ct-dark-600 font-semibold"
          >CodevoWeb</router-link
        >
      </div>
      <ul class="flex items-center gap-4">
        <li><router-link to="/" class="text-ct-dark-600">Home</router-link></li>
        <li v-if="!user">
          <router-link to="/register" class="text-ct-dark-600"
            >SignUp</router-link
          >
        </li>
        <li v-if="!user">
          <router-link to="/login" class="text-ct-dark-600">Login</router-link>
        </li>
        <li v-if="user">
          <router-link to="/profile" class="text-ct-dark-600"
            >Profile</router-link
          >
        </li>
        <li v-if="user" class="cursor-pointer" @click="handleLogout">Logout</li>
      </ul>
    </nav>
  </header>
</template>

<script setup lang="ts">
import { logoutUserFn } from '@/api/authApi';
import { useMutation } from 'vue-query';
import { useAuthStore } from '@/stores/authStore';
import { createToast } from 'mosha-vue-toastify';

const authStore = useAuthStore();

const user = authStore.authUser;

const { mutate: logoutUser } = useMutation(() => logoutUserFn(), {
  onSuccess: () => {
    authStore.setAuthUser(null);
    document.location.href = '/login';
  },
  onError: (error) => {
    if (Array.isArray((error as any).response.data.error)) {
      (error as any).response.data.error.forEach((el: any) =>
        createToast(el.message, {
          position: 'top-right',
          type: 'warning',
        })
      );
    } else {
      createToast((error as any).response.data.message, {
        position: 'top-right',
        type: 'danger',
      });
    }
  },
});

const handleLogout = () => {
  logoutUser();
};
</script>
Creating Views with tailwindCss
In this section, we’ll create the necessary views to perform the JWT authentication.
Note that I used Vue Query, Vee-validate, and Pinia with the Composition API and
<script setup>syntax.
Vue Query Axios Typescript Login User
Vue Query has a useMutation hook that can be used to perform CREATE, UPDATE, and DELETE operations against a backend API.
const { isLoading, mutate } = useMutation(
  (credentials: ILoginInput) => loginUserFn(credentials),
  {
    onError: (error) => {},
    onSuccess: (data) => {},
  }
);
loginUserFn(mutationFn) a function that returns a promise after performing an asynchronous action.onSuccessis an optional function that will be called when the mutation is successful.onErroris an optional function that will be called when the mutation results in an error.
The useMutation hook returns an object that contains:
isLoading: A boolean indicating whether the mutation is currently running.isSuccess: A boolean indicating whether the mutation was successful.isError: A boolean indicating whether the mutation resulted in an error.mutate: A function that manually triggers the mutation.error: An object returned after the mutation encounters an error.data: The data returned from the mutation.
To make a GET request to the API, we use Vue Query useQuery hook:
// API Get Current Logged-in user
  const query = useQuery('authUser', getMeFn, {
    enabled: false,
    select: (data) => data.data.user,
    retry: 1,
    onSuccess: (data) => {
      stateContext.dispatch({ type: 'SET_USER', payload: data });
    },
  });
const authResult = useQuery('authUser', () => getMeFn(), {
    enabled: false,
    select: (data) => {},
    retry: 1,
    onSuccess: (data) => {}
    onError: (error) => {}
});
getMeFn(queryFn) function returns a promise after performing an asynchronous task.authUser(queryKey): A unique key that will be used by Vue Query to manage the query cache.enabled: If set tofalse, this will disable the query from automatically running.select: A function used to transform the returned data.retry: Iftrue, failed queries will retry infinitely. If set to a number, failed queries will retry until the failed count reaches that number.
Now, let’s create a Vue.js Typescript tailwindCss component to log in the registered user with Vue Query and Axios:
src/views/LoginView.vue
<template>
  <section class="bg-ct-blue-600 min-h-screen grid place-items-center">
    <div>
      <h1
        class="text-4xl xl:text-6xl text-center font-[600] text-ct-yellow-600 mb-4"
      >
        Welcome Back
      </h1>
      <h2 class="text-lg text-center mb-4 text-ct-dark-200">
        Login to have access
      </h2>
      <form
        @submit="onSubmit"
        class="max-w-[27rem] mx-auto overflow-hidden shadow-lg bg-ct-dark-200 rounded-2xl p-8 space-y-5"
      >
        <div class="">
          <label for="email" class="block text-ct-blue-600 mb-3"
            >Email Address</label
          >
          <input
            type="email"
            placeholder=" "
            v-model="email"
            class="block w-full rounded-2xl appearance-none focus:outline-none py-2 px-4"
            id="email"
          />
          <span class="text-red-500 text-xs pt-1 block">{{
            errors.email
          }}</span>
        </div>
        <div class="">
          <label for="password" class="block text-ct-blue-600 mb-3"
            >Password</label
          >
          <input
            v-model="password"
            type="password"
            placeholder=" "
            class="block w-full rounded-2xl appearance-none focus:outline-none py-2 px-4"
            id="password"
          />
          <span class="text-red-500 text-xs pt-1 block">{{
            errors.password
          }}</span>
        </div>
        <div class="text-right">
          <a href="" class="">Forgot Password?</a>
        </div>
        <LoadingButton :loading="isLoading">Login</LoadingButton>
        <span class="block"
          >Need an account?
          <router-link :to="{ name: 'register' }" class="text-ct-blue-600"
            >Sign Up Here</router-link
          ></span
        >
      </form>
    </div>
  </section>
</template>

<script setup lang="ts">
import { onBeforeUpdate } from 'vue';
import { Form, useField, useForm } from 'vee-validate';
import { toFormValidator } from '@vee-validate/zod';
import * as zod from 'zod';
import { useMutation, useQuery, useQueryClient } from 'vue-query';
import { getMeFn, loginUserFn } from '@/api/authApi';
import type { ILoginInput } from '@/api/types';
import { createToast } from 'mosha-vue-toastify';
import router from '@/router';
import { useAuthStore } from '@/stores/authStore';
import LoadingButton from '@/components/LoadingButton.vue';

const authStore = useAuthStore();

const loginSchema = toFormValidator(
  zod.object({
    email: zod
      .string()
      .min(1, 'Email address is required')
      .email('Email Address is invalid'),
    password: zod
      .string()
      .min(1, 'Password is required')
      .min(8, 'Password must be more than 8 characters')
      .max(32, 'Password must be less than 32 characters'),
  })
);

const { handleSubmit, errors, resetForm } = useForm({
  validationSchema: loginSchema,
});

const { value: email } = useField('email');
const { value: password } = useField('password');

const authResult = useQuery('authUser', () => getMeFn(), {
  enabled: false,
  retry: 1,
});

const queryClient = useQueryClient();

const { isLoading, mutate } = useMutation(
  (credentials: ILoginInput) => loginUserFn(credentials),
  {
    onError: (error) => {
      if (Array.isArray((error as any).response.data.error)) {
        (error as any).response.data.error.forEach((el: any) =>
          createToast(el.message, {
            position: 'top-right',
            type: 'warning',
          })
        );
      } else {
        createToast((error as any).response.data.message, {
          position: 'top-right',
          type: 'danger',
        });
      }
    },
    onSuccess: (data) => {
      queryClient.refetchQueries('authUser');
      createToast('Successfully logged in', {
        position: 'top-right',
      });
      router.push({ name: 'profile' });
    },
  }
);

const onSubmit = handleSubmit((values) => {
  mutate({
    email: values.email,
    password: values.password,
  });
  resetForm();
});

onBeforeUpdate(() => {
  if (authResult.isSuccess.value) {
    const authUser = Object.assign({}, authResult.data.value?.data.user);
    authStore.setAuthUser(authUser);
  }
});
</script>
Vue Query Axios Register User
Next, let’s use Typescript, and Vue Query with Axios POST request to register a new user.
src/views/RegisterView.vue
<template>
  <section class="py-8 bg-ct-blue-600 min-h-screen grid place-items-center">
    <div>
      <h1
        class="text-4xl xl:text-6xl text-center font-[600] text-ct-yellow-600 mb-4"
      >
        Welcome to CodevoWeb!
      </h1>
      <h2 class="text-lg text-center mb-4 text-ct-dark-200">
        Sign Up To Get Started!
      </h2>
      <form
        @submit="onSubmit"
        class="max-w-[27rem] mx-auto overflow-hidden shadow-lg bg-ct-dark-200 rounded-2xl p-8 space-y-5"
      >
        <div class="">
          <label for="name" class="block text-ct-blue-600 mb-3"
            >Full Name</label
          >
          <input
            v-model="name"
            type="text"
            placeholder=" "
            class="block w-full rounded-2xl appearance-none focus:outline-none py-2 px-4"
            id="name"
          />
          <span class="text-red-500 text-xs pt-1 block">{{ errors.name }}</span>
        </div>
        <div class="">
          <label for="email" class="block text-ct-blue-600 mb-3"
            >Email Address</label
          >
          <input
            v-model="email"
            type="email"
            placeholder=" "
            class="block w-full rounded-2xl appearance-none focus:outline-none py-2 px-4"
            id="email"
          />
          <span class="text-red-500 text-xs pt-1 block">{{
            errors.email
          }}</span>
        </div>
        <div class="">
          <label for="password" class="block text-ct-blue-600 mb-3"
            >Password</label
          >
          <input
            v-model="password"
            type="password"
            placeholder=" "
            class="block w-full rounded-2xl appearance-none focus:outline-none py-2 px-4"
            id="password"
          />
          <span class="text-red-500 text-xs pt-1 block">{{
            errors.password
          }}</span>
        </div>
        <div class="">
          <label for="passwordConfirm" class="block text-ct-blue-600 mb-3"
            >Confirm Password</label
          >
          <input
            v-model="passwordConfirm"
            type="password"
            placeholder=" "
            class="block w-full rounded-2xl appearance-none focus:outline-none py-2 px-4"
            id="passwordConfirm"
          />
          <span class="text-red-500 text-xs pt-1 block">{{
            errors.passwordConfirm
          }}</span>
        </div>
        <span class="block"
          >Already have an account?
          <router-link :to="{ name: 'login' }" class="text-ct-blue-600"
            >Login Here</router-link
          ></span
        >
        <LoadingButton :loading="isLoading">Sign Up</LoadingButton>
      </form>
    </div>
  </section>
</template>

<script setup lang="ts">
import { Form, useField, useForm } from 'vee-validate';
import { toFormValidator } from '@vee-validate/zod';
import * as zod from 'zod';
import { useMutation } from 'vue-query';
import { signUpUserFn } from '@/api/authApi';
import type { ISignUpInput } from '@/api/types';
import { createToast } from 'mosha-vue-toastify';
import router from '@/router';
import LoadingButton from '../components/LoadingButton.vue';

const registerSchema = toFormValidator(
  zod
    .object({
      name: zod.string().min(1, 'Full name is required'),
      email: zod
        .string()
        .min(1, 'Email address is required')
        .email('Email Address is invalid'),
      password: zod
        .string()
        .min(1, 'Password is required')
        .min(8, 'Password must be more than 8 characters')
        .max(32, 'Password must be less than 32 characters'),
      passwordConfirm: zod.string().min(1, 'Please confirm your password'),
    })
    .refine((data) => data.password === data.passwordConfirm, {
      path: ['passwordConfirm'],
      message: 'Passwords do not match',
    })
);

const { handleSubmit, errors, resetForm } = useForm({
  validationSchema: registerSchema,
});

const { value: name } = useField('name');
const { value: email } = useField('email');
const { value: password } = useField('password');
const { value: passwordConfirm } = useField('passwordConfirm');

const { isLoading, mutate } = useMutation(
  (credentials: ISignUpInput) => signUpUserFn(credentials),
  {
    onError: (error) => {
      if (Array.isArray((error as any).response.data.error)) {
        (error as any).response.data.error.forEach((el: any) =>
          createToast(el.message, {
            position: 'top-right',
            type: 'warning',
          })
        );
      } else {
        createToast((error as any).response.data.message, {
          position: 'top-right',
          type: 'danger',
        });
      }
    },
    onSuccess: (data) => {
      router.push({ name: 'verifyemail' });
      createToast(data.message, {
        position: 'top-right',
      });
    },
  }
);

const onSubmit = handleSubmit((values) => {
  mutate({
    name: values.name,
    email: values.email,
    password: values.password,
    passwordConfirm: values.passwordConfirm,
  });
  resetForm();
});
</script>
Vue Query Axios Verify User’s Email
Create a Vue.js Typescript component with tailwindCss to verify the registered user’s email address.
src/views/VerifyEmailView.vue
<template>
  <section class="py-8 bg-ct-blue-600 min-h-screen grid place-items-center">
    <div>
      <h1
        class="text-5xl xl:text-7xl text-center font-[600] text-ct-yellow-600 mb-8"
      >
        Verify Email Address
      </h1>

      <form
        @submit="onSubmit"
        class="max-w-[27rem] mx-auto overflow-hidden shadow-lg bg-ct-dark-200 rounded-2xl p-8 space-y-5"
      >
        <div class="">
          <label for="verificationCode" class="block text-ct-blue-600 mb-3"
            >Verification Code</label
          >
          <input
            v-model="verificationCodeInput"
            type="text"
            placeholder=" "
            class="block w-full rounded-2xl appearance-none focus:outline-none py-2 px-4"
            id="verificationCode"
          />
          <span class="text-red-500 text-xs pt-1 block">{{
            errors.verificationCode
          }}</span>
        </div>

        <LoadingButton :loading="isLoading">Verify Email</LoadingButton>
      </form>
    </div>
  </section>
</template>

<script setup lang="ts">
import { onMounted } from 'vue';
import { toFormValidator } from '@vee-validate/zod';
import * as zod from 'zod';
import { useForm, useField } from 'vee-validate';
import { useRoute } from 'vue-router';
import { useMutation } from 'vue-query';
import { verifyEmailFn } from '@/api/authApi';
import router from '@/router';
import { createToast } from 'mosha-vue-toastify';
import LoadingButton from '@/components/LoadingButton.vue';

const route = useRoute();
const { verificationCode } = route.params;

const verifyEmailSchema = toFormValidator(
  zod.object({
    verificationCode: zod.string().min(1, 'Verification code required'),
  })
);

const { resetForm, setFieldValue, handleSubmit, errors } = useForm({
  validationSchema: verifyEmailSchema,
});

const { value: verificationCodeInput } = useField('verificationCode');

const { mutate: verifyEmail, isLoading } = useMutation(
  (code: string) => verifyEmailFn(code),
  {
    onError: (error) => {
      if (Array.isArray((error as any).response.data.error)) {
        (error as any).response.data.error.forEach((el: any) =>
          createToast(el.message, {
            position: 'top-right',
            type: 'warning',
          })
        );
      } else {
        createToast((error as any).response.data.message, {
          position: 'top-right',
          type: 'danger',
        });
      }
    },
    onSuccess: (data) => {
      createToast(data.message, {
        position: 'top-right',
      });
      router.push({ name: 'login' });
    },
  }
);

const onSubmit = handleSubmit((values) => {
  verifyEmail(values.verificationCode);
  resetForm();
});

onMounted(() => {
  if (verificationCode) {
    setFieldValue('verificationCode', verificationCode);
  }
});
</script>
Create Some Useful Views with Vue and tailwindCss
Home Page
src/views/HomeView.vue
<template>
  <Header />
  <section class="bg-ct-blue-600 min-h-screen pt-20">
    <div
      class="max-w-4xl mx-auto bg-ct-dark-200 rounded-md h-[20rem] flex justify-center items-center"
    >
      <p class="text-5xl font-semibold">Home Page</p>
    </div>
  </section>
</template>

<script setup lang="ts">
import Header from '@/components/Header.vue';
</script>
Profile Page
src/views/ProfileView.vue
<template>
  <Header />
  <section class="bg-ct-blue-600 min-h-screen pt-20">
    <div
      class="max-w-4xl mx-auto bg-ct-dark-100 rounded-md h-[20rem] flex justify-center items-center"
    >
      <div>
        <p class="text-5xl font-semibold">Profile Page</p>
        <div class="mt-8">
          <p class="mb-4">ID: {{ user?.id }}</p>
          <p class="mb-4">Name: {{ user?.name }}</p>
          <p class="mb-4">Email: {{ user?.email }}</p>
          <p class="mb-4">Role: {{ user?.role }}</p>
        </div>
      </div>
    </div>
  </section>
</template>

<script setup lang="ts">
import Header from '@/components/Header.vue';
import { useAuthStore } from '@/stores/authStore';
const authStore = useAuthStore();
const user = authStore.authUser;
</script>
Set up Routing with Vue-Router
In the rotuer directory, open the index.ts file and replace its content with the following:
src/router/index.ts
import { createRouter, createWebHistory } from 'vue-router';
import HomeView from '@/views/HomeView.vue';
import RegisterView from '@/views/RegisterView.vue';
import LoginView from '@/views/LoginView.vue';
import VerifyEmailView from '@/views/VerifyEmailView.vue';
import ProfileViewVue from '@/views/ProfileView.vue';

const routes = [
  {
    name: 'home',
    path: '/',
    component: HomeView,
  },
  {
    name: 'register',
    path: '/register',
    component: RegisterView,
  },
  {
    name: 'login',
    path: '/login',
    component: LoginView,
  },
  {
    name: 'verifyemail',
    path: '/verifyemail',
    component: VerifyEmailView,
    children: [
      {
        name: 'verifyemail',
        path: ':verificationCode',
        component: VerifyEmailView,
      },
    ],
  },
  {
    name: 'profile',
    path: '/profile',
    component: ProfileViewVue,
  },
];

const router = createRouter({
  history: createWebHistory('/'),
  routes,
});

export default router;
In the above, we created a new router instance and add a couple of configuration options as well as the routes array.
At this point, it’s crucial to know that all the routes are unprotected but we’ll add the code to protect them in a moment.
Creating the Authentication middleware
In the src/router directory, create a middleware folder and then create arequireAuth.ts file and paste the following code into it.
import { getMeFn } from '@/api/authApi';
import type { NavigationGuardNext } from 'vue-router';
import router from '..';

export default async function requireAuth({
  next,
  authStore,
}: {
  next: NavigationGuardNext;
  authStore: any;
}) {
  try {
    const response = await getMeFn();
    const user = response.data.user;
    authStore.setAuthUser(user);

    if (!user) {
      return next({
        name: 'login',
      });
    }
  } catch (error) {
    document.location.href = '/login';
  }

  return next();
}
The requireAuth middleware checks to see if the user is authenticated. The request to retrieve the user’s credentials will succeed only if they have a valid access token in the cookies sent along with the request.
Creating a Middleware Pipeline
Create a ./src/router/middlewarePipeline.ts file and add the following code to it.
function middlewarePipeline(context: any, middleware: any, index: any) {
  const nextMiddleware = middleware[index];

  if (!nextMiddleware) {
    return context.next;
  }

  return () => {
    const nextPipeline = middlewarePipeline(context, middleware, index + 1);

    nextMiddleware({ ...context, next: nextPipeline });
  };
}

export default middlewarePipeline;
Setup Vue Router Navigation Guards
Now let’s use the navigation guards provided by Vue Router to protect our routes. The navigation guards will protect our routes by either redirecting or canceling them.
To register a global guard that will be called whenever a route is triggered, we use the beforeEach method on the router instance.
const router = new Router({ ... })
const router = createRouter({
  history: createWebHistory(import.meta.env.BASE_URL),
  routes,
});

router.beforeEach(
  (
    to: RouteLocationNormalized,
    from: RouteLocationNormalized,
    next: NavigationGuardNext
  ) => {
    const authStore = useAuthStore();

    if (!to.meta.middleware) {
      return next();
    }
    const middleware = to.meta.middleware as any;

    const context = {
      to,
      from,
      next,
      authStore,
    };

    return middleware[0]({
      ...context,
      next: middlewarePipeline(context, middleware, 1),
    });
  }
);

export default router;
The beforeEach method accepts three arguments:
to:the target route being navigated to.from:the current route being navigated from.next:thefunctioncalled to resolve the hook.
Protecting the Routes with Navigation Guards
To protect the routes, we need to import the requireAuth middleware and define a meta field to contain a middleware array.
We will add all the middleware we want to associate with a particular route to the middleware array.
Now, update the ./src/router/index.ts file to have the following code:
src/router/index.ts
import {
  createRouter,
  createWebHistory,
  type NavigationGuardNext,
  type RouteLocationNormalized,
} from 'vue-router';
import HomeView from '@/views/HomeView.vue';
import RegisterView from '@/views/RegisterView.vue';
import LoginView from '@/views/LoginView.vue';
import VerifyEmailView from '@/views/VerifyEmailView.vue';
import { useAuthStore } from '@/stores/authStore';
import requireAuth from '@/router/middleware/requireAuth';
import middlewarePipeline from '@/router/middlewarePipeline';
import ProfileViewVue from '@/views/ProfileView.vue';

const routes = [
  {
    name: 'home',
    path: '/',
    component: HomeView,
  },
  {
    name: 'register',
    path: '/register',
    component: RegisterView,
  },
  {
    name: 'login',
    path: '/login',
    component: LoginView,
  },
  {
    name: 'verifyemail',
    path: '/verifyemail',
    component: VerifyEmailView,
    children: [
      {
        name: 'verifyemail',
        path: ':verificationCode',
        component: VerifyEmailView,
      },
    ],
  },
  {
    name: 'profile',
    path: '/profile',
    component: ProfileViewVue,
    meta: {
      middleware: [requireAuth],
    },
  },
];

const router = createRouter({
  history: createWebHistory('/'),
  routes,
});

router.beforeEach(
  (
    to: RouteLocationNormalized,
    from: RouteLocationNormalized,
    next: NavigationGuardNext
  ) => {
    const authStore = useAuthStore();

    if (!to.meta.middleware) {
      return next();
    }
    const middleware = to.meta.middleware as any;

    const context = {
      to,
      from,
      next,
      authStore,
    };

    return middleware[0]({
      ...context,
      next: middlewarePipeline(context, middleware, 1),
    });
  }
);

export default router;
Display the Views
src/App.vue
<script setup lang="ts">
import { RouterView } from 'vue-router';
</script>

<template>
  <RouterView />
</template>

<style></style>
Remember to add the custom font to the HTML body tag with
class="font-Poppins"
Conclusion
JWT Authentication can be done in different ways depending on the type of application you are working on. This simple example illustrates how you can implement JWT authentication in your Vue.js, Vue Query, Pinia, and Vee-validate applications.
You can find the source code of the Vue.js application here