
This article will teach you how to build a Node.js gRPC API server to register a user and verify their email address using Nodemailer, Pug template engine, Prisma, PostgreSQL, Redis, and Docker-compose.
You will also learn how to create a generic class to send multiple emails by appending the different instance methods.
Node.js gRPC API Server and Client with Prisma and PostgreSQL Series:
- Build a Node.js gRPC Server and Client: Register and Login User
- Build Node.js gRPC API Server and Client: Send HTML Emails
- Build a Complete gRPC CRUD API with Node.js and Express
Related articles:
- API with Golang + MongoDB + Redis + Gin Gonic: Project Setup
- Build Golang gRPC Server and Client: SignUp User & Verify Email
- Build Golang gRPC Server and Client: Access & Refresh Tokens
- Build CRUD gRPC Server API & Client with Golang and MongoDB
- Build CRUD RESTful API Server with Golang, Gin, and MongoDB
Send Emails with Node.js gRPC Server & Nodemailer
On the frontend application, the user provides the necessary credentials to create a new account and calls the appropriate RPC on the gRPC server.
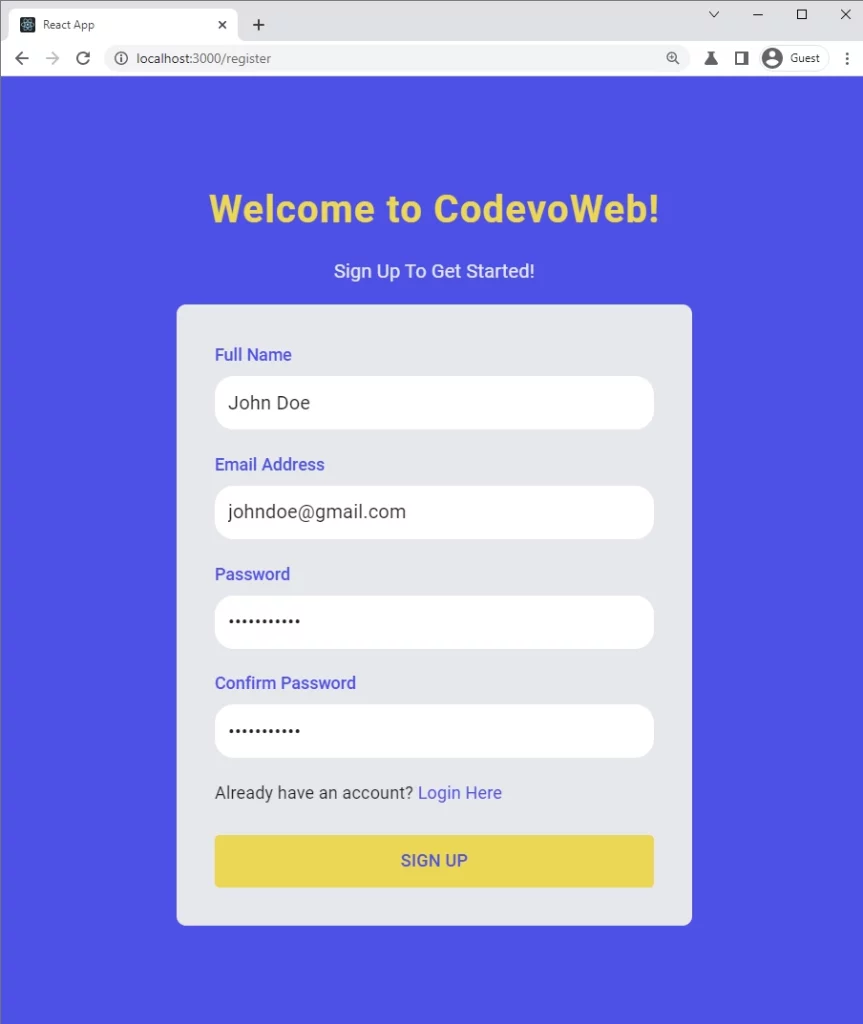
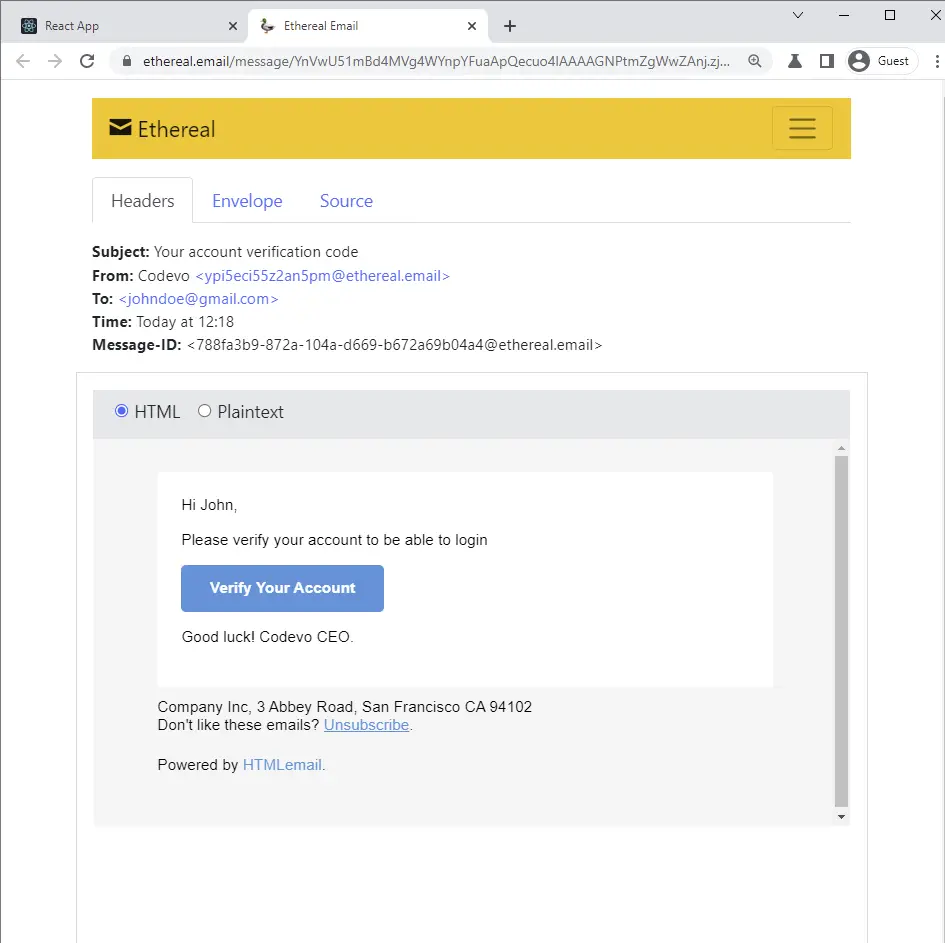
The gRPC Node.js API server validates the provided credentials, adds the user to the database, and generates the HTML template and the verification code before sending the HTML email to the user’s email address.
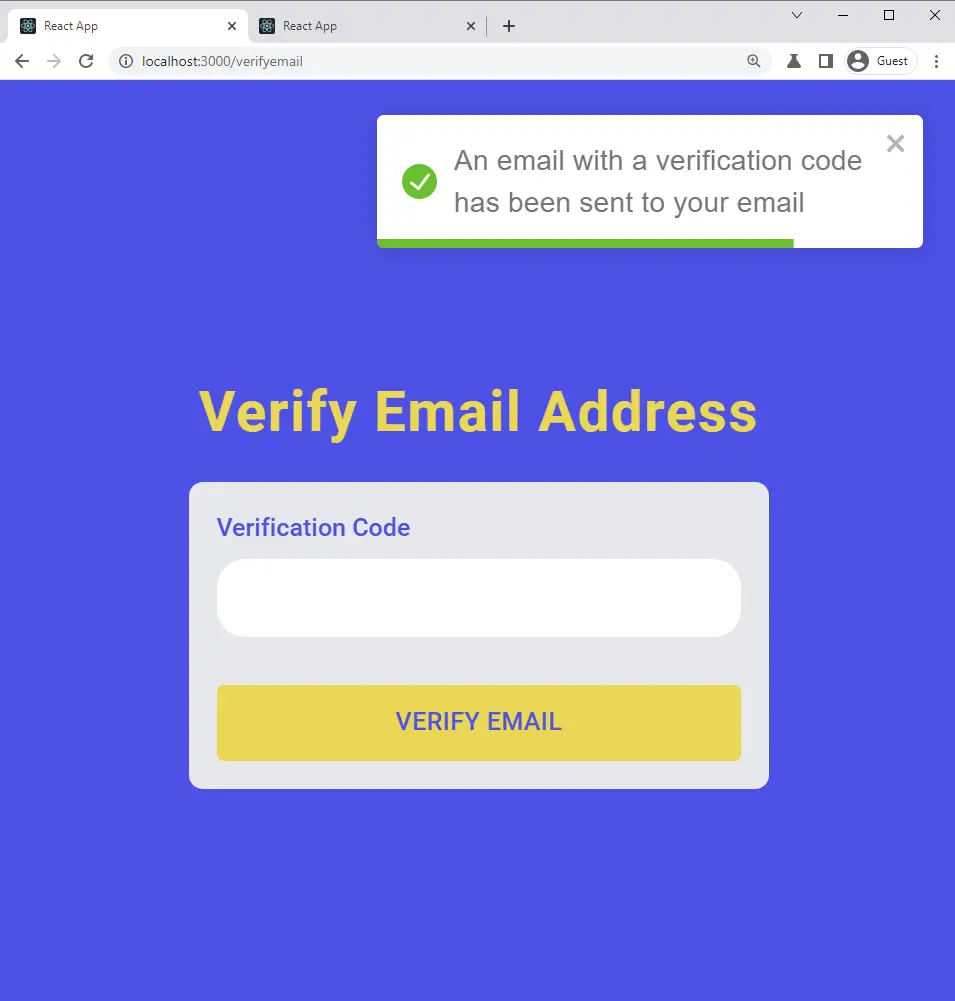
Upon receiving the email verification alert, the user clicks on the Verify Your Account button.
The user is then redirected to the email verification page where the code is automatically extracted from the URL parameters and added to the input field.
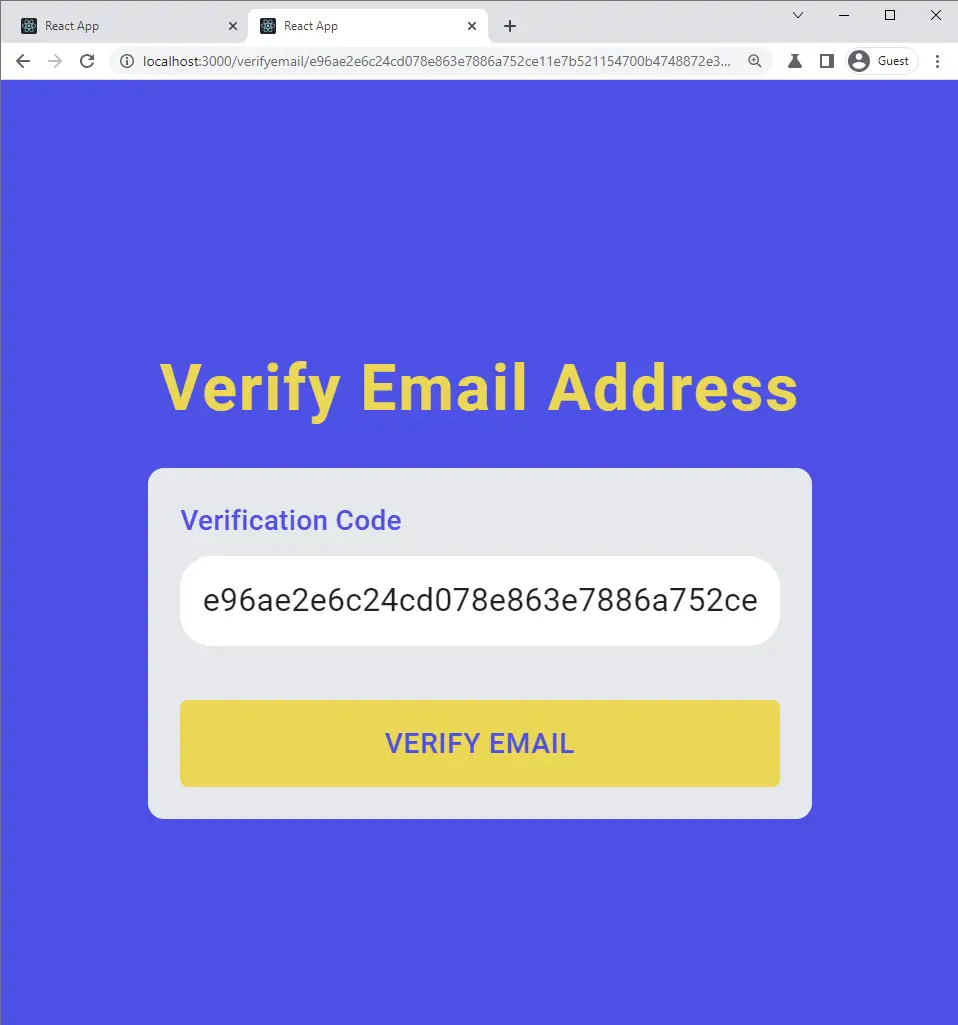
Next, the user clicks on the VERIFY EMAIL button and the appropriate RPC method is evoked on the gRPC server to validate the verification code.
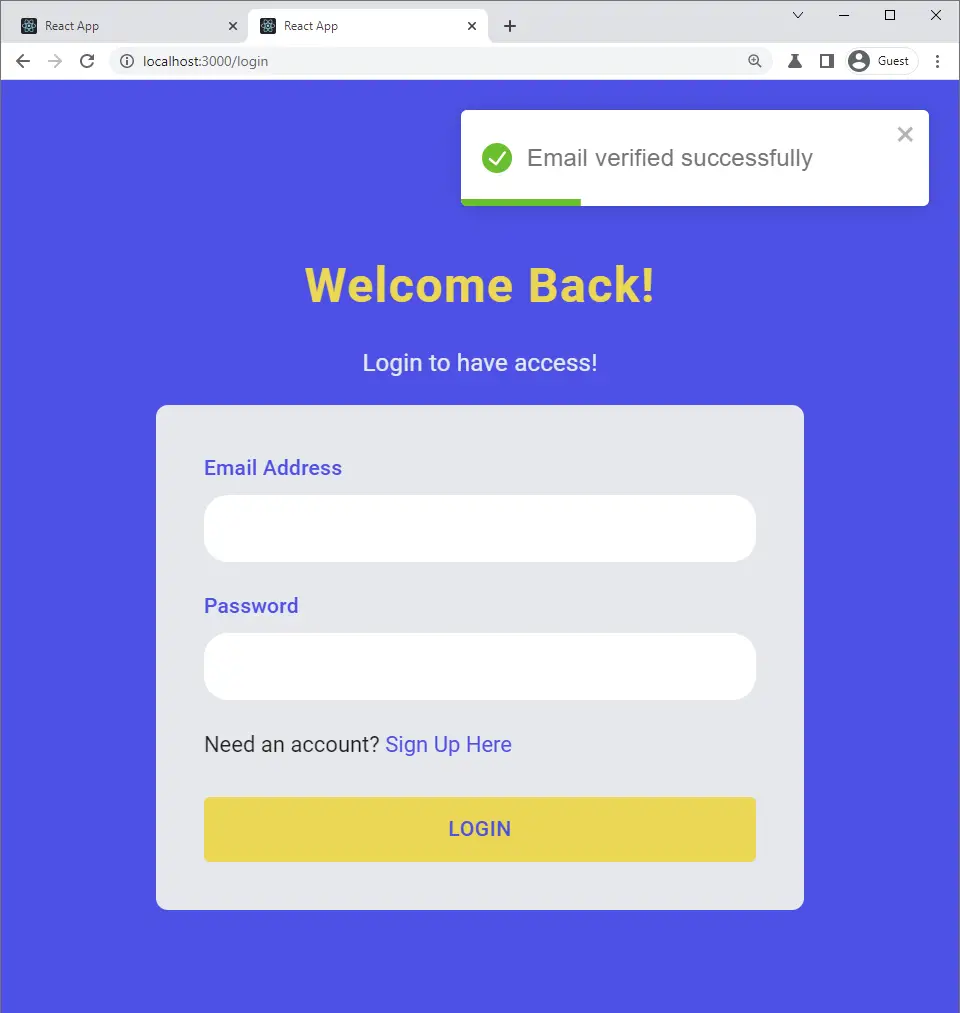
After the Node.js gRPC server validates the verification code, the user’s profile information will be updated to verified in the database and a success message will be returned to the gRPC client.
Setup Pug Templating Engine and Nodemailer
We have a handful of template engines used in Node.js projects but we are going to use Pug, a popular templating engine for Node.js to generate the HTML email templates.
There are other template engines like Handlebars, Swig, Mustache, EJS, etc but Pug has a clean and simple syntax making it the dominant one for most Node.js projects.
Install Pug and its peer dependencies:
yarn add nodemailer pug html-to-text && yarn add -D @types/nodemailer @types/html-to-text @types/pug
nodemailer: For sending SMTP Emails in Node.jspug: A Node.js template enginehtml-to-text: Converts HTML to plain Text
Execute the following code snippets at the beginning of the server/app.ts file to generate the Nodemailer SMTP credentials and remove the code afterward.
server/app.ts
// [...] ? other imports
import nodemailer from 'nodemailer';

(async function () {
  const credentials = await nodemailer.createTestAccount();
  console.log(credentials);
})();

// [...] ? Remaining code
Before running the gRPC server, start the PostgreSQL and Redis Docker containers with this command:
docker-compose up -d
Now run yarn start:server to start the Node.js gRPC server. Assuming the gRPC server starts successfully, you should see the generated SMTP credentials in the terminal.
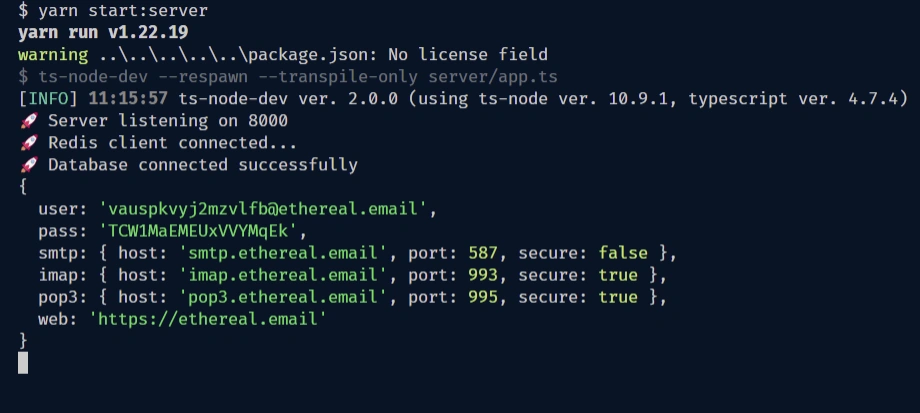
Update the .env file with the Nodemailer SMTP credentials.
.env
EMAIL_FROM=admin@admin.com
SMTP_PASS=zgpkQjDHGPhKTYUmSnSF
SMTP_USER=bvizvshgvdp43j22r@ethereal.email
SMTP_PORT=587
SMTP_HOST=smtp.ethereal.email
Add the variables to the server/config/default.ts file to load the environment variables with their corresponding TypeScript types.
server/config/default.ts
export default {
  port: 'PORT',

  accessTokenPrivateKey: 'JWT_ACCESS_TOKEN_PRIVATE_KEY',
  accessTokenPublicKey: 'JWT_ACCESS_TOKEN_PUBLIC_KEY',
  refreshTokenPrivateKey: 'JWT_REFRESH_TOKEN_PRIVATE_KEY',
  refreshTokenPublicKey: 'JWT_REFRESH_TOKEN_PUBLIC_KEY',

  smtp: {
    host: 'EMAIL_HOST',
    pass: 'EMAIL_PASS',
    port: 'EMAIL_PORT',
    user: 'EMAIL_USER',
  },
};
Creating the gRPC Protobuf Messages
Create the User Protobuf Message
proto/user.proto
syntax = "proto3";

package auth;

import "google/protobuf/timestamp.proto";

message User {
  string id = 1;
  string name = 2;
  string email = 3;
  string role = 4;
  string photo = 5;
  string provider = 6;
  google.protobuf.Timestamp created_at = 7;
  google.protobuf.Timestamp updated_at = 8;
}

message UserResponse { User user = 1; }

message GenericResponse {
  string status = 1;
  string message = 2;
}
Create the SignUp User Protobuf Message
proto/rpc_signup_user.proto
syntax = "proto3";

package auth;

import "user.proto";

message SignUpUserInput {
  string name = 1;
  string email = 2;
  string password = 3;
  string passwordConfirm = 4;
  string photo = 5;
  string provider = 6;
}

message SignUpUserResponse { User user = 1; }
Create the Sign-in User Protobuf Message
proto/rpc_signin_user.proto
syntax = "proto3";

package auth;

message SignInUserInput {
  string email = 1;
  string password = 2;
}

message SignInUserResponse {
  string status = 1;
  string access_token = 2;
  string refresh_token = 3;
}
Creating the gRPC Services and RPC Methods
Update the proto/services.proto file to have the following RPC Remote Procedure Call methods:
SignUpUser– RPC method to register the new userSignInUser– RPC method to sign in the registered userRefreshToken– RPC method to refresh the expired access tokenVerifyEmail– RPC method to verify the user’s email addressGetMe– RPC method to retrieve the authenticated user’s information
proto/services.proto
syntax = "proto3";

package auth;

import "user.proto";
import "rpc_signup_user.proto";
import "rpc_signin_user.proto";

service AuthService {
  rpc SignUpUser(SignUpUserInput) returns (GenericResponse) {}
  rpc SignInUser(SignInUserInput) returns (SignInUserResponse) {}
  rpc RefreshToken(RefreshTokenInput) returns (RefreshTokenResponse) {}
  rpc VerifyEmail(VerifyEmailInput) returns (GenericResponse) {}
  rpc GetMe(GetMeInput) returns (UserResponse) {}
}

message GetMeInput { string access_token = 1; }
message RefreshTokenInput { string refresh_token = 1; }
message RefreshTokenResponse {
  string access_token = 1;
  string refresh_token = 2;
}

message VerifyEmailInput { string verification_code = 1; }
How to Generate the TypeScript gRPC Code
Now that we have all the Protobuf definitions, let’s install these libraries to help us generate the TypeScript files.
yarn add @grpc/grpc-js @grpc/proto-loader
@grpc/grpc-js– A library for implementing gRPC in Nodejs.@grpc/proto-loader– A library for loading .proto files for use with gRPC.
With the required dependencies installed, create a proto-gen.sh file and add the following bash script to help us easily generate the TypeScript files from the Protobuf definitions.
proto-gen.sh
#!/bin/bash

rm -rf pb/
yarn proto-loader-gen-types --longs=String --enums=String --defaults --keepCase --oneofs --grpcLib=@grpc/grpc-js --outDir=pb/ proto/*.proto
If by any chance the bash script exits without generating the TypeScript files, you can execute the individual commands in the terminal.
The above script will create a pb folder and output all the generated TypeScript files into it.
Creating the Email Templates with Pug
Click here to automatically download the Pug HTML email templates. After the download is complete, extract the views folder from the downloaded Zip file and move it to the server folder.
Create a Helper Class to the Send Emails
Now let’s create a utility class to send single or multiple emails at once by chaining the different instance methods.
Retrieve the Nodemailer SMTP Credentials
server/utils/email.ts
import nodemailer from 'nodemailer';
import { User } from '@prisma/client';
import pug from 'pug';
import { convert } from 'html-to-text';
import customConfig from '../config/default';

const smtp = customConfig.smtp;
Add the Email Class Attributes
Create the Email class and add the attributes needed for the Mail Options and the email templates.
server/utils/email.ts
// ? SMTP configurations

export default class Email {
 firstName: string;
  to: string;
  from: string;
  constructor(public user: User, public url: string) {
    this.firstName = user.name.split(' ')[0];
    this.to = user.email;
    this.from = `Codevo ${customConfig.emailFrom}`;
  }

  // (...)
}
Define the Nodemailer Transporter
Now let’s define a private method on the class to create and return the Nodemailer transport object.
server/utils/email.ts
// ? SMTP configurations

export default class Email {
  // ? Constructor

  private newTransport() {
    // if (process.env.NODE_ENV === 'production') {
    //   console.log('Hello')
    // }

    return nodemailer.createTransport({
      ...smtp,
      auth: {
        user: smtp.user,
        pass: smtp.pass,
      },
    });
  }
}
Create a Method to Generate and Send the Email Templates
With that out of the way, let’s use the pug.renderFile() method to retrieve a particular Pug file from the views folder and render it into HTML.
Now evoke the sendMail() method available on the transport object to send the email.
server/utils/email.ts
// ? SMTP configurations

export default class Email {
// ? Constructor

// ? Transport

  private async send(template: string, subject: string) {
    // Generate HTML template based on the template string
    const html = pug.renderFile(`${__dirname}/../views/${template}.pug`, {
      firstName: this.firstName,
      subject,
      url: this.url,
    });
    // Create mailOptions
    const mailOptions = {
      from: this.from,
      to: this.to,
      subject,
      text: convert(html),
      html,
    };

    // Send email
    const info = await this.newTransport().sendMail(mailOptions);
    console.log(nodemailer.getTestMessageUrl(info));
  }
}
Create the Methods to Send the Emails
Let’s create two public methods to send the email verification code and a password reset token.
server/utils/email.ts
/ ? SMTP configurations

export default class Email {
  // ? Constructor

  // ? Transport

  // ? Method to send emails

  async sendVerificationCode() {
    await this.send('verificationCode', 'Your account verification code');
  }

  async sendPasswordResetToken() {
    await this.send(
      'resetPassword',
      'Your password reset token (valid for only 10 minutes)'
    );
  }
}
Complete Email Utility Code
server/utils/email.ts
import nodemailer from 'nodemailer';
import { User } from '@prisma/client';
import pug from 'pug';
import { convert } from 'html-to-text';
import customConfig from '../config/default';

const smtp = customConfig.smtp;

export default class Email {
  firstName: string;
  to: string;
  from: string;
  constructor(public user: User, public url: string) {
    this.firstName = user.name.split(' ')[0];
    this.to = user.email;
    this.from = `Codevo ${customConfig.emailFrom}`;
  }

  private newTransport() {
    // if (process.env.NODE_ENV === 'production') {
    //   console.log('Hello')
    // }

    return nodemailer.createTransport({
      ...smtp,
      auth: {
        user: smtp.user,
        pass: smtp.pass,
      },
    });
  }

  private async send(template: string, subject: string) {
    // Generate HTML template based on the template string
    const html = pug.renderFile(`${__dirname}/../views/${template}.pug`, {
      firstName: this.firstName,
      subject,
      url: this.url,
    });
    // Create mailOptions
    const mailOptions = {
      from: this.from,
      to: this.to,
      subject,
      text: convert(html),
      html,
    };

    // Send email
    const info = await this.newTransport().sendMail(mailOptions);
    console.log(nodemailer.getTestMessageUrl(info));
  }

  async sendVerificationCode() {
    await this.send('verificationCode', 'Your account verification code');
  }

  async sendPasswordResetToken() {
    await this.send(
      'resetPassword',
      'Your password reset token (valid for only 10 minutes)'
    );
  }
}
Update the Register RPC Controller
Now let’s update the user registration RPC controller to send the verification code to the user’s email address.
server/controllers/auth.controller.ts
export const registerHandler = async (
  req: grpc.ServerUnaryCall<SignUpUserInput__Output, SignUpUserResponse>,
  res: grpc.sendUnaryData<GenericResponse>
) => {
  try {
    const hashedPassword = await bcrypt.hash(req.request.password, 12);
    const user = await createUser({
      email: req.request.email.toLowerCase(),
      name: req.request.name,
      password: hashedPassword,
      photo: req.request.photo,
      verified: false,
      provider: 'local',
    });

    const verification_code = crypto.randomBytes(20).toString('hex');
    const hashed_verification_code = crypto
      .createHash('sha256')
      .update(verification_code)
      .digest('hex');
    await updateUser(
      { id: user.id },
      { verification_code: hashed_verification_code }
    );
    const redirectUrl = `https://localhost:3000/api/verifyemail?code=${verification_code}`;
    try {
      await new Email(user, redirectUrl).sendVerificationCode();
      res(null, { status: 'success', message: 'Email verification code sent' });
    } catch (error: any) {
      await updateUser({ id: user.id }, { verification_code: null });
      res({
        code: grpc.status.INTERNAL,
        message: error.message,
      });
    }
  } catch (err: any) {
    if (err.code === 'P2002') {
      res({
        code: grpc.status.ALREADY_EXISTS,
        message: 'Email already exists',
      });
    }
    res({ code: grpc.status.INTERNAL, message: err.message });
  }
};
Quite a lot happening in the above, let’s break it down:
- First, we hashed the plain-text password and added the user to the database.
- We then generated some random bytes with the Node.js Crypto module and converted them to a hexadecimal string.
- Next, we sent the unhashed string to the user’s email address and saved the hashed one in the database.
- Lastly, we returned a success message to the gRPC client.
Update the Login Controller
export const loginHandler = async (
  req: grpc.ServerUnaryCall<
    SignInUserInput__Output,
    SignInUserResponse__Output
  >,
  res: grpc.sendUnaryData<SignInUserResponse__Output>
) => {
  try {
    // Get the user from the collection
    const user = await findUser({ email: req.request.email });

    if (!user?.verified) {
      res({
        code: grpc.status.INVALID_ARGUMENT,
        message: 'Account not verified',
      });
    }

    // Check if user exist and password is correct
    if (!user || !(await bcrypt.compare(req.request.password, user.password))) {
      res({
        code: grpc.status.INVALID_ARGUMENT,
        message: 'Invalid email or password',
      });
    }

    // Create the Access and refresh Tokens
    const { access_token, refresh_token } = await signTokens(user);

    // Send Access Token
    res(null, {
      status: 'success',
      access_token,
      refresh_token,
    });
  } catch (err: any) {
    res({
      code: grpc.status.INTERNAL,
      message: err.message,
    });
  }
};
Create an RPC Controller to Verify the Code
Let’s create an RPC controller that will be evoked by the gRPC client to verify the verification code.
server/controllers/auth.controller.ts
export const verifyEmailHandler = async (
  req: grpc.ServerUnaryCall<VerifyEmailInput__Output, GenericResponse>,
  res: grpc.sendUnaryData<GenericResponse>
) => {
  try {
    const verification_code = crypto
      .createHash('sha256')
      .update(req.request.verification_code)
      .digest('hex');

    const user = await findUniqueUser({ verification_code });

    if (!user) {
      res({
        code: grpc.status.UNAUTHENTICATED,
        message: 'Could not verify email',
      });
    }

    await updateUser(
      { id: user.id },
      { verified: true, verification_code: null }
    );

    res(null, { status: 'success', message: 'Email verified successfully' });
  } catch (err: any) {
    res({
      code: grpc.status.INTERNAL,
      message: err.message,
    });
  }
};
Let’s evaluate the above code:
- First, we hashed the verification code sent by the gRPC client with the Node.js Crypto module.
- Then we queried the PostgreSQL database to see if a user with that code exists.
- Lastly, we updated the verified column of the user’s record to
trueassuming the verification code is valid and the user still exists.
Add the RPC Controller to the gRPC Service
Open the server/app.ts file and add the VerifyEmail RPC method to the gRPC service.
server/app.ts
import path from 'path';
import * as grpc from '@grpc/grpc-js';
import * as protoLoader from '@grpc/proto-loader';
import { ProtoGrpcType } from '../pb/services';
import { AuthServiceHandlers } from '../pb/auth/AuthService';
import {
  loginHandler,
  refreshAccessTokenHandler,
  registerHandler,
  verifyEmailHandler,
} from './controllers/auth.controller';
import customConfig from './config/default';
import connectDB from './utils/prisma';
import { getMeHandler } from './controllers/user.controller';
// [...] ? other imports
import nodemailer from 'nodemailer';

(async function () {
  const credentials = await nodemailer.createTestAccount();
  console.log(credentials);
})();

// [...] ? Remaining code
const options: protoLoader.Options = {
  keepCase: true,
  longs: String,
  enums: String,
  defaults: true,
  oneofs: true,
};

const PORT = customConfig.port;
const PROTO_FILE = '../proto/services.proto';
const packageDef = protoLoader.loadSync(
  path.resolve(__dirname, PROTO_FILE),
  options
);

const proto = grpc.loadPackageDefinition(
  packageDef
) as unknown as ProtoGrpcType;

const authPackage = proto.auth;

const server = new grpc.Server();
server.addService(authPackage.AuthService.service, {
  SignUpUser: (req, res) => registerHandler(req, res),
  SignInUser: (req, res) => loginHandler(req, res),
  RefreshToken: (req, res) => refreshAccessTokenHandler(req, res),
  GetMe: (req, res) => getMeHandler(req, res),
  VerifyEmail: (req, res) => verifyEmailHandler(req, res),
} as AuthServiceHandlers);
server.bindAsync(
  `0.0.0.0:${PORT}`,
  grpc.ServerCredentials.createInsecure(),
  (err, port) => {
    if (err) {
      console.error(err);
      return;
    }
    server.start();
    connectDB();
    console.log(`? Server listening on ${port}`);
  }
);
Updating the Node.js gRPC Client
client/app.ts
import path from 'path';
import * as grpc from '@grpc/grpc-js';
import * as protoLoader from '@grpc/proto-loader';
import { ProtoGrpcType } from '../pb/services';
import customConfig from '../server/config/default';

const options: protoLoader.Options = {
  keepCase: true,
  longs: String,
  enums: String,
  defaults: true,
  oneofs: true,
};
const PORT = customConfig.port;
const PROTO_FILE = '../proto/services.proto';
const packageDef = protoLoader.loadSync(
  path.resolve(__dirname, PROTO_FILE),
  options
);

const proto = grpc.loadPackageDefinition(
  packageDef
) as unknown as ProtoGrpcType;

const client = new proto.auth.AuthService(
  `0.0.0.0:${PORT}`,
  grpc.credentials.createInsecure()
);
const deadline = new Date();
deadline.setSeconds(deadline.getSeconds() + 5);
client.waitForReady(deadline, (err) => {
  if (err) {
    console.error(err);
    return;
  }
  onClientReady();
});

function onClientReady() {
  verifyEmail('60b82a93d1909ea9741052692f9d6ea3507b37f7');
}

function signUpUser() {
  client.SignUpUser(
    {
      name: 'Admin',
      email: 'admin@admin.com',
      password: 'password123',
      passwordConfirm: 'password123',
      photo: 'default.png',
    },
    (err, res) => {
      if (err) {
        console.error(err);
        return;
      }
      console.log(res);
    }
  );
}

function signInUser(email: string, password: string) {
  client.SignInUser(
    {
      email: 'admin@admin.com',
      password: 'password123',
    },
    (err, res) => {
      if (err) {
        console.error(err);
        return;
      }
      console.log(res);
    }
  );
}

function refreshToken(refresh_token: string) {
  client.RefreshToken(
    {
      refresh_token,
    },
    (err, res) => {
      if (err) {
        console.error(err);
        return;
      }
      console.log(res);
    }
  );
}

function getAuthenticatedUser(access_token: string) {
  client.getMe(
    {
      access_token,
    },
    (err, res) => {
      if (err) {
        console.error(err);
        return;
      }
      console.log(res);
    }
  );
}

function verifyEmail(verification_code: string) {
  client.verifyEmail({ verification_code }, (err, res) => {
    if (err) {
      console.error(err);
      return;
    }
    console.log(res);
  });
}
Calling the RPC Method to Create a User
Now let’s use the gRPC client to evoke the SignUpUser RPC method to:
- Create the new user in the database
- Send the email verification code
client/app.ts
// (...) code above

// [...] Register new user
function onClientReady() {
  signUpUser();
}

function signUpUser() {
  client.SignUpUser(
    {
      name: 'Admin',
      email: 'admin@admin.com',
      password: 'password123',
      passwordConfirm: 'password123',
      photo: 'default.png',
    },
    (err, res) => {
      if (err) {
        console.error(err);
        return;
      }
      console.log(res);
    }
  );
}
In the above code, we evoked theSignUpUser RPC method on the server and passed an object containing the required credentials.
We also passed a callback function that will be evoked by the gRPC server to return the results or error if any.
Now split the terminal into two, run the gRPC server yarn start:server in one half, and start the gRPC client yarn start:client in the other half.
Running the gRPC client will evoke the SignUpUser RPC method to register the user and send the email verification code.
Within a few seconds, you should get a successful response from the gRPC server.

Also, you should see the Nodemailer test URL logged in the console. Hold CTRL or CMD and click on the link to open it in the browser.
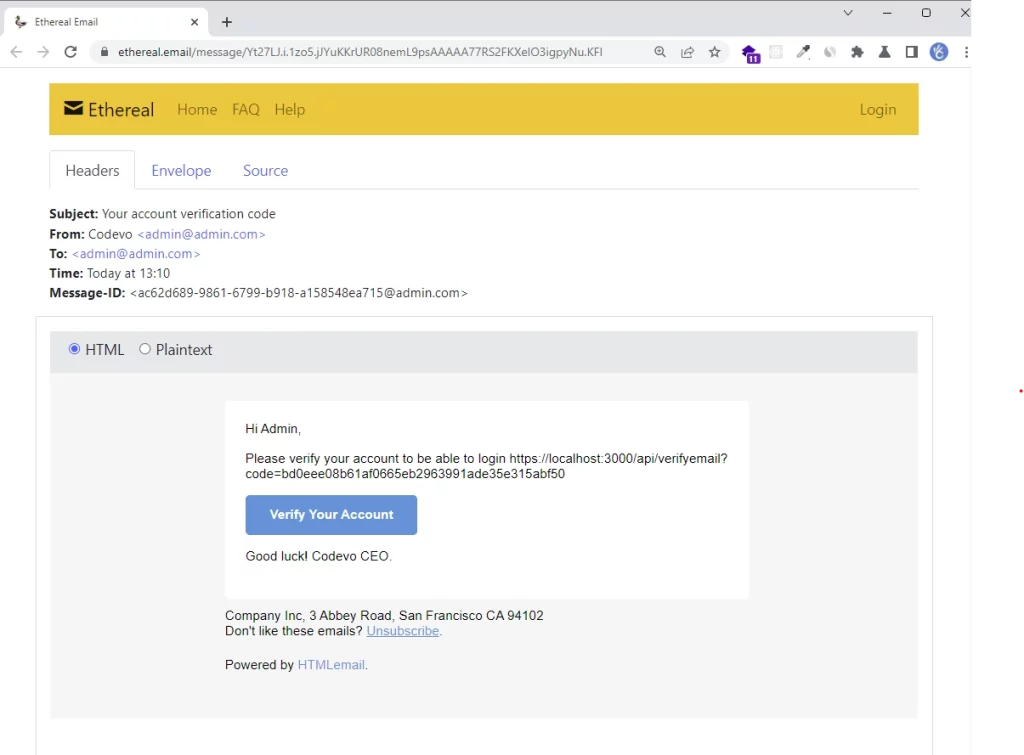
Calling the RPC Method to Verify the Code
In the HTML email, copy the verification code from the query string and pass it as an argument to the verifyEmail("past the code here") function.
client/app.ts
function onClientReady() {
  verifyEmail('60b82a93d1909ea9741052692f9d6ea3507b37f7');
}

function verifyEmail(verification_code: string) {
  client.verifyEmail({ verification_code }, (err, res) => {
    if (err) {
      console.error(err);
      return;
    }
    console.log(res);
  });
}
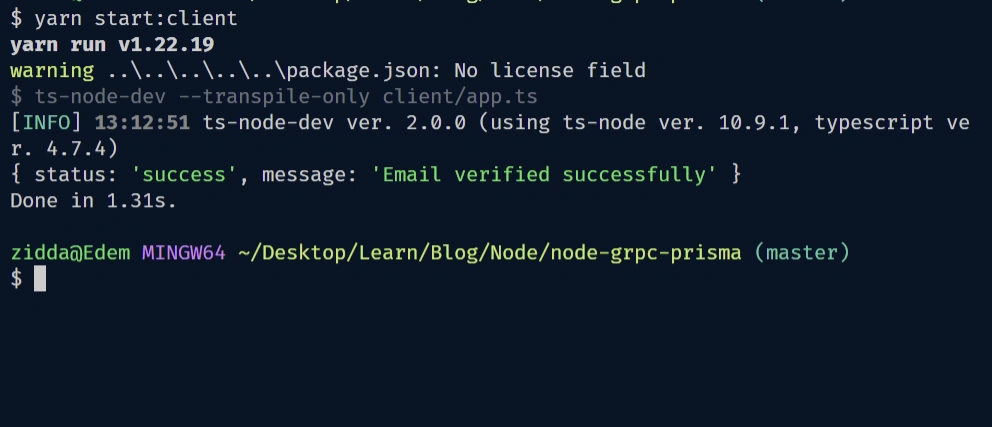
Now run the gRPC client yarn start:client and you should get this response within a few seconds.
Conclusion
Congrats for reaching the end. In this article, you learned how to build a Node.js gRPC API server and client to register a user and verify their email address with PostgreSQL, Prisma, Nodemailer, Redis, and Docker-compose.
Check out the source code on GitHub