

In this tutorial, we’ll cover how to build a Deno API that supports CRUD operations and stores data in a MongoDB database. The example API will run on an Oak middleware framework that will include routes to create, retrieve, update, and delete documents in the database.
The CRUD pattern and code structure implemented in the Deno API can be adjusted to work with any type of data like articles, products, services, todos, etc.
Articles in this series:
- How to Setup and Use MongoDB with Deno
- How to Set up Deno RESTful CRUD Project with MongoDB
- Authentication with Bcrypt, JWT, and Cookies in Deno
- Complete Deno CRUD RESTful API with MongoDB
Run the Deno + MongoDB CRUD API Locally
- Download or clone the project source code from https://github.com/wpcodevo/deno-mongodb
- Install all the required Yarn packages by running
yarnoryarn installin the terminal. - Update the database credentials in the
.envfile to connect to your local MongoDB server instance. Alternatively, you can use Docker to easily run the MongoDB server by runningdocker-compose up -dfrom the command line in the project root directory. - Install the make.js package globally by running
npm install make -g - Navigate to the Denon website to install it. This package will enable you to hot-reload the Oak server.
- Start the Deno server with Denon by running
make serverfrom the command line in the project root directory. - You can test the API directly in any API testing tool such as Postman or Insomnia
Deno CRUD API Overview
The Deno CRUD API will have the following endpoints:
| METHOD | ENDPOINT | DESCRIPTION |
|---|---|---|
| POST | /api/posts | Create a document |
| PATCH | /api/posts/:postId | Update a single document |
| GET | /api/posts/:postId | Retrieve a single document |
| DELETE | /api/posts/:postId | Delete a document |
| GET | /api/posts | Retrieve all documents |
Below are instructions on how to use Postman to perform the CRUD operations against the Deno API. Import the Postman JSON document into your Postman software to have access to the collection used in testing the API.
Register and Login
Before performing the CRUD operations, you first need to create an account and log in to obtain an access token.
Open Postman or any API testing tool and make a POST request to the http://localhost:8000/api/auth/register endpoint with a JSON object included in the request payload.
The JSON object should contain the fields required by the Deno /api/auth/register endpoint, e.g:
{
    "email": "admin@admin.com",
    "name": "Admin",
    "photo": "default.png",
    "password": "password123",
    "passwordConfirm": "password123"
}
After the user has been created, make another POST request to the http://localhost:8000/api/auth/login endpoint to obtain an access token from the Deno API. Don’t forget to include the email and password in the request body, e.g:
{
    "email": "admin@admin.com",
    "password": "password123"
}
The Deno server will query the MongoDB database to check if the provided email exists in the database, generate the JSON Web Token, and return it as an HTTPOnly cookie.
Create new document
After obtaining the access token, you can now perform the CRUD operations against the Deno API.
To create a new record with the Deno CRUD API, make a POST request to the http://localhost:8000/api/posts endpoint with the required JSON object included in the request body, e.g:
{
    "title": "My first 1 demo post always",
    "content": "My content haha My content haha",
    "category": "React.js",
    "image": "default.png"
}
The Deno API will validate the request payload with the Zod schema, add the new document to the database, and return the newly-created document to the client.

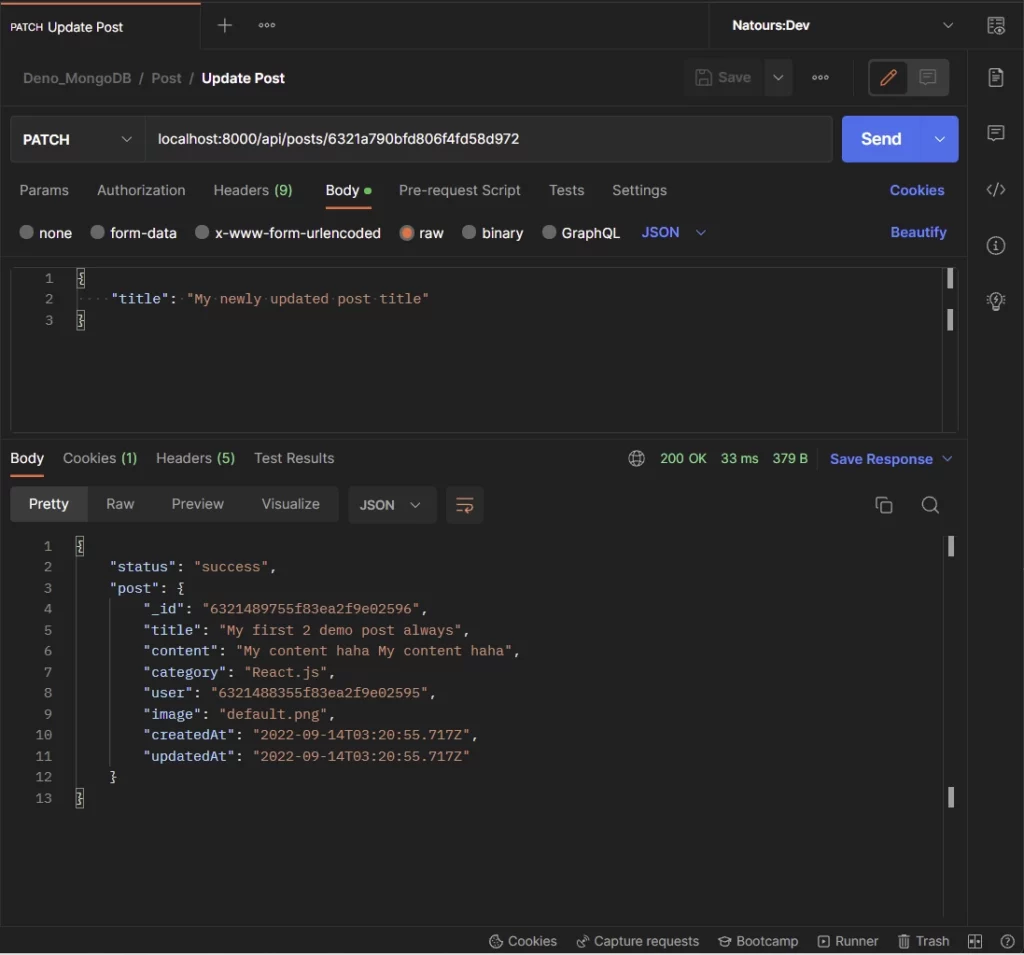
Update the existing document
To update a record with the CRUD API, make a PATCH request to the http://localhost:8000/api/posts/:postId endpoint with the ID of the document included as a URL parameter. Also, since the request method is PATCH, you are allowed to include one or more fields in the JSON object.
The Deno server will then make a query to the database to update only the field(s) specified in the request body and return the document after it has been updated to the client.
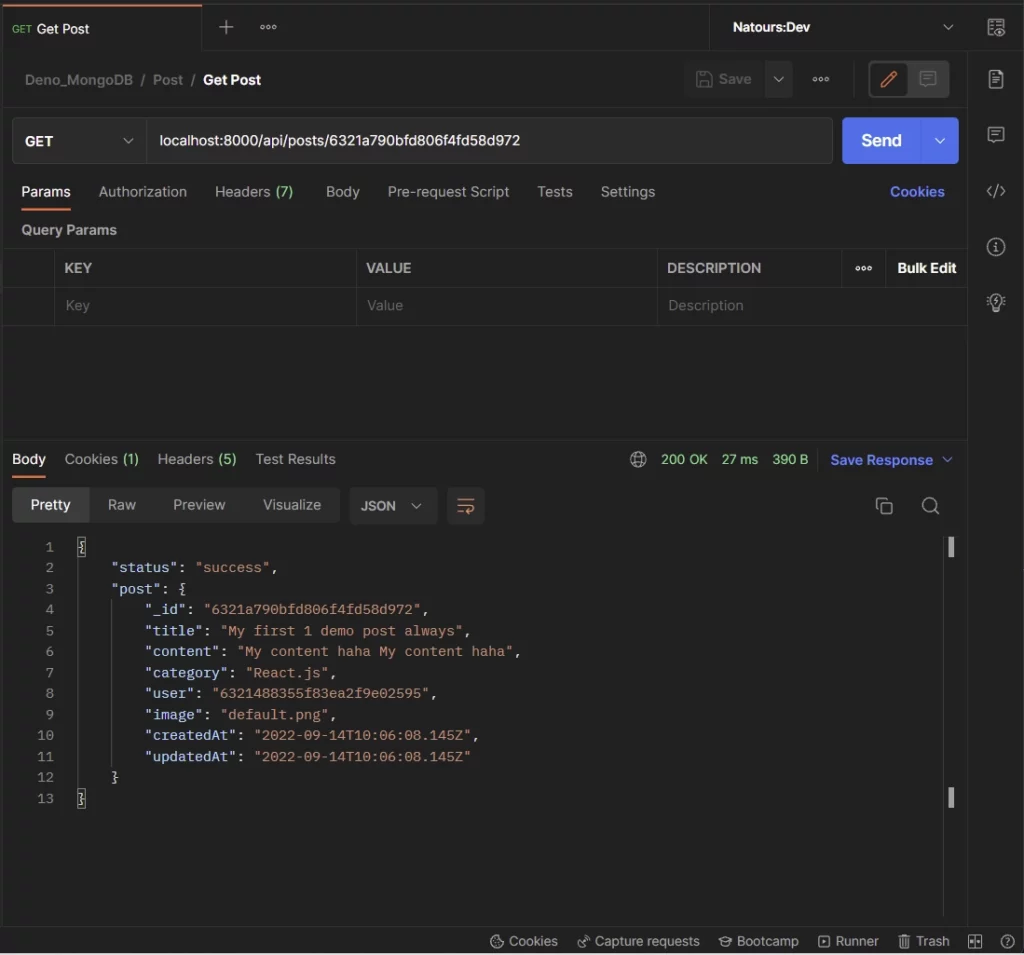
Retrieve a document with an ID
Here, you make a GET request to the http://localhost:8000/api/posts/:postId endpoint to retrieve the document that matches the query filter.
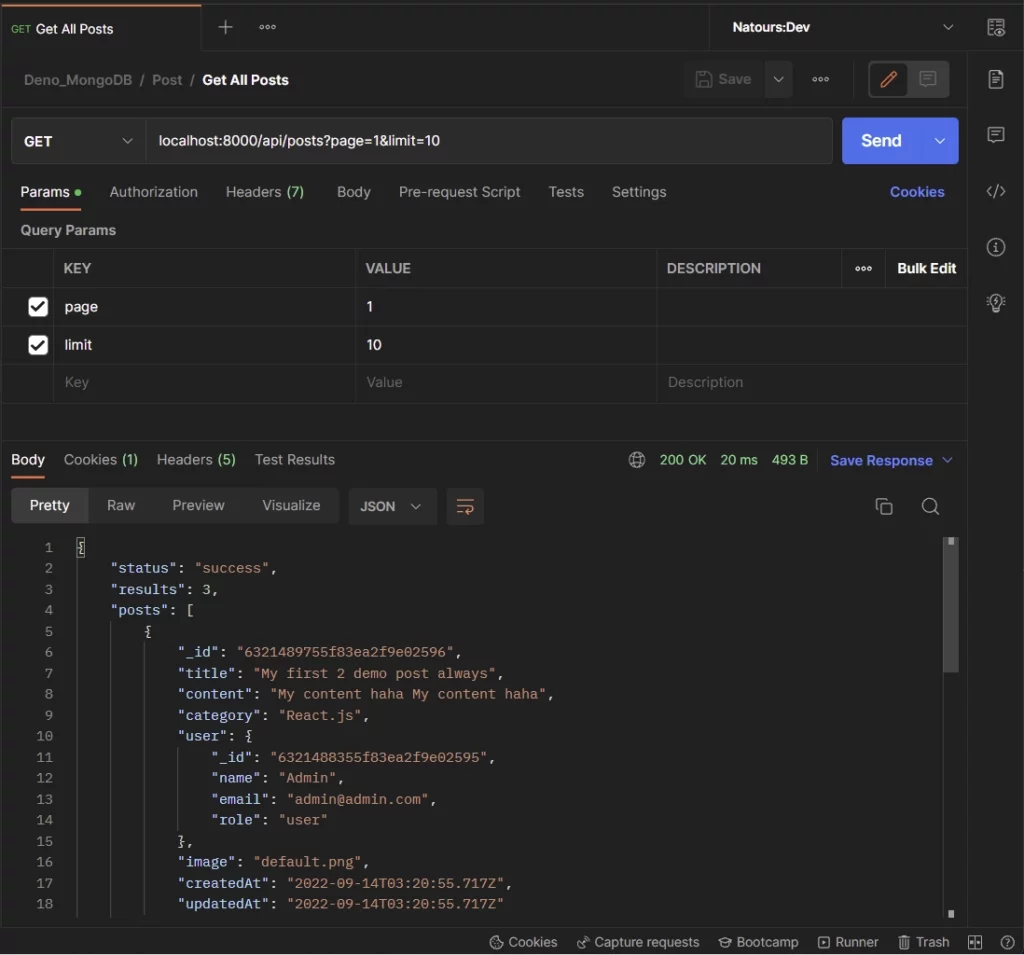
Retrieve all documents
To retrieve all the documents or paginated lists of them, you need to make a GET request to the http://localhost:8000/api/posts?page=1&limit=10 endpoint with the page and limit query parameters included in the URL.
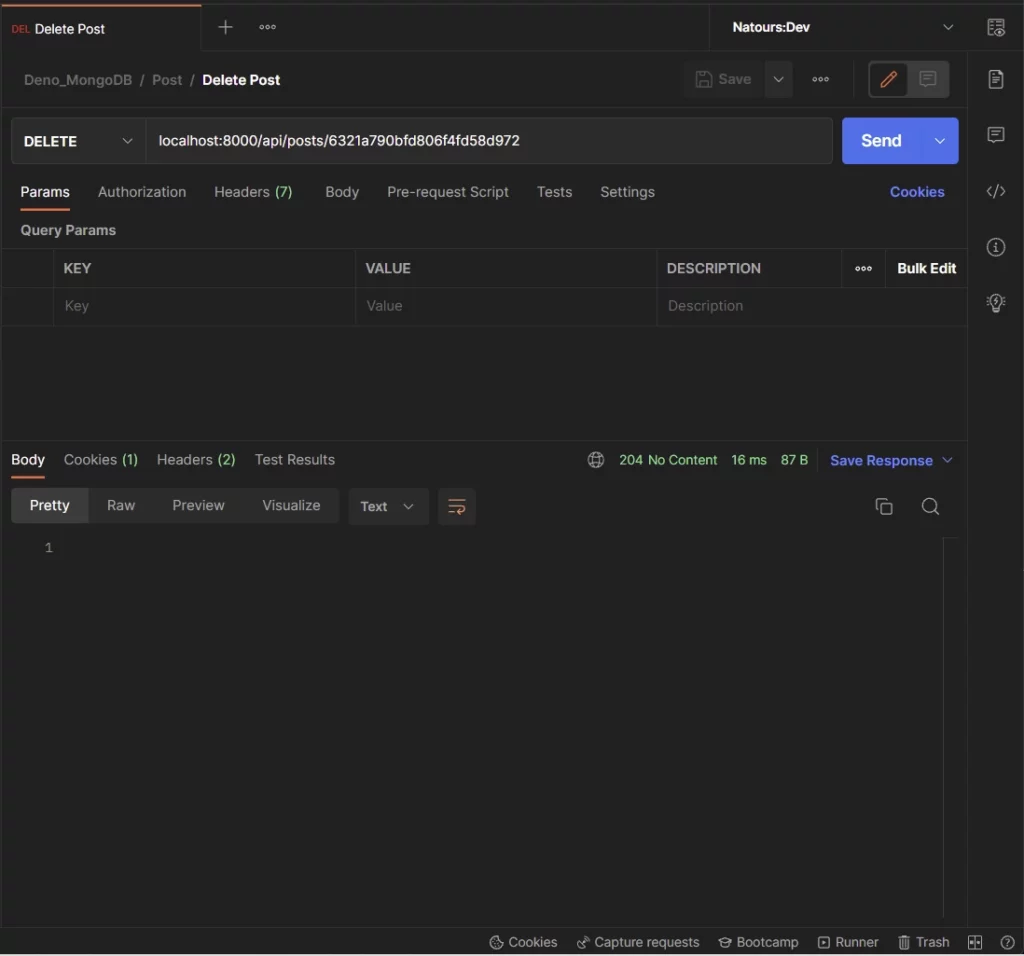
Delete a document
To delete a record with the CRUD API, make a DELETE request to the http://localhost:8000/api/posts/:postId endpoint to remove the document that matches the filter from the database.
Step 1 – Setup the Deno CRUD API
The Deno CRUD tutorial project is organized into the following folders:
Controllers
This folder contains the API handlers for the CRUD API. The controllers are responsible for performing the application logic of the API.
Models
This folder contains the models representing the application data stored in the database. The MongoDB driver will map the defined models to the NoSQL representation in the database and return an object containing a bunch of methods to be used within the application for CRUD operations and data management.
Schemas
This folder contains request schemas for the controller methods. The request schemas define parameters that will be used by the Deno Oak framework to validate the request payload.
Routes
This folder contains the Oak routes for the CRUD API. These files will produce middleware that will be used by Deno to enable routing based on the pathname of the incoming request.
config
This folder will contain configuration files. For example, there will be a file for loading the environment variables and providing their TypeScript types.
middleware
This folder will contain middleware functions that will be included in the middleware pipeline to intersect the request before the request gets delegated to the API controllers.
Utils
This folder contains helper functions that don’t fit into the above folders.
If you landed on this article from a Bing or Google search then you need to catch up by following the How to Set up Deno RESTful CRUD Project with MongoDB article.
Nevertheless, create a src/deps.ts file and add the following third-party dependencies. Deno uses modules referenced as URLs or file paths instead of a package.json file. To imitate a package.json file, we need to create a single file to manage all the dependencies.
src/deps.ts
export { Application, helpers, Router } from "https://deno.land/x/oak@v11.1.0/mod.ts";
export type { Context, RouterContext } from "https://deno.land/x/oak@v11.1.0/mod.ts";
export { config as dotenvConfig } from "https://deno.land/x/dotenv@v3.2.0/mod.ts";
export { z } from "https://deno.land/x/zod@v3.19.1/mod.ts";
export {
  compare,
  genSalt,
  hash,
} from "https://deno.land/x/bcrypt@v0.4.0/mod.ts";
export {
  create,
  getNumericDate,
  verify,
} from "https://deno.land/x/djwt@v2.7/mod.ts";
export type { Header, Payload } from "https://deno.land/x/djwt@v2.7/mod.ts";
export {
  Bson,
  Database,
  MongoClient,
  ObjectId,
} from "https://deno.land/x/mongo@v0.31.1/mod.ts";
oak– A middleware framework for building server applications in Denodotenv– For loading environment variables from a.envfilezod– A schema validation librarybcrypt– For hashing the plain-text passworddjwt– For signing and verifying the JSON Web Tokensmongo– MongoDB driver for Deno
Step 2 – Create the MongoDB Model
The PostSchema represents the data stored in the database. The TypeScript interface will be used by the MongoDB driver to generate the corresponding NoSQL representation in the database.
The question mark (?) added after the _id property name will make it optional. Making the _id field optional is important because the MongoDB server will automatically generate a UUID for the _id field when inserting a document into the database.
Instead of using string type for the _id and user fields, we will use the ObjectId type since that is what MongoDB uses to uniquely identify each document in the database.
src/models/post.model.ts
import { db } from '../utils/connectDB.ts';
import { ObjectId } from '../deps.ts';

export interface PostSchema {
  _id?: ObjectId;
  title: string;
  content: string;
  category: string;
  user: ObjectId;
  image: string;
  createdAt: Date;
  updatedAt: Date;
}

export const Post = db.collection<PostSchema>('posts');
Post.createIndexes({indexes:[{name: "unique_title", key: {"title": 1}, unique: true}]})
We called the .collection() method and provided it with the defined TypeScript interface to create a collection named posts in the database. The object returned by evoking the .collection() function will contain methods for handling all the low-level data (CRUD) operations.
Also, to demonstrate how MongoDB indexes work in Deno, we added an index and unique constraint on the title field. This will ensure that we have consistent data in the collection where every title is unique.
Step 3 – Create the Validation Schemas
Now that we have the MongoDB model defined, let’s create the schemas needed to validate the incoming POST and PATCH requests. These schemas will define parameters and validation rules for the incoming requests.
By default, all the fields defined with Zod are required. Due to that, we used the .partial() method to make all the fields optional in the updatePostSchema since the user is allowed to update any field in the database.
src/schema/post.schema.ts
import { z } from '../deps.ts';

export const createPostSchema = z.object({
  body: z.object({
    title: z.string({
      required_error: 'Title is required',
    }),
    content: z.string({
      required_error: 'Content is required',
    }),
    category: z.string({
      required_error: 'Category is required',
    }),
    image: z.string({
      required_error: 'Image is required',
    }),
  }),
});

const params = {
  params: z.object({
    postId: z.string(),
  }),
};

export const getPostSchema = z.object({
  ...params,
});

export const updatePostSchema = z.object({
  ...params,
  body: z
    .object({
      title: z.string(),
      content: z.string(),
      category: z.string(),
      image: z.string(),
    })
    .partial(),
});

export const deletePostSchema = z.object({
  ...params,
});

export type CreatePostInput = z.TypeOf<typeof createPostSchema>['body'];
export type GetPostInput = z.TypeOf<typeof getPostSchema>['params'];
export type UpdatePostInput = z.TypeOf<typeof updatePostSchema>;
export type DeletePostInput = z.TypeOf<typeof deletePostSchema>['params'];
Now defining the Zod schemas alone isn’t enough so we need to create a middleware to validate the incoming request payload against the schema passed as an argument to it.
Luckily, Oak provides a feature to create custom middleware functions that can be included in the middleware stack to intercept incoming requests.
src/middleware/validate.ts
import { z, RouterContext, helpers } from '../deps.ts';

const validate =
  (schema: z.AnyZodObject) =>
  async (ctx: RouterContext<string>, next: () => any): Promise<void> => {
    try {
      schema.parse({
        params: ctx.params,
        query: helpers.getQuery(ctx),
        body: await ctx.request.body().value,
      });

      await next();
    } catch (err) {
      if (err instanceof z.ZodError) {
        ctx.response.status = 400;
        ctx.response.body = {
          status: 'fail',
          error: err.errors,
        };
        return;
      }
      await next();
    }
  };
export default validate;
This middleware will take any of the Zod schemas as an argument and validate the request body based on the parameters and the validation rules defined in the schema. When any of the rules are violated, it will return the appropriate validation error to the client.
Step 4 – Create the Route Handlers
With that out of the way, it’s now time to create the five route functions to handle the higher-level CRUD operations. When building APIs, it’s a bad practice to query and mutate the database directly in the controllers, however, to reduce the complexity of the project, we’ll not create services to perform the business logic of the API.
Here, we will create five route handlers:
createPostController– For adding new documentsupdatePostController– For updating existing documentsfindPostController– Retrieves a single documentfindAllPostsController– Retrieves all the documents or paginated lists of the documentsdeletePostController– Removes a document
Each controller function will call the low-level database CRUD function to query or mutate the database.
Add document handler
The first controller will handle a POST request to the /api/posts endpoint. This route handler will be evoked to add a new document to the database.
Before a document can be inserted into the MongoDB database, we need to reference the user’s ID in the document. That means only logged-in users will be allowed to perform the CRUD operations.
In the previous tutorial Authentication with Bcrypt, JWT, and Cookies in Deno, we attached the authenticated user’s ID to the Oak state object after the JSON Web Token has been validated.
So we can pass the state object to the controller to have access to the authenticated user’s ID.
Once we have access to the user’s ID, we will implement a one-to-many relationship to reference the user creating the document. That means a post will belong to only one user but a user can have multiple posts.
src/controllers/post.controller.ts
import type { RouterContext } from '../deps.ts';
import { Bson } from '../deps.ts';
import { Post } from '../models/post.model.ts';
import type {
  CreatePostInput,
  UpdatePostInput,
} from '../schema/post.schema.ts';

// [...] Create new document
const createPostController = async ({
  state,
  request,
  response,
}: RouterContext<string>) => {
  try {
    const { title, category, content, image }: CreatePostInput =
      await request.body().value;

    const createdAt = new Date();
    const updatedAt = createdAt;

    const postId: string | Bson.ObjectId = await Post.insertOne({
      title,
      content,
      category,
      user: new Bson.ObjectId(state.userId),
      image,
      createdAt,
      updatedAt,
    });

    if (!postId) {
      response.status = 500;
      response.body = { status: 'error', message: 'Error creating user' };
      return;
    }

    const pipeline = [
      { $match: { _id: postId } },
      {
        $lookup: {
          from: 'users',
          localField: 'user',
          foreignField: '_id',
          as: 'user',
        },
      },
      { $unwind: '$user' },
      {$unset: ["user.password", "user.verified","user.createdAt", "user.updatedAt"]}
    ];

    const posts = await Post.aggregate(pipeline).toArray();

    response.status = 201;
    response.body = {
      status: 'success',
       post: posts[0],
    };
  } catch (error) {
    if((error.message as string).includes("E11000")){
      response.status = 409;
      response.body = { status: "fail", message: "Post with that title already exists" };
      return;
    }
    response.status = 500;
    response.body = { status: 'error', message: error.message };
    return;
  }
};
Quite a lot happening in the above, let’s break it down:
- First, we extracted the necessary fields from the request payload. We also used the
CreatePostInputtype we defined in the schema file to give TypeScript hints about the structure of the request body. - Next, we called the low-level
.insertOne()CRUD method to add the new document to the database. - Since the
.insertOne()method only returns the ID of the newly-created document, we had to query the database again to retrieve the newly-created document using the MongoDB aggregation pipeline. - We utilized the
.aggregate()method instead of the.find()method because we wanted to embed the user document in the newly-created post.
Update document handler
The second controller will handle a PATCH request to the /api/posts/:postId endpoint. This route handler will be evoked to update an existing document in the database.
This controller will accept three arguments: params ,request , and response . The params will contain the ID of the document to be updated and the request will contain the payload.
We’ll use the .updateOne() lower-level CRUD method and set a filter , update , and optional object in the query.
src/controllers/post.controller.ts
// [...] Create new document

// [...] Update document
const updatePostController = async ({
  params,
  request,
  response,
}: RouterContext<string>) => {
  try {
    const payload: UpdatePostInput['body'] = await request.body().value;

    const updatedInfo = await Post.updateOne(
      { _id: new Bson.ObjectId(params.postId) },
      { $set: { ...payload, updatedAt: new Date() } },
      { ignoreUndefined: true }
    );

    if (!updatedInfo.matchedCount) {
      response.status = 404;
      response.body = {
        status: 'fail',
        message: 'No post with that Id exists',
      };
      return;
    }

    const updatedPost = await Post.findOne({ _id: updatedInfo.upsertedId });

    response.status = 200;
    response.body = {
      status: 'success',
      post: updatedPost ,
    };
  } catch (error) {
    response.status = 500;
    response.body = { status: 'error', message: error.message };
    return;
  }
};
The filter object will select the document that matches the specified criteria and the update object will use the MongoDB $set operator to update the document fields.
Since the .updateOne() method doesn’t return the updated document we had to make another query to retrieve the document that was updated.
Get a single document handler
The third controller will handle a GET request to the /api/posts/:postId endpoint. This route handler will be evoked to retrieve a single document from the database.
This function will utilize the .findOne() low-level CRUD method which will take a filter object as an argument.
src/controllers/post.controller.ts
// [...] Create new document

// [...] Update document

// [...] Retrieve single document
const findPostController = async ({
  params,
  response,
}: RouterContext<string>) => {
  try {
    const post = await Post.findOne({ _id: new Bson.ObjectId(params.postId) });

    if (!post) {
      response.status = 404;
      response.body = {
        status: 'success',
        message: 'No post with that Id exists',
      };
      return;
    }

    response.status = 200;
    response.body = {
      status: 'success',
       post,
    };
  } catch (error) {
    response.status = 500;
    response.body = { status: 'error', message: error.message };
    return;
  }
};
Get all documents handler
The fourth controller will handle a GET request to the /api/posts endpoint. This route handler will be called to retrieve multiple documents in the database.
Because we don’t want to send a huge JSON object to the client, we added a pagination feature where the client can request any number of documents in the database.
We also utilized the MongoDB aggregation middleware to embed the user document in the individual post object.
src/controllers/post.controller.ts
// [...] Create new document

// [...] Update document

// [...] Retrieve single document

// [...] Retrieve all documents
const findAllPostsController = async ({
  request,
  response,
}: RouterContext<string>) => {
  try {
    const page = request.url.searchParams.get('page');
    const limit = request.url.searchParams.get('limit');
    const intPage = page ? parseInt(page) : 1;
    const intLimit = limit ? parseInt(limit) : 10;
    const skip = (intPage - 1) * intLimit;
    const pipeline = [
      { $match: {} },
      {
        $lookup: {
          from: 'users',
          localField: 'user',
          foreignField: '_id',
          as: 'user',
        },
      },
      { $unwind: '$user' },
      {
        $skip: skip,
      },
      {
        $limit: intLimit,
      },
      {$unset: ["user.password", "user.verified","user.createdAt", "user.updatedAt"]}
    ];

    const posts = await Post.aggregate(pipeline).toArray();

    response.status = 200;
    response.body = {
      status: 'success',
      results: posts.length,
      posts,
    };
  } catch (error) {
    response.status = 500;
    response.body = { status: 'error', message: error.message };
    return;
  }
};
To avoid sending sensitive information to the client, we added the $unset aggregation stage to remove all the sensitive fields.
Delete a document handler
The fifth controller will handle a DELETE request to the /api/posts/:postId endpoint. This route handler will be evoked to delete a document in the database.
src/controllers/post.controller.ts
// [...] Create new document

// [...] Update document

// [...] Retrieve single document

// [...] Retrieve all documents

// [...] Delete single document
const deletePostController = async ({
  params,
  response,
}: RouterContext<string>) => {
  try {
    const numberOfPost = await Post.deleteOne({
      _id: new Bson.ObjectId(params.postId),
    });

    if (!numberOfPost) {
      response.status = 404;
      response.body = {
        status: 'success',
        message: 'No post with that Id exists',
      };
      return;
    }

    response.status = 204;
  } catch (error) {
    response.status = 500;
    response.body = { status: 'error', message: error.message };
    return;
  }
};

export default {
  createPostController,
  updatePostController,
  findPostController,
  findAllPostsController,
  deletePostController,
};
Complete code for the CRUD handlers
src/controllers/post.controller.ts
import type { RouterContext } from '../deps.ts';
import { Bson } from '../deps.ts';
import { Post } from '../models/post.model.ts';
import type {
  CreatePostInput,
  UpdatePostInput,
} from '../schema/post.schema.ts';

// [...] Create new document
const createPostController = async ({
  state,
  request,
  response,
}: RouterContext<string>) => {
  try {
    const { title, category, content, image }: CreatePostInput =
      await request.body().value;

    const createdAt = new Date();
    const updatedAt = createdAt;

    const postId: string | Bson.ObjectId = await Post.insertOne({
      title,
      content,
      category,
      user: new Bson.ObjectId(state.userId),
      image,
      createdAt,
      updatedAt,
    });

    if (!postId) {
      response.status = 500;
      response.body = { status: 'error', message: 'Error creating user' };
      return;
    }

    const pipeline = [
      { $match: { _id: postId } },
      {
        $lookup: {
          from: 'users',
          localField: 'user',
          foreignField: '_id',
          as: 'user',
        },
      },
      { $unwind: '$user' },
      {$unset: ["user.password", "user.verified","user.createdAt", "user.updatedAt"]}
    ];

    const posts = await Post.aggregate(pipeline).toArray();

    response.status = 201;
    response.body = {
      status: 'success',
       post: posts[0],
    };
  } catch (error) {
    if((error.message as string).includes("E11000")){
      response.status = 409;
      response.body = { status: "fail", message: "Post with that title already exists" };
      return;
    }
    response.status = 500;
    response.body = { status: 'error', message: error.message };
    return;
  }
};

// [...] Update document
const updatePostController = async ({
  params,
  request,
  response,
}: RouterContext<string>) => {
  try {
    const payload: UpdatePostInput['body'] = await request.body().value;

    const updatedInfo = await Post.updateOne(
      { _id: new Bson.ObjectId(params.postId) },
      { $set: { ...payload, updatedAt: new Date() } },
      { ignoreUndefined: true }
    );

    if (!updatedInfo.matchedCount) {
      response.status = 404;
      response.body = {
        status: 'fail',
        message: 'No post with that Id exists',
      };
      return;
    }

    const updatedPost = await Post.findOne({ _id: updatedInfo.upsertedId });

    response.status = 200;
    response.body = {
      status: 'success',
      post: updatedPost ,
    };
  } catch (error) {
    response.status = 500;
    response.body = { status: 'error', message: error.message };
    return;
  }
};

// [...] Retrieve single document
const findPostController = async ({
  params,
  response,
}: RouterContext<string>) => {
  try {
    const post = await Post.findOne({ _id: new Bson.ObjectId(params.postId) });

    if (!post) {
      response.status = 404;
      response.body = {
        status: 'success',
        message: 'No post with that Id exists',
      };
      return;
    }

    response.status = 200;
    response.body = {
      status: 'success',
       post,
    };
  } catch (error) {
    response.status = 500;
    response.body = { status: 'error', message: error.message };
    return;
  }
};

// [...] Retrieve all documents
const findAllPostsController = async ({
  request,
  response,
}: RouterContext<string>) => {
  try {
    const page = request.url.searchParams.get('page');
    const limit = request.url.searchParams.get('limit');
    const intPage = page ? parseInt(page) : 1;
    const intLimit = limit ? parseInt(limit) : 10;
    const skip = (intPage - 1) * intLimit;
    const pipeline = [
      { $match: {} },
      {
        $lookup: {
          from: 'users',
          localField: 'user',
          foreignField: '_id',
          as: 'user',
        },
      },
      { $unwind: '$user' },
      {
        $skip: skip,
      },
      {
        $limit: intLimit,
      },
      {$unset: ["user.password", "user.verified","user.createdAt", "user.updatedAt"]}
    ];

    const posts = await Post.aggregate(pipeline).toArray();

    response.status = 200;
    response.body = {
      status: 'success',
      results: posts.length,
      posts,
    };
  } catch (error) {
    response.status = 500;
    response.body = { status: 'error', message: error.message };
    return;
  }
};

// [...] Delete single document
const deletePostController = async ({
  params,
  response,
}: RouterContext<string>) => {
  try {
    const numberOfPost = await Post.deleteOne({
      _id: new Bson.ObjectId(params.postId),
    });

    if (!numberOfPost) {
      response.status = 404;
      response.body = {
        status: 'success',
        message: 'No post with that Id exists',
      };
      return;
    }

    response.status = 204;
  } catch (error) {
    response.status = 500;
    response.body = { status: 'error', message: error.message };
    return;
  }
};

export default {
  createPostController,
  updatePostController,
  findPostController,
  findAllPostsController,
  deletePostController,
};
Step 5 – Create the Routes
Now that we have all the CRUD route handlers defined, it’s time to create the route middleware that the application will use to enable routing in the Deno server.
src/routes/post.routes.ts
import { Router } from '../deps.ts';
import postController from '../controllers/post.controller.ts';
import { createPostSchema, updatePostSchema } from '../schema/post.schema.ts';
import requireUser from '../middleware/requireUser.ts';
import validate from '../middleware/validate.ts';

const router = new Router();

router.use(requireUser);
router.get<string>('/', postController.findAllPostsController);
router.post<string>(
  '/',
  validate(createPostSchema),
  postController.createPostController
);
router.patch<string>(
  '/:postId',
  validate(updatePostSchema),
  postController.updatePostController
);
router.get<string>('/:postId', postController.findPostController);
router.delete<string>('/:postId', postController.deletePostController);

export default router;
We created a new instance of the Router class and appended all the Deno CRUD API routes. To protect all the CRUD API routes, we added the requireUser middleware to the middleware pipeline to ensure that a valid JSON Web Token is provided before the request reaches the private routes.
Routes that require schema validation include the validate middleware function that accepts a schema as an argument. The validation middleware will ensure that the request body is valid before the request continues to the next middleware function.
Now let’s create an init function that we will evoke to register all the defined routes in the middleware stack.
src/routes/index.ts
import { Application } from '../deps.ts';
import authRouter from './auth.routes.ts';
import userRouter from './user.routes.ts';
import postRouter from './post.routes.ts';

function init(app: Application) {
  app.use(authRouter.prefix('/api/auth/').routes());
  app.use(userRouter.prefix('/api/users/').routes());
  app.use(postRouter.prefix('/api/posts/').routes());
}

export default {
  init,
};
.use()– Register middleware to be used with the application.prefix()– Sets the router prefix.routes()– This method returns middleware that will do all the route processing that the router has been configured to handle.
Step 6 – Register the API Routes
The src/server.ts file is the entry point to the Deno CRUD API, it registers the application middleware, binds controllers to routes, and starts the Oak HTTP server for the API.
src/server.ts
import { Application, Router } from './deps.ts';
import type { RouterContext } from './deps.ts';
import config from './config/default.ts';
import appRouter from './routes/index.ts';

const app = new Application();
const router = new Router();

// Logger
app.use(async (ctx, next) => {
  await next();
  const rt = ctx.response.headers.get("X-Response-Time");
  console.log(`${ctx.request.method} ${ctx.request.url} - ${rt}`);
});

router.get<string>('/api/healthchecker', (ctx: RouterContext<string>) => {
  ctx.response.body = 'Hello World!';
});

appRouter.init(app);
app.use(router.routes());
app.use(router.allowedMethods());

app.addEventListener('listen', ({ port, secure }) => {
  console.log(
    `? Server started on ${secure ? 'https://' : 'http://'}localhost:${port}`
  );
});

const port = config.port;
app.listen({ port });
To imitate the morgan implementation in Deno, we created a middleware to log the incoming request information in the console. The /api/healthchecker route will be called to check if the Deno API is up and running.
Start the Deno CRUD API server by running the following command:
Install the denon package to help you restart the Deno server upon every file change.
denon run --allow-net --allow-read --allow-write --allow-env src/server.ts
Conclusion
In this comprehensive guide, you’ve learned how to build a Deno CRUD API with MongoDB, Oak middleware framework, and Docker to perform the basic Create, Read, Update, and Delete operations.
You can find the complete source code of the Deno CRUD API on this GitHub repository.