
In this article, you’ll learn how to set up a Node.js project with TypeScript, ExpressJs, PostgreSQL, TypeORM, and Redis.
Related Post: Backend
- API with Node.js + PostgreSQL + TypeORM: Project Setup
- API with Node.js + PostgreSQL + TypeORM: JWT Authentication
- API with Node.js + PostgreSQL + TypeORM: Send Emails
- Node.js, Express, TypeORM, PostgreSQL: CRUD Rest API
- Node.js and PostgreSQL: Upload and Resize Multiple Images
What the course will cover
- How to run docker containers with docker-compose
- How to connect a TypeORM Express app to PostgreSQL
- How to connect a TypeORM Express app to Redis
Prerequisites
- Knowledge of Docker and Docker-compose
- Knowledge of Node.js and Express
Setup Node.js with Express, PostgreSQL, Redis, and TypeORM
Creating PostgreSQL and Redis Database with Docker
The most straightforward way to get PostgreSQL and Redis database instances running on our computer is to use Docker and Docker-compose.
Am going to assume you already have Docker and Docker-compose installed on your machine.
Create a docker-compose.yml file in your root directory and paste the configurations below into it.
docker-compose.yml
version: '3'
services:
  postgres:
    image: postgres:latest
    container_name: postgres
    ports:
      - '6500:5432'
    volumes:
      - progresDB:/var/lib/postgresql/data
    env_file:
      - ./.env

  redis:
    image: redis:alpine
    container_name: redis
    ports:
      - '6379:6379'
    volumes:
      - redisDB:/data
volumes:
  progresDB:
  redisDB:
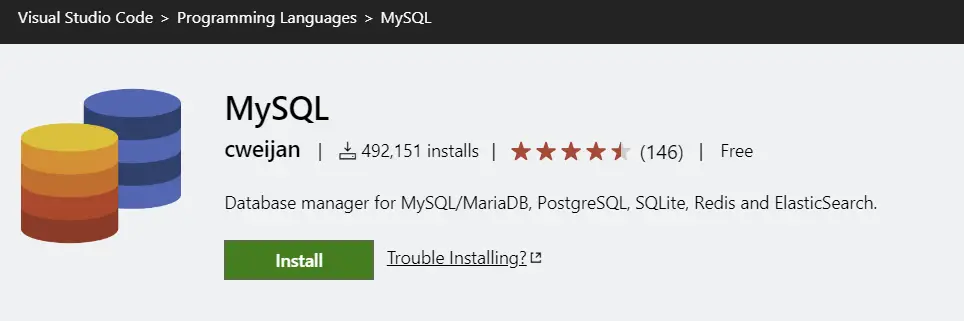
Later, we’re going to use this VS Code extension to view the data stored in both the PostgreSQL and Redis databases.
To provide the credentials needed by the PostgreSQL Docker image, we need to create a .env file in the root directory.
You can add the .env file to your .gitignore file to avoid committing it. In my case, I will include some of the content in the .env in an example.env so that you can see what the structure of the .env file should look like.
.env
PORT=8000
NODE_ENV=development

POSTGRES_HOST=127.0.0.1
POSTGRES_PORT=6500
POSTGRES_USER=admin
POSTGRES_PASSWORD=password123
POSTGRES_DB=node_typeorm
Once all of the above is set up correctly, we need to run the docker containers.
docker-compose up -d
Setup Environment Variables
The most important thing about our application is to set up environment variables. This will allow us to store sensitive data and we can easily omit it from being committed to a repository.
Am going to use the popular library dotenv to inject the environment variables.
Also, I will use the config library to load our environment variables to make them available to our application. The config library will also help us to provide the TypeScript types for our environment variables.
Initialize a new Typescript Node.js project with this command:
yarn init -y && yarn add -D typescript @types/node && npx tsc --init
Run this command in the terminal to install the dotenv and config packages.
yarn add config dotenv && yarn add -D @types/config
.env
PORT=8000
NODE_ENV=development

POSTGRES_HOST=127.0.0.1
POSTGRES_PORT=6500
POSTGRES_USER=admin
POSTGRES_PASSWORD=password123
POSTGRES_DB=node_typeorm


JWT_ACCESS_TOKEN_PRIVATE_KEY=LS0tLS1CRUdJTiBSU0EgUFJJVkFURSBLRVktLS0tLQpNSUlCT1FJQkFBSkJBSjdVblpyNUxpUGJxbDRENlo3VHVKK2NFMkI0Y3FzbnUzeUJaUHo2NmtqZDhJT1RFdjlNCkpEdmhMQ05PczYyWHBZcmFZYU5HS3UrN3Q4YVVjcWNoRzJNQ0F3RUFBUUpBRS84YXRKY29tdlVkOXVZeE5JRGQKWHFMc3dabUlma25yVGRxUWwxVVR5QWFPRWpIRGFnR0lGdEhRZE5IZTAybkp6a2Z1WkdWSkJVRmo1aTJJVyszMQpxUUloQU9LQVRxOVpSZHR0T0JDWWJLR3VpbjZnd1FVZ2YzUGkwSjh3Snh3cjNRVDFBaUVBczRRZ0lhR1c1V3NaCmNqWUQ3bVpwcXBiRkdubnBvMVR6QU1YS2psQ2dKL2NDSUQyZVZFbWx5cmhnSlNGMnBnN3lNZUV6RUcrNW9KTEIKUUtvZDZuWGloUFZGQWlCY0ZuUXhMR1p1NjhEUzhOaVZiQjNhYjV0TzJLazhxekE0L2ozSlFaeld3d0lnU2N1awoyZWlBM3E5ci9EdDQ3OUZHek4xSEVSdzJ2TXZjeEV6REZWRnV5aDg9Ci0tLS0tRU5EIFJTQSBQUklWQVRFIEtFWS0tLS0t
JWT_ACCESS_TOKEN_PUBLIC_KEY=LS0tLS1CRUdJTiBQVUJMSUMgS0VZLS0tLS0KTUZ3d0RRWUpLb1pJaHZjTkFRRUJCUUFEU3dBd1NBSkJBSjdVblpyNUxpUGJxbDRENlo3VHVKK2NFMkI0Y3Fzbgp1M3lCWlB6NjZramQ4SU9URXY5TUpEdmhMQ05PczYyWHBZcmFZYU5HS3UrN3Q4YVVjcWNoRzJNQ0F3RUFBUT09Ci0tLS0tRU5EIFBVQkxJQyBLRVktLS0tLQ==
JWT_REFRESH_TOKEN_PRIVATE_KEY=LS0tLS1CRUdJTiBSU0EgUFJJVkFURSBLRVktLS0tLQpNSUlCT0FJQkFBSkFmTmJzOVJhUGNnVG5RalB4cExLUXkvRHdBSVh5NFNiUWdlejFNU2pwWnozQ0tsTXdpWWwyCm5IUVg5Rk5NcU1pMmxnL29yUjJDTUJxRzFNdnlvN1EyTVFJREFRQUJBa0FKUStwU1JscGZHLzRONjgwRGJEMVMKNVk3cWV3YUxyMVhLVHN2ajJpVjRoQUdxb0d3K3NvbEZUalp1Y21xaW9vY1cydTNXYVdxdkNrVmtvamc2OFFBQgpBaUVBNElqNkFXbG91am84T1YvSEJ3elZpaDQzRllCNEpkZnd3SjFwYTBRVFlWRUNJUUNPVlhMdGZOTFh3cXFlCndZNVIrWktwY3JBb0tBMjVYM3M1cEhVNFhYVk80UUlnSDM0VzBxdmVMSUNPZ2QyVkpNQUFFMmM1Z3FLS040U2EKRituOEp6ZGRJSUVDSUZ4SllUeEU2L3lEdHRjNnpzbXVGWDhTNHM4V3NWZFpabStJaDR5bFpGTmhBaUFGRWJwSApqdlZqSHlPdlIyQ2F1clFmTmU3QldWVnVlODNQN3pYSXV3eHl5Zz09Ci0tLS0tRU5EIFJTQSBQUklWQVRFIEtFWS0tLS0t
JWT_REFRESH_TOKEN_PUBLIC_KEY=LS0tLS1CRUdJTiBQVUJMSUMgS0VZLS0tLS0KTUZzd0RRWUpLb1pJaHZjTkFRRUJCUUFEU2dBd1J3SkFmTmJzOVJhUGNnVG5RalB4cExLUXkvRHdBSVh5NFNiUQpnZXoxTVNqcFp6M0NLbE13aVlsMm5IUVg5Rk5NcU1pMmxnL29yUjJDTUJxRzFNdnlvN1EyTVFJREFRQUIKLS0tLS1FTkQgUFVCTElDIEtFWS0tLS0t
It is a convention for environment variables to be in uppercase.
In the root directory create a config folder and within the config folder create two files named default.ts and custom-environment-variables.ts.
default.ts
export default {
  origin: 'http://localhost:3000',
  accessTokenExpiresIn: 15,
  refreshTokenExpiresIn: 60,
  redisCacheExpiresIn: 60,
};
custom-environment-variables.ts
export default {
  port: 'PORT',
  postgresConfig: {
    host: 'POSTGRES_HOST',
    port: 'POSTGRES_PORT',
    username: 'POSTGRES_USER',
    password: 'POSTGRES_PASSWORD',
    database: 'POSTGRES_DB',
  },
  accessTokenPrivateKey: 'JWT_ACCESS_TOKEN_PRIVATE_KEY',
  accessTokenPublicKey: 'JWT_ACCESS_TOKEN_PUBLIC_KEY',
  refreshTokenPrivateKey: 'JWT_REFRESH_TOKEN_PRIVATE_KEY',
  refreshTokenPublicKey: 'JWT_REFRESH_TOKEN_PUBLIC_KEY',
};
Validating Environment Variables
Forgetting to add an environment variable or using the right type for an environment variable value can lead to unexpected bugs which will cause your application to malfunction.
To prevent this, we’re going to use the envalid package to validate the environment variables.
yarn add envalid
src/utils/validateEnv.ts
import { cleanEnv, port, str } from 'envalid';

const validateEnv = () => {
  cleanEnv(process.env, {
    NODE_ENV: str(),
    PORT: port(),
    POSTGRES_HOST: str(),
    POSTGRES_PORT: port(),
    POSTGRES_USER: str(),
    POSTGRES_PASSWORD: str(),
    POSTGRES_DB: str(),
    JWT_ACCESS_TOKEN_PRIVATE_KEY: str(),
    JWT_ACCESS_TOKEN_PUBLIC_KEY: str(),
    JWT_REFRESH_TOKEN_PRIVATE_KEY: str(),
    JWT_REFRESH_TOKEN_PUBLIC_KEY: str(),
  });
};

export default validateEnv;
The envalid package will throw an error if we forget to provide any of the defined variables or if they’re of the wrong types.
Initialize a New TypeORM Express App
We can use the TypeORM CLI to generate a base Express project with everything already set up.
To do that, you need to install typeorm package globally or as a dependency.
yarn add typeorm
Next, run this command to generate the Express TypeORM boilerplate project.
You can delete the package.lock file if you are using yarn. Finally, run yarn install to install all the dependencies.
npx typeorm init --database postgres --express
The
--databaseflag tells it what database to use. I usedpostgressince that’s what am writing about.
Next, change all the names of the folders created by TypeORM to their plural forms. Example: controller -> controllers .
Connecting an Express application with PostgreSQL
Also, move the data-source.ts into the utils folder and paste the code snippets below into it.
src/utils/data-source.ts
require('dotenv').config()
import 'reflect-metadata';
import { DataSource } from 'typeorm';
import config from 'config';

const postgresConfig = config.get<{
  host: string;
  port: number;
  username: string;
  password: string;
  database: string;
}>('postgresConfig');

export const AppDataSource = new DataSource({
  ...postgresConfig,
  type: 'postgres',
  synchronize: false,
  logging: false,
  entities: ['src/entities/**/*.entity{.ts,.js}'],
  migrations: ['src/migrations/**/*{.ts,.js}'],
  subscribers: ['src/subscribers/**/*{.ts,.js}'],
});
Next, paste the TypeScript configurations below into the tsconfig.json to avoid getting unnecessary errors.
tsconfig.json
{
  "compilerOptions": {
    "target": "es2016",
    "experimentalDecorators": true,
    "emitDecoratorMetadata": true,
    "module": "commonjs",
    "esModuleInterop": true,
    "forceConsistentCasingInFileNames": true,
    "strict": true,
    "strictPropertyInitialization": false,
    "skipLibCheck": true,
    "outDir": "./build",
    "rootDir": "."
  }
}
At the time of writing this article, the TypeORM Express base project doesn’t come with the Express type definition file so run yarn add -D @types/express to install it manually.
Connecting an ExpressJs application to Redis
src/utils/connectRedis.ts
import { createClient } from 'redis';

const redisUrl = 'redis://localhost:6379';

const redisClient = createClient({
  url: redisUrl,
});

const connectRedis = async () => {
  try {
    await redisClient.connect();
    console.log('Redis client connected successfully');
    redisClient.set('try', 'Hello Welcome to Express with TypeORM');
  } catch (error) {
    console.log(error);
    setTimeout(connectRedis, 5000);
  }
};

connectRedis();

export default redisClient;
Next, change the index.ts file to app.ts and paste the code snippets below into it.
src/app.ts
require('dotenv').config();
import express, { Response } from 'express';
import config from 'config';
import validateEnv from './utils/validateEnv';
import { AppDataSource } from './utils/data-source';
import redisClient from './utils/connectRedis';

AppDataSource.initialize()
  .then(async () => {
    // VALIDATE ENV
    validateEnv();

    const app = express();

    // MIDDLEWARE

    // 1. Body parser

    // 2. Logger

    // 3. Cookie Parser

    // 4. Cors

    // ROUTES

    // HEALTH CHECKER
    app.get('/api/healthchecker', async (_, res: Response) => {
      const message = await redisClient.get('try');
      res.status(200).json({
        status: 'success',
        message,
      });
    });

    // UNHANDLED ROUTE

    // GLOBAL ERROR HANDLER

    const port = config.get<number>('port');
    app.listen(port);

    console.log(`Server started on port: ${port}`);
  })
  .catch((error) => console.log(error));
Next, remove body-parser since Express has body-parser already built-in. So run the command below to remove body-parser and install ts-node-dev .
yarn remove body-parser && yarn add -D ts-node-dev
Your package.json should look somewhat like this after installing all the dependencies.
package.json
{
 "dependencies": {
    "config": "^3.3.7",
    "dotenv": "^16.0.0",
    "envalid": "^7.3.1",
    "express": "^4.18.1",
    "pg": "^8.4.0",
    "redis": "^4.1.0",
    "reflect-metadata": "^0.1.13",
    "typeorm": "0.3.6"
  },
  "devDependencies": {
    "@types/config": "^0.0.41",
    "@types/express": "^4.17.13",
    "@types/node": "^16.11.10",
    "ts-node": "10.7.0",
    "ts-node-dev": "^1.1.8",
    "typescript": "4.5.2"
  }
}
The
ts-node-devpackage will allows us automatically restart the server.
Now, update the start script in the package.json to use ts-node-dev .
package.json
{
 "scripts": {
    "start": "ts-node-dev --respawn --transpile-only --exit-child src/app.ts",
    "typeorm": "typeorm-ts-node-commonjs"
  }
}
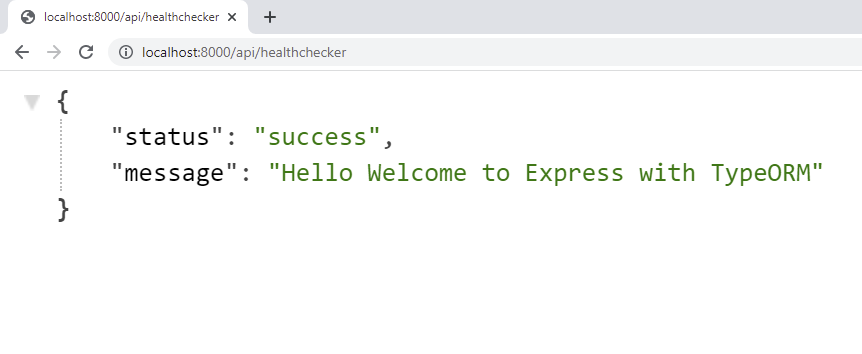
Finally, run yarn start to start the development server on port: 8000 assuming you used the same configurations in this article.
The PostgreSQL and Redis Docker containers must be running before you start the development server.
In your browser, enter this URL http://localhost:8000/api/healthchecker and you should see a success message.
Conclusion
In this article, you learned how to set up Node.js, ExpessJs, TypeScript, PostgreSQL, and Redis with TypeORM.
Source code on GitHub
i have problem, [ERROR] 06:20:11 Error: Configuration property “postgresConfig” is not defined.
how can fix it?
The “postgresConfig” is not defined because the “postgresConfig” object was not populated with the values you defined in the `.env` file.
Possible Solutions:
1. Make sure you are loading the environment variables at the top level of the `src/app.ts` and `src/utils/data-source.ts` files with `require(‘dotenv’).config()`.
2. Make sure you have the correct spelling of `custom-environment-variables.ts`.
3. Make sure the configurations in the `custom-environment-variables.ts` file are also correct.
4. Make sure you have the environment variables in the `.env` file.
require(‘dotenv’).config({ path: require(‘find-config’)(‘.env’) });
Try this it might resolved your isssue.
If you configure everything fine then it was issue with dotenv it was not able to load env file.
docker build and run returns page not working in browser and socket time out in postmanAPI
I have the problem: “[ERROR] 02:58:56 Error: Cannot find module ‘redis'”
I resolve it thus:
Go to your terminal -> App Root Folder
npm i -P redis
How can I generate migrations and then execute them on the database?
The migration and push commands can be found here https://github.com/wpcodevo/node_typeorm/blob/restapi-node-typeorm/package.json.
-d: This flag declares the path to the TypeORM Datasource file./src/migrations/{MIGRATION_FILE_NAME}: Replace the MIGRATION_FILE_NAME placeholder with the name of the migration file you want TypeORM to create