

This article will teach you how to implement Google OAuth Authentication with Vue.js and Node.js without using Passport.
You’ll also learn how to return access and refresh token cookies after the user is authenticated on the server.
Related Articles:
- GitHub OAuth Authentication Vue.js and Node.js (No Passport)
- Google OAuth Authentication React.js and Node.js(No Passport)
- GitHub OAuth Authentication React.js and Node.js(No Passport)
- How to Implement GitHub OAuth in React.js
- How to Implement Google OAuth2 in React.js
Prerequisites
- Have basic knowledge of HTML, CSS, Vue.js, and Node.js
- Have Node.js installed on your computer
Create Google client ID and client secret
In your browser, search for Google OAuth and click on the first link that appears in the search results. You should be taken to OAuth 2.0 to Access Google APIs.
On the OAuth 2.0 to Access Google APIs page, you will find instructions on how to get the access keys but don’t be overwhelmed I will show you the step-by-step process you must follow.
Click on the Google API Console link to open the API console where we will obtain the OAuth 2.0 client credentials.
You need a Google account to access the Google API Console page.
Create a New Console Project
Click on the Google-Oauth dropdown, and a modal should appear, select an existing project or create a new one.
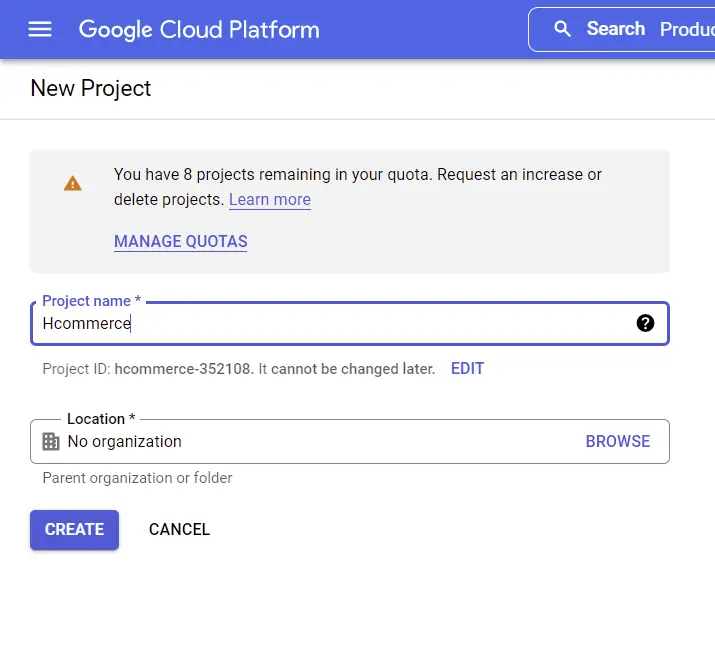
To create a new console project, click on the “New Project” button then type the project name and click on the “CREATE” button.
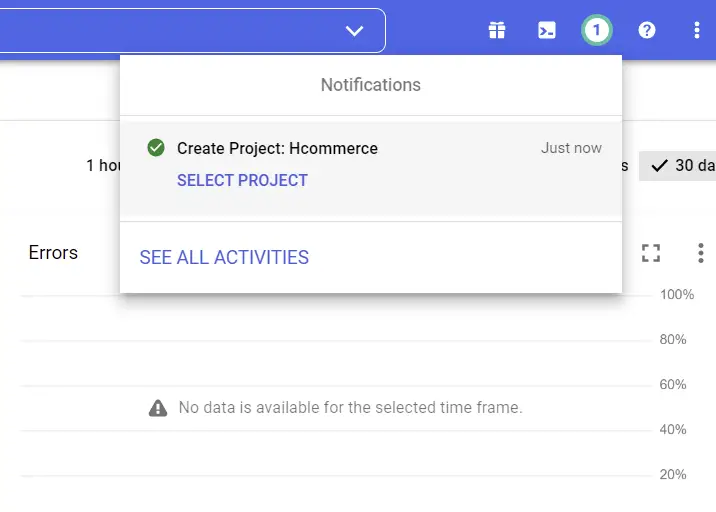
Now wait a few seconds for Google to do its job and once the project has been created, a success notification should appear in the top-right corner.
Click on the “SELECT PROJECT” button and tap anywhere on the browser to close the modal.
Create an OAuth Consent Screen
First, we need to create a consent screen before we can generate the credentials. The consent screen is where the user will be redirected when they click on the “Sign In with Google” button.
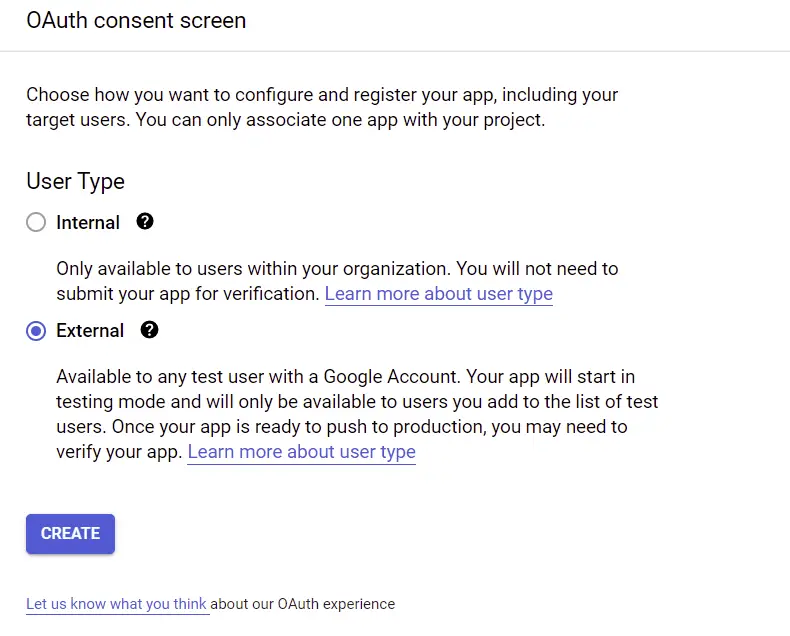
Under the “APIs & Services” on the sidebar, select the OAuth consent screen menu. On the OAuth consent screen, choose External User Type if it’s a public application you are building and click on the “CREATE” button.
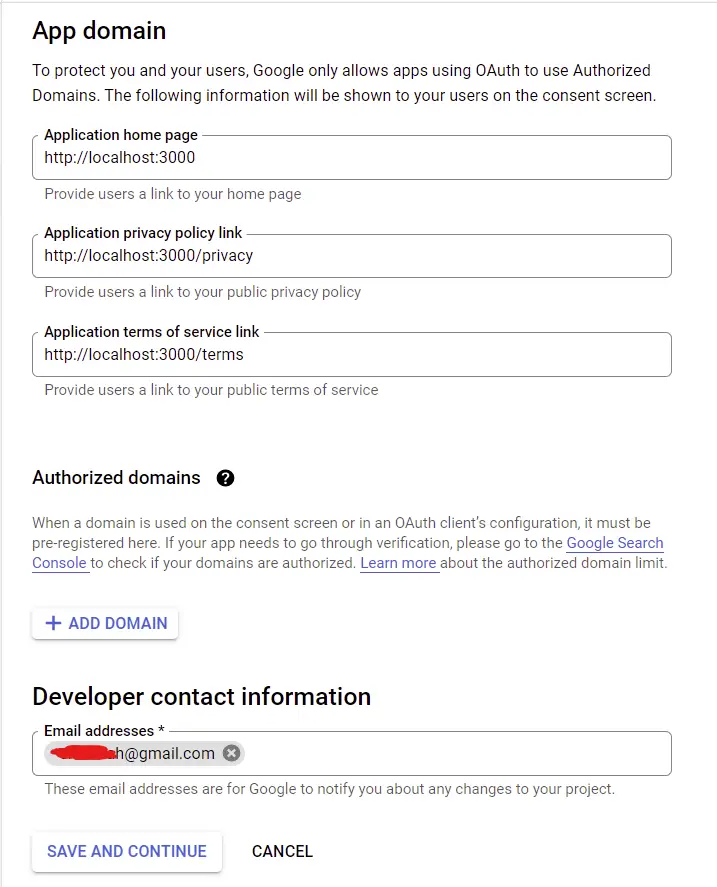
Next, provide the information needed for the consent screen
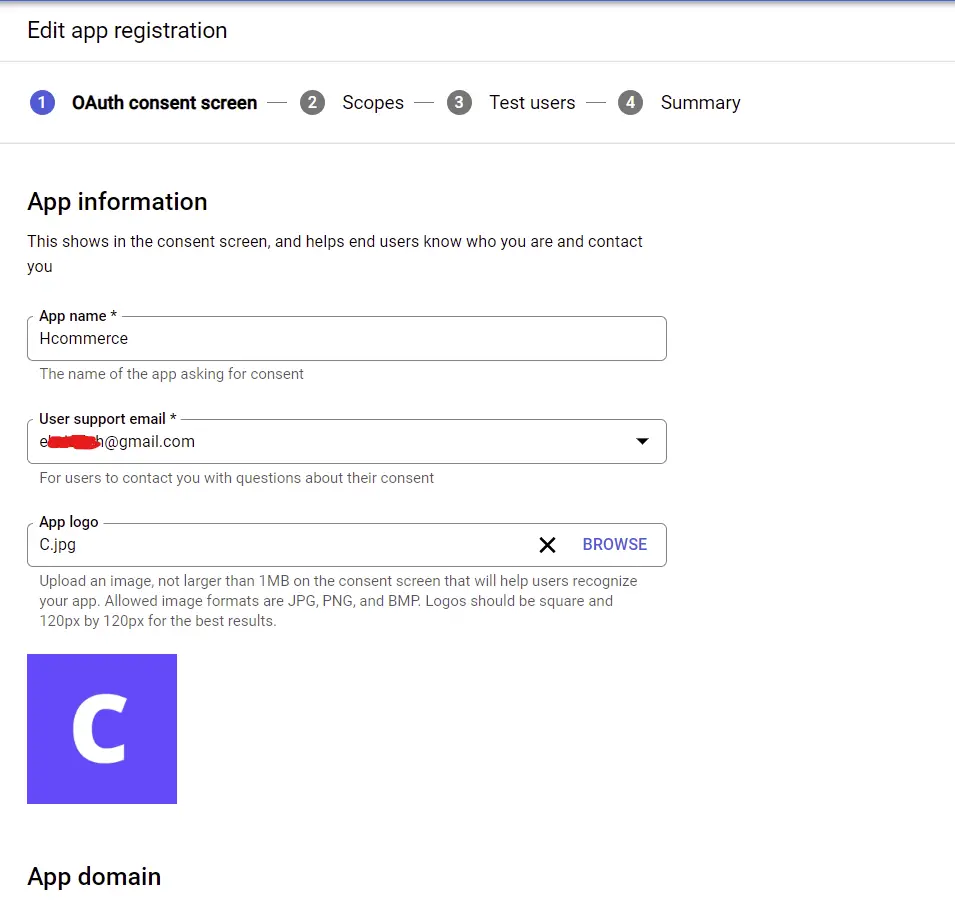
After filling the fields, click on the “SAVE AND CONTINUE” button.
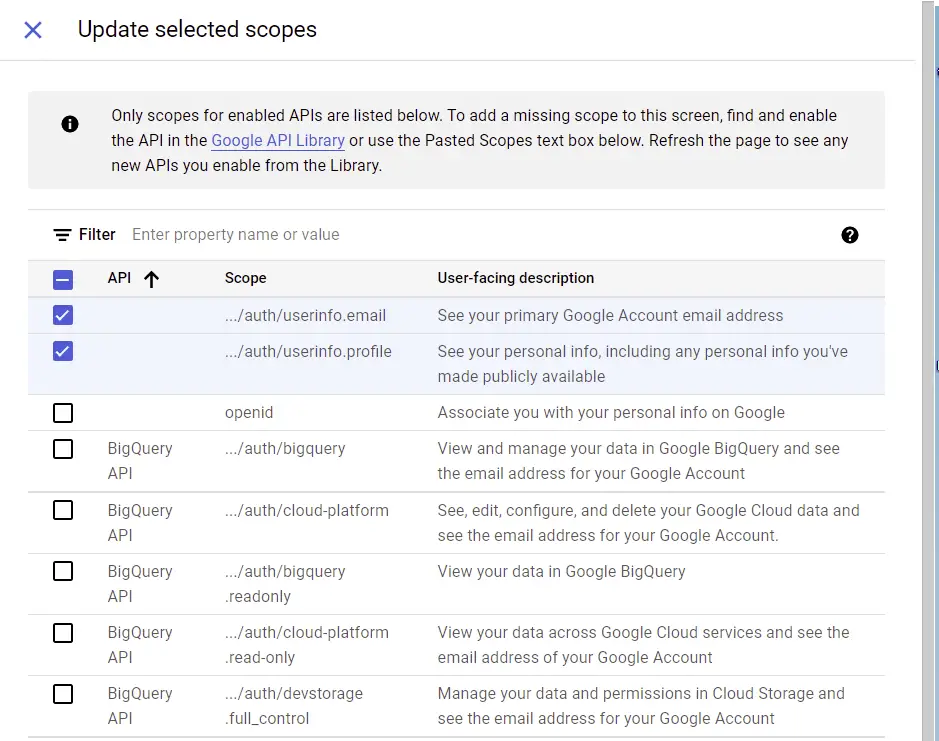
Click on the “ADD OR REMOVE SCOPES” button on the scopes tab. The number of scopes you can add depends on the type of application you are working on but am only interested in the user’s email and profile data.
Scroll down and click on the “UPDATE” button after you are done selecting the scopes. Next, click on the “SAVE AND CONTINUE” button.
Now click on the ADD USERS button on the Test users tab to add a test user. The test user will be the only account allowed to sign in to your application whilst in sandbox mode.
Click on the “SAVE AND CONTINUE” button after adding the test user.
On the Summary tab, carefully go through the provided information and click on the “BACK TO DASHBOARD” button.
Generate the OAuth Credentials
Under “APIs & Services” on the sidebar, click on Credentials. Next, click on “CREATE CREDENTIALS” on the Credentials tab and choose OAuth client ID.
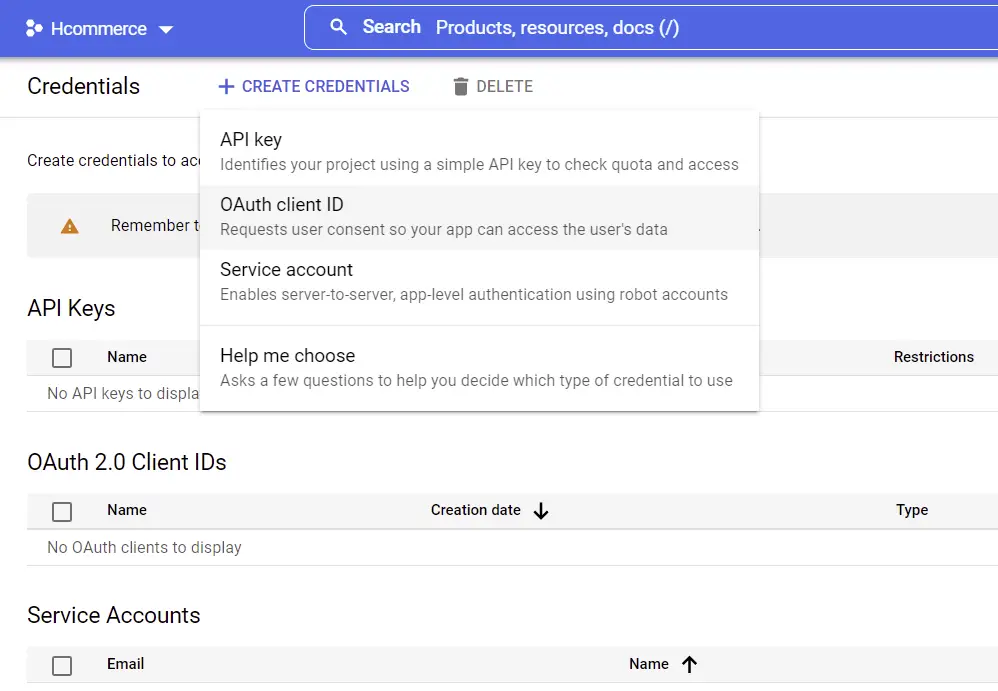
Now provide the necessary information. The authorized redirect URL should be a route on your server. This will enable us to make a GET request directly from the consent screen.
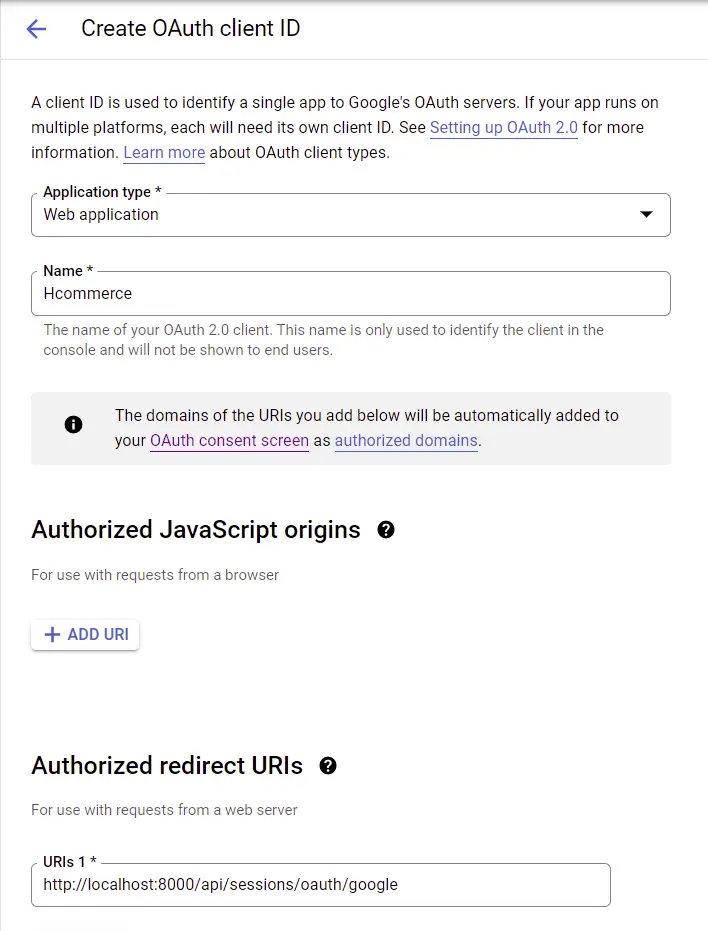
Next, click on “CREATE” and you should see your client ID and client secret.
Open the .env file in the server folder and add them.
.env
GOOGLE_OAUTH_CLIENT_ID=your client Id here
GOOGLE_OAUTH_CLIENT_SECRET=your client secret here
GOOGLE_OAUTH_REDIRECT_URL=http://localhost:8000/api/sessions/oauth/google
Also, update the .env.local file in the Vue.js application.
VITE_SERVER_ENDPOINT=http://localhost:8000

VITE_GOOGLE_OAUTH_CLIENT_ID=your client Id here
VITE_GOOGLE_OAUTH_CLIENT_SECRET=your client secret here
VITE_GOOGLE_OAUTH_REDIRECT=http://localhost:8000/api/sessions/oauth/google
Use
Vue_App_prefix if you generated the app with the@vue/cli.
Generate the Consent Screen URL
I think we are now ready to implement the Google OAuth in the Vue.js app.
To begin, we need to generate the OAuth consent screen URL based on the client ID, scopes, and the redirect URL.
src/utils/getGoogleUrl.js
export const getGoogleUrl = (from) => {
  const rootUrl = `https://accounts.google.com/o/oauth2/v2/auth`;

  const options = {
    redirect_uri: import.meta.env.VITE_GOOGLE_OAUTH_REDIRECT,
    client_id: import.meta.env.VITE_GOOGLE_OAUTH_CLIENT_ID,
    access_type: 'offline',
    response_type: 'code',
    prompt: 'consent',
    scope: [
      'https://www.googleapis.com/auth/userinfo.profile',
      'https://www.googleapis.com/auth/userinfo.email',
    ].join(' '),
    state: from,
  };

  const qs = new URLSearchParams(options);

  return `${rootUrl}?${qs.toString()}`;
};
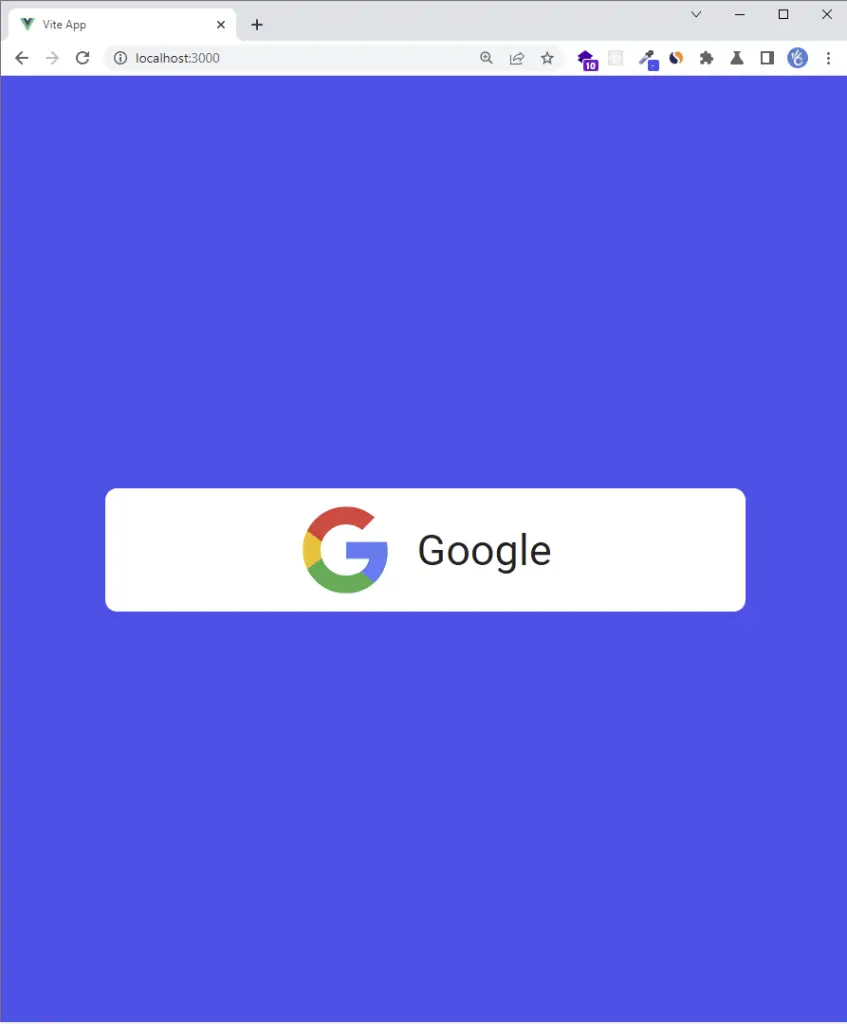
Build a Google OAuth Button with Vue.js
Now let’s create a simple Google Oauth button.
src/App.vue
<script setup>
import GoogleLogo from './assets/google.svg';
import { getGoogleUrl } from './utils/getGoogleUrl';

const from = '/';
</script>

<template>
  <div class="container">
    <div class="social-auth">
      <a :href="getGoogleUrl(from)" class="google-auth">
        <img :src="GoogleLogo" alt="Google Logo" />
        <span>Google</span>
      </a>
    </div>
  </div>
</template>

<style>
* {
  margin: 0;
  padding: 0;
  box-sizing: border-box;
}
a {
  text-decoration: none;
  color: inherit;
}

html {
  font-size: 62.5%;
}

body {
  font-family: Roboto, sans-serif;
  color: #222;
  font-size: 1.6rem;
}

.container {
  background-color: #2363eb;
  height: 100vh;
  width: 100vw;
  display: flex;
  align-items: center;
  justify-content: center;
}

.social-auth {
  max-width: 27rem;
  width: 100%;
  display: flex;
  align-items: center;
  flex-direction: column;
}

.google-auth {
  background-color: #fff;
  border-radius: 5px;
  padding: 0.6rem 0;
  width: 100%;
  display: flex;
  align-items: center;
  justify-content: center;
  transition: all 0.3s ease-in-out;
}

.google-auth img {
  height: 4rem;
  margin-right: 1rem;
}
.google-auth span {
  font-size: 1.8rem;
}

.google-auth:hover {
  box-shadow: 0 1px 13px 0 rgb(0 0 0 / 15%);
}
</style>
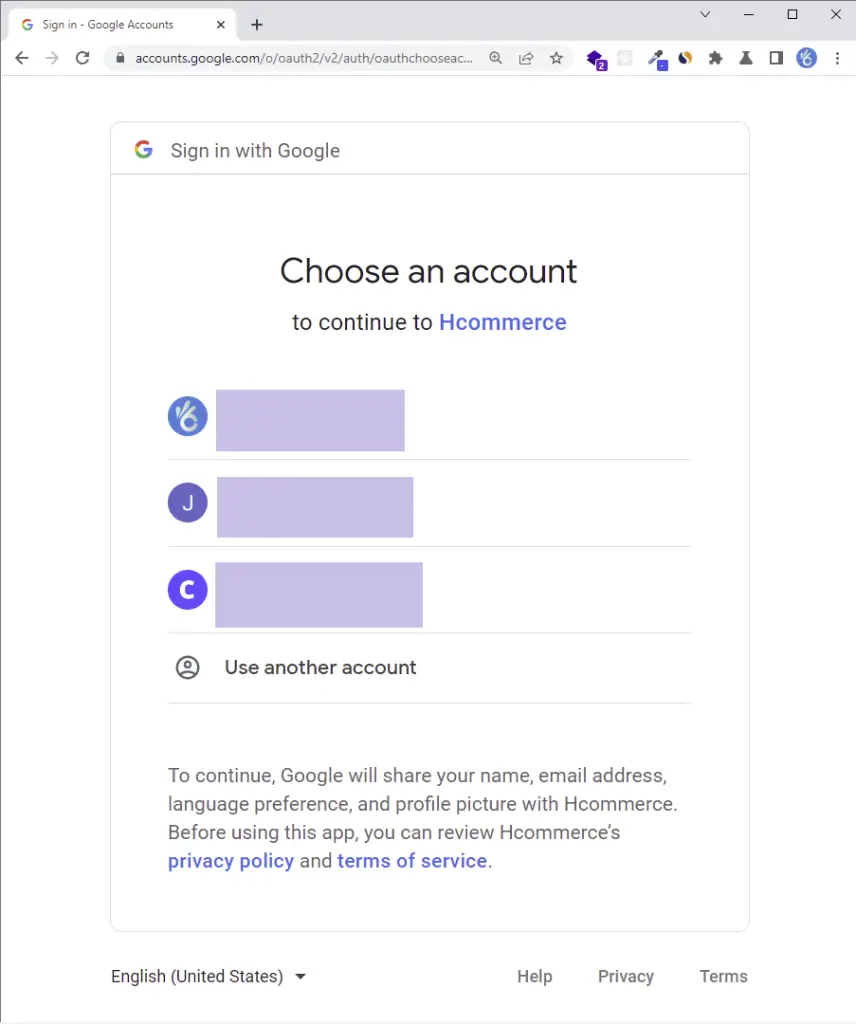
Now click on the Google Oauth button and you should be taken to the consent screen where you’ll see your logged-in Google accounts.
Next, click on the test user account on the consent screen or log in with the test Google account if you haven’t done that.
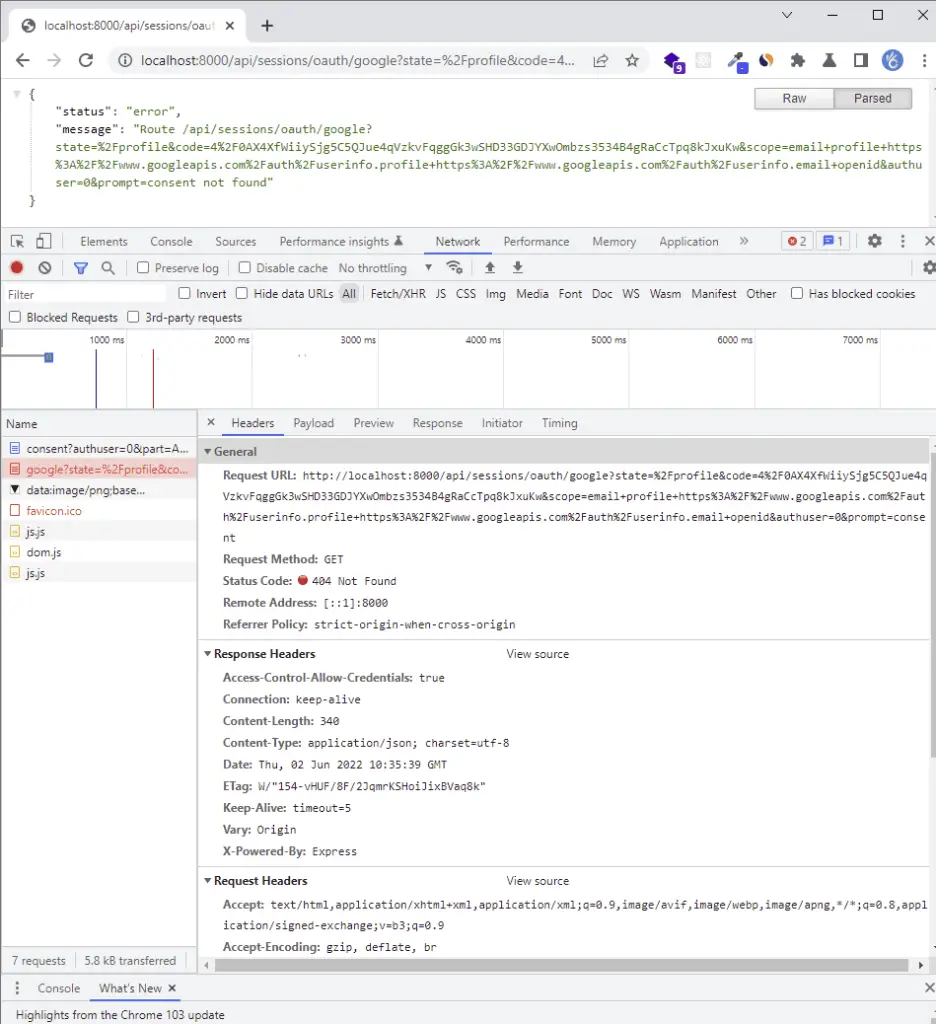
A 404 error should be returned assuming your server is running. The most important part of the redirect URL is the code in the query string.
You got the 404 error because we haven’t implemented the Oauth logic on the server yet.
Implement Google OAuth Authentication with Node.js
To make the HTTP requests to the Google API, we’ll use the Axios package.
Run the following command to install Axios.
yarn add axios
Edit the config/custom-environment-variables.ts file and add the OAuth client Id, client secret, and the redirect URL.
config/custom-environment-variables.ts
export default {
  dbName: 'MONGODB_USERNAME',
  dbPass: 'MONGODB_PASSWORD',

  accessTokenPrivateKey: 'ACCESS_TOKEN_PRIVATE_KEY',
  accessTokenPublicKey: 'ACCESS_TOKEN_PUBLIC_KEY',
  refreshTokenPrivateKey: 'REFRESH_TOKEN_PRIVATE_KEY',
  refreshTokenPublicKey: 'REFRESH_TOKEN_PUBLIC_KEY',

  googleClientId: 'GOOGLE_OAUTH_CLIENT_ID',
  googleClientSecret: 'GOOGLE_OAUTH_CLIENT_SECRET',
  googleOauthRedirect: 'GOOGLE_OAUTH_REDIRECT_URL',
};
Retrieve Google OAuth Access Token and User’s Profile
Now in the services folder, create a session.service.ts file and add these two functions:
getGoogleOauthToken()– To retrieve the OAuth Access Token from GooglegetGoogleUser()– Retrieves the user’s profile data with the OAuth Access Token
src/services/session.service.ts
import config from 'config';
import axios from 'axios';
import qs from 'qs';

interface GoogleOauthToken {
  access_token: string;
  id_token: string;
  expires_in: number;
  refresh_token: string;
  token_type: string;
  scope: string;
}

export const getGoogleOauthToken = async ({
  code,
}: {
  code: string;
}): Promise<GoogleOauthToken> => {
  const rootURl = 'https://oauth2.googleapis.com/token';

  const options = {
    code,
    client_id: config.get<string>('googleClientId'),
    client_secret: config.get<string>('googleClientSecret'),
    redirect_uri: config.get<string>('googleOauthRedirect'),
    grant_type: 'authorization_code',
  };
  try {
    const { data } = await axios.post<GoogleOauthToken>(
      rootURl,
      qs.stringify(options),
      {
        headers: {
          'Content-Type': 'application/x-www-form-urlencoded',
        },
      }
    );

    return data;
  } catch (err: any) {
    console.log('Failed to fetch Google Oauth Tokens');
    throw new Error(err);
  }
};

interface GoogleUserResult {
  id: string;
  email: string;
  verified_email: boolean;
  name: string;
  given_name: string;
  family_name: string;
  picture: string;
  locale: string;
}

export async function getGoogleUser({
  id_token,
  access_token,
}: {
  id_token: string;
  access_token: string;
}): Promise<GoogleUserResult> {
  try {
    const { data } = await axios.get<GoogleUserResult>(
      `https://www.googleapis.com/oauth2/v1/userinfo?alt=json&access_token=${access_token}`,
      {
        headers: {
          Authorization: `Bearer ${id_token}`,
        },
      }
    );

    return data;
  } catch (err: any) {
    console.log(err);
    throw Error(err);
  }
}
Update the User Model
If you followed the previous tutorials in this series then update the user.model.ts file to have the provider field.
When a user registers with Google OAuth, we’ll set the provider field to google whereas a user who registers with email and password will have provider: local .
src/models/user.model.ts
import {
  DocumentType,
  getModelForClass,
  index,
  modelOptions,
  pre,
  prop,
} from '@typegoose/typegoose';
import bcrypt from 'bcryptjs';

@index({ email: 1 })
@pre<User>('save', async function () {
  // Hash password if the password is new or was updated
  if (!this.isModified('password')) return;

  // Hash password with costFactor of 12
  this.password = await bcrypt.hash(this.password, 12);
})
@modelOptions({
  schemaOptions: {
    // Add createdAt and updatedAt fields
    timestamps: true,
  },
})

// Export the User class to be used as TypeScript type
export class User {
  @prop()
  name: string;

  @prop({ unique: true, required: true })
  email: string;

  @prop({ required: true, minlength: 8, maxLength: 32, select: false })
  password: string;

  @prop({ default: 'user' })
  role: string;

  @prop({ default: 'default.png' })
  photo: string;

  @prop({ default: false })
  verified: boolean;

  @prop({ default: 'local' })
  provider: string;

  // Instance method to check if passwords match
  async comparePasswords(hashedPassword: string, candidatePassword: string) {
    return await bcrypt.compare(candidatePassword, hashedPassword);
  }
}

// Create the user model from the User class
const userModel = getModelForClass(User);
export default userModel;
Add a Service to Upsert the User
Next, add the code below to the user.service.ts file to help us upsert the user’s information in the MongoDB database.
Adding upsert: true as a query option will instruct mongoose to create the user if that email doesn’t exist in the database. On the other hand, mongoose will update the user’s information if that email already exists in the database.
src/services/user.service.ts
export const findAndUpdateUser = async (
  query: FilterQuery<User>,
  update: UpdateQuery<User>,
  options: QueryOptions
) => {
  return await userModel.findOneAndUpdate(query, update, options);
};
Create the Google OAuth Handler
Next, create googleOauthHandler to call the findAndUpdateUser() service we defined above to upsert the user in the database.
After the user has been successfully upserted in the database, we need to generate the access and refresh tokens and send them to the client or the user’s browser as HTTPOnly cookies.
src/controllers/auth.controller.ts
export const googleOauthHandler = async (
  req: Request,
  res: Response,
  next: NextFunction
) => {
  try {
    // Get the code from the query
    const code = req.query.code as string;
    const pathUrl = (req.query.state as string) || '/';

    if (!code) {
      return next(new AppError('Authorization code not provided!', 401));
    }

    // Use the code to get the id and access tokens
    const { id_token, access_token } = await getGoogleOauthToken({ code });

    // Use the token to get the User
    const { name, verified_email, email, picture } = await getGoogleUser({
      id_token,
      access_token,
    });

    // Check if user is verified
    if (!verified_email) {
      return next(new AppError('Google account not verified', 403));
    }

    // Update user if user already exist or create new user
    const user = await findAndUpdateUser(
      { email },
      {
        name,
        photo: picture,
        email,
        provider: 'Google',
        verified: true,
      },
      { upsert: true, runValidators: false, new: true, lean: true }
    );

    if (!user)
      return res.redirect(`${config.get<string>('origin')}/oauth/error`);

    // Create access and refresh token
    const { access_token: accessToken, refresh_token } = await signToken(user);

    // Send cookie
    res.cookie('refresh-token', refresh_token, refreshTokenCookieOptions);
    res.cookie('access-token', accessToken, accessTokenCookieOptions);
    res.cookie('logged_in', true, {
      expires: new Date(
        Date.now() + config.get<number>('accessTokenExpiresIn') * 60 * 1000
      ),
    });

    res.redirect(`${config.get<string>('origin')}${pathUrl}`);
  } catch (err: any) {
    console.log('Failed to authorize Google User', err);
    return res.redirect(`${config.get<string>('origin')}/oauth/error`);
  }
};
Create the Route
In the routes folder, create a session.routes.ts file and add the code snippets below.
src/routes/session.routes.ts
import express from 'express';
import { googleOauthHandler } from '../controllers/auth.controller';

const router = express.Router();

router.get('/oauth/google', googleOauthHandler);

export default router;
Add the Session Router To the Middleware Stack
Next, add the router defined above to the Express middleware stack in the app.ts file.
import sessionRouter from './routes/session.route';

// ? Register the session router
app.use('/api/sessions', sessionRouter);
Conclusion
Congrats for reaching the end. This article taught you how to implement Google OAuth in Vue.js, Node.js, and MongoDB applications without using the Passport.js library.
You can find the complete code here: