
t3-stack popularly known as tRPC is a lightweight library tailored specifically for building end-to-end typesafe APIs without the need for defined schemas or extra dependencies for code generation. This article will teach you how to use Yarn Workspaces to set up tRPC with React.js, Express, Prisma, PostgreSQL, and Node.js.
At the time of writing this article, @tRPC/server now has adaptors for AWS Lambda, Express, and Fastify. Whereas the @tRPC/client can be used to create Vanilla, React.js, and Next.js clients.
In addition, the developer communities are working hard to create tRPC extensions for other frameworks, like Vue.js, Svelte, and many more.
tRPC API with React.js, Express, Prisma, Postgres, and Node.js Series:
- How to Setup tRPC API with Prisma, PostgreSQL, Node & React
- tRPC API with PostgreSQL, Prisma, Redis, & Node.js: JWT Authentication
Read more articles:
- Build tRPC API with React.js, Express & Node.js: Project Setup
- Golang & MongoDB: JWT Authentication and Authorization
- API with Golang + MongoDB: Send HTML Emails with Gomail
- API with Golang, Gin Gonic & MongoDB: Forget/Reset Password
Prerequisites
Before you begin, you should:
- Have Node.js installed on your system
- Be comfortable with Node.js and Express
- Be comfortable with React.js
What is tRPC?
tRPC is a lightweight toolkit that allows developers to use the power of TypeScript to build end-to-end typesafe APIs with Express, Fastify, AWS Lambda, and more without the need to create schemas or install extra dependencies for code generation.
Whether you are new to this web development ecosystem or you are a veteran player, you may have noticed that GraphQL is the dominant library for building type-safety APIs using a query language.
GraphQL is amazing and solved most of our miseries, however, it doesn’t take full advantage of TypeScript to write type-safety APIs.
For this reason, tRPC was introduced to use the full power of TypeScript to build full-stack type-safety applications.
Setup PostgreSQL and Redis with Docker
PostgreSQL is a powerful, free, and open-source relational database management system used as the primary data store for web, and mobile applications.
Running PostgreSQL with Docker and docker-compose gives you the ability to easily run and maintain it, especially in a development environment.
To simply run the containers using the Postgres and Redis Docker images we can create a docker-compose.yml file with the required configurations.
First, create a project folder named trpc-prisma-react and open it with your preferred IDE or text editor.
$ mkdir trpc-prisma-reactNext, create a docker-compose.yml in the project directory and add the following configurations to set up the Redis and PostgreSQL containers.
docker-compose.yml
version: '3'
services:
  postgres:
    image: postgres
    container_name: postgres
    ports:
      - '6500:5432'
    restart: always
    env_file:
      - ./.env
    volumes:
      - postgres-db:/var/lib/postgresql/data
  redis:
    image: redis:latest
    container_name: redis
    ports:
      - '6379:6379'
    volumes:
      - redis:/data
volumes:
  postgres-db:
  redis:
Create a .env file and add the following environment variables to send in the Postgres user, database name, and password.
.env
DATABASE_PORT=6500
POSTGRES_PASSWORD=password123
POSTGRES_USER=postgres
POSTGRES_DB=trpc_prisma
POSTGRES_HOST=postgres
POSTGRES_HOSTNAME=127.0.0.1
After this quick setup, start the containers with this command:
docker-compose up -dExecute this command to stop the containers:
docker-compose downUse Yarn Workspaces to Setup Monolithic Repository
First, let’s build a monorepo for the tRPC project with Yarn. For those who are new to the web and mobile development ecosystem, Yarn is simply a package manager developed by the guys at Facebook. It has a tool called Yarn workspaces, for organizing a project codebase into a monolithic repository.
With the explanation above, create a package.json file in the root workspace:
touch package.jsonNext, add the following code to the newly-created package.json file:
{
  "name": "trpc-node-react",
  "private": "true",
  "scripts": {},
  "workspaces": [
    "packages/*"
  ]
}
Workspaces are not meant to be published so we need to set the private property to true in the package.json file to avoid publishing the root workspace by mistake.
Next, we used wildcard (*) in the “workspaces” array for Yarn to recognize the folders in the “packages” directory as packages.
Don’t be anxious, we will create the “packages” folder in a moment.
Create a Script to Start the tRPC client and server
Now let’s install the concurrently and wsrun packages help us start the tRPC client and server in parallel.
Using this approach will save us a lot of time since we do not have to manually change directories in the terminal to run the start scripts of the tRPC client and server.
Install the concurrently and wsrun packages with this command:
yarn add -W -D concurrently wsrun
The “-W” flag tells Yarn to add the dependencies to the workspace itself. Whereas the “-D” flag tells Yarn to add the packages as dev-dependencies.
Update the package.json file in the root workspace with the following:
package.json
{
  "name": "trpc-prisma-react",
  "private": "true",
  "scripts": {
    "start": "concurrently \"wsrun --parallel start\""
  },
  "workspaces": [
    "packages/*"
  ],
  "devDependencies": {
    "concurrently": "^7.3.0",
    "wsrun": "^5.2.4"
  }
}
The start script in the above will help us execute the start scripts in the tRPC client and server in parallel.
Since we will be pushing the project to GitHub, create a .gitignore file in the root workspace and exclude the node_modules.
.gitignore
node_modules
Creating the tRPC Node.js Server in Express
We are now ready to set up the tRPC Express Node.js server.
First, create a “server” folder in the “packages” folder then open the integrated terminal and change the directory into it cd packages/server .
cd packages/serverNow run the command below to initialize a Node.js TypeScript project with Yarn:
yarn init -y && yarn add -D typescript && npx tsc --init
Next, open the newly-created “tsconfig.json” file and replace its content with the following configurations:
packages/server/tsconfig.json
{
  "compilerOptions": {
    "target": "es2018",
    "experimentalDecorators": true,
    "emitDecoratorMetadata": true,
    "module": "commonjs",
    "esModuleInterop": true,
    "forceConsistentCasingInFileNames": true,
    "strict": true,
    "strictPropertyInitialization": false,
    "skipLibCheck": true
  }
}
experimentalDecorators– allows you to set experimental support for decorators.emitDecoratorMetadata– allows you to enable experimental support for emitting type metadata for the decorators.strictPropertyInitialization– needed to prevent Typescript from raising errors when we declare the Typegoose class attributes without initializing them.
Add the dependencies required to set up the tRPC server with Express:
yarn add @trpc/server@next cors dotenv express @prisma/client redis && yarn add -D prisma @types/cors @types/express @types/node morgan @types/morgan ts-node-dev
@trpc/server– has tools for building the tRPC endpoints and routerscors– needed to configure the tRPC Express server to accept requests from cross-origin domains.dotenv– loads the environment variables from a configuration file into the Node.js environment.express– a lightweight Node.js framework for building web and mobile applications.@prisma/client– the query builder for Prismaprisma– the CLI for running Prisma commandsredis– a JavaScript library for accessing and mutating the Redis databasets-node-dev– to hot-reload the tRPC Express server upon every file change.morgan– an HTTP logger middleware
The security of the tRPC application is very important and it’s always a best practice to store sensitive data in an environment variables file. Create a packages/server/.env file and add the following credentials:
NODE_ENV=development

ORIGIN=http://127.0.0.1:3000

DATABASE_URL="postgresql://postgres:password123@localhost:6500/trpc_prisma?schema=public"
Open the packages/server/package.json file and add the start script to help us start the tRPC Express server.
packages/server/package.json
{
"scripts": {
    "start": "ts-node-dev --respawn --transpile-only src/app.ts"
  }
}
Within the packages/server folder, create an “src” folder. Next, create two folders named “config” and “utils” in the “src” directory.
Next, create a default.ts file in the “config” directory to enable us to load and export the environment variables.
packages/server/src/config/default.ts
import path from 'path';
require('dotenv').config({ path: path.join(__dirname, '../../.env') });

const customConfig: { port: number; origin: string; dbUri: string } = {
  port: 8000,
  origin: process.env.ORIGIN as unknown as string,

  dbUri: process.env.DATABASE_URL as unknown as string,
};

export default customConfig;
Connect the tRPC Server to PostgreSQL and Redis
Now that we have the Redis and PostgreSQL servers running in the Docker containers, let’s define some utility functions to connect them to the tRPC server.
packages/server/src/utils/prisma.ts
import { PrismaClient } from '@prisma/client';

declare global {
  var prisma: PrismaClient | undefined;
}

export const prisma =
  global.prisma || new PrismaClient({ log: ['query', 'info'] });

if (process.env.NODE_ENV !== 'production') {
  global.prisma = prisma;
}

async function connectDB() {
  try {
    await prisma.$connect();
    console.log('? Database connected successfully');
  } catch (error) {
    console.log(error);
    process.exit(1);
  } finally {
    await prisma.$disconnect();
  }
}

export default connectDB;
packages/server/src/utils/connectRedis.ts
import { createClient } from 'redis';

const redisUrl = `redis://localhost:6379`;
const redisClient = createClient({
  url: redisUrl,
});

const connectRedis = async () => {
  try {
    await redisClient.connect();
    console.log('? Redis client connected...');
    redisClient.set(
      'tRPC',
      '??Welcome to tRPC with React.js, Express and Typescript!'
    );
  } catch (err: any) {
    console.log(err.message);
    process.exit(1);
  }
};

connectRedis();

redisClient.on('error', (err) => console.log(err));

export default redisClient;
In the above, we created a function to connect to the Redis server and evoked the redisClient.set() function returned by calling the createClient() function to add a message to the Redis database with a “tRPC” key.
Later, we will request the message from the Redis database and send it to the tRPC React.js client.
Starting the tRPC Express Server
Creating the tRPC Context
Now let’s create a context function that will be called for every incoming request and the results will be passed as contextual data to all the resolvers.
packages/server/src/app.ts
import path from 'path';
import dotenv from 'dotenv';
import express from 'express';
import morgan from 'morgan';
import cors from 'cors';
import { inferAsyncReturnType, initTRPC, TRPCError } from "@trpc/server";
import * as trpcExpress from '@trpc/server/adapters/express';
import redisClient from './utils/connectRedis';
import customConfig from './config/default';
import connectDB from './utils/prisma';

dotenv.config({ path: path.join(__dirname, './.env') });

const createContext = ({
  req,
  res,
}: trpcExpress.CreateExpressContextOptions) => ({ req, res });

export type Context = inferAsyncReturnType<typeof createContext>;
// [...]
Creating the tRPC Router
Next, let’s use the “router()” function provided by tRPC to create a router to manage the tRPC endpoints. This will allow us to add:
- Query endpoints – for requesting data
- Mutation endpoints – to perform the Create, Update, and Delete operations.
- Subscription endpoints – used to subscribe to data over WebSockets.
packages/server/src/app.ts
// [...]
const t = initTRPC.context<Context>().create();

const appRouter = t.router({
  sayHello: t.procedure.query(async () => {
    const message = await redisClient.get("tRPC");
    return { message };
  }),
});

export type AppRouter = typeof appRouter;
Let’s evaluate the code above:
First, we initialized the tRPC server by evoking the .context<Context>() and .create() methods. Then, we created the tRPC router and added a sayHello procedure call. The sayHello query will be evoked by the tRPC client to return the message stored in the Redis database.
The appRouter returned by evoking t.router() function maintains all the endpoints, including what the routes accept as inputs, and their outputs.
Next, we exported the AppRouter type from the packages/server/src/app.ts file. This will allow us to install the tRPC server as a package in the tRPC client in order for the React client to know the different queries, mutations, and subscriptions available on the tRPC server.
Configuring the Express tRPC Server
packages/server/src/app.ts
// [...]
const app = express();
if (process.env.NODE_ENV !== "production") app.use(morgan("dev"));

app.use(
  cors({
    origin: [customConfig.origin, "http://localhost:3000"],
    credentials: true,
  })
);
app.use(
  "/api/trpc",
  trpcExpress.createExpressMiddleware({
    router: appRouter,
    createContext,
  })
);

const port = customConfig.port;
app.listen(port, () => {
  console.log(`🚀 Server listening on port ${port}`);

  // CONNECT DB
  connectDB();
});
Complete Express tRPC Server Code
packages/server/src/app.ts
import path from "path";
import dotenv from "dotenv";
import express from "express";
import morgan from "morgan";
import cors from "cors";
import { inferAsyncReturnType, initTRPC } from "@trpc/server";
import * as trpcExpress from "@trpc/server/adapters/express";
import redisClient from "./utils/connectRedis";
import customConfig from "./config/default";
import connectDB from "./utils/prisma";

dotenv.config({ path: path.join(__dirname, "./.env") });

const createContext = ({
  req,
  res,
}: trpcExpress.CreateExpressContextOptions) => ({ req, res });

export type Context = inferAsyncReturnType<typeof createContext>;

const t = initTRPC.context<Context>().create();

const appRouter = t.router({
  sayHello: t.procedure.query(async () => {
    const message = await redisClient.get("tRPC");
    return { message };
  }),
});

export type AppRouter = typeof appRouter;

const app = express();
if (process.env.NODE_ENV !== "production") app.use(morgan("dev"));

app.use(
  cors({
    origin: [customConfig.origin, "http://localhost:3000"],
    credentials: true,
  })
);
app.use(
  "/api/trpc",
  trpcExpress.createExpressMiddleware({
    router: appRouter,
    createContext,
  })
);

const port = customConfig.port;
app.listen(port, () => {
  console.log(`🚀 Server listening on port ${port}`);

  // CONNECT DB
  connectDB();
});
Turning the tRPC Express Server into a Library
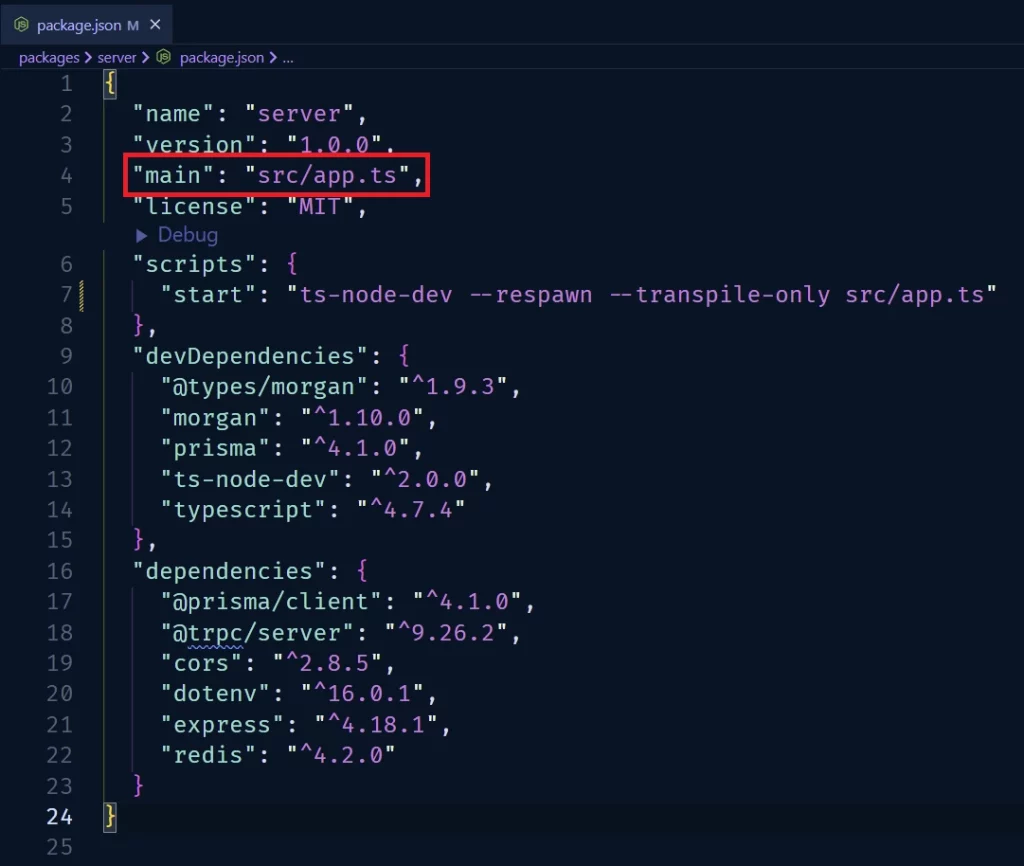
To convert the tRPC server into a library, we need to add "main": "src/app.ts" to the packages/server/package.json file. This will allow us to have access to the AppRouter type when we install the tRPC server in the tRPC React.js client.
packages/server/package.json
packages/server/package.json
{
  "name": "server",
  "version": "1.0.0",
  "main": "src/app.ts",
  "license": "MIT",
  "scripts": {
    "start": "ts-node-dev --respawn --transpile-only src/app.ts",
    "db:migrate": "npx prisma migrate dev --name user-entity --create-only && yarn prisma generate",
    "db:push": "npx prisma db push"
  },
  "devDependencies": {
    "@types/cors": "^2.8.12",
    "@types/express": "^4.17.14",
    "@types/morgan": "^1.9.3",
    "morgan": "^1.10.0",
    "prisma": "^4.5.0",
    "ts-node-dev": "^2.0.0",
    "typescript": "^4.8.4"
  },
  "dependencies": {
    "@prisma/client": "^4.5.0",
    "@trpc/server": "^10.0.0-proxy-beta.26",
    "cors": "^2.8.5",
    "dotenv": "^16.0.3",
    "express": "^4.18.2",
    "redis": "^4.3.1"
  }
}
Database Migration with Prisma
There are other ORMs for Node.js but we are going to use Prisma to query and mutate the database.
To get started, run the following code to initialize a new Prisma project in the packages/server folder.
Change the directory into the packages/server folder and run this command:
npx prisma init
The above command will generate a new packages/server/prisma folder containing a schema.prisma file. Also, when you open the environment variables file in the server folder, you should see a DATABASE_URL variable added by the Prisma CLI.
Now replace the content of the packages/server/prisma/schema.prisma file with the following code:
packages/server/prisma/schema.prisma
generator client {
  provider = "prisma-client-js"
}

datasource db {
  provider = "postgresql"
  url      = env("DATABASE_URL")
}


model User{
  @@map(name: "users")

  id String  @id @default(uuid())
  name String  @db.VarChar(255)
  email String @unique
  photo String? @default("default.png")
  verified Boolean? @default(false)

  password String
  role RoleEnumType? @default(user)

  createdAt DateTime @default(now())
  updatedAt DateTime @updatedAt

  provider String?
}

enum RoleEnumType {
  user
  admin
}
Quite a lot going on in the above, let’s break it down:
- First, we created a
Usermodel and used the@@map(name: "users")attribute to change the table name tousers. - Then we defined the attributes needed to create a new user in the database.
- The
@default(uuid())attribute sets a default UUID value for the ID field in the database.
With the above explanation, add the following scripts to the packages/server/package.json file.
{
"scripts": {
    "start": "ts-node-dev --respawn --transpile-only src/app.ts",
    "db:migrate": "npx prisma migrate dev --name user-entity --create-only && yarn prisma generate",
    "db:push": "npx prisma db push"
  },
}
db:migrate– create a new Prisma migration file and generate the TypeScript types based on the defined model.db:push– push the changes to the PostgreSQL database and ensures that the database is in-sync with the schema.
Add the PostgreSQL credentials defined in the .env file to the DATABASE_URL added by the Prisma CLI.
DATABASE_URL="postgresql://postgres:password123@localhost:6500/trpc_prisma?schema=public"
Now to create the users table in the PostgreSQL database, run the following command:
yarn db:migrate && yarn db:push
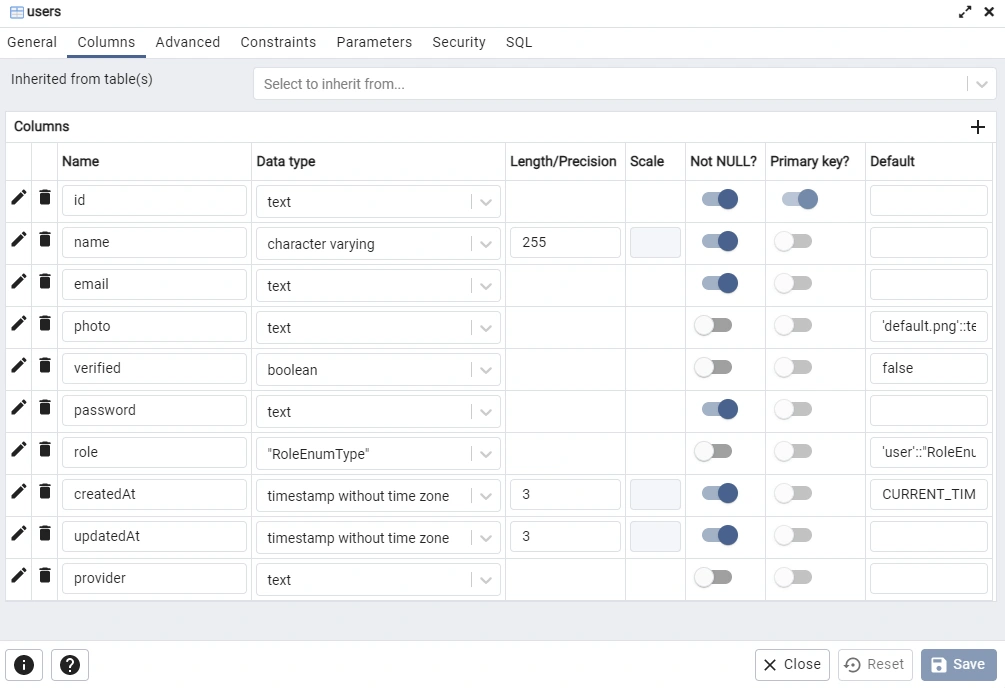
When you log into the PostgreSQL database in pgAdmin with the credentials defined in the .env , you should see the users table with the following properties.
Creating the tRPC Client in React.js
First, open the integrated terminal and change the directory into the “packages” folder to enable us to create a boilerplate React.js app with the Vite scaffolding tool.
Run this command to scaffold a new Vite project with Yarn:
yarn create vite
The above command will install and execute the Vite executable from the remote npm repository and you will be presented with prompts for a number of features like:
- The project name
- The type of framework
- TypeScript support
After the script has been executed, the tool will prompt you to enter a project name:
$ yarn create vite
yarn create v1.22.19
[1/4] Resolving packages...
[2/4] Fetching packages...
[3/4] Linking dependencies...
[4/4] Building fresh packages...

success Installed "create-vite@3.0.0" with binaries:
      - create-vite
      - cva
? Project name: » client
Type “client” as the project name and press the Enter key
After pressing the Enter key, you will be prompted to select a framework
? Select a framework: » - Use arrow-keys. Return to submit.
    vanilla
    vue
>   react
    preact
    lit
    svelte
After using the arrow keys to select the framework, press the Enter key again and Vite will prompt you to choose the language type.
? Select a variant: » - Use arrow-keys. Return to submit.
    react
>   react-ts
Select react-ts from the list and press the Enter key. Vite will then generate the project and instruct you to install the dependencies.
Scaffolding project in C:\Users\zidda\Desktop\Learn\Blog\tRPC\trpc-prisma-react\testing\client...

Done. Now run:

  cd client
  yarn
  yarn dev

Done in 544.96s.
Change the directory into the project folder as directed and run yarn to install the dependencies.
Next, open the packages/client/package.json file and change the dev script to start. Also, add the port flag to start the dev server on port 3000.
packages/client/package.json
{
"scripts": {
    "start": "vite --port 3000",
    "build": "tsc && vite build",
    "preview": "vite preview"
  }
}
We are now ready to install the tRPC server as a library in the React client. In your terminal, ensure that you are in the client folder and run the command below to install the tRPC server library.
yarn add server@1.0.0
server – is the property name in the packages/server/package.json file
@1.0.0 – is the corresponding version specified in it.
Next, run the following command to install the dependencies needed to set up the tRPC client:
yarn add @trpc/client@next @trpc/server@next @trpc/react-query@next @tanstack/react-query @tanstack/react-query-devtools
@tanstack/react-query– Library for managing server state in React applications.@trpc/react-query– A wrapper around React Query@trpc/client– has tools for creating the tRPC client@trpc/server– This is a peer dependency of@trpc/clientso you have to install it again!@tanstack/react-query-devtools– A tool for visualizing all the inner workings of React Query.
Creating the tRPC Client
Now let’s use the createTRPCReact() function provided by @trpc/react-query binding to generate the React Query hooks based on the queries, mutations, and subscriptions defined on the tRPC server.
packages/client/src/utils/trpc.ts
import { createTRPCReact } from "@trpc/react-query";
import type { AppRouter } from "server";

export const trpc = createTRPCReact<AppRouter>();
Testing the tRPC API Endpoint
Now let’s configure the React.js client with tRPC and React Query before making our first tRPC request to our API server.
packages/client/src/App.tsx
import "./global.css";
import { useState } from "react";
import { QueryClientProvider, QueryClient } from "@tanstack/react-query";
import { ReactQueryDevtools } from "@tanstack/react-query-devtools";
import { getFetch } from "@trpc/client";
import { loggerLink } from "@trpc/client/links/loggerLink";
import { httpBatchLink } from "@trpc/client/links/httpBatchLink";
import { trpc } from "./utils/trpc";

function AppContent() {
  const hello = trpc.sayHello.useQuery();
  return <main className="p-2">{JSON.stringify(hello.data, null, 2)}</main>;
}

function App() {
  const [queryClient] = useState(
    () =>
      new QueryClient({
        defaultOptions: {
          queries: {
            staleTime: 5 * 1000,
          },
        },
      })
  );

  const [trpcClient] = useState(() =>
    trpc.createClient({
      links: [
        loggerLink(),
        httpBatchLink({
          url: "http://localhost:8000/api/trpc",
          fetch: async (input, init?) => {
            const fetch = getFetch();
            return fetch(input, {
              ...init,
              credentials: "include",
            });
          },
        }),
      ],
    })
  );
  return (
    <trpc.Provider client={trpcClient} queryClient={queryClient}>
      <QueryClientProvider client={queryClient}>
        <AppContent />
        <ReactQueryDevtools initialIsOpen={false} />
      </QueryClientProvider>
    </trpc.Provider>
  );
}

export default App;
With the above configurations, we are now ready to start the tRPC client and server. Open your terminal and change the directory into the root Yarn workspace and run yarn start to start both the tRPC client and server.
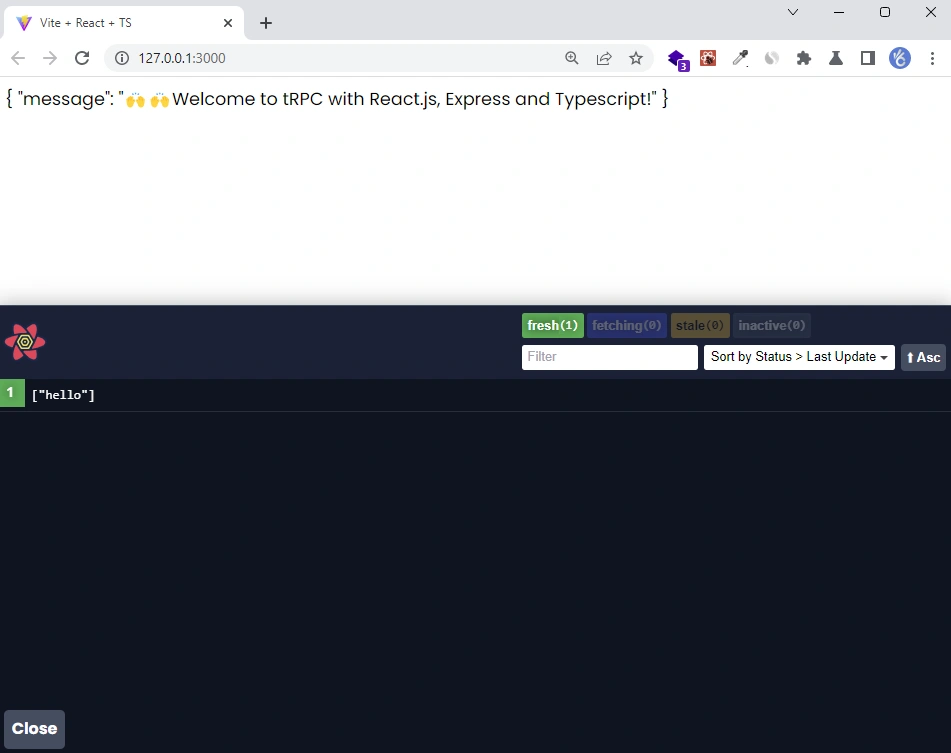
Enter the tRPC client URL http://127.0.0.1:3000/ in the browser and you should see the message we stored in the Redis database.
Adding tailwindCss to the React.js tRPC Client
In this section, follow the steps below to add tailwindCss to the React.js tRPC client.
Step 1: Install tailwindCss and its dependencies
Open the integrated terminal and change the directory to the packages/client folder. Run this command to install the tailwindCss library and its peer dependencies via Yarn.
yarn add -D tailwindcss postcss autoprefixer
Next, run the init command to generate the tailwind.config.js and postcss.config.js configuration files.
npx tailwindcss init -p
Step 2: Configure Template Paths
Next, open the tailwind.config.js file and add the path to the React template files. You can also include your custom colors and fonts.
packages/client/tailwind.config.js
/** @type {import('tailwindcss').Config} */
module.exports = {
  content: ['./src/**/*.{js,jsx,ts,tsx}'],
  theme: {
    extend: {
      colors: {
        'ct-dark-600': '#222',
        'ct-dark-200': '#e5e7eb',
        'ct-dark-100': '#f5f6f7',
        'ct-blue-600': '#2363eb',
        'ct-yellow-600': '#f9d13e',
      },
      container: {
        center: true,
        padding: '1rem',
        screens: {
          lg: '1125px',
          xl: '1125px',
          '2xl': '1125px',
        },
      },
    },
  },
  plugins: [],
};
Step 3: Adding the tailwindCss directives
Now create a packages/client/src/global.css file and add the TailwindCSS directives.
packages/client/src/global.css
@import url('https://fonts.googleapis.com/css2?family=Poppins:wght@300;400;500;600;700&display=swap');

@tailwind base;
@tailwind components;
@tailwind utilities;

@layer base {
  html {
    font-family: 'Poppins', sans-serif;
  }
}
Step 2: Importing the CSS file
We are now ready to start using the tailwindCss classes but before that let’s import the packages/client/src/global.css file into the App.tsx file.
packages/client/src/App.tsx
import './global.css';
// [...] other imports
Next, replace the content of the AppContent() component in the packages/client/src/App.tsx file with the following:
packages/client/src/App.tsx
function AppContent() {
  const hello = trpc.sayHello.useQuery();
  return (
    <div className="container mx-auto bg-ct-dark-200 rounded-xl shadow border p-8 m-10">
      <p className="text-3xl text-gray-700 font-bold mb-5">Welcome!</p>
      <p className="text-ct-blue-600 text-lg">{hello.data?.message}</p>
    </div>
  );
}
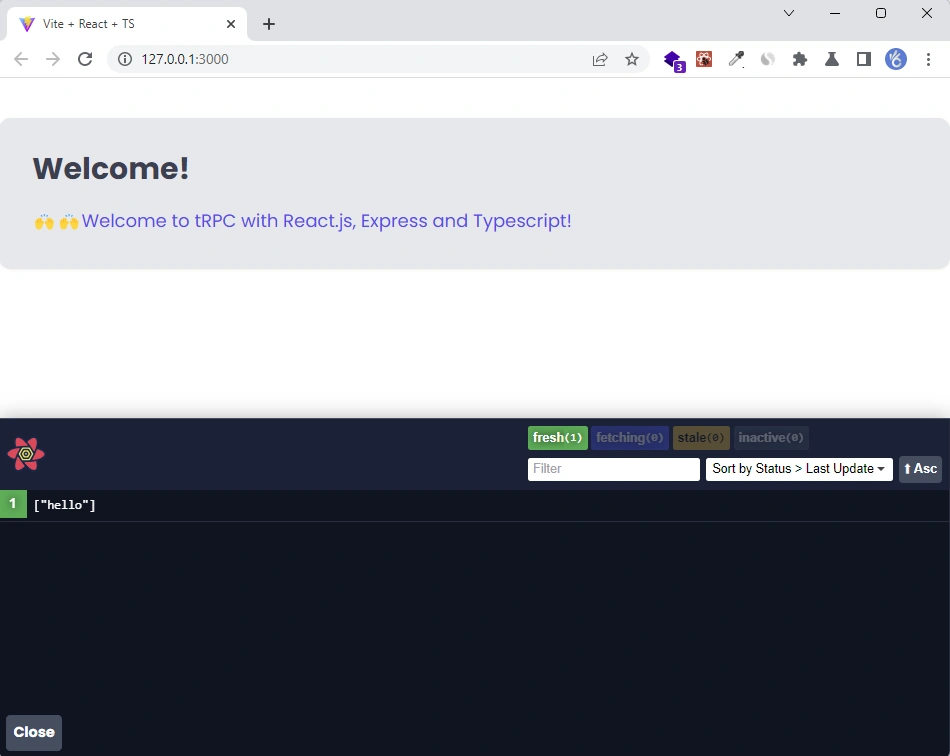
You should now see the following output in the browser:
Conclusion
With this tRPC client and server example, you’ve learned how to set up tRPC with React.js, PostgreSQL, Prisma, Express, and Redis.
You can find the source code of the tRPC client and server on my GitHub