

Visual Studio Code is a free and open-source editor developed and maintained by Microsoft. Over the years VS Code has grown to become the default editor for new and old developers. VS Code is fast and lightweight and it supports a wide variety of programming languages and extensions.
Also, it supports development operations like debugging, version control, and task running.
When we talk about API testing Postman is the tool most developers use because of the variety of features it provides to make API testing faster and easier.
A few months ago the Thunder Client VS Code API testing extension caught my attention.
The Thunder Client extension is similar to Postman but with fewer features and it was created by Ranga Vadhineni.
The VS Code Thunder Client extension was released at the end of March 2021 but at the time of writing this article, it already has 794,821 installs which is an indicator of how popular it has become.
In this article, you’ll learn how to make HTTP requests to a RESTful API or GraphQL API with the Thunder Client extension in VS Code by using an e-commerce REST API as an example.
You can also read:
- Node.js + TypeScript + MongoDB: JWT Authentication
- Node.js + TypeScript + MongoDB: JWT Refresh Token

Prerequisites
- A working REST API Server
- An internet connection
- Thunder Client VS Code Extension
How to Make HTTP Requests with VS Code Thunder Client Extension
VS Code Thunder Client: Installation
Let’s start by installing the Thunder Client VS Code extension. Open VS Code and click on the Extensions tab or use (CTRL + SHIFT + X) then search for Thunder Client in the search bar and click on the install button.
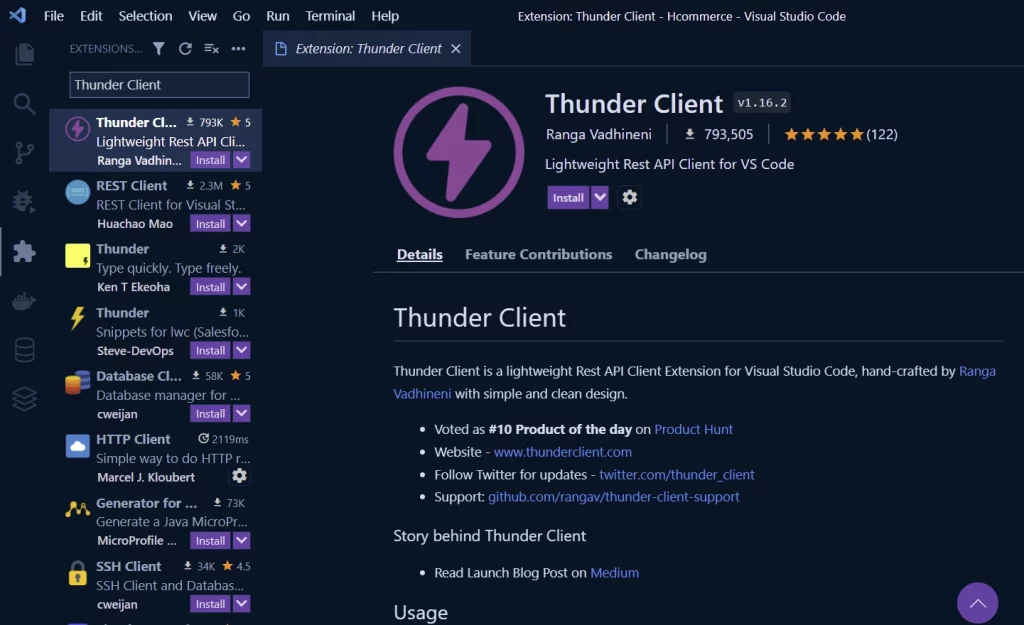
Once the Thunder Client extension has been installed you should see the Thunder Client logo on the left sidebar.
VS Code Thunder Client: Creating Collection
If you are familiar with Postman then you’ll probably know about collections. A collection is like a folder that helps us organize related HTTP requests together.
Now, click on the Thunder Client log on the left sidebar of VS Code and you should see the Thunder Client dashboard. The dashboard displays your recent activities, collections, and environments.
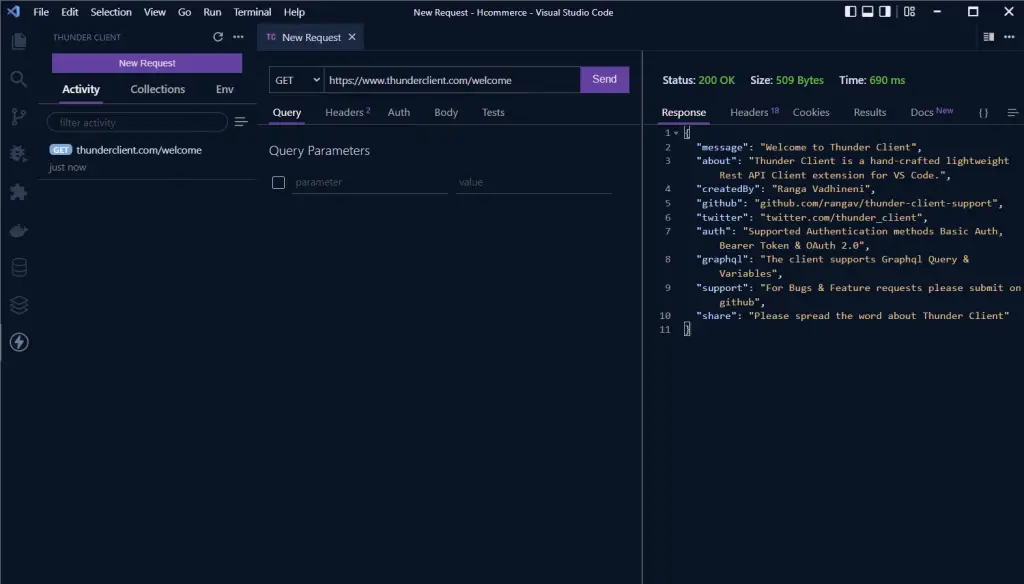
Let’s get our Thunder Client welcome message before going deep into the features it offers. Click on the New Request button and click on the Send button in the New Request tab.
Walaa… you just made your first Thunder Client request and you should see a welcome message.
We can make many HTTP requests by opening new tabs but it’s always a good idea to organize those HTTP requests in a collection.
To create your first collection, click on the Collections tab then click on the hamburger menu on the right of the filter activity search bar and select the New Collection menu from the popup.
Now type the collection name and press the enter key.
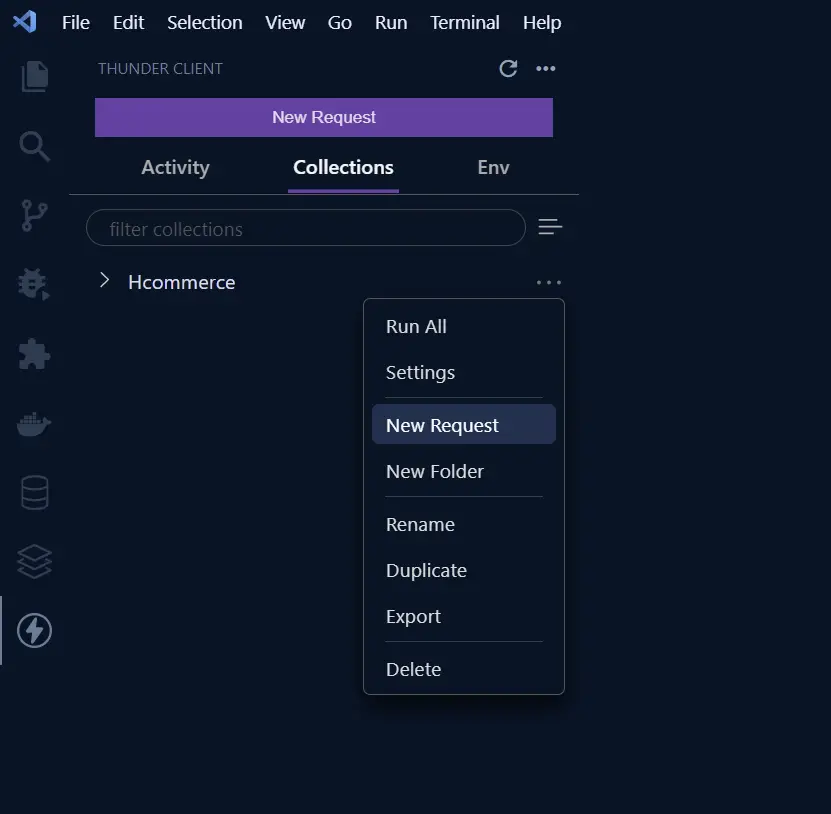
Hover your mouse on the collection name then click on the three dots on the right side and select the New Request menu.
Enter the request name and press enter. In my case since my API is an e-commerce REST API, my first request will be Get All Products.
VS Code Thunder Client: Creating subfolders in the collection
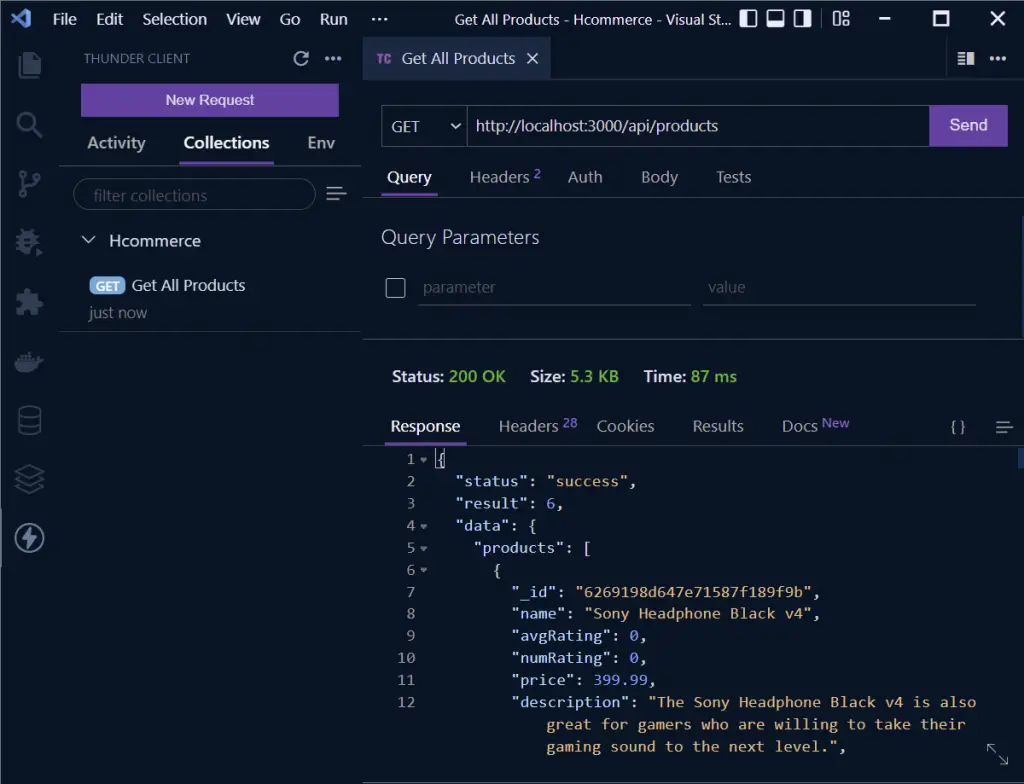
If you are also using my REST API then type this URL http://localhost:3000/api/products then click on the Send button to make a GET request to the products endpoint and you should see a list of products in the response returned by the server.
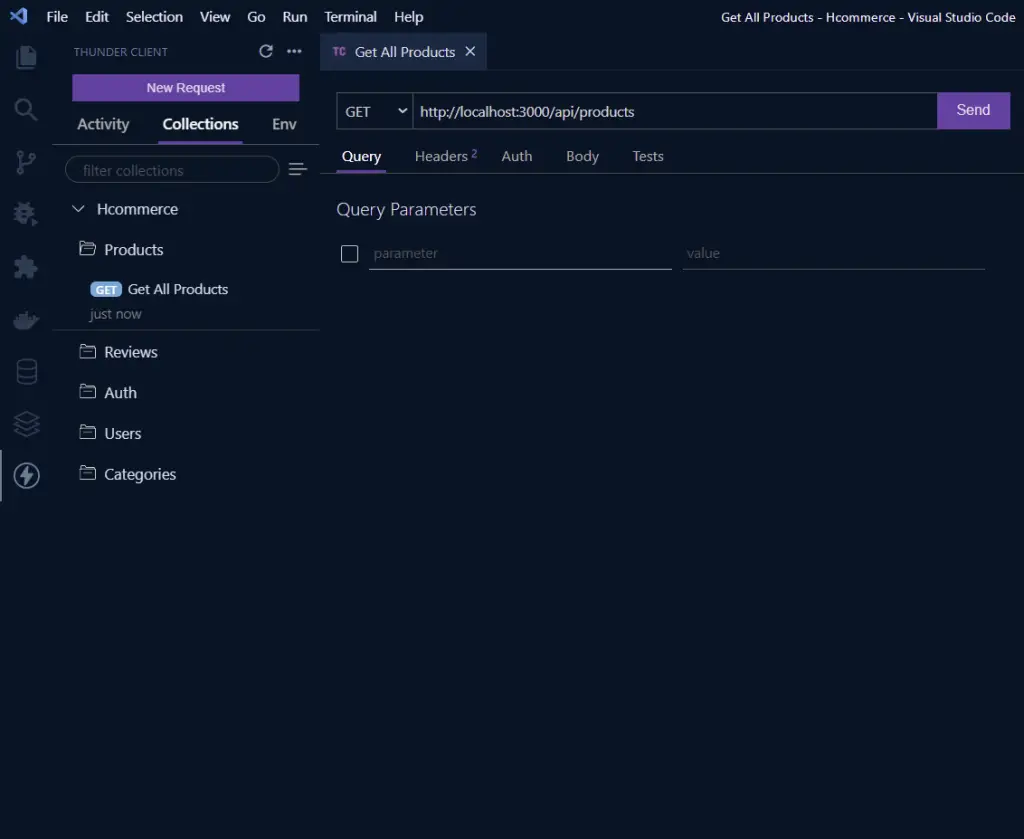
The e-commerce REST API has different resources like Users, Products, Reviews, Auth, and more so it’ll make a lot of sense to group the related requests in their own folder within the Collection.
Hover your mouse over the collection name then click on the three dots and select the New Folder menu. Type Products as the folder name or give it a different name and press enter.
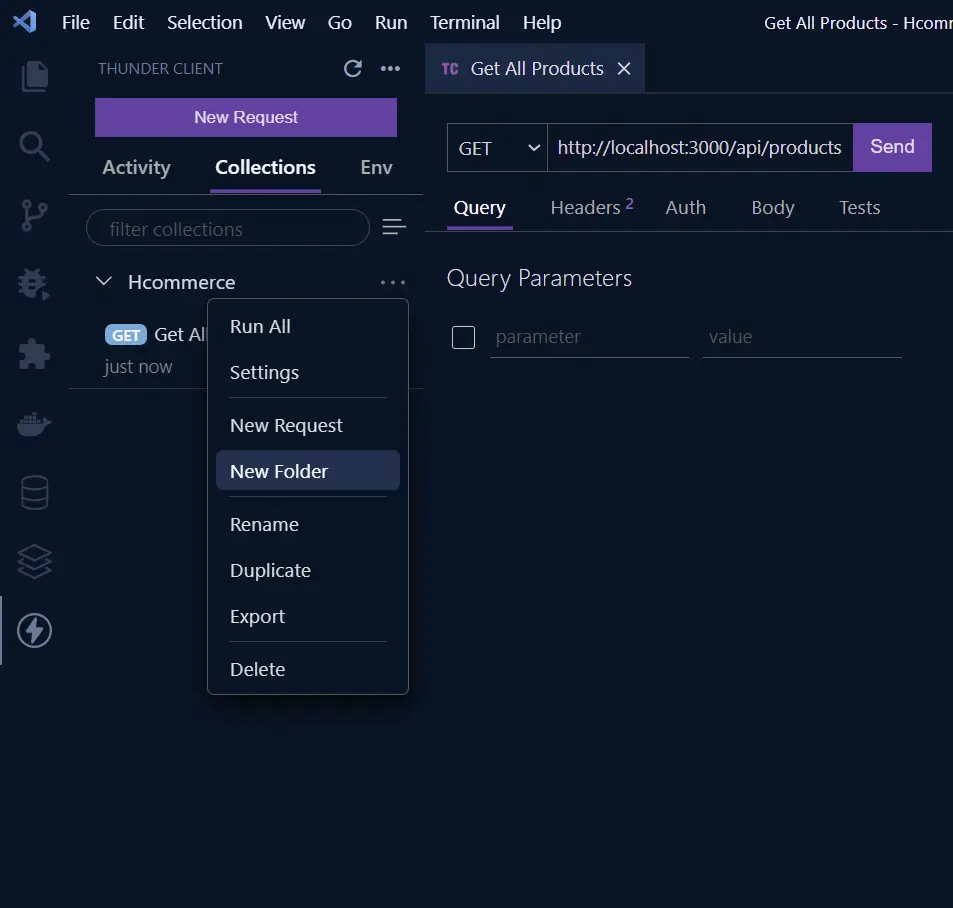
Now drag and drop the Get All Products request file into the Products folder. You can look at the screenshot below and create a similar folder structure.
Next, create a new POST request in the Auth folder and name it Sign Up. Enter the signup endpoint URL http://localhost:3000/api/users/signup and change the HTTP method to POST.
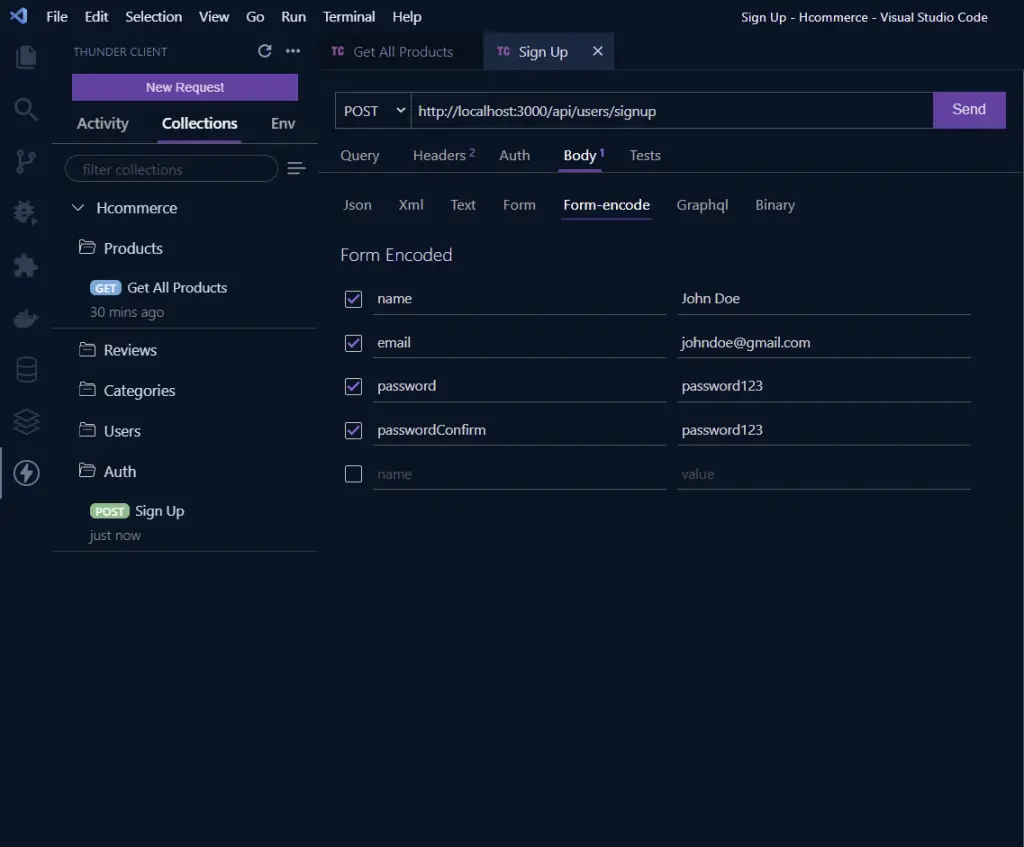
Provide the following fields (name, email, password, and passwordConfirm) in the JSON or Form-encode tabs of the Body tab. Please enter a valid email address because the server will send a verification code to the email you provided during the signup process.
Click on the Send button and after some seconds you should see a success message assuming all the credentials are valid.
Next, create a new GET request in the Auth folder with the name Verify Email and paste this http://localhost:3000/api/users/verify/{replace with the code in your email} into the URL field.
After including the verification code, press the Send button and you should receive a success message if the code is valid.
You could have directly clicked on the Verify Your Account button in the email you received to make the GET request in the browser.
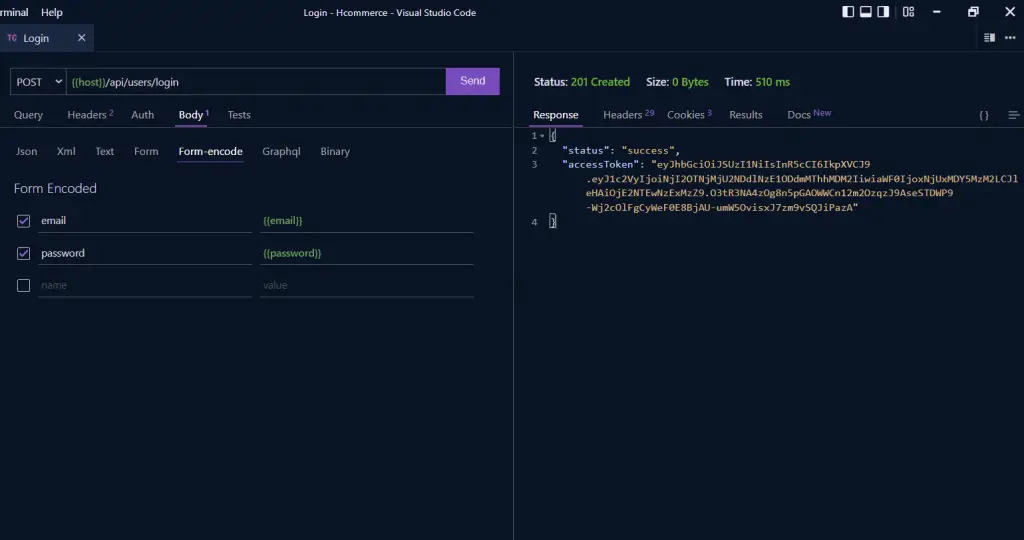
Next, let’s use the credentials to log into the account. Create a new Login POST request with the URL in the screenshot below.
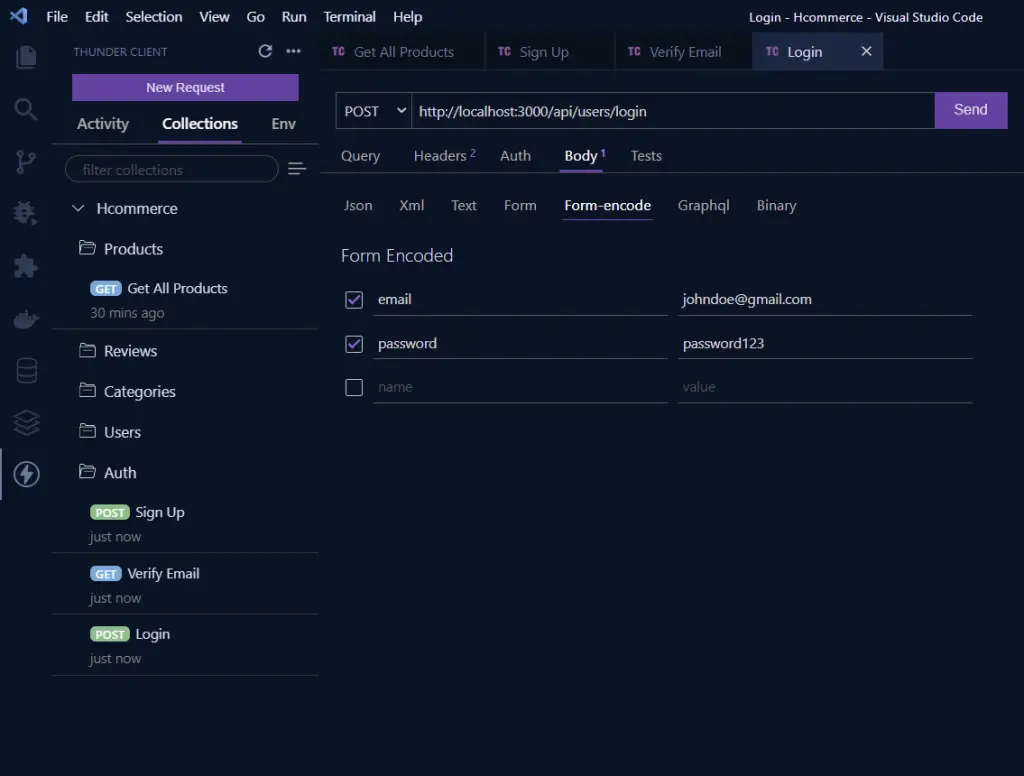
Enter the email and password you used to create the account then click on the Send button and you should see three cookies in the cookies tab and a JSON response containing an access token.
You may have already realized that some parts of the URL in each request look the same and since we are programmers it doesn’t make sense to be repeating them in every request.
Thunder Client gives us the luxury to store values in variables and then reference them in Collections, Scriptless Testing, and Environment.
VS Code Thunder Client: Creating a Request Environment
Setting environment variables in Thunder Client is similar to how we set them in Postman.
To create a new Environment, click on the Env tab then click on the hamburger menu and select New Environment. Type the name and press enter.
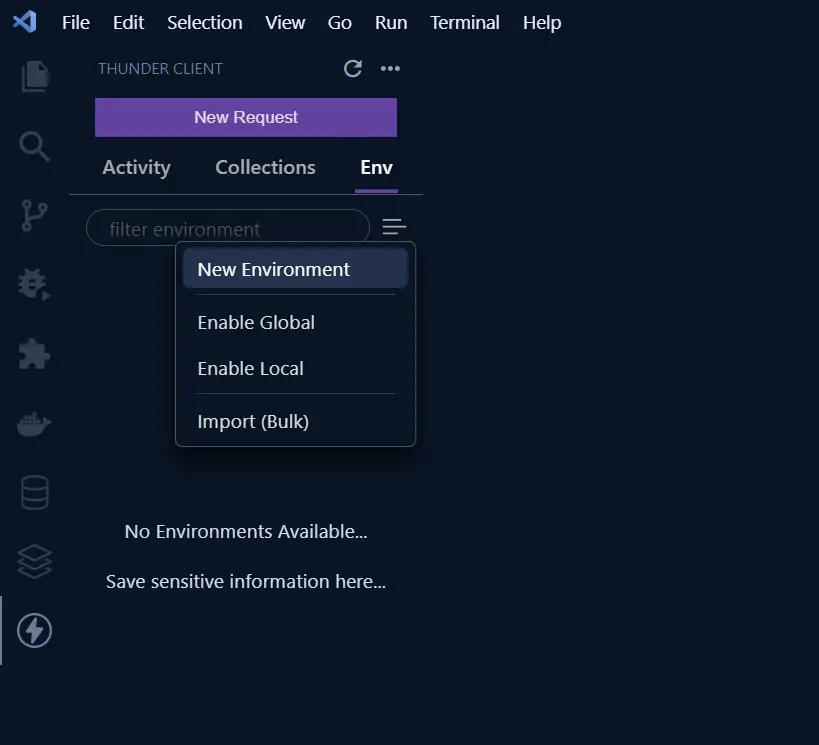
To be able to use an environment in tests, you need to set it to active. When a star appears beside the environment name then it means it’s active.
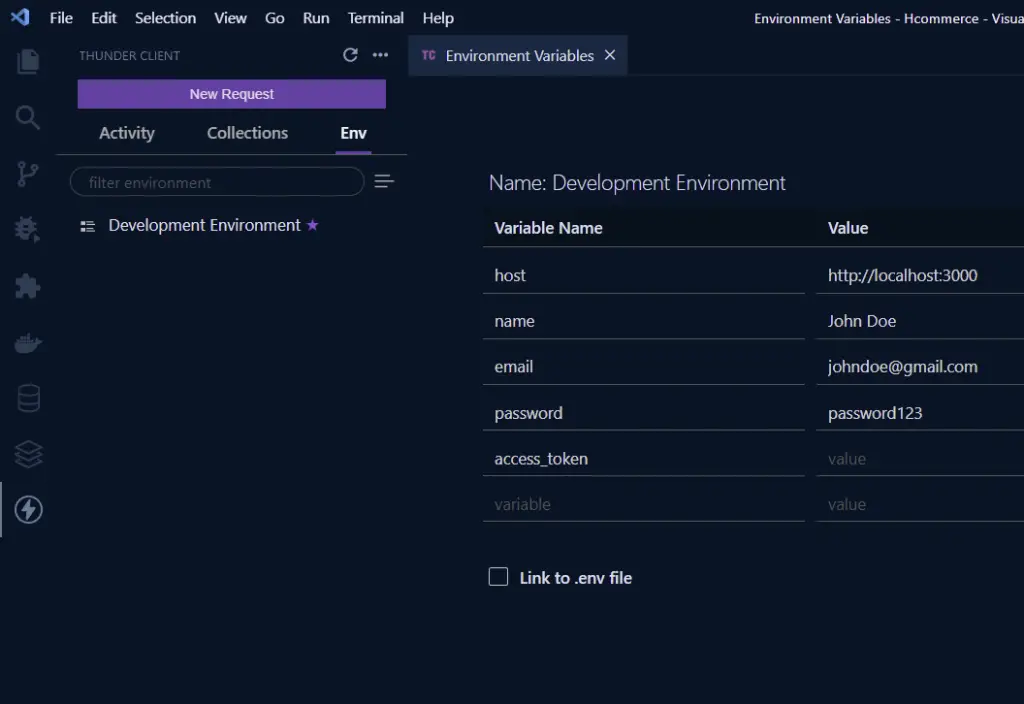
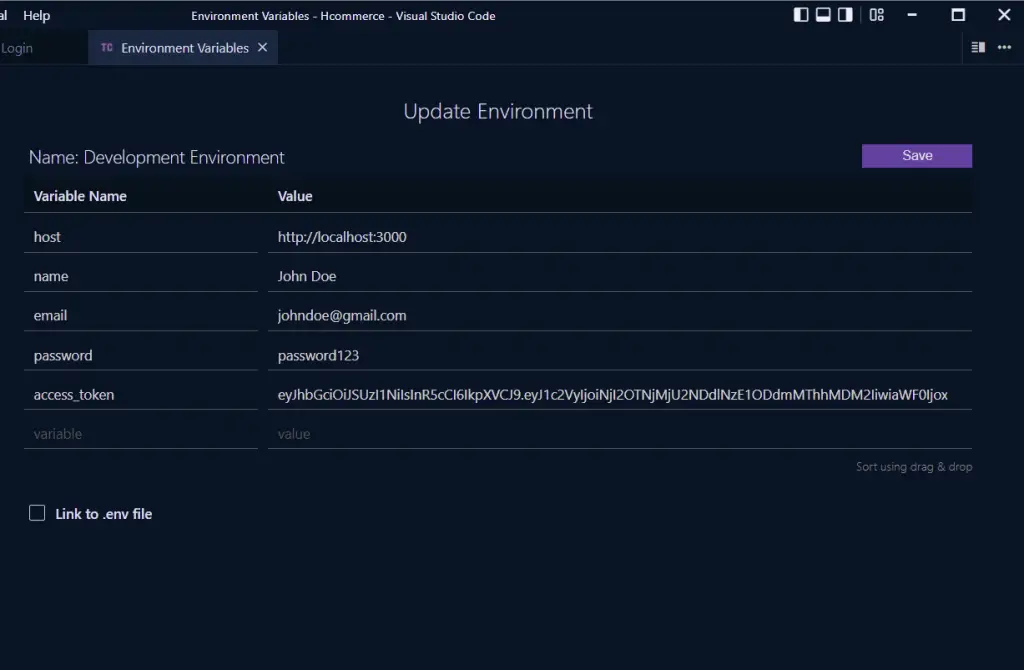
We will use the Environment name Development Environment as an example Environment in this article. Now set the following variables to store the e-commerce REST API Requests and parameters.
- host – The hostname of the server
- name – User’s name
- email – User’s email address
- password – User password
- access_token – variable to dynamically store the authentication access token.
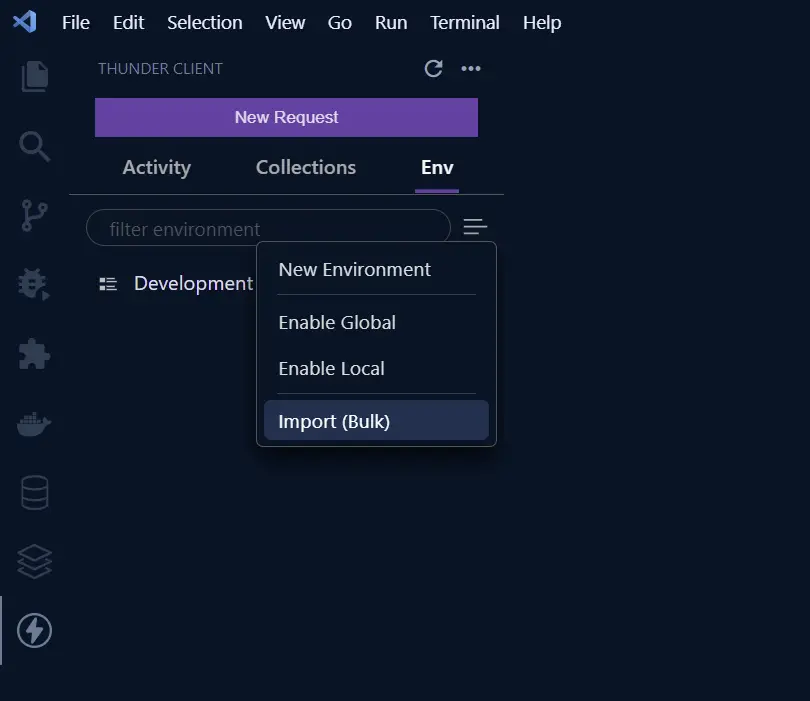
Thunder Client also allows you to import and export an environment in a JSON format.
To import an environment from Postman, export the environment as a JSON file in Postman, and on Thunder Client click on the hamburger menu under the Env tab and select the Import menu.
The variables in an environment can be set manually or dynamically set when a response is received.
To use an environment variable, you need to use this syntax {{variablename}} in the Request URL, Request Headers, Request Body, and also Tests.
When you use an environment variable that doesn’t exist, it will have a white font color but when it exists then the color will be green.
Open the Login Request and change the URL from http://localhost:3000/api/users/login to {{host}}/api/users/login.
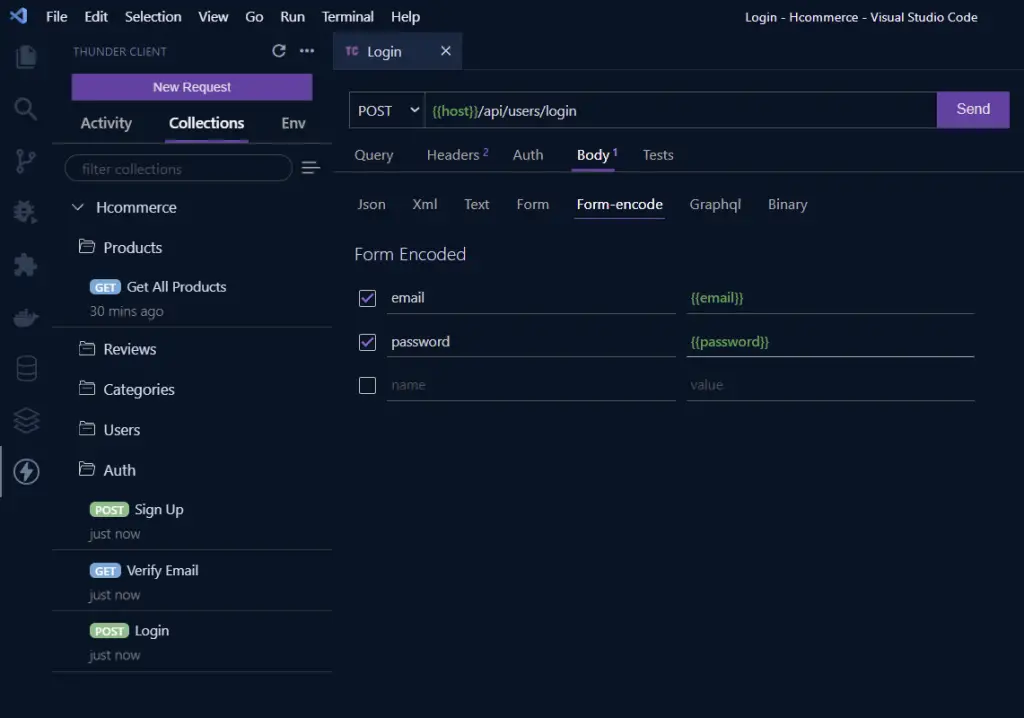
Also, update the field values in the Request Body. You can also change the body content to JSON because the server accepts both JSON and Form-encoded request body.
Click on the Send button to make the POST HTTP Request to the server. You should see a JSON response, Cookies, and Headers at the right panel.
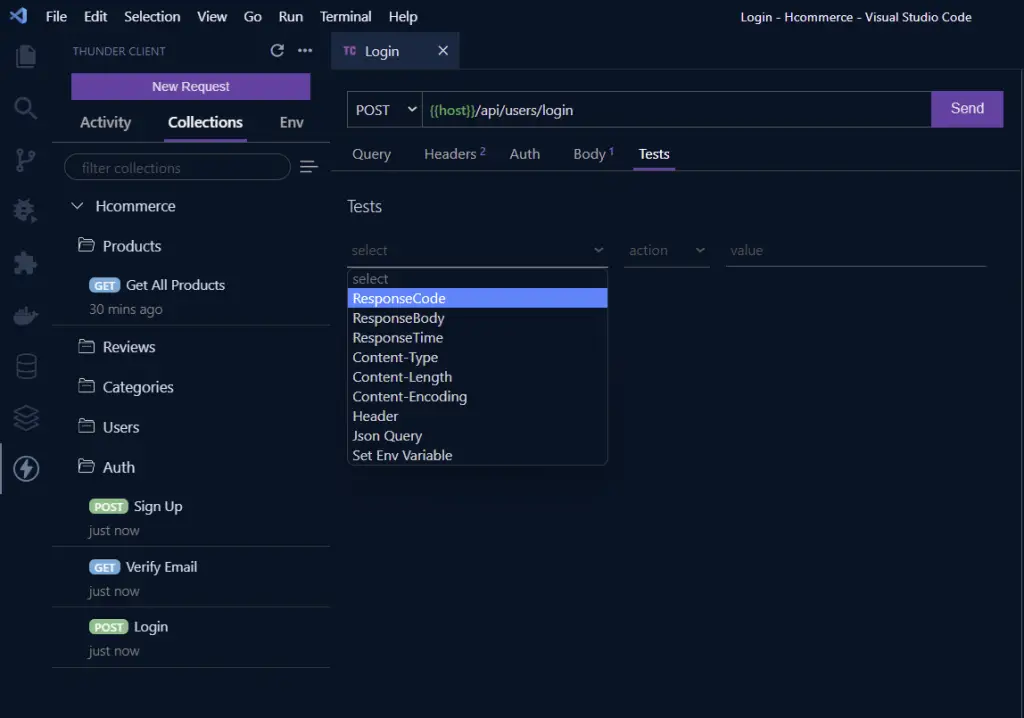
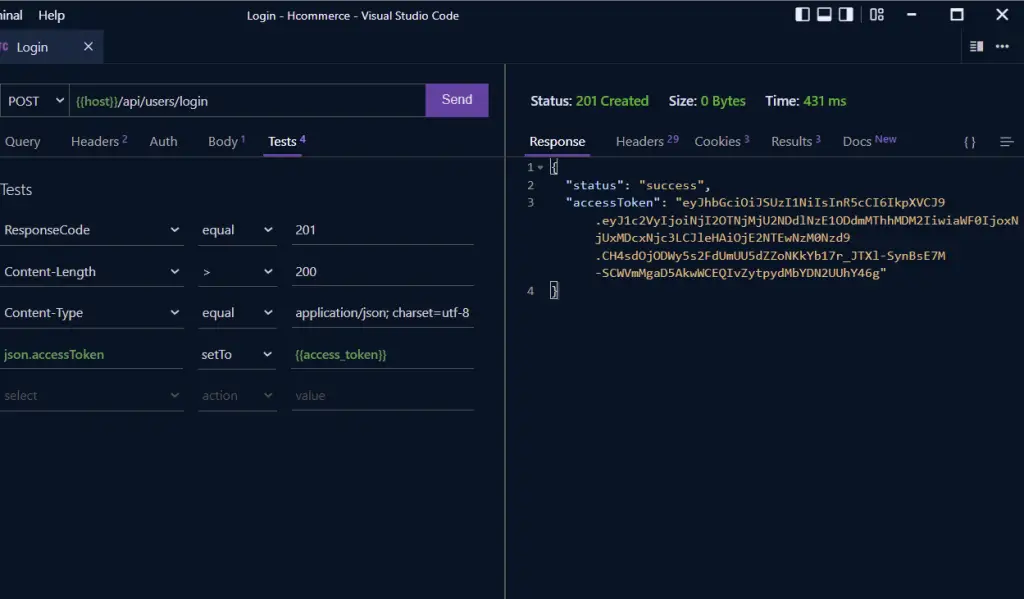
VS Code Thunder Client: Creating Test
In Postman you have to manually write test scripts but Thunder Client supports a scriptless feature that allows you to create tests by selecting a parameter in a dropdown menu.
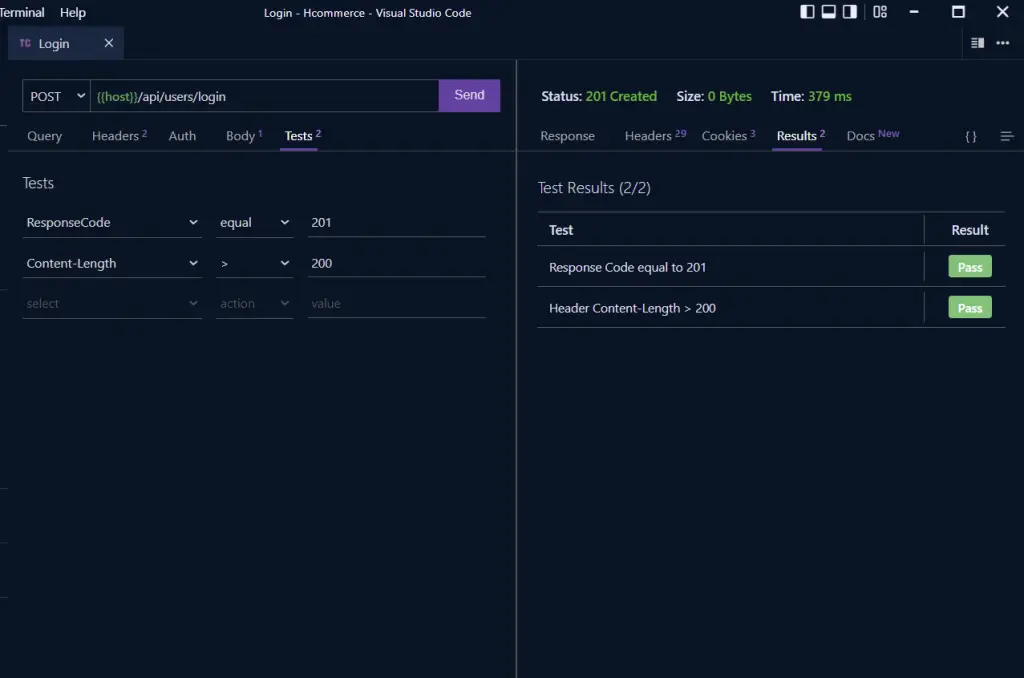
Now let’s create a test to check if the HTTP Response Code is 200 and the Content-Length is greater than 200.
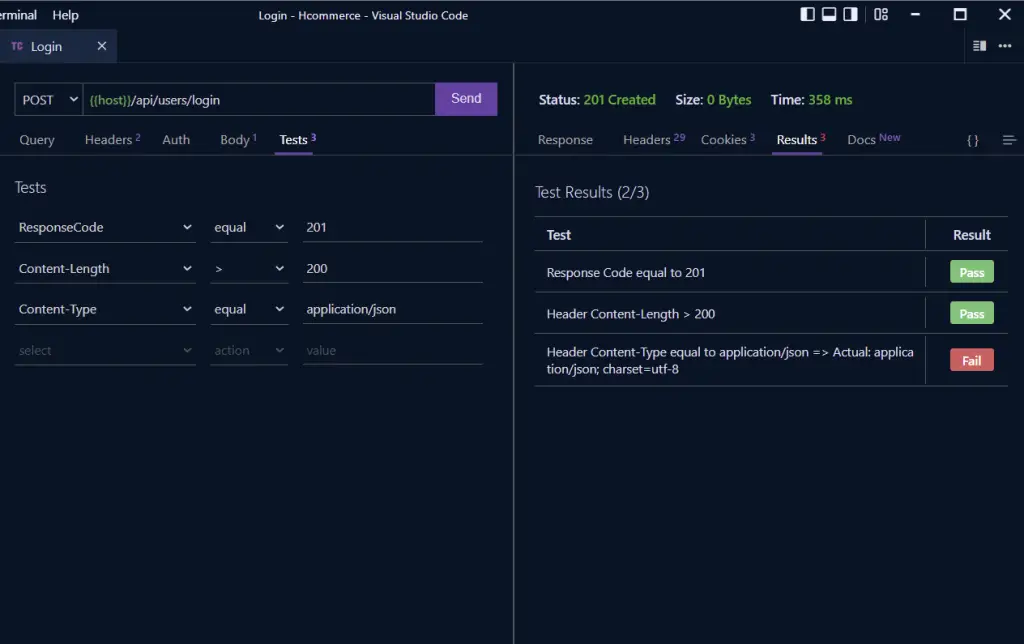
The example below has a failed test because the Content-Type is not exactly application/json but application/json; charset=utf-8 .
VS Code Thunder Client: Adding Environment Variables
Among all the test parameters, Thunder Client provides us with Set Env Variable which allows us to dynamically set the value of an environment variable.
To access protected routes on the server, you need to include the access token in the Authorization header or Cookie.
Let’s assume there wasn’t any cookie then we need a way to store the access token returned by the Login endpoint.
Don’t worry Thunder Client has our back. The extension lets you store values from an API response to an environment or global variable.
The Set Env Variable option lets you set the Header, Cookie, JSON Response, and Text Response data to a predefined variable.
You only need to provide the JSON path to the value then select setTo as the action type and input the variable name in double curly braces as the value.
- json.accessToken setTo {{access_token}}
Next, click on the Send button to make the request and you should see the variable value in the Env tab.
Now you can access the {{access_token}} value in the Authorization header.
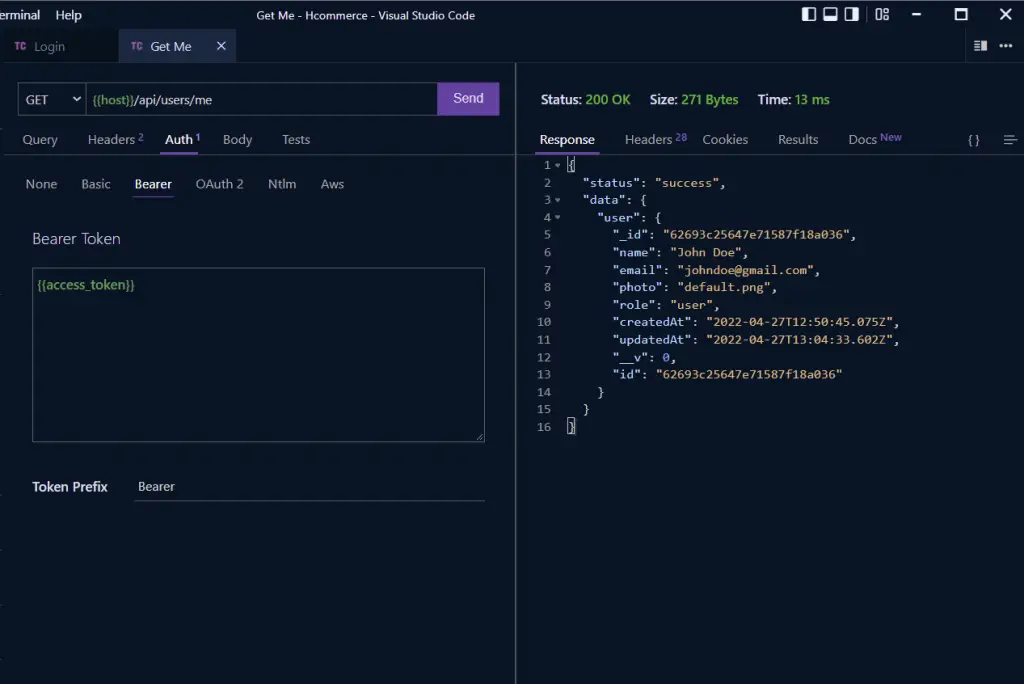
VS Code Thunder Client: Making a GET Request
Let’s make a GET request to a protected route with the stored access token.
We are going to make an HTTP GET request to the /me endpoint to get the currently logged-in user’s information.
Create a new GET Request in the Auth folder and select Bearer type under the Auth tab.
Type the access token reference variable in the Bearer Token field and execute the request to the currently logged-in user’s information.
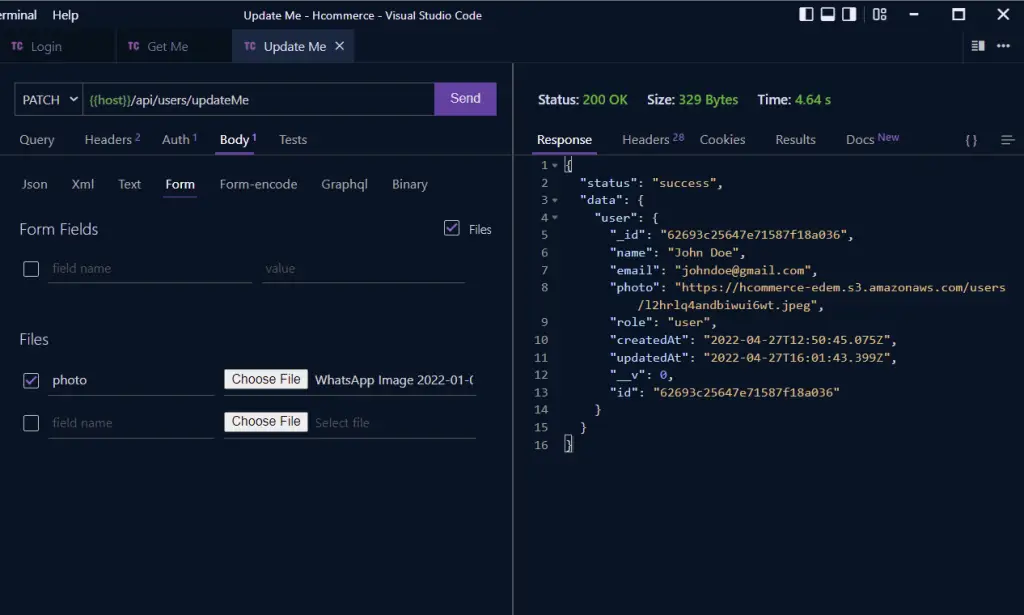
VS Code Thunder Client: Making a POST Request
Next, let’s create an HTTP Request that involves uploading a file to the server.
Create a new HTTP Request named Update Me and enter the URL {{host}}/api/users/updateMe , change the HTTP method to PATCH and provide the bearer token with {{access_token}}.
You can also avoid setting the access_token manually since Thunder Client will automatically send the cookies along with the request.
Now click on Form under the Body tab and check the Files checkbox. Under the Files section enter photo as the field name and click on the Choose File button to select an image from your computer.
Now execute the PATCH request to update the user’s profile image. This might take some time because the server has to process the image before uploading it to AWS S3.
After some seconds you should receive a success message with the updated user’s profile as an HTTP response.
VS Code Thunder Client: Exporting Environment and Request Collection
Similar to Postman, Thunder Client also allows us to export the HTTP Request Collection and Environment to a JSON file. The exported JSON file will contain the Collection structure, HTTP URLs, Request Body, Request Header, Tests, and so on.
You can do the following with the exported JSON file:
- Share the Collection JSON file with your teammates to create the same HTTP Request test environment.
- You can include the Collection JSON file in your source code so that anyone who downloads it can easily import it.
Also, clear sensitive data like tokens or credentials before exporting because everything will be included in the exported JSON file.
In my case am going to store the Collection and Environment JSON files within my source code. Before we do that let’s tell VS Code to prompt anyone who downloads and opens our project in VS Code to download the Thunder Client extension.
In the root directory, create a .vscode folder and within this folder create an extensions.json file and add the code snippets below.
{
  "recommendations": []
}
Next search for the Thunder Client extension in the extensions market and click on it. Click on the Settings icon and select the Copy Extension ID.
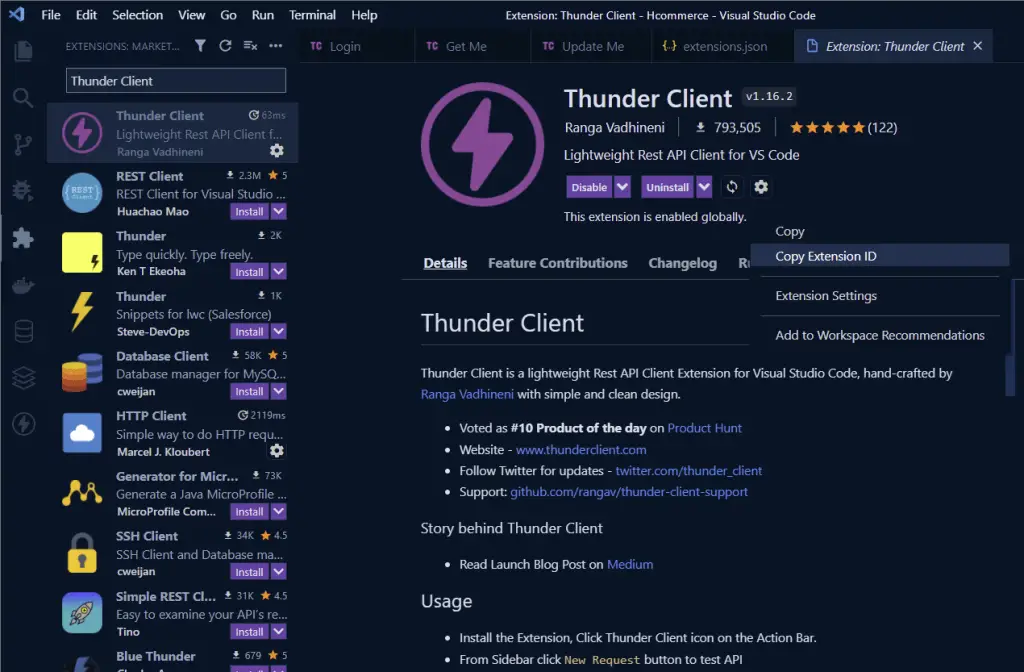
Go back to .vscode/extensions.json file and add the copied extension id to the recommendations array.
{
  "recommendations": ["rangav.vscode-thunder-client"]
}
With this configuration, VS Code will prompt anyone who opens the project to download the Thunder Client extension if they don’t have it installed.
Now, let’s export the Collection and Environment as JSON files into the root directory of our project.
VS Code Thunder Client: Importing Environment and Request Collection
You can now delete both your Collection and Environment then import the individual JSON files by following the GIF below.
Conclusion
The main purpose of the VS Code Thunder Extension is to help developers easily test their APIs without having to leave VS Code to Postman.
Postman is a complete GraphQL and REST API testing tool with a lot of features to help developers do advance API testing with ease.
Conversely, Thunder Client let developers do quick REST API or GraphQL tests easily in the editor without having to switch back and forth between an API testing tool and the editor.