
In this comprehensive guide, you will learn how to use Prisma ORM in a Deno project. To demonstrate how Prisma can be used in a Deno project, we will create a Todo CRUD RESTful API that runs on an Oak middleware framework.
More practice:
- How to Setup and Use MongoDB with Deno
- How to Set up Deno RESTful CRUD Project with MongoDB
- Authentication with Bcrypt, JWT, and Cookies in Deno
- Complete Deno CRUD RESTful API with MongoDB
Prerequisites
While this article is designed to be beginner friendly, these are some prerequisites
- Basic knowledge of TypeScript.
- Some knowledge of the Oak middleware framework will be beneficial
- A free Prisma Data Platform account. The Prisma data platform provides a Data Proxy feature that will enable us to connect to the database and manage the data with Prisma.
- Some understanding of RESTful APIs
- You should have the latest version of Deno installed. If you already have Deno installed, run
deno upgradeto upgrade to the latest version. - You should have a SQL or NoSQL database hosted in the cloud. In this project, I will be using MongoDB Atlas to spin up a cloud MongoDB database.
- You should install the Deno VS Code extension.
Run the Deno Project Locally
- Download or clone the source code from https://github.com/wpcodevo/deno-todo-api
- Open the integrated terminal in your IDE and run
yarn installoryarnto install all the necessary dependencies. - Remove the Git origin, create a new repository on GitHub, add the origin to the project, and push the source code to your GitHub account.
- Create a Prisma Prisma Data Platform account, add the Project to the Prisma Cloud, copy the generated Data Proxy URL and add it to the .env file as
DATABASE_URL. - Start the Deno Oak HTTP server by running
deno run -A src/server.ts. - Open an API testing software or visit
http://localhost:8000to test the Deno API endpoints.
Step 1 – Setup the Deno Project
First things first, navigate to the location where you want the project source code to reside and create a new folder. You can name the folder deno_prisma . After that, open the newly-created project folder with an IDE or text editor.
Now that we have the project opened with an IDE, let’s add all the dependencies needed for the project. To do that, create a src/deps.ts file and add the following URL paths.
export {
  Application,
  helpers,
  Router,
} from "https://deno.land/x/oak@v11.1.0/mod.ts";
export type {
  Context,
  RouterContext,
} from "https://deno.land/x/oak@v11.1.0/mod.ts";
export { z } from "https://deno.land/x/zod@v3.19.1/mod.ts";
export { config as dotenvConfig } from "https://deno.land/x/dotenv@v3.2.0/mod.ts";
oak– A middleware framework for Deno’s native HTTP server.dotenv– Loads environment variables from a configuration file.zod– A schema validation library.
If you are using VS Code for this project, create a .vscode/settings.json file and add the following configurations. This will explicitly tell VS Code to enable Deno in the project.
.vscode/settings.json
{
  "deno.enable": true,
  "deno.unstable": true
}
We are now ready to set up the Deno HTTP server. Create a src/server.ts file and add the following code snippets.
src/server.ts
import { Application, Router } from "./deps.ts";
import type { RouterContext } from "./deps.ts";

const app = new Application();

const router = new Router(); // Create router

// Middleware Logger
app.use(async (ctx, next) => {
  await next();
  const rt = ctx.response.headers.get("X-Response-Time");
  console.log(`${ctx.request.method} ${ctx.request.url} - ${rt}`);
});

// Test the API
router.get<string>("/api/healthchecker", (ctx: RouterContext<string>) => {
  ctx.response.body = {
    status: "success",
    message: "Welcome to Deno and Prisma",
  };
});

app.use(router.routes()); // Implement our router
app.use(router.allowedMethods()); // Allow router HTTP methods

app.addEventListener("listen", ({ port, secure }) => {
  console.log(
    `Server started on ${secure ? "https://" : "http://"}localhost:${port}`
  );
});

const port = 8000;
app.listen({ port });
Quite a lot is happening in the above, let’s break it down:
- First, we imported the dependencies we added to the
src/deps.tsfile and created an instance of the Application class. - Then, we created an instance of the Router class, added a middleware logger function and a health checker route to the middleware pipeline, registered the routes, and used an event listener to log a message to the console when the server starts.
- Finally, we called the
.listen()method to start the server and process requests with the registered middleware.
If you have a Node.js background, you may be familiar with Nodemon which restarts the Node.js server upon every file change. In Deno, we have the Denon package which can also hot-reload the server.
Install the Denon package globally with this command:
deno install -qAf --unstable https://deno.land/x/denon/denon.ts
With the Denon package installed, start the Oak HTTP server by running:
denon run --allow-env --allow-net --allow-read --allow-write src/server.ts
Alternatively, you can use the default Deno CLI to start the HTTP server if you are not interested in restarting the server after saving a file. By default, Deno takes security very seriously so we had to specify the permission flags.
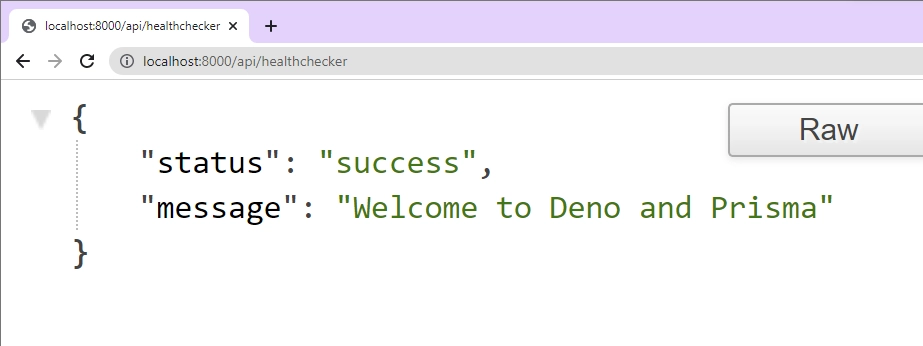
With that out of the way, open a new tab in your browser and visit http://localhost:8000/api/healthchecker to see the JSON object sent by the Deno web server.
Step 2 – Setup Prisma in Deno
In this step, you will learn how to use Data Proxy to connect to a cloud database and manage the data with Prisma. By using the Data Proxy, you can seamlessly scale up the Deno project while maintaining the database performance.
Initialize Prisma
Let’s begin by initializing Prisma in the project. To do that, open the integrated terminal in your IDE and run this command.
deno run -A --unstable npm:prisma init
The above command will generate a prisma/schema.prisma file and a .env file that has the database connection URL. Open the Prisma schema file and add the following schema:
prisma/schema.prisma
generator client {
  provider        = "prisma-client-js"
  previewFeatures = ["deno"]
  output          = "../generated/client"
}

datasource db {
  provider = "mongodb"
  url      = env("DATABASE_URL")
}

model Todo {
  id        String   @id @default(auto()) @map("_id") @db.ObjectId
  // id Int @id @default(autoincrement())
  title     String   @unique
  content   String
  category  String
  published Boolean? @default(false)

  createdAt DateTime @default(now())
  updatedAt DateTime @updatedAt

  @@map(name: "todos")
}
At the time of writing this article, the support for Deno in Prisma Client is a preview feature. Therefore, you have to include the preview feature flag “deno” and define a custom output location for the Prisma Client.
This tutorial uses a MongoDB database, however, you can easily adjust the code to use any Prisma-supported database like PostgreSQL, MySQL, SQLite, etc. To do that, deploy a database online and proceed with the steps below.
Now initialize Git in the project, create a repository on GitHub, add the origin to the project, and push the project to GitHub.
Create a Database on MongoDB Atlas
In this section, you’ll need a MongoDB Atlas account. If you already have one, sign in with your credentials, or create an Atlas account.
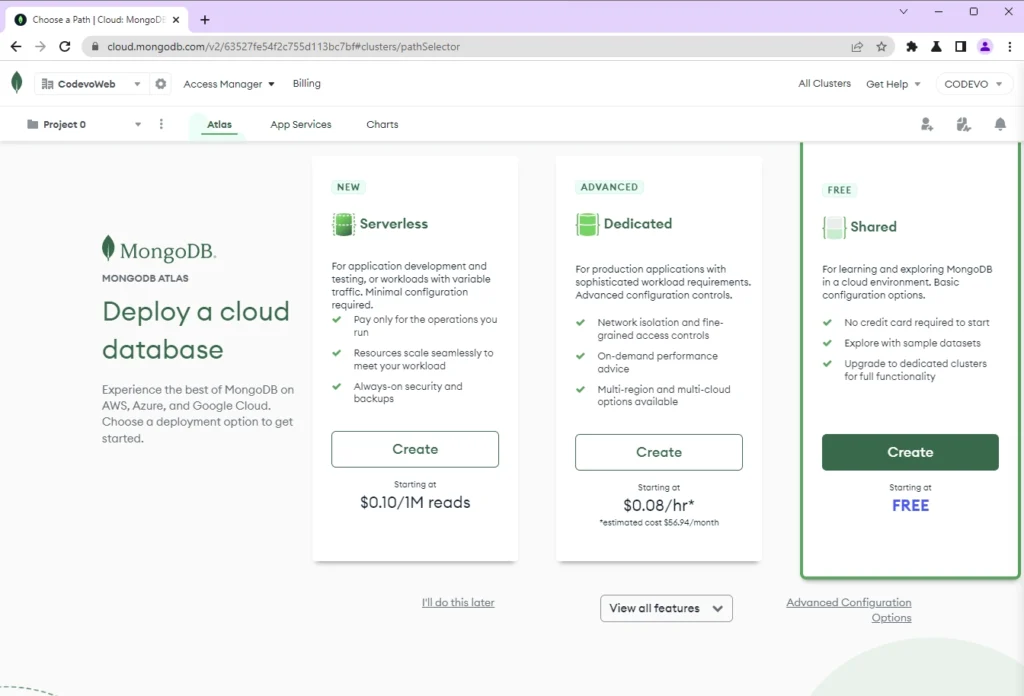
After signing into Atlas, you will be presented with a page that looks somewhat like this. Click on the “Build a Database” button to begin the database deployment process.

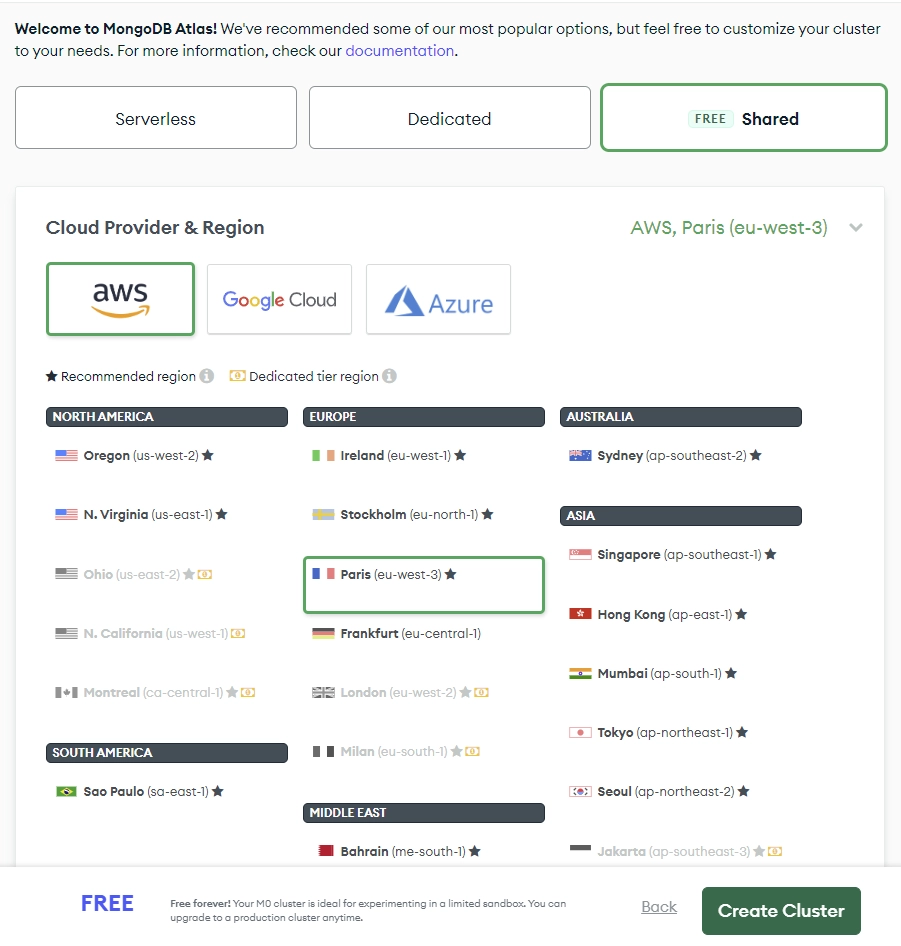
Depending on your use case, choose the plan that suits your project. However, for testing and learning purposes, I will select the “FREE PLAN“.
Next, choose the data center close to your country and click on the “Create Cluster” button. Feel free to modify some of the default settings.
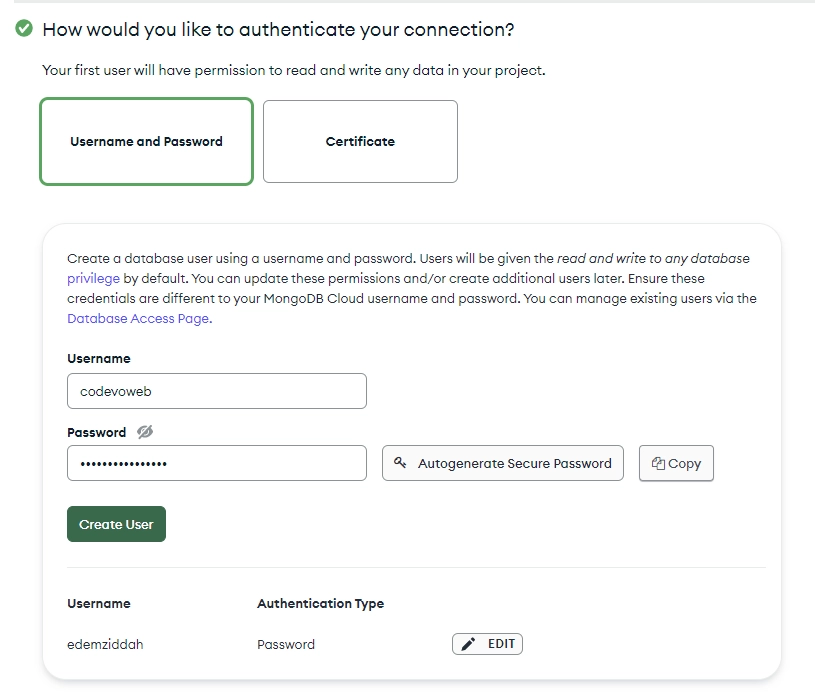
After MongoDB has finished creating the Cluster, you will be prompted to add a database user. Alternatively, you can access the database user screen by clicking the “Database Access” menu at the left sidebar.
Fill out the username and password. Add the credentials to a text file that you can easily access. Later, we will use the credentials to populate the placeholders in the connection URL.
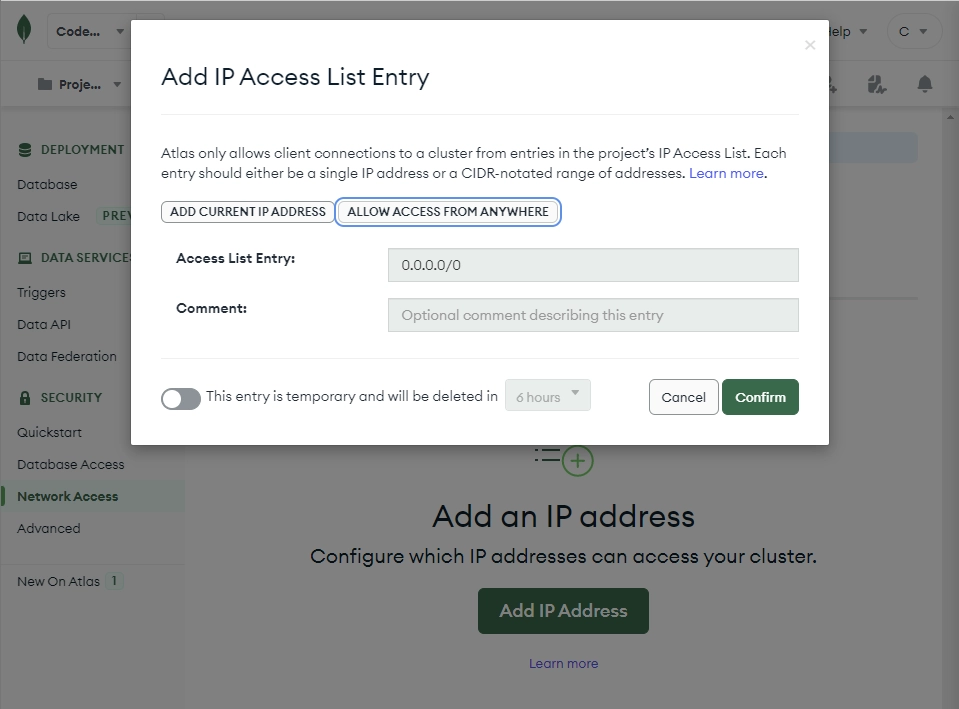
The next step is to whitelist your IP address before you can access the database. To do that, go to SECURITY > Network Access and click on the Add IP Address button.
Add your IP address to be granted access to the MongoDB cluster. Since my IP changes frequently, I will use the “ALLOW ACCESS FROM ANYWHERE” option and click on the Confirm button to save the changes.
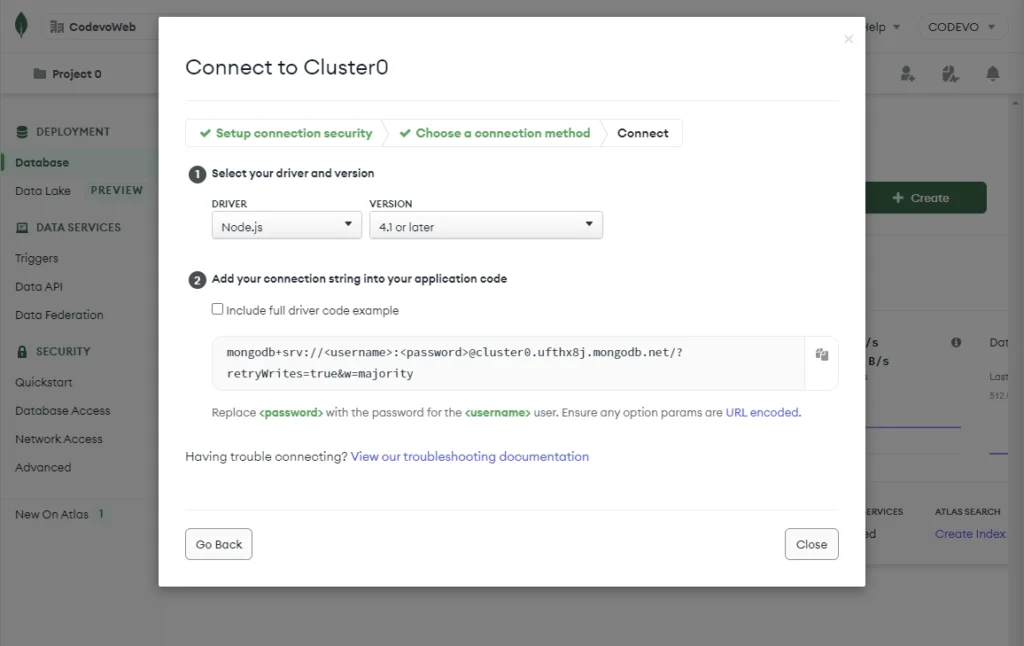
Now let’s get the database connection string. To do this, click on Database under the DEPLOYMENT tab to display the cluster. On the cluster, click on the “Connect” button and select “Connect your application“.
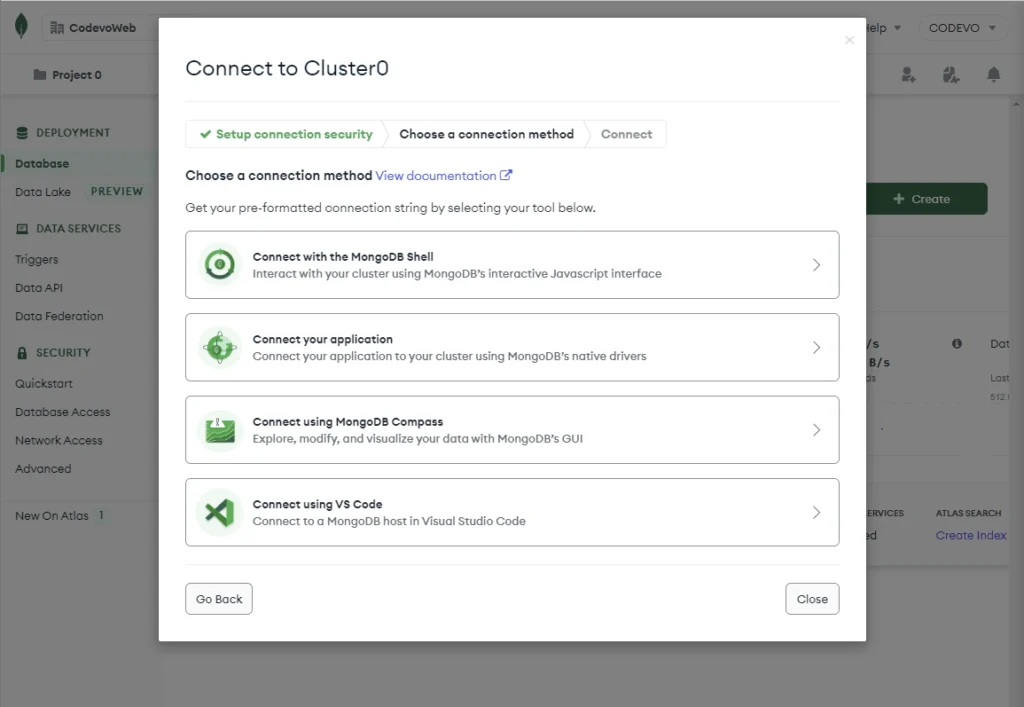
Copy the database connection string and add it to a text file. Later, we will use the database connection URL to generate the Prisma Data Proxy URL.
Add the Project to the Prisma Data Platform
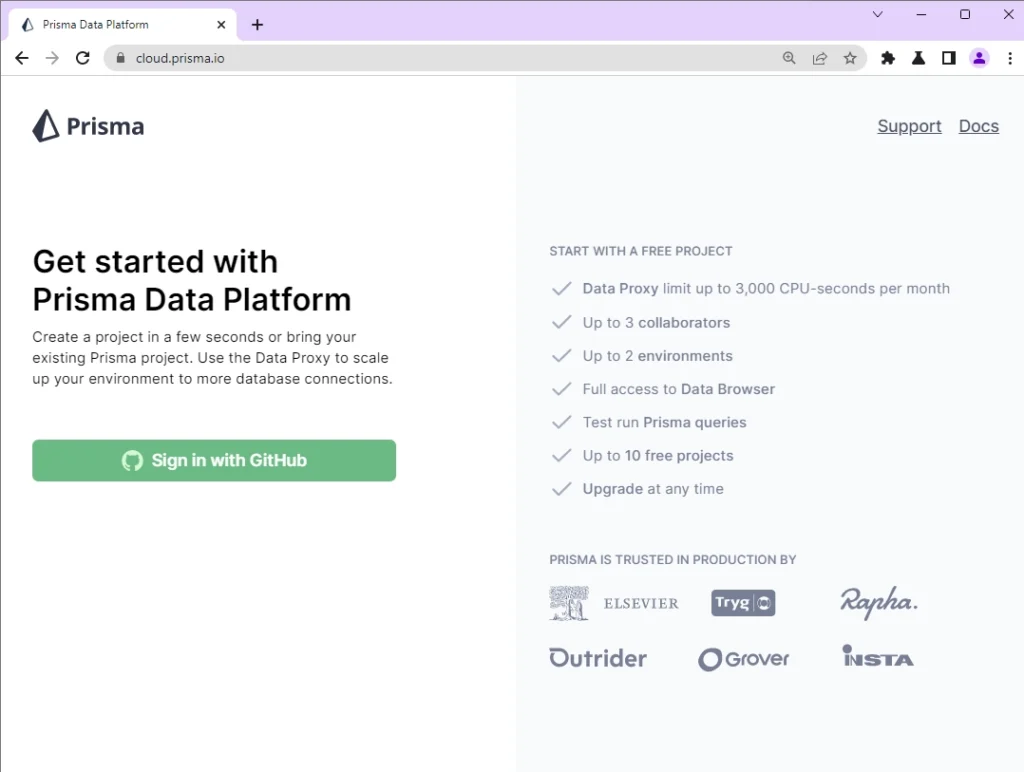
We are now ready to obtain the Data Proxy credentials. Navigate to https://cloud.prisma.io/ and sign in with your GitHub account.
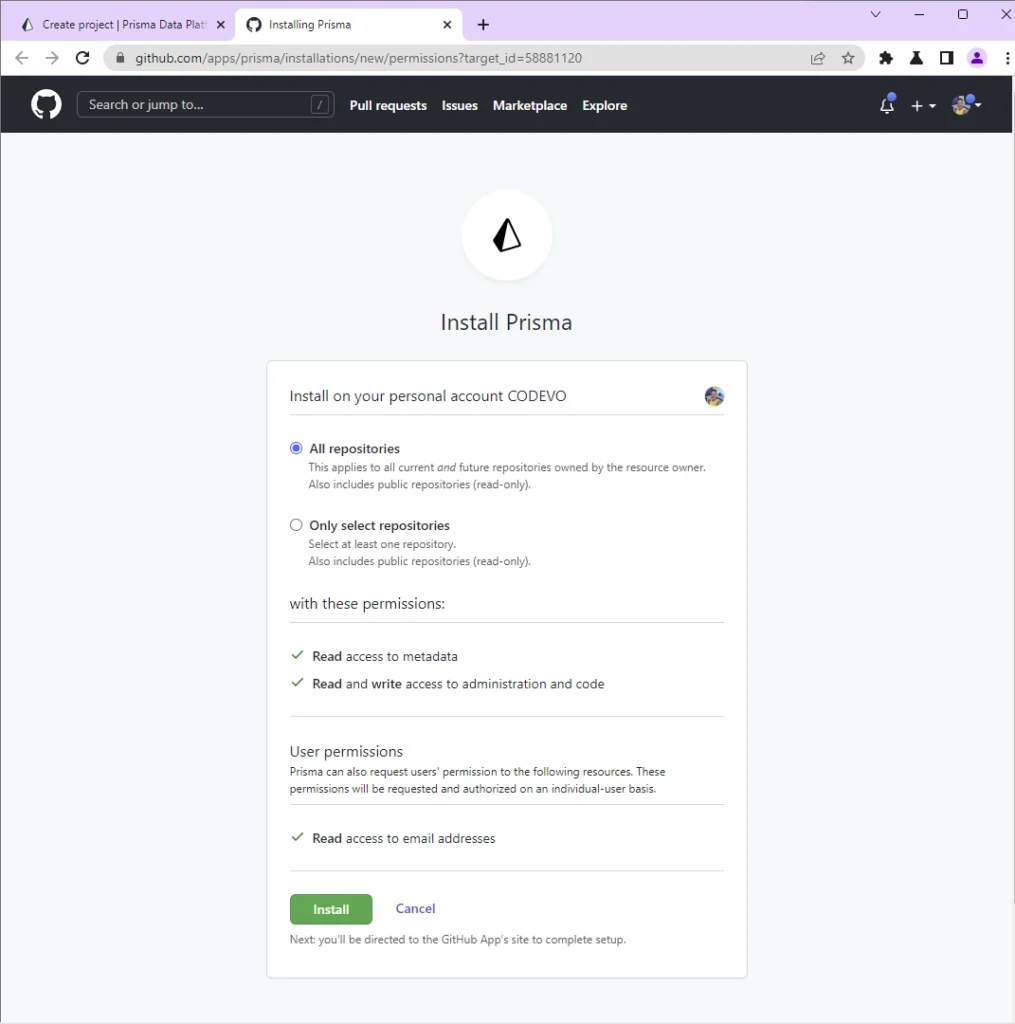
After your Prisma Data Platform account has been created, you will be prompted to install Prisma on your GitHub account. Click on the Install button.
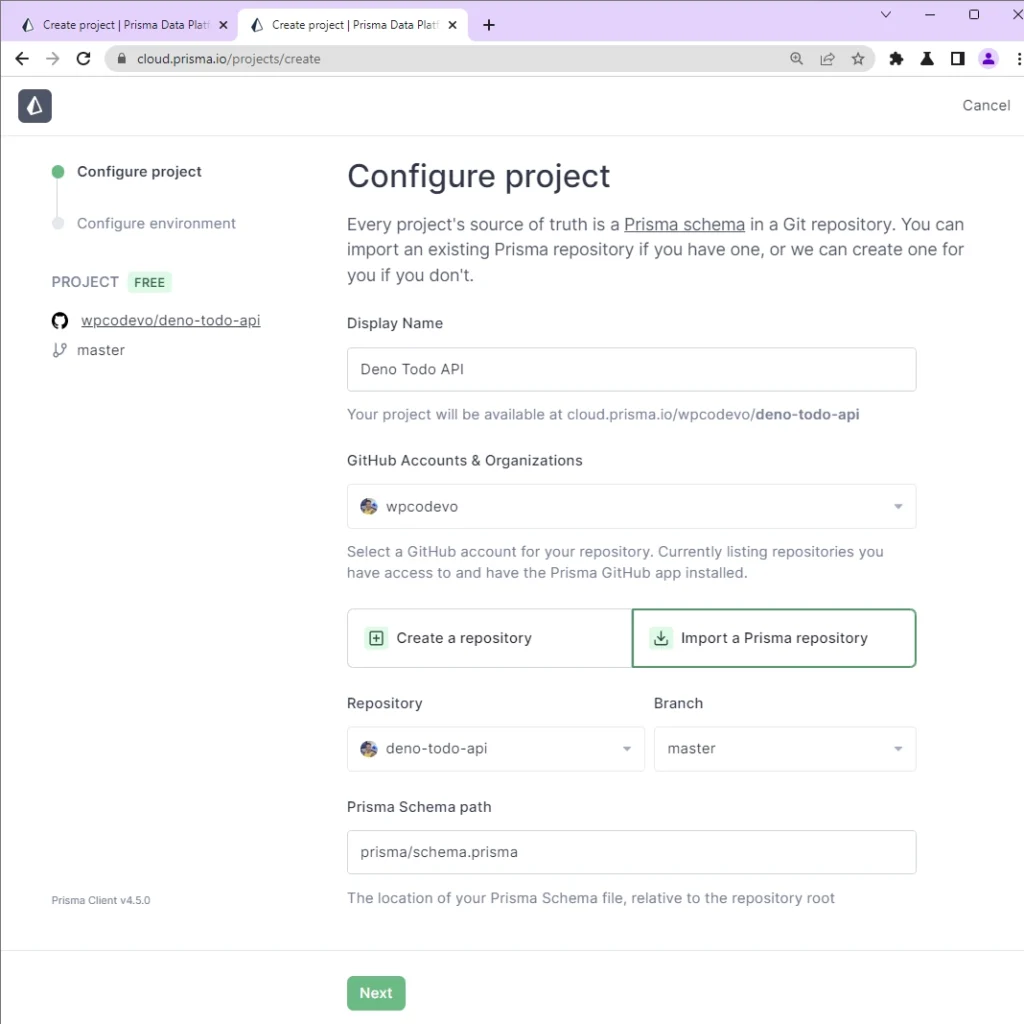
Once the installation is complete, you will be redirected to the Prisma cloud project creation page. Alternatively, you can access the same page by clicking the New Project button on https://cloud.prisma.io/projects.
Enter a display name, select the Import a Prisma repository option, choose the Deno project repository, and click on the Next button.
Get the MongoDB connection URL from where you stored it, modify the URL to have the database name, and populate the placeholders with your user credentials.
mongodb+srv://<username>:<password>@cluster0.ufthx8j.mongodb.net/<database_name>?retryWrites=true&w=majority<username>– is the MongoDB database username<password>– is the MongoDB database password<database_name>– is the MongoDB database name. Note: You can use any name for the database.
This is what my connection string looks like:
mongodb+srv://codevoweb:mypassword@cluster0.ufthx8j.mongodb.net/deno_prisma?retryWrites=true&w=majorityNow add the modified MongoDB database URL to the Connection string input field and click on the Create Project button.
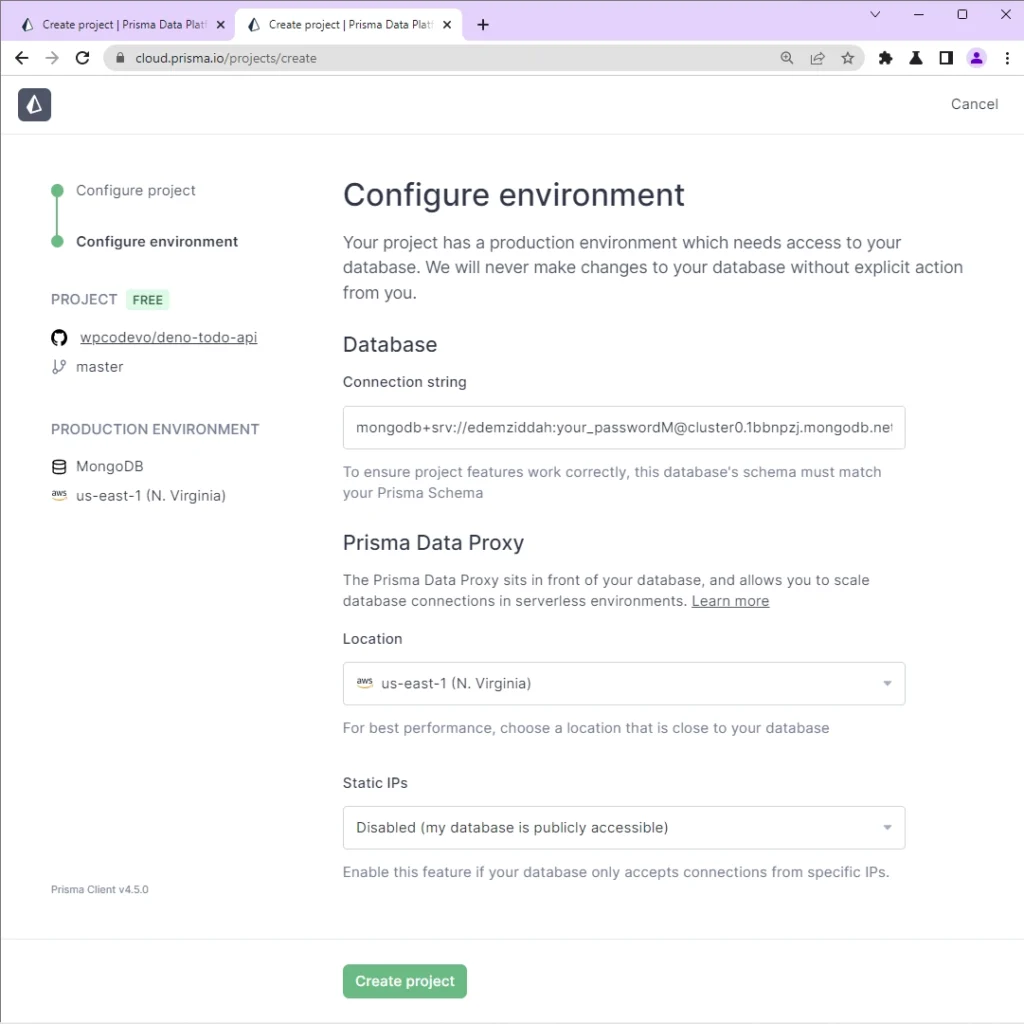
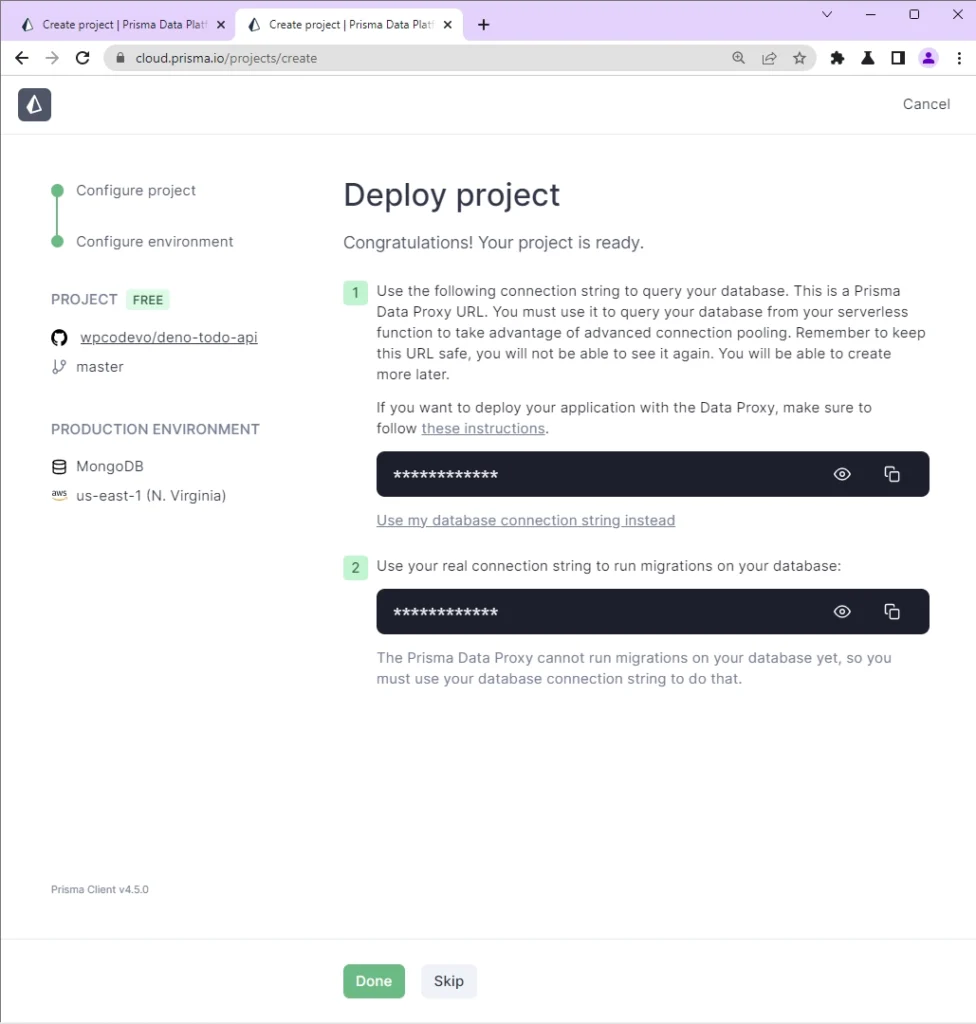
After the project has been created, replace the value of the DATABASE_URL with the Prisma Data Proxy URL in the .env file and click on the Done button.
The Data Proxy URL starts with
prisma://
Generate the Prisma Client for Data Proxy
Now that you’ve obtained the Data Proxy URL, let’s generate a Prisma Client that connects through the Data Proxy via HTTP.
Run this command to generate the Prisma Client:
deno run -A --unstable npm:prisma generate --data-proxy
Step 3 – Create the Validation Schemas
Before getting into the API implementation, let’s define Zod validation schemas that the Oak middleware framework will use to validate the incoming data.
To do that, create a src/todo.schema.ts file and add the following schemas:
src/todo.schema.ts
import { z } from "./deps.ts";

export const createTodoSchema = z.object({
  body: z.object({
    title: z.string({
      required_error: "Title is required",
    }),
    content: z.string({
      required_error: "Content is required",
    }),
    category: z.string({
      required_error: "Category is required",
    }),
    published: z.boolean().optional(),
  }),
});

const params = {
  params: z.object({
    todoId: z.string(),
  }),
};

export const getTodoSchema = z.object({
  ...params,
});

export const updateTodoSchema = z.object({
  ...params,
  body: z
    .object({
      title: z.string(),
      content: z.string(),
      category: z.string(),
      published: z.boolean(),
    })
    .partial(),
});

export const deleteTodoSchema = z.object({
  ...params,
});

export type CreateTodoInput = z.TypeOf<typeof createTodoSchema>["body"];
export type GetTodoInput = z.TypeOf<typeof getTodoSchema>["params"];
export type UpdateTodoInput = z.TypeOf<typeof updateTodoSchema>;
export type DeleteTodoInput = z.TypeOf<typeof deleteTodoSchema>["params"];
To validate the incoming payload, we need to create a middleware that will parse and validate the request body against the rules defined in the schema.
src/validate.ts
import { z, RouterContext, helpers } from "./deps.ts";

const validate =
  (schema: z.AnyZodObject) =>
  async (ctx: RouterContext<string>, next: () => any): Promise<void> => {
    try {
      schema.parse({
        params: ctx.params,
        query: helpers.getQuery(ctx),
        body: await ctx.request.body().value,
      });

      await next();
    } catch (err) {
      if (err instanceof z.ZodError) {
        ctx.response.status = 400;
        ctx.response.body = {
          status: "fail",
          error: err.errors,
        };
        return;
      }
      await next();
    }
  };
export default validate;
Step 4 – Create the API Controllers
Now that we have the validation schemas defined, let’s create the API controllers that Oak will use to handle the CRUD operations against the database. To begin, create a src/todo.controller.ts file and add the following imports.
src/todo.controller.ts
import { Prisma } from "../generated/client/deno/edge.ts";
import type { RouterContext } from "./deps.ts";
import { prisma } from "./server.ts";
import type { CreateTodoInput, UpdateTodoInput } from "./todo.schema.ts";
Create Record Controller
Now we can finally start creating our first route function. This route function will be evoked by Oak to add the new record to the database when a POST request is made to the /api/todos endpoint.
src/todo.controller.ts
// [...] Create Record
const createTodoController = async ({
  request,
  response,
}: RouterContext<string>) => {
  try {
    const { title, category, content, published }: CreateTodoInput =
      await request.body().value;

    const todo = await prisma.todo.create({
      data: { title, content, category, published },
    });

    response.status = 201;
    response.body = {
      status: "success",
      todo,
    };
  } catch (error) {
    if (error instanceof Prisma.PrismaClientKnownRequestError) {
      if (error.code === "P2002") {
        response.status = 409;
        response.body = {
          status: "fail",
          message: "Todo with that title already exists",
        };
        return;
      }
    }
    response.status = 500;
    response.body = { status: "error", message: error.message };
    return;
  }
};
Let’s evaluate the above code. First, we extracted the JSON payload from the request with .body().value and typed it with the CreateTodoInput we exported from the schema file. Then, we called Prisma’s .create() method to add the new record to the database.
Because querying and mutating the database is asynchronous, we used a try...catch block to handle any possible error. Since we added a unique constraint on the title field, Prisma will return an error that has a P2002 code.
The P2002 code indicates that a record with that title already exists in the database and it makes a lot of sense to handle the duplicate violation error.
Update Record Controller
Now that we have a function to create records, let’s set up an update function to allow us to make changes to existing records. This function will be evoked by Oak when a PATCH request is delegated to the /api/todos/:todoId endpoint.
src/todo.controller.ts
// [...] Create Record

// [...] Update Record
const updateTodoController = async ({
  params,
  request,
  response,
}: RouterContext<string>) => {
  try {
    const payload: UpdateTodoInput["body"] = await request.body().value;

    const updatedTodo = await prisma.todo.update({
      where: { id: params.todoId },
      data: payload,
    });

    response.status = 200;
    response.body = {
      status: "success",
      todo: updatedTodo,
    };
  } catch (error) {
    if (error instanceof Prisma.PrismaClientKnownRequestError) {
      if (error.code === "P2025") {
        response.status = 404;
        response.body = {
          status: "fail",
          message: "No todo with that Id exists",
        };
        return;
      }
    }
    response.status = 500;
    response.body = { status: "error", message: error.message };
    return;
  }
};
This function accepts three arguments: params , request , and response . The params will hold the ID of the record to update and the request will hold the data to update.
After the JSON payload has been obtained from the request, Prisma’s .update() method will be called to update the record that matches the query in the database.
Get a Single Record Controller
Next, we will set up a function to retrieve a single record from the database. We’ll call this function findTodoController .
src/todo.controller.ts
// [...] Create Record

// [...] Update Record

// [...] Find a Single Record
const findTodoController = async ({
  params,
  response,
}: RouterContext<string>) => {
  try {
    const todo = await prisma.todo.findFirst({ where: { id: params.todoId } });

    if (!todo) {
      response.status = 404;
      response.body = {
        status: "success",
        message: "No todo with that Id exists",
      };
      return;
    }

    response.status = 200;
    response.body = {
      status: "success",
      todo,
    };
  } catch (error) {
    response.status = 500;
    response.body = { status: "error", message: error.message };
    return;
  }
};
This function will utilize Prisma’s .findFirst() method to retrieve a record that matches the query.
Get All Records Controller
Now let’s set up a route function to retrieve all the records from the database. This function will have a pagination feature to retrieve a selected number of records from the database.
src/todo.controller.ts
// [...] Create Record

// [...] Update Record

// [...] Find a Single Record

// [...] Find All Records
const findAllTodosController = async ({
  request,
  response,
}: RouterContext<string>) => {
  try {
    const page = request.url.searchParams.get("page");
    const limit = request.url.searchParams.get("limit");
    const intPage = page ? parseInt(page) : 1;
    const intLimit = limit ? parseInt(limit) : 10;
    const skip = (intPage - 1) * intLimit;

    const todos = await prisma.todo.findMany({ skip, take: intLimit });

    response.status = 200;
    response.body = {
      status: "success",
      results: todos.length,
      todos,
    };
  } catch (error) {
    response.status = 500;
    response.body = { status: "error", message: error.message };
    return;
  }
};
Delete Record Controller
This route function will be evoked by Oak a DELETE request is routed to the /api/todos/:todoId endpoint. This function will utilize Prisma’s .delete() method to remove the record that matches the query from the database.
src/todo.controller.ts
// [...] Create Record

// [...] Update Record

// [...] Find a Single Record

// [...] Find All Records

// [...] Delete Record
const deleteTodoController = async ({
  params,
  response,
}: RouterContext<string>) => {
  try {
    await prisma.todo.delete({ where: { id: params.todoId } });

    response.status = 204;
  } catch (error) {
    if (error instanceof Prisma.PrismaClientKnownRequestError) {
      if (error.code === "P2025") {
        response.status = 404;
        response.body = {
          status: "fail",
          message: "No todo with that Id exists",
        };
        return;
      }
    }
    response.status = 500;
    response.body = { status: "error", message: error.message };
    return;
  }
};
Complete API Controllers
src/todo.controller.ts
import { Prisma } from "../generated/client/deno/edge.ts";
import type { RouterContext } from "./deps.ts";
import { prisma } from "./server.ts";
import type { CreateTodoInput, UpdateTodoInput } from "./todo.schema.ts";

const createTodoController = async ({
  request,
  response,
}: RouterContext<string>) => {
  try {
    const { title, category, content, published }: CreateTodoInput =
      await request.body().value;

    const todo = await prisma.todo.create({
      data: { title, content, category, published },
    });

    response.status = 201;
    response.body = {
      status: "success",
      todo,
    };
  } catch (error) {
    if (error instanceof Prisma.PrismaClientKnownRequestError) {
      if (error.code === "P2002") {
        response.status = 409;
        response.body = {
          status: "fail",
          message: "Todo with that title already exists",
        };
        return;
      }
    }
    response.status = 500;
    response.body = { status: "error", message: error.message };
    return;
  }
};

const updateTodoController = async ({
  params,
  request,
  response,
}: RouterContext<string>) => {
  try {
    const payload: UpdateTodoInput["body"] = await request.body().value;

    const updatedTodo = await prisma.todo.update({
      where: { id: params.todoId },
      data: payload,
    });

    response.status = 200;
    response.body = {
      status: "success",
      todo: updatedTodo,
    };
  } catch (error) {
    if (error instanceof Prisma.PrismaClientKnownRequestError) {
      if (error.code === "P2025") {
        response.status = 404;
        response.body = {
          status: "fail",
          message: "No todo with that Id exists",
        };
        return;
      }
    }
    response.status = 500;
    response.body = { status: "error", message: error.message };
    return;
  }
};

const findTodoController = async ({
  params,
  response,
}: RouterContext<string>) => {
  try {
    const todo = await prisma.todo.findFirst({ where: { id: params.todoId } });

    if (!todo) {
      response.status = 404;
      response.body = {
        status: "success",
        message: "No todo with that Id exists",
      };
      return;
    }

    response.status = 200;
    response.body = {
      status: "success",
      todo,
    };
  } catch (error) {
    response.status = 500;
    response.body = { status: "error", message: error.message };
    return;
  }
};

const findAllTodosController = async ({
  request,
  response,
}: RouterContext<string>) => {
  try {
    const page = request.url.searchParams.get("page");
    const limit = request.url.searchParams.get("limit");
    const intPage = page ? parseInt(page) : 1;
    const intLimit = limit ? parseInt(limit) : 10;
    const skip = (intPage - 1) * intLimit;

    const todos = await prisma.todo.findMany({ skip, take: intLimit });

    response.status = 200;
    response.body = {
      status: "success",
      results: todos.length,
      todos,
    };
  } catch (error) {
    response.status = 500;
    response.body = { status: "error", message: error.message };
    return;
  }
};

const deleteTodoController = async ({
  params,
  response,
}: RouterContext<string>) => {
  try {
    await prisma.todo.delete({ where: { id: params.todoId } });

    response.status = 204;
  } catch (error) {
    if (error instanceof Prisma.PrismaClientKnownRequestError) {
      if (error.code === "P2025") {
        response.status = 404;
        response.body = {
          status: "fail",
          message: "No todo with that Id exists",
        };
        return;
      }
    }
    response.status = 500;
    response.body = { status: "error", message: error.message };
    return;
  }
};

export default {
  createTodoController,
  updateTodoController,
  findTodoController,
  findAllTodosController,
  deleteTodoController,
};
Step 5 – Create the API Routes
In this section, you’ll create an instance of the Router class, append all the CRUD API endpoints, add the API controllers to their corresponding routes, and export the router from the file. To do that, create a src/todo.routes.ts file and add the code below.
src/todo.routes.ts
import { Router } from "./deps.ts";
import todoController from "./todo.controller.ts";
import { createTodoSchema, updateTodoSchema } from "./todo.schema.ts";
import validate from "./validate.ts";

const router = new Router();

router.get<string>("/", todoController.findAllTodosController);
router.post<string>(
  "/",
  validate(createTodoSchema),
  todoController.createTodoController
);
router.patch<string>(
  "/:todoId",
  validate(updateTodoSchema),
  todoController.updateTodoController
);
router.get<string>("/:todoId", todoController.findTodoController);
router.delete<string>("/:todoId", todoController.deleteTodoController);

export default router;
Step 6 – Add the API Routes to the App
Congrats if you have made it this far. In this section, you will initialize the Prisma Client, add the API router to the middleware pipeline and start the HTTP server. Open the src/server.ts file and replace its content with the following code:
src/server.ts
import { dotenvConfig } from "./deps.ts";
dotenvConfig({ export: true, path: ".env" });
import { PrismaClient } from "../generated/client/deno/edge.ts";
import { Application, Router } from "./deps.ts";
import type { RouterContext } from "./deps.ts";
import todoRouter from "./todo.routes.ts";

const DATABASE_URL = Deno.env.get("DATABASE_URL") as unknown as string;
export const prisma = new PrismaClient({
  datasources: { db: { url: DATABASE_URL } },
});

const app = new Application();
const router = new Router();

// Logger
app.use(async (ctx, next) => {
  await next();
  const rt = ctx.response.headers.get("X-Response-Time");
  console.log(`${ctx.request.method} ${ctx.request.url} - ${rt}`);
});

router.get<string>("/api/healthchecker", (ctx: RouterContext<string>) => {
  ctx.response.body = {
    status: "success",
    message: "Welcome to Deno and Prisma",
  };
});

app.use(todoRouter.prefix("/api/todos/").routes());
app.use(router.routes());
app.use(router.allowedMethods());

app.addEventListener("listen", ({ port, secure }) => {
  console.log(
    `🚀 Server started on ${secure ? "https://" : "http://"}localhost:${port}`
  );
});

const port = 8000;
app.listen({ port });
Finally, start the Deno HTTP server by running the command below:
denon run --allow-env --allow-net --allow-read --allow-write src/server.ts
Step 7 – Test the API Endpoints
Now our web server should be listening on port 8000. To test the API endpoints, we can use Postman, Insomnia, or the Thunder Client extension in VS Code.
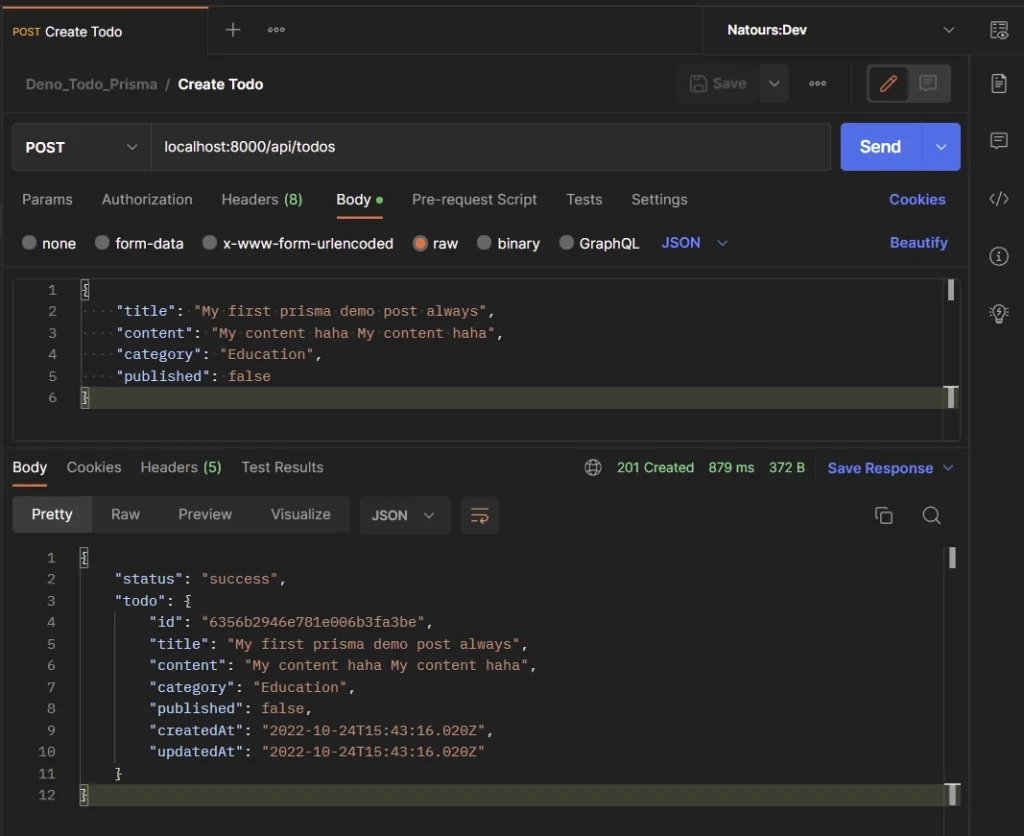
Create a New Record
To add a new record to the database, make a POST request with the JSON payload to the http://localhost:8000/api/todos endpoint.
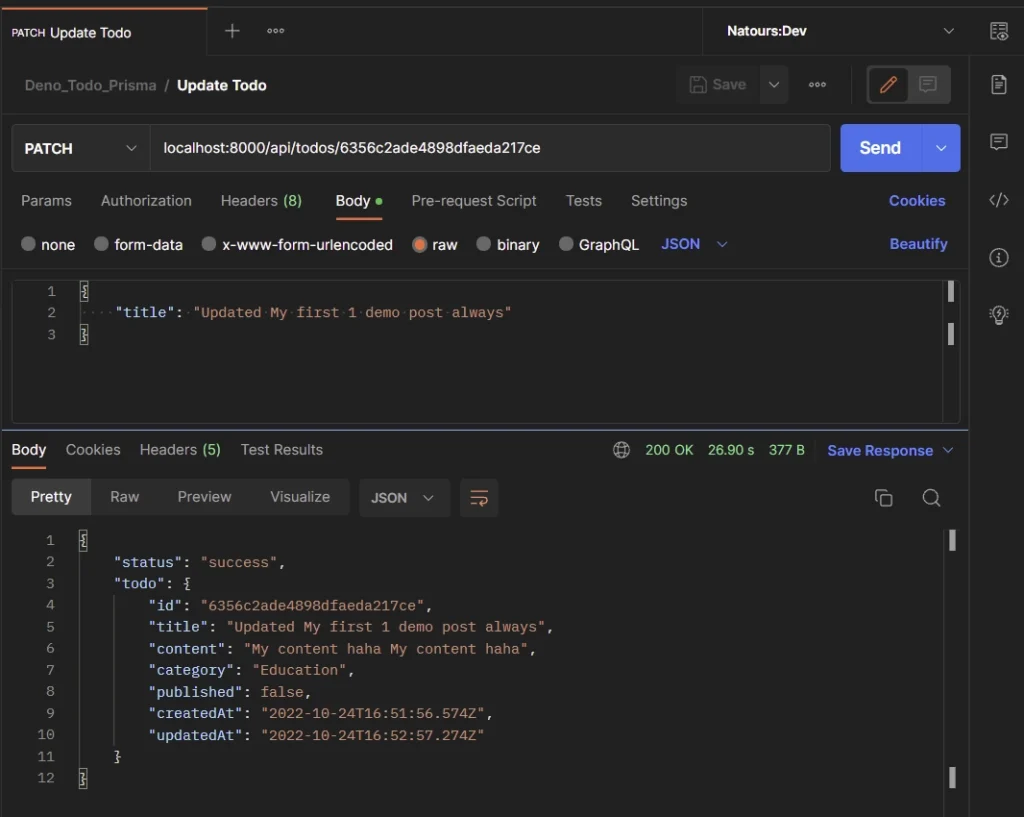
Update an Existing Record
To update an existing record, make a PATCH request with the new data to the http://localhost:8000/api/todos/:todoId endpoint.
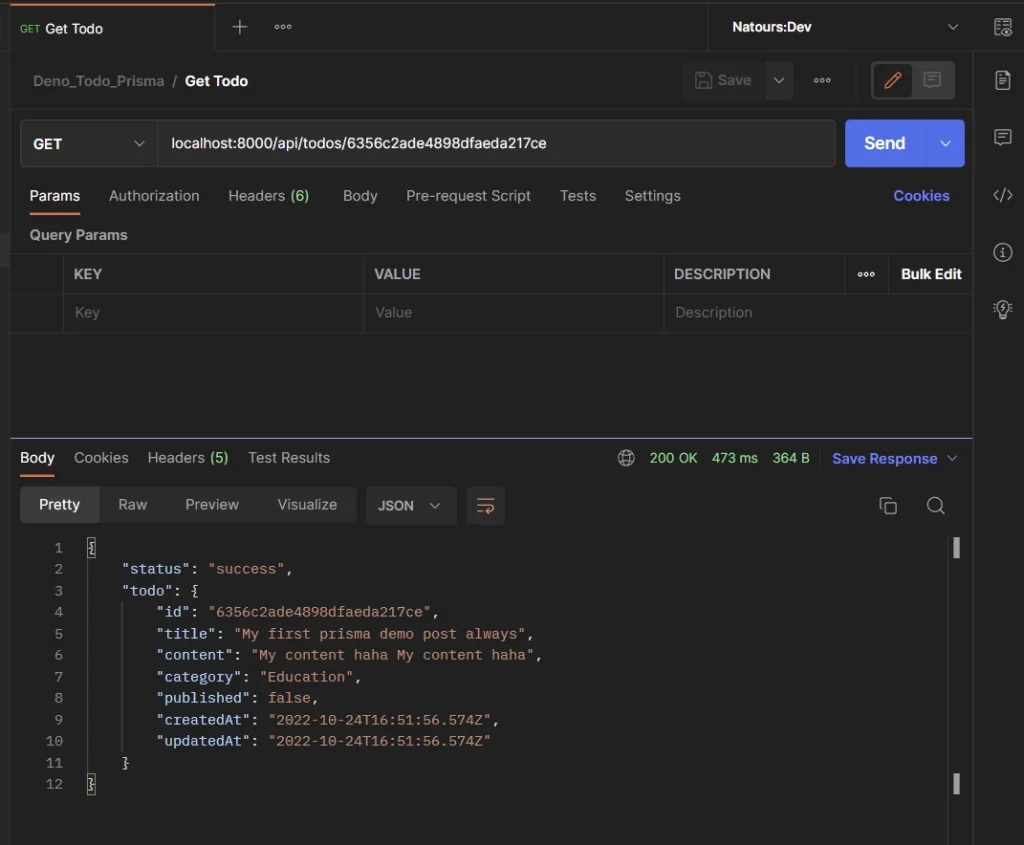
Retrieve a Single Record
To retrieve a single record from the database, make a GET request to the http://localhost:8000/api/todos/:todoId endpoint.
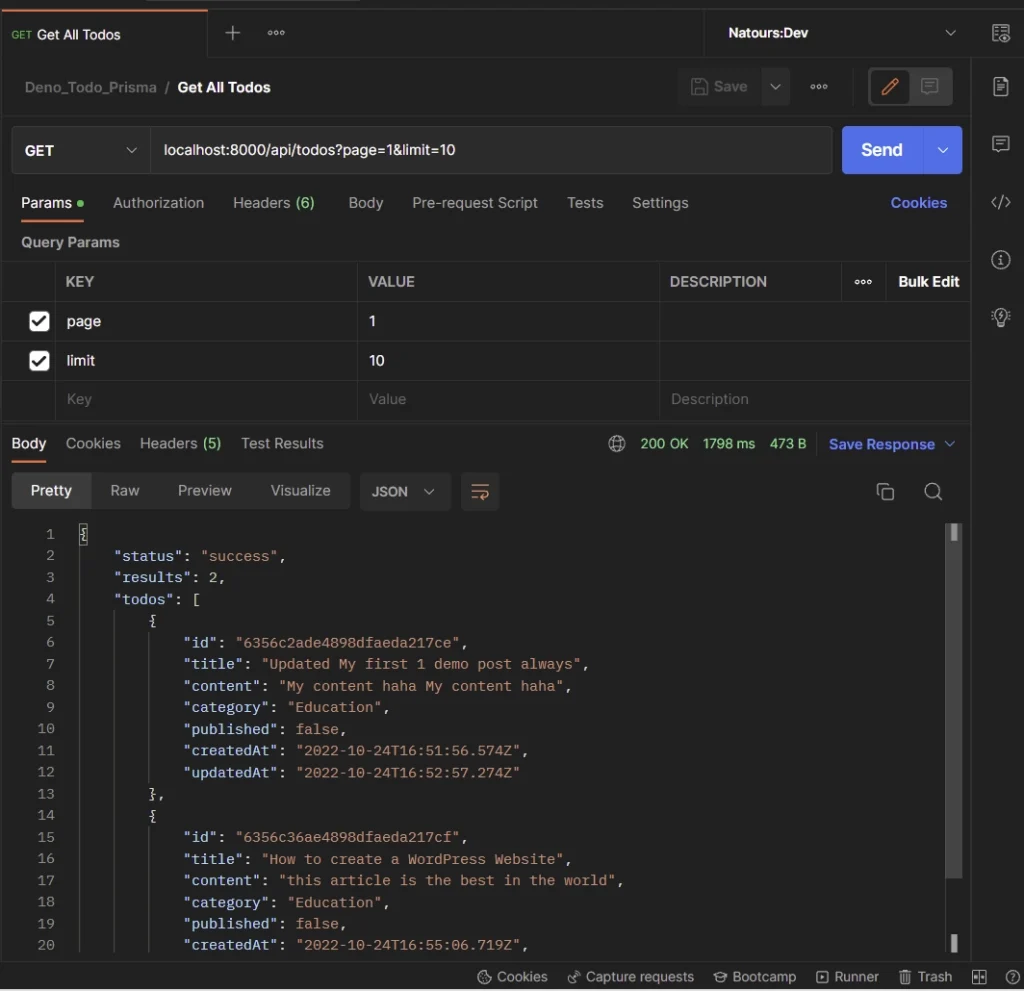
Retrieve all Records
To retrieve all the records in the database or a paginated list of them, make a GET request to the http://localhost:8000/api/todos?page=1&limit=10 endpoint.
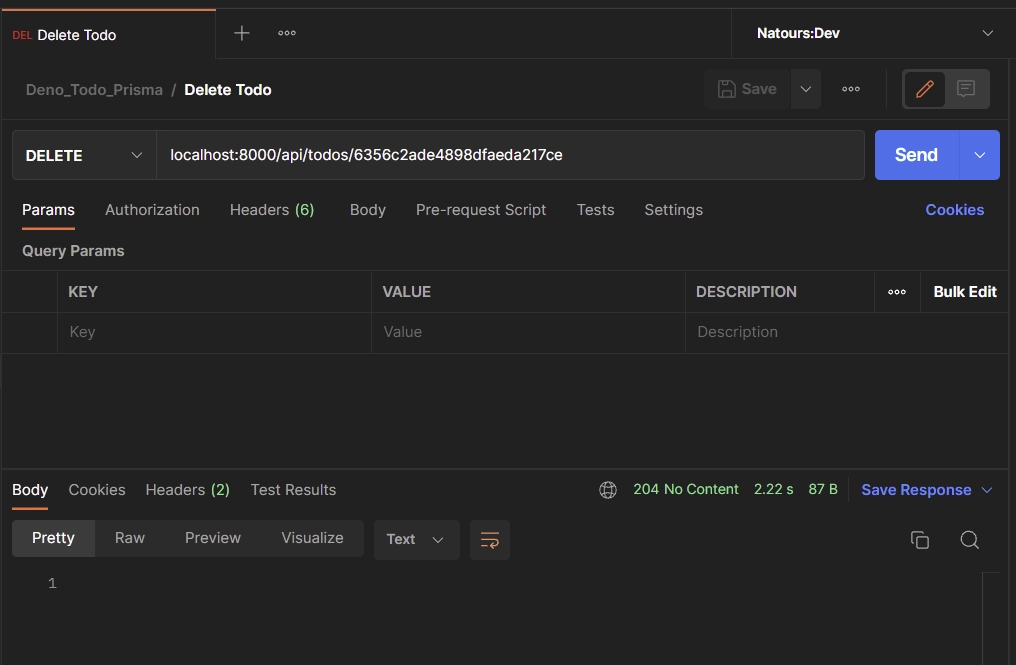
Delete a Record
To remove a single record from the database, make a DELETE request to the http://localhost:8000/api/todos/:todoId endpoint.
Conclusion
Congrats! You have made it to the end, and I hope you were able to learn how Prisma can be used in a Deno project.
You can find the complete code for the Deno Prisma project on GitHub.
is prisma accelerate/data proxy the only way to get this to work