
In this article, you’ll learn how to implement Google OAuth2 in a Golang application without using any third-party packages, such as the popular golang.org/x/oauth2 package. This application will leverage the Gin Gonic HTTP server to power the API and GORM to effectively store data in an SQLite database.
The implementation of Google OAuth2 in Golang can be achieved with ease using the standard Go libraries, such as net/http and net/url. This approach eliminates the need for any external packages, enabling you to create a custom implementation that fits your specific requirements.
By incorporating Google OAuth into your Golang application, users can log in using their Google accounts without revealing their account credentials to your application.
More practice:
- How to Implement GitHub OAuth in React.js
- How to Implement Google OAuth2 in React.js
- How to Implement GitHub OAuth in Node.js
- Google OAuth Authentication React.js and Node.js(No Passport)
- GitHub OAuth Authentication React.js and Node.js(No Passport)
- GitHub OAuth Authentication Vuejs, MongoDB and Golang
- Google OAuth Authentication React.js, MongoDB and Golang

Prerequisites
To fully understand the content of this article, it is recommended to have the following prerequisites in place.
- Basic knowledge of the Go programming language and its associated tools and libraries.
- A basic understanding of GORM and the principles of Object-Relational Mapping (ORM).
- Prior experience with a Golang web framework, such as Fiber or Gin Gonic, will be beneficial.
Run the Golang Google OAuth2 Project
- Ensure you have the most recent version of Golang installed on your machine.
- To access the project source code, you can download or clone the Golang Google OAuth2 project from https://github.com/wpcodevo/google-github-oauth2-golang and then open it in a code editor.
- For this implementation, you can switch to the
google-oauth2-golangbranch or use the “master” branch as an alternative. - Create a copy of the
example.envfile and rename the duplicate toapp.env. - In order to obtain the OAuth2 client ID and secret, refer to the instructions in the “Get the Google OAuth2 Client ID and Secret” section of the article.
- Add the obtained Google OAuth2 client ID and client secret to the
app.envfile. - Launch the Gin HTTP server and install the necessary dependencies by executing the command
go run main.go. - Set up the React application to test the Google OAuth2 flow.
Run the Golang API with a React App
For a detailed guide on how to integrate Google OAuth2 in a React.js application, see the post “How to Implement Google OAuth2 in React.js“. Nevertheless, use these steps to quickly set up the application.
- Get the React Google OAuth2 project from https://github.com/wpcodevo/google-github-oath2-reactjs by either downloading it or cloning it, and then open the source code in your preferred IDE or text editor.
- Open the integrated terminal in your IDE and install the project’s dependencies by running
yarnoryarn install. - Make a copy of the
example.envfile and rename the copy to.env.local. - Add the OAuth2 client ID and secret to the
.env.localfile. - Launch the Vite development server by running
yarn dev. - Test the functionality of the Google OAuth2 integration with the Golang API.
Setup the Golang Project
Upon completion of this tutorial, your folder structure should be identical to the one shown in the screenshot below.
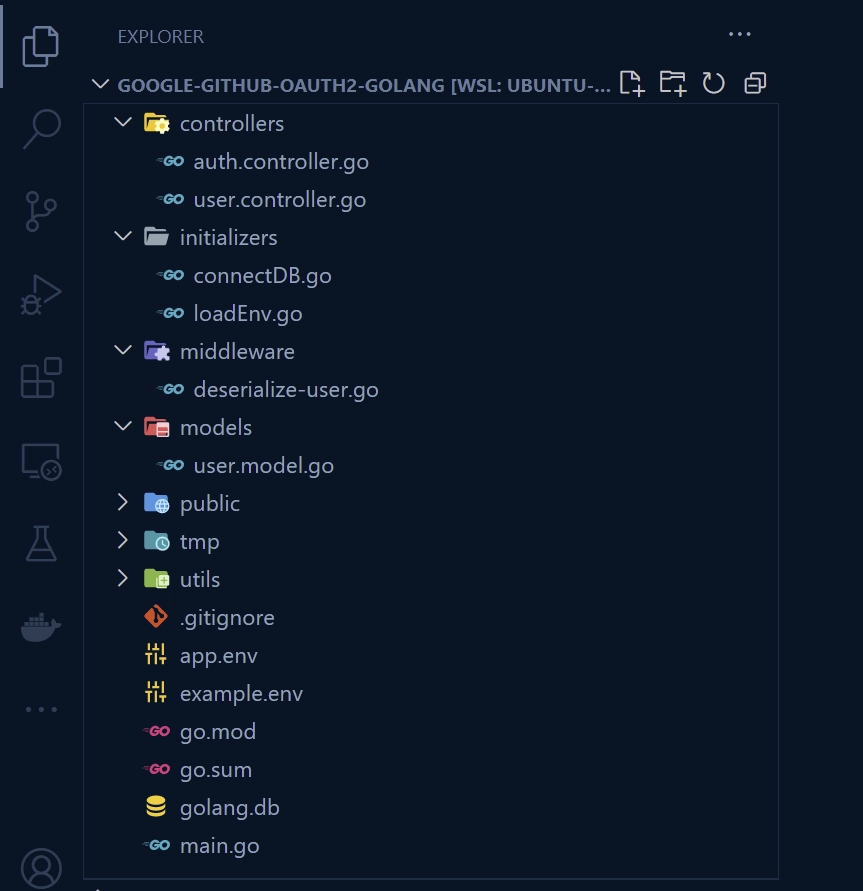
To get started, go to your desktop or any preferred location and create a folder called google-oauth2-golang. Then, navigate to the newly created folder and initialize your Golang project by executing the command go mod init. Remember to replace “wpcodevo” with your own GitHub username.
mkdir google-oauth2-golang
cd google-oauth2-golang
go mod init github.com/wpcodevo/google-oauth2-golang
Upon successful initialization of the project, execute the following commands to install the required dependencies. After the installation is complete, open the project in your IDE or text editor.
go get github.com/gin-contrib/cors
go get -u github.com/gin-gonic/gin
go get github.com/golang-jwt/jwt
go get github.com/satori/go.uuid
go get github.com/spf13/viper
go get gorm.io/driver/sqlite
go get -u gorm.io/gorm
go install github.com/cosmtrek/air@latest
Let’s get a feel of the project by creating a basic Gin Gonic server that returns a simple JSON object in response to a GET request made to the /api/healthchecker endpoint. To do this, create a main.go file and add the code snippets below.
main.go
package main

import (
	"log"
	"net/http"

	"github.com/gin-gonic/gin"
)

func main() {
	server := gin.Default()
	server.GET("/api/healthchecker", func(ctx *gin.Context) {
		ctx.JSON(http.StatusOK, gin.H{"status": "success", "message": "Implement Google OAuth2 in Golang"})
	})

	log.Fatal(server.Run(":" + "8000"))
}
Let’s evaluate the above code:
- First, we imported the Gin Gonic library and created a new Gin engine using
gin.Default(). - Next, we created an endpoint
/api/healthcheckerusing the GET method and specified a handler function to return the JSON object. - Finally, we started the Gin engine on port 8000 by calling the
server.Run(":" + "8000")method.
To launch the Gin server, execute the command go run main.go or use the tool air. After the server has started, send a GET request to the URLhttp://localhost:8000/api/healthchecker to retrieve the JSON object.

Obtain the Google OAuth2 Client ID and Secret
- Ensure you have already logged into your Google account, then proceed to the Google Cloud Console.
- Click the dropdown next to the Google Cloud logo to show a pop-up that allows you to choose an existing project or create a new one.
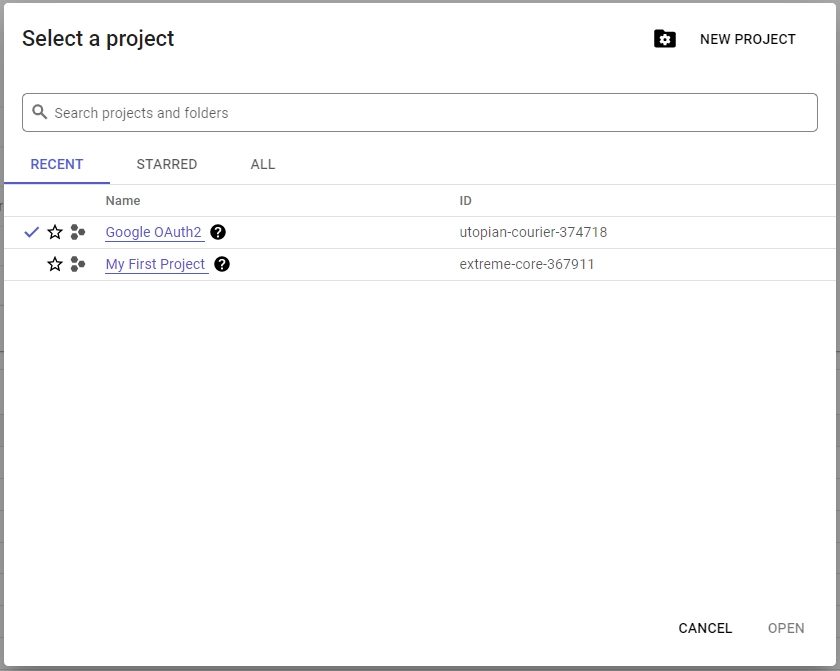
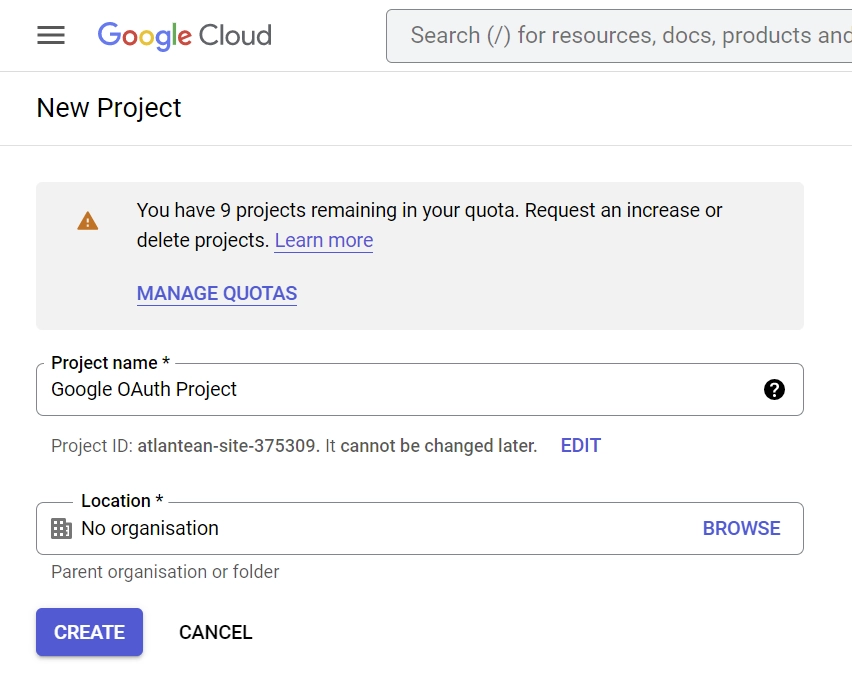
- To initiate a new project, click the “New Project” button in the top-right corner of the pop-up. Then, on the following page, enter the project name and click the “Create” button.
- In a matter of milliseconds, your project will be created and a notification will appear, allowing you to select the newly created project.

From the notifications, click the “SELECT PROJECT” button on the newly created project. - On the left sidebar, click the “OAuth consent screen” menu, then on the next page choose “External” under the “User Type“.
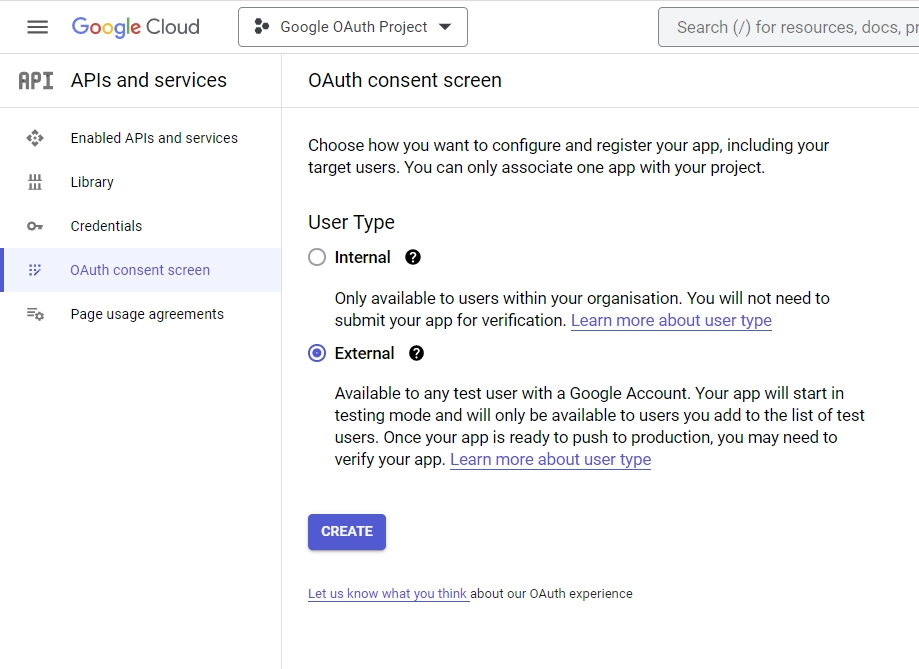
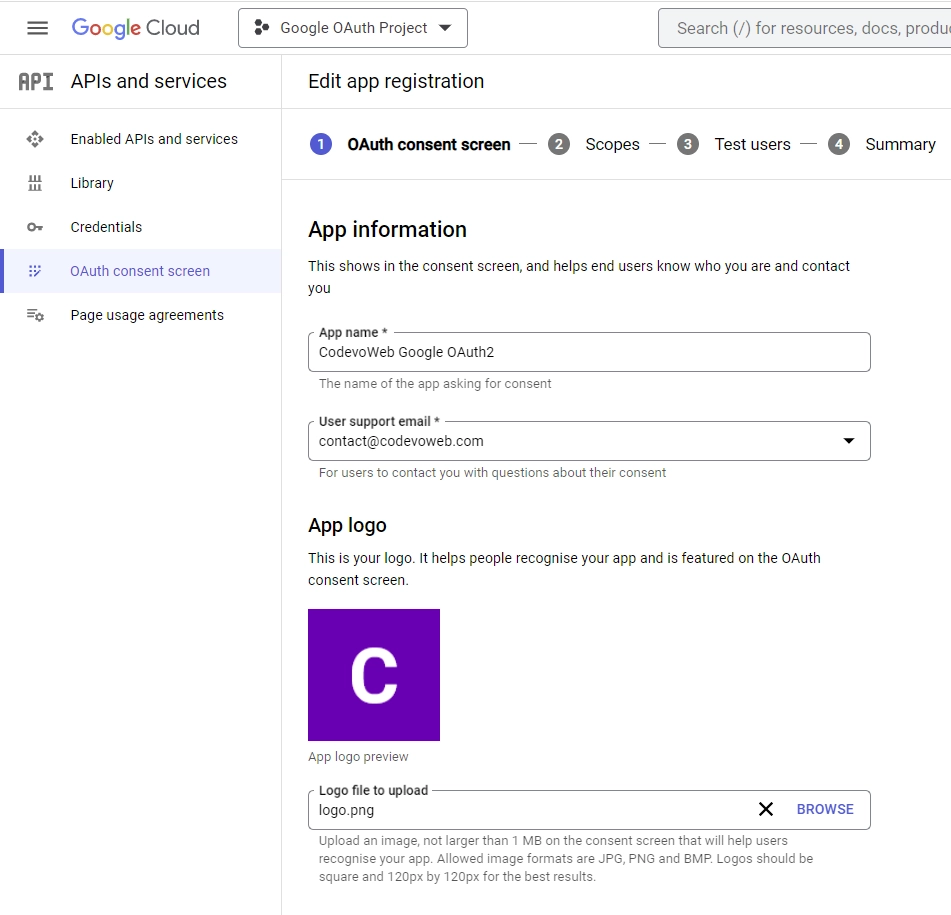
After that, click the “Create” button. - On the “Edit app registration” screen, under the “App information” section, enter the necessary information for the consent screen.
Scroll down to the “App domain” section and enter the application links.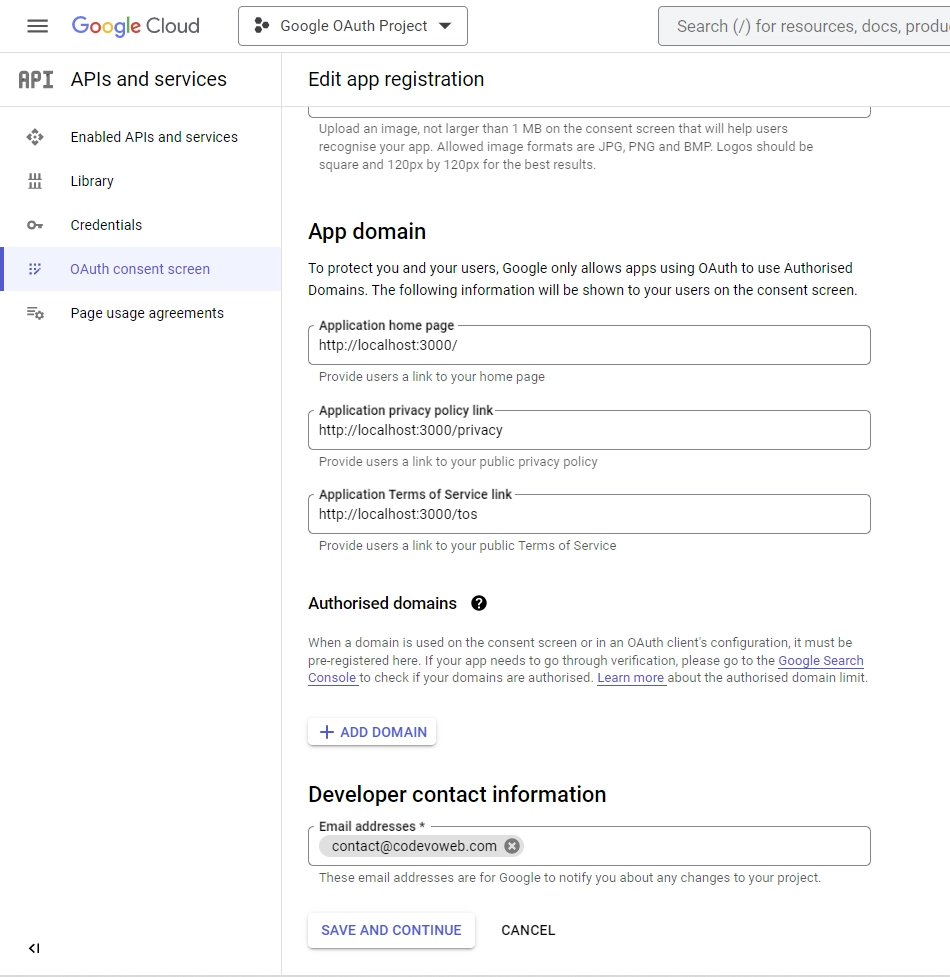
In the “Developer contact information” section, enter your email and click the “SAVE AND CONTINUE” button. - On the “Scopes” screen, click the “ADD OR REMOVE SCOPES” button, choose
.../auth/userinfo.emailand.../auth/userinfo.profile, and then click the “UPDATE” button at the bottom.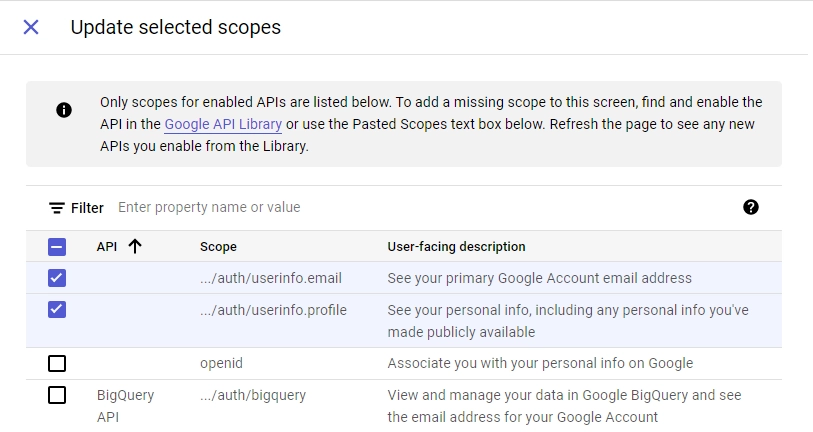
After adding the scopes, scroll down and then click the “SAVE AND CONTINUE” button. - On the “Test users” screen, click the “ADD USERS” button. Only these designated test users will be able to log in to your application while it remains in sandbox mode.
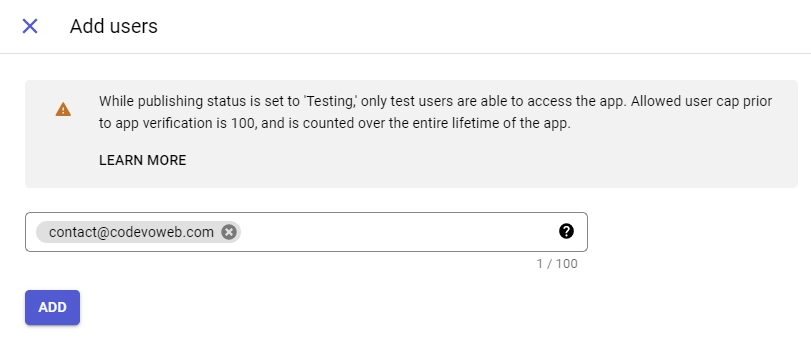
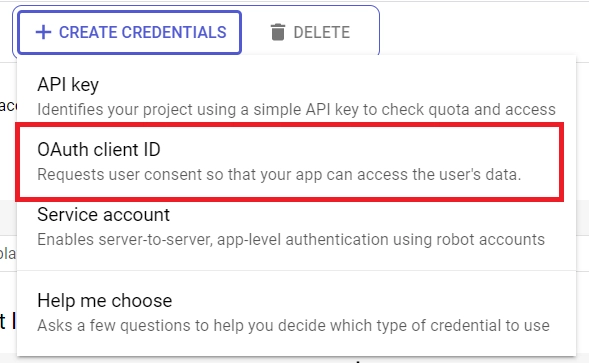
Once the test users are added, click the “SAVE AND CONTINUE” button, and go through the information on the “Summary” screen. After that, click the “BACK TO DASHBOARD” button. - Having completed the consent screen setup, we can now create the credentials. On the left sidebar, click the “Credentials” menu, and then click the “CREATE CREDENTIALS” button. From the options, select “OAuth client ID“.
- On the “Create OAuth client ID” screen, choose “Web application” as the application type, enter a name for the app, and provide the authorized redirect URI.
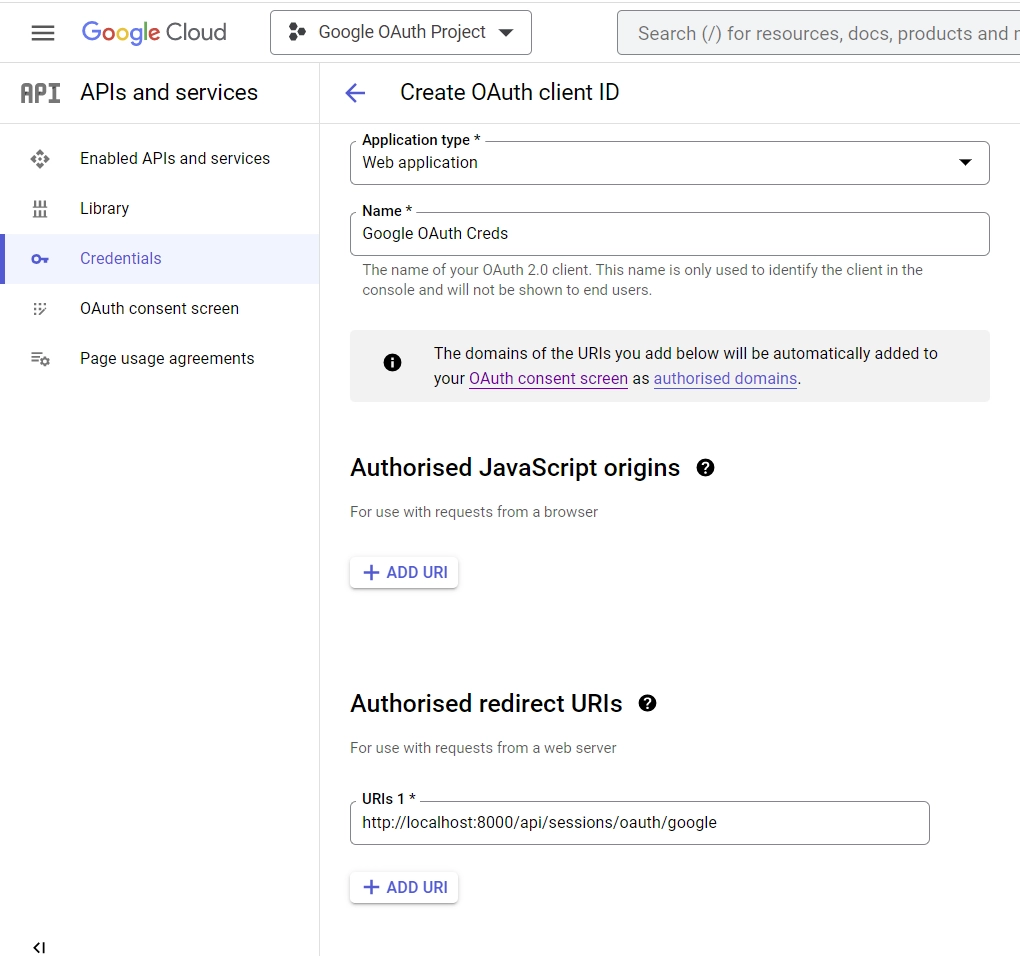
Enter http://localhost:8000/api/sessions/oauth/google as the authorised redirect URI and click the “Create” button at the bottom.
After the client ID has been created, you will be taken to the “Credentials” page where you can find the client ID and secret.
Create an app.env file in the root directory, and include the following environment variables. Don’t forget to add the OAuth2 client ID and client secret to the app.env file.
app.env
FRONTEND_ORIGIN=http://localhost:3000

JWT_SECRET=my_ultra_secure_secret
TOKEN_EXPIRED_IN=60m
TOKEN_MAXAGE=60

GOOGLE_OAUTH_CLIENT_ID=
GOOGLE_OAUTH_CLIENT_SECRET=
GOOGLE_OAUTH_REDIRECT_URL=http://localhost:8000/api/sessions/oauth/google
Create the Database Model with GORM
In this section, you’ll create a database model for the application using GORM, an ORM library for Golang. GORM provides powerful tools that we can use to interact with SQL databases in a simple and intuitive way, without writing raw SQL statements.
The GORM model represents the structure of the underlying SQL table, whereas the fields represent the columns of the table. Create a models folder in the root directory of the project. Then, within the models directory, create a file named user.model.go and add the following code.
models/user.model.go
package models

import (
	"time"

	uuid "github.com/satori/go.uuid"
	"gorm.io/gorm"
)

type User struct {
	ID       uuid.UUID `gorm:"type:uuid;primary_key;"`
	Name     string    `gorm:"type:varchar(100);not null"`
	Email    string    `gorm:"type:varchar(100);uniqueIndex;not null"`
	Password string    `gorm:"not null"`

	Role  string `gorm:"type:varchar(20);default:'user';"`
	Photo string `gorm:"default:'default.png';"`

	Verified  bool      `gorm:"default:false;"`
	Provider  string    `gorm:"default:'local';"`
	CreatedAt time.Time `gorm:"not null"`
	UpdatedAt time.Time `gorm:"not null"`
}

func (user *User) BeforeCreate(*gorm.DB) error {
	user.ID = uuid.NewV4()

	return nil
}

type RegisterUserInput struct {
	Name     string `json:"name" binding:"required"`
	Email    string `json:"email" bindinig:"required"`
	Password string `json:"password" binding:"required"`
}

type LoginUserInput struct {
	Email    string `json:"email" bindinig:"required"`
	Password string `json:"password" binding:"required"`
}

type UserResponse struct {
	ID        string `json:"id,omitempty"`
	Name      string `json:"name,omitempty"`
	Email     string `json:"email,omitempty"`
	Role      string `json:"role,omitempty"`
	Provider  string `json:"provider,omitempty"`
	Photo     string `json:"photo,omitempty"`
	Verified  bool   `json:"verified,omitempty"`
	CreatedAt time.Time
	UpdatedAt time.Time
}

func FilteredResponse(user *User) UserResponse {
	return UserResponse{
		ID:        user.ID.String(),
		Email:     user.Email,
		Name:      user.Name,
		Role:      user.Role,
		Verified:  user.Verified,
		Photo:     user.Photo,
		Provider:  user.Provider,
		CreatedAt: user.CreatedAt,
		UpdatedAt: user.UpdatedAt,
	}
}
The RegisterUserInput struct will be used to validate the request payload during the signup process, while the LoginUserInput struct will be used to validate the request payload during the sign-in process.
For the purpose of simplicity, both the RegisterUserInput and LoginUserInput structs will be included in the models/user.model.go file, instead of placing them in a separate schemas/user.schema.go file.
Lastly, we’ll use the FilteredResponse function to omit sensitive fields from the data returned by GORM.
Connect the App to the Database
Let’s create a helper function to connect the Golang application to the SQLite database using GORM. But before that, we need to load the environment variables into the Golang runtime using the Viper package.
Load the Environment Variables with Viper
Now let’s use the Viper package to load the environment variables into the Golang application. To do this, create a folder named “initializers” in the root directory and within it, create a file named loadEnv.go. Next, add the following code.
initializers/loadEnv.go
package initializers

import (
	"time"

	"github.com/spf13/viper"
)

type Config struct {
	FrontEndOrigin string `mapstructure:"FRONTEND_ORIGIN"`

	JWTTokenSecret string        `mapstructure:"JWT_SECRET"`
	TokenExpiresIn time.Duration `mapstructure:"TOKEN_EXPIRED_IN"`
	TokenMaxAge    int           `mapstructure:"TOKEN_MAXAGE"`

	GoogleClientID         string `mapstructure:"GOOGLE_OAUTH_CLIENT_ID"`
	GoogleClientSecret     string `mapstructure:"GOOGLE_OAUTH_CLIENT_SECRET"`
	GoogleOAuthRedirectUrl string `mapstructure:"GOOGLE_OAUTH_REDIRECT_URL"`
}

func LoadConfig(path string) (config Config, err error) {
	viper.AddConfigPath(path)
	viper.SetConfigType("env")
	viper.SetConfigName("app")

	viper.AutomaticEnv()

	err = viper.ReadInConfig()
	if err != nil {
		return
	}

	err = viper.Unmarshal(&config)
	return
}
The LoadConfig function will start by setting the config name and the search path for Viper. After that, it will read the configuration file and unmarshal the contents into the Config struct.
Then, the mapstructure tag will be used to map the environment variables to the fields in the struct. Once that is done, the function will return the populated Config struct.
Create the Database Connection Pool
Here, you’ll create a ConnectDB function that will utilize GORM to establish a connection with the SQLite database and perform automatic migration of the user model.
The function will start by creating a new GORM instance, then set the database connection details, and call the gorm.Open() function to establish the connection.
Subsequently, the AutoMigrate() function will be used to synchronize the database schema with the GORM model defined in the models/user.model.go file.
initializers/connectDB.go
package initializers

import (
	"fmt"
	"log"

	"github.com/wpcodevo/google-github-oath2-golang/models"
	"gorm.io/driver/sqlite"
	"gorm.io/gorm"
)

var DB *gorm.DB

func ConnectDB() {
	var err error
	DB, err = gorm.Open(sqlite.Open("golang.db"), &gorm.Config{})

	if err != nil {
		log.Fatal("Failed to connect to the Database")
	}

	DB.AutoMigrate(&models.User{})
	fmt.Println("🚀 Connected Successfully to the Database")
}
The DB.AutoMigrate() function will automatically create the “users” table in the database if it doesn’t already exist.
Create the OAuth2 Utility Functions
In this section, you’ll create two utility functions, GetGoogleOauthToken and GetGoogleUser, that will help you obtain and access information from the Google OAuth2 API.
The GetGoogleOauthToken function will use the authorization code, client ID, and secret to retrieve an access token from the Google OAuth2 token endpoint, and the GetGoogleUser function will use the access token to fetch the user’s account information.
Retrieve the OAuth2 Access Token
Now let’s create a utility function to obtain the access token from the Google OAuth2 token endpoint. To do this, create a utils folder in the root directory and create a googleOAuth.go file within it. Then, add the code below.
utils/googleOAuth.go
type GoogleOauthToken struct {
	Access_token string
	Id_token     string
}

func GetGoogleOauthToken(code string) (*GoogleOauthToken, error) {
	const rootURl = "https://oauth2.googleapis.com/token"

	config, _ := initializers.LoadConfig(".")
	values := url.Values{}
	values.Add("grant_type", "authorization_code")
	values.Add("code", code)
	values.Add("client_id", config.GoogleClientID)
	values.Add("client_secret", config.GoogleClientSecret)
	values.Add("redirect_uri", config.GoogleOAuthRedirectUrl)

	query := values.Encode()

	req, err := http.NewRequest("POST", rootURl, bytes.NewBufferString(query))
	if err != nil {
		return nil, err
	}

	req.Header.Set("Content-Type", "application/x-www-form-urlencoded")
	client := http.Client{
		Timeout: time.Second * 30,
	}

	res, err := client.Do(req)
	if err != nil {
		return nil, err
	}

	if res.StatusCode != http.StatusOK {
		return nil, errors.New("could not retrieve token")
	}

	var resBody bytes.Buffer
	_, err = io.Copy(&resBody, res.Body)
	if err != nil {
		return nil, err
	}

	var GoogleOauthTokenRes map[string]interface{}

	if err := json.Unmarshal(resBody.Bytes(), &GoogleOauthTokenRes); err != nil {
		return nil, err
	}

	tokenBody := &GoogleOauthToken{
		Access_token: GoogleOauthTokenRes["access_token"].(string),
		Id_token:     GoogleOauthTokenRes["id_token"].(string),
	}

	return tokenBody, nil
}
grant_type– The type of grant being requested, which is typically authorization_code.code– The authorization code obtained from the authorization endpoint.client_id– A unique code that serves as an identifier for the OAuth application.client_secret– The secret associated with the client ID.redirect_uri– The authorized callback URL registered with the client.
Get the Google User’s Account Information
Now, let’s utilize the acquired access token to obtain the public profile information of the user from the Google API endpoint. Create a googleOAuth.go file in the utils directory and add the following code.
utils/googleOAuth.go
type GoogleUserResult struct {
	Id             string
	Email          string
	Verified_email bool
	Name           string
	Given_name     string
	Family_name    string
	Picture        string
	Locale         string
}

func GetGoogleUser(access_token string, id_token string) (*GoogleUserResult, error) {
	rootUrl := fmt.Sprintf("https://www.googleapis.com/oauth2/v1/userinfo?alt=json&access_token=%s", access_token)

	req, err := http.NewRequest("GET", rootUrl, nil)
	if err != nil {
		return nil, err
	}

	req.Header.Set("Authorization", fmt.Sprintf("Bearer %s", id_token))

	client := http.Client{
		Timeout: time.Second * 30,
	}

	res, err := client.Do(req)
	if err != nil {
		return nil, err
	}

	if res.StatusCode != http.StatusOK {
		return nil, errors.New("could not retrieve user")
	}

	var resBody bytes.Buffer
	_, err = io.Copy(&resBody, res.Body)
	if err != nil {
		return nil, err
	}

	var GoogleUserRes map[string]interface{}

	if err := json.Unmarshal(resBody.Bytes(), &GoogleUserRes); err != nil {
		return nil, err
	}

	userBody := &GoogleUserResult{
		Id:             GoogleUserRes["id"].(string),
		Email:          GoogleUserRes["email"].(string),
		Verified_email: GoogleUserRes["verified_email"].(bool),
		Name:           GoogleUserRes["name"].(string),
		Given_name:     GoogleUserRes["given_name"].(string),
		Picture:        GoogleUserRes["picture"].(string),
		Locale:         GoogleUserRes["locale"].(string),
	}

	return userBody, nil
}
Generate and Verify the JWT Token
Create a token.go file within the utils directory and add the following code. This code has two functions:
GenerateToken– This function will generate a JWT token using the HMAC signing algorithm.ValidateToken– This function will validate the JWT token obtained from either the Authorization header or Cookies object, and extract the payload information.
utils/token.go
package utils

import (
	"fmt"
	"time"

	"github.com/golang-jwt/jwt"
)

func GenerateToken(ttl time.Duration, payload interface{}, secretJWTKey string) (string, error) {
	token := jwt.New(jwt.SigningMethodHS256)

	now := time.Now().UTC()
	claims := token.Claims.(jwt.MapClaims)

	claims["sub"] = payload
	claims["exp"] = now.Add(ttl).Unix()
	claims["iat"] = now.Unix()
	claims["nbf"] = now.Unix()

	tokenString, err := token.SignedString([]byte(secretJWTKey))

	if err != nil {
		return "", fmt.Errorf("generating JWT Token failed: %w", err)
	}

	return tokenString, nil
}

func ValidateToken(token string, signedJWTKey string) (interface{}, error) {
	tok, err := jwt.Parse(token, func(jwtToken *jwt.Token) (interface{}, error) {
		if _, ok := jwtToken.Method.(*jwt.SigningMethodHMAC); !ok {
			return nil, fmt.Errorf("unexpected method: %s", jwtToken.Header["alg"])
		}

		return []byte(signedJWTKey), nil
	})
	if err != nil {
		return nil, fmt.Errorf("invalidate token: %w", err)
	}

	claims, ok := tok.Claims.(jwt.MapClaims)
	if !ok || !tok.Valid {
		return nil, fmt.Errorf("invalid token claim")
	}

	return claims["sub"], nil
}
Create the Authentication Route Handlers
In this section, you will create route handlers for the authentication functionality of the API. These handlers will provide users with the ability to log in, register, authenticate using Google OAuth, and access protected resources.
Register User Route Handler
This route function will handle user registration requests by processing the incoming data and storing it in the SQLite database. When a POST request hits the server at the /api/auth/register endpoint, Gin Gonic will trigger this route function to handle the request.
When this handler is triggered, it will parse the incoming data, validate the data against the rules defined in the models.RegisterUserInput struct, save the user’s details in the database, and return a sanitized version of the record in the JSON response.
In case the email address submitted in the request already exists in the database, a 409 Conflict error response will be returned to the client.
controllers/auth.controller.go
func SignUpUser(ctx *gin.Context) {
	var payload *models.RegisterUserInput

	if err := ctx.ShouldBindJSON(&payload); err != nil {
		ctx.JSON(http.StatusBadRequest, gin.H{"status": "fail", "message": err.Error()})
		return
	}

	now := time.Now()
	newUser := models.User{
		Name:      payload.Name,
		Email:     strings.ToLower(payload.Email),
		Password:  payload.Password,
		Role:      "user",
		Verified:  true,
		CreatedAt: now,
		UpdatedAt: now,
	}

	result := initializers.DB.Create(&newUser)

	if result.Error != nil && strings.Contains(result.Error.Error(), "UNIQUE constraint failed: users.email") {
		ctx.JSON(http.StatusConflict, gin.H{"status": "fail", "message": "User with that email already exists"})
		return
	} else if result.Error != nil {
		ctx.JSON(http.StatusBadGateway, gin.H{"status": "error", "message": "Something bad happened"})
		return
	}

	ctx.JSON(http.StatusCreated, gin.H{"status": "success", "data": gin.H{"user": models.FilteredResponse(&newUser)}})
}
Login User Route Handler
This route function will be triggered when a POST request is made to the /api/auth/login endpoint and it will be responsible for granting a user access to the API’s features and services.
When this route function is triggered, it will parse the incoming request, validate the data based on the models.LoginUserInput struct, and check the database for the existence of a user with the email address provided in the request.
Once a matching user is found, the handler will determine if the account was registered via Google OAuth and, if so, a 403 Unauthorized error will be sent to the client.
controllers/auth.controller.go
func SignInUser(ctx *gin.Context) {
	var payload *models.LoginUserInput

	if err := ctx.ShouldBindJSON(&payload); err != nil {
		ctx.JSON(http.StatusBadRequest, gin.H{"status": "fail", "message": err.Error()})
		return
	}

	var user models.User
	result := initializers.DB.First(&user, "email = ?", strings.ToLower(payload.Email))
	if result.Error != nil {
		ctx.JSON(http.StatusBadRequest, gin.H{"status": "fail", "message": "Invalid email or Password"})
		return
	}

	if user.Provider == "Google" {
		ctx.JSON(http.StatusUnauthorized, gin.H{"status": "fail", "message": fmt.Sprintf("Use %v OAuth instead", user.Provider)})
		return
	}

	config, _ := initializers.LoadConfig(".")

	token, err := utils.GenerateToken(config.TokenExpiresIn, user.ID, config.JWTTokenSecret)
	if err != nil {
		ctx.JSON(http.StatusBadRequest, gin.H{"status": "fail", "message": err.Error()})
		return
	}

	ctx.SetCookie("token", token, config.TokenMaxAge*60, "/", "localhost", false, true)

	ctx.JSON(http.StatusOK, gin.H{"status": "success"})
}
If the user’s credentials are successfully verified, a JWT token will be generated and included in the response as an HTTP-only cookie.
Logout User Route Handler
With the ability to handle user sign-up and sign-in, it’s time to create a route handler to manage sign-out requests. To sign out a user, we will initiate a process to delete the current JWT token stored in the user’s API client or browser by sending an expired cookie.
controllers/auth.controller.go
func LogoutUser(ctx *gin.Context) {
	ctx.SetCookie("token", "", -1, "/", "localhost", false, true)
	ctx.JSON(http.StatusOK, gin.H{"status": "success"})
}
Implement the Google OAuth2 Flow
Upon successful completion of the Google OAuth authorization process, the request will be redirected to the specified callback URL of/api/sessions/oauth/google. At this point, the Gin engine will call this route function to handle the request.
When this route function is triggered, it will extract the authorization code from the redirect URL and assign it to the code variable. After retrieving the authorization code, the route function will then extract the value of the “state” parameter from the redirect URL and store it in a variable named pathUrl.
Next, the route function will invoke the utils.GetGoogleOauthToken() function with the authorization code as its argument to retrieve the access token from the Google OAuth2 token endpoint.
Subsequently, the utils.GetGoogleUser() function will be called to retrieve the user’s Google account information using the acquired access token. If the request is successful, the user’s information will be either inserted into the database using GORM or the existing record will be updated with the latest details, depending on whether the user already exists in the database.
controllers/auth.controller.go
func GoogleOAuth(ctx *gin.Context) {
	code := ctx.Query("code")
	var pathUrl string = "/"

	if ctx.Query("state") != "" {
		pathUrl = ctx.Query("state")
	}

	if code == "" {
		ctx.JSON(http.StatusUnauthorized, gin.H{"status": "fail", "message": "Authorization code not provided!"})
		return
	}

	tokenRes, err := utils.GetGoogleOauthToken(code)

	if err != nil {
		ctx.JSON(http.StatusBadGateway, gin.H{"status": "fail", "message": err.Error()})
		return
	}

	google_user, err := utils.GetGoogleUser(tokenRes.Access_token, tokenRes.Id_token)

	if err != nil {
		ctx.JSON(http.StatusBadGateway, gin.H{"status": "fail", "message": err.Error()})
		return
	}

	now := time.Now()
	email := strings.ToLower(google_user.Email)

	user_data := models.User{
		Name:      google_user.Name,
		Email:     email,
		Password:  "",
		Photo:     google_user.Picture,
		Provider:  "Google",
		Role:      "user",
		Verified:  true,
		CreatedAt: now,
		UpdatedAt: now,
	}

	if initializers.DB.Model(&user_data).Where("email = ?", email).Updates(&user_data).RowsAffected == 0 {
		initializers.DB.Create(&user_data)
	}

	var user models.User
	initializers.DB.First(&user, "email = ?", email)

	config, _ := initializers.LoadConfig(".")

	token, err := utils.GenerateToken(config.TokenExpiresIn, user.ID.String(), config.JWTTokenSecret)
	if err != nil {
		ctx.JSON(http.StatusBadRequest, gin.H{"status": "fail", "message": err.Error()})
		return
	}

	ctx.SetCookie("token", token, config.TokenMaxAge*60, "/", "localhost", false, true)

	ctx.Redirect(http.StatusTemporaryRedirect, fmt.Sprint(config.FrontEndOrigin, pathUrl))
}
If the retrieval of the user’s Google account information and insertion or update in the database is successful, a JWT token will be generated and added as an HTTP-only cookie in the response. The user will then be redirected to the URL provided in the “state” parameter.
Complete Route Handlers
controllers/auth.controller.go
package controllers

import (
	"fmt"
	"net/http"
	"strings"
	"time"

	"github.com/gin-gonic/gin"
	"github.com/wpcodevo/google-github-oath2-golang/initializers"
	"github.com/wpcodevo/google-github-oath2-golang/models"
	"github.com/wpcodevo/google-github-oath2-golang/utils"
)

func SignUpUser(ctx *gin.Context) {
	var payload *models.RegisterUserInput

	if err := ctx.ShouldBindJSON(&payload); err != nil {
		ctx.JSON(http.StatusBadRequest, gin.H{"status": "fail", "message": err.Error()})
		return
	}

	now := time.Now()
	newUser := models.User{
		Name:      payload.Name,
		Email:     strings.ToLower(payload.Email),
		Password:  payload.Password,
		Role:      "user",
		Verified:  true,
		CreatedAt: now,
		UpdatedAt: now,
	}

	result := initializers.DB.Create(&newUser)

	if result.Error != nil && strings.Contains(result.Error.Error(), "UNIQUE constraint failed: users.email") {
		ctx.JSON(http.StatusConflict, gin.H{"status": "fail", "message": "User with that email already exists"})
		return
	} else if result.Error != nil {
		ctx.JSON(http.StatusBadGateway, gin.H{"status": "error", "message": "Something bad happened"})
		return
	}

	ctx.JSON(http.StatusCreated, gin.H{"status": "success", "data": gin.H{"user": models.FilteredResponse(&newUser)}})
}

func SignInUser(ctx *gin.Context) {
	var payload *models.LoginUserInput

	if err := ctx.ShouldBindJSON(&payload); err != nil {
		ctx.JSON(http.StatusBadRequest, gin.H{"status": "fail", "message": err.Error()})
		return
	}

	var user models.User
	result := initializers.DB.First(&user, "email = ?", strings.ToLower(payload.Email))
	if result.Error != nil {
		ctx.JSON(http.StatusBadRequest, gin.H{"status": "fail", "message": "Invalid email or Password"})
		return
	}

	if user.Provider == "Google" || user.Provider == "GitHub" {
		ctx.JSON(http.StatusUnauthorized, gin.H{"status": "fail", "message": fmt.Sprintf("Use %v OAuth instead", user.Provider)})
		return
	}

	config, _ := initializers.LoadConfig(".")

	token, err := utils.GenerateToken(config.TokenExpiresIn, user.ID, config.JWTTokenSecret)
	if err != nil {
		ctx.JSON(http.StatusBadRequest, gin.H{"status": "fail", "message": err.Error()})
		return
	}

	ctx.SetCookie("token", token, config.TokenMaxAge*60, "/", "localhost", false, true)

	ctx.JSON(http.StatusOK, gin.H{"status": "success"})
}

func LogoutUser(ctx *gin.Context) {
	ctx.SetCookie("token", "", -1, "/", "localhost", false, true)
	ctx.JSON(http.StatusOK, gin.H{"status": "success"})
}

func GoogleOAuth(ctx *gin.Context) {
	code := ctx.Query("code")
	var pathUrl string = "/"

	if ctx.Query("state") != "" {
		pathUrl = ctx.Query("state")
	}

	if code == "" {
		ctx.JSON(http.StatusUnauthorized, gin.H{"status": "fail", "message": "Authorization code not provided!"})
		return
	}

	tokenRes, err := utils.GetGoogleOauthToken(code)

	if err != nil {
		ctx.JSON(http.StatusBadGateway, gin.H{"status": "fail", "message": err.Error()})
		return
	}

	google_user, err := utils.GetGoogleUser(tokenRes.Access_token, tokenRes.Id_token)

	if err != nil {
		ctx.JSON(http.StatusBadGateway, gin.H{"status": "fail", "message": err.Error()})
		return
	}

	now := time.Now()
	email := strings.ToLower(google_user.Email)

	user_data := models.User{
		Name:      google_user.Name,
		Email:     email,
		Password:  "",
		Photo:     google_user.Picture,
		Provider:  "Google",
		Role:      "user",
		Verified:  true,
		CreatedAt: now,
		UpdatedAt: now,
	}

	if initializers.DB.Model(&user_data).Where("email = ?", email).Updates(&user_data).RowsAffected == 0 {
		initializers.DB.Create(&user_data)
	}

	var user models.User
	initializers.DB.First(&user, "email = ?", email)

	config, _ := initializers.LoadConfig(".")

	token, err := utils.GenerateToken(config.TokenExpiresIn, user.ID.String(), config.JWTTokenSecret)
	if err != nil {
		ctx.JSON(http.StatusBadRequest, gin.H{"status": "fail", "message": err.Error()})
		return
	}

	ctx.SetCookie("token", token, config.TokenMaxAge*60, "/", "localhost", false, true)

	ctx.Redirect(http.StatusTemporaryRedirect, fmt.Sprint(config.FrontEndOrigin, pathUrl))
}
Get the Authenticated User
To test the authentication functionality, let’s create a GetMe route function that will be protected by a JWT middleware guard. This route function will be called to return the currently logged-in user’s account information when a GET request is made to the /api/users/me endpoint.
When Gin Gonic calls this route handler, it will extract the user’s profile information from the context object using the ctx.MustGet() function and return the credentials in the JSON response.
controllers/user.controller.go
package controllers
import (
"net/http"
"github.com/gin-gonic/gin"
"github.com/wpcodevo/google-github-oath2-golang/models"
)
func GetMe(ctx *gin.Context) {
currentUser := ctx.MustGet("currentUser").(models.User)
ctx.JSON(http.StatusOK, gin.H{"status": "success", "data": gin.H{"user": models.FilteredResponse(¤tUser)}})
}
Create an Authentication Guard
Let’s create a JWT middleware guard to ensure that access to protected resources is granted only when a valid JSON Web Token is provided. When the request reaches the authentication guard, the following actions will be performed:
- First, the function will extract the JWT token from either the Authorization header or the Cookies object.
- Then, it will validate the token using the secret key.
- Then, it will query the database to check if the user associated with the token still exists.
- Lastly, the function will add the query result to the Gin context object via the
ctx.Set()method and forward the request to subsequent middleware.
middleware/deserialize-user.go
package middleware

import (
	"fmt"
	"net/http"
	"strings"

	"github.com/gin-gonic/gin"
	"github.com/wpcodevo/google-github-oath2-golang/initializers"
	"github.com/wpcodevo/google-github-oath2-golang/models"
	"github.com/wpcodevo/google-github-oath2-golang/utils"
)

func DeserializeUser() gin.HandlerFunc {
	return func(ctx *gin.Context) {
		var token string
		cookie, err := ctx.Cookie("token")

		authorizationHeader := ctx.Request.Header.Get("Authorization")
		fields := strings.Fields(authorizationHeader)

		if len(fields) != 0 && fields[0] == "Bearer" {
			token = fields[1]
		} else if err == nil {
			token = cookie
		}

		if token == "" {
			ctx.AbortWithStatusJSON(http.StatusUnauthorized, gin.H{"status": "fail", "message": "You are not logged in"})
			return
		}

		config, _ := initializers.LoadConfig(".")
		sub, err := utils.ValidateToken(token, config.JWTTokenSecret)
		if err != nil {
			ctx.AbortWithStatusJSON(http.StatusUnauthorized, gin.H{"status": "fail", "message": err.Error()})
			return
		}

		var user models.User
		result := initializers.DB.First(&user, "id = ?", fmt.Sprint(sub))
		if result.Error != nil {
			ctx.AbortWithStatusJSON(http.StatusForbidden, gin.H{"status": "fail", "message": "the user belonging to this token no logger exists"})
			return
		}

		ctx.Set("currentUser", user)
		ctx.Next()

	}
}
Create the API Routes and Add CORS
Oops, quite a lot of code. Now let’s create routes for the route handlers and configure the server with CORS. Adding CORS will allow the Gin server to receive and respond to cross-origin requests from specified origins.
Open the main.go file and replace its content with the following code:
main.go
package main

import (
	"log"
	"net/http"

	"github.com/gin-contrib/cors"
	"github.com/gin-gonic/gin"
	"github.com/wpcodevo/google-github-oath2-golang/controllers"
	"github.com/wpcodevo/google-github-oath2-golang/initializers"
	"github.com/wpcodevo/google-github-oath2-golang/middleware"
)

var server *gin.Engine

func init() {
	initializers.ConnectDB()

	server = gin.Default()
}

func main() {
	corsConfig := cors.DefaultConfig()
	corsConfig.AllowOrigins = []string{"http://localhost:3000"}
	corsConfig.AllowCredentials = true

	server.Use(cors.New(corsConfig))

	router := server.Group("/api")
	router.GET("/healthchecker", func(ctx *gin.Context) {
		ctx.JSON(http.StatusOK, gin.H{"status": "success", "message": "Implement Google OAuth2 in Golang"})
	})

	auth_router := router.Group("/auth")
	auth_router.POST("/register", controllers.SignUpUser)
	auth_router.POST("/login", controllers.SignInUser)
	auth_router.GET("/logout", middleware.DeserializeUser(), controllers.LogoutUser)

	router.GET("/sessions/oauth/google", controllers.GoogleOAuth)
	router.GET("/users/me", middleware.DeserializeUser(), controllers.GetMe)

	router.StaticFS("/images", http.Dir("public"))
	server.NoRoute(func(ctx *gin.Context) {
		ctx.JSON(http.StatusNotFound, gin.H{"status": "error", "message": "Route Not Found"})
	})

	log.Fatal(server.Run(":" + "8000"))
}
Launch the Gin engine again by running either go run main.go or air.
Test the Google OAuth2 Flow
At this point, the Gin server is now ready to process requests. To test the Google OAuth flow, follow the steps outlined in the “Run the Golang API with a React App” section to set up the frontend application and interact with the Golang API.
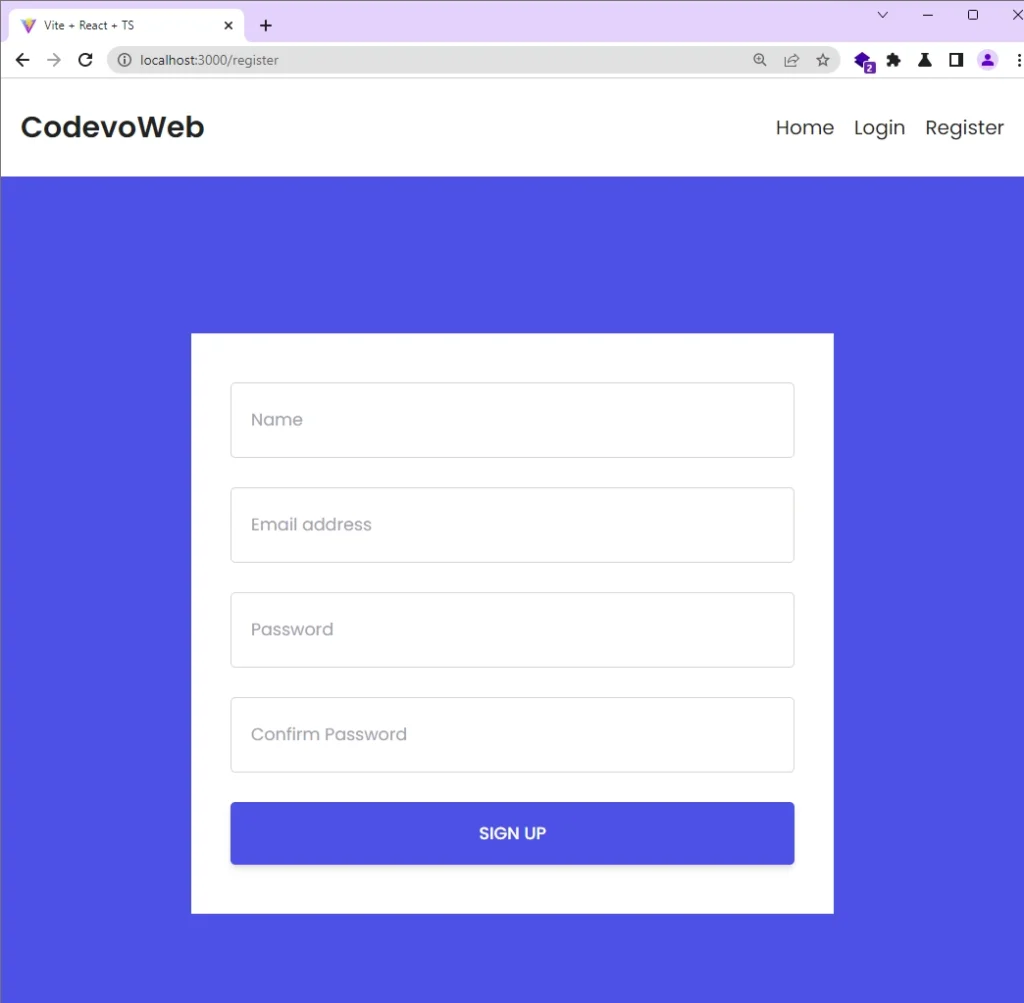
Register New User
To create an account, navigate to the account registration page and enter your credentials. After filling out the form, click the “SIGN UP” button to submit the information to the Golang API.
The Golang API will route the request to the controllers.SignUpUser function, which will validate the provided credentials and store the new user in the database.
Upon successful completion, the newly-inserted record will be filtered to remove sensitive information, and the final result will be returned as a JSON response.
If the request is successful, React will redirect the user to the account login page.
Login User
On the account login page, you can sign in to the application with either your email and password credentials or by using the Google OAuth option.
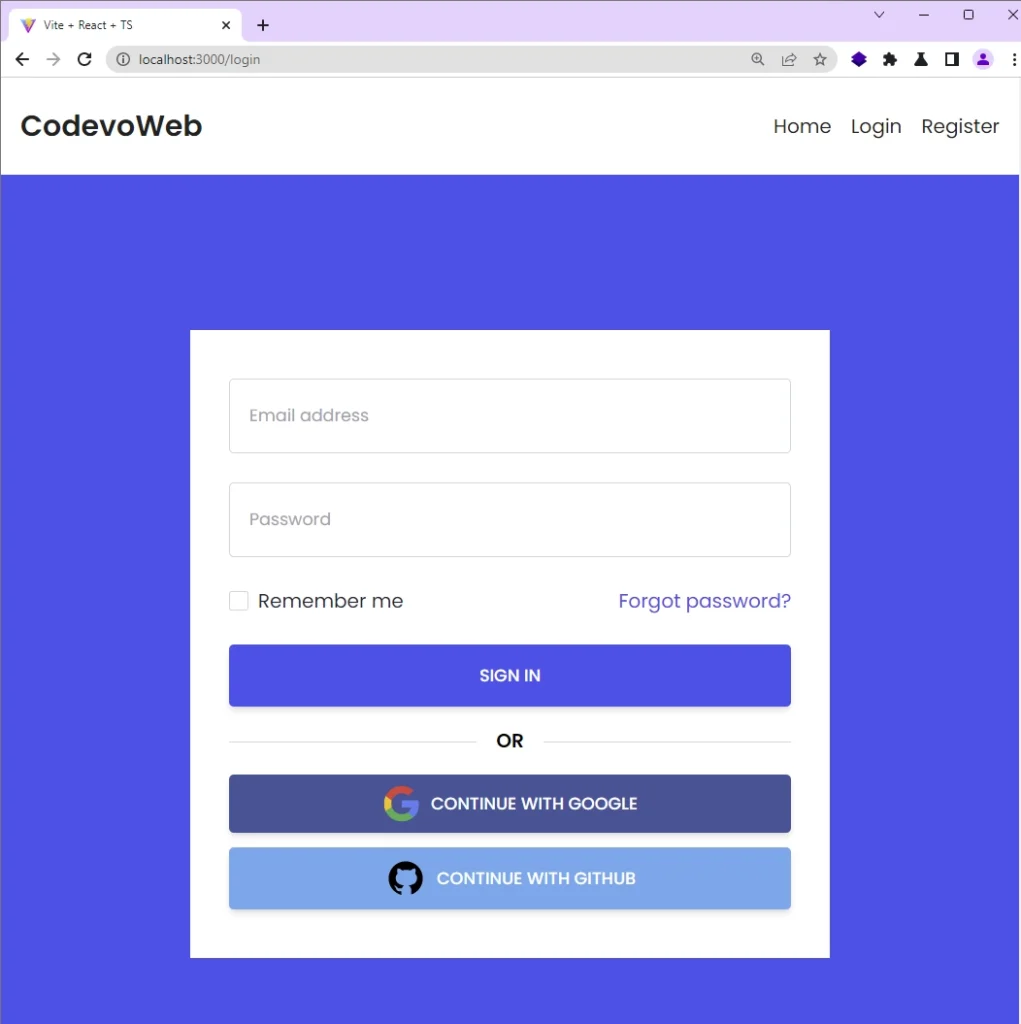
Login with Google OAuth
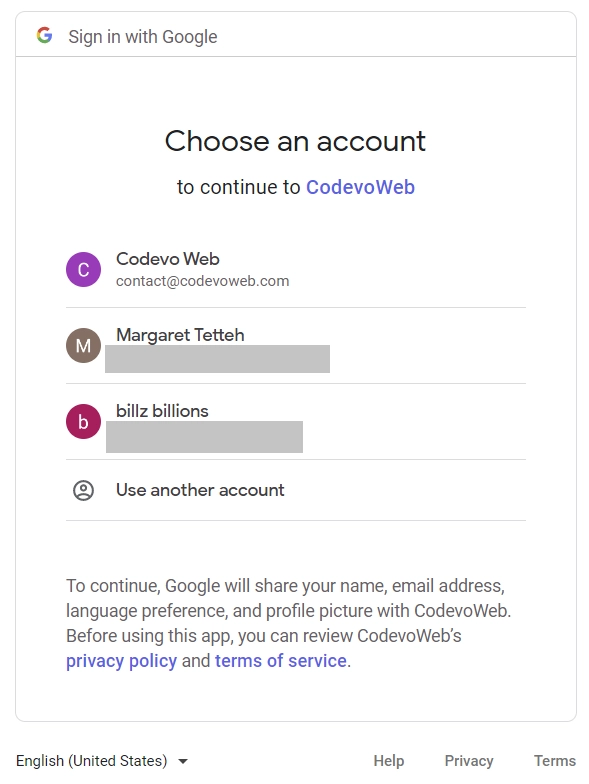
Clicking the “CONTINUE WITH GOOGLE” button will redirect you to the OAuth consent screen, where you can select a specific Google account.
Since the application is still in sandbox mode, select the account you designated as a test user on the Google Cloud Console.
The request will be received by the Google authorization server, which will validate the credentials contained in the URL and redirect the user back to the callback URL. The Golang API will then use the authorization code received in the callback URL to request an access token from the Google OAuth token endpoint.
Subsequently, a request will be made using the acquired access token to retrieve the user’s Google account information. The account information will be saved in the database and a filtered version will be returned as a JSON response, along with a JWT token set as an HTTP-only cookie.
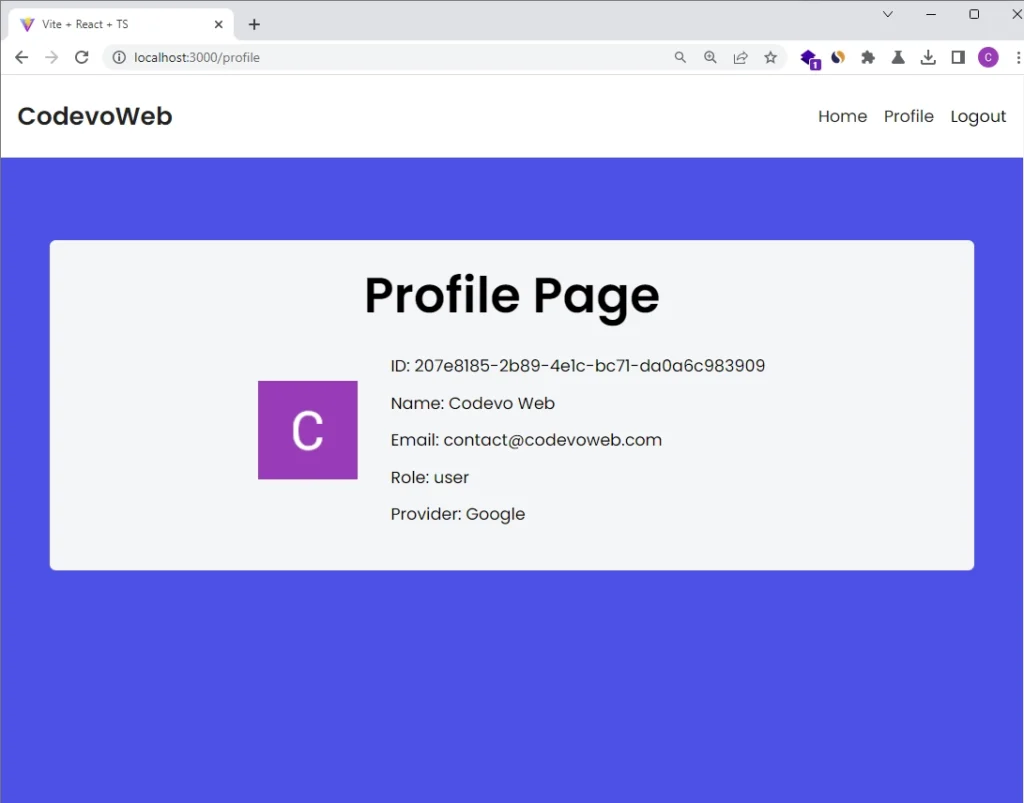
If the request is successful, the React app will use the included JWT token to retrieve the current user’s information from the Golang API, which will then be displayed on the profile page.
Conclusion
And we are done! You can find the complete source code of the Golang Google OAuth2 project on GitHub.
In this article, we created a Golang API using Gin Gonic and GORM to manage user registration, login, Google OAuth authentication, and logout. Additionally, we created a JWT middleware guard to ensure secure access to protected resources by verifying a valid JWT token.
Thank you for reading. I hope this article was helpful. Please feel free to leave a comment with any questions you may have.
When they say go is good for productivity -> ends up doing this to have simple social login ROFL
You’re absolutely correct about Go’s productivity benefits. In the article, we chose to manually implement the social login to gain a better understanding of the underlying flow. However, when working on your own projects, it’s highly recommended to leverage existing libraries that have already implemented this functionality.
In the Go ecosystem, there are different libraries available for OAuth. These libraries have two main benefits. First, they save you time because they handle the complex parts of implementing OAuth, so you don’t have to do it from scratch. Second, they ensure a more secure authentication process by taking care of any security issues or vulnerabilities that might arise.
Thanks for the tutorial. I would love to see this using a simpler approach: vanilla js/html, and Go without any framework, and no database, maybe a simple in memory approach? That would allow more people to understand the important parts.
Thanks for the suggestion!
is it possible to test the endpoints with postman or any other API client ?