

In this tutorial, I’ll walk you through the process of integrating GitHub OAuth into a Node.js application, including setting up the OAuth App on GitHub, retrieving the OAuth client ID and secret, and implementing the necessary code to handle the OAuth flow.
OAuth is a widely-used protocol that enables users to authenticate and authorize access to their resources in a secure and streamlined manner. By implementing GitHub OAuth in the Node.js application, users can sign into the application using their GitHub account, without sharing their credentials.
In summary, we will delve into the process of building a Node.js API, utilizing the Express.js framework as the HTTP server. We will also integrate an SQLite database, managed by Prisma ORM, to persist our data. Additionally, we will implement endpoints for authenticating users, providing a secure and efficient way to handle user access within the application.
More practice:
- How to Implement GitHub OAuth in React.js
- How to Implement Google OAuth2 in React.js
- GitHub OAuth Authentication Vue.js and Node.js (No Passport)
- Google OAuth Authentication React.js and Node.js(No Passport)
- GitHub OAuth Authentication React.js and Node.js(No Passport)
- GitHub OAuth Authentication Vuejs, MongoDB and Golang
- Google OAuth Authentication React.js, MongoDB and Golang

Run the Node.js GitHub OAuth Project
- Download or clone the Node.js GitHub OAuth project from https://github.com/wpcodevo/google-github-oauth2-nodejs and open the source code in a code editor.
- In the terminal of the root directory, run
git checkout github-oauth2-nodejsto change the Git branch to the GitHub project. - Run
yarnoryarn installto install the project’s dependencies. - Make a copy of the
example.envfile and rename the copied one to.env. - Follow the “Get the GitHub OAuth Credentials” section to obtain the GitHub OAuth client ID and secret.
- Add the GitHub OAuth credentials to the
.envfile. - Push the Prisma schema to the SQLite database by running
npx prisma db push. - Run
yarn startto start the Express HTTP server. - Set up the frontend application to interact with the Node.js API.
Run the Node.js API with a React App
For a detailed guide on how to set up the GitHub OAuth flow in a React application, see the post “How to Implement GitHub OAuth in React.js“. Nonetheless, use the following steps to spin up the app within minutes.
- Download or clone the React GitHub OAuth project from https://github.com/wpcodevo/google-github-oath2-reactjs and open the project in an IDE or text editor.
- Run
yarnoryarn installto install the required dependencies. - Duplicate the
example.envfile and rename the copied one to.env.local. - Add the GitHub OAuth client ID and client secret to the
.env.localfile. - Start the Vite development server by running
yarn dev - Interact with the Node.js API from the React application.
Setup the Node.js Project
To begin, create a github-oauth2-nodejs folder in a convenient location on your machine and navigate into it. Once you are done, run yarn init -y to initialize the Node.js project with Yarn.
mkdir github-oauth2-nodejs
cd github-oauth2-nodejs
yarn init -y
Execute the following commands to install all the dependencies we’ll need for the project.
yarn add @prisma/client axios cookie-parser cors dotenv express jsonwebtoken qs zod
yarn add -D typescript ts-node-dev prisma morgan @types/qs @types/node @types/morgan @types/jsonwebtoken @types/express @types/cors @types/cookie-parser
@prisma/client– A library that provides the Prisma Client, which is an auto-generated query builder that enables type-safe database access.axios– A promise-based HTTP client for the browser and Node.js.cookie-parser– A middleware for parsing HTTP request cookies.cors– A Node.js CORS middleware.dotenv– A library for loading environment variables from a.envfile.express– A web framework for Node.js.jsonwebtoken– A popular JavaScript library for signing and verifying JSON Web Tokens.qs– A library for parsing and stringifying query parameters.zod– Is a JavaScript library for input validation and object schema validation.typescript– An official TypeScript compilerts-node-dev– Runs TypeScript files directly, without the need to first compile them to JavaScript and restart the server when required files change.prisma– A CLI tool that allows developers to perform various tasks related to the Prisma ORM, such as initializing new projects, managing database migrations, and generating the Prisma client based on the data models defined in the Prisma schema file.morgan– An HTTP request middleware logger for Node.js
Now let’s create a tsconfig.json file to add TypeScript support. In the root directory, create a tsconfig.json file and add the following TypeScript configurations.
tsconfig.json
{
  "compilerOptions": {
    "target": "es2016",
    "experimentalDecorators": true,
    "emitDecoratorMetadata": true,
    "module": "commonjs",
    "esModuleInterop": true,
    "forceConsistentCasingInFileNames": true,
    "strict": true,
    "strictPropertyInitialization": false,
    "skipLibCheck": true
  }
}
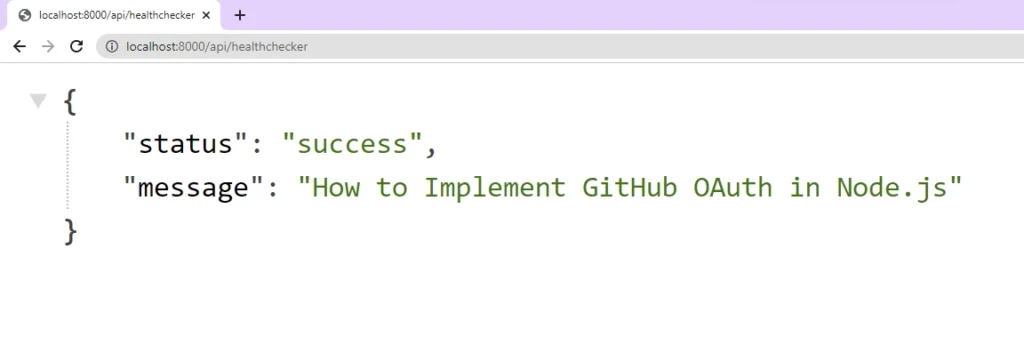
Let’s move on to creating a basic Express server that will return a simple JSON response. To do this, create an src folder in the root directory and create a app.ts file within it. Open the src/app.ts file and add the following code.
src/app.ts
import express, { Request, Response } from "express";

const app = express();

app.get("/api/healthchecker", (req: Request, res: Response) => {
  res.status(200).json({
    status: "success",
    message: "How to Implement GitHub OAuth in Node.js",
  });
});

const port = 8000;
app.listen(port, () => {
  console.log(`✅ Server started on port: ${port}`);
});
In the above, we imported the necessary dependencies at the top of the file, created an instance of the Express application, and then defined a /api/healthchecker route.
The res.status(200).json() method will send the JSON response to the client with a simple object. Finally, we evoked the app.listen() method to start the Express server. Open the package.json file and add the following scripts:
package.json
{
  "scripts": {
    "start": "ts-node-dev --respawn --transpile-only src/app.ts",
    "db:migrate": "npx prisma migrate dev --name 'users' --create-only",
    "db:generate": "npx prisma generate",
    "db:push": "npx prisma db push"
  }
}
start– For starting the Express HTTP server.db:migrate– For creating the Prisma migration files without applying them.db:generate– For generating the Prisma Client in the node_modules folder.db:push– For pushing the Prisma migration files to the database.
Now run yarn start to start the server. The server will respond with the JSON object when you make a GET request to the http://localhost:8000/api/healthchecker endpoint.
Get the GitHub OAuth Credentials
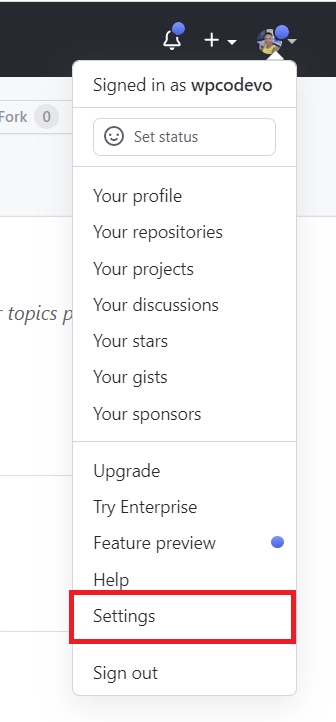
- Sign into your GitHub account. Click on the profile picture at the top right corner and select “Settings” from the dropdown menu. This will take you to the GitHub Developer Settings page.
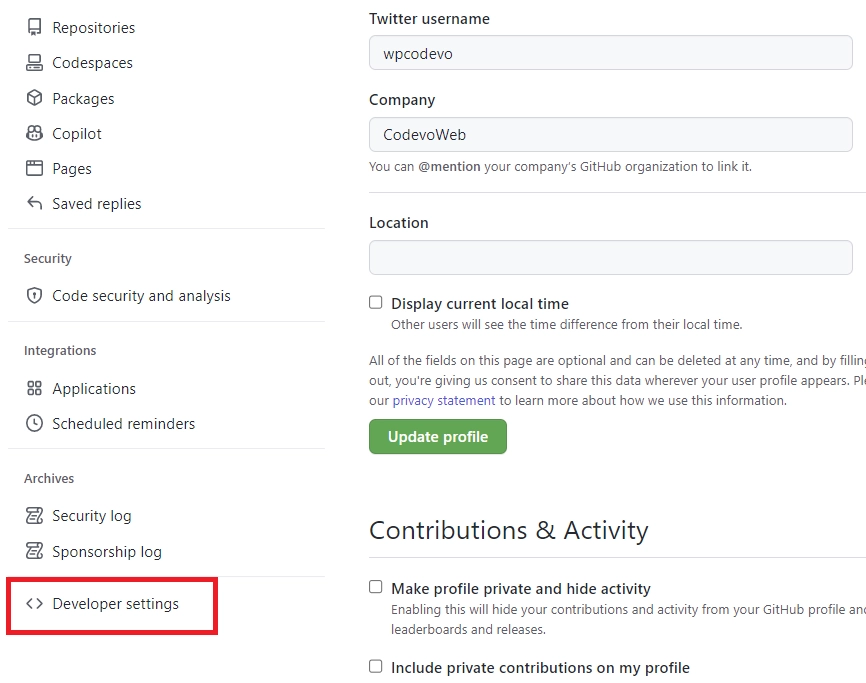
- Scroll down and click on “Developer settings“
- On the Developer settings page, click on “OAuth Apps“. Under the “OAuth Apps” section, click on the “New OAuth App” button.
- Fill in the “Application name” and “Homepage URL” input fields with the name and URL of your application. The “Authorization callback URL” field should be the URL where GitHub will redirect the user after they’ve authorized the application.
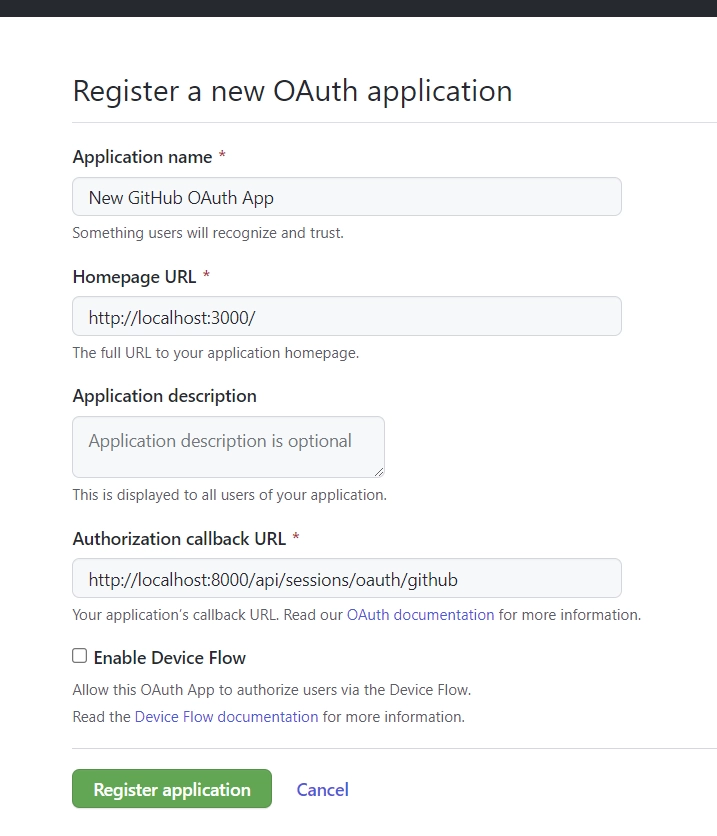
In this example, you can enterhttp://localhost:8000/api/sessions/oauth/githubas the redirect URL. Once you are done, click on the “Register application” button to create the OAuth App. - After the application has been created, you’ll be taken to the application details page where you can find the “Client ID” and generate the “Client Secret” keys.
To generate the OAuth client secret, click on the “Generate a new client secret” button. GitHub will then prompt you to confirm your identity before the client secret will be generated.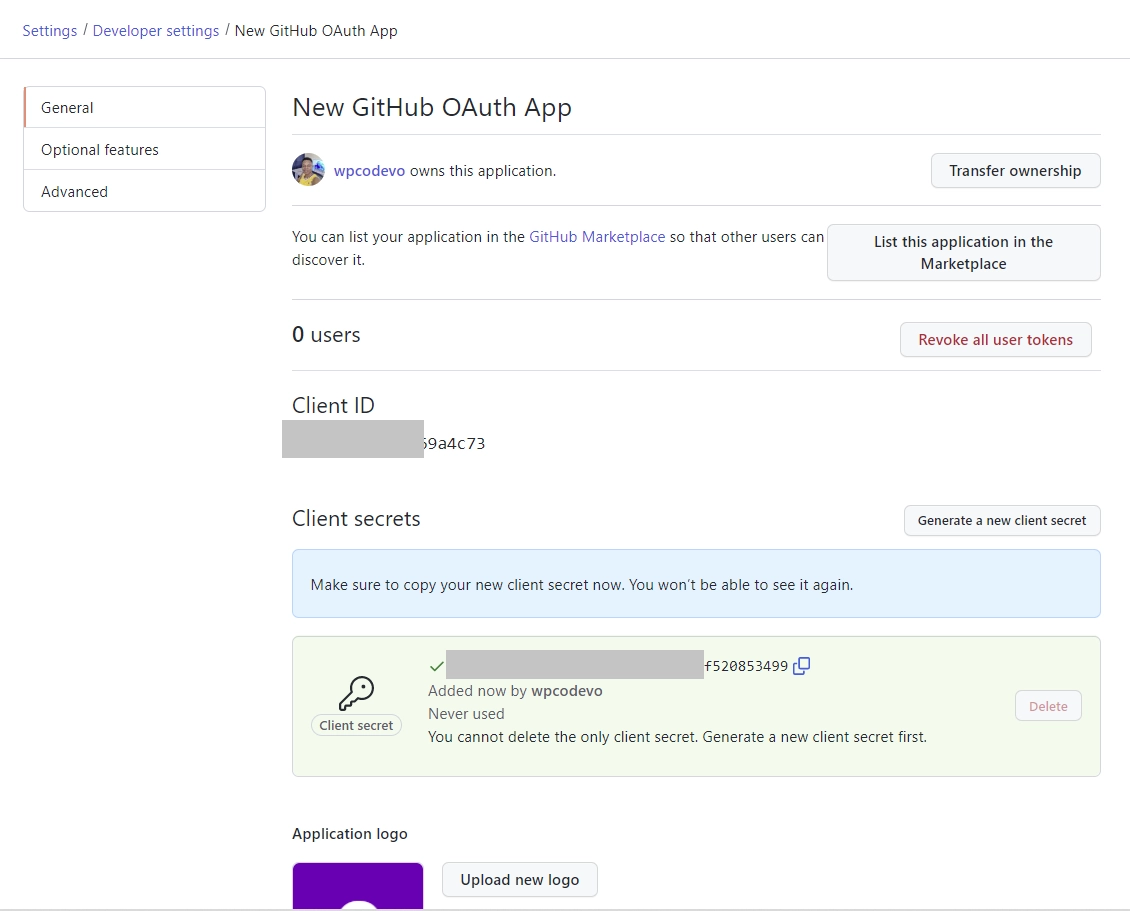
- You need to keep the OAuth client secret and ID in a secure place, as GitHub will require them to authenticate the application.
Create a .env file in the root directory and add the following environment variables. Then, add the OAuth client secret and ID to the .env file.
.env
DATABASE_URL="file:./dev.db"

GITHUB_OAUTH_CLIENT_ID=
GITHUB_OAUTH_CLIENT_SECRET=
GITHUB_OAUTH_REDIRECT_URL=http://localhost:8000/api/sessions/oauth/github

NODE_ENV=development
JWT_SECRET=my_ultra_secure_secret
TOKEN_EXPIRES_IN=60
FRONTEND_ORIGIN=http://localhost:3000
Create the Database Model
In this section, you’ll initialize the Prisma framework in the project, design the database model and synchronize the Prisma schema with the database. Feel free to use any Prisma-supported database instead SQLite.
npx prisma init --datasource-provider sqlite
Now let’s design the database model in the schema.prisma file. Open the prisma/schema.prisma file and add the model below. The model represents a table in the database and the fields represent the columns in the table.
prisma/schema.prisma
model User {
  id       String  @id @default(uuid())
  name     String
  email    String  @unique
  password String
  role     String  @default("user")
  photo    String  @default("default.png")
  verified Boolean @default(false)
  provider String  @default("local")

  createdAt DateTime
  updatedAt DateTime @updatedAt

  @@map(name: "users")
}
Run the Prisma migrate command to create and apply the database migrations for the Prisma client.
npx prisma migrate dev --name init
The above command will generate a migrations folder in the Prisma directory, sync the schema with the database, and generate the Prisma client in the node_modules folder.
Instead of importing the Prisma client in every file that needs it, let’s create a file to export it and a function to verify if the database connection was established successfully.
To do that, create a utils folder in the src directory. Within the src/utils directory, create a prisma.ts file and add the code below.
src/utils/prisma.ts
import { PrismaClient } from "@prisma/client";

export const prisma = new PrismaClient();

async function connectDB() {
  try {
    await prisma.$connect();
    console.log("🚀 Database connected successfully");
  } catch (error) {
    console.log(error);
    process.exit(1);
  } finally {
    await prisma.$disconnect();
  }
}

export default connectDB;
In the above code, we created an instance of the Prisma client and exported it from the file. Next, we created a connectDB() function that will attempt to connect to the database using the prisma.$connect() method. If the connection is successful, it will log “Database connected successfully“. However, if an error occurs, it will log the error and the process will exit with a code of 1.
Create the Validation Schemas
Now let’s use Zod to create validation schemas for the user registration and login requests. With Zod, we can define validation rules and constraints for the data and use the rules to validate the incoming request body.
Create a schema folder in the src directory. After that, create a user.schema.ts file and add the following schema definitions.
src/schema/user.schema.ts
import { object, string, TypeOf } from 'zod';

export const createUserSchema = object({
  body: object({
    name: string({ required_error: 'Name is required' }),
    email: string({ required_error: 'Email is required' }).email(
      'Invalid email'
    ),
    password: string({ required_error: 'Password is required' })
      .min(8, 'Password must be more than 8 characters')
      .max(32, 'Password must be less than 32 characters'),
    passwordConfirm: string({ required_error: 'Please confirm your password' }),
  }).refine((data) => data.password === data.passwordConfirm, {
    path: ['passwordConfirm'],
    message: 'Passwords do not match',
  }),
});

export const loginUserSchema = object({
  body: object({
    email: string({ required_error: 'Email is required' }).email(
      'Invalid email or password'
    ),
    password: string({ required_error: 'Password is required' }).min(
      8,
      'Invalid email or password'
    ),
  }),
});

export type CreateUserInput = TypeOf<typeof createUserSchema>['body'];
export type LoginUserInput = TypeOf<typeof loginUserSchema>['body'];
Let’s create an Express middleware that will accept a Zod schema as an argument and validate the incoming data against the schema. It will check for any violations of the rules defined in the schema, and return relevant validation errors to the client, if any, to improve user experience and minimize bugs.
Create a middleware folder in the src directory. Within the middleware folder, create a validate.ts file and add the following code.
src/middleware/validate.ts
import { NextFunction, Request, Response } from "express";
import { AnyZodObject, ZodError } from "zod";

export const validate =
  (schema: AnyZodObject) =>
  (req: Request, res: Response, next: NextFunction) => {
    try {
      schema.parse({
        params: req.params,
        query: req.query,
        body: req.body,
      });

      next();
    } catch (err: any) {
      if (err instanceof ZodError) {
        return res.status(400).json({
          status: "fail",
          error: err.errors,
        });
      }
      next(err);
    }
  };
Obtain the GitHub OAuth Access Token and User’s Info
In this section, you’ll utilize the Axios library to retrieve the GitHub OAuth access token and user details using the client ID, client secret, and authorization code.
To begin, create a services folder in the src directory. After that, create a session.service.ts file and add the following code.
src/services/session.service.ts
import axios from "axios";
import qs from "qs";

const GITHUB_OAUTH_CLIENT_ID = process.env
  .GITHUB_OAUTH_CLIENT_ID as unknown as string;
const GITHUB_OAUTH_CLIENT_SECRET = process.env
  .GITHUB_OAUTH_CLIENT_SECRET as unknown as string;
Retrieve the OAuth Access Token
Let’s create a function that will make a POST request to the GitHub OAuth token endpoint to retrieve an access token using the client ID, client secret, and authorization code as parameters. The response will contain the access token, token type, and scope.
src/services/session.service.ts
type GitHubOauthToken = {
  access_token: string;
};

export const getGithubOathToken = async ({
  code,
}: {
  code: string;
}): Promise<GitHubOauthToken> => {
  const rootUrl = "https://github.com/login/oauth/access_token";
  const options = {
    client_id: GITHUB_OAUTH_CLIENT_ID,
    client_secret: GITHUB_OAUTH_CLIENT_SECRET,
    code,
  };

  const queryString = qs.stringify(options);

  try {
    const { data } = await axios.post(`${rootUrl}?${queryString}`, {
      headers: {
        "Content-Type": "application/x-www-form-urlencoded",
      },
    });

    const decoded = qs.parse(data) as GitHubOauthToken;

    return decoded;
  } catch (err: any) {
    throw Error(err);
  }
};
client_id– This is the unique identifier for the GitHub OAuth application.client_secret– GitHub will use this secret to authenticate the application and ensure that only the application can request an access token.code– GitHub will include this code in the redirect URL after the user grants permission to the application. This code, also known as the authorization code will be exchanged for an access token.
Retrieve the GitHub Account Information
Here, let’s create a function to retrieve the public information of the GitHub user by passing the access token as a Bearer token in the request headers. This function will make a GET request with Axios to the user endpoint of GitHub API and retrieve the user’s account details such as id, name, login, and email.
src/services/session.service.ts
interface GitHubUser {
  login: string;
  avatar_url: string;
  name: string;
  email: string;
}

export const getGithubUser = async ({
  access_token,
}: {
  access_token: string;
}): Promise<GitHubUser> => {
  try {
    const { data } = await axios.get<GitHubUser>(
      "https://api.github.com/user",
      {
        headers: {
          Authorization: `Bearer ${access_token}`,
        },
      }
    );

    return data;
  } catch (err: any) {
    throw Error(err);
  }
};
Implement GitHub OAuth in Node.js
With the helper functions for obtaining the access token and user information in place, let’s proceed to create route middleware functions to manage the authentication and OAuth flow in the application.
Create a controllers folder in the src directory. After that, create a auth.controller.ts file and add the following code.
src/controllers/auth.controller.ts
import { NextFunction, Request, Response } from "express";
import { CreateUserInput, LoginUserInput } from "../schema/user.schema";
import { getGithubOathToken, getGithubUser } from "../services/session.service";
import { prisma } from "../utils/prisma";
import jwt from "jsonwebtoken";

export function exclude<User, Key extends keyof User>(
  user: User,
  keys: Key[]
): Omit<User, Key> {
  for (let key of keys) {
    delete user[key];
  }
  return user;
}
The exclude function will enable us to omit sensitive fields from the records returned by the Prisma client.
Account Registration Route Function
Here, you’ll create a route middleware function with Express that utilizes Prisma to add a new user to the database. This middleware will accept user data as part of the request body, validate the data against a Zod schema, and use Prisma to persist the user data in the database.
If a user with that email already exists in the database, a 409 Conflict response will be sent. Otherwise, the user object will be returned in the JSON response.
src/controllers/auth.controller.ts
export const registerHandler = async (
  req: Request<{}, {}, CreateUserInput>,
  res: Response,
  next: NextFunction
) => {
  try {
    const user = await prisma.user.create({
      data: {
        name: req.body.name,
        email: req.body.email,
        password: req.body.password,
        createdAt: new Date(),
      },
    });

    res.status(201).json({
      status: "success",
      data: {
        user: exclude(user, ["password"]),
      },
    });
  } catch (err: any) {
    if (err.code === "P2002") {
      return res.status(409).json({
        status: "fail",
        message: "Email already exist",
      });
    }
    next(err);
  }
};
In case of an unanticipated error, the next(err) function will be evoked which will trigger the Express error middleware to handle the error.
Account Login Route Function
Now let’s create a route function to log in users. This route function will accept user credentials (email and password) in the request body, validate the data using a Zod schema and query the database to verify if a user with that email exists.
To keep the project simple, we will skip other authentication methods, such as comparing the plain-text password to the hashed one stored in the database.
Next, we’ll check if the user registered the account through GitHub OAuth after verifying that the user exists in the database. If the user passes all the verification steps, a JWT token will be signed and returned to the client as an HTTP Only cookie.
src/controllers/auth.controller.ts
export const loginHandler = async (
  req: Request<{}, {}, LoginUserInput>,
  res: Response,
  next: NextFunction
) => {
  try {
    const user = await prisma.user.findUnique({
      where: { email: req.body.email },
    });

    if (!user) {
      return res.status(401).json({
        status: "fail",
        message: "Invalid email or password",
      });
    }

    if (user.provider === "GitHub") {
      return res.status(401).json({
        status: "fail",
        message: `Use ${user.provider} OAuth2 instead`,
      });
    }

    const TOKEN_EXPIRES_IN = process.env.TOKEN_EXPIRES_IN as unknown as number;
    const TOKEN_SECRET = process.env.JWT_SECRET as unknown as string;
    const token = jwt.sign({ sub: user.id }, TOKEN_SECRET, {
      expiresIn: `${TOKEN_EXPIRES_IN}m`,
    });

    res.cookie("token", token, {
      expires: new Date(Date.now() + TOKEN_EXPIRES_IN * 60 * 1000),
    });

    res.status(200).json({
      status: "success",
    });
  } catch (err: any) {
    next(err);
  }
};
If any error occurs it will be passed to the express error middleware through the next(err) function.
Logout Route Function
The process of signing out can be implemented in several ways, but one common method is to create a route on the server that handles the sign-out request. This route will be protected by a middleware guard that verifies if the user is authenticated before forwarding the request to the logout function.
To sign out the user, we’ll send an expired cookie to delete the existing one that matches the same key name from the user’s browser or API client. This way, they’ll have to re-login to access protected routes or resources.
src/controllers/auth.controller.ts
export const logoutHandler = async (
  req: Request,
  res: Response,
  next: NextFunction
) => {
  try {
    res.cookie("token", "", { maxAge: -1 });
    res.status(200).json({ status: "success" });
  } catch (err: any) {
    next(err);
  }
};
Authenticate with GitHub OAuth Route Function
Now let’s create a route function that Express will call when GitHub redirects the user to the authorized callback URL. This route function expects GitHub to include the authorization code and state as query parameters in the URL.
If both values are available in the URL, the getGithubOathToken({ code }) function will be called to retrieve the access token from the GitHub OAuth API.
Next, the function getGithubUser({ access_token }) will be used to retrieve the public information of the GitHub user. Once the information is obtained, it will be passed to the prisma.user.upsert() method which will insert or update the user in the database.
If the operation is successful, a JWT token will be generated and sent to the client as an HTTP Only cookie. Finally, the user will be redirected to the path provided in the state query parameter.
src/controllers/auth.controller.ts
export const githubOauthHandler = async (req: Request, res: Response) => {
  const FRONTEND_ORIGIN = process.env.FRONTEND_ORIGIN as unknown as string;

  try {
    const code = req.query.code as string;
    const pathUrl = (req.query.state as string) ?? "/";

    if (req.query.error) {
      return res.redirect(`${FRONTEND_ORIGIN}/login`);
    }

    if (!code) {
      return res.status(401).json({
        status: "error",
        message: "Authorization code not provided!",
      });
    }

    const { access_token } = await getGithubOathToken({ code });

    const { email, avatar_url, login } = await getGithubUser({ access_token });

    const user = await prisma.user.upsert({
      where: { email },
      create: {
        createdAt: new Date(),
        name: login,
        email,
        photo: avatar_url,
        password: "",
        verified: true,
        provider: "GitHub",
      },
      update: { name: login, email, photo: avatar_url, provider: "GitHub" },
    });

    if (!user) return res.redirect(`${FRONTEND_ORIGIN}/oauth/error`);

    const TOKEN_EXPIRES_IN = process.env.TOKEN_EXPIRES_IN as unknown as number;
    const TOKEN_SECRET = process.env.JWT_SECRET as unknown as string;
    const token = jwt.sign({ sub: user.id }, TOKEN_SECRET, {
      expiresIn: `${TOKEN_EXPIRES_IN}m`,
    });

    res.cookie("token", token, {
      expires: new Date(Date.now() + TOKEN_EXPIRES_IN * 60 * 1000),
    });

    res.redirect(`${FRONTEND_ORIGIN}${pathUrl}`);
  } catch (err: any) {
    return res.redirect(`${FRONTEND_ORIGIN}/oauth/error`);
  }
};
If an unknown error occurs, the user will be redirected to the /oauth/error route of the front-end application.
Complete Route Functions
src/controllers/auth.controller.ts
import { NextFunction, Request, Response } from "express";
import { CreateUserInput, LoginUserInput } from "../schema/user.schema";
import { getGithubOathToken, getGithubUser } from "../services/session.service";
import { prisma } from "../utils/prisma";
import jwt from "jsonwebtoken";

export function exclude<User, Key extends keyof User>(
  user: User,
  keys: Key[]
): Omit<User, Key> {
  for (let key of keys) {
    delete user[key];
  }
  return user;
}

export const registerHandler = async (
  req: Request<{}, {}, CreateUserInput>,
  res: Response,
  next: NextFunction
) => {
  try {
    const user = await prisma.user.create({
      data: {
        name: req.body.name,
        email: req.body.email,
        password: req.body.password,
        createdAt: new Date(),
      },
    });

    res.status(201).json({
      status: "success",
      data: {
        user: exclude(user, ["password"]),
      },
    });
  } catch (err: any) {
    if (err.code === "P2002") {
      return res.status(409).json({
        status: "fail",
        message: "Email already exist",
      });
    }
    next(err);
  }
};

export const loginHandler = async (
  req: Request<{}, {}, LoginUserInput>,
  res: Response,
  next: NextFunction
) => {
  try {
    const user = await prisma.user.findUnique({
      where: { email: req.body.email },
    });

    if (!user) {
      return res.status(401).json({
        status: "fail",
        message: "Invalid email or password",
      });
    }

    if (user.provider === "GitHub") {
      return res.status(401).json({
        status: "fail",
        message: `Use ${user.provider} OAuth2 instead`,
      });
    }

    const TOKEN_EXPIRES_IN = process.env.TOKEN_EXPIRES_IN as unknown as number;
    const TOKEN_SECRET = process.env.JWT_SECRET as unknown as string;
    const token = jwt.sign({ sub: user.id }, TOKEN_SECRET, {
      expiresIn: `${TOKEN_EXPIRES_IN}m`,
    });

    res.cookie("token", token, {
      expires: new Date(Date.now() + TOKEN_EXPIRES_IN * 60 * 1000),
    });

    res.status(200).json({
      status: "success",
    });
  } catch (err: any) {
    next(err);
  }
};

export const logoutHandler = async (
  req: Request,
  res: Response,
  next: NextFunction
) => {
  try {
    res.cookie("token", "", { maxAge: -1 });
    res.status(200).json({ status: "success" });
  } catch (err: any) {
    next(err);
  }
};

export const githubOauthHandler = async (req: Request, res: Response) => {
  const FRONTEND_ORIGIN = process.env.FRONTEND_ORIGIN as unknown as string;

  try {
    const code = req.query.code as string;
    const pathUrl = (req.query.state as string) ?? "/";

    if (req.query.error) {
      return res.redirect(`${FRONTEND_ORIGIN}/login`);
    }

    if (!code) {
      return res.status(401).json({
        status: "error",
        message: "Authorization code not provided!",
      });
    }

    const { access_token } = await getGithubOathToken({ code });

    const { email, avatar_url, login } = await getGithubUser({ access_token });

    const user = await prisma.user.upsert({
      where: { email },
      create: {
        createdAt: new Date(),
        name: login,
        email,
        photo: avatar_url,
        password: "",
        verified: true,
        provider: "GitHub",
      },
      update: { name: login, email, photo: avatar_url, provider: "GitHub" },
    });

    if (!user) return res.redirect(`${FRONTEND_ORIGIN}/oauth/error`);

    const TOKEN_EXPIRES_IN = process.env.TOKEN_EXPIRES_IN as unknown as number;
    const TOKEN_SECRET = process.env.JWT_SECRET as unknown as string;
    const token = jwt.sign({ sub: user.id }, TOKEN_SECRET, {
      expiresIn: `${TOKEN_EXPIRES_IN}m`,
    });

    res.cookie("token", token, {
      expires: new Date(Date.now() + TOKEN_EXPIRES_IN * 60 * 1000),
    });

    res.redirect(`${FRONTEND_ORIGIN}${pathUrl}`);
  } catch (err: any) {
    return res.redirect(`${FRONTEND_ORIGIN}/oauth/error`);
  }
};
GetMe Route Function
Let’s create a route middleware function to return the authenticated user’s information to the client. This route function will be protected and only authenticated users can access it.
When the user is authenticated, the user’s account information will be attached to the res.locals object.
src/controllers/user.controller.ts
import { NextFunction, Request, Response } from "express";

export const getMeHandler = (
  req: Request,
  res: Response,
  next: NextFunction
) => {
  try {
    const user = res.locals.user;
    res.status(200).json({
      status: "success",
      data: {
        user,
      },
    });
  } catch (err: any) {
    next(err);
  }
};
Create the Authentication Middleware
Now it’s time to create the authentication middleware to ensure that only users with valid JWTs can access protected routes.
Authentication Guard
Let’s create a middleware guard to validate the JWT in either the request cookies or the authorization header. To do this, create a deserializeUser.ts file in the src/middleware folder. After that, add the following code to the file.
src/middleware/deserializeUser.ts
import { NextFunction, Request, Response } from "express";
import jwt from "jsonwebtoken";
import { exclude } from "../controllers/auth.controller";
import { prisma } from "../utils/prisma";

export const deserializeUser = async (
  req: Request,
  res: Response,
  next: NextFunction
) => {
  try {
    let token;
    if (
      req.headers.authorization &&
      req.headers.authorization.startsWith("Bearer")
    ) {
      token = req.headers.authorization.split(" ")[1];
    } else if (req.cookies.token) {
      token = req.cookies.token;
    }

    if (!token) {
      return res.status(401).json({
        status: "fail",
        message: "You are not logged in",
      });
    }

    const JWT_SECRET = process.env.JWT_SECRET as unknown as string;
    const decoded = jwt.verify(token, JWT_SECRET);

    if (!decoded) {
      return res.status(401).json({
        status: "fail",
        message: "Invalid token or user doesn't exist",
      });
    }

    const user = await prisma.user.findUnique({
      where: { id: String(decoded.sub) },
    });

    if (!user) {
      return res.status(401).json({
        status: "fail",
        message: "User with that token no longer exist",
      });
    }

    res.locals.user = exclude(user, ["password"]);

    next();
  } catch (err: any) {
    next(err);
  }
};
This middleware function will attempt to get the JWT from the authorization header. If no token is found, it will check the request cookies object for a cookie named “token“.
If no token is found in either the request cookies object or the authorization header, a 401 Unauthorized response will be sent to the client. However, if a token is found, it will call the jwt.verify() function to verify the token using the secret key.
If the token is valid, the user’s ID stored in the token will be decoded, and a query will be made to check if the user belonging to the token still exists in the database. If the user still exists, the user’s profile details will be added to the res.locals object and the request will be delegated to the next middleware.
Require User Middleware
With the above explanation, let’s create another middleware function that will ensure that the res.locals object has the user record. If the res.locals.user property is undefined, a 401 Unauthorized response with the message “Invalid token or session has expired” will be sent.
src/middleware/requireUser.ts
import { NextFunction, Request, Response } from "express";

export const requireUser = (
  req: Request,
  res: Response,
  next: NextFunction
) => {
  try {
    const user = res.locals.user;
    if (!user) {
      return res.status(401).json({
        status: "fail",
        message: "Invalid token or session has expired",
      });
    }

    next();
  } catch (err: any) {
    next(err);
  }
};
Create the API Routes
Now let’s create routers for the middleware functions. The first router will have the following routes:
/register– This route will utilize thevalidate(createUserSchema)middleware function to validate the incoming signup request body and evoke theregisterHandlerfunction to register new users./login– This route will utilize thevalidate(loginUserSchema)middleware function to validate the incoming login request body and evoke theloginHandlerfunction to sign users into the API./logout– This route will be protected by the middleware guards and it’ll evoke thelogoutHandlermiddleware function to sign users out of the API.
Create a src/routes/auth.route.ts file and add the following code:
src/routes/auth.route.ts
import express from "express";
import {
  loginHandler,
  logoutHandler,
  registerHandler,
} from "../controllers/auth.controller";
import { deserializeUser } from "../middleware/deserializeUser";
import { requireUser } from "../middleware/requireUser";
import { validate } from "../middleware/validate";
import { createUserSchema, loginUserSchema } from "../schema/user.schema";

const router = express.Router();

// Register user route
router.post("/register", validate(createUserSchema), registerHandler);

// Login user route
router.post("/login", validate(loginUserSchema), loginHandler);

// Logout User
router.get("/logout", deserializeUser, requireUser, logoutHandler);

export default router;
Next, create a session.route.ts file in the src/routes/ folder and add the following code. This router will have one route, which is /oauth/github.
When GitHub redirects the user to the Node.js application, this router will evoke the githubOauthHandler function to handle the OAuth flow.
src/routes/session.route.ts
import express from "express";
import { githubOauthHandler } from "../controllers/auth.controller";

const router = express.Router();

router.get("/oauth/github", githubOauthHandler);

export default router;
Lastly, create a user.route.ts file in the src/routes/ folder and add the following route definition. When a GET request is made to the /users/me endpoint, the getMeHandler function will be called to return the authenticated user’s information.
src/routes/user.route.ts
import express from "express";
import { getMeHandler } from "../controllers/user.controller";
import { deserializeUser } from "../middleware/deserializeUser";
import { requireUser } from "../middleware/requireUser";

const router = express.Router();

router.use(deserializeUser, requireUser);

router.get("/me", getMeHandler);

export default router;
Register the API Routes and Setup CORS
Finally, let’s set up CORS and register the routers in the Express application. This will allow us to control which origins are allowed to make requests to the API, and which headers and methods are allowed in those requests. To do this, open the src/app.ts file and replace its content with the following code.
src/app.ts
require("dotenv").config();
import path from "path";
import express, { NextFunction, Request, Response } from "express";
import morgan from "morgan";
import cors from "cors";
import cookieParser from "cookie-parser";
import userRouter from "./routes/user.route";
import authRouter from "./routes/auth.route";
import sessionRouter from "./routes/session.route";
import connectDB from "./utils/prisma";

const app = express();

app.use(express.json({ limit: "10kb" }));
app.use(cookieParser());
if (process.env.NODE_ENV === "development") app.use(morgan("dev"));
app.use("/api/images", express.static(path.join(__dirname, "../public")));

const FRONTEND_ORIGIN = process.env.FRONTEND_ORIGIN as unknown as string;
app.use(
  cors({
    credentials: true,
    origin: [FRONTEND_ORIGIN],
  })
);

app.use("/api/users", userRouter);
app.use("/api/auth", authRouter);
app.use("/api/sessions", sessionRouter);

app.get("/api/healthChecker", (req: Request, res: Response) => {
  res.status(200).json({
    status: "success",
    message: "How to Implement GitHub OAuth in Node.js",
  });
});

// UnKnown Routes
app.all("*", (req: Request, res: Response, next: NextFunction) => {
  const err = new Error(`Route ${req.originalUrl} not found`) as any;
  err.statusCode = 404;
  next(err);
});

app.use((err: any, req: Request, res: Response, next: NextFunction) => {
  err.status = err.status || "error";
  err.statusCode = err.statusCode || 500;

  res.status(err.statusCode).json({
    status: err.status,
    message: err.message,
  });
});

const port = 8000;
app.listen(port, () => {
  console.log(`✅ Server started on port: ${port}`);
  connectDB();
});
Now run yarn start to start the Express HTTP server.
Conclusion
And we are done! You can find the complete source code of the Node.js GitHub OAuth project on GitHub.
In this tutorial, we walked through the process of adding authentication functionality to an Express server, including user registration and login, and enabling GitHub OAuth for simple login using existing GitHub accounts.
I really love your tutorial because it’s both specific and accessible, making it suitable for beginners like me.
Glad you found it helpful!
well organized tutorial