

In this article, you’ll learn how to implement GitHub OAuth in a React.js application, including creating an OAuth app in the GitHub developer settings page, configuring the application’s client ID, client secrets, and redirect URI, and implementing the necessary code in the React application.
Why should you add GitHub OAuth to your React app? OAuth is an open standard for token-based authentication and authorization. GitHub OAuth is a way for users to grant access to their GitHub resources such as repositories, pull requests, issues, profile information, etc with third-party applications without having to share their login credentials.
Related articles:
- How to Implement Google OAuth2 in React.js
- GitHub OAuth Authentication Vue.js and Node.js (No Passport)
- Google OAuth Authentication React.js and Node.js(No Passport)
- GitHub OAuth Authentication React.js and Node.js(No Passport)
- Google OAuth Authentication React.js, MongoDB and Golang
- GitHub OAuth Authentication Vuejs, MongoDB and Golang

Run the React GitHub OAuth Project
- Download or clone the React GitHub OAuth project from https://github.com/wpcodevo/google-github-oath2-reactjs and open the source code in an IDE or text editor.
- In the terminal of the root project directory, run
yarnoryarn installto install the project’s dependencies. - Duplicate the
example.envfile and rename the copied one to.env.local. - Follow the “Get the GitHub OAuth Credentials” section to obtain the GitHub OAuth client ID and client secret from the GitHub developer settings page.
- Add the OAuth client ID and client secret to the
.env.localfile. - Run
yarn devto start the Vite development server. - Set up the backend API to process the request when the GitHub OAuth API redirects the user to the authorised redirect URI.
Run the React App with Node.js API
- Make sure you have Node.js and Yarn installed on your machine.
- Download or clone the Node.js GitHub OAuth project from https://github.com/wpcodevo/google-github-oauth2-nodejs and open the source code in an IDE.
- Open the integrated terminal and run
git checkout github-oauth2-nodejsto change the Git branch to the GitHub OAuth project. Feel free to use the master branch. - Install all the required dependencies by running
yarnoryarn installin the console of the root project. - Make a copy of the
example.envfile and rename the copied one to.env. - Add the GitHub OAuth client ID and client secret to the
.envfile. - Push the Prisma schema to the SQLite database by running
npx prisma db push. - Start the Node.js HTTP server by running
yarn startin the terminal of the root directory. - Test the GitHub OAuth flow with the React app and the Node.js API.
Run the React App with Golang API
- Make sure you have the latest version of Golang installed on your machine.
- Download or clone the Golang GitHub OAuth project from https://github.com/wpcodevo/google-github-oauth2-golang and open the source code in a code editor.
- In the console of the root directory, run
git checkout github-oauth2-golangto change the Git branch to the GitHub OAuth project. Feel free to use the master branch instead. - Duplicate the
example.envfile and rename the copied one toapp.env. - Add the GitHub OAuth client ID and client secret to the
app.envfile. - Run
go run main.goto install the necessary dependencies and start the Gin HTTP server. - Test the GitHub OAuth flow with the Golang API and the React app.
Setup the React Project
First things first, open the terminal in a convenient location and run the command below to bootstrap the React project with the Vite scaffolding tool.
npm create vite@latest github-oauth-reactjs -- --template react
# or
yarn create vite github-oauth-reactjs -- --template react
This will download the Vite CLI binary from the NPM repository, generate the React boilerplate project, and output the files into a github-oauth-reactjs folder.
Once that is done, change into the github-oauth-reactjs folder, and run yarn or npm install to install the required dependencies. After that, open the project folder in a code editor.
Now let’s set up Tailwind CSS to handle the styling aspect of the project. Run the command below to install tailwind CSS and its peer dependencies.
npm install -D tailwindcss postcss autoprefixer
# or
yarn add -D tailwindcss postcss autoprefixer
After the installation is complete, run the Tailwind CSS init command to generate the tailwind.config.cjs and postcss.config.cjs files.
npx tailwindcss init -p
Replace the content of the tailwind.config.cjs file with the following Tailwind CSS configurations.
tailwind.config.cjs
/** @type {import('tailwindcss').Config} */
module.exports = {
  content: [
    "./index.html",
    "./src/**/*.{vue,js,ts,jsx,tsx}",
  ],
  theme: {
    extend: {
      colors: {
        'ct-dark-600': '#222',
        'ct-dark-200': '#e5e7eb',
        'ct-dark-100': '#f5f6f7',
        'ct-blue-600': '#2363eb',
        'ct-yellow-600': '#f9d13e',
      },
      fontFamily: {
        Poppins: ['Poppins, sans-serif'],
      },
      container: {
        center: true,
        padding: '1rem',
        screens: {
          lg: '1125px',
          xl: '1125px',
          '2xl': '1125px',
        },
      },
    },
  },
  plugins: [],
};
Also, replace the content of the src/index.css file with the following CSS and Tailwind CSS directives.
src/index.css
@import url('https://fonts.googleapis.com/css2?family=Poppins:wght@300;400;500;600;700&display=swap');

@tailwind base;
@tailwind components;
@tailwind utilities;

html{
    font-family: 'Poppins', sans-serif;
}
We’re now ready to install the dependencies we’ll need for the project. Run the commands below to install them.
yarn add react-hook-form @hookform/resolvers react-router-dom react-toastify tailwind-merge zod zustand
# or
npm install react-hook-form @hookform/resolvers react-router-dom react-toastify tailwind-merge zod zustand
react-hook-form– A form validation library for React@hookform/resolvers– A validation resolver for React-Hook-Formreact-router-dom– Provides routing for React web applicationsreact-toastify– Display alert notifications in Reacttailwind-merge– Merge Tailwind CSS classes without style conflictszod– A schema validation libraryzustand– A state management library for React
Once that is done, open the package.json file and change the dev script to "dev": "vite --port 3000" . This will tell Vite to start the development server on port 3000 instead of the default port 5173.
Get the GitHub OAuth Credentials
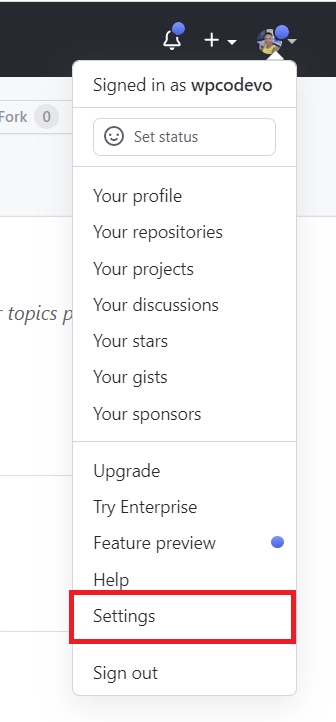
- First, navigate to GitHub and click on your profile photo in the upper-right corner. Select “Settings” from the dropdown.
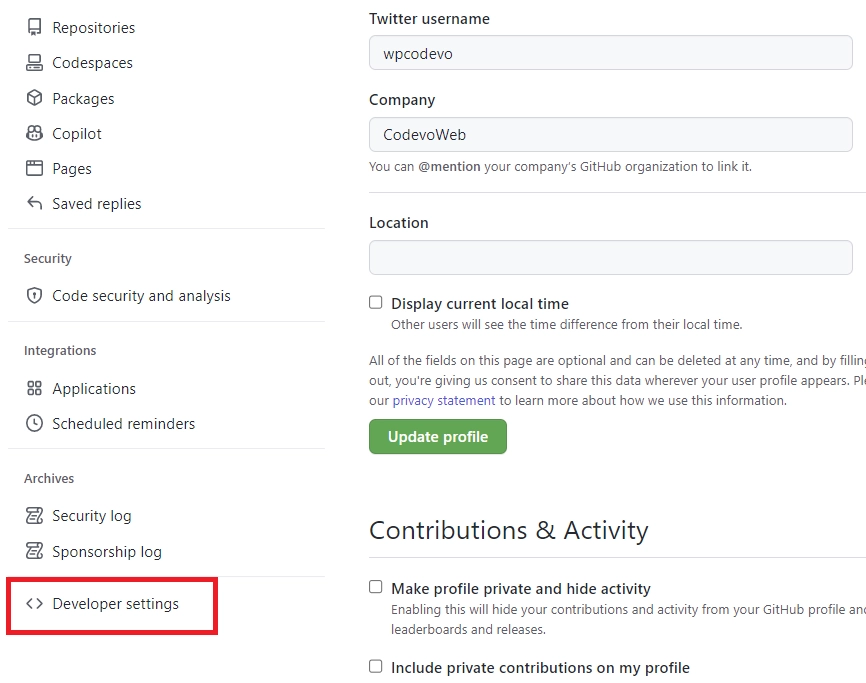
- Scroll down and click on the “Developer settings” in the left sidebar.
- On the GitHub Apps screen, click on the “OAuth Apps” menu.
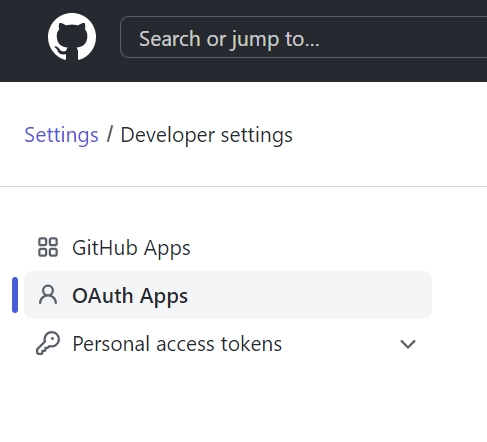
- Select an existing OAuth app or create a new one. Click on the “New OAuth App” button to create a new OAuth app.
- Provide the OAuth credentials, including the application name, homepage URL, and the authorized redirect URI.
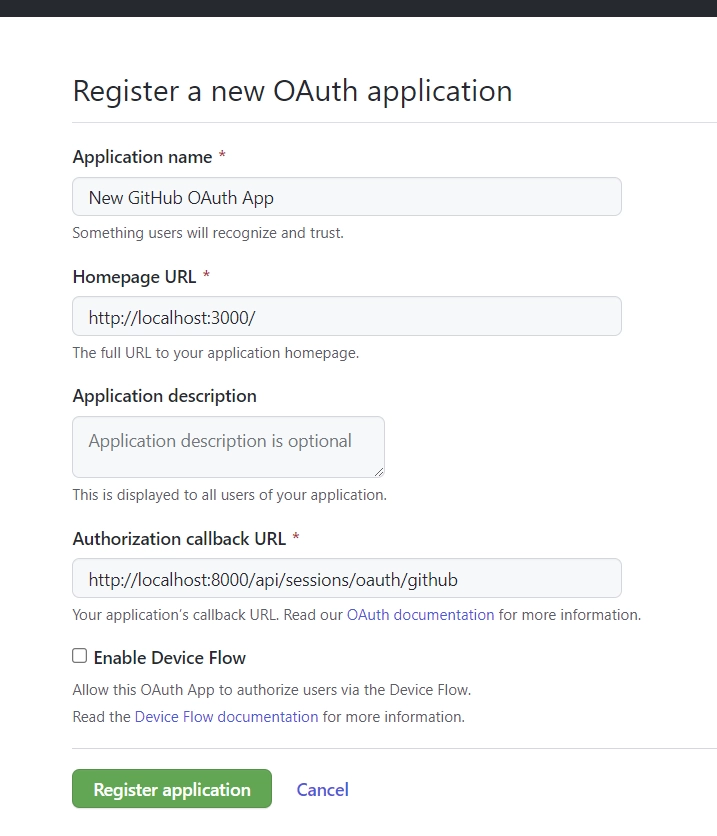
After entering the necessary information, click on the “Register application” button. - On the “New GitHub OAuth App” screen, upload the application logo, and click on the “Generate a new client secret” button to generate the OAuth client secret.
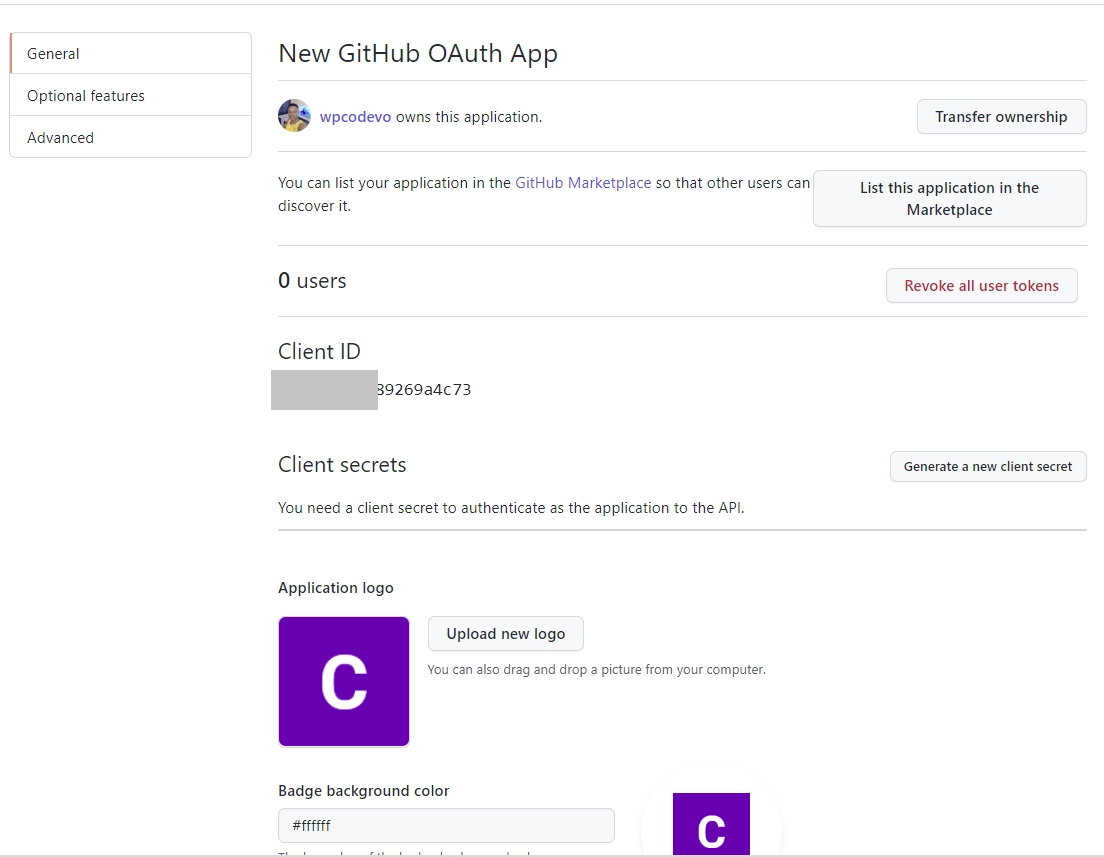
Once you click the “Generate a new client secret” button, GitHub will prompt you to confirm your access through the password, two-factor authentication, or mobile app options.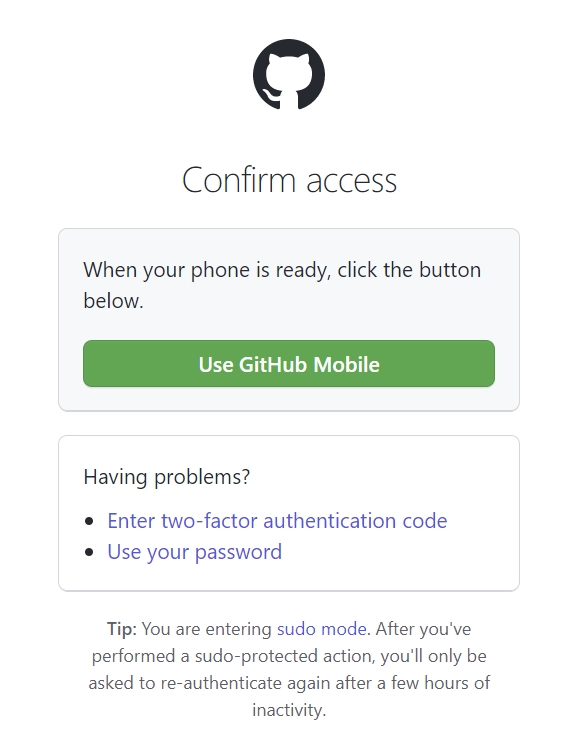
- After GitHub has confirmed your identity, the OAuth client secret will be generated.
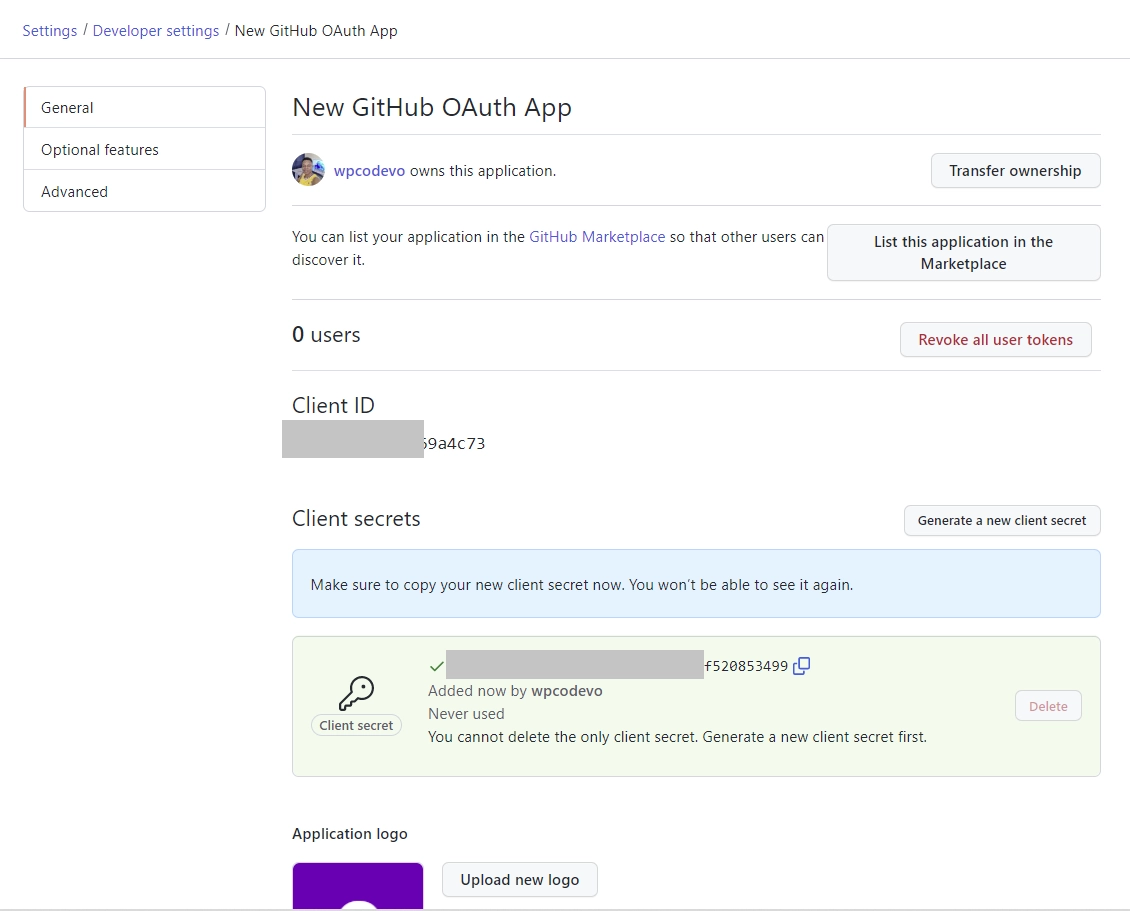
- Add the GitHub OAuth client ID and client secret to the
.env.localfile.
In the end, your .env.local file should have the following environment variables.
.env.local
VITE_SERVER_ENDPOINT=http://localhost:8000

VITE_GITHUB_OAUTH_CLIENT_ID=
VITE_GITHUB_OAUTH_CLIENT_SECRET=
VITE_GITHUB_OAUTH_REDIRECT_URL=http://localhost:8000/api/sessions/oauth/github
Generate the GitHub Consent Screen Link
Now let’s create a helper function to generate the GitHub OAuth consent screen link from the client ID and secret. To do this, create a utils folder in the src directory. Within the src/utils/ folder, create a getGithubUrl.ts file and add the TypeScript code below.
src/utils/getGithubUrl.ts
export function getGitHubUrl(from: string) {
  const rootURl = "https://github.com/login/oauth/authorize";

  const options = {
    client_id: import.meta.env.VITE_GITHUB_OAUTH_CLIENT_ID as string,
    redirect_uri: import.meta.env.VITE_GITHUB_OAUTH_REDIRECT_URL as string,
    scope: "user:email",
    state: from,
  };

  const qs = new URLSearchParams(options);

  return `${rootURl}?${qs.toString()}`;
}
In the above, we created a function to generate the OAuth consent screen URL based on the OAuth app credentials.
client_id– The GitHub OAuth API will use this parameter to identify the OAuth App that is making the request. This unique identifier was assigned to the OAuth app when we created it in the GitHub developer settings.redirect_uri– This is the URL the GitHub OAuth API will redirect the user to after the permission has been granted or denied. This callback URL must match the authorized redirect URL we configured in the GitHub developer settings.scope– This parameter specifies the level of access the application is requesting. Theuser:emailscope grants read access to the user’s email addresses.state– This parameter allows us to pass data back to our application after the user grants or denies the permission. In this example, we’ll pass a path to a protected page to the backend API. Also, the state parameter can be used to prevent cross-site request forgery (CSRF) attacks.
Setup a React Store with Zustand
In this section, you’ll set up a global state to store the authenticated user’s credentials using the Zustand library. Zustand is a small and simple state management library for React that allows state access and mutation via React hooks.
First, let’s create a IUser type to represent the fields of a user record. To do this, create a store folder in the src directory. Within the src/store/ folder, create a types.ts file and add the interface below.
src/store/types.ts
export interface IUser {
  id: string;
  name: string;
  email: string;
  role: string;
  photo: string;
  provider: string;
  verified: string;
}
Now create a index.ts file in the src/store/ directory and add the following code.
src/store/index.ts
import { create } from "zustand";
import { IUser } from "./types";

type Store = {
  authUser: IUser | null;
  requestLoading: boolean;
  setAuthUser: (user: IUser | null) => void;
  setRequestLoading: (isLoading: boolean) => void;
};

const useStore = create<Store>((set) => ({
  authUser: null,
  requestLoading: false,
  setAuthUser: (user) => set((state) => ({ ...state, authUser: user })),
  setRequestLoading: (isLoading) =>
    set((state) => ({ ...state, requestLoading: isLoading })),
}));

export default useStore;
In the above code, we created properties to store the states and methods for mutating the states. Also, we exported the useStore hook that we can use to access the states and actions of the store.
Create Reusable Components
With that out of the way, let’s create some reusable React components and style them with Tailwind CSS.
Spinner Component
The first component is a Spinner that will be displayed whenever a request is in flight. This component will be hidden by default, however, when a request is being processed by the backend API, it will be made visible to give visual feedback to the user.
Create a Spinner.tsx file in the src/components/ folder and add the following TSX code.
src/components/Spinner.tsx
import React from 'react';
import { twMerge } from 'tailwind-merge';
type SpinnerProps = {
  width?: number;
  height?: number;
  color?: string;
  bgColor?: string;
};
const Spinner: React.FC<SpinnerProps> = ({
  width = 5,
  height = 5,
  color,
  bgColor,
}) => {
  return (
    <svg
      role='status'
      className={twMerge(
        'w-5 h-5 mr-2 text-gray-200 animate-spin dark:text-gray-600 fill-blue-600',
        `w-${width} h-${height} ${color} ${bgColor}`
      )}
      viewBox='0 0 100 101'
      fill='none'
      xmlns='http://www.w3.org/2000/svg'
    >
      <path
        d='M100 50.5908C100 78.2051 77.6142 100.591 50 100.591C22.3858 100.591 0 78.2051 0 50.5908C0 22.9766 22.3858 0.59082 50 0.59082C77.6142 0.59082 100 22.9766 100 50.5908ZM9.08144 50.5908C9.08144 73.1895 27.4013 91.5094 50 91.5094C72.5987 91.5094 90.9186 73.1895 90.9186 50.5908C90.9186 27.9921 72.5987 9.67226 50 9.67226C27.4013 9.67226 9.08144 27.9921 9.08144 50.5908Z'
        fill='currentColor'
      />
      <path
        d='M93.9676 39.0409C96.393 38.4038 97.8624 35.9116 97.0079 33.5539C95.2932 28.8227 92.871 24.3692 89.8167 20.348C85.8452 15.1192 80.8826 10.7238 75.2124 7.41289C69.5422 4.10194 63.2754 1.94025 56.7698 1.05124C51.7666 0.367541 46.6976 0.446843 41.7345 1.27873C39.2613 1.69328 37.813 4.19778 38.4501 6.62326C39.0873 9.04874 41.5694 10.4717 44.0505 10.1071C47.8511 9.54855 51.7191 9.52689 55.5402 10.0491C60.8642 10.7766 65.9928 12.5457 70.6331 15.2552C75.2735 17.9648 79.3347 21.5619 82.5849 25.841C84.9175 28.9121 86.7997 32.2913 88.1811 35.8758C89.083 38.2158 91.5421 39.6781 93.9676 39.0409Z'
        fill='currentFill'
      />
    </svg>
  );
};

export default Spinner;
Header Component
The second component is a Header that will display a list of menus. These menus will have links pointing to the different pages of the application. Also, the logic for logging out users will be included in this component.
Create a Header.tsx file in the src/components/ directory and add the code below.
src/components/Header.tsx
import { Link, useNavigate } from "react-router-dom";
import { toast } from "react-toastify";
import useStore from "../store";
import Spinner from "./Spinner";

const Header = () => {
  const store = useStore();
  const user = store.authUser;
  const navigate = useNavigate();

  const handleLogout = async () => {
    try {
      store.setRequestLoading(true);
      const VITE_SERVER_ENDPOINT = import.meta.env.VITE_SERVER_ENDPOINT;
      const response = await fetch(`${VITE_SERVER_ENDPOINT}/api/auth/logout`, {
        credentials: "include",
      });
      if (!response.ok) {
        throw await response.json();
      }

      store.setRequestLoading(false);
      store.setAuthUser(null);
      navigate("/login");
    } catch (error: any) {
      store.setRequestLoading(false);
      const resMessage =
        (error.response &&
          error.response.data &&
          error.response.data.message) ||
        error.message ||
        error.toString();

      if (error?.message === "You are not logged in") {
        navigate("/login");
      }

      toast.error(resMessage, {
        position: "top-right",
      });
    }
  };

  return (
    <>
      <header className="bg-white h-20">
        <nav className="h-full flex justify-between container items-center">
          <div>
            <Link to="/" className="text-ct-dark-600 text-2xl font-semibold">
              CodevoWeb
            </Link>
          </div>
          <ul className="flex items-center gap-4">
            <li>
              <Link to="/" className="text-ct-dark-600">
                Home
              </Link>
            </li>
            {!user && (
              <>
                <li>
                  <Link to="/login" className="text-ct-dark-600">
                    Login
                  </Link>
                </li>
                <li>
                  <Link to="/register" className="text-ct-dark-600">
                    Register
                  </Link>
                </li>
              </>
            )}
            {user && (
              <>
                <li>
                  <Link to="/profile" className="text-ct-dark-600">
                    Profile
                  </Link>
                </li>
                <li className="cursor-pointer" onClick={handleLogout}>
                  Logout
                </li>
              </>
            )}
          </ul>
        </nav>
      </header>
      <div className="pt-4 pl-2 bg-ct-blue-600 fixed">
        {store.requestLoading && <Spinner color="text-ct-yellow-600" />}
      </div>
    </>
  );
};

export default Header;
When the handleLogout function is evoked, a GET request will be made to the backend API to sign out the user. If the request is successful, React will redirect the user to the login page.
Layout Component
Finally, let’s create a layout component to render the different pages below the Header component. This will prevent us from adding the Header component to all the pages that need it.
Now we need a way to render the page components below the Header component. Luckily, React Router Dom provides an <Outlet /> component that can do just that.
Create a Layout.tsx file in the src/components/ folder and add the code snippet below.
src/components/Layout.tsx
import { Outlet } from "react-router-dom";
import Header from "./Header";

const Layout = () => {
  return (
    <>
      <Header />
      <Outlet />
    </>
  );
};

export default Layout;
Implement the GitHub OAuth
Oops, quite a lot of code. At this point, we’re now ready to create React components to implement the GitHub OAuth flow. To do this, we’ll create two routes to handle the authentication aspect of the application.
/register– This route will render the account registration component which will contain a form for registering new users./login– This route will render the login component which will have a form for signing users into the application. Also, the form component will have the Google and GitHub OAuth buttons.
Account Registration Component
Here, you’ll create a React component that will contain a form for registering new users. The validation of the form will be handled by the React-Hook-Form library and the validation schema will be defined by the Zod schema validation library.
When the form is submitted, React-Hook-Form will validate the fields against the Zod schema and if the form is valid, the registerUser function will be called to submit the form data to the backend API.
src/pages/register.page.tsx
import { useNavigate } from "react-router-dom";
import { toast } from "react-toastify";
import useStore from "../store";
import { object, string, TypeOf } from "zod";
import { useEffect } from "react";
import { useForm, SubmitHandler } from "react-hook-form";
import { zodResolver } from "@hookform/resolvers/zod";

const registerSchema = object({
  name: string().min(1, "Full name is required").max(100),
  email: string()
    .min(1, "Email address is required")
    .email("Email Address is invalid"),
  password: string()
    .min(1, "Password is required")
    .min(8, "Password must be more than 8 characters")
    .max(32, "Password must be less than 32 characters"),
  passwordConfirm: string().min(1, "Please confirm your password"),
}).refine((data) => data.password === data.passwordConfirm, {
  path: ["passwordConfirm"],
  message: "Passwords do not match",
});

export type RegisterInput = TypeOf<typeof registerSchema>;

const RegisterPage = () => {
  const navigate = useNavigate();
  const store = useStore();

  const registerUser = async (data: RegisterInput) => {
    try {
      store.setRequestLoading(true);
      const VITE_SERVER_ENDPOINT = import.meta.env.VITE_SERVER_ENDPOINT;
      const response = await fetch(
        `${VITE_SERVER_ENDPOINT}/api/auth/register`,
        {
          method: "POST",
          credentials: "include",
          body: JSON.stringify(data),
          headers: {
            "Content-Type": "application/json",
          },
        }
      );
      if (!response.ok) {
        throw await response.json();
      }

      toast.success("Account created successfully", {
        position: "top-right",
      });
      store.setRequestLoading(false);
      navigate("/login");
    } catch (error: any) {
      store.setRequestLoading(false);
      if (error.error) {
        error.error.forEach((err: any) => {
          toast.error(err.message, {
            position: "top-right",
          });
        });
        return;
      }
      const resMessage =
        (error.response &&
          error.response.data &&
          error.response.data.message) ||
        error.message ||
        error.toString();

      toast.error(resMessage, {
        position: "top-right",
      });
    }
  };

  const methods = useForm<RegisterInput>({
    resolver: zodResolver(registerSchema),
  });

  const {
    reset,
    handleSubmit,
    register,
    formState: { isSubmitSuccessful, errors },
  } = methods;

  useEffect(() => {
    if (isSubmitSuccessful) {
      reset();
    }
    // eslint-disable-next-line react-hooks/exhaustive-deps
  }, [isSubmitSuccessful]);

  const onSubmitHandler: SubmitHandler<RegisterInput> = (values) => {
    registerUser(values);
  };

  return (
    <section className="bg-ct-blue-600 min-h-screen pt-20">
      <div className="container mx-auto px-6 py-12 h-full flex justify-center items-center">
        <div className="md:w-8/12 lg:w-5/12 bg-white px-8 py-10">
          <form onSubmit={handleSubmit(onSubmitHandler)}>
            <div className="mb-6">
              <input
                type="text"
                className="form-control block w-full px-4 py-5 text-sm font-normal text-gray-700 bg-white bg-clip-padding border border-solid border-gray-300 rounded transition ease-in-out m-0 focus:text-gray-700 focus:bg-white focus:border-blue-600 focus:outline-none"
                placeholder="Name"
                {...register("name")}
              />
              {errors.name && (
                <p className="text-red-700 text-sm mt-1">
                  {errors.name?.message}
                </p>
              )}
            </div>
            <div className="mb-6">
              <input
                type="email"
                className="form-control block w-full px-4 py-5 text-sm font-normal text-gray-700 bg-white bg-clip-padding border border-solid border-gray-300 rounded transition ease-in-out m-0 focus:text-gray-700 focus:bg-white focus:border-blue-600 focus:outline-none"
                placeholder="Email address"
                {...register("email")}
              />
              {errors.email && (
                <p className="text-red-700 text-sm mt-1">
                  {errors.email?.message}
                </p>
              )}
            </div>

            <div className="mb-6">
              <input
                type="password"
                className="form-control block w-full px-4 py-5 text-sm font-normal text-gray-700 bg-white bg-clip-padding border border-solid border-gray-300 rounded transition ease-in-out m-0 focus:text-gray-700 focus:bg-white focus:border-blue-600 focus:outline-none"
                placeholder="Password"
                {...register("password")}
              />
              {errors.password && (
                <p className="text-red-700 text-sm mt-1">
                  {errors.password?.message}
                </p>
              )}
            </div>

            <div className="mb-6">
              <input
                type="password"
                className="form-control block w-full px-4 py-5 text-sm font-normal text-gray-700 bg-white bg-clip-padding border border-solid border-gray-300 rounded transition ease-in-out m-0 focus:text-gray-700 focus:bg-white focus:border-blue-600 focus:outline-none"
                placeholder="Confirm Password"
                {...register("passwordConfirm")}
              />
              {errors.passwordConfirm && (
                <p className="text-red-700 text-sm mt-1">
                  {errors.passwordConfirm?.message}
                </p>
              )}
            </div>

            <button
              type="submit"
              className="inline-block px-7 py-4 bg-blue-600 text-white font-medium text-sm leading-snug uppercase rounded shadow-md hover:bg-blue-700 hover:shadow-lg focus:bg-blue-700 focus:shadow-lg focus:outline-none focus:ring-0 active:bg-blue-800 active:shadow-lg transition duration-150 ease-in-out w-full"
              data-mdb-ripple="true"
              data-mdb-ripple-color="light"
            >
              Sign up
            </button>
          </form>
        </div>
      </div>
    </section>
  );
};

export default RegisterPage;
If the request is successful, React will redirect the user to the login page where the user can sign into the app using the email and password. However, if the request resolves in errors, alert notifications will be displayed to list the errors.
Login Component
Here, you’ll create a login component that will have a form for signing the registered users into the application. The form validation will be controlled by React-Hook-Form and the validation rules will be provided by Zod.
The backend API is configured in such a way that only users who registered their accounts using email and password will be allowed to log into the application through the login form.
However, users can also use the Google or GitHub OAuth options to sign into the application.
src/pages/login.page.tsx
import { useLocation, useNavigate } from "react-router-dom";
import GitHubLogo from "../assets/github.svg";
import GoogleLogo from "../assets/google.svg";
import { getGitHubUrl } from "../utils/getGithubUrl";
import { object, string, TypeOf } from "zod";
import { useForm, SubmitHandler } from "react-hook-form";
import { zodResolver } from "@hookform/resolvers/zod";
import useStore from "../store";
import { toast } from "react-toastify";
import { useEffect } from "react";

const loginSchema = object({
  email: string()
    .min(1, "Email address is required")
    .email("Email Address is invalid"),
  password: string()
    .min(1, "Password is required")
    .min(8, "Password must be more than 8 characters")
    .max(32, "Password must be less than 32 characters"),
});

export type LoginInput = TypeOf<typeof loginSchema>;

const LoginPage = () => {
  const location = useLocation();
  const navigate = useNavigate();
  const store = useStore();
  const from = ((location.state as any)?.from.pathname as string) || "/profile";

  const loginUser = async (data: LoginInput) => {
    try {
      store.setRequestLoading(true);
      const VITE_SERVER_ENDPOINT = import.meta.env.VITE_SERVER_ENDPOINT;
      const response = await fetch(`${VITE_SERVER_ENDPOINT}/api/auth/login`, {
        method: "POST",
        credentials: "include",
        body: JSON.stringify(data),
        headers: {
          "Content-Type": "application/json",
        },
      });
      if (!response.ok) {
        throw await response.json();
      }

      store.setRequestLoading(false);
      navigate("/profile");
    } catch (error: any) {
      store.setRequestLoading(false);
      if (error.error) {
        error.error.forEach((err: any) => {
          toast.error(err.message, {
            position: "top-right",
          });
        });
        return;
      }
      const resMessage =
        (error.response &&
          error.response.data &&
          error.response.data.message) ||
        error.message ||
        error.toString();

      toast.error(resMessage, {
        position: "top-right",
      });
    }
  };

  const methods = useForm<LoginInput>({
    resolver: zodResolver(loginSchema),
  });

  const {
    reset,
    handleSubmit,
    register,
    formState: { isSubmitSuccessful, errors },
  } = methods;

  useEffect(() => {
    if (isSubmitSuccessful) {
      reset();
    }
    // eslint-disable-next-line react-hooks/exhaustive-deps
  }, [isSubmitSuccessful]);

  const onSubmitHandler: SubmitHandler<LoginInput> = (values) => {
    loginUser(values);
  };

  return (
    <section className="bg-ct-blue-600 min-h-screen pt-20">
      <div className="container mx-auto px-6 py-12 h-full flex justify-center items-center">
        <div className="md:w-8/12 lg:w-5/12 bg-white px-8 py-10">
          <form onSubmit={handleSubmit(onSubmitHandler)}>
            <div className="mb-6">
              <input
                type="email"
                className="form-control block w-full px-4 py-5 text-sm font-normal text-gray-700 bg-white bg-clip-padding border border-solid border-gray-300 rounded transition ease-in-out m-0 focus:text-gray-700 focus:bg-white focus:border-blue-600 focus:outline-none"
                placeholder="Email address"
                {...register("email")}
              />
              {errors.email && (
                <p className="text-red-700 text-sm mt-1">
                  {errors.email?.message}
                </p>
              )}
            </div>

            <div className="mb-6">
              <input
                type="password"
                className="form-control block w-full px-4 py-5 text-sm font-normal text-gray-700 bg-white bg-clip-padding border border-solid border-gray-300 rounded transition ease-in-out m-0 focus:text-gray-700 focus:bg-white focus:border-blue-600 focus:outline-none"
                placeholder="Password"
                {...register("password")}
              />

              {errors.password && (
                <p className="text-red-700 text-sm mt-1">
                  {errors.password?.message}
                </p>
              )}
            </div>

            <div className="flex justify-between items-center mb-6">
              <div className="form-group form-check">
                <input
                  type="checkbox"
                  className="form-check-input appearance-none h-4 w-4 border border-gray-300 rounded-sm bg-white checked:bg-blue-600 checked:border-blue-600 focus:outline-none transition duration-200 mt-1 align-top bg-no-repeat bg-center bg-contain float-left mr-2 cursor-pointer"
                  id="exampleCheck3"
                />
                <label
                  className="form-check-label inline-block text-gray-800"
                  htmlFor="exampleCheck2"
                >
                  Remember me
                </label>
              </div>
              <a
                href="#!"
                className="text-blue-600 hover:text-blue-700 focus:text-blue-700 active:text-blue-800 duration-200 transition ease-in-out"
              >
                Forgot password?
              </a>
            </div>

            <button
              type="submit"
              className="inline-block px-7 py-4 bg-blue-600 text-white font-medium text-sm leading-snug uppercase rounded shadow-md hover:bg-blue-700 hover:shadow-lg focus:bg-blue-700 focus:shadow-lg focus:outline-none focus:ring-0 active:bg-blue-800 active:shadow-lg transition duration-150 ease-in-out w-full"
              data-mdb-ripple="true"
              data-mdb-ripple-color="light"
            >
              Sign in
            </button>

            <div className="flex items-center my-4 before:flex-1 before:border-t before:border-gray-300 before:mt-0.5 after:flex-1 after:border-t after:border-gray-300 after:mt-0.5">
              <p className="text-center font-semibold mx-4 mb-0">OR</p>
            </div>

            <a
              className="px-7 py-2 text-white font-medium text-sm leading-snug uppercase rounded shadow-md hover:shadow-lg focus:shadow-lg focus:outline-none focus:ring-0 active:shadow-lg transition duration-150 ease-in-out w-full flex justify-center items-center mb-3"
              style={{ backgroundColor: "#3b5998" }}
              href=""
              role="button"
              data-mdb-ripple="true"
              data-mdb-ripple-color="light"
              onClick={(e) => {
                e.preventDefault();
                alert("Only GitHub OAuth is allowed");
              }}
            >
              <img
                className="pr-2"
                src={GoogleLogo}
                alt=""
                style={{ height: "2rem" }}
              />
              Continue with Google
            </a>
            <a
              className="px-7 py-2 text-white font-medium text-sm leading-snug uppercase rounded shadow-md hover:shadow-lg focus:shadow-lg focus:outline-none focus:ring-0 active:shadow-lg transition duration-150 ease-in-out w-full flex justify-center items-center"
              style={{ backgroundColor: "#55acee" }}
              href={getGitHubUrl(from)}
              role="button"
              data-mdb-ripple="true"
              data-mdb-ripple-color="light"
            >
              <img
                className="pr-2"
                src={GitHubLogo}
                alt=""
                style={{ height: "2.2rem" }}
              />
              Continue with GitHub
            </a>
          </form>
        </div>
      </div>
    </section>
  );
};

export default LoginPage;
If the OAuth or local (email and password) authentication is successful, the backend API or the React app will redirect the authenticated user to the Profile page. Also, the backend API will send an HTTP Only cookie to the client. This cookie will be included in subsequent requests that involve authentication.
Create the Other Pages
In this section, you’ll create the remaining React components. The most essential component is the Profile page which will display the user’s credentials.
Home Page Component
First, create a home.page.tsx file in the src/pages/ folder and add the following code. The Home page component will display a simple welcome message when the user lands on the root route.
src/pages/home.page.tsx
const HomePage = () => {
  return (
    <>
      <section className="bg-ct-blue-600 min-h-screen pt-20">
        <div className="max-w-4xl mx-auto bg-ct-dark-100 rounded-md h-[20rem] flex justify-center items-center">
          <p className="text-3xl font-semibold">
            Welcome to Google OAuth2 with React.js
          </p>
        </div>
      </section>
    </>
  );
};

export default HomePage;
Profile Page Component
Let’s create the profile page component to display the authenticated user’s account information. The backend API will redirect the user to the profile page after the OAuth verification is complete.
When the user lands on this page, React will make a GET request with Fetch API to retrieve the authenticated user’s credentials. For the request to succeed, React will include the Cookie along with the request.
src/pages/profile.page.tsx
import { useEffect } from "react";
import { useNavigate } from "react-router-dom";
import { toast } from "react-toastify";
import useStore from "../store";
import { IUser } from "../store/types";

const ProfilePage = () => {
  const navigate = useNavigate();
  const store = useStore();

  const fetchUser = async () => {
    try {
      store.setRequestLoading(true);
      const VITE_SERVER_ENDPOINT = import.meta.env.VITE_SERVER_ENDPOINT;
      const response = await fetch(`${VITE_SERVER_ENDPOINT}/api/users/me`, {
        credentials: "include",
      });
      if (!response.ok) {
        throw await response.json();
      }

      const data = await response.json();
      const user = data.data.user as IUser;
      store.setRequestLoading(false);
      console.log(user);

      store.setAuthUser(user);
    } catch (error: any) {
      store.setRequestLoading(false);
      if (error.error) {
        error.error.forEach((err: any) => {
          toast.error(err.message, {
            position: "top-right",
          });
        });
        return;
      }
      const resMessage =
        (error.response &&
          error.response.data &&
          error.response.data.message) ||
        error.message ||
        error.toString();

      if (error?.message === "You are not logged in") {
        navigate("/login");
      }

      toast.error(resMessage, {
        position: "top-right",
      });
    }
  };

  useEffect(() => {
    fetchUser();
  }, []);

  const user = store.authUser;

  return (
    <section className="bg-ct-blue-600  min-h-screen pt-20">
      <div className="max-w-4xl mx-auto bg-ct-dark-100 rounded-md h-[20rem] flex justify-center items-center">
        <div>
          <p className="text-5xl text-center font-semibold">Profile Page</p>
          {!user ? (
            <p>Loading...</p>
          ) : (
            <div className="flex items-center gap-8">
              <div>
                <img
                  src={
                    user.photo.includes("default.png")
                      ? `http://localhost:8000/api/images/${user.photo}`
                      : user.photo
                  }
                  className="max-h-36"
                  alt={`profile photo of ${user.name}`}
                />
              </div>
              <div className="mt-8">
                <p className="mb-3">ID: {user.id}</p>
                <p className="mb-3">Name: {user.name}</p>
                <p className="mb-3">Email: {user.email}</p>
                <p className="mb-3">Role: {user.role}</p>
                <p className="mb-3">Provider: {user.provider}</p>
              </div>
            </div>
          )}
        </div>
      </div>
    </section>
  );
};

export default ProfilePage;
If the request resolves successfully, React will re-render the DOM to display the account information in the UI.
Create Routes for the Pages
Now that we’ve created all the React components, let’s create routes for them using the React Router DOM library. Instead of using Route elements, we’ll use objects to define the routes.
Create a router folder in the src directory. In the src/router/ folder, create an index.tsx file and add the following code.
src/router/index.tsx
import type { RouteObject } from "react-router-dom";
import Layout from "../components/Layout";
import HomePage from "../pages/home.page";
import LoginPage from "../pages/login.page";
import ProfilePage from "../pages/profile.page";
import RegisterPage from "../pages/register.page";

const normalRoutes: RouteObject = {
  path: "*",
  element: <Layout />,
  children: [
    {
      index: true,
      element: <HomePage />,
    },
    {
      path: "profile",
      element: <ProfilePage />,
    },
    {
      path: "login",
      element: <LoginPage />,
    },
    {
      path: "register",
      element: <RegisterPage />,
    },
  ],
};

const routes: RouteObject[] = [normalRoutes];

export default routes;
Next, let’s use the useRoutes hook to generate the route elements from the route object. Open the src/App.tsx file and replace its content with the following code.
src/App.tsx
import { useRoutes } from "react-router-dom";
import routes from "./router";

function App() {
  const content = useRoutes(routes);
  return content;
}

export default App;
Also, we need to wrap the BrowserRouter component around the root component to give routing control to React Router DOM. Replace the content of the src/main.tsx file with the code below.
src/main.tsx
import "./index.css";
import { ToastContainer } from "react-toastify";
import "react-toastify/dist/ReactToastify.css";
import React from "react";
import ReactDOM from "react-dom/client";
import App from "./App";
import { BrowserRouter } from "react-router-dom";

ReactDOM.createRoot(document.getElementById("root") as HTMLElement).render(
  <React.StrictMode>
    <BrowserRouter>
      <App />
      <ToastContainer />
    </BrowserRouter>
  </React.StrictMode>
);
And we are done! You can now start the Vite development server by running yarn dev .
Test the GitHub OAuth Flow
Now that both the frontend and backend servers are running, we can test the GitHub OAuth flow to make sure we configured everything correctly.
Login with GitHub OAuth
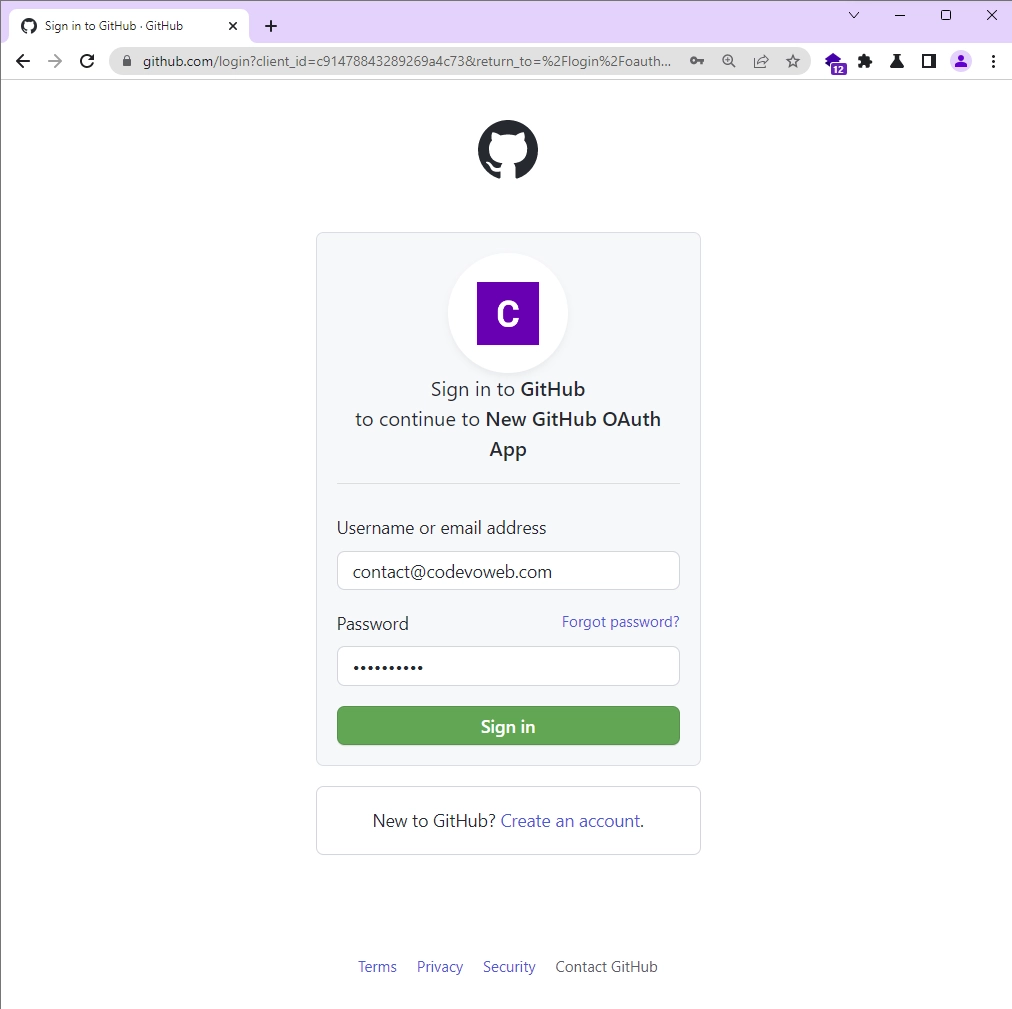
You can initiate the OAuth flow by clicking on the “CONTINUE WITH GITHUB” button available on the login page.
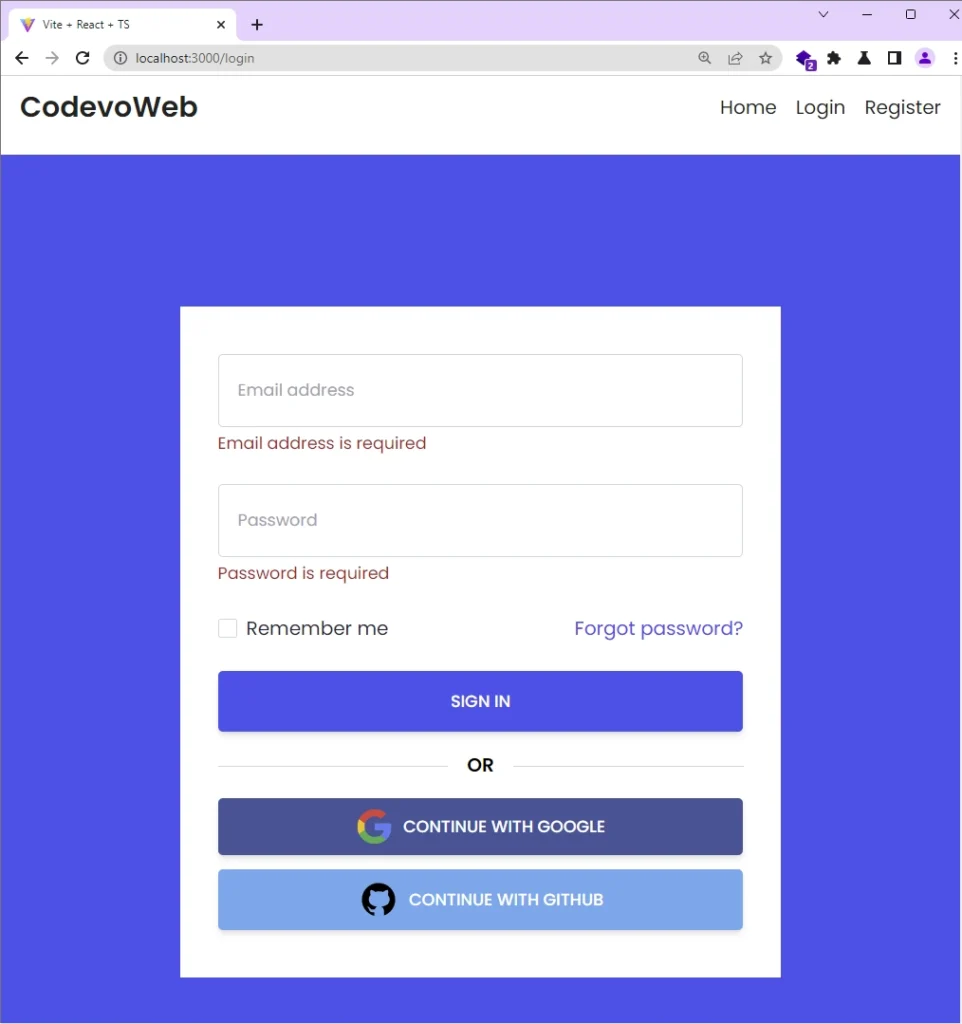
Once the button is clicked, you’ll be redirected to the GitHub OAuth consent screen where you’ll be prompted to sign into your GitHub account if you are not already signed in.
However, if you are already signed in, you’ll be presented with a screen that lists the permissions the application is requesting. You can grant the requested permissions to the application by clicking on the “Authorize” button.
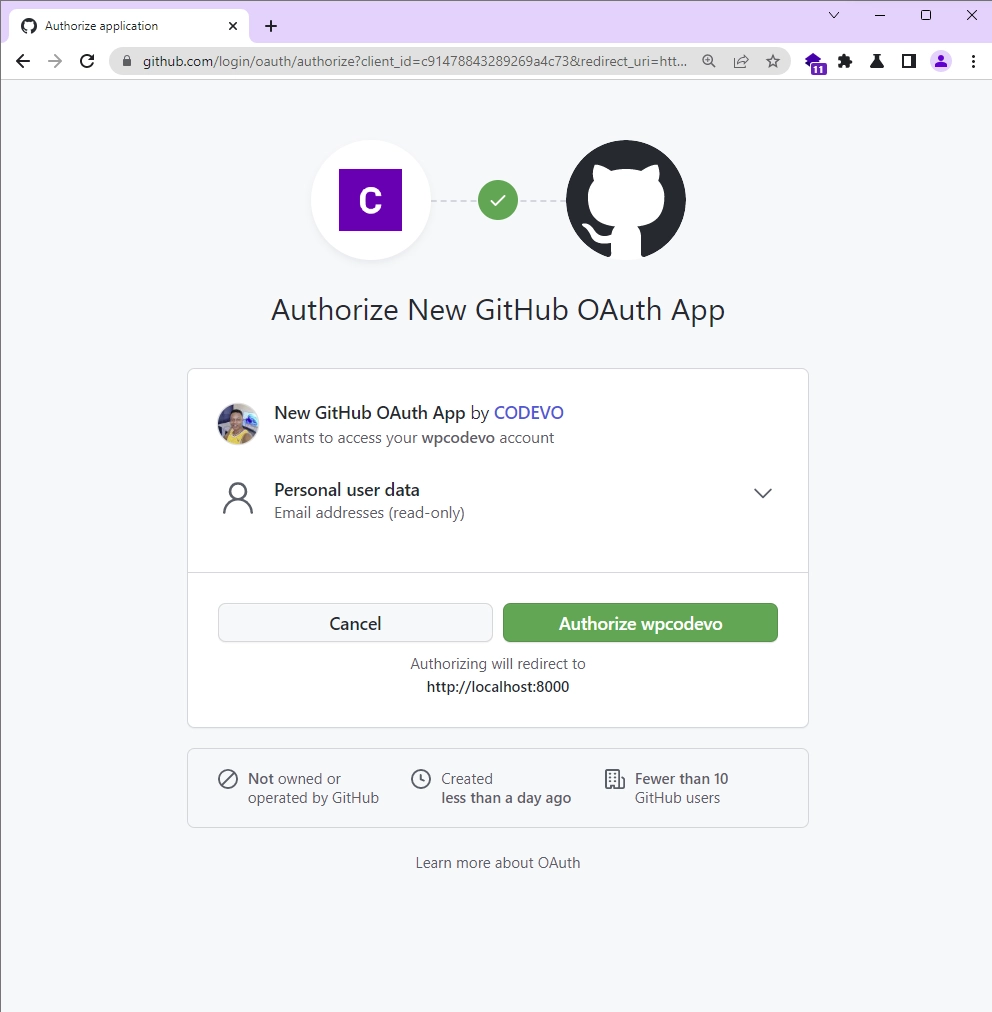
After you’ve granted the permissions, GitHub will redirect you to the redirect URL you specified while creating the GitHub OAuth App. The backend API will then exchange the authorization code for an access token using the GitHub OAuth token endpoint.
The token endpoint requires the client ID, client secret, and authorization code as query parameters. Once the backend API has the access token, it’ll make a GET request to retrieve your profile information from the GitHub API.
Next, the backend API will store the profile information in the database and return a copy to the frontend app. In addition, it will send an HTTP Only cookie that the React app will include in subsequent requests that require authentication.
Finally, the backend API will redirect you to the path that was stored in the state parameter.
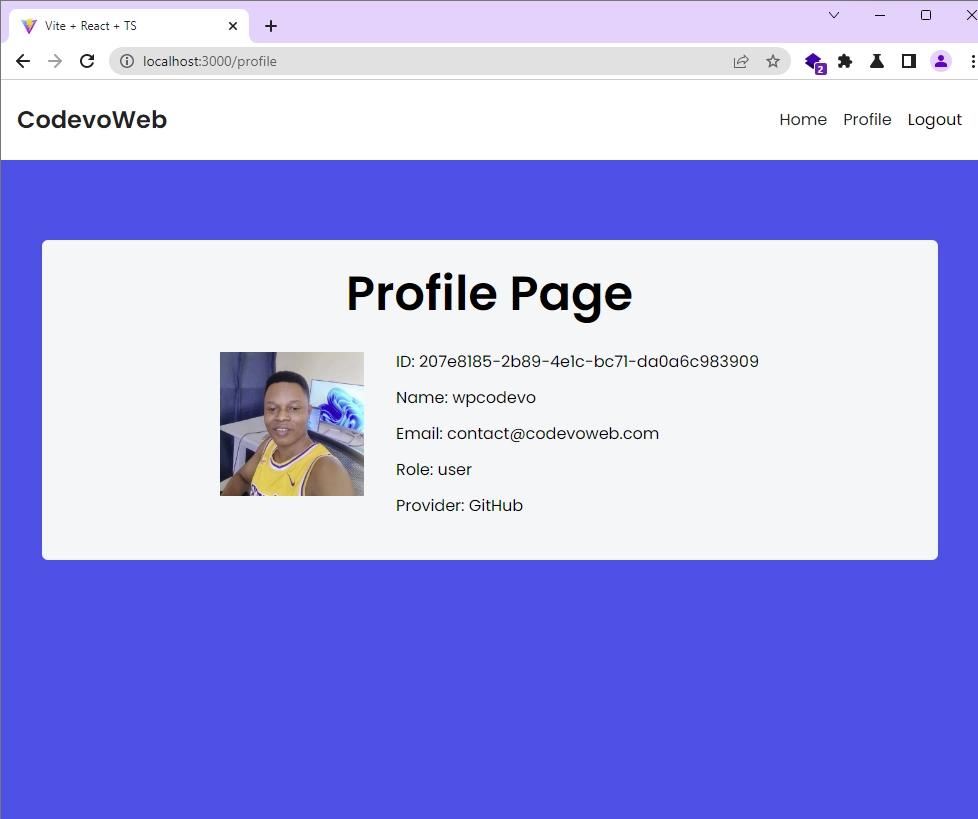
Display Profile Information
When the backend API redirects you to the Profile page, React will make a GET request to exchange the JWT token for your account information. If the request is successful, React will re-render the DOM to display the credentials in the UI.
Conclusion
You can find the complete code of the React GitHub OAuth project on GitHub.
In this tutorial, we implemented GitHub OAuth flow in a React.js application. Our app has all the required functionalities, for example, registering new users, signing them into the application with the GitHub OAuth option or password, and logging them out of the application.
We even went a step further to create an OAuth app in the GitHub developer settings, and obtain the OAuth client ID and client secret. I hope you enjoyed this article. Don’t forget to leave a comment if you have any questions.
thanks for your helpful guide
You are welcome!