
In this article, you’ll learn how to set up a Golang project with the standard Database/SQL package, Gin Gonic, SQLC, PostgreSQL, Golang-migrate, and Docker-compose. Later, we’ll access the PostgreSQL database directly in VS Code using a MySQL VS Code extension.
CRUD RESTful API with Golang + PostgreSQL Series:
- API with Golang, PostgreSQL, SQLC & Gin Gonic: Project Setup
- Golang, SQLC, and PostgreSQL API: JWT Access and Refresh Tokens
- Golang CRUD RESTful API with SQLC and PostgreSQL
Related Articles:
- API with Golang + MongoDB + Redis + Gin Gonic: Project Setup
- Golang & MongoDB: JWT Authentication and Authorization
- API with Golang + MongoDB: Send HTML Emails with Gomail
What the course will cover
- How to run PostgreSQL Docker container with docker-compose
- How to connect a Golang app to a PostgreSQL instance using the SQL driver
Prerequisites
- Have Golang and Docker installed on your system
- Basic knowledge of Golang and SQL
How to Setup Golang with PostgreSQL
PostgreSQL is an advanced open-source relational database management system (DBMS) that stores data points in rows with columns.
Creating PostgreSQL Docker Container
Docker is a powerful development platform for developing, shipping, and running applications.
When you install Docker, it comes with Docker-compose that allows us to run multiple containers together using a docker-compose.yaml file.
On this occasion, am going to assume you already have Docker installed on your system.
Now create a new project folder on your machine and open it with your Text editor of choice. I’m going to use VS Code because of the flexibility it comes with and the different extensions available to make it a professional IDE.
Create a docker-compose.yml file in the newly-created project and add the following configurations:
docker-compose.yml
version: '3'
services:
  postgres:
    image: postgres:latest
    container_name: postgres
    ports:
      - '6500:5432'
    volumes:
      - progresDB:/var/lib/postgresql/data
    env_file:
      - ./app.env
volumes:
  progresDB:
Now let’s create an app.env file to house the credentials needed by the Postgres Docker image to configure the PostgreSQL database.
Since the security of the Golang app is really crucial to us, remember to add the app.env file to your .gitignore in order to save you from accidentally pushing it to GitHub.
app.env
PORT=8000
NODE_ENV=development

POSTGRES_DRIVER=postgres
POSTGRES_SOURCE=postgresql://admin:password123@localhost:6500/golang_postgres?sslmode=disable

POSTGRES_HOST=127.0.0.1
POSTGRES_PORT=6500
POSTGRES_USER=admin
POSTGRES_PASSWORD=password123
POSTGRES_DB=golang_postgres
With the above Docker configurations, run this command to start the PostgreSQL container:
docker-compose up -d
Run this command to see if the container is running:
docker ps
Run this command to stop the container:
docker-compose down
Database Migration in Golang
Database schema migration refers to the process of tracking incremental, and reversible changes in database schemas. It can be related to Git version control which allows developers to record changes to a file or set of files over time.
When working with databases, database schema migration is a crucial task that we often have to do throughout the lifetime of the application.
In this section, you will learn how to run database schema migrations with Golang using the golang-migrate library.
The golang-migrate library works with many different databases like CockroachDB, MongoDB, MySQL/ MariaDB, and more but in our case, we are only interested in PostgreSQL.
On their GitHub page, click the CLI Documentation to open the installation manual.
Once you have it installed on your system, run this command to check if the installation was successful.
migrate
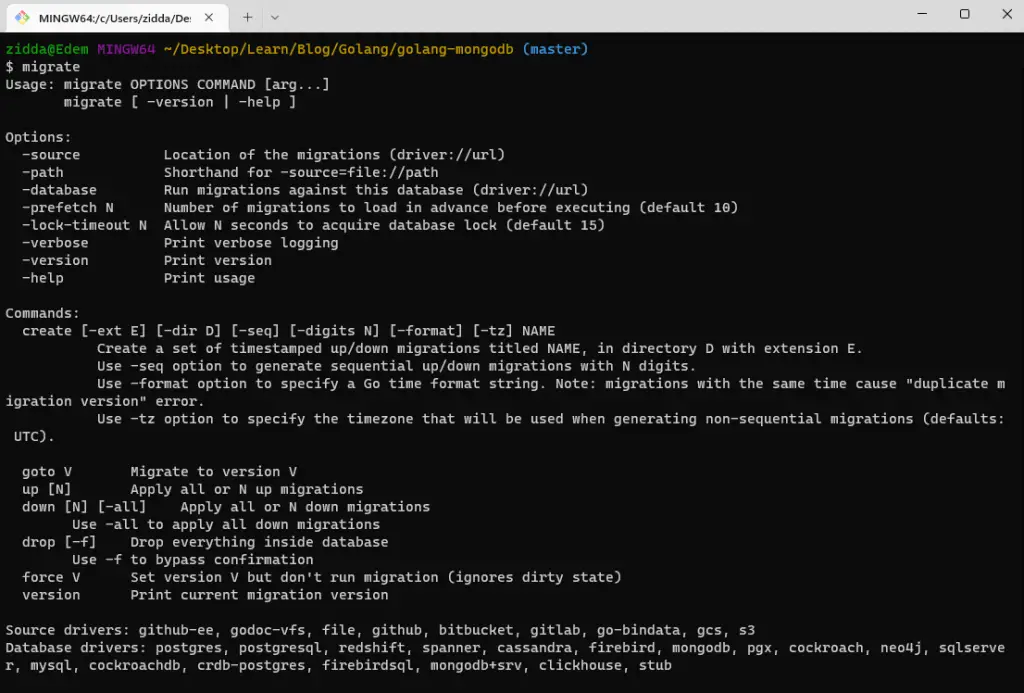
Below are some of the important golang-migrate commands you should know:
create– used to create new migration filesgoto V– used to migrate the schema to a specific versionup– this will run the up migration files in sequential order of their prefix version.down– this will run the down migration files sequentially by the reverse order of their prefix version.
Now create a db/migrations folder in the root directory and run this command to create the up/down migration files.
migrate create -ext sql -dir db/migrations -seq init_schema
-ext– the extension of the files-dir– the directory to store the generated files-seq– used to generate a sequential version number for the migration files.
Creating the Up Migration with SQL
Now paste your SQL code into the up migration file or paste the following code to create a new table named users to be used for authentication later on in this tutorial series.
db/migrations/000001_init-schema.up.sql
CREATE TABLE "users" (
    "id" UUID NOT NULL DEFAULT (uuid_generate_v4()),
    "name" VARCHAR NOT NULL,
    "email" VARCHAR NOT NULL,
    "photo" VARCHAR NOT NULL,
    "verified" BOOLEAN NOT NULL,
    "password" VARCHAR NOT NULL,
    "role" VARCHAR NOT NULL,
    "created_at" TIMESTAMP(3) NOT NULL DEFAULT CURRENT_TIMESTAMP,
    "updated_at" TIMESTAMP(3) NOT NULL,

    CONSTRAINT "users_pkey" PRIMARY KEY ("id")
);

CREATE UNIQUE INDEX "users_email_key" ON "users"("email");
Creating the Down Migration with SQL
Next, open the down migration file and write the code to revert the changes made by the up migration.
In this scenario, we created a user table with the up migration and the reverse logic is to drop the users table in the down migration.
db/migrations/000001_init-schema.down.sql
DROP TABLE IF EXISTS users;
Install the UUID OSSP Contrib Module for PostgreSQL
PostgreSQL natively supports the Universally Unique Identifier aka UUID as a data type and it’s even capable of being indexed and used as a primary key.
In a situation where we want to generate a UUID value as a default value for a column, we will have to manually install a Postgres extension. Many distributions of PostgreSQL include such a plugin but do not activate it by default.
Now we need to run the CREATE EXTENSION command in the Postgres database to install the UUID extension.
Before that, we need to access the bash shell of the running Postgres Docker container with this command docker exec -it <container name> bash.
docker exec -it postgres bash
Since this is a Postgres container, we have access to some CLI commands to interact with the PostgreSQL server directly.
Let’s install the UUID extension with the following steps:
Step 1: Access the Postgres database with this command psql -U admin <database name>:
psql -U admin golang_postgresStep 2: Run this command to list all the available extensions
select * from pg_available_extensions;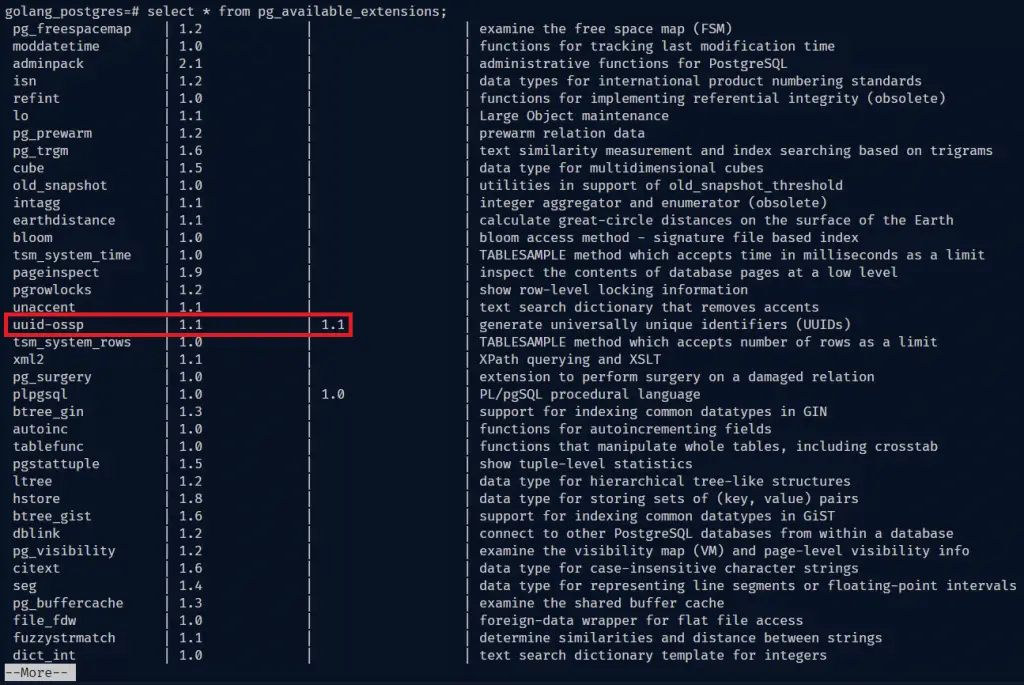
If you take a careful look at the extensions, you wouldn’t see the uuid-ossp plugin installed.
Step 3: Run this command to install the uuid-ossp extension
CREATE EXTENSION IF NOT EXISTS "uuid-ossp";Run the Up Migration to Push the Schema to the Database
We are now ready to run our first migration to push the changes to the PostgreSQL database.
Run this command to execute the up migration:
migrate -path db/migrations -database "postgresql://admin:password123@localhost:6500/golang_postgres?sslmode=disable" -verbose up
Now let’s log into the PostgreSQL database with the VS Code extension to see the schema we just pushed to the database.
After installing the extension, click on the “database” icon on the left sidebar of VS Code and then click on the “Create Connection” button.
Next, turn on the “Use Connection String” radio button and paste the PostgreSQL connection URL provided in the app.env file. Click the “Connect” button to log into the Postgres database.
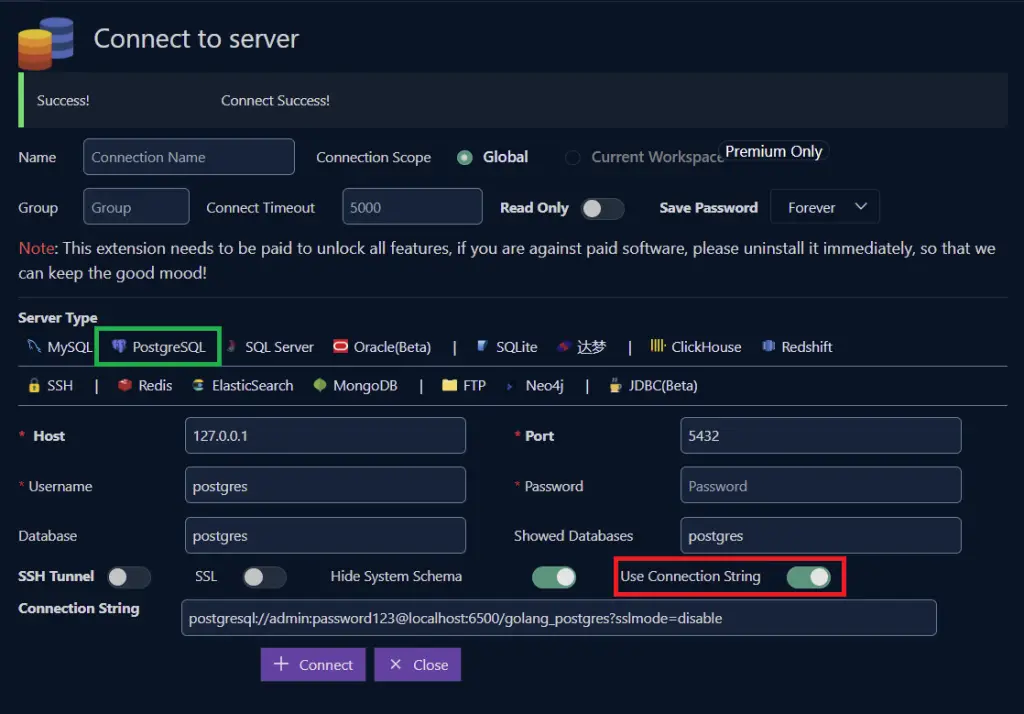
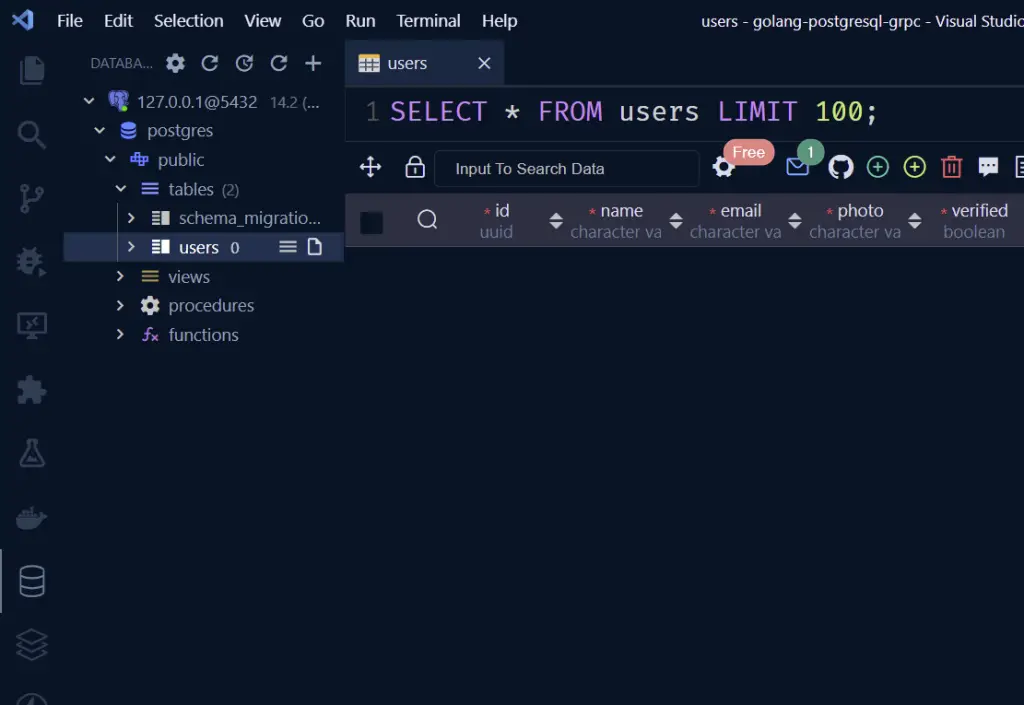
You should see the user’s table in the database. Feel free to access the database in pgAdmin if that is what you are comfortable with.
You can revert the up migration with the down command:
migrate -path db/migrations -database "postgresql://admin:password123@localhost:6500/golang_postgres?sslmode=disable" -verbose down
Create CRUD Golang Code with SQLC
Now that we are able to write scripts to run the database migrations against the Postgres database, let’s generate the CRUD Golang code with SQLC to perform the basic CRUD (Create/Read/Update/Delete) operations against our database.
There are different ways to implement CRUD operations in Golang:
Database/SQL– the first option is to use the low-level SQL library. It is very fast but we have to manually map the SQL fields to the variables which can result in runtime errors if not done properly.GORM– a high-level object-relational mapping library. It’s very easy to use because all the CRUD codes have already been implemented. The downside is it runs very slowly on a high load.SQLX– It runs nearly as fast as the standard SQL library. It’s easy to use because the field mappings are done via query text and structs. The downside is errors are only caught in runtime.SQLC– It’s similar toSQLX. The most exciting thing is we only need to write SQL queries and the Golang CRUD code will be automatically generated from them. Another advantage it has overSQLXis that the SQL query errors are caught before generating the CRUD codes.
Click here to navigate to the SQLC installation page and choose the right option for your operating system.
I am on a Windows machine and had issues with the Postgres driver not being installed on Windows, so I had to install Ubuntu using WSL before installing the SQLC library.
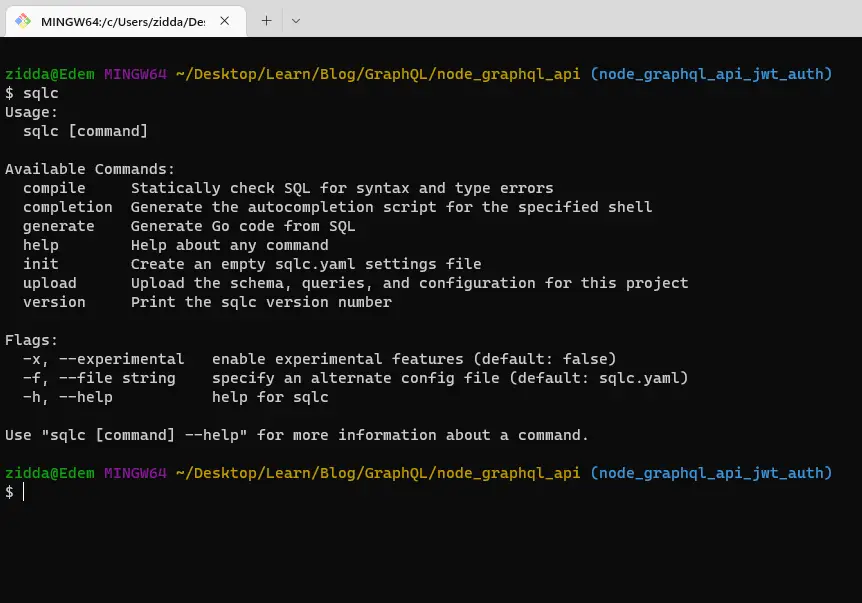
Once you have it installed, run sqlc in the terminal and you should see something like this:
Now run sqlc init to generate an empty sqlc.yaml settings file in the root directory.
sqlc.yaml
version: '1'
packages:
  - name: 'db'
    path: './db/sqlc'
    queries: './db/query'
    schema: './db/migrations'
    engine: 'postgresql'
    emit_prepared_queries: true
    emit_interface: false
    emit_exact_table_names: false
    emit_json_tags: true
name– tells SQLC what name to use for the generated Golang package.path– specifies the path to store the generated Golang CRUD codequeries– tells SQLC the location of the query files.schema– specifies the path to the SQL migration filesengine– tells SQLC the type of database engine to use. Could be eitherpostgresqlormysql.emit_prepared_queries– If set totrue, SQLC will include support for prepared queries.emit_interface– If set totrue, SQLC will includeQuerierinterface in the generated package. It’s useful when mocking the database to test higher-level functions.emit_json_tag– if set totrue, SQLC will add JSON tags to the generated structs.emit_exact_table_names– If set totrue, Struct names will mirror table names.
In the db folder, create two folders namely query and sqlc . Now in the query folder, create a user.sql file with five queries:
-- name: CreateUser :one
INSERT INTO users (
  name,
  email,
  photo,
  verified,
  password,
  role,
  updated_at
) VALUES (
  $1, $2, $3, $4, $5, $6, $7
)
RETURNING *;

-- name: GetUserById :one
SELECT * FROM users
WHERE id = $1 LIMIT 1;

-- name: GetUserByEmail :one
SELECT * FROM users
WHERE email = $1 LIMIT 1;

-- name: ListUsers :many
SELECT * FROM users
ORDER BY id
LIMIT $1
OFFSET $2;

-- name: UpdateUser :one
UPDATE users
set name = $2,
email = $3,
photo = $4,
verified = $5,
password = $6,
role = $7,
updated_at = $8
WHERE id = $1
RETURNING *;

-- name: DeleteUser :exec
DELETE FROM users
WHERE id = $1;
These are just basic SQL queries. The only special thing is the comment on top of them.
The comments will tell SQLC how to generate the Golang functions. The -- name: CreateUser :one tells SQLC to generate a Golang function called “CreateUser” and it should return one user document.
With this -- name: ListUsers :many , SQLC will create a function called “ListUsers” and the :many label tells SQLC the function will return multiple user documents.
With that out of the way, run this command to generate the Golang CRUD functions:
sqlc generateIf you are using the Ubuntu WSL and you got ‘sqlc’ not found, run this command first before running the SQLC command:
alias sqlc='$(go env GOPATH)/bin/sqlc'After the generation is successful, open the db/sqlc folder and you should see three newly generated Golang files.
models.go– this file contains the struct definitions for the user model.user.sql.go– this file contains the Golang CRUD codesdb.go– this file contains theDBTXinterface with four common methods that both SQLdband SQLtxobject has. This allows us to either use adbortxto execute a query.
Setup the Golang Project
Run this command to initialize a new Golang project
go mod init github.com/<GitHub username>/<project folder name>Next, run this command to install missing dependencies:
go mod tidy
Setup Environment Variables
Install the viper package to load the environment variables we stored in the app.env file into the Golang environment.
go get github.com/spf13/viper
Now create a config/default.go file in the root directory and add the following code to configure Viper:
config/default.go
package config

import (
	"github.com/spf13/viper"
)

type Config struct {
	PostgreDriver  string `mapstructure:"POSTGRES_DRIVER"`
	PostgresSource string `mapstructure:"POSTGRES_SOURCE"`

	Port string `mapstructure:"PORT"`
}

func LoadConfig(path string) (config Config, err error) {
	viper.AddConfigPath(path)
	viper.SetConfigType("env")
	viper.SetConfigName("app")

	viper.AutomaticEnv()

	err = viper.ReadInConfig()
	if err != nil {
		return
	}

	err = viper.Unmarshal(&config)
	return
}
Connect the Golang App to PostgreSQL
In this section, we gonna install the Gin Gonic web framework to build the RESTful API in Golang. I decided to use Gin because it’s 40 times faster than other web frameworks.
We’ll be using the standard Database/SQL package to connect to the running PostgreSQL database.
Run the following commands to install Gin Gonic:
go get github.com/gin-gonic/gin
Create a cmd/server/main.go file and add the following code to connect to the Postgres database and start the Gin server.
package main
import (
"database/sql"
"fmt"
"log"
"net/http"
"github.com/gin-gonic/gin"
"github.com/wpcodevo/golang-postgresql-api/config"
dbConn "github.com/wpcodevo/golang-postgresql-api/db/sqlc"
_ "github.com/lib/pq"
)
var (
server *gin.Engine
db *dbConn.Queries
)
func init() {
config, err := config.LoadConfig(".")
if err != nil {
log.Fatalf("could not load config: %v", err)
}
conn, err := sql.Open(config.PostgreDriver, config.PostgresSource)
if err != nil {
log.Fatalf("could not connect to postgres database: %v", err)
}
db = dbConn.New(conn)
fmt.Println("PostgreSQL connected successfully...")
server = gin.Default()
}
func main() {
config, err := config.LoadConfig(".")
if err != nil {
log.Fatalf("could not load config: %v", err)
}
router := server.Group("/api")
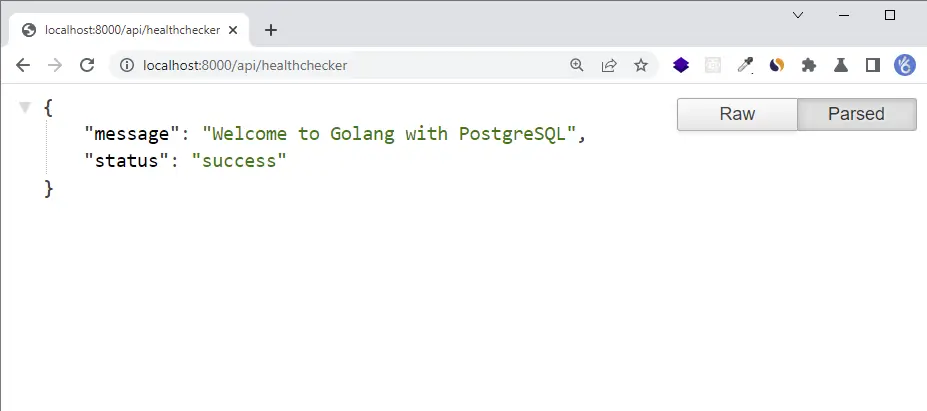
router.GET("/healthchecker", func(ctx *gin.Context) {
ctx.JSON(http.StatusOK, gin.H{"status": "success", "message": "Welcome to Golang with PostgreSQL"})
})
log.Fatal(server.Run(":" + config.Port))
}
In the above, we created an init function to connect to the PostgreSQL database since it runs before the main function is called.
Install the Golang air package to hot-reload the Golang Gin server whenever there is a file change.
go install github.com/cosmtrek/air@latest
Optional: only for Ubuntu users
alias air='$(go env GOPATH)/bin/air'Run air init in the terminal and update the CMD command in the generated .air.toml file to point to the main file.
cmd = "go build -o ./tmp/main ./cmd/server/main.go"Now run air in the terminal to start the Gin server.
I also added a testing route so open http://localhost:8000/api/healthchecker in your browser and you should see the welcome message.
Create a Utility Function to Hash Password
Let’s create two helper functions to hash and verify the user’s password with the Golang Bcrypt package.
utils/password.go
package utils

import "golang.org/x/crypto/bcrypt"

func HashPassword(password string) string {
	hashedPassword, _ := bcrypt.GenerateFromPassword([]byte(password), bcrypt.DefaultCost)
	return string(hashedPassword)
}

func ComparePassword(hashedPassword string, candidatePassword string) error {
	return bcrypt.CompareHashAndPassword([]byte(hashedPassword), []byte(candidatePassword))
}
Create an Auth Controller to Register User
Now let’s create the handler that will be called by the Gin router to register the new user in the database.
controllers/signup.controller.go
package controllers
import (
"net/http"
"time"
"github.com/gin-gonic/gin"
db "github.com/wpcodevo/golang-postgresql-api/db/sqlc"
"github.com/wpcodevo/golang-postgresql-api/utils"
)
type AuthController struct {
db *db.Queries
}
func NewAuthController(db *db.Queries) *AuthController {
return &AuthController{db}
}
func (ac *AuthController) SignUpUser(ctx *gin.Context) {
var credentials *db.User
if err := ctx.ShouldBindJSON(&credentials); err != nil {
ctx.JSON(http.StatusBadRequest, err.Error())
return
}
hashedPassword := utils.HashPassword(credentials.Password)
args := &db.CreateUserParams{
Name: credentials.Name,
Email: credentials.Email,
Password: hashedPassword,
Photo: "default.jpeg",
Verified: true,
Role: "user",
UpdatedAt: time.Now(),
}
user, err := ac.db.CreateUser(ctx, *args)
if err != nil {
ctx.JSON(http.StatusBadGateway, err.Error())
return
}
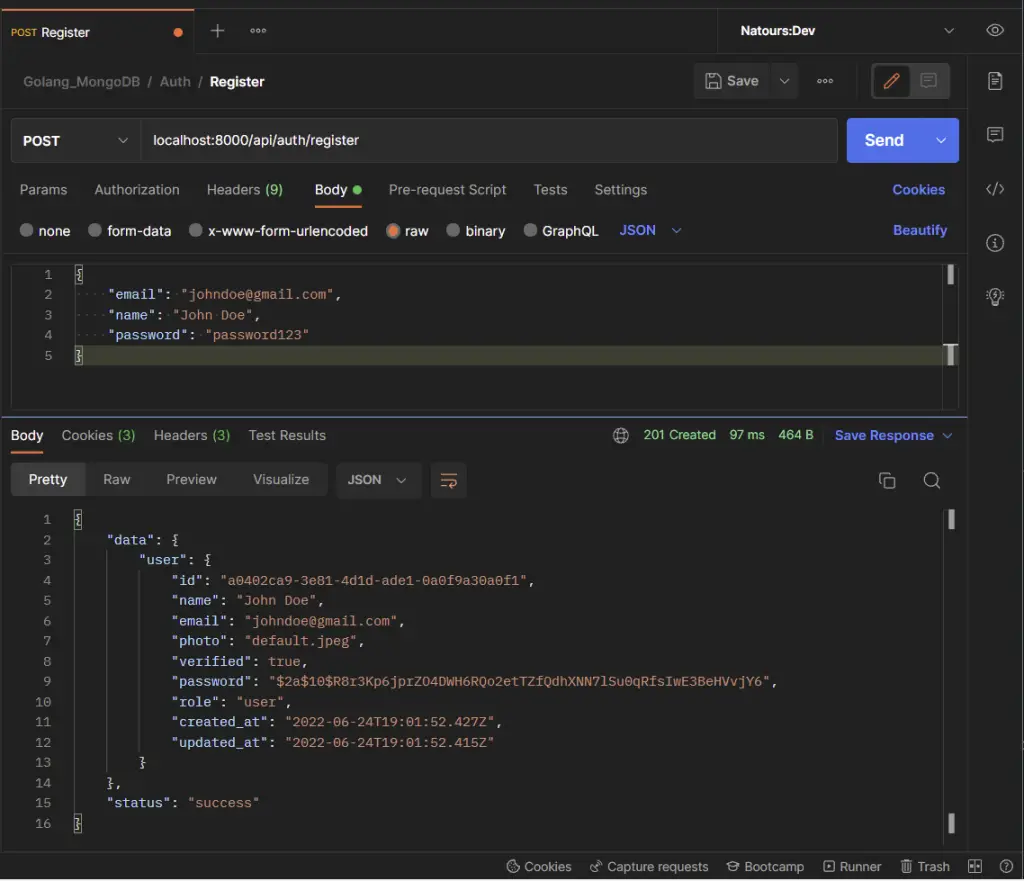
ctx.JSON(http.StatusCreated, gin.H{"status": "success", "data": gin.H{"user": user}})
}
Create the Auth Route
routes/auth.route.go
package routes

import (
	"github.com/gin-gonic/gin"
	"github.com/wpcodevo/golang-postgresql-api/controllers"
)

type AuthRoutes struct {
	authController controllers.AuthController
}

func NewAuthRoutes(authController controllers.AuthController) AuthRoutes {
	return AuthRoutes{authController}
}

func (rc *AuthRoutes) AuthRoute(rg *gin.RouterGroup) {

	router := rg.Group("/auth")
	router.POST("/register", rc.authController.SignUpUser)
}
Update the Main Server File
cmd/server/main.go
package main

import (
	"database/sql"
	"fmt"
	"log"
	"net/http"

	"github.com/gin-gonic/gin"
	"github.com/wpcodevo/golang-postgresql-api/config"
	"github.com/wpcodevo/golang-postgresql-api/controllers"
	dbConn "github.com/wpcodevo/golang-postgresql-api/db/sqlc"
	"github.com/wpcodevo/golang-postgresql-api/routes"

	_ "github.com/lib/pq"
)

var (
	server *gin.Engine
	db     *dbConn.Queries

	AuthController controllers.AuthController
	AuthRoutes     routes.AuthRoutes
)

func init() {
	config, err := config.LoadConfig(".")

	if err != nil {
		log.Fatalf("could not load config: %v", err)
	}

	conn, err := sql.Open(config.PostgreDriver, config.PostgresSource)
	if err != nil {
		log.Fatalf("could not connect to postgres database: %v", err)
	}

	db = dbConn.New(conn)

	fmt.Println("PostgreSQL connected successfully...")

	AuthController = *controllers.NewAuthController(db)
	AuthRoutes = routes.NewAuthRoutes(AuthController)

	server = gin.Default()
}

func main() {
	config, err := config.LoadConfig(".")

	if err != nil {
		log.Fatalf("could not load config: %v", err)
	}

	router := server.Group("/api")

	router.GET("/healthchecker", func(ctx *gin.Context) {
		ctx.JSON(http.StatusOK, gin.H{"status": "success", "message": "Welcome to Golang with PostgreSQL"})
	})

	AuthRoutes.AuthRoute(router)
        server.NoRoute(func(ctx *gin.Context) {
		ctx.JSON(http.StatusNotFound, gin.H{"status": "fail", "message":
                       fmt.Sprintf("Route %s not found", ctx.Request.URL)})
	})
	log.Fatal(server.Run(":" + config.Port))
}
Testing the Golang Gin API
-Register the user
Conclusion
With this Golang and Gin Gonic setup example with SQLC, PostgreSQL, and Docker-compose, you’ve learned how to set up a Golang project with PostgreSQL, SQLC, and Gin Gonic.
Golang Gin & PostgreSQL Setup Source Code
You can find the complete source code on my GitHub page
Hey ! Thanks by this article. I’m a beginner and this helps a lot = )
Looks like these repos aren’t available anymore:
https://github.com/wpcodevo/golang-postgresql-grpc/db/sqlc
https://github.com/wpcodevo/golang-postgresql-grpcgo
Am glad you found the article helpful.
please can you explain to me how you performed this instruction still using Windows
<>
I apologize, but I’m a little confused about the instruction you are referring to with
"<>", it is difficult for me to provide a detailed explanation. Could you please provide more context or clarify the instruction you are referring to?